The Battle of Raab - Free NAPOLEONIC Scenarios
The Battle of Raab - Free NAPOLEONIC Scenarios
The Battle of Raab - Free NAPOLEONIC Scenarios

Create successful ePaper yourself
Turn your PDF publications into a flip-book with our unique Google optimized e-Paper software.
<strong>The</strong> <strong>Battle</strong> <strong>of</strong> <strong>Raab</strong><br />
Age <strong>of</strong> Eagles Scenario<br />
by GRW, 2008<br />
SETTING<br />
Date: 14 June 1809, 11:30 AM<br />
Location: 40 miles southeast <strong>of</strong> Vienna<br />
Combatants: French Empire & Kingdom <strong>of</strong> Italy vs. Austrian Empire<br />
History: With the main national armies squaring <strong>of</strong>f along the Danube, Napoleon’s step-son and<br />
Archduke Charles’ brother maneuvered for superior position. While Archduke John sought a<br />
way to join his brother, Eugene de Beauharnais found himself with orders to intercept the<br />
Austrian union. <strong>The</strong> two armies met outside the fortress <strong>of</strong> <strong>Raab</strong>, with John deployed in an<br />
excellent defensive position behind the <strong>Raab</strong> River and its tributary, the Pancza stream.<br />
While the opposing armies fielded a comparable number <strong>of</strong> soldiers, there was a marked<br />
difference in quality. After enduring a long retreat from northern Italy, Archduke John found it<br />
necessary to scrape together conscript troops to replenish his army. Eugene, by contrast, had<br />
received fresh, veteran reinforcements from Napoleon. On the morning <strong>of</strong> June 14, 1809, the<br />
stage was set for Eugene to prove himself a skilled independent commander and drive the<br />
Austrians deeper into Hungary, away from the main action at Vienna.<br />
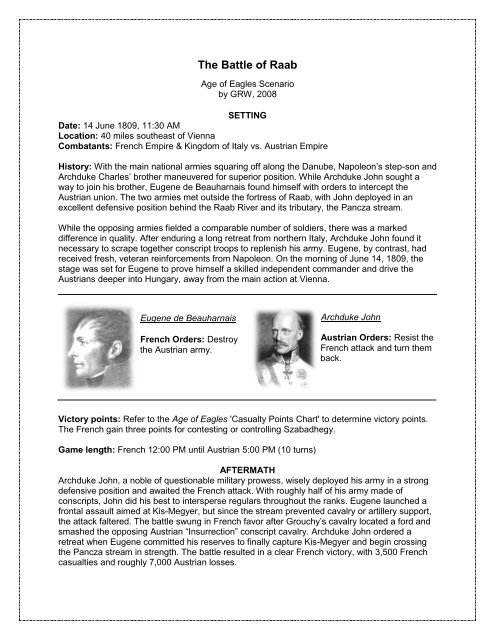
Eugene de Beauharnais<br />
French Orders: Destroy<br />
the Austrian army.<br />
Victory points: Refer to the Age <strong>of</strong> Eagles 'Casualty Points Chart' to determine victory points.<br />
<strong>The</strong> French gain three points for contesting or controlling Szabadhegy.<br />
Game length: French 12:00 PM until Austrian 5:00 PM (10 turns)<br />
Archduke John<br />
Austrian Orders: Resist the<br />
French attack and turn them<br />
back.<br />
AFTERMATH<br />
Archduke John, a noble <strong>of</strong> questionable military prowess, wisely deployed his army in a strong<br />
defensive position and awaited the French attack. With roughly half <strong>of</strong> his army made <strong>of</strong><br />
conscripts, John did his best to intersperse regulars throughout the ranks. Eugene launched a<br />
frontal assault aimed at Kis-Megyer, but since the stream prevented cavalry or artillery support,<br />
the attack faltered. <strong>The</strong> battle swung in French favor after Grouchy’s cavalry located a ford and<br />
smashed the opposing Austrian “Insurrection” conscript cavalry. Archduke John ordered a<br />
retreat when Eugene committed his reserves to finally capture Kis-Megyer and begin crossing<br />
the Pancza stream in strength. <strong>The</strong> battle resulted in a clear French victory, with 3,500 French<br />
casualties and roughly 7,000 Austrian losses.
SCENARIO RULES<br />
1. Players who wish to use a historical deployment should refer to the Map. Players who wish to<br />
experience more flexibility should place a screen across the center <strong>of</strong> the table and allow<br />
players to deploy in secret, however they desire. If using the blind deployment option, the<br />
Austrians can be anywhere east <strong>of</strong> the Pancza stream, and the French can begin anywhere<br />
within 8” <strong>of</strong> their starting table edge.<br />
2. <strong>The</strong> Austrians deploy first.<br />
3. <strong>The</strong> Kis-Megyer farm, with its high walls, had been well-fortified by the Austrians. As such,<br />
defenders <strong>of</strong> the farm receive a +3 benefit in melee and a -3 benefit when under fire. Up to four<br />
stands <strong>of</strong> infantry may garrison the farm.<br />
4. Cavalry may only ford the stream where marshes are not present.<br />
5. EUGENE is +0 when rolling for initiative and ARCHDUKE JOHN suffers a -2 modifier.<br />
TERRAIN & WEATHER<br />
<strong>The</strong> gaming table should be six feet long by four feet wide, laid out according to the<br />
accompanying map. Urban areas <strong>of</strong>fer +2 advantages to defending units in melee and a -2<br />
benefit when under fire. <strong>The</strong> Pancza stream, an excellent marshy, defensive position, counts as<br />
rough going and automatically disorders all brigades who ford. Artillery may only cross at one <strong>of</strong><br />
the two bridges. Movement along roads <strong>of</strong>fers full movement benefits. <strong>The</strong> weather is warm and<br />
clear.<br />
DEPLOYMENT<br />
Units set up according to the accompanying map in whichever formation the commander sees<br />
fit. Batteries may begin limbered or unlimbered, and commanders must be deployed within 12<br />
inches <strong>of</strong> their commands. Archduke JOHN should deploy within FRIMONT’s deployment zone.<br />
EUGENE and his artillery and cavalry reserve should deploy within 12” <strong>of</strong> point A. French<br />
reinforcements arrive at entry point A in whichever formation the player chooses. PACTHOD<br />
and PULLY arrive on the French 2:00pm turn, and LECCHI arrives at 2:30pm.<br />
SCALE<br />
Each infantry stand represents 360 soldiers, each cavalry stand 180 troopers, and artillery<br />
stands a battery <strong>of</strong> 6-12 guns. Ground scale is one inch to 150 yards and one complete turn<br />
represents thirty minutes <strong>of</strong> historical time.<br />
Notes on Sources<br />
<strong>The</strong> <strong>Battle</strong> <strong>of</strong> <strong>Raab</strong> is the most studied battle <strong>of</strong> Eugene’s military career and is also noteworthy<br />
for its implications on Wagram, where Archduke John was absent. As such, <strong>Raab</strong> is a popular<br />
smaller scenario among war gaming systems. <strong>The</strong> exact order <strong>of</strong> battle for Austrian forces is a<br />
matter <strong>of</strong> some debate. Some liberties have also been taken in designing this scenario with<br />
regard to exact brigade strengths. Eugene also reshuffled his commanders on the eve <strong>of</strong> the<br />
battle, reassigning Grouchy to a different command, and placing Grouchy's original corps into<br />
the army reserve. This reshuffling is reflected in the OOB. See Frederick Schneid, Napoleon’s<br />
Italian Campaigns: 1805-1815 (2002).
French Order <strong>of</strong> <strong>Battle</strong><br />
EUGÈNE<br />
Army <strong>of</strong> Northern Italy<br />
EUGENE army ldr<br />
GRENIER corps ldr d’HILLIERS corps ldr<br />
Seras 1st Division ldr Severoli 2nd Division ldr<br />
Moreau R 7/5/3 Sk line Julhien R 11/8/5 Sk line (Italian)<br />
Roussel R 9/6/4 Sk line Peyri R 7/5/4 Sk line (Italian)<br />
Light Foot Artillery #1 Light Foot Artillery #3<br />
Durutte 2nd Division ldr<br />
Dessaix 9/6/4 Sk line Sahuc R 8/6/4 LC chasseurs<br />
Valentin 12/8/5 Sk line<br />
Light Foot Artillery #2<br />
ARMY RESERVE<br />
Pacthod 1st Reserve Division ldr<br />
Abbe R 6/4/3 Sk line<br />
GROUCHY Cavalry Corps ldr Teste R 7/5/3 Sk light<br />
Montbrun R 7/5/3 LC chasseurs<br />
Colbert R 8/6/4 LC chasseurs Lecchi E 7/5/3 Sk grenadiers (Italian)<br />
Guedin E 10/7/5 HC dragoons Light Foot Artillery #6<br />
Horse Artillery #4 & 5<br />
Pully E 6/4/3 HC dragoons<br />
Austrian Order <strong>of</strong> <strong>Battle</strong><br />
ARCHDUKE JOHN<br />
Army <strong>of</strong> Inner Austria<br />
Archduke John army ldr<br />
Jellacic Right Flank Division ldr Mescery Left Flank Division ldr<br />
Legisfeld C 7/5/4 landwehr Andrassy C 10/8/6 Irr. LC hussars<br />
Eckhardt C 10/8/6 landwehr Gosztony C 11/9/6 Irr. LC hussars<br />
Sebottendorf R 11/8/5 line<br />
Light Foot Artillery #1 & 2 Frimont Reserve Division ldr<br />
Kleinmeyer E 6/4/3 Sk grenadier<br />
Colloredo Center Division ldr Gavasini C 7/5/4 line<br />
Lutz R 16/12/8 line Kalnassy R 8/6/4 line<br />
Marziani C 14/11/8 landwehr Besan R 8/7/4 LC mixed<br />
Light Foot Artillery #3 Heavy Foot Artillery Reserve #4 & 5
MAP & DEPLOYMENT