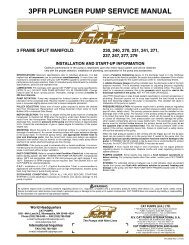
Pump service manual for 1DX, 2DX, 3DX, 3DNX, 3SP ... - Cat Pumps
Pump service manual for 1DX, 2DX, 3DX, 3DNX, 3SP ... - Cat Pumps
Pump service manual for 1DX, 2DX, 3DX, 3DNX, 3SP ... - Cat Pumps

Create successful ePaper yourself
Turn your PDF publications into a flip-book with our unique Google optimized e-Paper software.
All <strong>1DX</strong>.MIST, <strong>2DX</strong>, <strong>2DX</strong>.MIST, <strong>3DX</strong>, <strong>3DNX</strong> and <strong>3SP</strong>X Models<br />
Plunger Arrangement<br />
SERVICING THE PLUNGERS<br />
Disassembly<br />
1. To <strong>service</strong> the ceramic plungers, it is necessary to remove<br />
the manifold head. See SERVICING THE SEALS,<br />
Disassembly, steps 1-3.<br />
2. Remove seal retainer from each plunger rod.<br />
3. Using a M10 Hex tool, loosen the plunger retainer on each<br />
plunger rod approximately three to four turns.<br />
4. Push the ceramic plunger back towards the crankcase to<br />
separate from the plunger retainer and proceed with<br />
unthreading the plunger retainer by hand.<br />
5. Models <strong>1DX</strong>.MIST, <strong>2DX</strong>, <strong>2DX</strong>.MIST, <strong>3DX</strong>, <strong>3DNX</strong> and <strong>3SP</strong>X:<br />
Remove the ceramic plunger and seal washer from each<br />
plunger retainer.<br />
Model <strong>3SP</strong>: Remove the ceramic plunger and copper<br />
retainer gasket from each plunger retainer.<br />
NOTE: Copper plunger retainer gasket has been replaced<br />
by NBR seal washer.<br />
Reassembly<br />
1. Visually inspect the crankcase oil seals <strong>for</strong> deterioration or<br />
leaks. Contact CAT PUMPS <strong>for</strong> assistance with replacement.<br />
See SERVICING THE CRANKCASE.<br />
2. Examine seal washers and replace if cut or worn.<br />
3. Examine plunger retainers <strong>for</strong> damaged threads and<br />
replace as needed.<br />
4. Install new seal washer onto each plunger retainer.<br />
5. Examine the ceramic plungers <strong>for</strong> scoring, scale buildup,<br />
chips or cracks and replace as needed. The ceramic plungers<br />
do not need to be replaced with every seal servicing.<br />
6. Slide plunger retainer with seal washer into flat end of<br />
ceramic plunger.<br />
7. Apply Loctite® 242® to exposed threaded end of plunger<br />
retainer.<br />
8. Install ceramic plunger with plunger retainer and seal<br />
washer over each plunger rod shoulder and thread hand<br />
tight. Torque to specifications per chart.<br />
NOTE: Ceramic Plungers can only be installed in one<br />
direction. Counterbore end of ceramic plunger fits over<br />
lunger rod shoulder.<br />
9. See SERVICING THE SEALS, Reassembly, steps 10-13.<br />
<strong>3SP</strong>30G1I, <strong>3SP</strong>35GEI<br />
Plunger Arrangement<br />
TORQUE SEQUENCE<br />
7 1 3 5<br />
6 4 2 8<br />
SERVICING THE CRANKCASE<br />
1. While manifold, plungers and retainers are removed,<br />
examine crankcase oil seals <strong>for</strong> leaking and wear.<br />
2. Check <strong>for</strong> any signs of leaking at bearing cover, drain plug<br />
or bubble gauge.<br />
3. Check oil level and <strong>for</strong> evidence of water in oil. Change<br />
crankcase oil on a regular schedule. See PREVENTATIVE<br />
MAINTENANCE CHECK-LIST.<br />
4. Rotate crankshaft by hand to feel <strong>for</strong> smooth bearing<br />
movement.<br />
5. Examine crankshaft oil seal externally <strong>for</strong> drying, cracking<br />
or leaking.<br />
6. Contact CAT PUMPS or local distributor if crankcase <strong>service</strong><br />
is required.