Why Sign Language For Babies? - VTech
Why Sign Language For Babies? - VTech
Why Sign Language For Babies? - VTech
Create successful ePaper yourself
Turn your PDF publications into a flip-book with our unique Google optimized e-Paper software.
User’s Manual
Dear Parent,<br />
At <strong>VTech</strong>®, we know that there is nothing more special than watching your baby discover<br />
something new for the first time. These moments become even more rewarding when<br />
you see your baby share and smile in the excitement of these important discoveries.<br />
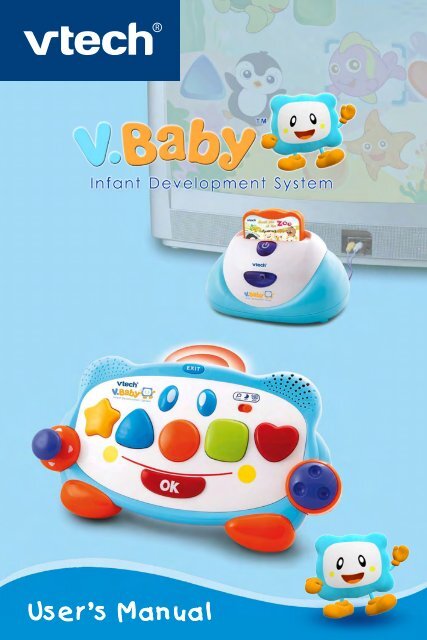
That is why <strong>VTech</strong>® created the V.Baby Infant Development System, a unique growwith-me<br />
development system designed especially for the youngest learners aged 9 to 36<br />
months. The learning grows as your baby grows!<br />
The V.Baby Infant Development System combines a baby-friendly wireless activity<br />
panel, age-appropriate curriculum, entertaining images, and fun early learning<br />
activities into a unique experience for babies and parents to share together. The V.Baby<br />
Infant Development System engages even the littlest learner with two, grow-with-me<br />
play modes: Watch & Learn and Smart Play. <strong>Babies</strong> go from playing with the activity<br />
panel, to watching educational videos complete with baby sign language, to directing<br />
their own play on the TV screen by choosing subjects they want to learn.<br />
As part of the V.Baby Infant Development System, <strong>VTech</strong>® offers a library of Baby<br />
Smartridges based on popular children’s environments that engage and invite your baby<br />
to play and discover. Each Baby Smartridge features a variety of learning activities,<br />
baby sign language, ‘grow-with-me’ play, and lovable characters to guide your baby on<br />
a learning journey.<br />
At <strong>VTech</strong>®, we are proud to provide parents with a sensory-rich learning tool for their<br />
little ones. Tapping into a baby’s natural curiosity, creativity and passion for learning,<br />
<strong>VTech</strong>® makes every encounter an opportunity for discovery. We thank you for trusting<br />
<strong>VTech</strong>® with the important job of helping your child grow.<br />
Sincerely,<br />
Your Friends at <strong>VTech</strong>®<br />
To learn more about the V.Baby TM Infant Development System and other <strong>VTech</strong> ® toys, visit www.vtechkids.com
<strong>Sign</strong> <strong>Language</strong> <strong>For</strong> <strong>Babies</strong>:<br />
Helping <strong>Babies</strong> Tell Us What’s On Their Minds<br />
By<br />
Dr. Linda Acredolo and Dr. Susan Goodwyn<br />
<strong>Why</strong> <strong>Sign</strong> <strong>Language</strong> for <strong>Babies</strong>?<br />
There’s nothing more heart-wrenching than hearing a baby cry and not<br />
knowing what’s wrong. Unfortunately, until they can talk, babies are literally<br />
“at a loss for words” when it comes to telling us what’s going on and how<br />
best we can help.<br />
Wait No More!<br />
Now, thanks to our book Baby <strong>Sign</strong>s and our research-based Baby <strong>Sign</strong>s ®<br />
Program, the world’s leading sign language program for babies, children<br />
from 6 months to 3 years need no longer wait until they can talk to let us<br />
know what’s on their minds. Instead, as Newsweek Magazine put it, they<br />
can learn simple “hand signals that let them communicate their joys and<br />
fears without tears.”<br />
You’re Already Doing It<br />
<strong>Sign</strong>ing is a very natural form of communication. In fact, it’s so natural<br />
that all parents teach their babies at least three signs-YES, NO, and BYE-<br />
BYE-without even thinking about it. After two decades of research at the<br />
University of California, we now know that these three signs are just the<br />
tip of the iceberg. <strong>Babies</strong> are eager to learn many, many more signs to let<br />
us know what they need, what they see, what they feel, and even what<br />
they remember. What parents wouldn’t want such a priceless window into<br />
their baby’s mind?<br />
The Research Behind the Program<br />
But won’t signing slow down learning to talk? The answer is a resounding<br />
“No!” In fact, just as crawling is a helpful precursor to walking, signing is a<br />
helpful precursor to talking. We’ve proven this to be the case with a longterm<br />
study funded by the National Institutes of Health. Far from hindering<br />
language development, babies in the Baby <strong>Sign</strong>s ® Program actually learned<br />
to talk sooner. We also discovered that this advantage continued over<br />
time in the form of higher IQs at age 8.<br />
<strong>Why</strong> <strong>Sign</strong> <strong>Language</strong> for <strong>Babies</strong>?
<strong>Why</strong> <strong>Sign</strong> <strong>Language</strong> for <strong>Babies</strong>?<br />
3<br />
The Most Important Benefits<br />
Our research has also revealed even more important benefits for emotional<br />
development. Once your baby begins signing you’ll see for yourself how<br />
the ability to use signs makes daily life with your baby easier and sweeter.<br />
Specifically, using signs. . .<br />
* decreases frustration, tantrums, and tears;<br />
* enables your baby to share his or her world with you;<br />
* strengthens the parent-infant bond;<br />
* helps you recognise just how clever your baby is; and<br />
* promotes the development of self-confidence and self-esteem.<br />
A Gift to Last a Lifetime<br />
It’s easy, it’s fun, and it’s a wonderful way to support your baby’s<br />
development. By helping your baby communicate effectively so early in life,<br />
you are laying a foundation of love and learning that will last a lifetime.<br />
Dr. Linda Acredolo and Dr. Susan Goodwyn are internationally recognised<br />
scholars whose ground-breaking research demonstrating the positive<br />
effects of signing on infant development has sparked a world-wide<br />
movement. They are authors of the best-selling book Baby <strong>Sign</strong>s: How<br />
to Talk With Your Baby Before Your Baby Can Talk and co-founders of<br />
the Baby <strong>Sign</strong>s Institute through which they provide <strong>Sign</strong>, Say & Play<br />
classes, Parent Workshops, and high-quality products to make every<br />
family’s signing experience a success. <strong>For</strong> more information, visit<br />
www.babysigns.com.
INTRODUCTION<br />
Thank you for purchasing the <strong>VTech</strong> ® V.Baby TM Infant Development System!<br />
V.Baby TM Infant Development System is a unique learning system created<br />
especially for the littlest learner. V.Baby TM combines a colorful activity panel with the<br />
enhanced, non-traditional element of TV learning to allow parents and their little ones<br />
to share special moments as their child begins to explore early learning concepts,<br />
such as shapes, colors and animals. It even helps teach baby sign language!<br />
V.Baby TM works with age-appropriate Baby Smartridges TM that include two “growwith<br />
me” play modes, allowing baby to grow in learning from 9-36 months. Each<br />
Baby Smartridge TM features real photo images to enhance learning. Photo Time<br />
mode allows little learners to view their photos in a slide show, or use the photos<br />
to put themselves in games.<br />
Activity Panel<br />
Infrared <strong>Sign</strong>al Exit Button<br />
Shape Buttons<br />
Joystick<br />
OK Button<br />
Console<br />
Front View<br />
Meet Me at the Zoo<br />
Smartridge TM<br />
Back View<br />
USB Port (to connect<br />
console to PC)<br />
TV PLAY/OFF/PLAY<br />
ALONE Switch<br />
Wheel<br />
ON/OFF Button<br />
Infrared <strong>Sign</strong>al<br />
Receiver<br />
AC/DC Adaptor port<br />
TV Connection Cable<br />
CAUTION: The console contains an audio/video cord which is<br />
FOR ADULT INSTALLATION AND OPERATION ONLY. Keep out of a<br />
child’s reach.<br />
INTRODUCTION
INTRODUCTION<br />
INSTRUCTIONS<br />
INCLUDED IN THIS PACKAGE<br />
• One activity panel<br />
• One console<br />
• One Meet Me at the Zoo Smartridge and instruction manual<br />
• One USB cable<br />
• Seven AA batteries<br />
• One instruction manual<br />
WARNING: All packing materials, such as tape, plastic sheets, packing lockers,<br />
wire ties and tags are not part of this toy, and should be discarded for<br />
your child’s safety.<br />
Unlocking the Packaging Locks:<br />
1. Rotate the packaging lock 90 degrees counter-clockwise.<br />
. Pull out the packaging lock.<br />
GETTING STARTED<br />
BATTERY INSTALLATION (Activity Panel)<br />
• Make sure the unit is turned OFF.<br />
• Locate the battery cover on the bottom of the activity<br />
panel.<br />
• Use a screwdriver to loosen the screw and remove<br />
the battery cover.<br />
• Insert 3 new “AA” batteries (AM-3/LR6) as<br />
illustrated.<br />
• Replace the battery cover and tighten the screw to secure.<br />
BATTERY INSTALLATION (Console)<br />
• Make sure the unit is turned OFF.<br />
• Locate the battery cover on the bottom of the<br />
console.<br />
• Use a screwdriver to loosen the screw and remove<br />
the battery cover.<br />
• Insert new “AA” batteries (AM-3/LR6) as<br />
illustrated.<br />
• Replace the battery cover and tighten the screw to secure.<br />
BATTERY NOTICE<br />
• Install batteries correctly observing the polarity (+, -) signs to avoid leakage.<br />
• Do not mix old and new batteries.
• Do not mix batteries of different types: alkaline, standard (carbon-zinc) or<br />
rechargeable (nickel-cadmium).<br />
• Remove the batteries from the equipment when the unit will not be used for an<br />
extended period of time.<br />
• Always remove exhausted batteries from the equipment.<br />
• Do not dispose of batteries in fire.<br />
• Do not attempt to recharge ordinary batteries.<br />
• The supply terminals are not to be short-circuited.<br />
• Only batteries of the same and equivalent type as recommended are to be<br />
used.<br />
Notice : When the V.Baby is running on batteries, you may see this icon<br />
appear on the TV screen. This indicates that battery power is low, and<br />
you should replace the batteries soon. Battery time remaining once the<br />
icon first appears is approximately 30-60 minutes.<br />
AC ADAPTOR<br />
• Use a standard 9V 300mA AC/DC adaptor. We recommend the use of<br />
a <strong>VTech</strong> ® 9V AC/DC adaptor<br />
• Make sure the unit is turned OFF<br />
• Plug the power jack into the 9V DC socket at the back of the console.<br />
• Plug the AC adaptor into a wall socket.<br />
NOTE: The use of an adaptor will override the batteries. When the toy is not going<br />
to be in use for an extended period of time, unplug the adaptor.<br />
Standard Guidelines for Adaptor Toys<br />
• The toy is not intended for use by children under 3 years old.<br />
• Only use the recommended adaptor with the toy.<br />
• The transformer is not a toy.<br />
• Never clean a plugged-in toy with liquid.<br />
• Never use more than one adaptor.<br />
• Do not leave the toy plugged-in for extended periods of time.<br />
CONNECTING TO A TV<br />
NOTE: Before you connect the V.BabyTM Infant Development System to a TV,<br />
check to make sure that the unit is working. Once you have turned the unit<br />
ON, the power indicator light should glow. If the ON/OFF Button does not<br />
glow, check to see that the batteries are installed correctly. If the batteries<br />
are not installed correctly, the V.BabyTM Infant Development System will<br />
not function and this could cause damage as a result. Make sure that your<br />
TV and the unit are turned OFF before you begin making connections.<br />
Connect the V.BabyTM Infant Development System to your TV by plugging the<br />
colored cables on the unit into the matching color video and audio input jacks on<br />
your TV set.<br />
INTRODUCTION<br />
6
TO BEGIN PLAY<br />
<strong>For</strong> TVs with stereo audio inputs:<br />
- Connect the yellow plug on the V.BabyTM cable to the yellow<br />
video input terminal on your TV.<br />
- Connect the white plug on the V.BabyTM cable to the white<br />
audio input terminal on your TV.<br />
<strong>For</strong> TVs with mono audio inputs:<br />
- Connect the yellow plug on the V.BabyTM cable to the yellow<br />
video input terminal on your TV.<br />
- Connect the white plug on the V.BabyTM cable to the white<br />
audio input terminal on your TV.<br />
CONNECTING TO A VCR<br />
If there is no video IN and audio IN terminal on your TV set, you can connect<br />
V.BabyTM through a VCR.<br />
- Connect the yellow plug on the V.Baby TM cable to the yellow<br />
video input terminal on your VCR.<br />
- Connect the white plug on the V.BabyTM cable to the white<br />
audio input terminal on your VCR.<br />
TO BEGIN PLAY<br />
• Make sure the unit is turned OFF.<br />
• Insert a Baby Smartridge into the Smartridge slot on the front of the console.<br />
The Smartridge should lock into place. Please use care when removing the<br />
Smartridge from the slot.<br />
• Turn on the TV.<br />
• Set your TV input mode to accept input from the port to which V.Baby is<br />
connected. In many cases this will involve setting the TV to ‘video’ mode; however,<br />
since all TVs vary, please refer to your TV or VCR manual for further details.<br />
• Turn the V. Baby Infant Development System on by pressing the ON<br />
button.<br />
• Turn the V.Baby activity panel on by sliding the TV PLAY/OFF/PLAY ALONE<br />
Switch.
CONSOLE FEATURES<br />
ON/OFF Button Press this button to turn the unit ON/OFF.<br />
ACTIVITY PANEL FEATURES<br />
Infrared <strong>Sign</strong>al<br />
Shape Buttons<br />
Joystick<br />
OK Button<br />
TV PLAY/OFF/PLAY ALONE Switch To activate the Play Alone mode, slide the TV<br />
PLAY/OFF/PLAY ALONE Switch to the Play<br />
Alone position . To activate TV Play mode,<br />
slide the TV PLAY/OFF/PLAY ALONE Switch to<br />
the TV Play position . Make sure the console<br />
is connected to the TV and turned on for TV Play<br />
Mode.<br />
Automatic Shut-Off To preserve battery life, the <strong>VTech</strong> ® V.Baby<br />
activity panel will automatically power-down<br />
after several minutes without input. The unit can<br />
be turned on again by pressing any button.<br />
PLAY ALONE MODE<br />
ON/OFF Button<br />
Infrared <strong>Sign</strong>al<br />
Receiver<br />
Exit Button<br />
TV PLAY/OFF/PLAY<br />
ALONE Switch<br />
Wheel<br />
1. Slide the TV PLAY/OFF/PLAY ALONE switch to the PLAY ALONE position. You<br />
will hear an inviting phrase and a fun song.<br />
. Press the shape buttons to learn about shapes, colors and to hear sound effects.<br />
3. Turn the wheel to play melodies. Turn the wheel to the right to speed up the melodies,<br />
and turn the wheel to the left to slow down the melodies.<br />
. Move the joystick in all directions to hear fun sounds.<br />
PLAY ALONE MODE<br />
8
TV PLAY MODE<br />
9<br />
. Press the OK button to hear sounds and phrases.<br />
MELODY LIST<br />
1. This Old Man<br />
. Camptown Races<br />
3. Three Blind Mice<br />
. Row, Row, Row Your Boat<br />
. Old MacDonald Had a Farm<br />
SUNG SONG 1 (to the tune of The Farmer in the Dell)<br />
Red and yellow and blue.<br />
A square and circle, too.<br />
A heart, a star, a triangle,<br />
It’s fun to learn with you!<br />
SUNG SONG 2 (to the tune of Skip to My Lou)<br />
It’s a great day to play with you!<br />
Learning shapes and colors, too.<br />
Press a button, let’s explore.<br />
We’ll hear music, sounds and more!<br />
TV PLAY MODE<br />
TV PLAY/OFF/PLAY ALONE Switch Slide the TV PLAY/OFF/PLAY ALONE Switch<br />
to the TV PLAY position. Always turn the unit<br />
off before removing a Baby Smartridge<br />
from the console.<br />
EXIT Button Press this button to exit an activity. Press and<br />
hold the button for about 3 seconds to exit all<br />
the way to the main menu.<br />
Shape Buttons Use these buttons to make a choice or to<br />
perform certain game actions.<br />
Joystick Use this feature to activate additional<br />
animations and sounds within an activity.<br />
Wheel Use this feature to activate additional<br />
animations in an activity.<br />
OK Button Use this feature to activate additional<br />
animations in an activity.
IR Receiver Range<br />
TV Play Mode features three different activity modes -- Smartridge, Baby <strong>Sign</strong><br />
<strong>Language</strong> and Photo Time. Please select an activity mode from the main menu.<br />
Smartridge<br />
Up and down 30°<br />
Baby <strong>Sign</strong> <strong>Language</strong><br />
ACTIVITY PANEL<br />
Smartridge<br />
Photo Time<br />
Please see each Smartridge’s user manual for details on that Smartridge’s<br />
specific activities.<br />
Baby <strong>Sign</strong> <strong>Language</strong><br />
Teach baby to start talking with their hands. Research has proven that infants<br />
who sign speak earlier, experience less frustration and benefit intellectually.<br />
Smartridge <strong>Sign</strong>s<br />
These are the signs<br />
included with the inserted<br />
Smartridge.<br />
Left to right °<br />
CONSOLE (Keep out of child’s reach)<br />
9 Feet<br />
TV<br />
Your Library<br />
These are the signs you<br />
have downloaded from<br />
the V.Baby web site.<br />
ACTIVITIES<br />
10
ACTIVITIES<br />
11<br />
To save additional baby signs on your V.Baby console, please make sure the<br />
V.Baby console is connected to your computer with the provided USB cable, and<br />
that your computer is connected to the Internet. The V.Baby program will launch<br />
on your computer. Go to the Baby <strong>Sign</strong> section of the program. Select “Baby <strong>Sign</strong>s<br />
to Download” and mark the baby signs you want to download. Select “Download”<br />
to download the selected signs and wait for the “Download Successful!” message<br />
before disconnecting the V.Baby console. To delete baby signs from the V.Baby<br />
console, go to “Your Library” in the Baby <strong>Sign</strong> section of the program, then select<br />
the signs you wish to delete. Select “Delete from V.Baby” to delete the selected<br />
signs. You can save up to 0 baby signs to the V.Baby console.<br />
<strong>For</strong> more information, please see the Connecting V.Baby to Your PC section of<br />
this manual.<br />
Photo Time<br />
Photo Time allows little learners to view their photos in a slide show, or use their<br />
photos to put themselves into games.<br />
NOTE: It is assumed that parents, not children, will operate Photo Time.<br />
Photo Album<br />
Allows players to<br />
view their own photos<br />
(uploaded from their<br />
computer) on the TV.<br />
Photo Games<br />
Allows players to use<br />
their photos to put<br />
themselves in games.<br />
Photo Album<br />
The Photo Album displays the player’s photos on TV, and allows the player to scroll<br />
through the photos using the shape buttons. Press the green square to advance<br />
the photos, and press the blue triangle to go backward. Press the orange circle to<br />
pause the slide show. Press the yellow star to delete photos.<br />
NOTE: Sample photos included on the console cannot be deleted.
To save photos from your computer to the V.Baby console, please make sure the<br />
V.Baby console is connected to your computer with the provided USB cable. The<br />
V.Baby program will launch on your computer. Go to the Photo Album section of<br />
the program. Choose the PC Photo section and then select photos to download from<br />
your computer. Select “Download” to download the selected photos and wait for the<br />
“Download Successful!” message before disconnecting the V.Baby console. Please<br />
note that the V.Baby program only supports photos in JPEG format. Photos can<br />
only be downloaded from your computer’s hard drive, but from not removable storage<br />
drives. To delete photos from the V.Baby console, go to the Photo Album section<br />
of the program. Select “Console,” then select the photos you wish to delete. Select<br />
“Delete” to delete the selected photos. You can save up to 100 of your photos on the<br />
V.Baby console.<br />
<strong>For</strong> more information, please see the Connecting V.Baby to Your PC section of<br />
this manual.<br />
Photo Games<br />
The Photo Games section features games for the player to play using their own<br />
photos. If a Smartridge is inserted into the console, there will be three photo<br />
games available. If there is not a Smartridge present, only two photo games<br />
will be available.<br />
ACTIVITIES<br />
1
CONNECTING V.BABY TM TO YOUR COMPUTER<br />
13<br />
You can choose to continue a game, begin a new game or play a sample game. If<br />
you choose a new game, you need to edit one of your photos to create a character<br />
to play in the game. Follow the instructions onscreen to choose and crop a photo to<br />
use in the game. You can save up to 10 cropped photos on the V.Baby console.<br />
CONNECTING V.BABY TM TO YOUR COMPUTER<br />
As mentioned earlier in this manual, the V.Baby console can be connected to your<br />
personal computer (PC) for saving your photos or downloading baby signs from the<br />
Internet. The software application supports both Windows and Mac systems. The<br />
application program will automatically launch and connect to the Internet when you<br />
connect the V.Baby console to your PC with the included USB cable.<br />
Installing the PC Application Program<br />
The first time you connect the V.Baby console to your PC with the included<br />
USB cable, a window will pop up and the installation program will begin to run<br />
automatically. Follow the instructions onscreen and click ‘Finish’ to complete the<br />
installation. After installation is complete, please disconnect and then reconnect<br />
V.Baby to your computer to launch the V.Baby web site.
MINIMUM SYSTEM REqUIREMENTS<br />
PC Hardware Requirements:<br />
CPU: Pentium® , 1 GHz or above<br />
Memory: 6MB<br />
Video Adaptor: Graphic card with 10 x 68 at 16 or 3 bit color<br />
Monitor Resolution: 10 x 68<br />
USB 1.1 or higher<br />
100MB Hard disk space<br />
Windows® compatible sound card and speakers<br />
PC Software Requirements:<br />
Microsoft® Windows® 000, XP or Windows Vista® Operating System<br />
Internet Explorer® version 6 or above<br />
Adobe® Flash® Player 10 (To acquire the latest version of Flash player, please<br />
visit www.adobe.com)<br />
Macintosh Hardware Requirements:<br />
Macintosh Computer with an Intel or PowerPC G (1GHz or faster) processor<br />
6 MB RAM ( 1 MB recommended)<br />
100 MB Hard disk space<br />
USB Port required<br />
Macintosh Software Requirements:<br />
Mac OS X version 10. or later<br />
Safari Internet Browser version 3.0 or later<br />
Adobe ® Flash ® Player 10 (To acquire the latest version of Flash player, please<br />
visit www.adobe.com)<br />
*Internet connection required for Internet enabled functions on both PC and<br />
Macintosh computers.<br />
Microsoft® and Windows® are either registered trademarks or trademarks of<br />
Microsoft Corporation in the United States and/or other countries. Adobe®, the<br />
Adobe logo, Flash® are either registered trademarks or trademarks of Adobe<br />
Systems Incorporated in the United States and/or other countries. Intel®, Pentium®<br />
are trademarks of Intel Corporation in the United States and other count ries. Mac,<br />
Mac OS, Safari are trademarks of Apple Inc., registered in the United States and<br />
other countries. All other trademarks are the property of their respective owners.<br />
THIS PRODUCT IS NOT ENDORSED OR SPONSORED BY ADOBE SYSTEMS<br />
INCORPORATED, PUBLISHER OF FLASH.<br />
NOTE: If the installation window does not pop up the first time you connect the<br />
V.Baby console to your PC, please manually load the installation program from<br />
the Internet:<br />
MINIMUM SYSTEM REqUIREMENTS<br />
1
CARE & MAINTENANCE / WARNING<br />
1<br />
All Windows OS:<br />
http://www.vtechvbaby.com/downloads/setup/us/windows/setup10 100.exe<br />
Mac OS X 10. :<br />
http://www.vtechvbaby.com/downloads/setup/us/mac/Mac10 /VBabysetup10 100.<br />
dmg<br />
Mac OS X 10. :<br />
http://www.vtechvbaby.com/downloads/setup/us/mac/Mac10 /VBabysetup10 100.<br />
dmg<br />
Mac OS X 10.6:<br />
http://www.vtechvbaby.com/downloads/setup/us/mac/Mac106/VBabysetup10 100.<br />
dmg<br />
CARE & MAINTENANCE<br />
1. Keep your V.Baby clean by wiping it with a slightly damp cloth. Never use solvents<br />
or abrasives.<br />
. Keep it out of direct sunlight and away from direct sources of heat.<br />
3. Remove the batteries when not using the V.Baby console and activity panel<br />
for an extended period of time.<br />
. Avoid dropping it. NEVER try to dismantle it.<br />
. Always keep the V.Baby away from water.<br />
6. The AC adaptor should be regularly examined for damage to the cord, plug,<br />
enclosure and other parts. In the event of such damage, the V.Baby must not<br />
be used with this adaptor until the damage has been repaired.<br />
. Please examine the toy transformer periodically for conditions that may result in<br />
the risk of fire, electric shock, or injury to persons (such as damage to the output<br />
cord, blades, housing, or other parts) and that, in an event of such conditions,<br />
the transformer should not be used until properly repaired.<br />
8. It is not recommended to add files to the V.Baby console without first installing<br />
the application software.<br />
WARNING<br />
A very small percentage of the public, due to an existing condition, may experience<br />
epileptic seizures or momentary loss of consciousness when viewing certain types<br />
of flashing colours or patterns, especially on television. While the V.Baby Infant<br />
Development System does not contribute to any additional risks, we do recommend<br />
that parents supervise their children while they play games in front of a television.<br />
If your child experiences dizziness, altered vision, disorientation, or convulsions,<br />
discontinue use immediately and consult your physician.<br />
We recommend that children take a 1 minute break for every hour of play.
TROUBLESHOOTING<br />
Problem Possible Reason Solution<br />
The power light does<br />
not come on when the<br />
ON Button is pressed.<br />
The power light is ON,<br />
but there is no picture<br />
on the screen.<br />
The power light is ON,<br />
but there is no picture<br />
(or incorrect picture)<br />
on the TV, and<br />
pressing the ON/OFF<br />
Button has no effect.<br />
The TV picture is<br />
black and white.<br />
1. Incorrect or<br />
missing power<br />
connection<br />
. Program needs to<br />
be reset<br />
1. Incorrect TV<br />
connection<br />
. Incorrect TV mode<br />
selected<br />
1. Program needs to<br />
be reset<br />
1. Non-matching<br />
colour system<br />
. Cable connection<br />
problem<br />
1. Check that new batteries are correctly<br />
installed, or an AC/DC adaptor (9V<br />
300mA, centerpositive) is properly<br />
connected to the main unit.<br />
.1 Disconnect all power supplies (batteries<br />
and adaptor), then reconnect power<br />
supplies.<br />
. Remove the Smartridge and then reinsert<br />
it.<br />
1. Make sure that the yellow plug of the<br />
main unit is connected to the video IN<br />
terminal (usually yellow) of the TV.<br />
. Make sure that the TV is set to “video”<br />
mode. Some TVs have several video<br />
inputs - please make sure you have<br />
selected the video input that matches the<br />
video port connected to the V.Baby<br />
unit.<br />
1.1 Remove the Smartridge, wipe it’s<br />
connection plug with a dry, soft cloth and<br />
then re-insert it.<br />
1. Disconnect all power supplies (batteries<br />
and adaptor), then reconnect power<br />
supplies.<br />
1. Make sure that the TV is set to the correct<br />
TV system.<br />
. Make sure that the video cable is firmly<br />
connected to the video input of the TV.<br />
There is a picture on<br />
the TV, but no sound. 1. TV setting 1. Raise the volume of the TV, and make<br />
sure it is not set to “Mute”.<br />
There is no response<br />
on the TV when I<br />
press the buttons on<br />
the activity panel.<br />
Photos and<br />
downloaded baby<br />
signs are missing.<br />
. Cable connection<br />
problem<br />
1. Activity Panel<br />
operation mode<br />
. Infrared receiving<br />
problem<br />
1. There is a problem<br />
with the files.<br />
. Make sure that the white plug is firmly<br />
connected to the audio input of the TV.<br />
1. Make sure the batteries inside the Activity<br />
Panel have power and are inserted<br />
correctly. Make sure the TV PLAY/OFF/<br />
PLAY ALONE Switch is in TV PLAY<br />
position.<br />
. Make sure there are no obstacles<br />
between the Activity Panel’s Infrared<br />
<strong>Sign</strong>al and the Console’s Infrared <strong>Sign</strong>al<br />
Receiver. Make sure the distance<br />
between the Activity Panel and the<br />
Console is less than 1 feet.<br />
1. Download the photos and signs again.<br />
TROUBLESHOOTING<br />
16
TROUBLESHOOTING / TECHNICAL SUPPORT / OTHER INFO<br />
1<br />
If your V.Baby does not respond to an inserted cartridge, please carefully try<br />
the following:<br />
• Remove all batteries and unplug all wiring.<br />
• Use a cotton swab dipped in rubbing alcohol or an alcohol-based window cleaner<br />
to gently clean the contact area of the cartridge slot.<br />
• Locate the cartridge’s contact area at the bottom of the cartridge. Softly clean the<br />
contact area.<br />
• If necessary, dry all the clean contact areas with a soft, lint-free cloth.<br />
• Please make sure that all parts are completely dry before restoring electricity.<br />
TECHNICAL SUPPORT<br />
If you have a problem that cannot be solved by using this manual, we encourage you<br />
to visit us online or contact our Consumer Services Department with any problems<br />
and/or suggestions that you might have. A support representative will be happy to<br />
assist you. Before requesting support, please be ready to provide or include the<br />
information below:<br />
• The name of your product or model number (the model number is typically located<br />
on the back or bottom of your product).<br />
• The actual problem you are experiencing.<br />
• The actions you took right before the problem occurred.<br />
Internet : www.vtechkids.com<br />
Phone : 1-800- 1- 010 in the U.S. or 1-8 -3 -869 in Canada<br />
OTHER INFO<br />
DISCLAIMER AND LIMITATION OF LIABILITY<br />
<strong>VTech</strong>® Electronics North America, L.L.C. and its suppliers assume no responsibility<br />
for any damage or loss resulting from the use of this handbook. <strong>VTech</strong>® Electronics<br />
North America, L.L.C. and its supplies assume no responsibility for any loss or<br />
claims by third parties that may arise through the use of this software. <strong>VTech</strong>®<br />
Electronics North America, L.L.C. and its suppliers assume no responsibility for any<br />
damage or loss caused by deletion of data as a result of malfunction, dead battery,<br />
or repairs. Be sure to make backup copies of important data on other media to<br />
protect against data loss.<br />
COMPANY: <strong>VTech</strong> ® Electronics North America, L.L.C.<br />
ADDRESS: 1155 West Dundee, Suite 130, Arlington Heights, IL 60004 USA<br />
TEL NO.: 1-800-521-2010 in the U.S. or 1-877-352-8697 in Canada.
FCC Notice:<br />
This equipment has been tested and found to comply with the limits for a Class<br />
B digital device, pursuant to Part 15 of the FCC Rules. These limits are designed<br />
to provide reasonable protection against harmful interference in a residential<br />
installation. This equipment generates, uses and can radiate radio frequency<br />
energy and, if not installed and used in accordance with the instructions, may cause<br />
harmful interference to radio communications. However, there is no guarantee that<br />
interference will not occur in a particular installation. If this equipment does cause<br />
harmful interference to radio or television reception, which can be determined<br />
by turning the equipment off and on, the user is encouraged to try to correct the<br />
interference by one or more of the following measures:<br />
• Reorient or relocate the receiving antenna.<br />
• Increase the separation between the equipment and receiver<br />
• Connect the equipment into an outlet on a circuit different from that to which<br />
the receiver is connected.<br />
• Consult the dealer or an experienced radio/TV technician for help.<br />
This device complies with Part 1 of the FCC Rules. Operation is subject to the<br />
following two conditions: (1) this device may not cause harmful interference, and<br />
( ) this device must accept any interference received, including interference<br />
that may cause undesired operation.<br />
This Class B digital apparatus complies with Canadian ices-003.<br />
Cet appareil numérique de la classe b est conforme à la norme nmb-003 du<br />
Canada.<br />
Caution: Changes or modifications not expressly approved by the party responsible<br />
for compliance could void the user’s authority to operate the equipment.<br />
FCC NOTICE<br />
18
2009 © <strong>VTech</strong><br />
Printed in China<br />
91-002386-003-000


