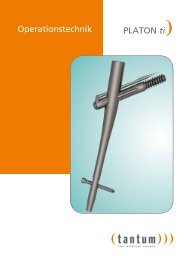
PLATON-Locking-Nail-System - tantum AG
PLATON-Locking-Nail-System - tantum AG
PLATON-Locking-Nail-System - tantum AG

Create successful ePaper yourself
Turn your PDF publications into a flip-book with our unique Google optimized e-Paper software.
<strong>tantum</strong> · OR manual <strong>PLATON</strong><br />
Fig.9<br />
Fig.10<br />
10<br />
Fig.9a Fig.9b<br />
Fig.10a<br />
8. Implantation of the <strong>PLATON</strong>-<strong>Nail</strong><br />
Under x-ray control, the <strong>PLATON</strong>-S-<strong>Nail</strong> is inserted<br />
with slight rotating movements over the Guide Pin<br />
and into the femoral canal. The correct position of the<br />
nail can be identified by the narrowing at the opening<br />
for the Femoral Lag Screw (Fig. 9a).<br />
Caution:If it is not possible manually, to insert the nail<br />
completely, the nail must be removed and the canal<br />
over reamed until the implantation is possible by<br />
hand. Under no circumstances should the use of force<br />
be administered (i.e. hammering).<br />
With the Platon-L-<strong>Nail</strong> it must be considered that due<br />
to the higher length, a hammering of the last centimeters<br />
can be necessary, requiring the use of<br />
the final impactor (Art. No 205-100).<br />
9. Exact Positioning of the <strong>PLATON</strong>-<strong>Nail</strong><br />
After insertion is completed, the <strong>PLATON</strong>-<br />
<strong>Nail</strong> must be placed correctly. The ideal position<br />
of the Femoral Lag Screw is the lower<br />
half of the femoral head in the AP plane<br />
(Fig. 9a) and centrally in the lateral plane<br />
(Fig. 9b). With the help of a long K-wire,<br />
which is placed over the femoral neck, the correct<br />
position of the Femoral Lag Screw Guide Pin (Art. No.<br />
206-100) must be ensured in the AP view<br />
using the image intensifier (Fig. 9).<br />
10. Insertion of the Femoral Lag Screw<br />
1. Remove the Reamer Guide Wire.<br />
2. Skin incision and splitting of the fascia.<br />
Insertions of the Platon tissue protection<br />
sleeve (Art. No. 202-108) with inserted<br />
Obturator (Art. No. 203-107) at the desired<br />
position through the targeting head of the targeting<br />
Device (Art. No. 204-106) (Fig. 10).<br />
The Obturator is removed while pushing the<br />
<strong>PLATON</strong> tissue protection Sleeve slightly forward.<br />
The <strong>PLATON</strong> double sleeve (Art. No. 202-106) is<br />
Thereafter,<br />
inserted.<br />
the Guide Sleeve (Art. No. 202-112, Color<br />
Code: blue) is inserted into the Double Sleeve. <strong>Locking</strong><br />
of the Guide Sleeve with a half twist (Fig. 10a).<br />
The correct position is verified again by lengthening<br />
the axis to the future position of the Femoral Lag<br />
Screw (Fig. 9a).<br />
Check if the locking ring on the Targeting arm<br />
of the Targeting Device is tightened and thereby ensure<br />
exact drilling.