- Page 1 and 2:
STATE OF OHIO DEPARTMENT OF TRANSPO
- Page 3 and 4:
Table of Contents 100 General Provi
- Page 5 and 6:
Item 613 Low Strength Mortar Backfi
- Page 7 and 8:
100 GENERAL PROVISIONS 101 DEFINITI
- Page 9 and 10:
3 101.02 FHWA Federal Highway Admin
- Page 11 and 12:
TODS Tourist-Oriented Directional S
- Page 13 and 14:
7 101.03 Contract Price. The amount
- Page 15 and 16:
9 101.03 Right-of-Way. A general te
- Page 17 and 18:
102 BIDDING REQUIREMENTS AND CONDIT
- Page 19 and 20:
ENTITY SUBMITTING PROPOSAL REQUIRED
- Page 21 and 22:
15 102.15 B. The Bidder fails to fu
- Page 23 and 24:
104.02 Revisions to the Contract Do
- Page 25 and 26:
19 104.03 Work. The adjustment will
- Page 27 and 28:
21 104.05 Within seven (7) calendar
- Page 29 and 30:
23 104.05 d. References to the appl
- Page 31 and 32:
25 105.03 Work consists of repairs,
- Page 33 and 34:
27 105.08 105.08 Cooperation Betwee
- Page 35 and 36:
29 105.15 Maintain the previous cou
- Page 37 and 38:
105.18 Under the regulations cited
- Page 39 and 40:
33 106.03 request. Furnish the requ
- Page 41 and 42:
C. Applications. 35 106.10 1. When
- Page 43 and 44:
37 107.06 Such inspections will not
- Page 45 and 46:
39 107.10 Section 4733-37-04, Measu
- Page 47 and 48:
41 107.12 B. Contractor’s Use of
- Page 49 and 50:
43 107.13 $5,000,000 and Each Occur
- Page 51 and 52:
45 107.16 as authorized by Change O
- Page 53 and 54:
47 107.19 beginning construction of
- Page 55 and 56:
108.02 The Director will calculate
- Page 57 and 58:
108.03 Items into component activit
- Page 59 and 60:
53 108.06 request in writing to the
- Page 61 and 62:
55 108.07 escalated labor and mater
- Page 63 and 64:
57 108.10 108.10 Payroll Records. K
- Page 65 and 66: 59 109.02 Thousand Board Feet, MBF
- Page 67 and 68: 61 109.03 TABLE 109.02-2 SI (METRIC
- Page 69 and 70: 1. Administration. 2. Superintenden
- Page 71 and 72: 65 109.05 g. If materials are taken
- Page 73 and 74: 67 109.05 charges. If the Contracto
- Page 75 and 76: 69 109.05 However, compensation for
- Page 77 and 78: 71 109.05 currently on the Project
- Page 79 and 80: 73 109.05 wage, submit payroll and
- Page 81 and 82: c. Proof of escalated cost for labo
- Page 83 and 84: 77 109.05 overhead provided the cri
- Page 85 and 86: 79 109.06 If the original material
- Page 87 and 88: 81 109.12 complete. Final Inspectio
- Page 89 and 90: 200 EARTHWORK ITEM 201 CLEARING AND
- Page 91 and 92: 202.01 Description 202.02 General C
- Page 93 and 94: 87 202.04 Where alteration of an ex
- Page 95 and 96: 89 202.08 ground surface. Break up
- Page 97 and 98: 91 202.14 removal or excavation, an
- Page 99 and 100: 93 203.03 F. Excavation. The excava
- Page 101 and 102: 95 203.04 c. Perform the tests on e
- Page 103 and 104: 97 203.06 granular material in a un
- Page 105 and 106: 99 203.07 6. Construct the other em
- Page 107 and 108: 101 203.09 the bottom of the ditch,
- Page 109 and 110: 103 203.10 If during excavation the
- Page 111 and 112: 105 204.03 Furnish geotextile fabri
- Page 113 and 114: 107 204.07 Operate equipment at a s
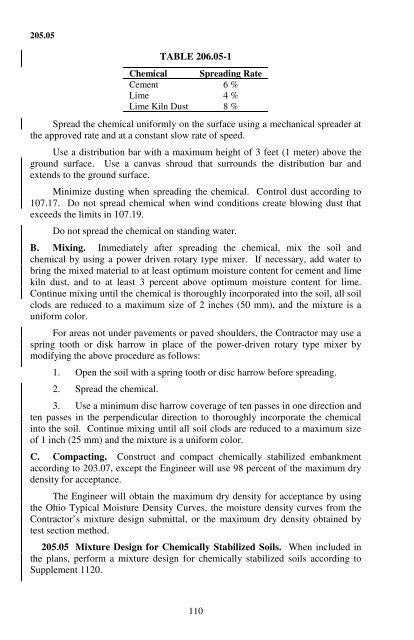
- Page 115: ITEM 205 CHEMICALLY STABILIZED EMBA
- Page 119 and 120: 206.05 1. Cement or Lime Kiln Dust.
- Page 121 and 122: 115 206.06 Cover the completed chem
- Page 123 and 124: 117 207.03 with construction seed a
- Page 125 and 126: 119 207.04 advance of needing them.
- Page 127 and 128: The Department will measure Inlet P
- Page 129 and 130: 123 208.02 208.02 Regulations on th
- Page 131 and 132: 125 208.07 E. Maintain a stemming d
- Page 133 and 134: 208.09 During the 5-minute delay, t
- Page 135 and 136: 129 208.10 S. Use the same diameter
- Page 137 and 138: 131 208.14 208.14 Pre-Blast Conditi
- Page 139 and 140: 133 208.17 B. The airblast and nois
- Page 141 and 142: 135 208.21 B. Report of Loss. If a
- Page 143 and 144: 137 209.01 209.01 Description. This
- Page 145 and 146: 250 PAVEMENT REPAIRS ITEM 251 PARTI
- Page 147 and 148: 141 252.05 If the Contract does not
- Page 149 and 150: Item Unit Description 253 Square Ya
- Page 151 and 152: 255.10 Basis of Payment 145 255.01
- Page 153 and 154: 147 255.07 Apply the liquid membran
- Page 155 and 156: 149 256.03 256.03 Equipment. Use a
- Page 157 and 158: 151 256.10 irrespective of the dept
- Page 159 and 160: 153 257.05 of the pavement is unifo
- Page 161 and 162: 155 258.03 the 1/2 -inch (12.5 mm)
- Page 163 and 164: 300 BASES ITEM 301 ASPHALT CONCRETE
- Page 165 and 166: 159 302.02 The Contractor may use r
- Page 167 and 168:
161 304.03 304.03 Before Spreading.
- Page 169 and 170:
163 304.08 Where variable depth is
- Page 171 and 172:
165 320.04 If using a resonant freq
- Page 173 and 174:
167 321.04 quality by cracking at l
- Page 175 and 176:
169 401.02 401.02 Mix Design and Qu
- Page 177 and 178:
Asphalt Mix Application Heavy Traff
- Page 179 and 180:
173 401.05 Test blended RAP stockpi
- Page 181 and 182:
175 401.11 401.11 Hauling. Use truc
- Page 183 and 184:
TABLE 401.13-3 PNEUMATIC TIRE ROLLE
- Page 185 and 186:
179 401.16 lighting at the beginnin
- Page 187 and 188:
401.18 Form hot longitudinal joints
- Page 189 and 190:
TABLE 401.21 Aggregate lb/yd 3 (kg/
- Page 191 and 192:
185 402.06 402.06 Calibration. Cali
- Page 193 and 194:
187 403.01 project use on non-ODOT
- Page 195 and 196:
189 403.03 D. Copies of worksheets,
- Page 197 and 198:
191 403.06 A. Sampling. The Departm
- Page 199 and 200:
193 403.06 District lab on its own
- Page 201 and 202:
195 403.07 the acceptance. While wo
- Page 203 and 204:
197 403.08 Table 403.08-1, but fall
- Page 205 and 206:
199 407.06 407.06 Application of As
- Page 207 and 208:
201 408.08 rate of application, tem
- Page 209 and 210:
203 409.05 409.05 Basis of Payment.
- Page 211 and 212:
ITEM 411 STABILIZED CRUSHED AGGREGA
- Page 213 and 214:
207 421.02 Ensure that the Binder h
- Page 215 and 216:
A. Source of each individual materi
- Page 217 and 218:
211 421.10 If the microsurfacing is
- Page 219 and 220:
Item Unit Description 421 Square Ya
- Page 221 and 222:
215 422.04 oversized material, revo
- Page 223 and 224:
422.09 Before rolling, correct defi
- Page 225 and 226:
Reject aggregate that does not meet
- Page 227 and 228:
422 Square Yard Double Chip Seal (S
- Page 229 and 230:
223 423.08 or spalling. Do not seal
- Page 231 and 232:
225 424.04 submittal. For medium mi
- Page 233 and 234:
227 441.02 If the F/A ratio using t
- Page 235 and 236:
TABLE 441.02-1 (CONTINUED) Course T
- Page 237 and 238:
TABLE 441.02-1 (CONTINUED) Course T
- Page 239 and 240:
233 441.06 Limit adjustments of the
- Page 241 and 242:
235 441.09 When the F-T value is sp
- Page 243 and 244:
237 441.11 holding a Level 3 Asphal
- Page 245 and 246:
TABLE 442.02-1 GYRATION LEVEL AND M
- Page 247 and 248:
241 442.06 442.06 Compaction. Cease
- Page 249 and 250:
TABLE 443.03-2 MIX PROPERTIES 243 4
- Page 251 and 252:
2. Shot content (ASTM C612) Passing
- Page 253 and 254:
446.01 Description 446.02 JMF Field
- Page 255 and 256:
249 446.05 Fill core holes by the n
- Page 257 and 258:
448.01 Description 448.02 JMF Field
- Page 259 and 260:
450 RIGID PAVEMENT ITEM 451 REINFOR
- Page 261 and 262:
255 451.04 track speed, and the fre
- Page 263 and 264:
257 451.07 finishing the freshly pl
- Page 265 and 266:
451.08 Immediately before paving, r
- Page 267 and 268:
451.09 oil. Use an adequate bulkhea
- Page 269 and 270:
263 451.15 self propelled machines
- Page 271 and 272:
265 451.18 When zones of deficient
- Page 273 and 274:
267 452.04 directs in writing. The
- Page 275 and 276:
269 499.03 C. Concrete Classes. Usi
- Page 277 and 278:
TABLE 499.03-4 CLASS HP CONCRETE 27
- Page 279 and 280:
273 499.04 However, do not change t
- Page 281 and 282:
TABLE 499.04-2 OPTION 2 CONCRETE (C
- Page 283 and 284:
277 499.06 rigid pavement removal a
- Page 285 and 286:
TABLE 499.08-1 EVERY BATCH TICKET N
- Page 287 and 288:
281 499.09 When approved by the Eng
- Page 289 and 290:
283 501.04 Prepare the shop drawing
- Page 291 and 292:
285 501.05 drawing at least 24 hour
- Page 293 and 294:
287 501.05 ii. Erection sequence fo
- Page 295 and 296:
289 502.01 Accompany all certified
- Page 297 and 298:
291 503.01 503.01 Description. This
- Page 299 and 300:
293 503.08 503.08 Backfill. Backfil
- Page 301 and 302:
295 504.01 provide the minimum cove
- Page 303 and 304:
297 506.03 limits of the footing 3
- Page 305 and 306:
299 506.04 506.04 Basis of Payment.
- Page 307 and 308:
507.05 Do not use a follower unless
- Page 309 and 310:
303 507.11 (75 mm) above the elevat
- Page 311 and 312:
305 508.03 To compensate for falsew
- Page 313 and 314:
509.09 Epoxy Coated Reinforcing Ste
- Page 315 and 316:
TABLE 509.05-1M STANDARD BENDS Dime
- Page 317 and 318:
311 509.10 If repair is required, c
- Page 319 and 320:
511.03 Proportions 511.04 Mix Optio
- Page 321 and 322:
511.09 511.09 Slump. Within the slu
- Page 323 and 324:
FIGURE 1 ACI 308-81 511.11 Slipform
- Page 325 and 326:
319 511.13 of principal stress and
- Page 327 and 328:
321 511.16 from 50 to 100 °F (10 t
- Page 329 and 330:
323 511.19 corners or edges, and ot
- Page 331 and 332:
325 511.21 expansion joints. Saw gr
- Page 333 and 334:
327 511.25 511.25 Basis of Payment.
- Page 335 and 336:
329 512.03 Do not mix or apply the
- Page 337 and 338:
2. Non-epoxy sealer. 331 512.03 a.
- Page 339 and 340:
333 512.04 markings according to Se
- Page 341 and 342:
335 512.06 Engineer with written in
- Page 343 and 344:
337 512.07 200 psi (1400kPa) max.,
- Page 345 and 346:
339 512.08 applying the waterproofi
- Page 347 and 348:
341 512.09 512.09 Method of Measure
- Page 349 and 350:
343 513.03 The Office of Materials
- Page 351 and 352:
345 513.05 513.05 Fabricator Docume
- Page 353 and 354:
347 513.12 before assembly. During
- Page 355 and 356:
349 513.18 for up to 5-inch (127 mm
- Page 357 and 358:
TABLE 513.20-1M Bolt Size (mm) To d
- Page 359 and 360:
TABLE 513.20-2M 353 513.20 Bolt Siz
- Page 361 and 362:
355 513.23 each workday, when weldi
- Page 363 and 364:
357 513.25 A. Radiographic Inspecti
- Page 365 and 366:
359 513.26 The fabrication quality
- Page 367 and 368:
361 513.30 The Department will not
- Page 369 and 370:
363 514.04 The quality control spec
- Page 371 and 372:
365 514.05 inspection identifies a
- Page 373 and 374:
367 514.07 continuously and uniform
- Page 375 and 376:
369 514.11 supporting 250 pounds (1
- Page 377 and 378:
371 514.13 1. For an automated blas
- Page 379 and 380:
SW 846 Regulatory Concentration Ana
- Page 381 and 382:
375 514.17 Except for primer, mix p
- Page 383 and 384:
377 514.18 If mud cracking occurs,
- Page 385 and 386:
514.20 F. Measure other areas or re
- Page 387 and 388:
514.23 immediately before applying
- Page 389 and 390:
Item Unit Description 514 Square Fo
- Page 391 and 392:
385 515.07 members, and all other i
- Page 393 and 394:
515.13 according to a method accept
- Page 395 and 396:
515.15 production. When using admix
- Page 397 and 398:
391 515.17 BEAM DIMENSIONAL TOLERAN
- Page 399 and 400:
393 515.20 support locations. Durin
- Page 401 and 402:
395 516.04 516.03 Coating. Coat exp
- Page 403 and 404:
397 516.09 feet (meters) horizontal
- Page 405 and 406:
Scuppers, structural steel and cast
- Page 407 and 408:
401 518.10 518.10 Basis of Payment.
- Page 409 and 410:
519.08 columns, the Department will
- Page 411 and 412:
405 520.05 and two times the weight
- Page 413 and 414:
407 520.11 520.11 Inspection and Te
- Page 415 and 416:
Concrete footings will be paid for
- Page 417 and 418:
411 524.02 plan requirements, with
- Page 419 and 420:
413 524.05 groundwater must be cont
- Page 421 and 422:
415 524.08 Determine density, visco
- Page 423 and 424:
417 524.13 parts, do not allow thes
- Page 425 and 426:
ITEM 526 APPROACH SLABS 526.01 Desc
- Page 427 and 428:
600 INCIDENTALS ITEM 601 SLOPE AND
- Page 429 and 430:
423 601.05 Stretchers are bags plac
- Page 431 and 432:
425 601.12 mm) wide at the surface;
- Page 433 and 434:
427 602.03 602.03 Construction Requ
- Page 435 and 436:
Soil and granular embankment ......
- Page 437 and 438:
paved invert ......................
- Page 439 and 440:
Polyvinyl chloride sanitary pipe ..
- Page 441 and 442:
435 603.05 place with approval from
- Page 443 and 444:
437 603.08 cut end at an interior j
- Page 445 and 446:
439 603.09 c. If resilient and flex
- Page 447 and 448:
441 603.11 1. In a cut situation, p
- Page 449 and 450:
603 Foot (Meter) ___" (___ mm) Cond
- Page 451 and 452:
604.02 Use removed or excavated mat
- Page 453 and 454:
447 604.07 mm). Ensure that the str
- Page 455 and 456:
449 605.03 If the size of the under
- Page 457 and 458:
605.07 Construct the underdrains ou
- Page 459 and 460:
453 606.04 Space Type 5A guardrail
- Page 461 and 462:
607.05 Horizontal Deflection 607.06
- Page 463 and 464:
457 607.10 607.10 Basis of Payment.
- Page 465 and 466:
608.09 The Department will measure
- Page 467 and 468:
461 609.04 portions of adjacent sec
- Page 469 and 470:
463 609.07 Where medians and traffi
- Page 471 and 472:
465 610.04 Use metal sheets with a
- Page 473 and 474:
467 610.09 610.09 Basis of Payment.
- Page 475 and 476:
469 613.06 The Contractor may use f
- Page 477 and 478:
614.03 B. When the highway under co
- Page 479 and 480:
473 614.06 614.055 Surface Conditio
- Page 481 and 482:
475 614.11 A. Acceptability and Exp
- Page 483 and 484:
614.11 Apply Class I work zone mark
- Page 485 and 486:
479 614.11 passing zone and places
- Page 487 and 488:
481 614.12 approximately 4 inches (
- Page 489 and 490:
Line Type Normal Spacing Feet (Mete
- Page 491 and 492:
B. Work zone signal, pole, or contr
- Page 493 and 494:
615.05 specified in Item 606, excep
- Page 495 and 496:
489 616.01 616.01 Description. This
- Page 497 and 498:
TABLE 617.06-1 Material Conversion
- Page 499 and 500:
493 619.02 Furnish neat, sanitary,
- Page 501 and 502:
495 620.03 620.03 Layout. Lay out a
- Page 503 and 504:
497 621.05 When a casting is insert
- Page 505 and 506:
499 621.10 The Department will meas
- Page 507 and 508:
622.09 622.09 Basis of Payment. The
- Page 509 and 510:
624.03 Method of Measurement 624.04
- Page 511 and 512:
505 625.01 625.01 Description. This
- Page 513 and 514:
625.10 Ensure that the grounding co
- Page 515 and 516:
509 625.13 grounding conductor that
- Page 517 and 518:
511 625.16 625.16 Grounding. Connec
- Page 519 and 520:
513 625.19 Measure the earth resist
- Page 521 and 522:
Pull boxes include the aggregate fo
- Page 523 and 524:
517 625.23 except for a power servi
- Page 525 and 526:
519 626.04 The Contractor may vary
- Page 527 and 528:
Concrete, Class C..................
- Page 529 and 530:
523 630.04 panels to achieve the si
- Page 531 and 532:
525 630.06 galvanize steel structur
- Page 533 and 534:
527 630.07 Provide for the attachme
- Page 535 and 536:
Remove temporary overlay signs so a
- Page 537 and 538:
630.15 The Department will measure
- Page 539 and 540:
631.08 Controls 631.09 Electrical S
- Page 541 and 542:
535 631.07 install the nipple. Ensu
- Page 543 and 544:
Item Unit Description 631 Each Sign
- Page 545 and 546:
539 632.04 Ensure that major items
- Page 547 and 548:
541 632.06 Upon acceptance of the p
- Page 549 and 550:
543 632.15 against undisturbed soil
- Page 551 and 552:
545 632.23 Support cables installed
- Page 553 and 554:
547 632.28 complete test records, t
- Page 555 and 556:
549 632.30 include excavation, dewa
- Page 557 and 558:
632 Each Power Service 632 Each Cov
- Page 559 and 560:
553 633.07 1. Furnish a certified t
- Page 561 and 562:
555 633.15 and software, in one or
- Page 563 and 564:
557 633.17 5. A minimum of three ti
- Page 565 and 566:
559 633.18 potential modifications
- Page 567 and 568:
633 Each Controller, Master, Traffi
- Page 569 and 570:
563 638.03 The metric equivalent pi
- Page 571 and 572:
565 638.07 L. Thrust Blocking. Furn
- Page 573 and 574:
567 638.13 Install valve boxes on a
- Page 575 and 576:
569 638.16 it to the extended branc
- Page 577 and 578:
571 638.20 638 Foot (Meter) ___ inc
- Page 579 and 580:
573 641.03 641.03 General. Apply li
- Page 581 and 582:
575 641.05 At the end of the projec
- Page 583 and 584:
577 641.10 communication between th
- Page 585 and 586:
Keep the paint thoroughly mixed dur
- Page 587 and 588:
ITEM 643 POLYESTER PAVEMENT MARKING
- Page 589 and 590:
583 643.05 643.05 Basis of Payment.
- Page 591 and 592:
644.04 Ensure that the applicator p
- Page 593 and 594:
644 Foot or Square Foot Removal of
- Page 595 and 596:
646.07 Basis of Payment 589 646.01
- Page 597 and 598:
591 646.04 Perform operations in su
- Page 599 and 600:
B. The marking has cyclical soft sp
- Page 601 and 602:
595 647.05 process of material appl
- Page 603 and 604:
597 652.04 652.04 Basis of Payment.
- Page 605 and 606:
599 656.02 prunings, rubbish, stump
- Page 607 and 608:
601 657.07 657.07 Pipe Drains. Drai
- Page 609 and 610:
659.18 Maintenance 659.19 Mowing 65
- Page 611 and 612:
605 659.04 with the Liquid Lime man
- Page 613 and 614:
C. A statement of the purity and ge
- Page 615 and 616:
Weight per Area Mix Type lb kg Clas
- Page 617 and 618:
611 659.11 659.11 Placing Topsoil.
- Page 619 and 620:
659.17 may also mix the grass seed
- Page 621 and 622:
615 660.01 The Department will pay
- Page 623 and 624:
617 664.05 Immediately before placi
- Page 625 and 626:
619 661.03 current edition of the A
- Page 627 and 628:
Locate Seedlings, Groundcovers, Vin
- Page 629 and 630:
623 662.02 662.02 Watering. Furnish
- Page 631 and 632:
670.05 Method of Measurement 670.06
- Page 633 and 634:
627 671.04 4. Place upgrade slots a
- Page 635 and 636:
700 MATERIAL DETAILS 700 MINIMUM RE
- Page 637 and 638:
631 700.00 Spec No. Material Materi
- Page 639 and 640:
633 700.00 Spec No. Material Materi
- Page 641 and 642:
635 700.00 Spec No. Material Materi
- Page 643 and 644:
637 700.00 Spec No. Material Materi
- Page 645 and 646:
639 700.00 Spec No. Material Materi
- Page 647 and 648:
641 700.00 Spec No. Material Materi
- Page 649 and 650:
643 700.00 Spec No. Material Materi
- Page 651 and 652:
645 700.00 Spec No. Material Materi
- Page 653 and 654:
647 700.00 Spec No. Material Materi
- Page 655 and 656:
649 700.00 Spec No. Material Materi
- Page 657 and 658:
651 700.00 Spec No. Material Materi
- Page 659 and 660:
653 700.00 Spec No. Material Materi
- Page 661 and 662:
655 700.00 Spec No. Material Materi
- Page 663 and 664:
657 700.00 Spec No. Material Materi
- Page 665 and 666:
702 ASPHALT MATERIAL 702.00 Accepta
- Page 667 and 668:
661 702.01 the asphalt concrete mix
- Page 669 and 670:
663 702.06 702.06 Asphalt for Water
- Page 671 and 672:
Penetration @ 77 °F (25 °C)., 100
- Page 673 and 674:
Length, ...........................
- Page 675 and 676:
Sodium sulfate soundness test, 5 cy
- Page 677 and 678:
671 703.01
- Page 679 and 680:
2. Physical properties. Percent of
- Page 681 and 682:
Deleterious substances shall not ex
- Page 683 and 684:
703.07 Mineral Filler. 677 703.07 A
- Page 685 and 686:
B. Structural Backfill Type 2. 679
- Page 687 and 688:
681 703.14 moisture. Ensure that th
- Page 689 and 690:
683 703.1� 2. When using BOF or E
- Page 691 and 692:
A. Furnish CCS, crushed gravel, cru
- Page 693 and 694:
Furnish materials for Item 617 acco
- Page 695 and 696:
689 704.01 2. Type B material has a
- Page 697 and 698:
691 705.10 Furnish materials accord
- Page 699 and 700:
Test Description Bond Strength (dry
- Page 701 and 702:
1. Ensure that the material meets t
- Page 703 and 704:
697 705.24 Furnish the test data, a
- Page 705 and 706:
3. 1 Pint non-absorbent container 4
- Page 707 and 708:
6.3 Provide aggregate conforming to
- Page 709 and 710:
Illustrative Example of S-Stirrup S
- Page 711 and 712:
705 706.02 2. When it has been esta
- Page 713 and 714:
0.3 mm Crack D-Load 65.0 Ultimate S
- Page 715 and 716:
0.01-inch Crack D-Load 3000 Ultimat
- Page 717 and 718:
711 706.03 with elliptical reinforc
- Page 719 and 720:
706.05 class. Ensure that the marki
- Page 721 and 722:
706.05 1. All structural design acc
- Page 723 and 724:
717 706.05 handling strengths, then
- Page 725 and 726:
719 706.05 The manufacturer may be
- Page 727 and 728:
721 706.05 The spacing center-to-ce
- Page 729 and 730:
723 706.06 12.0 Make repairs accord
- Page 731 and 732:
725 706.12 Furnish materials accord
- Page 733 and 734:
727 707.01 8.1.2. Ensure that the m
- Page 735 and 736:
729 707.02 annular corrugation that
- Page 737 and 738:
731 707.10 707.10 Square and Rectan
- Page 739 and 740:
733 707.13 9.3 A bell and spigot jo
- Page 741 and 742:
197M. Pipe Pipe-Arch Diameter Wall
- Page 743 and 744:
737 707.25 7.5.1 Reroll the ends of
- Page 745 and 746:
739 707.41 7.4 When tested in accor
- Page 747 and 748:
9.1 Perform inspection at the proje
- Page 749 and 750:
743 708.02 g. Pot life. SSPC-Paint
- Page 751 and 752:
745 708.02 36M hot rolled steel. Bl
- Page 753 and 754:
747 709.01 775, Section 11, permiss
- Page 755 and 756:
749 710.01 in round column and dril
- Page 757 and 758:
751 710.03 TABLE 710.03-1 STEEL POS
- Page 759 and 760:
753 710.03 plunger bar of the latch
- Page 761 and 762:
710.12 Furnish steel line posts acc
- Page 763 and 764:
757 711.04 ASTM A 328/A 328M. Furni
- Page 765 and 766:
759 711.13 17 Ship test bars with t
- Page 767 and 768:
761 711.23 18.7.4.5, and 18.10.3. I
- Page 769 and 770:
763 711.27 Air-dry or kiln-dry timb
- Page 771 and 772:
Total calcium and magnesium oxides
- Page 773 and 774:
Type A: Underdrains and Slope Drain
- Page 775 and 776:
769 712.11 5. A netting weight of a
- Page 777 and 778:
771 712.11 2. Excelsior cut from wo
- Page 779 and 780:
773 721.02 Furnish materials accord
- Page 781 and 782:
775 725.07 725.07 Plastic Pull Boxe
- Page 783 and 784:
TABLE 725. 11-3 ANSI WATTS Horizont
- Page 785 and 786:
779 725.11 Ensure that the luminair
- Page 787 and 788:
781 725.15 Ensure that the box and
- Page 789 and 790:
783 725.19 E. Photoelectric Cell. E
- Page 791 and 792:
785 725.21 Luminaires and Traffic S
- Page 793 and 794:
787 725.21 and bears easily found a
- Page 795 and 796:
789 725.21 designed to develop a co
- Page 797 and 798:
730.01 which has been drilled and t
- Page 799 and 800:
793 730.05 730.05 Handhole Covers.
- Page 801 and 802:
795 730.19 730.192 Reflective Sheet
- Page 803 and 804:
797 731.07 60 times per minute with
- Page 805 and 806:
Furnish a visor with each signal se
- Page 807 and 808:
801 732.04 percent humidity. Operat
- Page 809 and 810:
803 732.04 q. The module shall be d
- Page 811 and 812:
805 732.04 period of 60 months, ove
- Page 813 and 814:
807 732.05 The LED signal lamp unit
- Page 815 and 816:
809 732.06 Furnish materials accord
- Page 817 and 818:
811 732.08 B. NEMA TS-2. Furnish lo
- Page 819 and 820:
813 732.15 expanding or screw type
- Page 821 and 822:
Cable or Wire Number of Conductors
- Page 823 and 824:
817 733.02 1. NEMA 8 phase, dual ri
- Page 825 and 826:
733.03 Model 2070-3B Front Panel, D
- Page 827 and 828:
821 733.03 hardware and equipment f
- Page 829 and 830:
823 733.03 withstand a peak current
- Page 831 and 832:
825 733.03 l. Terminal Blocks. Furn
- Page 833 and 834:
827 733.03 (7) Furnish loop detecto
- Page 835 and 836:
829 733.03 c. Install red monitor c
- Page 837 and 838:
light to display. 831 733.03 (c) En
- Page 839 and 840:
733.03 circuits, yellow timing, mul
- Page 841 and 842:
733.03 (h) MULT IND. Illuminates wh
- Page 843 and 844:
837 733.03 Watchdog Timer, 24VDC, C
- Page 845 and 846:
(l) Event logs 839 733.03 (5) Furni
- Page 847 and 848:
733.05 A. Cabinet Riser for NEMA Ca
- Page 849 and 850:
843 733.06 b. Time of day/day of we
- Page 851 and 852:
3. Modem 4. Printer 5. Accessory It
- Page 853 and 854:
847 740.01 Furnish two (2) sets of
- Page 855 and 856:
849 740.03 Minimum Maximum 1. Consi
- Page 857 and 858:
H. Color. 851 740.05 Minimum Maximu
- Page 859 and 860:
853 740.08 Allow samples to cure at
- Page 861 and 862:
855 748.00 Roundness (Percent by We
- Page 863 and 864:
Pipe Diameter Wall Thickness Wall T
- Page 865 and 866:
859 748.15 or threads. Furnish nozz
- Page 867 and 868:
Award, 5, 16 Cancellation of, 16 Of
- Page 869 and 870:
Clearances, reinforcing steel, 307
- Page 871 and 872:
Control of work, 24 Controller (see
- Page 873 and 874:
Retaining walls, 466 Execution of c
- Page 875 and 876:
81, 82, 582, 593 Authority and duti
- Page 877 and 878:
NEMA TS-2, 805, 811, 816, 818, 819,
- Page 879 and 880:
Metallic coated, 727, 730 Metric eq
- Page 881 and 882:
Contents, 11 Delivery of, 14 Guaran
- Page 883 and 884:
691 Sheet piling left in place Mate
- Page 885 and 886:
Screw threads, 355 Sheet piling, 75
- Page 887 and 888:
Pedestrian signal lamps, 800 Perfor
- Page 889:
Working drawings, plans and, 24 Wor


