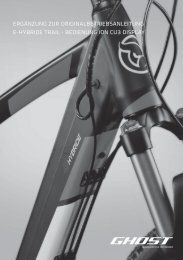
ORIGINAL OPERATING MANUAL GHOST E-HYBRIDE
ORIGINAL OPERATING MANUAL GHOST E-HYBRIDE
ORIGINAL OPERATING MANUAL GHOST E-HYBRIDE

Create successful ePaper yourself
Turn your PDF publications into a flip-book with our unique Google optimized e-Paper software.
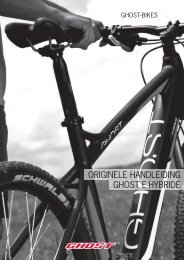
<strong>GHOST</strong>-BIKES<br />
<strong>ORIGINAL</strong> <strong>OPERATING</strong> <strong>MANUAL</strong><br />
<strong>GHOST</strong> E-<strong>HYBRIDE</strong>
2<br />
Original Operating Manual<br />
· E-HYBRID TRAIL 9000 LADY / MAN<br />
· E-HYBRID TRAIL 4000 LADY / MAN<br />
· E-HYBRID STREET LADY / MAN<br />
for <strong>GHOST</strong> EPACs of the Models<br />
Date of issue: 10/2011<br />
<strong>GHOST</strong> EPAC
1 Fundamental information on your new EPAC and this<br />
E-<strong>HYBRIDE</strong> TRAIL 9000 LADY / MAN<br />
E-<strong>HYBRIDE</strong> TRAIL 4000 LADY / MAN<br />
E-<strong>HYBRIDE</strong> STREET LADY / MAN<br />
operating manual .......................................................................................... 7<br />
1.1 Scope of supply ..................................................................................... 7<br />
1.1.1 Basic equipment .................................................................................... 7<br />
1.1.2 Optional accessories for installation by the specialist bicycle dealer .... 7<br />
1.2 Other applicable documents .................................................................. 7<br />
1.3 Legal regulations ................................................................................... 7<br />
1.4 Conventions .......................................................................................... 8<br />
1.4.1 Symbols and signal words ..................................................................... 8<br />
1.4.2 Abbreviations ......................................................................................... 8<br />
1.4.3 Technical terms ..................................................................................... 8<br />
1.4.4 Representation ...................................................................................... 9<br />
2 For Your Safety ............................................................................................ 10<br />
2.1 Follow the instructions in this operating manual .................................. 10<br />
2.2 Consulting your specialist bicycle dealer ............................................. 10<br />
2.3 The meanings of markings on your EPAC........................................... 11<br />
2.4 Using your EPAC for its intended purpose .......................................... 12<br />
2.4.1 What work may you carry out yourself on your EPAC? ....................... 12<br />
2.4.2 What must you bear in mind when retrofitting accessories and<br />
carrying out conversions? ................................................................... 12<br />
2.4.3 Who is allowed to ride your EPAC? ..................................................... 13<br />
2.4.4 Where are you allowed to ride your EPAC? ........................................ 14<br />
2.5 Residual dangers ................................................................................ 16<br />
2.5.1 Danger of burns ................................................................................... 16<br />
2.5.2 Electric hazards ................................................................................... 17<br />
2.5.3 Other hazards and protective measures ............................................. 17<br />
3 Technical Data ............................................................................................. 18<br />
4 Design and Function ................................................................................... 20<br />
4.1 Brakes and brake configuration ........................................................... 21<br />
4.2 Gears ................................................................................................... 21<br />
4.3 Frame and Fork ................................................................................... 21<br />
4.4 Wheels ................................................................................................ 22<br />
4.5 Rear tyre .............................................................................................. 22<br />
4.6 Electrical equipment ............................................................................ 22<br />
4.6.1 Rechargeable battery pack and motor ................................................ 22<br />
4.6.2 Display ................................................................................................. 24<br />
4.6.3 Charging device for rechargeable battery pack in the frame ............... 24<br />
5 Before your first Ride ................................................................................. 25<br />
6 Before Every Use ........................................................................................ 26<br />
6.1 Inspecting the wheels .......................................................................... 27<br />
6.1.1 Checking the tightness ........................................................................ 27<br />
6.1.2 Checking the tyres ............................................................................... 27<br />
6.1.2.1 Checking the position of the valve ....................................................... 27<br />
3
4<br />
<strong>GHOST</strong> EPAC<br />
6.1.2.2 Checking the tyre ................................................................................ 28<br />
6.1.2.3 Checking the air pressure ................................................................... 28<br />
6.1.2.4 Checking that the tyre is correctly fitted .............................................. 29<br />
6.1.3 Checking other points .......................................................................... 29<br />
6.2 Inspecting the saddle and saddle post ................................................ 30<br />
6.3 Inspecting the handlebars and handlebar stem .................................. 31<br />
6.4 Inspecting the handlebar attachments ................................................ 31<br />
6.5 Inspecting the headset ........................................................................ 33<br />
6.6 Inspecting the spring fork .................................................................... 33<br />
6.7 Inspecting the brakes .......................................................................... 34<br />
6.7.1 Checking general functions ................................................................. 34<br />
6.7.2 Checking the hydraulic disc brake ....................................................... 35<br />
6.8 Inspecting the drive and chain ............................................................. 36<br />
6.9 Checking the lights (optional) .............................................................. 37<br />
6.10 Checking the luggage rack (optional) .................................................. 37<br />
6.11 Checking the kickstand (if present) ..................................................... 38<br />
6.12 Checking the drive electrical system ................................................... 38<br />
6.13 Checking other points .......................................................................... 38<br />
7 Adjusting the EPAC ..................................................................................... 39<br />
7.1 Adjusting the saddle position ............................................................... 39<br />
7.2 Adjusting the saddle height ................................................................. 39<br />
7.3 Adjusting the spring fork ...................................................................... 39<br />
7.3.1 Adjusting the air pressure .................................................................... 39<br />
7.3.2 Switching off the suspension ............................................................... 40<br />
8 Operating the EPAC .................................................................................... 41<br />
8.1 Display ................................................................................................. 41<br />
8.2 Gears ................................................................................................... 43<br />
8.2.1 Switching to a larger chainring/sprocket: ............................................. 44<br />
8.2.2 Switching to a smaller chainring/sprocket: .......................................... 44<br />
8.3 Brakes ................................................................................................. 44<br />
8.4 Quick-release axles, thru axle ............................................................. 45<br />
8.4.1 Opening and closing the quick-release axle on the front wheel .......... 45<br />
8.4.2 Opening and closing the thru axle ....................................................... 47<br />
8.4.3 Opening and closing the quick-release axle on the saddle post clamp 48<br />
8.5 Electric drive ........................................................................................ 49<br />
8.5.1 Charging the rechargeable battery pack ............................................. 49<br />
8.5.2 Calibrating the electric drive ................................................................ 50<br />
9 Loading the EPAC ....................................................................................... 51<br />
10 Riding the EPAC .......................................................................................... 53<br />
10.1 Switching on the electric drive ............................................................. 55<br />
10.2 Riding the EPAC .................................................................................. 55<br />
10.3 Switching off the electric drive ............................................................. 55<br />
11 What to do in the case of a fall or accident .............................................. 56<br />
12 Parking the EPAC safely ............................................................................. 57
E-<strong>HYBRIDE</strong> TRAIL 9000 LADY / MAN<br />
E-<strong>HYBRIDE</strong> TRAIL 4000 LADY / MAN<br />
E-<strong>HYBRIDE</strong> STREET LADY / MAN<br />
13 Transporting the EPAC ............................................................................... 58<br />
13.1 Assembling and dismantling the front wheel ....................................... 59<br />
13.1.1 Dismantling the front wheel ................................................................. 60<br />
13.2 Installing and dismantling the saddle post with the saddle .................. 62<br />
13.2.1 Dismantling the saddle post ................................................................ 62<br />
13.2.2 Installing the saddle post ..................................................................... 62<br />
14 Maintaining the EPAC ................................................................................. 65<br />
14.1 Your servicing and maintenance plan .................................................. 65<br />
14.2 How to clean and care for your EPAC ................................................. 66<br />
14.3 Workshop service ................................................................................ 68<br />
15 What to do in the case of faults ................................................................. 69<br />
15.1 Gear shift, drive ................................................................................... 70<br />
15.2 Brakes ................................................................................................. 72<br />
15.3 Frame, Saddle Post and Suspension .................................................. 73<br />
15.4 Luggage rack and lights ...................................................................... 74<br />
15.5 Wheels and tyres ................................................................................. 74<br />
15.5.1 Front tyre flat ....................................................................................... 76<br />
15.6 Electric drive ........................................................................................ 78<br />
15.6.1 General ................................................................................................ 78<br />
15.6.2 Diagnosis messages ........................................................................... 80<br />
16 Taking the EPAC out of operation ............................................................. 82<br />
17 Disposing of the EPAC ............................................................................... 83<br />
18 Appendix ................................................................................................... 84<br />
18.1 Warranty .............................................................................................. 84<br />
18.2 Guarantee ........................................................................................... 84<br />
18.3 EC Declaration of Conformity .............................................................. 86<br />
5
6<br />
Dear Customer,<br />
<strong>GHOST</strong> EPAC<br />
We wish to congratulate you on your choice of an EPAC from our company and thank you for the trust<br />
placed in us.<br />
With your EPAC you have acquired a high-quality, environmentally-friendly sports model with which you will<br />
have a great deal of pleasure while at the same time doing something to improve your health.
1 Fundamental information on your new EPAC<br />
and this operating manual<br />
1.1 Scope of supply<br />
1.1.1 Basic equipment<br />
· complete bicycle with pedals and bottle holder (bottle holder only for the men's models)<br />
· a transport lock for the disc brake<br />
· charging device<br />
· operating manual in your national language.<br />
1.1.2 Optional accessories for installation by the specialist bicycle dealer<br />
E-<strong>HYBRIDE</strong> TRAIL 9000 LADY / MAN<br />
E-<strong>HYBRIDE</strong> TRAIL 4000 LADY / MAN<br />
E-<strong>HYBRIDE</strong> STREET LADY / MAN<br />
Please see section 2.4.2, What must you bear in mind when retrofitting accessories and carrying out<br />
conversions?,to find out which optional accessories can be retrofitted to your EPAC.<br />
1.2 Other applicable documents<br />
Delivery certificate<br />
The delivery certificate is an important accompanying document which your specialist bicycle dealer has<br />
completed and handed over to you. This contains key data and other data about your EPAC. Your specialist<br />
bicycle dealer updates this document every time he works on your EPAC.<br />
1.3 Legal regulations<br />
As a road user you have to abide by the traffic regulations in your country.<br />
In Germany do not need any official authorisation or driving licence for your EPAC.<br />
On public roads and paths you are only allowed to ride your EPAC if you retrofit it with the equipment which<br />
is stipulated by law in your country. In Germany these requirements are laid down in the German highway<br />
code (StVZO).<br />
NOTE:<br />
Not all of the equipment required by law in Germany is included in the scope of delivery of your EPAC.<br />
Please contact your specialist bicycle dealer to retrofit these parts. Your specialist dealer will be pleased to<br />
advise you.<br />
7
1.4 Conventions<br />
1.4.1 Symbols an<br />
8<br />
WARNING<br />
CAUTION<br />
This draws your attention to how to deal with and the effects of<br />
safety information.<br />
This draws your attention to a dangerous situation which might<br />
result in death or injury if it is not avoided.<br />
This draws your attention to a dangerous situation which might<br />
result in slight to moderate injury if it is not avoided.<br />
NOTE: This draws your attention to possible damage to property and other<br />
important information.<br />
1.4.2 Abbreviations<br />
° Degree, measure of angle size<br />
A Ampere, unit of current strength<br />
AC Alternating current<br />
Ah Ampere hour, unit of battery storage capacity<br />
bar Common unit of measure for air pressure<br />
°C Degrees Celsius, unit of temperature<br />
DIN (German<br />
Industry<br />
Norm)<br />
German Institute for Standardisation<br />
EN European norm<br />
EPAC Electric Power Assisted Cycles, also called Pedelec (pedal electric)<br />
Bicycle with an additional electric drive which only operates when the driver<br />
also pedals at the same time.<br />
h Hour(s)<br />
HWK Chamber of Crafts (in Germany)<br />
IHK Chamber of Commerce and Industry (in Germany)<br />
Sec. Section<br />
km/h Kilometres per hour, unit of speed<br />
kg Kilogram, unit of mass<br />
MTB Mountain bike<br />
Nm Newton-metre, unit of torque<br />
Pedelec see EPAC<br />
psi pound per square inch, American unit of pressure<br />
(1 psi = 0.06897 bar)<br />
RH Frame height<br />
StVO German road traffic regulations (Highway Code)<br />
StVZO German Road Traffic Licensing Regulations<br />
SW Wrench size, measure of tool sizes<br />
V Volt, unit of electric tension<br />
W Watt, unit of electrical and mechanical power<br />
1.4.3 Technical terms<br />
Wobble Colloquial term for radial eccentricity of the rim<br />
Torque also tightening torque. This states how much a screw should be tightened.<br />
<strong>GHOST</strong> EPAC
Specialist<br />
dealer/<br />
specialist<br />
workshop<br />
A business which is authorised by the authorities and the manufacturer to call<br />
itself a specialist business for the sale and repair of conventional bicycles and<br />
<strong>GHOST</strong> EPACS.<br />
Hand force The force that an average adult can apply with moderate to average effort<br />
using one hand.<br />
Manometer Air pressure measuring device<br />
Correct screw<br />
connection<br />
Incorrect<br />
screw<br />
connection<br />
Permanent screw connection in which the screw heads are positioned tightly<br />
against the component over their entire area.<br />
A screw connection which is too loose and where the screw heads are not<br />
positioned tightly against the component over their entire area. This can<br />
generally be recognised by a gap between the screw head and component.<br />
1.4.4. Representation<br />
In this operating manual we use the following representation rules:<br />
E-<strong>HYBRIDE</strong> TRAIL 9000 LADY / MAN<br />
E-<strong>HYBRIDE</strong> TRAIL 4000 LADY / MAN<br />
E-<strong>HYBRIDE</strong> STREET LADY / MAN<br />
· Safety instructions are represented with a symbol and a signal word and are printed in bold, see<br />
section 1.4.1, Symbols and signal words.<br />
· Instruction texts are numbered.<br />
· Information and cross-references are in italics.<br />
· Representations in illustrations are not specific to any particular model. They apply to all EPAC models in<br />
this operating manual.<br />
· Positional terms<br />
In these operating instructions we use the following designations for the position of objects in space<br />
(position details):<br />
the words left, right, front and rear always refer to the position in the direction of motion.<br />
9
2 For Your Safety<br />
2.1 Follow the instructions in this operating manual<br />
10<br />
<strong>GHOST</strong> EPAC<br />
· Please ensure that your specialist bicycle dealer has completed the delivery certificate for your<br />
EPAC and that you have received all of the documents referred to in the delivery certificate.<br />
– You should contact your specialist bicycle dealer if any items are missing.<br />
– Please ride your EPAC only after you have received all of the documentation and read it<br />
carefully.<br />
· You should always take this operating manual with you when you ride your EPAC and keep<br />
it protected against water and soiling. If your EPAC has a fault or malfunction, this operating<br />
manual contains important information.<br />
· If you sell or give your EPAC to somebody as a present, you should also pass on this operating<br />
manual to the new owner.<br />
2.2 Consulting your specialist bicycle dealer<br />
NOTE:<br />
Even after providing advice and carrying out the final assembly, your bike dealer is still very important to you.<br />
He or she is your contact person for all types of servicing and maintenance, conversions and repairs. Please<br />
contact your specialist bicycle dealer if you have any questions concerning your EPAC.
2.3 The meanings of markings on your E<br />
E-<strong>HYBRIDE</strong> TRAIL 9000 LADY / MAN<br />
E-<strong>HYBRIDE</strong> TRAIL 4000 LADY / MAN<br />
E-<strong>HYBRIDE</strong> STREET LADY / MAN<br />
This symbol means that your EPAC is subject to European Directive 2002/96/<br />
EC and means that you must dispose of your EPAC separately from the<br />
domestic waste by means of a return and collection system.<br />
NOTE:<br />
Details on disposal can be found in section 17, Disposing of the EPAC.<br />
CE symbol on the type plate<br />
This symbol means that your EPAC fulfils all fundamental safety requirements<br />
of the applicable European directives.<br />
Type plate<br />
You can find the following details on the type<br />
plate:<br />
A Manufacturer‘s address<br />
B Type of machine: EPAC<br />
C Model/Type: E-hybrid ...<br />
D Year of construction<br />
11
2.4 Using your EPAC for its intended purpose<br />
12<br />
<strong>GHOST</strong> EPAC<br />
If you do not use your EPAC in accordance with the designated purpose this may result in<br />
dangerous riding situations, falls and accidents. Another consequence may be internal short-circuits<br />
in the rechargeable battery pack, causing the pack to catch fire. A damaged rechargeable battery<br />
pack can also cause a life-threatening electric shock.<br />
You should always use your EPAC as described in this operating manual and any additional<br />
documentation that you may have.<br />
2.4.1 What work may you carry out yourself on your EPAC?<br />
Faults caused by incorrectly performed work to your EPAC may damage the EPAC and impair its<br />
operational safety. This can lead to dangerous riding situations, falls and accidents.<br />
· You may only carry out work to your EPAC which is described as such in this operating manual<br />
and for which you have the appropriate tools.<br />
· Do not change the properties of individual components of your EPAC.<br />
· All other work - including making the EPAC ready for the road - may only be carried out by a<br />
specialist bicycle dealer whose personnel have taken part in the official <strong>GHOST</strong> training courses<br />
for your EPAC.<br />
Ask your specialist bicycle dealer to show you the certificate of attendance at a <strong>GHOST</strong> training<br />
course for your EPAC as proof of qualification.<br />
· Under no circumstances may you dismantle the rear wheel.<br />
2.4.2. What must you bear in mind when retrofitting accessories and carrying out conversions?<br />
The retrofitting of accessories and performance of conversions which are not permitted for your<br />
EPAC may damage your EPAC and impair its operational safety. This can lead to dangerous riding<br />
situations, falls and accidents.<br />
· You should never retrofit your EPAC or carry out any conversions yourself.<br />
· Always select the accessories and modification parts together with a specialist bicycle dealer<br />
who has been trained for your EPAC. When fitting accessories, ensure that the additional weight<br />
does not cause your EPAC to exceed the permitted maximum total weight.<br />
The following accessories may be retrofitted:<br />
– Equipment for riding the EPAC on public roads and paths in accordance with the regulations in<br />
force in your country<br />
– Click pedals<br />
– Luggage racks<br />
– Child seat if you are using a luggage rack which is authorised for a child seat. Please ask your<br />
specialist bicycle dealer He or she will be pleased to advise you.<br />
– Saddlebags if you are using a luggage rack which is authorised for saddlebags. Please ask<br />
your specialist bicycle dealer He or she will be pleased to advise you.<br />
· You may have the following modifications carried out to your EPAC:<br />
– Saddle<br />
– Front wheel<br />
Not for the model E-HYBRID TRAIL 9000 LADY / MAN.
E-<strong>HYBRIDE</strong> TRAIL 9000 LADY / MAN<br />
E-<strong>HYBRIDE</strong> TRAIL 4000 LADY / MAN<br />
E-<strong>HYBRIDE</strong> STREET LADY / MAN<br />
· Always have accessories and modification parts mounted only by a specialist bicycle dealer who<br />
has been trained for your EPAC.<br />
· Please ensure that you receive the documentation for your accessories and modification parts<br />
from your specialist bicycle dealer.<br />
· Please ensure that your specialist bicycle dealer notes down in the delivery certificate which<br />
documentation you have received from him.<br />
· Always take your delivery certificate with you if you purchase accessories and modification parts<br />
from your specialist bicycle dealer at a later time.<br />
· Follow all of the safety instructions and specifications in the documentation for your accessories<br />
and modification parts.<br />
2.4.3. Who is allowed to ride your EPAC?<br />
· The rider must be at least 15 years old.<br />
· The rider must be able to ride a bike, i.e. he/she must have the necessary basic knowledge about<br />
the use of a bike and the necessary feeling of balance to be able to steer and control an EPAC.<br />
· The rider must be able to safely get on and off the EPAC.<br />
This applies in particular in the case of ergonomically adjusted saddles if the rider’s feet cannot<br />
reach the ground when he or she is sitting down.<br />
· The rider must be of the correct height for their EPAC and the maximum permitted loading weight<br />
must not be exceede<br />
Correct Height Max. Permitted<br />
Loading Weight<br />
Frame height 44 48 52 (Rider + children +<br />
rack)<br />
E-HYBRID<br />
TRAIL 9000<br />
E-HYBRID<br />
TRAIL 4000<br />
E-HYBRID<br />
STREET<br />
155–165<br />
cm<br />
165-180 cm 180-190 cm<br />
155-165 cm 165-180 cm 180-190 cm<br />
155-165 cm 165-180 cm 180-190 cm<br />
115 kg<br />
· Physical and mental fitness<br />
If the rider would like to ride on public roads and paths:<br />
The rider must be able both physically and mentally to use public thoroughfares in safety.<br />
NOTE:<br />
Information on the technical conditions applicable to the use of public roads can be found in section 1.3,<br />
Legal regulations.<br />
· Stamina<br />
It is possible to ride your EPAC for prolonged periods at high speeds. The rider must have<br />
enough stamina to be able to ride the EPAC safely for at least two hours.<br />
· Do not use your EPAC to compensate for physical infirmity or lack of fitness.<br />
NOTE:<br />
There are wide range of offers available with respect to training to ride a mountain bike.<br />
Such cycle training can help you to increase your safety when riding and improve your riding techniques.<br />
Ask your specialist bicycle dealer about offers near you.<br />
13
2.4.4 Where are you allowed to ride your EPAC?<br />
14<br />
<strong>GHOST</strong> EPAC<br />
If you overload your EPAC by riding on roads, paths and slopes for which your EPAC is not suited<br />
it is possible that parts of your EPAC will break or fail. This can lead to dangerous riding situations,<br />
falls and accidents.<br />
You should only ride your EPAC on roads, paths and slopes which are authorised for your model<br />
according to the following table.<br />
NOTE:<br />
The model designation of your EPAC can be found on the type plate, see section 2.3, The meanings of<br />
markings on your EPAC and on the delivery certificate.
X = permitted<br />
- = not permitted<br />
Road Asphalted surface<br />
Specification E-HYBRID<br />
TRAIL 9000<br />
E-HYBRID<br />
TRAIL 4000<br />
E-<strong>HYBRIDE</strong> TRAIL 9000 LADY / MAN<br />
E-<strong>HYBRIDE</strong> TRAIL 4000 LADY / MAN<br />
E-<strong>HYBRIDE</strong> STREET LADY / MAN<br />
E-HYBRID<br />
STREET<br />
· non-public X X X<br />
· public -* Only with legally required<br />
additional equipment,<br />
see section 1.3, Legal<br />
Regulations.<br />
Path Sand, gravel or<br />
X X X<br />
· non-public<br />
similar surface e.g.<br />
forest road, field track<br />
X X X<br />
· public -* Only with legally required<br />
additional equipment,<br />
see section 1.3, Legal<br />
Regulations.<br />
Paved longdistance<br />
footpath<br />
On easy terrain with<br />
slight to moderate<br />
gradients<br />
No or only a few<br />
roots, bumps, stones,<br />
ledges etc<br />
X X -<br />
Jumps - - -<br />
Unpaved longdistance<br />
footpath<br />
Roller training<br />
devices<br />
With roots, bumps,<br />
stones, ledges etc.<br />
Sports park Specially designated<br />
area for free riding,<br />
downhill, BMX and<br />
dirt<br />
Downhill Downhill rides at a<br />
high to very high<br />
speed and specifically<br />
designated slopes<br />
Free-Riding Artistic and sporting<br />
use, rapid downhill<br />
riding in free terrain<br />
- - -<br />
- - -<br />
- - -<br />
- - -<br />
- - -<br />
*For the E-HYBRID TRAIL 9000 model there is currently no hub dynamo. In countries where a dynamo is compulsory, it is therefore not<br />
permitted to ride this model on public roads and paths.<br />
15
2.5 Residual dangers<br />
2.5.1. Danger of burns<br />
16<br />
<strong>GHOST</strong> EPAC<br />
Strong vibrations through use of your EPAC which is not in accordance with the designated<br />
purpose, storage in an environment which is too hot (e.g. car interior in strong sunlight) and falls<br />
with your EPAC may lead to internal short-circuits in the rechargeable battery pack and therefore<br />
cause the rechargeable battery pack to catch fire.<br />
· You should usual EPAC in accordance with the designated purpose (see Section 2.4).<br />
· Store your EPAC only in rooms with an ambient temperature of between -10°C and +35°C.<br />
· Keep your EPAC away from sources of heat such as radiators, radiant heaters, ovens etc.<br />
· If flames or smoke come out of the down tube you must immediately leave your EPAC where it is.<br />
Put out the fire with fire extinguishing equipment if available.<br />
· If there is a danger that the fire will spread to neighbouring items, call the fire brigade<br />
immediately.
2.5.2. Electric hazards<br />
E-<strong>HYBRIDE</strong> TRAIL 9000 LADY / MAN<br />
E-<strong>HYBRIDE</strong> TRAIL 4000 LADY / MAN<br />
E-<strong>HYBRIDE</strong> STREET LADY / MAN<br />
Through the use of an incorrect, damaged or broken charging device and mains cable you may<br />
receive a life-threatening electric shock.<br />
A battery that is incorrectly charged or stored may begin to burn.<br />
· You should only use the charging device supplied to charge up the rechargeable battery pack of<br />
your EPAC.<br />
· Keep the charging device and EPAC away from children and animals.<br />
· Avoid all contact between your charging device and water.<br />
· Do not charge up the rechargeable battery pack in bright sunshine.<br />
Keep the rechargeable battery pack and charging device away from sources of heat (e.g.<br />
radiators).<br />
· You should only charge up your battery while you are supervising it.<br />
· Under no circumstances must you use your charging device, or you must remove the mains plug<br />
immediately<br />
– if the charging device is damaged in any way<br />
– if the insulation of the cables or one or more plug-in connections are damaged. In this case<br />
you may only touch the mains plug at a point where it is insulated. If necessary, turn off the<br />
corresponding fuse in your electricity distribution box.<br />
– if the charging device is unusually hot. However, the production of a small amount of heat by<br />
the charging device and battery is normal.<br />
– if you hear unusual noises (e.g. loud humming, hissing etc.)<br />
– if there are sparks when you switch the device on and off, plug it in or unplug it<br />
– if smoke is produced by the charging device or EPAC.<br />
2.5.3. Other hazards and protective measures<br />
Rotating wheels can injure your hands and other parts of the body.<br />
· Keep your hands and other parts of the body away from rotating wheels!<br />
· Please ensure that any children sitting on mounted children’s seats cannot come into contact<br />
with the rotating wheels.<br />
17
3 Technical Data<br />
18<br />
Model E-HYBRID TRAIL 9000<br />
MAN / LADY<br />
Mechanical Data<br />
Frame Aluminium<br />
3 frame sizes:<br />
44 cm, 48 cm, 52 cm<br />
Fork Fox Forx 32 Float Fit RL<br />
120mm 15QR<br />
E-HYBRID TRAIL 4000<br />
E-HYBRID STREET<br />
MAN / LADY<br />
Aluminium<br />
3 frame sizes:<br />
44 cm, 48 cm, 52 cm<br />
RST First 23 Air SRL 120mm<br />
Gear change Shimano XT Shimano Acera<br />
Derailleur Shimano XT 9-speed Shimano XT 9-speed<br />
Front derailleur Shimano XT 3-speed E-Type<br />
direct<br />
Number of gears 27 27<br />
Shimano SLX 3-speed E-Type<br />
direct<br />
Brake Shimano XT 180/160 Shimano BL-M445L saddle:<br />
BR-446L<br />
Crank Shimano XT, 3-piece Shimano FCM-542, 3-piece<br />
No. of teeth chain rings 44-32-22 44-32-22<br />
No. of teeth geared ring 11-32 11-32<br />
Tyre size 26 x 2.1 Street: 26 x 2.15<br />
Trail: 26 x 2.1<br />
Valve Automatic valve Automatic valve<br />
Prescribed tyre pressure 2.0 – 4.0 bar 2.0 – 4.0 bar<br />
Admissible ambient<br />
temperatures<br />
· Riding -15 to +50°C -15 to +50°C<br />
· Loading -5 to +50°C -5 to +50°C<br />
· Storage -10 to +35°C -10 to +35°C<br />
Weight 22.4 kg (RH 48) 22.7 kg (RH 48)<br />
Maximum permitted<br />
loading weight<br />
(rider + children +<br />
luggage)<br />
115 kg 115 kg<br />
Saddle support Manufacturer: Simca Team Post<br />
Model/Type: rigid<br />
Connection: Saddle clamping<br />
Type of Connection: Two screws<br />
Torque screw connection: 8 - 10 Nm<br />
Electrical data<br />
Electric motor, type XHP2, brushless XHP2, brushless<br />
<strong>GHOST</strong> EPAC
Model E-HYBRID TRAIL 9000<br />
MAN / LADY<br />
Power 250 W 250 W<br />
maximum torque 40 Nm 40 Nm<br />
Battery type GP LiNiCoMnO 2 battery pack<br />
Downtube<br />
E-HYBRID TRAIL 4000<br />
E-HYBRID STREET<br />
MAN / LADY<br />
GP LiNiCoMnO 2 battery pack<br />
Downtube<br />
Operating voltage 36 Volt 36 Volt<br />
Battery capacity 10 Ah 10 Ah<br />
Charging device<br />
· Supply voltage<br />
· Charging current<br />
· Power consumption<br />
Charging time<br />
· initial charge<br />
· after initial charge<br />
Delta Electronics, DPS-84DB A<br />
· 230 V AC<br />
· 0.5 A<br />
· 100 W<br />
up to 10 h<br />
4 – 5 h<br />
Delta Electronics, DPS-84DB A<br />
230 V AC<br />
0.5 A<br />
100 W<br />
up to 10 h<br />
4 – 5 h<br />
Display CU2-2 CU2-2<br />
Closing off of the pedalling<br />
support at<br />
25 km/h 25 km/h<br />
E-<strong>HYBRIDE</strong> TRAIL 9000 LADY / MAN<br />
E-<strong>HYBRIDE</strong> TRAIL 4000 LADY / MAN<br />
E-<strong>HYBRIDE</strong> STREET LADY / MAN<br />
19
4 Design and Function<br />
20<br />
<strong>GHOST</strong> EPAC<br />
Your bicycle is a so-called EPAC or pedelec. That is a bicycle whose electric motor helps you to pedal. The<br />
pedalling assistance switches on automatically as soon as you pedal and switches off automatically as soon<br />
as you stop pedalling.<br />
Pedalling assistance is provided up to a maximum speed of 25 km/h. The level of the support provided by<br />
the electric motor is determined by a control device attached to the handlebars.<br />
Bicycle with electric motor pedalling<br />
assistance up to 25 km/h.<br />
· The electromotor drive only switches on<br />
when you pedal<br />
· Electric motor in the rear wheel hub<br />
· Rechargeable battery pack not<br />
removable, integrated in the frame<br />
· No initial traction assistant<br />
E-HYBRID<br />
TRAIL 9000<br />
LADY / MAN<br />
E-HYBRID<br />
TRAIL 9000<br />
LADY / MAN<br />
E-HYBRID<br />
STREET<br />
LADY / MAN<br />
X X X<br />
Basic bicycle type: Mountainbike (MTB) X X X<br />
27-speed Shimano derailleur X X X<br />
Front wheel fork with air suspension X X X<br />
Unsprung frame made of aluminium X X X<br />
Self-repairing tube in the rear wheel X X X<br />
Display on the handlebars X X X<br />
Disc brakes X X X<br />
Pedals without click system X X X<br />
Kick stand - - -<br />
Bottle holder (only on the men‘s model) X X X
4.1 Brakes and brake configuration<br />
4.2 Gears<br />
E-<strong>HYBRIDE</strong> TRAIL 9000 LADY / MAN<br />
E-<strong>HYBRIDE</strong> TRAIL 4000 LADY / MAN<br />
E-<strong>HYBRIDE</strong> STREET LADY / MAN<br />
· Your EPAC has one or two disc brakes which are independent of one another.<br />
· The left-hand brake lever operates the front brake.<br />
· The right-hand brake lever operates the rear brake.<br />
· Please ride very defensively for as long as your braking system has not been run in.<br />
· Run your brake in. The rule of thumb is: perform approximately 30 braking operations from a moderate<br />
speed (approx. 25 km/h) until you come to a standstill.<br />
· Avoid long downhill riding for as long as your braking system has not been run in.<br />
· As soon as your braking system has been run in, the braking force at your disposal is very strong. If you<br />
pull the brake lever too strongly, it is possible that the wheels will lock.<br />
· If the front wheel blocks the EPAC may overturn.<br />
Your EPAC has a derailleur, a crankset with three chainrings and a geared ring with 9 individual cogs. You<br />
have 27 gears at your disposal. The gear assembly provides you with the optimum gear for every speed and<br />
makes it easier to climb hills, for example.<br />
4.3 Frame and Fork<br />
Your EPAC has a rigid, unsprung main frame with integrated suspension fork. On the E-Hybrid 4000 and on<br />
the E-Hybrid Street the suspension of the fork can be almost completely blocked from the handlebars.<br />
21
4.4 Wheels<br />
22<br />
NOTE:<br />
A wheel/wheels is/are also called the front and rear wheel(s).<br />
Your wheel consists of<br />
· Hub: the electric motor is also located in the rear wheel hub<br />
· Only on the rear wheel hub: geared ring, also called the cassette or sprocket cluster<br />
· Brake disc<br />
· Spokes<br />
· Rim<br />
· Tyres<br />
· Rim reflectors (optional).<br />
On your EPAC the wheels are attached as follows.<br />
<strong>GHOST</strong> EPAC<br />
· Front wheel:<br />
– E-Hybrid Trail 4000 and E-Hybrid Street models: with quick-release axle (for operation see section<br />
8.4.1).<br />
– E-Hybrid Trail 9000 model: with 15 mm thru axle (for operation see section 8.4.2).<br />
4.5 Rear tyre<br />
- Rear wheel: with axle nuts<br />
Your rear wheel has a self-repairing tube which immediately seals holes caused by small items such as<br />
pieces of glass, small stones, thorns or small nails.<br />
4.6 Electrical equipment<br />
4.6.1. Rechargeable battery pack and motor
E-<strong>HYBRIDE</strong> TRAIL 9000 LADY / MAN<br />
E-<strong>HYBRIDE</strong> TRAIL 4000 LADY / MAN<br />
E-<strong>HYBRIDE</strong> STREET LADY / MAN<br />
The motor is located in the rear wheel hub and is supplied by a rechargeable battery pack. The hub has a<br />
freewheel and a 9-speed sprocket cassette.<br />
The rechargeable battery pack is in the down tube and cannot be removed.<br />
23
4.6.2. Display<br />
24<br />
<strong>GHOST</strong> EPAC<br />
The display shows various items of important information while at the same time controlling various (drive)<br />
functions.<br />
Your display is encoded. Your EPAC can only be used with the associated display. If an alternative display is<br />
installed before you try to move off, an error message appears and the electric drive cannot be switched on.<br />
NOTE:<br />
if you have two bicycles of the same type, your specialist bicycle dealer can adjust the displays in such a<br />
way that they work on both bicycles.<br />
4.6.3. Charging device for rechargeable battery pack in the frame<br />
A Charging connection<br />
B Plug<br />
C Battery charging device<br />
D Indicator light<br />
E Mains lead<br />
F Covering cap
5 Before your first Ride<br />
E-<strong>HYBRIDE</strong> TRAIL 9000 LADY / MAN<br />
E-<strong>HYBRIDE</strong> TRAIL 4000 LADY / MAN<br />
E-<strong>HYBRIDE</strong> STREET LADY / MAN<br />
WARNING Danger from heavy falls and accidents<br />
Your EPAC is preassembled when it is delivered to your specialist bicycle dealer. Some of the safetyrelevant<br />
parts are not yet sufficiently mounted. The final assembly of your EPAC has to be carried<br />
out by your specialist bicycle dealer, i.e. it has to be made safe to ride.<br />
· Please make sure that your specialist bicycle dealer has completely filled in the “Inspection<br />
Checklist for the Handover” in the delivery certificate for your EPAC.<br />
· You should only ride your EPAC if the sitting position is correct for you.<br />
– Have your dealer adjust the correct saddle height and position for you.<br />
– Ask your specialist bicycle dealer to explain to you the technology included in your EPAC.<br />
– Seal your EPAC with spray wax.<br />
See section 14.2, How to clean and care for your EPAC.<br />
– Charge your rechargeable battery pack fully.<br />
See section 8.5.1, Charging the rechargeable battery pack.<br />
– You should carry out the fine adjustment of the saddle height and position yourself.<br />
See section 7.1, Adjusting the saddle position and section 7.2, Adjusting the saddle height.<br />
25
6 Before Every Use<br />
26<br />
<strong>GHOST</strong> EPAC<br />
WARNING Danger from heavy falls and accidents<br />
If your EPAC is not ready for operation this may result in dangerous riding situations, falls and<br />
accidents.<br />
· Before you ride your EPAC you should ensure every time that it is safe to operate.<br />
You should also consider the possibility that your EPAC may have fallen over when it was not<br />
supervised or that strangers may have tampered with it.<br />
· Memorise the correct condition of your EPAC when new so that you can more easily recognise<br />
any deviations from the correct condition.<br />
NOTE:<br />
Taking photographs may also prove valuable.<br />
· Contact your dealer immediately if the inspection reveals faults of any kind. You may correct<br />
small defects yourself if the appropriate measures are described below.<br />
· You should contact your specialist bicycle dealer immediately if the measures for rectifying the<br />
defect are not described, you cannot perform them yourself or if these measures do not correct<br />
the problems.<br />
· You should only use your EPAC again when it has been made safe to operate.<br />
WARNING Danger of injuries to fingers and arms, danger of accidents<br />
The test measures might cause the EPAC to move off unexpectedly.<br />
Please ensure that you switch off the electric drive of your EPAC before carrying out any tests.<br />
– Make sure that the electric drive is switched off.<br />
See section 10.3, Switching off the electric drive.<br />
– Perform a visual check of all fastening screws to ensure that they are all correctly attached.<br />
See section 1.4.3, Technical Terms.<br />
– Carry out a visual inspection of the entire EPAC for dents, cracks, deep scratches or other<br />
mechanical damage.<br />
– If you find faults during the inspection:<br />
contact your specialist bicycle dealer.
6.1 Inspecting the wheels<br />
6.1.1 Checking the tightness<br />
6.1.2 Checking the tyres<br />
1. Shake both wheels strongly at right angles to the direction of travel.<br />
6.1.2.1 Checking the position of the valve<br />
· The wheels must not move in their mounting.<br />
· The quick-release lever or thru axle must be closed<br />
See section 8.4, Quick-release axles, thru axle.<br />
· No cracking or grinding noises should be heard.<br />
E-<strong>HYBRIDE</strong> TRAIL 9000 LADY / MAN<br />
E-<strong>HYBRIDE</strong> TRAIL 4000 LADY / MAN<br />
E-<strong>HYBRIDE</strong> STREET LADY / MAN<br />
As a result of stresses and strains and low tyre pressure, the tyre and inner tube can move on the rim and<br />
result in incorrect positioning of the valves. The valve base may tear off during the journey and result in a<br />
sudden loss of pressure in the tyre.<br />
1. Remove the valve nut.<br />
1. Check the valve position:<br />
the valves must point in the direction of the centre of the wheel.<br />
Correct valve position:<br />
Incorrect valve position:<br />
27
6.1.2.2 Checking the tyre<br />
6.1.2.3 Checking the air pressure<br />
28<br />
1. Inspect your tyres for visible signs of damage, foreign bodies and wear.<br />
<strong>GHOST</strong> EPAC<br />
· The tyre rubber must have its original profile over its whole surface.<br />
· The tyre fabric under the rubber layer must not be visible.<br />
· There must be no visible blisters or cracks.<br />
2. Remove any foreign bodies (thorns, small stones, pieces of glass or similar items) by<br />
hand or carefully with a small screwdriver.<br />
Check if air is then leaking out.<br />
If air is leaking out the inner tube has to be renewed. You may replace the inner tube of<br />
the front wheel yourself. The instructions for doing so can be found in section 15.5.1,<br />
Front tyre flat.<br />
3. If air is escaping from the rear wheel you must not use your EPAC. In this case you<br />
should contact your specialist bicycle dealer.<br />
As a result of low tyre pressure<br />
· the tyre and inner tube may move on the rim and result in the incorrect positioning of the valves. The<br />
valve base may tear off during the journey and result in a sudden loss of pressure in the tyre.<br />
· the tyre may come off the rim in curves.<br />
· the likelihood of a breakdown is increased.<br />
NOTE:<br />
The higher your body weight and the weight of the additional load, the higher the air pressure has to be in<br />
the tyre.<br />
Guideline values can be found in the following table. Please note, however, that these values<br />
are only an approximate guide. If you have any questions, please contact your specialist bicycle<br />
dealer.<br />
Please also pay attention to the minimum and maximum pressure stated on<br />
Load in kilograms Air pressure in bar<br />
50 2,00<br />
60 2,25<br />
70 2,50<br />
80 2,75<br />
90 3,00<br />
100 3,25<br />
110 3,50
1. Unscrew the dust cap from the valve.<br />
NOTE:<br />
Your EPAC is equipped with an automatic valve.<br />
E-<strong>HYBRIDE</strong> TRAIL 9000 LADY / MAN<br />
E-<strong>HYBRIDE</strong> TRAIL 4000 LADY / MAN<br />
E-<strong>HYBRIDE</strong> STREET LADY / MAN<br />
2. Check the air pressure with a tyre pressure gauge at a petrol station or with an air pump<br />
with a manometer.<br />
NOTE:<br />
if necessary, ask the petrol pump attendant or your specialist bicycle dealer to show you<br />
how to use the pressure test equipment.<br />
· If the air pressure is too low:<br />
Increase the air pressure.<br />
· If the air pressure is too high:<br />
Reduce the air pressure by allowing air to escape through the valve.<br />
Check the air pressure again.<br />
3. Screw the dust cap back on to the valve.<br />
NOTE:<br />
with a bicycle pump with manometer you can check the air pressure while you are pumping up the tyre. You<br />
should first of all let a small amount of air escape from the tyre and then increase the air pressure up to the<br />
desired value.<br />
6.1.2.4 Checking that the tyre is correctly fitted<br />
6.1.3 Checking other points<br />
1. Lift the front wheel.<br />
2. Turn the front wheel by hand.<br />
The tyre must run smoothly.<br />
There must be no wobble or eccentricity.<br />
3. Check the back wheel in the same way as the front wheel.<br />
1. Check whether there are any other loose items such as twigs, substance residues or<br />
similar items in your wheels.<br />
2. Remove such items carefully.<br />
3. If you have had spoke reflectors fitted, check that these are firmly fitted in place.<br />
4. If they are loose, please remove them completely.<br />
5. Check whether your wheels have been damaged by these loose parts.<br />
29
6.3 Inspecting the saddle and saddle post<br />
30<br />
<strong>GHOST</strong> EPAC<br />
WARNING Danger from heavy falls<br />
If the insertion depth of the saddle post is too small, it may be released from the frame while you are<br />
riding and lead to dangerous situations, falls and accidents.<br />
Please ensure the correct insertion depth of the saddle post, see also section 7.2 and 8.4.<br />
1. Try to twist the saddle and post in the frame by hand.<br />
It must not be possible to twist the saddle and saddle post.<br />
2. Try to move the saddle in its clamp with your hand by alternately pushing down and<br />
pulling up.<br />
The saddle must not move.<br />
3. If the saddle and/or saddle post do move,<br />
please tighten them (see sections 8.4.3 and 9).
6.4 Inspecting the handlebars and handlebar stem<br />
E-<strong>HYBRIDE</strong> TRAIL 9000 LADY / MAN<br />
E-<strong>HYBRIDE</strong> TRAIL 4000 LADY / MAN<br />
E-<strong>HYBRIDE</strong> STREET LADY / MAN<br />
WARNING Danger from heavy falls and accidents<br />
Incorrectly mounted or damaged handlebars and handlebar stems may result in dangerous riding<br />
situations, falls and accidents.<br />
· If you discover damage to these parts or have any doubt about their integrity, you must not use<br />
your EPAC again under any circumstances.<br />
· Contact an approved workshop immediately.<br />
1. Perform a visual check of the stem and handlebars.<br />
· The handlebar stem must be parallel to the front wheel rim.<br />
· The handlebars aligned at right angles to the stem.<br />
2. Clamp the front wheel between your legs.<br />
3. Grip the handlebars at both ends.<br />
4. Try to twist the handlebars in both directions with your hands.<br />
5. Try to twist the handlebars in the handlebar stem with your hands.<br />
6.5 Inspecting the handlebar attachments<br />
· None of the parts must twist or move.<br />
· No cracking or grinding noises should be heard.<br />
How to check the attachment of the gear lever, brake levers and grips:<br />
1. Grip the front wheel firmly between your legs or hold the handlebars tightly with one<br />
hand.<br />
2. Try to turn the brake levers with your other hand.<br />
31
32<br />
3. Try to turn the gear lever with your other hand.<br />
<strong>GHOST</strong> EPAC<br />
4. If your EPAC has been retrofitted with a bell, try to twist this with light hand pressure.<br />
· It must not be possible to move or twist any of the parts.<br />
· No cracking or grinding noises should be heard.
6.5 Inspecting the headset<br />
E-<strong>HYBRIDE</strong> TRAIL 9000 LADY / MAN<br />
E-<strong>HYBRIDE</strong> TRAIL 4000 LADY / MAN<br />
E-<strong>HYBRIDE</strong> STREET LADY / MAN<br />
The headset is the mounting of the handlebar stem in the fork column. Via this mounting, steering<br />
movements are transmitted to the front fork.<br />
6.6 Inspecting the spring fork<br />
1. Check your headset. It must be possible to steer the front wheel easily in both directions<br />
without backlash.<br />
2. Stand alongside your EPAC and hold the handlebar grips with both hands.<br />
3. Apply the front wheel brake and keep the brake applied.<br />
4. Push your EPAC forward and back with short, jerky movements.<br />
· The headset must not exhibit any play.<br />
· No cracking must be heard or felt.<br />
· No crunching noise may be heard.<br />
5. Turn the handlebars with the front wheel several times to the left and right.<br />
· It must be possible to steer the front wheel easily in both directions without any play.<br />
· The handlebars must not lock in any position.<br />
6. If you find any defects during the test:<br />
contact your specialist bicycle dealer.<br />
1. Apply the front wheel brake and keep the brake applied.<br />
2. Press with your body weight onto the handlebars so that the spring fork is compressed.<br />
3. The fork must move easily up and down.<br />
4. No cracking or grinding noises should be heard.<br />
5. Grip the front wheel between your legs and try to pull up the EPAC by the handlebars.<br />
6. The standing tubes must not be released from the fork tubes or from the crown.<br />
33
6.7 Inspecting the brakes<br />
34<br />
<strong>GHOST</strong> EPAC<br />
WARNING Danger from heavy falls<br />
Failing brakes always result in dangerous riding situations, falls and accidents. A brake malfunction<br />
is a serious danger to safety.<br />
· Pay particular attention when checking your brake system.<br />
· Under no circumstances should you continue using your EPAC if it has any defects. Contact your<br />
specialist workshop immediately if you discover any defects and the requirements referred to in<br />
sections 6.7.1 and 6.7.2 are not fulfilled.<br />
NOTE:<br />
During prolonged tours over several days the brake disc and brake linings can become severely worn.<br />
· You should plan tours lasting several days in such a way that you can have any necessary<br />
servicing work carried out at specialist workshops.<br />
· As a precaution you should carry brake linings for your brakes with you. If you do this you will<br />
avoid having to break off your tour if the specialist workshop does not have your type of brake<br />
linings in stock.<br />
6.7.1 Checking general functions<br />
How to check the function of your braking system:<br />
1. Pull on both brake levers completely with the bike at a standstill. The smallest distance<br />
between the brake lever and handlebar grip must be at least 10 mm.<br />
2. Try to push the EPAC with both brakes applied.<br />
Both wheels must remain locked.
6.7.2 Checking the hydraulic disc brake<br />
E-<strong>HYBRIDE</strong> TRAIL 9000 LADY / MAN<br />
E-<strong>HYBRIDE</strong> TRAIL 4000 LADY / MAN<br />
E-<strong>HYBRIDE</strong> STREET LADY / MAN<br />
WARNING Danger from falls and accidents<br />
Oil and grease on the brake discs can reduce the braking effect and lead to dangerous riding<br />
situations, falls and accidents.<br />
· Soiled brake discs must be cleaned immediately, see section 14.2, How to clean and care for your<br />
EPAC.<br />
1. Pull the brake calliper alternately in all directions with your hands. The brake calliper must<br />
not move.<br />
2. Pull the respective brake lever with the bike at a standstill and hold the brake lever in this<br />
position. The pressure point must not move.<br />
3. Inspect the brake system visually from the brake lever along the lines up to the brakes.<br />
No hydraulic fluid should escape at any point.<br />
4. Inspect the brake disc for damage. It must not exhibit any dents, cracks, deep scratches<br />
or other mechanical damage.<br />
5. Raise the front and rear wheels alternately and turn the wheel by hand. The brake disc<br />
must run smoothly.<br />
6. Inspect your brake discs for soiling, in particular for oil and grease. Clean the soiled brake<br />
discs immediately. (see section 14.2 ,How to clean and care for your EPAC).<br />
35
6.8 Inspecting the drive and chain<br />
36<br />
<strong>GHOST</strong> EPAC<br />
1. Turn the right-hand pedal arm in an anti-clockwise direction and observe the chainwheels<br />
and the sprocket assembly from above.<br />
· The chainwheels and sprockets must not have any lateral runout.<br />
· There must not be any foreign matter in any of the components. Remove any such<br />
foreign matter if it is easy to do so.<br />
2. Press the left-hand pedal arm towards the chain run in the position shown.<br />
· You should not feel any bearing play.<br />
· No cracking or grinding noises should be heard.<br />
3. Inspect the chain for damage.<br />
The chain must not be damaged at any point, e.g. by bent chain links, protruding chain<br />
link pins, etc. or jammed and immobile chain links.<br />
4. With the bike at standstill, turn the right-hand pedal lever contrary to the drive direction<br />
and observe the chain run at the derailleur rollers of the rear derailleur.<br />
The chain must run smoothly over the derailleur rollers and must not jump.
6.9 Checking the lights (optional)<br />
E-<strong>HYBRIDE</strong> TRAIL 9000 LADY / MAN<br />
E-<strong>HYBRIDE</strong> TRAIL 4000 LADY / MAN<br />
E-<strong>HYBRIDE</strong> STREET LADY / MAN<br />
NOTE:<br />
This section only applies if you have retrofitted your EPAC with equipment for public roads, see section 1.3,<br />
Legal regulations.<br />
WARNING Danger from falls and accidents<br />
Failure of the headlight and rear light can lead to dangerous riding situations in the dark and/or poor<br />
visibility. You might fail to see obstacles or be overlooked yourself by other road users.<br />
You should use your EPAC in such visibility conditions only with the lights switched on and fully<br />
functioning.<br />
1. Turn on your lights.<br />
See user information for your lights.<br />
2. Lift the front wheel.<br />
3. Rotate the front wheel vigorously by hand.<br />
6.10 Checking the luggage rack (optional)<br />
· The headlight and rear light must come on.<br />
· If your EPAC has a parking light, the headlight and rear light must also light up when<br />
the front wheel stops turning.<br />
NOTE:<br />
This section only applies if you have retrofitted your EPAC with a luggage rack.<br />
WARNING Danger from falls and accidents<br />
Loose luggage rack parts can cause the wheels to lock and result in serious falls.<br />
Use your EPAC again only when the luggage rack has been properly attached in an approved<br />
workshop.<br />
1. Shake the luggage rack at right angles to the direction of travel with your hands.<br />
· The luggage rack mountings must not come loose.<br />
· The luggage rack or parts of it must not touch the tyre.<br />
37
6.11 Checking the kickstand (if present)<br />
38<br />
<strong>GHOST</strong> EPAC<br />
WARNING Danger from falls and accidents<br />
If the kickstand is folded out while you are riding the EPAC, this may result in serious falls. This also<br />
applies to a kickstand which folds out automatically while you are riding.<br />
A kickstand which is bent, too short or too long will not provide your EPAC with sufficient stability.<br />
Your EPAC can fall over, injuring you or other individuals.<br />
Your EPAC and other objects located nearby, such as other bicycles, cars etc. may be damaged.<br />
· Always fold away the kickstand before riding the EPAC.<br />
· You should have bent kickstands repaired or replaced in a specialist workshop.<br />
· Kickstands whose length can be adjusted:<br />
have the right length adjusted in a specialist workshop if your EPAC is not stable.<br />
1. Carry out a visual inspection of the screw connections of the kickstand.<br />
2. Always fold up the kickstand before riding your EPAC. The stand must not fold downloads<br />
of its own accord.<br />
3. Lightly tap the arm of the kickstand in a downwards direction.<br />
The arm of the kickstand must not fold downwards.<br />
4. Kickstands whose length can be adjusted:<br />
use the force of your hand to check that the extendable part cannot be moved.<br />
6.12 Checking the drive electrical system<br />
WARNING Danger of fire<br />
A broken or damaged drive electrical system can cause a short circuit. This means that there is a<br />
danger of fire.<br />
· Carry out a visual inspection whether all electric cables are undamaged and correctly laid.<br />
· Do not turn on the electrical control system until you have completed all of the other tests.<br />
· Check for any error messages in the display.<br />
· You should only use your EPAC if the drive electrical system is free of faults and there are no<br />
error messages in the display. Otherwise you should only use your EPAC again when it has been<br />
repaired in a specialist workshop.<br />
6.13 Checking other points<br />
WARNING Danger from cuts<br />
Damaged parts of your EPAC may have sharp edges and cause injury.<br />
Check all parts for damage.<br />
Have any damaged parts repaired or replaced immediately in an approved workshop.
7 Adjusting the EPAC<br />
E-<strong>HYBRIDE</strong> TRAIL 9000 LADY / MAN<br />
E-<strong>HYBRIDE</strong> TRAIL 4000 LADY / MAN<br />
E-<strong>HYBRIDE</strong> STREET LADY / MAN<br />
NOTE:<br />
You may carry out certain adjustments to your EPAC yourself. You should only carry out this work yourself if<br />
you have the stated tools.<br />
7.1 Adjusting the saddle position<br />
Your saddle is attached with a clamping bolt. You need an Allen key and a torque spanner with a 5 mm<br />
hexagon socket bit attachment.<br />
7.2 Adjusting the saddle height<br />
7.3 Adjusting the spring fork<br />
7.3.1 Adjusting the air pressure<br />
Adjusting the horizontal position or angle of your saddle:<br />
1. Loosen clamping bolt A by a few turns until the saddle can be moved easily and/or the<br />
angle can be easily adjusted.<br />
2. Move the saddle to the desired position. You can change the inclination with adjustment<br />
screw B.<br />
3. Retighten the clamping bolt with the torque spanner. Prescribed tightening torque: 8 – 10<br />
Nm.<br />
1. Loosen the clamping of the saddle post.<br />
See section 8.4.3, Opening and closing the quick-release axle on the saddle post clamp.<br />
2. Move the saddle with saddle post to the desired position.<br />
Note the instructions for the insertion depth of the saddle post, see section 13.2, Installing<br />
and dismantling the saddle post with the saddle.<br />
3. Clamp the saddle post securely in position.<br />
NOTE:<br />
Your suspension fork has air suspension. You can adjust the springing behaviour by means of the air<br />
pressure. For the adjustment you need a special suspension fork pump. The use of other pumps may<br />
damage your suspension fork.<br />
39
40<br />
<strong>GHOST</strong> EPAC<br />
You can purchase a suspension fork pump that is suitable for your EPAC from your specialist<br />
bicycle dealer. If you do not have such a pump, have your suspension adjusted by your specialist<br />
bicycle dealer.<br />
With a lever on the handlebars (only for the E-Hybrid 4000 and E-Hybrid Street) you can almost<br />
completely block the suspension of the fork - the fork tubes can then only compress and rebound<br />
to a small extent.<br />
WARNING Danger from falls and accidents<br />
At a high speed, particularly when riding downhill on unpaved terrain, riding behaviour with a<br />
blocked suspension fork is very poor. The front wheel may lose contact with the ground.<br />
You should release the blocked suspension fork before riding (downhill).<br />
7.3.2 Switching off the suspension<br />
1. The rule of thumb is: The suspension fork should sink in approximately 20 to 25% of the<br />
total suspension travel distance when the rider sits on the bicycle in the riding position.<br />
In the case of the forks used here with a suspension travel distance of 120 mm, this 20 –<br />
25% corresponds to a value of 24 – 30 mm.<br />
If you are not certain how to carry out the adjustment, please contact your specialist<br />
bicycle dealer.<br />
2. Screw the head of the suspension fork pump on to the connection of your suspension<br />
fork.<br />
Position of the connection: See the user information of the suspension fork manufacturer.<br />
3. Continue pumping until you have reached the required air pressure.<br />
4. Unscrew the pump head.<br />
NOTE:<br />
Unscrew the pump head quickly in order to keep the amount of air escaping (which can<br />
be heard as hissing) as small as possible.<br />
NOTE:<br />
This section only applies to the EPAC types E-Hybrid 4000 and E-Hybrid Street.<br />
With a lever on the handlebars (only E-Hybrid 4000 and E-Hybrid Street) you can almost completely switch<br />
off the suspension of the fork. The fork tubes can only move in and out to a small extent.<br />
WARNING Danger from falls and accidents<br />
At a high speed, particularly when riding downhill on unpaved terrain, riding behaviour with the<br />
suspension switched off is very poor. The front wheel may lose contact with the ground.<br />
You should switch on the suspension fork before riding your EPAC fast (downhill).<br />
1. Switching off the suspension:<br />
Press lever A until it locks in place.<br />
2. Switching on the suspension:<br />
Press lever B until lever A jumps back to the starting position.
8 Operating the EPAC<br />
8.4 Display<br />
A „Illumination“ symbol This appears when you switch on the illumination<br />
of the display.<br />
It goes off when you switch off the illumination of<br />
the display.<br />
B Trip counter display This shows the distance covered on the trip<br />
(standard setting).<br />
Resetting the trip counter to 0:<br />
Press the set button (L) for 5 seconds.<br />
C Pedalling assistance<br />
display 0<br />
D Pedalling assistance<br />
display 1<br />
E Pedalling assistance<br />
display 2<br />
F Pedalling assistance<br />
display 3<br />
G Total distance display<br />
(annual kilometres)<br />
The pedalling assistance is switched off.<br />
ECO<br />
The weakest pedalling assistance level<br />
Greatest range<br />
NORMAL<br />
The middle pedalling assistance level<br />
Medium range<br />
POWER<br />
The strongest pedalling assistance level<br />
Shortest range<br />
After the pedalling assistance or illumination is<br />
switched on this shows the total distance covered<br />
for 15 seconds.<br />
After 15 seconds the display automatically switches<br />
over to the trip counter distance.<br />
E-<strong>HYBRIDE</strong> TRAIL 9000 LADY / MAN<br />
E-<strong>HYBRIDE</strong> TRAIL 4000 LADY / MAN<br />
E-<strong>HYBRIDE</strong> STREET LADY / MAN<br />
41
42<br />
H „Tool“ symbol with<br />
code number<br />
„Tool“ symbol without<br />
code number<br />
I Code number without<br />
the „tool“ symbol<br />
J Display of the current<br />
speed<br />
K Display of the<br />
charge status of the<br />
rechargeable battery<br />
pack<br />
This shows that there is a fault in the electrical<br />
drive system which you cannot repair yourself.<br />
NOTE:<br />
You should contact your specialist workshop for<br />
bicycles immediately. Continuing to ride the EPAC<br />
may cause material damage.<br />
For the meaning of the code number see section<br />
15.6.2, Diagnosis messages.<br />
This shows that the regular service is due.<br />
NOTE:<br />
Contact a specialist bicycle dealer as soon as<br />
possible and have the service carried out. Do<br />
not ride your EPAC until the service has been<br />
performed.<br />
This shows that there is a fault which you may be<br />
able to correct yourself.<br />
NOTE:<br />
For the meaning of the code number see section<br />
15.6.2, Diagnosis messages.<br />
This permanently shows the current speed.<br />
This shows the charge status of the rechargeable<br />
battery pack in 4% steps.<br />
L Set button This switches the pedalling assistance on and off.<br />
It also sets the pedalling assistance level.<br />
Press the set button repeatedly until the desired<br />
pedalling assistance level appears in the pedalling<br />
assistance display.<br />
The „cyclist“ symbol appears on the left next to the<br />
pedalling assistance level shown.<br />
M Light button This switches the illumination of the display on and<br />
off.<br />
Switching on the illumination:<br />
Press the light button (M) briefly.<br />
The „illumination“ symbol appears in the display.<br />
The illumination of the display is switched on.<br />
Switching off the illumination:<br />
Press the light button (M) again briefly.<br />
The „illumination“ symbol disappears from the<br />
display.<br />
The illumination of the display is switched off.<br />
NOTE:<br />
Even if the EPAC is stationary, the illumination of<br />
the display remains switched on.<br />
<strong>GHOST</strong> EPAC
8.2 Gears<br />
E-<strong>HYBRIDE</strong> TRAIL 9000 LADY / MAN<br />
E-<strong>HYBRIDE</strong> TRAIL 4000 LADY / MAN<br />
E-<strong>HYBRIDE</strong> STREET LADY / MAN<br />
Your EPAC has a derailleur made by Shimano with so-called Rapidfire gear levers. When the gear is<br />
changed, the chain is moved to a different cog. On the crankset these cogs are referred to as “chainrings”,<br />
and on the geared ring “sprockets”.<br />
The gear can only be changed while the EPAC is moving. The crankset must turn in the direction of the<br />
drive.<br />
Your gear shift has two levers. Lever A is used to shift to a larger chainring or sprocket, lever B to a smaller<br />
chainring or sprocket.<br />
The left-hand switch operates the front derailleur. Switching to a larger chainring results in a higher gear ratio<br />
(= higher gear). The resistance to pedalling becomes higher, but you can reach a greater speed.<br />
The right-hand switch operates the rear derailleur. Here switching to a larger sprocket results in a lower gear<br />
ratio (= lower gear). The pedalling resistance becomes lower, you can only reach a lower speed, but it is<br />
easier to climb hills.<br />
NOTE:<br />
If you ride with the unfavourable chain positions shown you will increase the level of noise produced and the<br />
wear and tear.<br />
· Avoid:<br />
– largest chainring + largest sprocket<br />
– middle chainring + largest sprocket<br />
– middle chainring + smallest sprocket<br />
– smallest chainring + smallest sprocket<br />
NOTE:<br />
Incorrect operation of the gear shift levers can damage your drive components.<br />
· Never operate both shift levers or both switches at the same time!<br />
· This applies to switches on the crankset (left-hand switch): never change gear under a load!<br />
43
8.2.1 Switching to a larger chainring/sprocket:<br />
44<br />
1. Please pedal in the direction of the drive.<br />
<strong>GHOST</strong> EPAC<br />
2. Press lever A with your thumb beyond the first locking step until you hear a clear click and<br />
hold it pressed until the desired gear is engaged.<br />
3. If you would like to leave out several gears, press the lever right down and hold it pressed<br />
until the desired gear is engaged.<br />
8.2.2 Switching to a smaller chainring/sprocket:<br />
8.3 Brakes<br />
1. Please pedal in the direction of the drive.<br />
2. Pull lever B until you feel and hear it engage and then release the lever again<br />
immediately.<br />
WARNING Danger from falls and accidents<br />
If you operate the brakes too firmly this can lock the wheels and cause the EPAC to skid or roll over.<br />
· Please familiarise yourself with the operation of the brakes. Begin by riding slowly and operating<br />
the brake lever gently.<br />
· You should perform these braking exercises on level surfaces without any road traffic.<br />
· Brake in a controlled manner and press both brake levers at the same time.<br />
NOTE:<br />
Disc brakes only develop their full braking power after a certain “running-in phase”. The rule of thumb is:<br />
After 30 brief braking operations from a medium speed (approximately 25 km/h) down to a standstill the<br />
brakes are considered to have been run in. Avoid long downhill riding for as long as your braking system has<br />
not been run in. As soon as your braking system has been run in, the braking force at your disposal is very<br />
strong. If you pull the brake lever too strongly, it is possible that the wheels will lock.<br />
NOTE:<br />
Approximately 65% of the total braking power is provided by the front wheel brake.<br />
The maximum braking power is achieved by operating both brake levers at the same time.<br />
1. Pull the lever towards the handlebars to actuate the brake.
8.4 Quick-release axles, thru axle<br />
E-<strong>HYBRIDE</strong> TRAIL 9000 LADY / MAN<br />
E-<strong>HYBRIDE</strong> TRAIL 4000 LADY / MAN<br />
E-<strong>HYBRIDE</strong> STREET LADY / MAN<br />
The hub of your front wheel is attached with a quick-release axle or with a thru axle in the fork. The clamping<br />
of your saddle post is equipped with a quick-release axle. These clamping systems permit quick removal and<br />
installation of these components without the use of tools.<br />
WARNING Danger from falls and accidents<br />
If the wheels and saddle post are not correctly mounted, these parts can become loose and as a<br />
result lead to dangerous riding situations, falls and accidents.<br />
· Comply with the following description.<br />
· Practise the operation of the quick-release axle and/or thru axle several times and regularly.<br />
· If after installation you are not sure whether your front wheel and/or the saddle post have been<br />
correctly mounted, do not use your EPAC and consult your specialist bicycle dealer.<br />
8.4.1 Opening and closing the quick-release axle on the front wheel<br />
1 Axle<br />
2 Nut<br />
NOTE:<br />
This section applies to the models<br />
· E-HYBRID TRAIL 4000 LADY / MAN<br />
· E-HYBRID STREET LADY / MAN<br />
3 Lever<br />
4 Spring<br />
45
46<br />
1. Opening the quick-release axle<br />
· Press the eccentrically pivoted lever away from the hub.<br />
The lever can now be turned by approx. 180° about its own axis.<br />
<strong>GHOST</strong> EPAC<br />
· Turn the screw nut in an anti-clockwise direction until the wheel can be pulled out of<br />
the frame or front forks without great effort.<br />
NOTE:<br />
Make sure that you do not lose the springs.<br />
2. Closing the quick-release axle<br />
· If the quick-release axle was completely removed from the hub:<br />
push it through the hub from the left-hand side (as seen in the riding direction).<br />
· Place the spring and screw nut on to the quick-release axle.<br />
· Turn the nut in a clockwise direction on to the right-hand end of the quick-release<br />
axle, which is protruding out of the hub.
E-<strong>HYBRIDE</strong> TRAIL 9000 LADY / MAN<br />
E-<strong>HYBRIDE</strong> TRAIL 4000 LADY / MAN<br />
E-<strong>HYBRIDE</strong> STREET LADY / MAN<br />
3. Tilt the eccentrically pivoted lever so that it forms roughly the extension of the hub axle.<br />
Hold the lever in this position.<br />
4. Now turn the screw nut until the eccentrically pivoted lever when turned through 90°<br />
about its pivot can only move against a resistance (it then forms more or less the straight<br />
extension of the hub axle).<br />
5. Now press the lever by a further 90° up to its end position.<br />
6. Testing the adjustment of the quick-release lever:<br />
· If the quick-release lever does not close tightly enough:<br />
WARNING Danger from falls and accidents<br />
If the quick-release lever is too loose when closed, the front wheel may become<br />
loose and move its position. This can lead to dangerous riding situations, falls<br />
and accidents.<br />
Open the quick-release lever.<br />
Tighten the nut slightly in a clockwise direction.<br />
Close the quick-release lever.<br />
· If the quick-release lever closes too tightly:<br />
WARNING Danger from falls and accidents<br />
If the lever cannot move in its final position (90° to the hub axle) because<br />
the pre-tension is too great, it is possible that the lever will become loose<br />
of its own accord while you are riding the EPAC, so that the front wheel<br />
also becomes loose. This can lead to dangerous riding situations, falls and<br />
accidents.<br />
Open the quick-release lever.<br />
Loosen the nut slightly in an anticlockwise direction.<br />
Close the quick-release lever.<br />
7. Check the tightness of the wheels as described in section 6.1.1.<br />
8.4.2 Opening and closing the thru axle<br />
NOTE:<br />
This section applies to the models E-HYBRID TRAIL 9000 LADY / MAN.<br />
47
48<br />
<strong>GHOST</strong> EPAC<br />
1 Axle<br />
3 Lever<br />
2 Thread<br />
NOTE:<br />
The opening and closing procedure for the thru axle is the same as that for opening and closing the quickrelease<br />
axle on the front wheel, see section 8.4.1. Opening and closing the quick-release axle on the front<br />
wheel.<br />
The lever of the quick-release axle is closed by turning the quick-release axle itself.<br />
8.4.3 Opening and closing the quick-release axle on the saddle post clamp<br />
1 Axle<br />
3 Lever<br />
2 Knurled nut<br />
NOTE:<br />
The opening and closing procedure for the quick-release axle on the saddle post clamp is the same as that<br />
for opening and closing the quick-release axle on the front wheel, see section 8.4.1. Opening and closing the<br />
quick-release axle on the front wheel.<br />
· The quick-release lever of the quick-release axle is closed by turning the quick-release axle itself.<br />
· To open and close it you should only operate the quick-release lever. You do not have to further loosen or<br />
completely release the entire axle in order to dismantle the saddle post.<br />
· You should only turn the knurled nut if the quick-release lever can be moved too easily or only with<br />
difficulty.<br />
· Before closing the quick-release lever, ensure that the clamp is flush and in the correct position on the<br />
seat tube.
8.9 Electric drive<br />
8.9.8 Charging the rechargeable battery pack<br />
WARNING Danger from electric shock and burns<br />
E-<strong>HYBRIDE</strong> TRAIL 9000 LADY / MAN<br />
E-<strong>HYBRIDE</strong> TRAIL 4000 LADY / MAN<br />
E-<strong>HYBRIDE</strong> STREET LADY / MAN<br />
Through the use of an incorrect, damaged or broken charging device or mains cable you may<br />
receive a life-threatening electric shock.<br />
· You should only use the charging device supplied to charge up your EPAC.<br />
· Only use the charging device if it is in perfect condition. Do not use the charging device if it is<br />
damaged in any way, e.g. if the cable insulation or individual plug connections are damaged.<br />
· If during the charging procedure you notice that<br />
– the cable insulation is damaged<br />
– the charging device becomes unusually hot<br />
NOTE:<br />
The production of a small amount of heat on the charging device and rechargeable battery pack is<br />
normal.<br />
– the charging device is producing unusual noises such as loud humming or hissing<br />
– sparks are produced when plugging or unplugging<br />
– The production of smoke can be seen on the charging device or EPAC.<br />
· Turn off the corresponding fuse in your electricity distribution box.<br />
Remove the mains plug of your charging device from the socket.<br />
Contact your specialist bicycle dealer immediately.<br />
· Do not use the charging device in direct sunlight.<br />
NOTE:<br />
Deep discharge will gradually destroy your rechargeable battery pack. Damage to the rechargeable battery<br />
pack resulting from deep discharge is caused by an operating error and is not covered by the warranty.<br />
· You should charge up your rechargeable battery pack for the first time not later than 2 months<br />
after purchasing your EPAC.<br />
· After the first charge you should recharge the battery pack every two months at the latest.<br />
· Charge the rechargeable battery pack up within the permitted ambient temperature range of -5°C<br />
to +50°C.<br />
A charging device<br />
B Indicator light<br />
C Plug of the charging cable<br />
D Socket<br />
E Mains plug<br />
F Socket<br />
49
50<br />
<strong>GHOST</strong> EPAC<br />
1. Insert the mains plug of the charging device into the socket (F).<br />
The green indicator lamp goes on.<br />
The charge status is shown in the display.<br />
WARNING If the display light does not go on,<br />
the charging device might be damaged.<br />
· Remove the mains plug from the socket (F).<br />
· Do not use the charging device any more.<br />
· Contact your specialist bicycle dealer.<br />
2. Insert the plug of the charging cable into the socket (D) of the rechargeable battery pack.<br />
The rechargeable battery pack is now being charged up.<br />
The display goes off when the rechargeable battery pack is fully charged.<br />
NOTE:<br />
When the battery pack is charged up for the first time the charging time is considerably<br />
longer than the average charging time of 4 – 5 hours.<br />
3. Remove the plug of the charging cable from the socket (D) on the rechargeable battery<br />
pack.<br />
4. Remove the mains plug from the socket (F).<br />
NOTE:<br />
You can leave the rechargeable battery pack permanently connected to the charging device for as long as<br />
you do not use the EPAC. This increases the service life of the rechargeable battery pack, but also increases<br />
your electricity consumption.<br />
8.9.9 Calibrating the electric drive<br />
Calibrate the electric drive if the pedalling assistance no longer provides the desired power.<br />
1. Place the EPAC on the ground.<br />
2. Stand next to the EPAC.<br />
3. Turn the lights off.<br />
4. Turn the pedalling assistance to 0 (OFF) in the display.<br />
5. Press the M button for 5 seconds until<br />
-0-0- is shown in the bottom line of the display.<br />
The EPAC is calibrated.
9 Loading the EPAC<br />
WARNING Danger from falls and accidents<br />
E-<strong>HYBRIDE</strong> TRAIL 9000 LADY / MAN<br />
E-<strong>HYBRIDE</strong> TRAIL 4000 LADY / MAN<br />
E-<strong>HYBRIDE</strong> STREET LADY / MAN<br />
Adding an extra load impairs the riding behaviour of your EPAC and the braking distance becomes<br />
longer. And if you overload your EPAC, it is possible that parts of it might even break or fail. All of<br />
this can lead to dangerous riding situations, falls and accidents.<br />
· You should load your EPAC in such a way that you always have enough room to move and can<br />
always operate your EPAC safely when it is loaded.<br />
Adapt your riding to the more difficult riding behaviour of the EPAC.<br />
· Do not use your EPAC for transporting goods, but only as an item of sports equipment and for<br />
moving from one location to another.<br />
· Never use your EPAC with a bicycle trailer.<br />
· Do not transport any bulky luggage or other adults on a luggage rack (optional).<br />
· Children should only be transported in child seats. You should only mount child seats on the<br />
appropriate luggage racks.<br />
Please contact your specialist bicycle dealer to select and mount a child seat. Your specialist<br />
dealer will be pleased to advise you.<br />
· Transport your luggage only on suitable carrier systems.<br />
· You should only use carrier systems which are approved for your EPAC, see section 2.4.2, What<br />
must you bear in mind when retrofitting accessories and carrying out conversions?<br />
Please contact your specialist bicycle dealer to retrofit a carrier system. He or she will be pleased<br />
to advise you.<br />
· Do not exceed the maximum permitted loading weight for your loading system. Please see the<br />
documentation for your loading system for the maximum permitted loading weight.<br />
· Do not exceed the maximum permitted loading weight for your EPAC (rider plus children and<br />
luggage).<br />
· Load your EPAC in such a way that the luggage and carrier system never come into contact with<br />
the wheels, drive, chain or brakes.<br />
· Load your EPAC in such a way that the luggage and carrier system never cover the lights or<br />
reflectors of your EPAC.<br />
51
52<br />
How to determine the maximum permitted loading weight:<br />
1. If you would like to transport a child on your EPAC:<br />
Weigh the child on a calibrated set of scales.<br />
<strong>GHOST</strong> EPAC<br />
2. Weigh yourself wearing all of your cycling clothes and helmet on a calibrated set of<br />
scales. If you wish to use a bicycle rucksack while you are riding, stand on the scales<br />
with the loaded rucksack.<br />
3. Weigh the luggage that you would like to transport on your luggage rack on a set of<br />
calibrated scales.<br />
4. Adds together all of the weights. The total must not be more than 115 kg.<br />
5. Reduce the weight of your luggage if the total is more than 115 kg.<br />
6. Securing a child:<br />
Please secure your child as shown in the documentation for your child seat.<br />
If you have any questions, please contact your specialist bicycle dealer. He or she will be<br />
pleased to advise you.<br />
Loading the luggage rack (optional):<br />
7. Place your luggage on the middle of your luggage rack.<br />
8. Please mount and load your saddlebags, if you are using any, in accordance with the<br />
documentation for your saddlebags. If you have any questions, please contact your<br />
specialist bicycle dealer. He or she will be pleased to advise you.<br />
9. Attach your luggage with suitable and stable holding systems (spring clamp, click system,<br />
tensioning straps, elastic belt straps or similar items).<br />
10. Shake your EPAC vigorously after you have loaded it.<br />
The luggage and carrying system must be firmly attached and not become loose.<br />
If the luggage or carrier system are not firmly attached or become loose:<br />
fix the luggage or carrier system in place until it is firmly attached.
10 Riding the EPAC<br />
WARNING Danger from falls and accidents<br />
With your EPAC you can reach high speeds to which you may not be accustomed.<br />
E-<strong>HYBRIDE</strong> TRAIL 9000 LADY / MAN<br />
E-<strong>HYBRIDE</strong> TRAIL 4000 LADY / MAN<br />
E-<strong>HYBRIDE</strong> STREET LADY / MAN<br />
· You should only use this EPAC if you can safely ride at high speeds and brake from such speeds.<br />
· Always wear a helmet when riding your bike.<br />
· Ride with foresight and defensively.<br />
· Be ready to brake at all times.<br />
· Do not ride after consuming alcohol.<br />
· Ride in such a way that you have your EPAC under control at all times and can react correctly in<br />
the event of sudden dangerous situations.<br />
· When wet, the brakes may not be as effective. The braking distance becomes longer.<br />
· When riding, wear only suitable clothing that does not hinder the operation of the EPAC or your<br />
sight.<br />
· Always wear tight-fitting legwear when riding. Loose clothing can become tangled in the EPAC<br />
and lead to serious falls.<br />
· In the dark and with poor visibility, wear clothing with reflective stripes and switch on your lights.<br />
· Note that some items of clothing and/or the use of a backpack can hinder your mobility.<br />
WARNING Danger from falls and accidents if the EPAC starts up unexpectedly<br />
If you place your foot on the pedal and move the wheels slightly, the electric drive will start up. There<br />
is a danger that you will move off unintentionally. This is particularly dangerous at traffic lights, level<br />
crossings and on the edge of slopes, as well as at roads and paths where you do not have priority.<br />
· You should only put your foot on the pedal when you actually want to move off.<br />
· Operate both of the brakes immediately beforehand and only release them when you actually<br />
want to move off.<br />
WARNING Danger from falls and accidents resulting from unexpected after-running<br />
In the case of an incorrect engine management system your EPAC may suffer from after-running.<br />
Ride your EPAC carefully, comply with the servicing intervals and contact your specialist workshop<br />
immediately in the case of faults.<br />
53
54<br />
<strong>GHOST</strong> EPAC<br />
WARNING Danger from heavy falls and accidents<br />
Amongst other things, your safety depends on your speed and the riding conditions. The faster you<br />
ride and the more unfavourable the riding conditions are, the greater is your risk.<br />
· Always adapt your speed to your riding skills and the riding conditions.<br />
· Remember that roads and trails may be damaged and there may be concealed obstacles, edges,<br />
“sleeping policemen”, bumps in the road etc.<br />
In such areas you should ride slowly and with particular care. If necessary, push or carry your<br />
EPAC.<br />
WARNING Danger through trapping and shearing<br />
Rotating wheels can injure hands and other parts of the body.<br />
· Keep your hands and other parts of the body away from rotating wheels!<br />
· Please ensure that your child’s hands and other parts of their body cannot come into contact with<br />
the revolving wheels.<br />
CAUTION Danger of burns<br />
When you are riding - particularly in the case of long downhill rides and frequent braking - it is<br />
possible that the brake discs will become so hot that they can cause burns if in contact with the skin.<br />
Do not touch the brake discs immediately after riding your EPAC.<br />
Allow the brake discs to cool down for at least 5 minutes before touching them. In order to check the<br />
temperature, lightly tap with your bare finger very briefly on the brake discs. If these are hot, wait a<br />
few minutes and repeat this test until the brake discs have cooled down completely.
10.1 Switching on the electric drive<br />
10.2 Riding the EPAC<br />
A Display<br />
B Holder<br />
E-<strong>HYBRIDE</strong> TRAIL 9000 LADY / MAN<br />
E-<strong>HYBRIDE</strong> TRAIL 4000 LADY / MAN<br />
E-<strong>HYBRIDE</strong> STREET LADY / MAN<br />
1. Attach the display to the holder.<br />
NOTE:<br />
When you attach the display to the holder, the drive automatically becomes ready to<br />
operate.<br />
2. Place the display at an angle of 45° in an anticlockwise direction on the holder.<br />
3. Turn the display through an angle of 45° in a clockwise direction until you feel it lock in<br />
place.<br />
1. Hold the left-hand grip of the handlebars with your left hand and the right-hand grip with<br />
your right hand.<br />
2. Press both brakes.<br />
3. When riding, place your left foot on the left pedal and your right foot on the right pedal.<br />
4. Sit on the saddle or ride standing up on the pedals.<br />
5. Release both of the brakes.<br />
6. Press down on the pedals.<br />
10.3 Switching off the electric drive<br />
1. Releasing the display from the holder: Turn the display through 45° in an anticlockwise<br />
direction and take it off the holder.<br />
NOTE:<br />
When you remove the display from the holder the operational readiness of the drive is<br />
automatically switched off.<br />
55
11 What to do in the case of a fall or accident<br />
56<br />
<strong>GHOST</strong> EPAC<br />
WARNING<br />
Danger of fire<br />
If your EPAC falls over this may result in short circuits in the rechargeable battery pack and cause<br />
the rechargeable battery pack to catch fire.<br />
· After a fall or accident you should leave your EPAC outside for an hour away from combustible<br />
materials.<br />
· Move the back of your finger briefly and carefully along the down tube. If you notice any unusual<br />
warmth, leave your EPAC where it is. Under no circumstances should you continue to use your<br />
EPAC. Transport your EPAC to your specialist bicycle dealer as soon as the down tube has<br />
cooled down.<br />
· If flames or smoke come out of the down tube, leave your EPAC where it is. Put out the fire<br />
with fire extinguishing equipment, if available. If you do not have any extinguishing equipment<br />
available, wait until the fire has become extinguished and all of the parts of your EPAC have<br />
cooled down. Then transport your EPAC without delay to a specialist bicycle dealer.<br />
· If there is a danger that the fire will spread to neighbouring items, call the fire brigade<br />
immediately.<br />
· You should only use your EPAC again when it has been checked by a specialist workshop and<br />
repaired if necessary.<br />
WARNING Danger from falls and accidents<br />
If you have a fall or accident with your EPAC, parts of it which are important for safety may be<br />
damaged. This can lead to dangerous riding situations, falls, accidents and material damage.<br />
· Contact your specialist bicycle dealer immediately after an accident or fall.<br />
· You should only use your EPAC again when it has been properly repaired by the specialist bicycle<br />
dealer.<br />
After a fall it is essential to have all of the parts of your EPAC which have hit a hard surface, such as the<br />
· Handlebars<br />
· Handlebar stem<br />
· and crank<br />
replaced.<br />
All other parts must be inspected by your dealer and replaced, if necessary.<br />
NOTE:<br />
If you have any questions after falls and accidents, you can also contact a bicycle specialist. In Germany you<br />
can obtain corresponding contact addresses from your local Chamber of Commerce and Industry (IHK).
12 Parking the EPAC safely<br />
E-<strong>HYBRIDE</strong> TRAIL 9000 LADY / MAN<br />
E-<strong>HYBRIDE</strong> TRAIL 4000 LADY / MAN<br />
E-<strong>HYBRIDE</strong> STREET LADY / MAN<br />
WARNING Danger of injury from your EPAC falling over<br />
An EPAC that is supported by its kickstand or leaning against a house wall or garden fence, for<br />
example, can fall over when subjected to a small force. This may cause injury to individuals or<br />
animals and damage other objects.<br />
· You should only park your EPAC where it does not represent an obstacle or nuisance to anyone.<br />
· Keep children and animals away from your parked EPAC.<br />
· Please do not park your EPAC next to items which are easily damaged, such as cars and similar<br />
items.<br />
If your bicycle has a kickstand:<br />
1. Stop your EPAC on a flat and firm surface.<br />
2. Turn off the electric drive by removing the display. (see section 10.3 ,Switching off the<br />
electric drive).<br />
3. With the EPAC stationary, use your right foot to fold the kickstand down until it clearly<br />
locks in place.<br />
4. Turn the handlebars so that they point slightly to the left.<br />
5. Lean your EPAC carefully on its left side until it is in a stable position.<br />
6. Check the stability of your EPAC:<br />
· Hold your EPAC lightly with one hand by the handlebars or saddle.<br />
· Push the saddle of the EPAC lightly with the other hand in all directions.<br />
Look for another place to park your EPAC if it could easily fall over.<br />
If your bicycle does not have a kickstand:<br />
1. Stop your EPAC on a flat and firm surface.<br />
2. Turn off the electric drive by removing the display. (see section 10.3 ,Switching off the<br />
electric drive).<br />
3. Dismount on the left.<br />
4. Lean your EPAC with the back wheel or with the saddle against a firm object.<br />
5. Turn the handlebars to the side to which you have tilted your EPAC.<br />
NOTE:<br />
If there is no suitable object available, you can also carefully place your EPAC on the ground.<br />
57
13 Transporting the EPAC<br />
58<br />
WARNING Danger of injury through shearing and trapping in the back wheel<br />
<strong>GHOST</strong> EPAC<br />
If you load your EPAC with the motor switched on, this may start up unintentionally if the pedals<br />
are touched. The rotating rear wheel may then cause serious injuries. When you then put down the<br />
EPAC, this may result in uncontrolled movements.<br />
You should therefore remove the display of the electric control unit before transporting the EPAC,<br />
see section 10.3, Switching off the electric drive.<br />
WARNING Danger of fire<br />
In strong sunlight the interior of a car can heat up to very high temperatures. High temperatures can<br />
result in internal short-circuits in the rechargeable battery pack and cause the rechargeable battery<br />
pack to catch fire.<br />
You should only park your vehicle in a shady place with an ambient temperature of less than 35°C.<br />
· If flames or smoke come out of the down tube, leave your EPAC where it is. Put out the fire with<br />
fire extinguishing equipment, if available.<br />
· If there is a danger that the fire will spread to neighbouring items, call the fire brigade<br />
immediately.<br />
WARNING Danger from heavy falls and accidents<br />
The use of bicycle carriers may damage safety-relevant parts of your EPAC. The failure of these<br />
parts can lead to dangerous riding situations, falls, accidents and material damage.<br />
· Transport this EPAC only inside your car.<br />
· No other objects may be placed on this EPAC during transport.<br />
· This EPAC must not be clamped into car transport systems (roof racks, rear or interior carrying<br />
devices etc.
13.1 Assembling and dismantling the front wheel<br />
In order to transport the EPAC in your car you can dismantle the front wheel.<br />
E-<strong>HYBRIDE</strong> TRAIL 9000 LADY / MAN<br />
E-<strong>HYBRIDE</strong> TRAIL 4000 LADY / MAN<br />
E-<strong>HYBRIDE</strong> STREET LADY / MAN<br />
WARNING Danger from falls and accidents<br />
If the wheels are incorrectly mounted this may result in dangerous riding situations, falls and<br />
accidents. Check that the wheel is correctly mounted before you use your EPAC again.<br />
· Check that the front wheel is positioned in the centre of the front wheel fork.<br />
· Shake the two wheels vigorously at right angles to the direction of travel.<br />
– The wheels must not move in their mounting.<br />
– No cracking or grinding noises should be heard.<br />
· Check whether the quick-release lever or thru axle is correctly closed, see section 8.4 Quickrelease<br />
axles, thru axle.<br />
WARNING<br />
Danger of burns<br />
After long downhill rides it is possible that the brake discs have become very hot.<br />
· Do not touch the brake discs immediately after a downhill ride.<br />
· Allow the brake discs to cool down for at least 5 minutes before touching them.<br />
· In order to check the temperature, tap the brake discs briefly with your bare finger. If these are<br />
hot, wait a few minutes and repeat this test until the brake discs have cooled down completely.<br />
NOTE:<br />
Your EPAC has a disc brake. After dismantling the wheel you should use the enclosed transport lock when<br />
transporting the EPAC. Remove this only immediately before installing the wheels again.<br />
59
13.1.1. Dismantling the front wheel<br />
60<br />
1. If your EPAC has been retrofitted with a hub dynamo:<br />
release the plug-in connection between the dynamo and cables.<br />
<strong>GHOST</strong> EPAC<br />
2. In the case of clamping with the quick-release axle (E-Hybrid Street and Trail 4000):<br />
· Open the quick-release axle<br />
See section 8.4.1, Opening and closing the quick-release axle on the front wheel.<br />
· Unscrew the lock nut until it is just still on the axle.<br />
3. In the case of clamping with the thru axle (E-Hybrid Trail 9000):<br />
· Open the quick-release lever.<br />
See section 8.4.2, Opening and closing the thru axle.<br />
· Turn the thru axle in an anticlockwise direction until it is released from the thread in<br />
the fork rod and then pull the axle completely out of the hub.<br />
4. Pick up your EPAC with the handlebars and pull the front wheel out of the fork ends of<br />
the front-wheel fork.<br />
5. Insert the enclosed transport lock for your disc brake between the brake pistons.<br />
NOTE:<br />
Under no circumstances may the hydraulic brakes be operated after the wheel has been<br />
removed.<br />
You should use the enclosed transport locks. Remove these before re-installing the front<br />
wheel.<br />
6. Place your EPAC carefully on the ground with the fork ends.
Installing the front wheel<br />
1. Remove the transport lock from the brake pistons<br />
2. Pick up the EPAC by the handlebars.<br />
E-<strong>HYBRIDE</strong> TRAIL 9000 LADY / MAN<br />
E-<strong>HYBRIDE</strong> TRAIL 4000 LADY / MAN<br />
E-<strong>HYBRIDE</strong> STREET LADY / MAN<br />
3. Position the hub of the front wheel under the fork ends of the front-wheel fork.<br />
4. Insert the wheel so that the brake disc slides smoothly between the brake pads.<br />
5. Lower the fork carefully until the axle is flush with the stop of the fork ends on the left and<br />
right.<br />
· In the case of clamping with a quick-release axle (E-Hybrid Street and Trail 4000):<br />
Close the quick-release axle in accordance with section 8.4.1, Opening and closing<br />
the quick-release axle on the front wheel.<br />
· In the case of the thru axle (E-Hybrid Trail 9000):<br />
Push the thru axle from the left through the fork dropout and the hub.<br />
Clamp the front wheel hub.<br />
See section 8.4.2, Opening and closing the thru axle.<br />
6. If your EPAC has been retrofitted with a hub dynamo:<br />
Connect the plug-in connection between the hub dynamo and cables.<br />
7. Operate the front wheel brake several times with the EPAC stationary after you have<br />
reinstalled the front wheel.<br />
8. Lift up the EPAC by the handlebars and turn the front wheel by hand. If a brake block<br />
is in contact with the wheel rim, this can indicate incorrect mounting of the hub in the<br />
fork dropouts. In this case you should open the quick-release lever and shake the front<br />
wheel lightly to and fro (at right angles to the direction of travel). Repeat the installation<br />
61
62<br />
<strong>GHOST</strong> EPAC<br />
from point 5. If there is no improvement, please contact your specialist bicycle dealer<br />
immediately.<br />
9. If your EPAC has been retrofitted with a hub dynamo:<br />
check the function of the lights.<br />
See section 6.9, Checking the lights (optional).<br />
13.2 Installing and dismantling the saddle post with the saddle<br />
In order to make it easier to transport your EPAC you can dismantle the saddle post and the saddle. The<br />
saddle post is fastened with a clamp in the seat tube of the frame. The clamping is performed by means of a<br />
quick-release axle and knurled nut.<br />
13.2.1 Dismantling the saddle post<br />
13.2.2 Installing the saddle post<br />
1. Open the seat clamp on the quick-release lever.<br />
See section 8.4.3, Opening and closing the quick-release axle on the saddle post clamp.<br />
2. Pull the saddle together with the saddle post out of the frame.<br />
1. If the insertion area is not greased:<br />
Grease the insertion area of the saddle post.
E-<strong>HYBRIDE</strong> TRAIL 9000 LADY / MAN<br />
E-<strong>HYBRIDE</strong> TRAIL 4000 LADY / MAN<br />
E-<strong>HYBRIDE</strong> STREET LADY / MAN<br />
Push the saddle with saddle post into the saddle tube of the frame until the required<br />
saddle height is obtained. In this position the lower end of the saddle post must be<br />
located at least 10 cm below the upper edge of the seat tube.<br />
NOTE:<br />
Do not rely on the marking on the saddle post.<br />
Check the correct insertion depth as follows:<br />
· Place a finger tip against the saddle post in the installed position immediately above<br />
the clamping bolt.<br />
· Leave your finger in this position and pull the saddle post out of the saddle tube.<br />
· Hold the saddle post at the side next to the seat tube so that your fingertip is again<br />
located directly above the clamp. In this position the lower end of the saddle post<br />
must be at least 10 cm below the upper edge of the seat tube.<br />
2. Turn the saddle so that the saddle tip is pointing in the direction of travel.<br />
3. Ensure that the clamp is flush with the frame and that the slots in the saddle tube and<br />
clamp are aligned.<br />
4. Close the quick-release lever.<br />
See section 8.4.3, Opening and closing the quick-release axle on the saddle post clamp.<br />
63
64<br />
NOTE:<br />
Mark the correct position of the saddle post with adhesive tape.<br />
<strong>GHOST</strong> EPAC<br />
5. Check the saddle post.<br />
See section 6.2, Inspecting the saddle and saddle post.<br />
WARNING Danger from falls and accidents<br />
An incorrectly mounted saddle post may result in dangerous riding situations, falls<br />
and accidents.
14 Maintaining the EPAC<br />
E-<strong>HYBRIDE</strong> TRAIL 9000 LADY / MAN<br />
E-<strong>HYBRIDE</strong> TRAIL 4000 LADY / MAN<br />
E-<strong>HYBRIDE</strong> STREET LADY / MAN<br />
WARNING<br />
Danger of injuries to fingers and arms, danger of accidents<br />
The test measures may cause the EPAC to move off unexpectedly.<br />
Remove the display before carrying out all work (see section 10.3, Switching off the electric drive).<br />
WARNING Danger from falls and accidents<br />
Electric hazard when working on the electrical equipment<br />
Incorrectly performed maintenance can lead to dangerous riding situations, falls and accidents.<br />
· You should only carry out the maintenance work on your EPAC which is permitted according to<br />
this section.<br />
· Have all other maintenance work carried out by a specialist workshop for bicycles.<br />
WARNING Danger of injury from shearing and trapping in the back wheel<br />
When the EPAC is in the standby position, the electric drive may start up unintentionally. The<br />
rotating rear wheel may then cause serious injuries. If you put down the EPAC, this may result in<br />
uncontrolled movements as a result of which you might also be injured.<br />
Make sure that the EPAC is not in the standby position before starting any work on the EPAC, see<br />
section 10.3, Switching off the electric drive.<br />
14.1 Your serv<br />
Work Interval<br />
Cleaning the EPAC<br />
See section 14.2, How to clean<br />
and care for your EPAC<br />
Adjusting the air pressure of the<br />
suspension fork<br />
See section 7.3.1, Adjusting the<br />
air pressure<br />
Cleaning and greasing the chain<br />
See section 14.2, How to clean<br />
and care for your EPAC, point 7<br />
· whenever you have ridden the EPAC on muddy or dirty<br />
surfaces<br />
· every 200 km at the latest<br />
every 500 km or 3 months<br />
after any change to the overall weight by 10 kg<br />
· after every ride in the wet<br />
· whenever you have cleaned your EPAC with water<br />
· after every prolonged ride on a sandy surface<br />
· every 200 km at the latest<br />
65
14.2 How to clean and care for your EPAC<br />
66<br />
<strong>GHOST</strong> EPAC<br />
WARNING<br />
Danger of injury<br />
Before carrying out any work on your EPAC, make sure that it is not in the standby position in<br />
accordance with section 10.3, Switching off the electric drive.<br />
WARNING Danger from falls and accidents<br />
Insufficient cleaning and care can lead to dangerous riding situations, falls and accidents.<br />
You should care for your EPAC in accordance with the following instructions.<br />
WARNING Danger from falls and accidents<br />
Corrosion - which can also affect non-rusting parts - may damage the safety components of your<br />
EPAC so severely that they break when you are riding it. This may result in serious falls.<br />
Corrosion can result, amongst other things,<br />
from salt, e.g. salty air near the coast or the spreading of salt on the roads in the winter<br />
through a corrosive atmosphere, e.g. on industrial sites<br />
through sweat.<br />
· Protect your EPAC with spray wax or a similar preserving agent against all contacts with<br />
corrosive substances.<br />
· Clean your EPAC after all contacts with corrosive substances and protect it again in accordance<br />
with the following description.<br />
· Do not use any steam jet/high-pressure cleaner for wet cleaning. The strong waterjet may damage<br />
your EPAC or cause a short circuit (danger of fire).<br />
NOTE:<br />
Taking care of your EPAC will increase its service life and that of its components.<br />
· Clean and service your EPAC at regular intervals.<br />
· Use a gentle water jet or a bucket of water and sponge to clean your EPAC.<br />
· Use only clean fresh or desalinated water. Do not use any saltwater e.g. (seawater)<br />
NOTE:<br />
With many cleansers and light soiling it is often sufficient to spray on the cleanser and to rinse it off again<br />
after the prescribed waiting time.<br />
Stubborn soiling can be loosened e.g. with a radiator paintbrush or sponge after the waiting time before<br />
rinsing.<br />
NOTE:<br />
Cleansers, lubricants and preserving agents are chemical products. Some of these agents can<br />
damage your EPAC.<br />
· Use only products that are expressly suitable for bikes.<br />
· Ensure that this agent does not attack paintwork or rubber, plastic or metal parts etc. Contact your<br />
specialist bicycle dealer for further advice.<br />
· Follow the manufacturers’ instructions.<br />
1. Switch off the standby readiness of your EPAC:<br />
Remove the display.<br />
See section 10, Riding the EPAC, point 1.<br />
2. Remove coarse soiling such as earth, stones, sand, etc. using a gentle water spray.<br />
2. Allow the EPAC to dry for a while.<br />
3. Spray the entire EPAC with a suitable cleansing agent.<br />
4. Use a water jet to rinse down the entire EPAC. You can also carry out additional wet
cleaning with the help of a sponge or cloth.<br />
5. Allow the EPAC to dry.<br />
6. Cleaning and greasing the chain:<br />
E-<strong>HYBRIDE</strong> TRAIL 9000 LADY / MAN<br />
E-<strong>HYBRIDE</strong> TRAIL 4000 LADY / MAN<br />
E-<strong>HYBRIDE</strong> STREET LADY / MAN<br />
· Rotate the crank slowly against the direction of the drive. The rear wheel must not<br />
revolve.<br />
· Pour a small amount of a suitable chain cleansing agent onto a clean, lint-free cotton<br />
cloth and wipe off the chain.<br />
· Repeat this procedure as often as necessary with a clean part of the cotton cloth until<br />
the chain is clean.<br />
· Allow the cleansing agent to evaporate for approximately 1 hour.<br />
NOTE:<br />
If there is still some cleansing agent between the links of the chain, the new grease is<br />
immediately decomposed and therefore has no effect.<br />
· Apply a suitable grease for bicycle chains sparingly on to the chain links.<br />
WARNING Danger from falls and accidents<br />
If you use too much or inappropriate grease, this may drip on to the brake disc<br />
and smear it. This may cause the braking effect to deteriorate significantly.<br />
Remove any excess lubricant from the chain using a clean, dry and lint-free<br />
cotton cloth.<br />
Clean the wheel rim and brake disc with a suitable degreasing agent. Consulting<br />
your specialist bicycle dealer<br />
NOTE:<br />
Lubricant for motorbike chains will clog your bike chain and drive components.<br />
Use only lubricants expressly approved for use on bike chains.<br />
6. Clean any remaining heavily soiled parts by hand using a clean and lint-free cotton cloth<br />
and a suitable cleansing agent.<br />
7. Spray the entire EPAC with a suitable spray wax or similar preserving agent.<br />
WARNING Danger from falls and accidents<br />
Spray wax or other preserving agents on the brake discs can cause the braking<br />
effect to deteriorate significantly.<br />
Clean the brake discs with a suitable degreasing agent. Consult your specialist<br />
bicycle dealer.<br />
These parts must not be treated with preserving agents.<br />
· Brake blocks<br />
· Brake discs<br />
· Grips, brake and gear levers<br />
· Saddle<br />
· Tyre<br />
8. Polish your EPAC after the prescribed waiting time with a clean, lint-free cotton cloth.<br />
9. Clean the brake discs by hand using a clean, dry, lint-free cotton cloth and a suitable<br />
degreasing agent.<br />
67
14.3 Workshop service<br />
68<br />
<strong>GHOST</strong> EPAC<br />
WARNING Danger from falls and accidents<br />
Servicing which is not/incorrectly carried out, as well as damage from falls or accidents which is not<br />
repaired, may lead to dangerous riding situations, falls and accidents.<br />
· Take your EPAC on time to the prescribed servicing appointments at a specialist workshop for bicycles.<br />
Only in this way can worn parts and damage be reliably detected and repaired.<br />
· Ask your specialist workshop to show you their confirmation of participation in a <strong>GHOST</strong> training course<br />
for your EPAC to prove that they are qualified to carry out t<br />
Work Interval<br />
First inspection after 500 km or 6 months at the latest<br />
Inspection of the brake linings,<br />
brake discs, chain<br />
every 500 km<br />
Regular inspections every 1000 km or once a year
15 What to do in the case of faults<br />
E-<strong>HYBRIDE</strong> TRAIL 9000 LADY / MAN<br />
E-<strong>HYBRIDE</strong> TRAIL 4000 LADY / MAN<br />
E-<strong>HYBRIDE</strong> STREET LADY / MAN<br />
WARNING<br />
Danger from falls and accidents resulting from unexpected after-running<br />
If your engine management system is faulty, your EPAC may continue running.<br />
· Be ready to brake at all times.<br />
· Drive defensively, comply with all of the servicing intervals and contact your specialist workshop<br />
immediately in the case of faults.<br />
· You should only use this EPAC if you can safely ride at high speeds and brake from such speeds.<br />
WARNING<br />
Danger from heavy falls and accidents<br />
Incorrectly performed troubleshooting may result in dangerous riding situations, falls and accidents.<br />
· You should only carry out work to your EPAC which you are permitted to perform according to the<br />
following table.<br />
Contact a specialist workshop for bicycles if the work that you have carried out is not successful.<br />
· Have all other work carried out by a specialist workshop for bicycles.<br />
· You should contact your specialist bicycle dealer immediately if the riding behaviour of your<br />
EPAC does not appear to be normal, if you can hear unusual noises or if you notice any<br />
malfunctions which are not listed in the following table.<br />
WARNING<br />
Danger of injury from shearing and trapping in the back wheel<br />
When the EPAC is in the standby position, the electric drive may start up unintentionally. The<br />
rotating rear wheel may then cause serious injuries. If you put down the EPAC, this may result in<br />
uncontrolled movements as a result of which you might also be injured.<br />
Make sure that the EPAC is not in the standby position before starting any work on the EPAC, see<br />
section 10.3, Switching off the electric drive.<br />
69
15.1 Gear shift, drive<br />
70<br />
Malfunction Possible cause(s) Remedy<br />
Gears do not change or do not<br />
change smoothly<br />
Drive blocks during or after gear<br />
shifting<br />
Unusual noise such as cracking,<br />
loud grinding and/or banging<br />
Irregular resistance during the<br />
pedal movements<br />
Shift lever not actuated correctly Actuate the lever again<br />
Shift mechanism maladjusted Contact your specialist bicycle<br />
dealer.<br />
· In the case of steep<br />
inclinations, excessive<br />
pressure on the pedal<br />
· and/or pedalling movement<br />
too slow<br />
Repeat the gear shifting<br />
procedure on flat terrain.<br />
Changing gear while stationary:<br />
· Lift the rear wheel.<br />
· Turn the crank in the drive<br />
direction until the desired gear<br />
is engaged.<br />
Chain jamming · Leave the EPAC where it is.<br />
· Turn off the standby mode in<br />
accordance with section 10.3,<br />
Switching off the electric drive<br />
· Actuate the gear lever in the<br />
opposite direction.<br />
· Lift the rear wheel.<br />
· If this is possible without<br />
force:<br />
turn the crank in the opposite<br />
direction to the drive.<br />
Drive/gearing components<br />
damaged<br />
Drive/gearing components<br />
damaged<br />
NOTE:<br />
Under no circumstances should<br />
you apply force if the crank<br />
cannot be easily turned .<br />
You should contact your<br />
specialist workshop for bicycles<br />
immediately.<br />
Contact your specialist bicycle<br />
dealer immediately.<br />
<strong>GHOST</strong> EPAC
Malfunction Possible cause(s) Remedy<br />
Chain jumped off sprocket · Incorrect operation of the<br />
gearshift<br />
Chain jumped off during or after<br />
gear shifting<br />
· Maladjusted or damaged gear<br />
shift mechanism<br />
· Incorrect operation of the<br />
gearshift<br />
· Maladjusted or damaged gear<br />
shift mechanism<br />
Chain jumps off repeatedly · Repeated incorrect operation<br />
of the gearshift<br />
· Maladjusted or damaged gear<br />
shift mechanism<br />
E-<strong>HYBRIDE</strong> TRAIL 9000 LADY / MAN<br />
E-<strong>HYBRIDE</strong> TRAIL 4000 LADY / MAN<br />
E-<strong>HYBRIDE</strong> STREET LADY / MAN<br />
· Leave the EPAC where it is.<br />
· Turn off the standby mode in<br />
accordance with section 10.3,<br />
Switching off the electric drive<br />
· Lift the chain onto the next<br />
sprocket by hand,<br />
· Lift the rear wheel.<br />
· If this is possible without<br />
force:<br />
turn the crank in the direction<br />
of the drive.<br />
NOTE:<br />
Under no circumstances should<br />
you apply force if the crank<br />
cannot be turned easily or if you<br />
do not have the strength to lift<br />
the back wheel.<br />
Contact your specialist workshop<br />
immediately.<br />
· Leave the EPAC where it is.<br />
· Turn off the standby mode in<br />
accordance with section 10.3,<br />
Switching off the electric drive<br />
· Actuate the gear lever in the<br />
opposite direction.<br />
· Lift the chain onto the next<br />
sprocket by hand,<br />
· Lift the rear wheel.<br />
· If this is possible without<br />
force:<br />
turn the crank in the direction<br />
of the drive.<br />
NOTE:<br />
Under no circumstances should<br />
you apply force if the crank<br />
cannot be easily turned .<br />
You should contact your<br />
specialist workshop for bicycles<br />
immediately.<br />
Operate the gearshift correctly,<br />
see section 8.2, Gears.<br />
Contact your specialist workshop<br />
immediately if the fault occurs<br />
when you change gear correctly.<br />
71
15.2 Brakes<br />
72<br />
<strong>GHOST</strong> EPAC<br />
WARNING Danger from falls and accidents<br />
The brakes of your EPAC are some of the most important components for your riding safety. Failing<br />
brakes always lead to dangerous riding situations, falls and accidents. A brake malfunction is a<br />
serious danger to safety.<br />
· Contact your specialist bicycle dealer immediately if you notice the slightest malfunction or a<br />
deterioration in the braking effect.<br />
· You should only use your EPAC again when it has been properly repaired by the specialist bicycle<br />
dealer.<br />
Malfunction Possible cause(s) Remedy<br />
Brakes do not work Brakes not correctly installed Contact your specialist bicycle<br />
dealer immediately.<br />
Decreasing braking effect, brake<br />
levers can be pulled too far<br />
Brakes damaged Contact your specialist bicycle<br />
dealer immediately.<br />
Brake linings worn Have the brake linings replaced<br />
immediately in an approved<br />
workshop.<br />
With hydraulic brakes: Brake<br />
system leaking<br />
Contact your specialist bicycle<br />
dealer immediately.<br />
The brake drags The brake disc is damaged Contact your specialist bicycle<br />
dealer immediately.<br />
The wheel is not straight Front wheel: Install your front<br />
wheel correctly (see section 13.1,<br />
Assembling and dismantling the<br />
front wheel<br />
Rear wheel: Please contact your<br />
specialist bicycle dealer.
15.3 Frame, Saddle Post and Suspension<br />
E-<strong>HYBRIDE</strong> TRAIL 9000 LADY / MAN<br />
E-<strong>HYBRIDE</strong> TRAIL 4000 LADY / MAN<br />
E-<strong>HYBRIDE</strong> STREET LADY / MAN<br />
WARNING Danger from falls and accidents<br />
Defects and damage to the frame and suspension may lead to dangerous riding situations, falls,<br />
accidents and material damage.<br />
· Contact your specialist bicycle dealer immediately if you notice the slightest malfunction.<br />
· You should only use your EPAC again when it has been properly repaired by the specialist bicycle<br />
dealer.<br />
Malfunction Possible cause(s) Remedy<br />
Noises: Cracking, banging,<br />
grinding, etc.<br />
Saddle post slips into the frame<br />
or twists<br />
Frame, saddle post and/or<br />
suspension damaged<br />
Improper suspension function Suspension not correctly<br />
adjusted<br />
Improper suspension function<br />
despite correct adjustment<br />
The suspension fork cannot be<br />
locked<br />
Contact your specialist bicycle<br />
dealer immediately.<br />
Clamp too loose Check and increase the clamping<br />
force (see section 13.2.2)<br />
Saddle post diameter is too small Assembly of a saddle post with<br />
correct diameter<br />
Adjust correctly according to the<br />
component user manual supplied<br />
with the bike.<br />
The suspension is blocked Release the blockage (see<br />
section 7.3.2).<br />
Suspension damaged Contact your specialist bicycle<br />
dealer immediately.<br />
Actuation mechanism broken Please contact your specialist<br />
bicycle dealer.<br />
73
15.4 Luggage rack and lights<br />
74<br />
<strong>GHOST</strong> EPAC<br />
WARNING Danger from falls and accidents<br />
Defects and damage to the luggage rack and lights may lead to dangerous riding situations, falls,<br />
accidents and material damage.<br />
· Contact your specialist bicycle dealer immediately if you notice the slightest malfunction.<br />
· You should only use your EPAC again when it has been properly repaired by the specialist bicycle<br />
dealer.<br />
Malfunction Possible cause(s) Remedy<br />
Noises: Cracking, banging,<br />
grinding, etc.<br />
Lights partially or completely<br />
without function<br />
Mudguard or luggage rack parts<br />
loose<br />
Light fixtures (bulbs, LEDs)<br />
burned out<br />
Contact your specialist bicycle<br />
dealer immediately.<br />
Replace the bulb(s) Contact your<br />
specialist bicycle dealer.<br />
Cables damaged Contact your specialist bicycle<br />
dealer immediately.<br />
Dynamo defective<br />
15.5 Wheels and tyres<br />
WARNING<br />
Danger from falls and accidents<br />
Defects and damage to the wheels and tyres may lead to dangerous riding situations, falls, accidents<br />
and material damage.<br />
· Contact your specialist bicycle dealer immediately if you notice the slightest malfunction.<br />
· You should only use your EPAC again when it has been properly repaired by the specialist bicycle<br />
dealer.<br />
NOTE:<br />
Your rear wheel has a self-repairing tube which immediately seals holes caused by small items such as<br />
pieces of glass, small stones, thorns or small nails.<br />
The tube is not able to seal large holes. In this case you could not repair the problem yourself if you installed<br />
a spare tube. Due to the size of the cut this would expand out of the tyre while being pumped up and burst<br />
after a short time. In this case you must transport your EPAC to the nearest specialist bicycle dealer to have<br />
the tyres completely replaced.
Malfunction Possible cause(s) Remedy<br />
Wheels “jump” · Tyre damaged<br />
· Spoke broken<br />
Noises: Cracking, banging,<br />
grinding, etc.<br />
Foreign matter has become<br />
trapped in the wheel<br />
E-<strong>HYBRIDE</strong> TRAIL 9000 LADY / MAN<br />
E-<strong>HYBRIDE</strong> TRAIL 4000 LADY / MAN<br />
E-<strong>HYBRIDE</strong> STREET LADY / MAN<br />
Contact your specialist bicycle<br />
dealer immediately.<br />
Remove the foreign matter. Use<br />
your EPAC very carefully after<br />
this.<br />
Have your EPAC checked in an<br />
approved workshop for possible<br />
consequential damage.<br />
Damage to the wheel Contact your specialist bicycle<br />
dealer immediately.<br />
“Spongy” riding behaviour Tyre pressure too low Increase the air pressure (see<br />
section 6.1.2). If the same riding<br />
behaviour occurs again fairly<br />
shortly thereafter, the tyre has a<br />
slow puncture (see next line).<br />
· Increasingly “spongy” riding<br />
behaviour<br />
· Very unusual wheel rolling<br />
behaviour (you feel every<br />
small stone)<br />
Flat tyre Front tyre flat: Replace the inner<br />
tube, as well as the tyre and<br />
tube protector if necessary, see<br />
section 15.5.1.<br />
Rear tyre flat:<br />
Take your EPAC to a specialist<br />
workshop without delay. The<br />
EPAC must not be used until<br />
then.<br />
WARNUNG<br />
Danger of injury through falls,<br />
accidents and damage<br />
The rear wheel of your EPAC<br />
may only be dismantled<br />
and installed by specialist<br />
workshops.<br />
When the work is carried out<br />
at your specialist workshop<br />
you should insist on the<br />
installation of a self-repairing<br />
inner tube.<br />
75
15.5.1 Front tyre flat<br />
76<br />
WARNING Danger from falls and accidents<br />
Mistakes during the repair of the front wheel can result in dangerous riding behaviour.<br />
You should only carry out these repairs yourself if you have the necessary tools available.<br />
In order to repair a flat tyre you need the following equipment/tools:<br />
· 2 tyre irons<br />
· Inner tube (new) with automatic valve for tyre size 26 x 2.1<br />
· New tyre, if necessary<br />
· Air pump with pump head suitable for the valve<br />
1. Dismantle the front wheel.<br />
See section 13.1.1, Dismantling the front wheel.<br />
2. Unscrew the valve nut as far as it will go.<br />
3. Press the valve with your finger until all of the residual air has escaped.<br />
4. Remove the nut from the valve base.<br />
5. Lift the tyre off the rim using the tyre irons. Begin on the side opposite the valve.<br />
6. Pull the inner tube out of the tyre. Note the direction of the inner tube in the tyre.<br />
7. Look for the cause of the flat tyre:<br />
· Pump up the damaged inner tube.<br />
· Search for the point where the air is escaping.<br />
· When you have found the leak:<br />
turn the inner tube in on itself so that the valve is pointing inwards.<br />
8. If the leak is on the inside:<br />
<strong>GHOST</strong> EPAC<br />
· Check whether the tube protector is correctly fitted:<br />
all spoke holes must be covered.<br />
If this is not the case, please contact your specialist bicycle dealer.<br />
· Check the rim for damage (sharp edges, chippings etc).<br />
If you find such damage, please contact your specialist bicycle dealer.<br />
· Check whether there are one or two small holes next to each other.<br />
NOTE:<br />
Two small holes indicate a puncture (snakebite). This is a frequent cause when riding<br />
over sharp-edged obstacles with too little air pressure.<br />
If the rim is not damaged: install a new inner tube.<br />
9. If the leak is on the outside:<br />
· Hold the inner tube next to the rim with a tyre, as it was mounted. Check the area<br />
of the tyre where the hole is located in the inner tube. Often there is a thorn, a small<br />
stone or glass splinter in the tyre.
E-<strong>HYBRIDE</strong> TRAIL 9000 LADY / MAN<br />
E-<strong>HYBRIDE</strong> TRAIL 4000 LADY / MAN<br />
E-<strong>HYBRIDE</strong> STREET LADY / MAN<br />
CAUTION Danger of cuts<br />
If you feel the inside of the tyre with your thumb or finger, you might cut<br />
yourself on sharp-edged objects if these are still in the tyre.<br />
Avoid moving your thumb and fingers quickly along the inside walls of the<br />
tyre.<br />
You should feel the walls of the tyre with extreme caution.<br />
10. Remove the item causing the problem carefully with your fingernail, penknife or similar<br />
item. If the tyre has been damaged or cut over a large area, it also has to be renewed.<br />
If a tyre change is needed:<br />
1. Remove the old tyre completely from the rim.<br />
2. Mount the new tyre with one side on the rim. Make sure that the arrow indicating the<br />
direction of movement on the tyre is pointing in the direction of rotation when the EPAC is<br />
ridden.<br />
If no tyre change is needed:<br />
1. Pump up the new inner tube somewhat, so that it takes on its final shape.<br />
2. Insert the valve through the valve hole in the rim. The valve must be pointing towards the<br />
middle of the wheel.<br />
3. Now press the side of the tyre which is still outside the rim into the tube protector at the<br />
level of the valve.<br />
4. Press the external sides of the tyre into the tube protector at the same time around the<br />
circumference. Start at the valve.<br />
5. Opposite the valve the force required to press the tyre in may be greater. Use the tyre<br />
irons for this. Make sure that you do not damage the inner tube.<br />
6. Pump up the inner tube slightly.<br />
7. Move the tyre to and fro around the circumference at right angles to the direction of<br />
travel. Ensure that the tyre is positioned evenly on the rim and that the inner tube is not<br />
visible at any point.<br />
8. Pump the tyre up to the specified air pressure of 2.0 - 4.0 bar.<br />
9. Mount the front wheel in accordance with section 6, Installing the front wheel.<br />
10. Check the tyres.<br />
See section 6.1.2, Checking the tyres.<br />
77
15.6 Electric drive<br />
15.6.1 Gene<br />
78<br />
<strong>GHOST</strong> EPAC<br />
Malfunction Possible cause(s) Remedy<br />
No display Display not correctly attached Take the display off and attach it again (see<br />
section 10, Riding the EPAC, point 1)<br />
Rechargeable<br />
battery pack<br />
cannot be charged<br />
up<br />
Rechargeable battery pack flat Charge the rechargeable battery pack (see<br />
section 8.5.1, Charging the rechargeable<br />
battery pack)<br />
Rechargeable battery pack broken Please contact your specialist bicycle<br />
dealer.<br />
Cables damaged Please contact your specialist bicycle<br />
dealer.<br />
Rechargeable battery pack broken Please contact your specialist bicycle<br />
dealer.<br />
Charging device broken Please contact your specialist bicycle<br />
dealer.<br />
Drive not working Fault in the control system Carry out a fault diagnosis in accordance<br />
with section 15.6.2 .<br />
Drive does not<br />
supply enough<br />
power<br />
Rechargeable battery pack flat Charge the rechargeable battery pack (see<br />
section 8.5.1, Charging the rechargeable<br />
battery pack)<br />
Rechargeable battery pack broken Please contact your specialist bicycle<br />
dealer.<br />
Cables damaged Please contact your specialist bicycle<br />
dealer.<br />
Speed is over 25 km/h The drive is designed to switch off at<br />
speeds over 25 km/h.<br />
Control system fault Calibrate the drive in accordance with<br />
section 8.5.2.<br />
Rechargeable battery pack almost flat Charge the rechargeable battery pack (see<br />
section 8.5.1, Charging the rechargeable<br />
battery pack)<br />
Motor temperature too high due to<br />
excessive load<br />
Stop at an appropriate location and wait<br />
until the motor has cooled down.<br />
Otherwise the power of the drive is<br />
reduced until the motor temperature has<br />
gone down of its own accord.
Malfunction Possible cause(s) Remedy<br />
The drive does<br />
not switch off<br />
completely<br />
although the<br />
pedalling<br />
movement is<br />
stopped.<br />
Drive starts<br />
unintentionally<br />
Drive reacts after<br />
a delay<br />
Drive does not run<br />
smoothly<br />
The axle nuts on the rear wheel have been<br />
loosened and not re-tightened correctly.<br />
This affects the measurement system of<br />
the drive, which is required to determine<br />
the degree of assistance required, in a<br />
negative way. A faulty control system is the<br />
consequence.<br />
NOTE:<br />
Only your specialist bicycle dealer is<br />
allowed to carry out work on the rear<br />
wheel!<br />
If you place your foot on the pedal and<br />
move the wheels slightly, the electric drive<br />
will start up.<br />
Measurement system of the drive not<br />
calibrated<br />
Measurement system of the drive not<br />
calibrated<br />
Calibrate the drive temporarily in<br />
accordance with section 8.5.2.<br />
E-<strong>HYBRIDE</strong> TRAIL 9000 LADY / MAN<br />
E-<strong>HYBRIDE</strong> TRAIL 4000 LADY / MAN<br />
E-<strong>HYBRIDE</strong> STREET LADY / MAN<br />
Then take your EPAC to your specialist<br />
bicycle dealer without delay.<br />
· You should only put your foot<br />
on the pedal when you actually<br />
want to move off.<br />
· Always operate both brakes in<br />
a stationary position and only<br />
release them when you actually<br />
want to move off.<br />
Calibrate the drive in accordance with<br />
section 8.5.2.<br />
Calibrate the drive in accordance with<br />
section 8.5.2.<br />
79
15.6.2. Diagnosis messages<br />
80<br />
<strong>GHOST</strong> EPAC<br />
If a code number (E....) is displayed without a tool symbol, you may repair this yourself if the code number is<br />
listed below.<br />
NOTE:<br />
If the code number displayed is not listed here, or if the stated measures do not rectify the problem, please<br />
contact a specialist workshop immediatel<br />
Message Diagnosis Measures<br />
E01 Rechargeable battery pack is flat. Charge the rechargeable battery pack.<br />
E04 EPAC is connected to the<br />
charging device.<br />
Disconnect the charging device from the EPAC.<br />
E05 Poor connection to the motor Turn the pedalling assistance on again.<br />
E06 Short circuit in the lights Please contact your specialist bicycle dealer<br />
immediately.<br />
E07 Temperature of the motor is<br />
outside the temperature limits.<br />
Stop at an appropriate location and wait until<br />
the motor has cooled down.<br />
Otherwise the power of the drive is reduced<br />
until the motor temperature has gone down of<br />
its own accord.<br />
E14 Display is not recognised. The display has to be readjusted. Please<br />
contact your specialist bicycle dealer.<br />
E16 Continuous deflection of the force<br />
sensor<br />
E19 Temperature of the rechargeable<br />
battery pack is outside the<br />
temperature limits.<br />
Keep the light button pressed down for 5<br />
sections for calibration.<br />
Wait until the rechargeable battery pack is<br />
within the temperature limits. Charging then<br />
continues automatically.<br />
E20 Servicing required Please contact your specialist bicycle dealer<br />
immediately.<br />
E21 Motor current regulator The assistance is automatically readjusted due<br />
to excessive load.<br />
E22 Problems during charging Switch the lights on and off and wait for 10<br />
seconds.<br />
Connect the charging device.<br />
If this display is shown repeatedly, please<br />
contact your specialist bicycle dealer.<br />
E23 Serial number of the motor not<br />
correct<br />
E30 No communication with the<br />
torque sensor<br />
The code of the rechargeable battery pack and<br />
control unit do not match. Please contact your<br />
specialist bicycle dealer.<br />
Turn the pedalling assistance off and on again.<br />
E32 Battery electronics too hot Allow the rechargeable battery pack to cool<br />
down and then switch the assistance on again.<br />
E34 The control unit on the<br />
handlebars does not support any<br />
accessories<br />
Please contact your specialist bicycle dealer<br />
immediately.
E-<strong>HYBRIDE</strong> TRAIL 9000 LADY / MAN<br />
E-<strong>HYBRIDE</strong> TRAIL 4000 LADY / MAN<br />
E-<strong>HYBRIDE</strong> STREET LADY / MAN<br />
E99 Software error Please contact your specialist bicycle dealer<br />
immediately.<br />
81
16 Taking the EPAC out of operation<br />
82<br />
<strong>GHOST</strong> EPAC<br />
NOTE:<br />
The incorrect storage of your EPAC can damage the bearing, tyres and rechargeable battery pack and<br />
promote corrosion. Store your EPAC in accordance with the following instructions if you are not going to use<br />
your EPAC for more than 2 months.<br />
The ambient temperature at the storage location must be between –10°C and + 35°C.<br />
If you take your EPAC out of service for more than 2 months, you should charge up the rechargeable battery<br />
pack every 2 months in accordance with section 8.5.1, Charging the rechargeable battery pack.<br />
If you are not able to charge up the battery pack every two months, you can increase the storage time<br />
without charging to 6 months. For this, a fuse on the rechargeable battery pack has to be removed.<br />
1. Fully charge the rechargeable battery pack, see section 8.5.1, Charging the rechargeable<br />
battery pack.<br />
2. Ask your specialist bicycle dealer to remove the fuse from the rechargeable battery pack.<br />
3. Clean and service your EPAC as described in section 14.2, How to clean and care for<br />
your EPAC .<br />
4. Charge the rechargeable battery pack up.<br />
See section 8.5.1, Charging the rechargeable battery pack.<br />
5. Store your EPAC only in dry rooms where it is not exposed to dust.<br />
6. Use suitable bike stands (e.g. tripod).<br />
Consult your specialist bicycle dealer on this.<br />
7. If your EPAC is standing with one or both wheels on the floor:<br />
· Lift your EPAC every 2-3 weeks and turn the wheels a few rotations by hand.<br />
· Move the handlebars back and forth a few times.<br />
· Turn the crank by hand a few revolutions in the opposite direction to the drive.<br />
8. Before you put the EPAC back into service:<br />
· Have your specialist bicycle dealer reinsert the fuse before you use the EPAC again.<br />
· Charge up the rechargeable battery pack completely.<br />
· Perform the checks in accordance with section 6, Before Every Use.
17 Disposing of the EPAC<br />
E-<strong>HYBRIDE</strong> TRAIL 9000 LADY / MAN<br />
E-<strong>HYBRIDE</strong> TRAIL 4000 LADY / MAN<br />
E-<strong>HYBRIDE</strong> STREET LADY / MAN<br />
Like all electrical and electronic equipment, your EPAC contains substances which are harmful to the<br />
environment and human health, as well as materials which can be reused and recycled. In the European<br />
Economic Area (EEA) you are therefore obliged to keep your EPAC separate from the domestic waste and<br />
make use of a return and collection system.<br />
Dispose of your EPAC at a local authority collection point. Detailed information on the correct disposal of<br />
your EPAC can be obtained from your local authority or your specialist bicycle dealer.<br />
Tyres and inner tubes can be disposed of in the domestic waste.<br />
83
18 Appendix<br />
18.1 Warranty<br />
84<br />
<strong>GHOST</strong> EPAC<br />
The legally prescribed warranty period of two years applies in all cases to your EPAC. If a defect should<br />
occur to your EPAC within this period, please contact the specialist bicycle dealer where you bought your<br />
EPAC.<br />
18.2 Guarantee<br />
In addition to the statutory warranty, the firm <strong>GHOST</strong>-Bikes provides a durability guarantee of five years,<br />
provided that you - as the end-customer - complete the guarantee card accompanying your EPAC and sends<br />
it to the firm <strong>GHOST</strong>-Bikes. Alternatively, you can complete an online registration on the <strong>GHOST</strong> website.<br />
The guarantee period begins with the purchase of the EPAC by you as the end-customer from an authorised<br />
dealer. If the guarantee card is not returned to the firm <strong>GHOST</strong>-Bikes or the EPAC is not registered online,<br />
no guarantee will apply. This guarantee does not infringe your warranty entitlements.<br />
The guarantee applies only to the frame construction and not to the paintwork and decoration.<br />
The guarantee does not cover:<br />
· faults and damage attributable to a failure to observe the instructions and tips given in the user manual.<br />
· faults and damage attributable to force majeure, accident, improper use, incorrectly performed repairs,<br />
lack of maintenance and care or to wear and tear.<br />
· faults and damage attributable to original spare parts not being used when replacing parts.<br />
· changes to the product without the prior agreement of the firm <strong>GHOST</strong>-Bikes, insofar as defects and<br />
damage are attributable to these.<br />
In the event of a complaint within the above guarantee period but outside the statutory warranty period,<br />
only the defective frame will be repaired or replaced. Costs for any necessary modification of components<br />
or the shipping of a frame within the stated period will not be assumed or refunded. The frames concerned<br />
therefore have to be dismantled and sent carriage paid to the firm <strong>GHOST</strong>-Bikes. In cases where the frame<br />
is replaced within the guarantee period, the guarantee period begins again for the new frame from the time<br />
of replacement.<br />
Should a frame of the same type no longer be available if it becomes necessary to replace a frame, <strong>GHOST</strong>-<br />
Bikes reserves the right to supply an alternative frame which may differ in form and colour from the original<br />
frame, but which is of an equal or higher quality.<br />
The warranty entitlements continue to apply alongside this guarantee.<br />
Additional guarantee on the electric drive<br />
A two-year guarantee is provided on the electric parts of your EPAC (display, monitor and rechargeable<br />
battery pack). However, within the first two years of the purchase of your new E-bike you have the<br />
opportunity to extend the guarantee period by three years to a total of five years.<br />
The guarantee does not cover:<br />
· faults and damage attributable to a failure to observe the instructions and tips given in the user manual.<br />
· faults and damage attributable to force majeure, accident, improper use, incorrectly performed repairs,<br />
lack of maintenance and care or to wear and tear.
E-<strong>HYBRIDE</strong> TRAIL 9000 LADY / MAN<br />
E-<strong>HYBRIDE</strong> TRAIL 4000 LADY / MAN<br />
E-<strong>HYBRIDE</strong> STREET LADY / MAN<br />
· faults and damage attributable to original spare parts not being used when replacing parts.<br />
· changes to the product without the prior agreement of the firm <strong>GHOST</strong>-Bikes, insofar as defects and<br />
damage are attributable to these.<br />
If you have any questions, please contact your specialist bicycle dealer.<br />
85
18.3 EC Declaration of Conformity<br />
86<br />
<strong>GHOST</strong> EPAC
E-<strong>HYBRIDE</strong> TRAIL 9000 LADY / MAN<br />
E-<strong>HYBRIDE</strong> TRAIL 4000 LADY / MAN<br />
E-<strong>HYBRIDE</strong> STREET LADY / MAN<br />
87
88<br />
Imprint<br />
Manufacturer: <strong>GHOST</strong> Bikes GmbH<br />
An der Tongrube 3<br />
95652 Waldsassen<br />
Germany<br />
Fon: +49 9632 92550<br />
Fax: +49 9632 925516<br />
www.ghost-bikes.com<br />
info@ghost-bikes.de<br />
Consulting: Andreas Zauhar, Dipl.-Ing. FH,<br />
Assessor for bike damage and valuations officially approved and<br />
certified by the Chamber of Trade and Industry for Munich and Upper Bavaria<br />
Horner Straße 12d<br />
83329 Waging – Tettenhausen<br />
Germany<br />
Fon: + 49 8681 4779284<br />
Fax: + 49 8681 4779285<br />
www.andreas-zauhar.de<br />
kontakt@andreas-zauhar.de
1<br />
Illustrations / Terms<br />
· Dropout C5<br />
· Battery / rechargeable battery pack A1<br />
· Tyres A2<br />
· Brake made up of B1, A3, A4<br />
· Brake lever B1<br />
· Brake calliper A3<br />
· Brake disc A4<br />
· Socket H1<br />
· Display B2<br />
· Suspension fork A5<br />
· Rim C1<br />
· Fork A5<br />
· Fork steering tube D1<br />
· Grip (handlebar grip) B3<br />
· Rear wheel A6<br />
· Rear wheel hub A7, C9<br />
· Cable C2<br />
· Chain A8<br />
· Chainring A9<br />
· Chainring screw A25<br />
· Chain stud C6<br />
· Chain link C7<br />
· Chain link plate C8<br />
· Crankset made up of A25, A9, A11<br />
· Chain stay A10<br />
· Clamp E2, F3<br />
· Click pedal F1<br />
· Crank A11<br />
· Crankset made up of A25, A9, A11<br />
· Charging device I4<br />
· Handlebars B5<br />
· Handlebar stem A12<br />
· Motor A7, C9<br />
· Hub, rear A7, C9<br />
· Hub, front A26<br />
<strong>GHOST</strong>-BIKES
2<br />
· Mains lead I3<br />
· Top tube A13<br />
· Pedal A14<br />
· Frame made up of C5, A10, A13, A16, A19, A20<br />
· Remote control lever B6<br />
· Tyres A2<br />
· Tyre iron (appearance varies according to manufacturer) I1<br />
· Sprocket C10<br />
· Saddle A15<br />
· Seat clamp screw(s) A27<br />
· Seat tube A16<br />
· Seat stay A19<br />
· Saddle post A17<br />
· Saddle post clamp made up of E1, E2, E3, E4<br />
· Seatpost clamp bolt(s) E1<br />
· Seatpost clamp E2<br />
· Switch F2<br />
· Gearlever F2<br />
· Rear derailleur A18<br />
· Rear derailleur wheel A24<br />
· Gearshift cable C3<br />
· Disc brake made up of B1, A3, A4<br />
· Inner tube<br />
· Quick-release axle E3<br />
· Quick-release unit made up of E3, E4<br />
· Fork tube D2<br />
· Quick-release lever E4<br />
· Seat tube A16<br />
· Seat stay A19<br />
· Spoke C4<br />
· Thru axle D4<br />
· Plug I2<br />
· Head tube A20<br />
· Headset B4<br />
· Dip tube D3<br />
· Type plate A28<br />
· Front derailleur A21<br />
<strong>GHOST</strong>-BIKES
3<br />
· Down tube A22<br />
· Valve G3<br />
· Valve cap G2<br />
· Valve nut G1<br />
· Handlebar stem A12<br />
· Front wheel A23<br />
· Front wheel hub A26<br />
· Geared ring C10<br />
· Geared ring cassette made up of several C10<br />
1.1 Numbering / Classification<br />
Illustration A<br />
A1: Battery / battery pack (located in the down tube A22)<br />
A2: Tyres<br />
A3: Brake calliper<br />
A4: Brake disc<br />
A5: Suspension fork / fork<br />
A6: Rear wheel<br />
A7: Rear wheel hub, hub, rear; motor<br />
A8: Chain<br />
<strong>GHOST</strong>-BIKES
4<br />
A9: Chainring<br />
A10: Chain stay<br />
A11: Crank<br />
A12: Handlebar stem, stem<br />
A13: Top tube<br />
A14: Pedal<br />
A15: Saddle<br />
A16: Seat tube<br />
A17: Saddle support<br />
A18: Derailleur<br />
A19: Seat stay<br />
A20: Head tube<br />
A21: Front derailleur<br />
A22: Down tube<br />
A23: Front wheel<br />
A24: Rear derailleur wheel<br />
A25: Chainring screw<br />
A26: Hub, front, front wheel hub<br />
A27: Seat clamp screw(s)<br />
A28: Type plate (on the top tube)<br />
Illustration B<br />
B1: Brake lever<br />
B2: Display<br />
B3: Grip (handlebar grip)<br />
B4: Headset<br />
<strong>GHOST</strong>-BIKES
5<br />
B5: Handlebars<br />
B6: Remote control lever<br />
Illustration C<br />
C1: Rim<br />
C2: Cable<br />
C3: Gearshift cable<br />
C4: Spoke<br />
C5: Dropout<br />
C6: Chain stud<br />
C7: Chain link<br />
C8: Chain link plate<br />
C9: Motor, hub, rear, rear wheel hub<br />
C10: Sprocket, geared ring<br />
Illustration D<br />
D1: Fork steering tube<br />
D2: Fork tube<br />
D3: Dip tube<br />
D4: Thru axle<br />
<strong>GHOST</strong>-BIKES
6<br />
Illustration E<br />
E1: Seatpost clamp bolt<br />
E2: Seatpost clamp, clamp<br />
E3: Quick-release axle<br />
E4: Quick-release lever<br />
Illustration F<br />
F1: Click pedal<br />
F2: Switch, gear lever<br />
<strong>GHOST</strong>-BIKES
7<br />
Illustration G<br />
G1: Valve nut<br />
G2: Valve cap<br />
G3: Valve<br />
G4: Inner tube<br />
Illustration H<br />
H1: Socket<br />
<strong>GHOST</strong>-BIKES
8<br />
Illustration I<br />
I1: Tyre iron (appearance varies according to manufacturer) I1<br />
I2: Plug<br />
I3: Mains lead<br />
I4: Charging device<br />
<strong>GHOST</strong>-BIKES