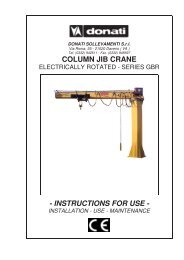
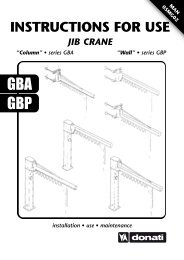
JIB CRANES WITH AN ARTICULATED ARM MANUALLY ROTATED
JIB CRANES WITH AN ARTICULATED ARM MANUALLY ROTATED
JIB CRANES WITH AN ARTICULATED ARM MANUALLY ROTATED

Create successful ePaper yourself
Turn your PDF publications into a flip-book with our unique Google optimized e-Paper software.
DONATI SOLLEVAMENTI S.r.l. - Via Roma, 55 - 21020 Daverio (VA) - Tel. 0332 942611 - Fax. 0332 948597<br />
4.3.4 Assembly of the bracket – For MBB wall-mounted cranes<br />
• The fixing of the bracket to the support structure can take place as follows:<br />
• using brackets with the related staybolts<br />
• using bolts and screw anchors or dowelling.<br />
• The fixing of the bracket using bolts and screw anchors or dowelling,<br />
requires a scrupulous check of suitability in relation to the type of support.<br />
• Technical data, so that the user can scale the fixings to the right size are<br />
shown in the table at paragraph 2.2.7 (“Fixing systems”-page 12).<br />
• The suitability checks of the support structure are the responsibility of the<br />
user and must be carried out by expert technicians who evaluate the<br />
feasibility and take on the related responsibilities.<br />
Assembly of the brackets to the pillar or load-bearing wall:<br />
1. Screw up the nuts 1 on the four staybolts T and insert the contrast panels 2 (fig. 27).<br />
2. Assemble the two brackets, the front one 3 and the back one 4, for the fixing of the upper part of the<br />
bracket, in such a position to obtain the required height under the arm of the crane, inserting the safety<br />
washers 5 and the cramping nuts 6 on the staybolts T (fig.28).<br />
3. Pretighten the nuts 6 to ensure good adherence to the pillar brackets (fig.29).<br />
fig.27<br />
Assembly of the bracket:<br />
fig.28<br />
26<br />
fig.29<br />
Assemble on bracket 1 the other front bracket 2 ( fig.30 ).<br />
1. Lift the bracket to a height with suitable equipment, by putting it in the sling as shown and fix it to the<br />
front bracket previously positioned on the pillar ( fig.31 ).<br />
2. Assemble on the front bracket fixed on the bracket, the other back bracket (fig. 36). (Refer to the<br />
preceding point “Assembly of the brackets” at positions 1 and 2)<br />
fig.30<br />
fig.31<br />
fig.32