

TMF Quarterly - Tulsa Modelers Forum
TMF Quarterly - Tulsa Modelers Forum
TMF Quarterly - Tulsa Modelers Forum

You also want an ePaper? Increase the reach of your titles
YUMPU automatically turns print PDFs into web optimized ePapers that Google loves.
The Official Publication of the <strong>Tulsa</strong> Modeler’s <strong>Forum</strong> July-September 2012 Volume 1 Issue 3<br />
Modeling History<br />
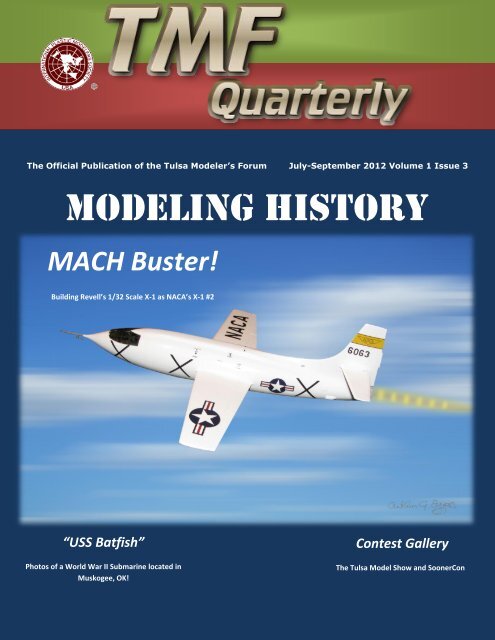
MACH Buster!<br />
Building Revell’s 1/32 Scale X-1 as NACA’s X-1 #2<br />
“USS Batfish”<br />
Photos of a World War II Submarine located in<br />
Muskogee, OK!<br />
Contest Gallery<br />
The <strong>Tulsa</strong> Model Show and SoonerCon
When you’re ready to take your aviation art seriously...<br />
“LOW LEVEL HELL”<br />
OH-6A Cayuse- C TROOP 16 th CAV - “electric olive II” – SIGNED BY ROD WILLIS – LIMITED TO 10 PRINTS<br />
OH-6A Cayuse- C TROOP 16 th CAV - “MISS CLAWD IV” – SIGNED BY HUGH MILLS – LIMITED TO 10 PRINTS<br />
“Our Aviation Art Takes Flight!”<br />
Digital Color Aircraft Profiles and Pen & Ink Artwork<br />
Air Wing Graphics prints available at The Hussar!<br />
See these and more at: http://fineartamerica.com/profiles/arthur-eggers.html<br />
All artwork © Air Wing Graphics/Art Eggers
<strong>Tulsa</strong> Modeler’s <strong>Forum</strong><br />
The <strong>Tulsa</strong> Modeler’s <strong>Forum</strong> meets from 7-9pm<br />
on the first Tuesday of every month at<br />
HobbyTown USA located at 71 st & Memorial.<br />
<strong>Tulsa</strong> Modeler’s <strong>Forum</strong> <strong>Quarterly</strong> is the quarterly<br />
publication of the <strong>Tulsa</strong> <strong>Modelers</strong> <strong>Forum</strong>. This is a<br />
digital only publication. No part of this<br />
publication maybe reproduced without the<br />
express permission of the <strong>Tulsa</strong> Modeler’s<br />
<strong>Forum</strong>.<br />
Advertising: If you are interested in advertising in<br />
the <strong>TMF</strong> <strong>Quarterly</strong>, please contact us at<br />
tulsaipms@cox.net<br />
Subscription Rates: Membership in the <strong>Tulsa</strong><br />
<strong>Modelers</strong> <strong>Forum</strong> is $12.00 per year for adults (18<br />
or older) and $6.00 for juniors (17 and younger).<br />
Cover Photo: Steve Eggers’ 1/32 scale Bell<br />
Aircraft X-1, supersonic research aircraft by<br />
Revell.<br />
3<br />
Features<br />
9 MachBuster<br />
Building Revell’s 1/32 scale X-1 as NACA’s X-1 #2 research aircraft<br />
16 The <strong>Tulsa</strong> Show<br />
HMSNEO host’s their annual event!<br />
18 SoonerCon<br />
IPMS Metro/OKC host’s their annual event!<br />
23 1/1 Scale – USS Batfish<br />
World War II Submarine in Muskogee, OK!
Editor’s Page<br />
The Topic for this Quarter:<br />
“Modeling history”<br />
When I decided to take up scale modeling as my<br />
hobby, 26 years ago, I remember going to my first few model<br />
meetings in Amarillo, Texas and seeing a bumper sticker<br />
that had artwork of a hand with an F-15 flying out of it. The<br />
text read something like, “Scale Modeling…Holding History<br />
in Your Hands.” This got me thinking. I looked at the models<br />
in my display case and I realized how much history I have<br />
portrayed in that case. Every model in my display case has a<br />
story, whether it is a history on a model and the markings it<br />
is displayed in or even a personal history of what it took to<br />
build and finish that model.<br />
Think about the amount of time you spend<br />
researching a particular subject. I’m sure that it’s in the tens,<br />
maybe even into the hundreds, of hours. The amount of<br />
research that goes into these subjects could almost classify<br />
a person as an amateur historian in your particular area of<br />
interest. In my case, my area of interest is USAF aircraft<br />
1947 to Present, experimental, R&D, 1950-1960’s aircraft,<br />
Rotary Wing and Science Fiction.<br />
With my most recent completion, Revell’s Bell X-1, I<br />
spent many hours researching photos from the Dryden web<br />
site. I scoured through web articles on building the Revell kit.<br />
I dug out old books that I had on the subject of research and<br />
developmental aircraft. I even called NASA for references. I<br />
went so far as to search for the proper technique of spraying<br />
and polishing white lacquer paint. I learned/rediscovered<br />
many things with this build, such as:<br />
History<br />
X-1, 46-063, the number two aircraft of the<br />
X-1 series, was the first X-1 to fly.<br />
4<br />
Technique<br />
6063 was turned over to the NACA on 25<br />
September 1947<br />
10 March 1948 – NACA pilot Herb Hoover<br />
became the first civilian to break the sound<br />
barrier @ Mach 1.065. (You never read<br />
about that in the aviation history books.)<br />
6063 was grounded on 23 Oct 1951 due to<br />
possible nitrogen sphere fatigue.<br />
6063 was remanufactured as the X-1E and<br />
continued to fly in the X-1E configuration<br />
until 1958.<br />
The X-1 cockpit area is hard to mask over<br />
with all the stuff in there. Why did I put all<br />
that stuff in the cockpit?<br />
I hate white paint.<br />
Wait 12 hours for the paint to cure, and then<br />
wet sand with 2000 grit.<br />
Reapply paint; wait for the paint to cure and<br />
then polish.<br />
When polishing, be sure to keep polishing<br />
compound on the pad and don’t let it dry out.<br />
When decaling, use distilled water. Tap<br />
water has “stuff” in it that will ruin the finish<br />
on your models years later.<br />
So, the next time you look at your model display;<br />
don’t look at them like a bunch of models sitting on a<br />
shelf, think of them as history in miniature, each one<br />
with their own unique story.<br />
- Steve Eggers<br />
Editor
NEW<br />
1/72 scale Bell X-1E Decals only $10.00<br />
1/48 scale Bell X-1E Decals only $12.50<br />
ISS Exploded View Photo in 13” X 19” Graphic Format $16.50<br />
Two Die-Cut Circle Images for “When Worlds Collide! $12.50<br />
Adams<br />
“Vanguard At Cape Canaveral “ $16.00<br />
“Thor At White Sands” $12.00<br />
Airfix<br />
1/125 Ariane 5 Decals with Helios 2B Logo $10.00<br />
1/96 Ariane 5 Decals with Helios 2B Logo $16.50<br />
AMT<br />
Man In Space Decals 1/200 $12.50<br />
Aurora<br />
1/144 Space Shuttle Orion 2001 Decals (Also fits Airfix) $7.00<br />
1/72 Aurora Lunar Probe Digital Decals (# 385) $16.50<br />
1/48 Ryan X-13 Vertijet Decal $16.50<br />
1/48 Bomarc with & without Launcher decals $12.50<br />
1/48 Regulus - ll Missile Now available $16.50<br />
1/48 Mace Decals $16.50<br />
Hawk<br />
Tactical Guided Missile # 554 Corporal Missile $12.50<br />
3 Rocket Power Guided Missiles Decals $10.00<br />
3 Rocket Power Guided Missiles Replacement Mat (2-sided) $10.00 OOP<br />
“ Project Vanguard Satellite” Decals kit # 515 $12.50<br />
Atlas Manned Orbiting Lab Kit *551 New Lettering & Artwork $16.50<br />
Heller<br />
1/125 ISS Station and Panels $16.50<br />
1/72 TWA markings for Connie –1 ½ pages $12.50<br />
Lindberg<br />
Mars Probe Space Transport $16.00<br />
Space Shuttle Tile Decal (underside of shuttle only) for The 1/200 $10.00<br />
U.S. Moon Ship No.1003 Digital Decals. $12.50<br />
Flying Saucer Decal - From Another World ! $5.00<br />
1/48 Convair XFY-1 VTO POGO Decals (Also fits Aurora 1/48 POGO) $12.00<br />
Mach2<br />
1/72 Seadart Set $14.00<br />
Monogram<br />
# 6061 Apollo Spacecraft 1/32 scale Decals $14.00<br />
PD-40 U.S. Missile set decals for this classic kit at 1/128 scale – 2 sheets $30.00<br />
PD-40 U.S. Missile set Mat for the Display stand. $16.50 OOP<br />
Rascal Missile PD-42 Decals $16.50<br />
1/96 Monogram TV Orbiter $12.50<br />
PA-56 “Air Power” Decals Famed aircraft set !! $30.00<br />
Original artwork for PA-29 Blue Angels decals ! $16.50<br />
Strombecker<br />
Moonliner Decals with correct color Red (also fits Glencoe kit) $10.00<br />
What’s New<br />
Rockets, Missiles, Spacecraft and Aircraft Decals for New & Classic Kits<br />
Prices are constantly changing in mail service and on some of my list prices.<br />
Please email me first prior to paying so I can give you an accurate amount for shipping.<br />
By Ed Bisconti Current as of: 5/29/2012<br />
If you want to see what a particular decal below looks like then send me your email.<br />
You can reach me at scifi77@aol.com<br />
5<br />
D-32“Space Station” decals - Includes red and black S-1 decal (fits Glencoe) $10.00<br />
D-26 Man in Space D-26 RX- 1 (also fits Glencoe kit ) $16.50<br />
Manned Nuclear Interplanetary Vehicle $16.50<br />
RM-1 Original “Man In Space Series” $10.00<br />
Satellite Launcher D-35 Replaces Paper Insert $16.00<br />
Sea Dart U.S. Navy Decals $16.00<br />
Pan Am Decals for the TWA Moonliner kit (Fits Glencoe) $7.00<br />
Revell<br />
1/110 scale “Everything is Go” #1833 Decal Set $16.50<br />
1/40 Nike Hercules Decals $16.50.<br />
Convair Atlas Digital Decals – 1822 $20.00<br />
H-248 United DC-8 Jet Mainliner Decals $16.50<br />
H-1825 Moon Ship $12.00<br />
H-1805 Space Station $30.00<br />
H-1800 XSL-01 Manned Space Ship Decals $16.00<br />
8639 Thor & Jupiter Set $16.50<br />
H-1823 Thor & Thor Able Missile $14.00<br />
H-1824 Jupiter with truck & trailer $14.00<br />
Convair Space Shuttlecraft Digital Decals # 1828 $8.00<br />
Helios H-1851 $14.00<br />
Helios H-1829 Decal Set $14.00<br />
Old B-24 Decals $12.00<br />
17 Missile Decal set with new lettering $12.50<br />
1/96 Saturn V Digital Decal Set $16.50<br />
1/144 TWA markings Constellation aircraft models. (Fits Minicraft) $8.00<br />
1/144 Revell ISS Solar Panels (Need kit to measure scale)<br />
ISS Update for the Revell 1/144 International Space Station $16.50<br />
1/32 BELL X-1 Digital TEXT Lettering Decals* The Clearest Letters Ever seen. $14.00<br />
SkunkModels<br />
RQ- 4B UAV NASA version Redesigned $16.50<br />
Tuskegee Airman Lee Anchor Honored on RQ-4B UAV Global Hawk Aircraft No.<br />
512010 $12.50<br />
1/48 TM-76 Mace Missile & Trailer Decals (Fits Resin kits,Topping and can be used<br />
on Hawk kit. (Renwal Style) Currently back in Production.) $12.00<br />
1/200 Space Shuttle Tiles $12.50<br />
1/32 Apollo Spacecraft Kit 6061 Now $10.00<br />
Digital 1:72 Monogram Revell Space Shuttle Decals $14.00<br />
1/72 Space Orbiter Update Decal $12.00<br />
1/144 Space Orbiter Update Decal $10.00<br />
SPACE SHUTTLE TILE SETS<br />
Revell 1/72 Space Shuttle Tiles $46.00<br />
Available nowhere else not even on the internet. U.S. plus Priority mail postage<br />
and insurance By postal area per USPS now.<br />
International Priority Rates Apply. Canada can get 1st class rates or Priority mail.<br />
International rates quoted for postage by country.<br />
1/144 Shuttle Decal Set $20 plus postage<br />
1/288 Shuttle Decal Set $8 plus postage<br />
1/72 Space Orbiter Update Decal $12.50<br />
1/144 Space Orbiter Update Decal $10.00<br />
PDF format 1/72 Digital Decal Atlantis Cockpit Panels for your Space Shuttle 10.00<br />
1/144 Launch Tower & Space Shuttle Decals $12.50<br />
1/100 Tamiya Space Orbiter Update Decal $12.50<br />
1/100 Tamiya Space Orbiter Standard Decal Set $8.00<br />
New in 2009 Monogram PS193 1/144 Apollo Saturn Decals with Flags $12.50
AIRCRAFT, X-15 & Misc.<br />
1/48 X-15 The Definitive Historical Set Decals $30.00<br />
The Never before seen ( I drew these decals via computer ) Ventral tail markings<br />
of 10 X-15's The never issued Little Joe ll Dice insiginia for the nose area of the<br />
aircraft and much more! I have created special artwork that you will find nowhere<br />
else for any 1/48 X-15 !! Includes White X-15A2 Version (Red Decals) in 1:48 Scale<br />
Copyright 2006 -2007<br />
Comprehensive 1/32 X-15 Digital Decal set for 2010 - 2 ½ sheets of decals. For the<br />
Special Hobby 1/32 X-15 kits. $40.00 On Sale for $30.<br />
1/72 X-15 Decals same as above with X-15A2 White version red decals ! $12.50<br />
1/48 &1/72 X-15 Instrument Panel Decals only (either Set) Special Order ! $9.00<br />
OOP<br />
1/144 X-15 Set Complete. World’s smallest set $5.00<br />
1/48 F/A 18-C Hornet Operation Iraqi Freedom Decals. $14.00<br />
ARMOR<br />
Renwal Armor - Military Decals<br />
Renwal Big Shot Decals 2 Versions $10.00<br />
Atomic Cannon Decals 1/32 scale $20.00<br />
Walker Bulldog Tank $16.00<br />
Renwal Ontos decals $10.00<br />
Renwal Wrecker 1/32 U.S. Army Truck $12.00<br />
New-Re-mastered Renwal / Revell Nike Missile decals $12.00<br />
Renwal / Revell 1/32 Hawk Guided Missile System decals $12.00<br />
Renwal MACE Tera-Cruzer Decal set also fits Revell Kit. $16.50<br />
1:32 Revell / Renwal MACE TM-76 Missile Decals $16.50<br />
M4A3 US Marine "BEELZABUB" At Iwo Jima 1/35 Tank Decals $12.50<br />
NASA RESCUE M113*DECAL*By Mike Del Vecchio @ 1/35 Scale $14.50<br />
Aug. 2011 RESCUE M113*DECAL*By Mike Del Vecchio @ 1/72 Scale $10.00<br />
MACE TAC for Revell Mace and Teracruzer $14.00<br />
Air Support for Ground Troops and ARMOR<br />
Monogram “Phantom Huey” 1:24 Decal set 2 Decals $20.00<br />
Monogram “Phantom Huey” 1:35 Decal set 2 Decals $12.50<br />
Monogram “Phantom Huey” 1:48 Decal set 2 Decals $12.50<br />
What’s New<br />
6<br />
Monogram “Tour of Duty” 1:24 Decal set 2 Decals $16.50<br />
Monogram “Tour of Duty” 1:35 Decal set 2 Decals $14.00<br />
Monogram “Tour of Duty” 1:48 Decal set 2 Decals $12.00<br />
Monogram “Razor Backs” 1:24 Decal set 2 Decals $16.50<br />
Monogram “Razor Backs” 1:48 Decal set 2 Decals $12.50<br />
Monogram “Razor Backs” 1:72 Decal set 2 Decals $10.00<br />
Monogram “Nevada Dice” 1:24 Decal set 2 Decals $16.50<br />
Monogram “Nevada Dice” 1:35 Decal set 2 Decals $12.50<br />
Missiles, CDs & MISC.<br />
Nike Missile CD’s Vol - l & Vol – ll By Military Historian Ed Bisconti $20.00<br />
Plastic Rockets, Missiles & Spacecraft Vol - l CD's $20.00<br />
Plastic Rockets, Missiles & Spacecraft Vol - ll CD's $20.00<br />
INCLUDES AUTHOR'S EXCLUSIVE GUS "GRISSOM 8MM FILM" - Report Plus Decals<br />
The Renwal Armor Recon Report”Ontos” By Ed Bisconti $15.00<br />
“New” 1/48 NASA Decal Logos, also fits 1/72, 1/44 and 1/96 scale rockets , aircraft,<br />
spacecraft and missiles $10 for per decal sheet 5 ½ X 8 ½ Flags<br />
1/48 U.S. flags 50 star $5.00 on white paper. New digital Images for U.S. aircraft.<br />
1/48 U.S. flags 50 star slanted $5.00 on white paper. New digital Images for U.S<br />
Aircraft OOP<br />
1/48 U.S. flags 48 star $5.00 on white paper. New digital Images for U.S. aircraft<br />
OOP<br />
More Rockets, Missiles & Spacecraft<br />
2008 Monogram US & USSR Missiles Kit # 6019 Decals $12.00<br />
2010 Update to 5904 above and 6019 and Revell kits ! $12.50<br />
2008 Monogram 36 Missiles 6055 $14.50<br />
2008 Historically accurate Aurora Astronaut lll New NASA emblem artwork. $6.00<br />
1/48 RENWAL / Palmer Vanguard Decal set $16.50.<br />
MONOGRAM PD-43 U.S. MISSILE Arsenal Set $20.00<br />
MONOGRAM PD-40 U.S. MISSILE MAT 4 Your Base $16.50<br />
Revell Tactical Missile Set No. H-812 and H-547 for $15.00
NEWSLETTERS WORK WHEN THE MEMBERS CONTRIBUTE!<br />
7
History<br />
26 May 1950 – NACA pilot John Griffith breaks Mach 1.2<br />
Modeling history:<br />
Building Revell’s 1/32 Scale Bell X-1 as a NACA Research Aircraft<br />
On 16 March 1945, the United States Army Air Forces' Flight<br />
Test Division and the National Advisory Committee for<br />
Aeronautics (NACA) contracted Bell Aircraft to build three X-<br />
1 aircraft to obtain flight data on conditions in the transonic<br />
speed range.<br />
The X-1 was in principle a "bullet with wings", its shape<br />
closely resembled the Browning .50-caliber (12.7 mm)<br />
machine gun bullet that was known to be stable in<br />
supersonic flight. The pattern shape was followed to the<br />
point of seating the pilot behind a sloped, framed window<br />
inside a confined cockpit in the nose, with no ejection seat.<br />
After the aircraft ran into compressibility problems in 1947, it<br />
was modified to feature a variable-incidence tail plane<br />
(Flying Tail).<br />
Bell Aircraft Chief Test Pilot, Jack Woolams became the first<br />
to fly the X-1, in a glide flight over Pinecastle Army Airfield, in<br />
by Steve Eggers<br />
9<br />
Florida, on 25 January 1946. Woolams would complete nine<br />
additional glide flights over Pinecastle before March 1946,<br />
when the #1 aircraft was returned to Bell for modifications in<br />
anticipation of the powered flight tests, planned for Muroc<br />
Army Air Field in California. Later, Chalmers "Slick" Goodlin<br />
would become the primary Bell Aircraft test pilot of X-1-1<br />
(serial 46-062). He made 26 successful flights in both of the<br />
X-1 aircraft from September 1946 until June 1947.<br />
The Army Air Force was unhappy with the cautious pace of<br />
flight envelope expansion and Bell Aircraft's flight test<br />
contract for aircraft #46-062 was terminated and was taken<br />
over by the Army Air Force Flight Test Division on 24 June<br />
after months of negotiation. Flight tests of the X-1-2 (serial<br />
46-063) would be conducted by NACA to provide design<br />
data for later production high-performance aircraft.
Movie Myths<br />
I’ve always known that the 1983 movie “The Right Stuff” is<br />
not the most historically accurate movie. I would like to point<br />
out some of the misconceptions about the quest to break the<br />
sound barrier and a few other glaring errors in the movie.<br />
Myth: In the opening scene of the movie, a test pilot is<br />
standing next to the X-1 and gives thumbs up to all his fellow<br />
test pilots. The B-29 takes off and the X-1, call sign Whiskey<br />
Kilo 28, is carried aloft. The X-1 is dropped and starts its<br />
pursuit of Mach 1. The aircraft starts buffeting wildly, the pilot<br />
loses control and the X-1 barrels into the ground killing the<br />
pilot.<br />
Fact: That never happened! No X-1 was ever lost in an air<br />
mishap. There were three XS-1 aircraft built, X-1 #1 (6062),<br />
X-1 #2 (6063) and X-1 #3 (6064). While 6062 and 6063<br />
experienced their own series of nose strut failures, only the<br />
#3 aircraft was lost. 6064 exploded while under the EB-50<br />
carrier aircraft during taxi. This was due a failure of the<br />
Ulmer leather gaskets installed in the nitrogen pressurization<br />
system. NACA pilot Joe Cannon was severely burned and<br />
almost lost his life. The EB-50 and X-1 #3 were a total loss.<br />
It wasn’t until the explosion of the X-1D and the X-2 while<br />
slung under their EB-50 carrier aircraft that the cause of X-1<br />
#3 explosion was determined.<br />
X-1 #1 (6062) is on display at the National Air and Space<br />
Museum, Washington DC and X-1 #2 (6063) (X-1E<br />
configuration) is on display in front of the Dryden Research<br />
Center, Edwards AFB.<br />
Myth: While sitting at Pancho’s, Bell Aircraft Test Pilot “Slick”<br />
Goodlin states that he can break the sound barrier for<br />
$150,000. The Air Force brass and Bell Aircraft management<br />
balk at the idea, Yeager, “a real stick and rudder man”, is<br />
suggested as the guy who can do it. An Air Force Major<br />
walks over to Yeager and makes the suggestion. Yeager<br />
replies that he thinks the sound barrier doesn’t exist. The<br />
brass thinks this is an attempt for Yeager to bribe them.<br />
Yeager replies that the Air Force pays him enough. The next<br />
day, 14 October 1947, Yeager heads out to the flightline,<br />
hops in a B-29, squeezes into the X-1 and as they say “the<br />
rest is history.”<br />
10<br />
Fact: NOT EVEN CLOSE! In the beginning, Bell Aircraft<br />
handled envelope expansion, The Air Force got tired of<br />
waiting on Bell so they took over the program. The Air Force<br />
would push the envelope a little further with each test flight.<br />
The quest to reach Mach 1 was very structured. Everything<br />
culminated on 14 October 1947. That was the day scheduled<br />
to achieve Mach 1. Although the dialog between Ridley and<br />
Yeager about the Mach meter going all “screwy” is accurate.<br />
Myth: In the movie, depicted sometime in the early 1960’s,<br />
Yeager has a conversation with Jack Ridley about breaking<br />
the altitude record, in a later scene Yeager, standing in a<br />
high altitude flight suit, he and Ridley walk out to the NF-104<br />
and Yeager “steals” the NF-104. Later the aircraft<br />
experiences a loss of control, Yeager ejects and the aircraft<br />
plummets to the ground. Ridley and another airman go out to<br />
the crash site, they see Yeager walking and they pick him<br />
up.<br />
Fact: That entire scene, minus the crash, never took<br />
place. It’s impossible! Jack Ridley was killed in 1957 at<br />
age 42 while flying as a passenger in a C-47 when it crashed<br />
into a snow-covered mountainside northeast of Tokyo.<br />
Furthermore, Yeager never “stole” the NF-104. He was<br />
scheduled to fly the aircraft that day.<br />
One last thing: Gus Grissom was not a bumbling idiot as<br />
portrayed in the movie. He was exonerated from the incident<br />
with the “Liberty Bell 7”. It was indeed an unexplained<br />
“glitch”. The other Mercury 7 astronauts who saw the movie<br />
were not happy with the way Grissom was portrayed and<br />
they went further to explain that he was quite the opposite<br />
from the movie character and was very intelligent and a<br />
highly skilled pilot / astronaut.<br />
In conclusion, while “The Right Stuff” is an entertaining<br />
movie with cool scenes of supersonic airplanes and the first<br />
missions into space, it is important to remember, it’s<br />
Hollywood. When Tom Wolfe, the author of the book,<br />
previewed the movie, he absolutely hated it. He even went<br />
so far as to try to have the movie pulled. The studio told him:<br />
“We had to squeeze 20 years into 2 hours, enjoy your<br />
money”. Moving on…
Kit Impressions<br />
The Revell kit is listed as a Skill Level 2 with an overall<br />
length of 12-3/4", a wingspan: 10-5/8", with a total of 50<br />
parts. The kit is molded in light gray, a big improvement over<br />
the original orange mold from years past. The kit features<br />
fine raised panel lines, a fully detailed cockpit with an<br />
optional pilot figure, a full rocket engine (that you can’t see<br />
when the fuselage is closed), an optional position cockpit<br />
door and water slide decals.<br />
The Build<br />
I decided early that this build was not going to be<br />
“Glamorous Glennis”. It seems everybody builds the record<br />
breaking aircraft. I already built this version using Eduard’s<br />
excellent 1/48 scale kit. With that in mind, my options were<br />
limited to aircraft 6063 in either the early overall orange paint<br />
scheme or the later NACA white aircraft. The overall white<br />
appealed to me. I don’t recall ever seeing one of these built<br />
in person and the aircraft is colorful with the yellow and black<br />
NACA tail band and the stars and bars.<br />
I also wanted to pose this model in flight. When I worked at<br />
Bell Helicopter, our HR director had a nice 1/32 scale desk<br />
model of “Glamorous Glennis” sitting at the corner of his<br />
desk. It always caught my eye when I was called to his<br />
office. With that said, that was my inspiration for putting this<br />
model in flight. I normally like using clear acrylic rod, but until<br />
recently, I have used square Evergreen tube in the aircraft<br />
and a brass square rod on the base. This allows the aircraft<br />
to be posed and then it is held into position without it<br />
swiveling around and having to glue it in place.<br />
Fuselage and Cockpit<br />
This build, like most aircraft builds, start out with assembling<br />
the cockpit. Assembly is straight forward to no major issues<br />
were encounter. I painted the cockpit parts, sidewalls and<br />
the rocket motor area Model Master Green Zinc Chromate<br />
11<br />
prior to assembly. The back of<br />
the instruments were drilled out<br />
and wire super glued into each<br />
instrument. The instrument panel<br />
was painted Model Master<br />
Interior Black. The details on the<br />
instruments were picked out<br />
using a silver PrismaColor<br />
pencil. The instruments were<br />
then sealed with a drop of Future on each instrument face.<br />
The control yoke was also painted Interior Black.<br />
Since this is an in-flight display, the next step was the pilot<br />
figure. The pilot is broken down into an unusual left and right<br />
head half, front and back torso and legs and left and right<br />
arm. I assembled the head and the body. I placed the arms<br />
into the position and noticed immediately that the opening<br />
between the left and right arms was too narrow for the<br />
control yoke. I super glued the back side of the shoulders in<br />
place on each arm, using the yoke as a guide for the correct<br />
distance. I filled the front shoulder gap using 3M Blue Acryl<br />
putty.<br />
The kit instructions show the pilot in a khaki color flight suit. I<br />
opted to paint the pilot in the standard sage color flight suit.<br />
The helmet was painted Model Master Leather and the<br />
goggles where painted flat black with gunmetal lenses. I also<br />
decided on flat black flight gloves and flat black flight boots. I<br />
painted the oxygen mask Interior Black with gray pastel post<br />
shading to lighted it up a bit. I post shaded the pilot using an<br />
array of pastels and then sprayed with Testors Dullcoat to<br />
seal everything. After drying, I coated the goggle lenses with<br />
Future.<br />
I now needed to decide where I was going to place my<br />
square Evergreen tubing. I wanted the aircraft in a climbing,<br />
banking pose. I cut a square in the center of the bottom<br />
spine (for the lack of a better term) and positioned it<br />
accordingly. I reinforced the upper part of the tube by gluing<br />
pieces of styrene, boxing it in, to give it added support and<br />
prevent the tube from coming loose.
Rocket Motor<br />
The rocket motor is made up of three parts left and right half<br />
and the exhaust section. Assembly of this was very easy, but<br />
I wanted something a little more. I decided to add four pieces<br />
of aluminum tubing to the exhaust section. After drying, I<br />
sprayed the entire motor gunmetal. I wasn’t too worried<br />
about the overall results since it wasn’t going to be seen<br />
anyway. I was only concerned about the nozzle section.<br />
There are two alignment pins on the motor that attach to the<br />
left side of the fuselage. One of the pins was way too long.<br />
This was one of those easy trim to fit situations. There is a<br />
sizable gap between the fuselage halves and the exhaust<br />
section. I guess I could have used styrene and gone along<br />
the outside of the nozzle piece, but I decided not to bother<br />
with it.<br />
Closing up the Fuselage<br />
I didn’t have any difficulty closing up the fuselage. Although<br />
on side of the vertical tail was warped. (This would come<br />
back to haunt me later.) I sanded the seams and filled any<br />
gaps with 3M Blue Acryl spot glazing putty dried overnight. I<br />
have discovered with Blue Acryl, it is a minimum of three<br />
filling jobs to get the gap adequately filled. I like using this<br />
because it doesn’t shrink too much and it can be scribed.<br />
There were a few sink marks on the fuselage these were<br />
filled at this time as well.<br />
12<br />
On the aft fuselage, X-1-2 had two inlet scoops not found on<br />
X-1-1. Revell didn’t do their research when they decided to<br />
include 46-063 markings on the decal sheet. These were<br />
easily robbed from a Panda 1/35 UH-1N kit. The UH-1N<br />
doesn’t use these scoops on the roof. So, it worked out quite<br />
well for the X-1 kit.<br />
Landing Gear Doors<br />
I figured out real quick that Revell never intended for the<br />
landing gear doors to be in the closed positions. The doors<br />
are undersized and require shims to be put in so they could<br />
be closed. The shims were put in raised and sanded flush.<br />
Most of the filling and sanding was done on the gear doors.<br />
Winging It<br />
The wings of the X-1 are completely straight and parallel<br />
with ground with no droop. Care needs to be taken when<br />
attaching the wings to the fuselage. The locator tabs on the<br />
wings are an upper and lower tab. The tabs need to be in<br />
the proper place to ensure the wings are straight and level.<br />
Final Assembly<br />
After everything was closed up and put together, I attached<br />
the horizontals to the tail and it was very crooked! So, I<br />
popped the seam and twisted the fuselage to correct the<br />
warp. I guess they pulled the parts out of the molds a little<br />
too early on this run of the kit. With that fixed, it was time<br />
start filling and sanding and get prepped for paint.
Decals and Markings<br />
The kit instructions give you four aircraft options, although<br />
you can do other versions not listed on the instruction sheet<br />
with the decals are provided (noted by “*”).<br />
46-062 – Prior to the record breaking flight – “Bell Aircraft” logo in four<br />
locations, Early Stars and Bars<br />
46-062 – “Glamorous Glennis” – Record Breaking flight<br />
46-062 – Interim Air Force scheme with white upper and lower spine as<br />
seen in the movie “Jet Pilot” (6062 Last Flight)<br />
46-063 – Delivery scheme, Overall Orange with “Bell Aircraft” logo in four<br />
locations, Early Stars and Bars.<br />
46-063* – Overall white, black walkways – Large Stars and Bars on wings<br />
and fuselage. (To do this scheme, the early NACA shield is missing from the<br />
kit decal sheet, it is available on aftermarket sheets)<br />
13<br />
46-063 – Overall White with black walkways (inboard wing) – NACA tail<br />
band<br />
46-063* – Overall White, no walkways – NACA on wings, NACA tail band,<br />
X’s on sides of fuselage<br />
46-063* – Overall White, Natural metal wings, X’s on sides of fuselage –<br />
small Stars and Bars on aft fuselage, NACA tail band<br />
There are many variations to 46-063. I found many different<br />
marking variations when it was in NACA service prior to the<br />
X-1E conversion. Check your references when building<br />
6063. In my opinion, there’s probably no wrong way to build<br />
it with all the different variations it had throughout its career<br />
in the original X-1 configuration.<br />
The biggest omission, in my opinion, on the decal sheet is all<br />
the stencil data. This can be remedied with an aftermarket<br />
decal sheet, more on this later.
Painting and Markings<br />
NACA operated X-1s were painted over all Gloss White. The<br />
NACA discovered that the aircraft were easier to track when<br />
painted white, instead of the overall Reefer Orange or<br />
natural metal when operated by the USAF Flight Test<br />
Division.<br />
I painted my X-1 using the Model Master Two Part Lacquer<br />
System out of the spray can. What I like about this paint is<br />
that it dries FAST! I found the best way to spray ANY paint<br />
out of the can is to heat it up. To do so, here is what I do, fill<br />
up the kitchen/bathroom sink with very hot water. (DON’T<br />
STICK THE PAINT CAN IN THE MICROWAVE TO HEAT IT<br />
UP!) I sprayed the first coat and let it cure overnight. The<br />
next day I wet sanded the entire model with 2000 grit sand<br />
paper. I heated up the can of paint in hot water and applied a<br />
second coat of the gloss white lacquer. I let the second coat<br />
cure for about six hours.<br />
I then used Turtle Wax Polishing Compound to buff the paint<br />
to a high shine! I did this off and on over the course of a day.<br />
When I was finished polishing the model, I washed the<br />
model to remove any residual compound.<br />
14<br />
I painted the area around the rocket motor at the aft fuselage<br />
Floquil Old Silver. I like using Old Silver because it dries<br />
hard and can be masked. It’s not shiny silver, but nice dull<br />
silver. The instrumentation boom was painted Old Silver as<br />
well.<br />
The canopy was painstakingly masked and painted Model<br />
Master Flat black.<br />
Since I had decided to do my X-1 in a NACA scheme, I had<br />
four different markings to choose from. Three out of the four<br />
of these can be done with the kit decal sheet. When X-1-2<br />
was turned over to NACA, it carried the NACA shield on the<br />
tail instead of the familiar black and yellow tail band I wanted<br />
mine to have as many markings as possible. I went with The<br />
Stars and Bars on the wings and fuselage, NACA text on the<br />
wings, the photo identification “Xs” on the side of the<br />
fuselage and the NACA tail band.
Stencil Data<br />
After the model was complete, the kit didn’t looked finished<br />
to me. I checked my references and noticed that the X-1 had<br />
data stencil located all over the fuselage for access and<br />
servicing. I found a great 1/32 X-1 data sheet offered by Ed<br />
Bisconti. This decal sheet is printed on clear decal film and<br />
the text is well printed and is readable! I contacted Ed and<br />
requested his decal sheet. Ed was very generous and sent<br />
me a review sample at no cost in exchange for advertising<br />
and the use my model to promote his work!<br />
This gave the model a truly finished off look! To me, it now<br />
looked like an airplane and not a toy of an X-1.<br />
15<br />
Final Thoughts<br />
I wanted to do a project like this for some time. I finished it<br />
off in the look I was going for, which is a nice clean desk<br />
model of an NACA flown Bell X-1. Construction of this kit<br />
isn’t hard. It does have its little quirks, but what model kit<br />
doesn’t. I would recommend this kit to anyone interested in<br />
building the X-1. It is a good size, construction is very<br />
straight forward and there are no surprises. The only con to<br />
this kit, is that it was pulled from the mold a little too soon<br />
and the vertical was a little warped, other than that, a great<br />
kit overall.<br />
Definitely Recommended!
HMSNEO - The <strong>Tulsa</strong> Model Show – 2 June 2012<br />
The Historical Miniatures Society of Northeastern Oklahoma sponsored the 2012 <strong>Tulsa</strong> Model Show. There was<br />
excellent work by all who entered the contest. Photos by Steve Eggers<br />
16
The <strong>Tulsa</strong> Model Show – 2 June 2012<br />
17
SoonerCon – 16 June 2012<br />
IPMS Metro and the AMPS sponsored the 2012 SoonerCon. This year, as in previous years, welcomed all scale<br />
modelers from Texas, Arkansas and the Oklahoma area. There was excellent work by all who entered the contest.<br />
Photos by Steve Eggers<br />
18
SoonerCon – 16 June 2012<br />
19
SoonerCon – 16 June 2012<br />
20
SoonerCon – 16 June 2012<br />
21
SoonerCon – 16 June 2012<br />
22
1/1 Scale – USS Batfish<br />
23
1/1 Scale – USS Batfish<br />
24
Paul T – Hobbycraft P-40B<br />
Member Gallery<br />
25
<strong>TMF</strong> <strong>Quarterly</strong> PERIODICAL<br />
<strong>Tulsa</strong>, OK<br />
26
