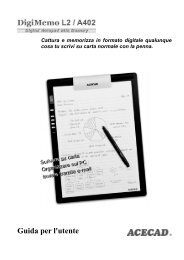
DigiMemo Bluetooth Transmitter for Smartphone - the ACECAD
DigiMemo Bluetooth Transmitter for Smartphone - the ACECAD
DigiMemo Bluetooth Transmitter for Smartphone - the ACECAD

You also want an ePaper? Increase the reach of your titles
YUMPU automatically turns print PDFs into web optimized ePapers that Google loves.
BTX-100<br />
<strong>DigiMemo</strong> <strong>Bluetooth</strong> <strong>Transmitter</strong><br />
<strong>for</strong> <strong>Smartphone</strong><br />
User Guide
Preparation ............................................................................. 1<br />
Pairing <strong>the</strong> <strong>Bluetooth</strong> <strong>Transmitter</strong>................................................................. 1<br />
Installing <strong>the</strong> <strong>DigiMemo</strong> Express Software to Your Phone ............................ 1<br />
Turning on and Working modes of <strong>the</strong> Digital Pad ....................................... 2<br />
Writing Mode and DHW file .................................................................... 2<br />
<strong>Bluetooth</strong> Mode ...................................................................................... 2<br />
Turning off <strong>the</strong> Digital Pad ............................................................................ 2<br />
Automatic Shutting down in <strong>Bluetooth</strong> mode ......................................... 2<br />
<strong>DigiMemo</strong> Express Software.................................................... 3<br />
Your DHW File List ........................................................................................ 3<br />
To View Your DHW files ................................................................................ 3<br />
The Capture Feature ..................................................................................... 4<br />
To Send via MMS .......................................................................................... 5<br />
To Send via e-Mail ......................................................................................... 5<br />
To Save to Your Phone .................................................................................. 6<br />
The File name <strong>for</strong> <strong>the</strong> Auto and Frame Capture ...................................... 6<br />
The Default Folder <strong>for</strong> <strong>the</strong> Saved Files ..................................................... 6<br />
Trouble Shooting ..................................................................... 7<br />
Specifications .......................................................................... 7
Preparation<br />
Pairing <strong>the</strong> <strong>Bluetooth</strong> <strong>Transmitter</strong><br />
Be<strong>for</strong>e you can use <strong>the</strong> <strong>Transmitter</strong> with your phone, it has<br />
to be paired once with your phone.<br />
To pair <strong>the</strong> <strong>Transmitter</strong> with a phone:<br />
1. When <strong>the</strong> digital pad of your <strong>DigiMemo</strong> is turned off,<br />
connect <strong>the</strong> <strong>Transmitter</strong> to <strong>the</strong> digital pad by <strong>the</strong> mini<br />
USB connectors.<br />
Indicator<br />
<strong>Transmitter</strong><br />
Mini USB Connector<br />
Digital Pad<br />
2. Press and hold <strong>the</strong> Power button on <strong>the</strong> digital pad<br />
(about 5 seconds) until <strong>the</strong> indicator on <strong>the</strong> <strong>Transmitter</strong><br />
rapidly flashes.<br />
3. Prepare your phone according to <strong>the</strong> phone user guide<br />
on how to add a <strong>Bluetooth</strong> device. The device name of<br />
<strong>the</strong> <strong>Transmitter</strong> is BTX-100. Enter <strong>the</strong> <strong>Transmitter</strong><br />
passcode (0000).<br />
4. When successfully paired, <strong>the</strong> indicator light on <strong>the</strong><br />
<strong>Transmitter</strong> changes to a solid light.<br />
Installing <strong>the</strong> <strong>DigiMemo</strong> Express<br />
Software to Your Phone<br />
1. Connect your phone to <strong>the</strong> computer, preferably with<br />
<strong>the</strong> USB cable that comes with your phone.<br />
Tip: Please refer to your phone’s user guide on how<br />
to connect to <strong>the</strong> computer.<br />
2. According to <strong>the</strong> OS of your phone, copy <strong>the</strong> relevant<br />
installation file to your phone from <strong>the</strong> software CD<br />
supplied with <strong>the</strong> <strong>Transmitter</strong>:<br />
� For Symbian S60 phone<br />
DMExpress_s60.sisx in <strong>the</strong> For Symbian S60<br />
folder<br />
� For Symbian UIQ phone<br />
DMExpress_uiq.sis in <strong>the</strong> For Symbian UIQ<br />
folder<br />
� For Windows Mobile phone<br />
DMExpress_wm.cab in <strong>the</strong> For Windows Mobile<br />
folder<br />
3. Select <strong>the</strong> installation file from your phone to start <strong>the</strong><br />
installation.<br />
1
4. Follow <strong>the</strong> instructions on your phone to complete <strong>the</strong><br />
installation of <strong>the</strong> <strong>DigiMemo</strong> Express software.<br />
Tip! You can also refer to <strong>the</strong> user guide of your phone<br />
<strong>for</strong> o<strong>the</strong>r ways to transfer an installation file (<strong>for</strong> example,<br />
to download it, or receive it in an MMS or as an e-Mail<br />
attachment) and install <strong>the</strong> software to your phone.<br />
Turning on and Working modes of <strong>the</strong><br />
Digital Pad<br />
Writing Mode and DHW file<br />
When turning on <strong>the</strong> digital pad without <strong>the</strong><br />
<strong>Transmitter</strong> connected, <strong>the</strong> working mode of <strong>the</strong><br />
digital pad will be in Writing mode. The display<br />
will be on and show <strong>the</strong> Digital Page Number,<br />
Storage Device icon and Time display.<br />
In <strong>the</strong> Writing mode, everything you write on<br />
<strong>the</strong> digital pad will be immediately captured and<br />
stored in <strong>the</strong> current Digital Page file which is <strong>the</strong> DHW<br />
file.<br />
Tip! You can refer to <strong>the</strong> user guide of your <strong>DigiMemo</strong><br />
<strong>for</strong> more in<strong>for</strong>mation.<br />
<strong>Bluetooth</strong> Mode<br />
In <strong>Bluetooth</strong> mode, <strong>the</strong> digital pad can be connected to<br />
your phone through <strong>Bluetooth</strong> connectivity.<br />
To turn on <strong>the</strong> digital pad into <strong>Bluetooth</strong> mode<br />
1. Connect <strong>the</strong> <strong>Transmitter</strong> to <strong>the</strong> digital pad by <strong>the</strong> mini<br />
2<br />
USB connector.<br />
2. Press and hold <strong>the</strong> Power button on <strong>the</strong><br />
digital pad until <strong>the</strong> display is on. The working<br />
mode of <strong>the</strong> digital pad is now in <strong>Bluetooth</strong><br />
mode.<br />
The display will show <strong>the</strong> <strong>Bluetooth</strong> icon and<br />
<strong>the</strong> indicator light on <strong>the</strong> <strong>Transmitter</strong> remains<br />
solidly lit.<br />
Tip! When in <strong>the</strong> Writing mode, connecting <strong>the</strong><br />
<strong>Transmitter</strong> to <strong>the</strong> digital pad will automatically change <strong>the</strong><br />
working mode to <strong>Bluetooth</strong> mode.<br />
Note! In <strong>the</strong> <strong>Bluetooth</strong> mode, your handwriting on <strong>the</strong><br />
digital pad will not be captured and stored.<br />
Turning off <strong>the</strong> Digital Pad<br />
Press and hold <strong>the</strong> Power button until <strong>the</strong> display is blank.<br />
Tip! When in <strong>the</strong> <strong>Bluetooth</strong> mode, disconnecting <strong>the</strong><br />
<strong>Transmitter</strong> from <strong>the</strong> digital pad will turn off <strong>the</strong> digital pad.<br />
Automatic Shutting down in <strong>Bluetooth</strong> mode<br />
If your phone has not accessed any data from <strong>the</strong> digital<br />
pad within <strong>the</strong> previous 15 minutes, <strong>the</strong> digital pad will<br />
sound a beep and automatically shut down.
<strong>DigiMemo</strong> Express Software<br />
Tip! According to your phone specification, you can use<br />
<strong>the</strong> function keys or navigating feature on your phone to<br />
zoom, scroll, rotate or browse. Pressing # or � to zoom in<br />
or out is available only <strong>for</strong> <strong>the</strong> physical numeric keypad.<br />
Your DHW File List<br />
1. Select <strong>the</strong> <strong>DigiMemo</strong> Express software to<br />
start it in your phone.<br />
Tip! Please refer to your phone’s user<br />
guide <strong>for</strong> <strong>the</strong> location of installed software.<br />
According to <strong>the</strong> OS of your phone, <strong>the</strong> menu name in<br />
<strong>the</strong> software will be Options, More or Menu at <strong>the</strong><br />
bottom of <strong>the</strong> phone screen.<br />
2. Select Digital Pad or Phone Folder from which you<br />
want to select your DHW files.<br />
� The Phone Folder is <strong>the</strong> default folder in which<br />
you save your DHW files from <strong>the</strong> digital pad to<br />
your phone. Please refer to <strong>the</strong> following section on<br />
how to Save to Your Phone.<br />
3. If you select <strong>the</strong> Digital Pad option, your phone will<br />
connect to <strong>the</strong> digital pad providing <strong>Bluetooth</strong> mode is<br />
active. Once <strong>the</strong> connection is established, <strong>the</strong><br />
indicator light on <strong>the</strong> <strong>Transmitter</strong> changes to a slower,<br />
pulsing light.<br />
Select <strong>the</strong> DMEMO-M folder <strong>for</strong> <strong>the</strong> built-in storage<br />
device. Or select DMEMO-S folder <strong>for</strong> <strong>the</strong> optional SD<br />
memory card in <strong>the</strong> digital pad.<br />
Notice! If you have paired more than one <strong>Transmitter</strong><br />
(BTX-100) with your phone, you will need to select a<br />
<strong>Transmitter</strong> when prompted.<br />
4. The DHW File List will appear on your phone screen.<br />
Tip! Select Mark in <strong>the</strong> menu to mark <strong>the</strong> files.<br />
To View Your DHW files<br />
1. In <strong>the</strong> DHW File List, select a file to open it. Or select<br />
Open in <strong>the</strong> menu to view marked files.<br />
2. In <strong>the</strong> DHW Viewer, you can view your DHW files.<br />
� To zoom in or out, press a number key from 1 to 6<br />
<strong>for</strong> <strong>the</strong> different zoom level.<br />
� You can also press # or � to zoom in or out.<br />
� To view <strong>the</strong> next or previous marked DHW file,<br />
select Next Page or Previous Page in <strong>the</strong> menu.<br />
� According to your phone specification, you can use<br />
<strong>the</strong> function keys or navigating feature on your<br />
phone to zoom or scroll <strong>the</strong> page, or browse <strong>the</strong><br />
DHW files one by one.<br />
3
The Capture Feature<br />
When you want to save or send via MMS / e-Mail your<br />
DHW file as a picture (JPG), you need to select <strong>the</strong><br />
following Capture option:<br />
� Auto Capture — The function automatically captures<br />
only your handwriting area from a DHW file as a<br />
picture.<br />
4<br />
DHW File<br />
A Picture<br />
Tip! The Auto Capture can easily reduce <strong>the</strong> size of<br />
your note or message as a smaller picture.<br />
Tip! Using paper sticky notes and <strong>the</strong> Auto Capture<br />
feature, you can quickly send a smaller handwritten<br />
MMS / e-Mail. Or you can quickly save your<br />
handwritten notes as smaller pictures to your phone <strong>for</strong><br />
viewing or messaging later.<br />
Tip! The minimum range captured by <strong>the</strong> Auto<br />
Capture is 2" x 2" (50.8 mm x 50.8 mm) on paper.<br />
� Frame Capture — Using this option, you can scroll <strong>the</strong><br />
current page until <strong>the</strong> desired handwritten area is<br />
within <strong>the</strong> Red Fixed Frame which is shown around<br />
<strong>the</strong> boundary of your phone screen.<br />
DHW File<br />
A Picture<br />
Tip! The range captured by <strong>the</strong> Red Fixed Frame is<br />
3" x 3" (76.2mm x 76.2mm) on paper.<br />
Note! The Frame Capture is available only <strong>for</strong> one<br />
selected or marked file in <strong>the</strong> DHW File List or <strong>the</strong><br />
current page in <strong>the</strong> DHW Viewer.<br />
� Full Page — Capture <strong>the</strong> full page of a DHW file as a<br />
picture.
To Send via MMS<br />
Note! Please first make sure that you can use MMS in<br />
your phone.<br />
Note! Please make sure <strong>the</strong> size of MMS message that<br />
you send is within <strong>the</strong> limits allowed by your wireless<br />
service provider.<br />
The Send via MMS will capture your DHW file using <strong>the</strong><br />
Capture option as a picture (JPG) and insert it into a<br />
newly created MMS. It is available only <strong>for</strong> one selected or<br />
marked file in <strong>the</strong> DHW File List or <strong>the</strong> current page in <strong>the</strong><br />
DHW Viewer.<br />
1. In <strong>the</strong> DHW File List or <strong>the</strong> DHW Viewer, select Send<br />
via MMS > Auto Capture, Frame Capture or Full<br />
Page / Full Current Page in <strong>the</strong> menu.<br />
2. For <strong>the</strong> Auto Capture or Frame Capture, You can<br />
press # or � to zoom in or out on <strong>the</strong> captured picture.<br />
Then select Send in <strong>the</strong> menu.<br />
3. A new MMS will be created with your handwritten<br />
message (an inserted picture).<br />
Note! If a new MMS cannot be directly created by <strong>the</strong><br />
Send via MMS, your phone does not support this kind of<br />
function. Please refer to <strong>the</strong> following section on how to<br />
Save to Your Phone. First save your DHW file as a picture<br />
to your phone. Then insert it into a new MMS.<br />
To Send via e-Mail<br />
Note! Please first make sure that you can use e-Mail in<br />
your phone.<br />
The Send via E-mail can attach one or several DHW files<br />
(your handwritten messages) as a JPG (picture), PDF or<br />
DHW <strong>for</strong>mat to a newly created e-Mail.<br />
1. In <strong>the</strong> DHW File List or <strong>the</strong> DHW Viewer, select Send<br />
via E-mail.<br />
2. Select one of <strong>the</strong> following file <strong>for</strong>mats <strong>for</strong> your<br />
handwritten message.<br />
� JPG<br />
Auto Capture — You can press # or � to zoom<br />
<strong>the</strong> captured picture. You can browse <strong>the</strong> captured<br />
pictures one by one if you mark several DHW files.<br />
Then select Send in <strong>the</strong> menu.<br />
Frame Capture — You can press # or � to zoom<br />
<strong>the</strong> captured picture. Then select Send in <strong>the</strong><br />
menu.<br />
Full Page — Attach <strong>the</strong> selected or marked DHW<br />
files as pictures using this option.<br />
� PDF<br />
All DHW files which you select or mark will be<br />
converted to one PDF file. You can edit <strong>the</strong> PDF<br />
file name <strong>for</strong> more than one marked DHW file, and<br />
<strong>the</strong>n select Send.<br />
5
6<br />
� DHW<br />
Attach <strong>the</strong> DHW files which you select or mark.<br />
The recipient can download <strong>the</strong> <strong>DigiMemo</strong><br />
Manager <strong>for</strong> Windows or <strong>DigiMemo</strong> Express <strong>for</strong><br />
<strong>Smartphone</strong> from <strong>the</strong> <strong>ACECAD</strong> website.<br />
http://www.acecad.com.tw<br />
3. For Windows Mobile phone, select <strong>the</strong> desired e-Mail<br />
account.<br />
4. A new e-Mail will be created with <strong>the</strong> attachments<br />
(your handwritten messages).<br />
To Save to Your Phone<br />
The Save as can save your DHW files (your handwritten<br />
notes) as a JPG (picture), PDF or DHW <strong>for</strong>mat to your<br />
phone <strong>for</strong> your view or messaging later.<br />
1. In <strong>the</strong> DHW File List or <strong>the</strong> DHW Viewer, select Save<br />
as.<br />
2. Select from <strong>the</strong> following file <strong>for</strong>mats <strong>the</strong> one you want<br />
to use to save your handwritten notes to your phone.<br />
� JPG<br />
Auto Capture — Save <strong>the</strong> selected or marked<br />
DHW files as pictures using this option.<br />
Frame Capture — You can press # or � to zoom<br />
<strong>the</strong> captured picture. Then select Save in <strong>the</strong><br />
menu.<br />
Full Page — Save <strong>the</strong> selected or marked DHW<br />
files as pictures using this option.<br />
� PDF<br />
All DHW files which you select or mark will be<br />
converted to one PDF file. You can edit <strong>the</strong> PDF<br />
file name <strong>for</strong> more than one marked DHW file, and<br />
<strong>the</strong>n select Save.<br />
� DHW<br />
Save <strong>the</strong> DHW files which you select or mark to<br />
your phone.<br />
The File name <strong>for</strong> <strong>the</strong> Auto and Frame Capture<br />
For saved pictures (your handwritten memos) captured by<br />
Auto Capture and Frame Capture, <strong>the</strong> file name will be<br />
Memo_yymmdd(s).jpg. The yymmdd represents <strong>the</strong> date.<br />
The (s) represents <strong>the</strong> serial number from (1) to (999)<br />
during that day.<br />
The Default Folder <strong>for</strong> <strong>the</strong> Saved Files<br />
According to <strong>the</strong> file <strong>for</strong>mat that you select, <strong>the</strong> default<br />
folders which <strong>the</strong> files are saved to are listed in <strong>the</strong><br />
following:<br />
Note! If you have a memory card inserted in your phone,<br />
<strong>the</strong> following default folders will be created in <strong>the</strong> memory<br />
card. If not, <strong>the</strong> following default folders will be created in<br />
your phone memory.
� JPG \<strong>DigiMemo</strong>\My Memo<br />
� PDF \<strong>DigiMemo</strong><br />
� DHW \<strong>DigiMemo</strong>\My Handwriting (Selecting Phone<br />
Folder in <strong>the</strong> <strong>DigiMemo</strong> Express software is to open<br />
<strong>the</strong> My Handwriting folder.)<br />
Trouble Shooting<br />
Problem: The digital pad and your phone do not connect<br />
through <strong>Bluetooth</strong> connectivity.<br />
Solution: Please verify <strong>the</strong> following:<br />
� Turn on <strong>Bluetooth</strong> connectivity on your phone.<br />
� Turn on <strong>the</strong> digital pad into <strong>Bluetooth</strong> mode and<br />
check <strong>the</strong> indicator light on <strong>the</strong> <strong>Transmitter</strong> remains<br />
solidly lit.<br />
� The distance between <strong>the</strong> digital pad and your phone<br />
is not over 10 meters (33 feet) and <strong>the</strong>re are no walls<br />
or o<strong>the</strong>r obstructions between <strong>the</strong> two devices.<br />
� If you have paired more than one <strong>Transmitter</strong> (BTX-<br />
100) with your phone, you must select <strong>the</strong> right<br />
<strong>Transmitter</strong> when prompted.<br />
� The <strong>Transmitter</strong> has paired with your phone.<br />
Problem: When you use <strong>the</strong> Auto Capture feature, a<br />
large space is beside your desired handwriting area on <strong>the</strong><br />
captured picture.<br />
Solution: In <strong>the</strong> DHW file, any digital ink you write will be<br />
captured by <strong>the</strong> feature. You may have written something<br />
such as a dot or page number which is far away from your<br />
desired handwritten area in <strong>the</strong> DHW file.<br />
Specifications<br />
Size 1.62" (W) x 0.98" (L) x 0.30" (T)<br />
41.2 mm (W) x 24.8 mm (L) x 7.6 mm (T)<br />
Weight 7.6 g (0.017 lbs)<br />
Power Source Supplied from <strong>the</strong> digital pad when connected<br />
<strong>Smartphone</strong><br />
Requirements<br />
Digital Notepad<br />
Requirements<br />
Based on Symbian S60 3rd / 5th Edition (3.x /<br />
5.x) / UIQ 3.x, or Windows Mobile 5 / 6 with<br />
<strong>Bluetooth</strong> wireless technology<br />
<strong>ACECAD</strong> <strong>DigiMemo</strong> L2 or A402<br />
7
Federal Communications Commission (FCC)<br />
Radio Frequency Interference Statement<br />
This equipment has been tested and found to comply with<br />
<strong>the</strong> limits <strong>for</strong> a Class B digital device, pursuant to Part 15<br />
of <strong>the</strong> FCC Rules. These limits are designed to provide<br />
reasonable protection against harmful interference in a<br />
residential installation. This equipment generates, uses,<br />
and can radiate radio frequency energy and, if not<br />
installed and used in accordance with <strong>the</strong> instructions,<br />
may cause harmful interference to radio communications.<br />
However, <strong>the</strong>re is no guarantee that interference will not<br />
occur in a particular installation. If this equipment does<br />
cause harmful interference to radio or television reception,<br />
which can be determined by turning <strong>the</strong> equipment off and<br />
on, <strong>the</strong> user is encouraged to try to correct <strong>the</strong> interference<br />
by one or more of <strong>the</strong> following measures:<br />
� Reorient or relocate <strong>the</strong> receiving antenna.<br />
� Increase <strong>the</strong> separation between <strong>the</strong> equipment and<br />
receiver.<br />
� Connect <strong>the</strong> equipment to an outlet on a circuit<br />
different from that to which <strong>the</strong> receiver is connected.<br />
� Consult <strong>the</strong> dealer or an experienced radio/TV<br />
technician <strong>for</strong> help.<br />
The user should not modify or change this device without<br />
written approval from ACE CAD Enterprise Co., Ltd.<br />
Modification could void authority to use this equipment.<br />
8<br />
Trademark In<strong>for</strong>mation<br />
<strong>ACECAD</strong> is a registered trademark of ACE CAD<br />
Enterprise Co., Ltd.<br />
The <strong>Bluetooth</strong> word mark and logos are registered<br />
trademarks owned by <strong>Bluetooth</strong> SIG, Inc. and any use of<br />
such marks by ACE CAD Enterprise Co., Ltd is under<br />
license.<br />
All o<strong>the</strong>r trademarks are <strong>the</strong> property of <strong>the</strong>ir respective<br />
owners.<br />
Copyright Notice<br />
© 2009 ACE CAD Enterprise Co., Ltd. All rights reserved.<br />
No part of this publication may be reproduced, stored in a<br />
retrieval system, or transmitted, in any <strong>for</strong>m or by any<br />
means (electronic, mechanical, photocopying, recording,<br />
or o<strong>the</strong>rwise), without <strong>the</strong> prior written permission of <strong>the</strong><br />
publisher.<br />
Part Number: 91100-40811<br />
English Version v1.20<br />
Printed in Taiwan 2009.09