AV Control Receiver SA-XR25 - Operating Manuals for Panasonic ...
AV Control Receiver SA-XR25 - Operating Manuals for Panasonic ...
AV Control Receiver SA-XR25 - Operating Manuals for Panasonic ...

You also want an ePaper? Increase the reach of your titles
YUMPU automatically turns print PDFs into web optimized ePapers that Google loves.
Be<strong>for</strong>e use<br />
RQT6840<br />
4<br />
The remote control<br />
Batteries<br />
1<br />
2<br />
3<br />
–<br />
(R6, AA, UM-3)<br />
¡ Insert so the poles (+ and –) match those in the remote control.<br />
¡ Do not use rechargeable type batteries.<br />
Use<br />
Aim at the sensor, avoiding obstacles, at a maximum range of 7 m<br />
(23 feet) directly in front of the unit.<br />
Remote control signal sensor<br />
POWER 8 DTS<br />
^ % DIGITAL EX % PL2<br />
% DIGITAL<br />
DTS 96/24 DTS-ES NEO:6 FM MODE MEMORY VOLUME<br />
PRESET TUNE 2 TUNE 1<br />
RECEIVER<br />
RECEIVER <strong>AV</strong> SYSTEM<br />
DVD TV<br />
^ ^ 2CH / 6CH<br />
TUNER/BAND TAPE CD VCR<br />
RECEIVER<br />
/<br />
1 2 3<br />
CH<br />
4 5 6<br />
VOLUME<br />
7 8 9<br />
DIRECT TUNING<br />
ENTER<br />
DISC 0 ><br />
= 10<br />
SKIP<br />
SLOW SEARCH<br />
u i t y<br />
– TV VOL +<br />
g<br />
TOP MENU MENU<br />
DIRECT<br />
N<strong>AV</strong>IGATOR<br />
ENTER<br />
DISPLAY<br />
RETURN<br />
TV/VIDEO DIMMER SUBWOOFER MUTING<br />
h<br />
-TEST<br />
INPUT MODE –SETUP<br />
–/L +/R<br />
PLAY<br />
LIST<br />
TONE/<br />
SLEEP BALANCE LEVEL EFFECT<br />
STEREO/ DOLBY<br />
2CH MIX PRO LOGIC NEO:6 SFC<br />
q<br />
7 meters (23 feet)<br />
Transmission window<br />
¡ Keep the transmission window and the unit’s sensor free from dust.<br />
¡ Operation can be affected by strong light sources, such as direct<br />
sunlight, and the glass doors on cabinets.<br />
■ How to open the remote control<br />
+<br />
–<br />
INPUT SELECTOR MULTI-SOURCE ENHANCED<br />
DIGITAL RE-MASTER SURROUND BAND<br />
+<br />
DOWN UP PHO<br />
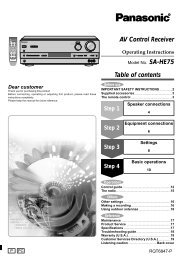
Step 1 2 3 4<br />
Placement of speakers<br />
90°<br />
C<br />
A B<br />
30° 30°<br />
D E<br />
90°<br />
F<br />
G<br />
The front, center, and<br />
surround speakers<br />
should be placed at<br />
approximately the same<br />
distance from the seating<br />
area. The angles in the<br />
diagram are approximate.<br />
Front speakers (A left B right)<br />
Place on the left and right of the TV at seated ear height so that there is<br />
good coherency between the picture and sound.<br />
Center speaker (C)<br />
Place underneath or above the center of the TV. Aim the speaker at the<br />
seating area.<br />
Surround speakers (D left E right)<br />
Place on the side of or slightly behind the seating area, about one meter<br />
(3 feet) higher than ear level.<br />
Surround back speaker (F)<br />
Place behind the seating area, about one meter (3 feet) higher than ear<br />
level.<br />
Subwoofer (G)<br />
The subwoofer can be placed in any position as long as it is at a<br />
reasonable distance from the TV.<br />
Note that some experimentation can yield the smoothest low frequency<br />
per<strong>for</strong>mance. Placement near a corner can increase the apparent output<br />
level, but can result in unnatural bass.<br />
Speaker cable<br />
Cable Speaker terminals<br />
Twist the wire<br />
Note If using 4-mm plugs<br />
Do not short-circuit.<br />
FRONT<br />
Other terminals<br />
( )<br />
( )<br />
Fully tighten the terminal,<br />
then insert.