AV Control Receiver SA-XR25 - Operating Manuals for Panasonic ...
AV Control Receiver SA-XR25 - Operating Manuals for Panasonic ...
AV Control Receiver SA-XR25 - Operating Manuals for Panasonic ...

You also want an ePaper? Increase the reach of your titles
YUMPU automatically turns print PDFs into web optimized ePapers that Google loves.
RECEIVER<br />
RECEIVER <strong>AV</strong> SYSTEM<br />
DVD TV<br />
^ ^ 2CH / 6CH<br />
TUNER/BAND TAPE CD VCR<br />
RECEIVER<br />
1 2 3<br />
CH<br />
4 5 6<br />
VOLUME<br />
7 8 9<br />
DIRECT TUNING<br />
ENTER<br />
DISC 0 ><br />
= 10<br />
SKIP<br />
SLOW / SEARCH<br />
u i t y<br />
– TV VOL +<br />
g<br />
TOP MENU MENU<br />
DIRECT<br />
N<strong>AV</strong>IGATOR<br />
ENTER<br />
DISPLAY<br />
RETURN<br />
TV/VIDEO DIMMER SUBWOOFER MUTING<br />
-TEST<br />
INPUT MODE –SETUP<br />
TONE/<br />
SLEEP BALANCE LEVEL EFFECT<br />
STEREO/ DOLBY<br />
2CH MIX PRO LOGIC NEO:6 SFC<br />
PP<br />
h<br />
q<br />
–/L +/R<br />
PLAY<br />
LIST<br />
<strong>SA</strong>-XR45<br />
POWER 8 DTS<br />
^ % DIGITAL EX % PL2<br />
% DIGITAL<br />
DTS 96/24 DTS-ES NEO:6 FM MODE MEMORY VOLUME<br />
PRESET TUNE 2 TUNE 1<br />
INPUT SELECTOR MULTI-SOURCE ENHANCED<br />
DIGITAL RE-MASTER SURROUND BAND<br />
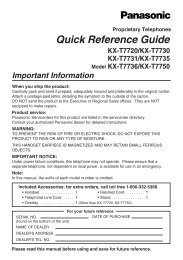
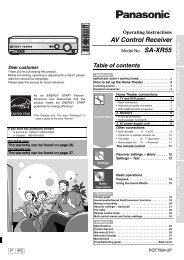
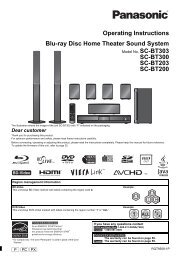
Dear customer<br />
Thank you <strong>for</strong> purchasing this product.<br />
Be<strong>for</strong>e connecting, operating or adjusting this product, please read<br />
these instructions completely.<br />
Please keep this manual <strong>for</strong> future reference.<br />
<strong>SA</strong>-XR45 is used in the illustrations unless otherwise mentioned.<br />
P PC<br />
As an ENERGY STAR ® Partner,<br />
<strong>Panasonic</strong> has determined that this<br />
product meets the ENERGY STAR ®<br />
For U.S.A.<br />
guidelines <strong>for</strong> energy efficiency.<br />
DOWN UP PHONES<br />
Be<strong>for</strong>e use<br />
Step 1<br />
Step 2<br />
Step 3<br />
Step 4<br />
Others<br />
Reference<br />
<strong>AV</strong> <strong>Control</strong> <strong>Receiver</strong><br />
<strong>Operating</strong> Instructions<br />
Model No. <strong>SA</strong>-XR45<br />
<strong>SA</strong>-<strong>XR25</strong><br />
Table of contents<br />
IMPORTANT <strong>SA</strong>FETY INSTRUCTIONS ......................2<br />
Listening caution..........................................................3<br />
Supplied accessories ..................................................3<br />
The remote control ......................................................4<br />
Speaker connections<br />
4<br />
Equipment connections<br />
6<br />
Settings<br />
10<br />
Basic operations<br />
14<br />
<strong>Control</strong> guide ..............................................................16<br />
The radio ....................................................................19<br />
Other settings ............................................................20<br />
Other functions ..........................................................21<br />
Making a recording ....................................................21<br />
Sleep timer ..................................................................21<br />
Troubleshooting guide ..............................................22<br />
The RESET function ..................................................22<br />
Maintenance................................................................22<br />
Warranty (U.S.A.) ........................................................23<br />
Customer Services Directory (U.S.A.) ......................23<br />
Specifications ..............................................Back cover<br />
Product Service ..........................................Back cover<br />
RQT6840-P
Be<strong>for</strong>e use<br />
RQT6840<br />
2<br />
IMPORTANT <strong>SA</strong>FETY INSTRUCTIONS<br />
Read these operating instructions carefully be<strong>for</strong>e using the unit. Follow the safety instructions on the unit and the applicable safety<br />
instructions listed below. Keep these operating instructions handy <strong>for</strong> future reference.<br />
1) Read these instructions.<br />
2) Keep these instructions.<br />
3) Heed all warnings.<br />
4) Follow all instructions.<br />
5) Do not use this apparatus near water.<br />
6) Clean only with dry cloth.<br />
7) Do not block any ventilation openings. Install in<br />
accordance with the manufacturer’s instructions.<br />
8) Do not install near any heat sources such as radiators,<br />
heat registers, stoves, or other apparatus (including<br />
amplifiers) that produce heat.<br />
9) Do not defeat the safety purpose of the polarized or<br />
grounding-type plug. A polarized plug has two blades with<br />
one wider than the other. A grounding-type plug has two<br />
blades and a third grounding prong. The wide blade or the<br />
third prong are provided <strong>for</strong> your safety. If the provided<br />
plug does not fit into your outlet, consult an electrician <strong>for</strong><br />
replacement of the obsolete outlet.<br />
10) Protect the power cord from being walked on or pinched<br />
particularly at plugs, convenience receptacles, and the<br />
point where they exit from the apparatus.<br />
CAUTION<br />
RISK OF ELECTRIC SHOCK<br />
DO NOT OPEN<br />
CAUTION:TO REDUCE THE RISK OF ELECTRIC<br />
SHOCK, DO NOT REMOVE SCREWS.<br />
NO USER-SERVICEABLE PARTS<br />
INSIDE.<br />
REFER SERVICING TO QUALIFIED<br />
SERVICE PERSONNEL.<br />
The lightning flash with arrowhead symbol,<br />
within an equilateral triangle, is intended to<br />
alert the user to the presence of uninsulated<br />
“dangerous voltage” within the product's<br />
enclosure that may be of sufficient magnitude<br />
to constitute a risk of electric shock to persons.<br />
The exclamation point within an equilateral<br />
triangle is intended to alert the user to the<br />
presence of important operating and<br />
maintenance (servicing) instructions in the<br />
literature accompanying the appliance.<br />
11) Only use attachments/accessories specified by the<br />
manufacturer.<br />
12) Use only with the cart, stand, tripod,<br />
bracket, or table specified by the<br />
manufacturer, or sold with the apparatus.<br />
When a cart is used, use caution when<br />
moving the cart/apparatus combination to<br />
avoid injury from tip-over.<br />
13) Unplug this apparatus during lightning storms or when<br />
unused <strong>for</strong> long periods of time.<br />
14) Refer all servicing to qualified service personnel. Servicing<br />
is required when the apparatus has been damaged in any<br />
way, such as power-supply cord or plug is damaged, liquid<br />
has been spilled or objects have fallen into the apparatus,<br />
the apparatus has been exposed to rain or moisture, does<br />
not operate normally, or has been dropped.<br />
THE FOLLOWING APPLIES ONLY IN THE U.S.A.<br />
CAUTION:<br />
This equipment has been tested and found to comply with<br />
the limits <strong>for</strong> a Class B digital device, pursuant to Part 15 of<br />
the FCC Rules.<br />
These limits are designed to provide reasonable protection<br />
against harmful interference in a residential installation. This<br />
equipment generates, uses and can radiate radio frequency<br />
energy and, if not installed and used in accordance with the<br />
instructions, may cause harmful interference to radio<br />
communications. However, there is no guarantee that<br />
interference will not occur in a particular installation. If this<br />
equipment does cause harmful interference to radio or<br />
television reception, which can be determined by turning the<br />
equipment off and on, the user is encouraged to try to<br />
correct the interference by one or more of the following<br />
measures:<br />
¡Reorient or relocate the receiving antenna.<br />
¡Increase the separation between the equipment and<br />
receiver.<br />
¡Connect the equipment into an outlet on a circuit different<br />
from that to which the receiver is connected.<br />
¡Consult the dealer or an experienced radio/TV technician<br />
<strong>for</strong> help.<br />
Any unauthorized changes or modifications to this<br />
equipment would void the user’s authority to operate this<br />
device.<br />
This device complies with Part 15 of the FCC Rules.<br />
Operation is subject to the following two conditions: (1) This<br />
device may not cause harmful interference, and (2) this<br />
device must accept any interference received, including<br />
interference that may cause undesired operation.
Listening caution<br />
EST. 1924<br />
Selecting fine audio equipment such as the unit you’ve just<br />
purchased is only the start of your musical enjoyment. Now it’s<br />
time to consider how you can maximize the fun and excitement<br />
your equipment offers. This manufacturer and the Electronic<br />
Industries Association’s Consumer Electronics Group want you<br />
to get the most out of your equipment by playing it at a safe<br />
level. One that lets the sound come through loud and clear<br />
without annoying blaring or distortion–and, most importantly,<br />
without affecting your sensitive hearing.<br />
We recommend that you avoid prolonged exposure to<br />
excessive noise.<br />
Sound can be deceiving. Over time your hearing “com<strong>for</strong>t level”<br />
adapts to higher volumes of sound. So what sounds “normal”<br />
can actually be loud and harmful to your hearing.<br />
Guard against this by setting your equipment at a safe level<br />
BEFORE your hearing adapts.<br />
To establish a safe level:<br />
¡Start your volume control at a low setting.<br />
¡Slowly increase the sound until you can hear it com<strong>for</strong>tably<br />
and clearly, and without distortion.<br />
Once you have established a com<strong>for</strong>table sound level:<br />
¡Set the dial and leave it there.<br />
Taking a minute to do this now will help to prevent hearing<br />
damage or loss in the future. After all, we want you listening <strong>for</strong><br />
a lifetime.<br />
WARNING:<br />
TO REDUCE THE RISK OF FIRE, ELECTRIC<br />
SHOCK OR PRODUCT DAMAGE, DO NOT<br />
EXPOSE THIS APPARATUS TO RAIN,<br />
MOISTURE, DRIPPING OR SPLASHING AND<br />
THAT NO OBJECTS FILLED WITH LIQUIDS,<br />
SUCH AS VASES, SHALL BE PLACED ON<br />
THE APPARATUS.<br />
CAUTION!<br />
DO NOT INSTALL OR PLACE THIS UNIT IN A<br />
BOOKCASE, BUILT-IN CABINET OR IN ANOTHER<br />
CONFINED SPACE. ENSURE THE UNIT IS WELL<br />
VENTILATED. TO PREVENT RISK OF ELECTRIC SHOCK<br />
OR FIRE HAZARD DUE TO OVERHEATING, ENSURE<br />
THAT CURTAINS AND ANY OTHER MATERIALS DO<br />
NOT OBSTRUCT THE VENTILATION VENTS.<br />
Marking sign is located on bottom of the unit.<br />
Supplied accessories<br />
User memo:<br />
Please check and identify the supplied<br />
accessories.<br />
1 AC power supply cord<br />
(RJA0065-A)<br />
1 FM indoor antenna<br />
(R<strong>SA</strong>0006-L)<br />
1 AM loop antenna<br />
(R<strong>SA</strong>0037)<br />
2 Batteries<br />
1 Remote control<br />
<strong>SA</strong>-XR45<br />
(EUR7622X10)<br />
<strong>SA</strong>-<strong>XR25</strong><br />
(EUR7622KA0)<br />
Refer to the separate booklet, “Remote <strong>Control</strong> Operation<br />
Guide”, <strong>for</strong> remote control operation details.<br />
Use the numbers indicated in parentheses when asking <strong>for</strong> replacement<br />
parts.<br />
(Only <strong>for</strong> U.S.A.)<br />
To order accessories contact 1-800-332-5368 or web site<br />
(http://www.panasonic.com).<br />
DATE OF PURCHASE _____________________________<br />
DEALER NAME __________________________________<br />
DEALER ADDRESS _______________________________<br />
________________________________________________<br />
TELEPHONE NUMBER ____________________________<br />
The model number and serial number of this product can be found<br />
on either the back or the bottom of the unit.<br />
Please note them in the space provided below and keep <strong>for</strong> future<br />
reference.<br />
MODEL NUMBER _______________________________________<br />
SERIAL NUMBER _______________________________________<br />
Be<strong>for</strong>e use<br />
RQT6840<br />
3
Be<strong>for</strong>e use<br />
RQT6840<br />
4<br />
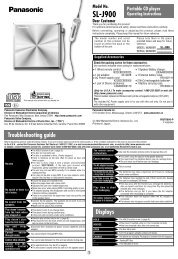
The remote control<br />
Batteries<br />
1<br />
2<br />
3<br />
–<br />
(R6, AA, UM-3)<br />
¡ Insert so the poles (+ and –) match those in the remote control.<br />
¡ Do not use rechargeable type batteries.<br />
Use<br />
Aim at the sensor, avoiding obstacles, at a maximum range of 7 m<br />
(23 feet) directly in front of the unit.<br />
Remote control signal sensor<br />
POWER 8 DTS<br />
^ % DIGITAL EX % PL2<br />
% DIGITAL<br />
DTS 96/24 DTS-ES NEO:6 FM MODE MEMORY VOLUME<br />
PRESET TUNE 2 TUNE 1<br />
RECEIVER<br />
RECEIVER <strong>AV</strong> SYSTEM<br />
DVD TV<br />
^ ^ 2CH / 6CH<br />
TUNER/BAND TAPE CD VCR<br />
RECEIVER<br />
/<br />
1 2 3<br />
CH<br />
4 5 6<br />
VOLUME<br />
7 8 9<br />
DIRECT TUNING<br />
ENTER<br />
DISC 0 ><br />
= 10<br />
SKIP<br />
SLOW SEARCH<br />
u i t y<br />
– TV VOL +<br />
g<br />
TOP MENU MENU<br />
DIRECT<br />
N<strong>AV</strong>IGATOR<br />
ENTER<br />
DISPLAY<br />
RETURN<br />
TV/VIDEO DIMMER SUBWOOFER MUTING<br />
h<br />
-TEST<br />
INPUT MODE –SETUP<br />
–/L +/R<br />
PLAY<br />
LIST<br />
TONE/<br />
SLEEP BALANCE LEVEL EFFECT<br />
STEREO/ DOLBY<br />
2CH MIX PRO LOGIC NEO:6 SFC<br />
q<br />
7 meters (23 feet)<br />
Transmission window<br />
¡ Keep the transmission window and the unit’s sensor free from dust.<br />
¡ Operation can be affected by strong light sources, such as direct<br />
sunlight, and the glass doors on cabinets.<br />
■ How to open the remote control<br />
+<br />
–<br />
INPUT SELECTOR MULTI-SOURCE ENHANCED<br />
DIGITAL RE-MASTER SURROUND BAND<br />
+<br />
DOWN UP PHO<br />
Step 1 2 3 4<br />
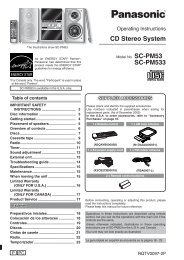
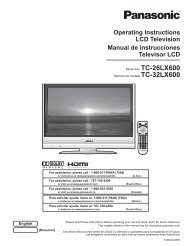
Placement of speakers<br />
90°<br />
C<br />
A B<br />
30° 30°<br />
D E<br />
90°<br />
F<br />
G<br />
The front, center, and<br />
surround speakers<br />
should be placed at<br />
approximately the same<br />
distance from the seating<br />
area. The angles in the<br />
diagram are approximate.<br />
Front speakers (A left B right)<br />
Place on the left and right of the TV at seated ear height so that there is<br />
good coherency between the picture and sound.<br />
Center speaker (C)<br />
Place underneath or above the center of the TV. Aim the speaker at the<br />
seating area.<br />
Surround speakers (D left E right)<br />
Place on the side of or slightly behind the seating area, about one meter<br />
(3 feet) higher than ear level.<br />
Surround back speaker (F)<br />
Place behind the seating area, about one meter (3 feet) higher than ear<br />
level.<br />
Subwoofer (G)<br />
The subwoofer can be placed in any position as long as it is at a<br />
reasonable distance from the TV.<br />
Note that some experimentation can yield the smoothest low frequency<br />
per<strong>for</strong>mance. Placement near a corner can increase the apparent output<br />
level, but can result in unnatural bass.<br />
Speaker cable<br />
Cable Speaker terminals<br />
Twist the wire<br />
Note If using 4-mm plugs<br />
Do not short-circuit.<br />
FRONT<br />
Other terminals<br />
( )<br />
( )<br />
Fully tighten the terminal,<br />
then insert.
Speaker connections<br />
Peripheral equipment and cables sold separately unless otherwise indicated.<br />
Connecting speakers<br />
Turn off the receiver be<strong>for</strong>e connecting the speakers.<br />
Other connections are possible depending on your speaker system.<br />
See your speaker system’s operating instructions <strong>for</strong> details.<br />
Front speakers – Impedance: 6–8 Ω<br />
Right Left<br />
B<br />
(<br />
A<br />
LOOP ANT<br />
GND<br />
Speaker cable<br />
R L<br />
Speaker cable<br />
FRONT<br />
L<br />
R<br />
75 Ω GND LOOP EXT<br />
FM ANT AM ANT<br />
OUT<br />
SECOND AUDIO OUT OPTICAL<br />
(TV) IN<br />
OPTICAL1<br />
(DVD) IN<br />
OPTICAL2<br />
(DVR) IN<br />
OPTICAL3<br />
IN<br />
COAXIAL<br />
Y<br />
CENTER<br />
DVD DVR/VCR<br />
L<br />
L<br />
PR<br />
R R<br />
IN REC (OUT) PLAY (IN) OUT IN IN SUBWOOFER SURROUND FRONT OUT MONITOR OUT IN MONITOR OUT IN IN<br />
CD TAPE<br />
DVR/VCR<br />
TV<br />
DVD/DVD 6CH<br />
SUBWOOFER<br />
TV<br />
TV<br />
DVD<br />
AUDIO<br />
VIDEO<br />
COMPONENT VIDEO<br />
Subwoofer<br />
OUT<br />
SUBWOOFER<br />
Monaural connection cable<br />
INPUT<br />
G<br />
Active subwoofer<br />
R<br />
)<br />
L<br />
IN<br />
OUT<br />
DIGITAL S VIDEO<br />
IN<br />
PB<br />
TV MONITOR TV IN DVD IN DVR/VCR IN<br />
OUT<br />
Surround speakers – Impedance: 6–8 Ω<br />
E<br />
Right<br />
(<br />
)<br />
CENTER<br />
Center speaker – Impedance: 6–8 Ω<br />
C<br />
Speaker cable<br />
SURROUND<br />
(<br />
)<br />
Speaker cable<br />
R L BACK<br />
Class 2 Wiring<br />
(<br />
)<br />
(<br />
)<br />
CENTER<br />
R L R L BACK<br />
FRONT<br />
CENTER SURROUND<br />
SPEAKERS (6∼8Ω) HAUT-PARLEURS<br />
Speaker cable Speaker cable<br />
D<br />
F<br />
R L BACK<br />
SURROUND<br />
AC IN ∼<br />
Left<br />
Back<br />
Step 1<br />
RQT6840<br />
5
Step 2<br />
RQT6840<br />
6<br />
Step 1 2 3 4<br />
Stereo connection cable<br />
White (L)<br />
Red (R)<br />
Video connection cable<br />
Turn off all components be<strong>for</strong>e making any connections.<br />
To connect equipment, refer to the appropriate operating<br />
instructions.<br />
Note<br />
¡Do not bend the optical fiber cable.<br />
¡Use digital connection to enjoy Dolby Digital or DTS (\ page 14).<br />
¡Use analog connection to enjoy sources that cannot be decoded on<br />
this unit, to record analog sources and to output through SECOND<br />
AUDIO OUT (<strong>SA</strong>-XR45) (\ pages 8, 14, 20 and 21).<br />
LOOP ANT<br />
GND<br />
TV and DVD player<br />
<strong>SA</strong>-XR45<br />
L<br />
R<br />
<strong>SA</strong>-XR45<br />
<strong>SA</strong>-<strong>XR25</strong><br />
75 Ω GND LOOP EXT<br />
R<br />
L<br />
FM ANT AM ANT<br />
OUT<br />
SECOND AUDIO OUT OPTICAL<br />
(TV) IN<br />
OPTICAL1<br />
(DVD) IN<br />
OPTICAL2<br />
(DVR) IN<br />
OPTICAL3<br />
IN<br />
COAXIAL<br />
Y<br />
CENTER<br />
DVD DVR/VCR<br />
L<br />
L<br />
PR<br />
R R<br />
IN REC (OUT) PLAY (IN) OUT IN IN SUBWOOFER SURROUND FRONT OUT MONITOR OUT IN MONITOR OUT IN IN<br />
CD TAPE<br />
DVR/VCR<br />
TV<br />
DVD/DVD 6CH<br />
SUBWOOFER<br />
TV<br />
TV<br />
DVD<br />
AUDIO<br />
VIDEO<br />
COMPONENT VIDEO<br />
DIGITAL<br />
DVD player<br />
OUT (TV) IN (DVD) IN (DVR) IN IN<br />
OPTICAL OPTICAL1 OPTICAL2 OPTICAL3 COAXIAL<br />
CENTER<br />
R R<br />
SUBWOOFER SURROUND<br />
DVD/DVD 6CH<br />
FRONT<br />
Satellite receiver etc.<br />
OUT (TV) IN (DVD) IN (DVR) IN IN<br />
OPTICAL OPTICAL1 OPTICAL2 OPTICAL3 COAXIAL<br />
OUT (TV) IN (DVD) IN IN<br />
OPTICAL<br />
OPTICAL1 OPTICAL2 COAXIAL<br />
L<br />
L<br />
DVD<br />
IN<br />
DIGITAL<br />
DIGITAL AUDIO OUT<br />
DIGITAL<br />
IN<br />
OUT<br />
IN<br />
Equipment connections<br />
Optical fiber cable<br />
Coaxial cable<br />
DIGITAL S VIDEO<br />
PB<br />
DIGITAL OUT<br />
DIGITAL OUT<br />
Changing the digital input settings<br />
You can change the input settings <strong>for</strong> the digital terminals if<br />
necessary. Note the equipment you have connected to the<br />
terminals, then change the settings (\ page 11 or 13).<br />
<strong>SA</strong>-<strong>XR25</strong><br />
AUDIO OUT<br />
(CENTER, SUBWOOFER)<br />
AUDIO OUT<br />
(SURROUND L, R)<br />
VIDEO OUT<br />
AUDIO OUT<br />
(FRONT L, R)<br />
IN<br />
TV<br />
AUDIO<br />
DIGITAL<br />
OUT (TV) IN (DVD) IN IN<br />
OPTICAL<br />
OPTICAL1 OPTICAL2 COAXIAL<br />
Note<br />
TV MONITOR TV IN DVD IN DVR/VCR IN<br />
OUT<br />
Connect to FRONT L, R if your DVD player does<br />
not have 6 channel output.<br />
(<br />
)<br />
MONITOR OUT IN<br />
TV<br />
VIDEO<br />
Class 2 Wiring<br />
(<br />
)<br />
R L R L BACK<br />
FRONT<br />
CENTER SURROUND<br />
SPEAKERS (6∼8Ω) HAUT-PARLEURS<br />
TV or monitor<br />
AUDIO OUT<br />
AC IN ∼<br />
VIDEO IN<br />
DIGITAL<br />
AUDIO<br />
OUT<br />
VIDEO OUT
Peripheral equipment and cables sold separately unless otherwise indicated.<br />
LOOP ANT<br />
GND<br />
L<br />
R<br />
Other audio visual equipment<br />
L<br />
R<br />
75 Ω GND LOOP EXT<br />
<strong>SA</strong>-XR45<br />
DVD recorder/VCR<br />
OUT (TV) IN (DVD) IN (DVR) IN IN<br />
OPTICAL OPTICAL1 OPTICAL2 OPTICAL3 COAXIAL<br />
OUT IN<br />
DVR/VCR<br />
AUDIO<br />
R<br />
L<br />
FM ANT AM ANT<br />
OUT<br />
SECOND AUDIO OUT OPTICAL<br />
(TV) IN<br />
OPTICAL1<br />
(DVD) IN<br />
OPTICAL2<br />
(DVR) IN<br />
OPTICAL3<br />
IN<br />
COAXIAL<br />
Y<br />
CENTER<br />
DVD DVR/VCR<br />
L<br />
L<br />
PR<br />
R R<br />
IN REC (OUT) PLAY (IN) OUT IN IN SUBWOOFER SURROUND FRONT OUT MONITOR OUT IN MONITOR OUT IN IN<br />
CD TAPE<br />
DVR/VCR<br />
TV<br />
DVD/DVD 6CH<br />
SUBWOOFER<br />
TV<br />
TV<br />
DVD<br />
AUDIO<br />
VIDEO<br />
COMPONENT VIDEO<br />
<strong>SA</strong>-XR45<br />
DIGITAL OUT<br />
CD Player<br />
LINE OUT<br />
AUDIO IN<br />
AUDIO OUT<br />
OUT (TV) IN (DVD) IN (DVR) IN IN<br />
OPTICAL OPTICAL1 OPTICAL2 OPTICAL3 COAXIAL<br />
<strong>SA</strong>-<strong>XR25</strong><br />
OUT (TV) IN (DVD) IN IN<br />
OPTICAL<br />
OPTICAL1 OPTICAL2 COAXIAL<br />
IN<br />
CD<br />
DIGITAL OUT<br />
DIGITAL<br />
OUT<br />
DVR/VCR<br />
DIGITAL<br />
IN<br />
DIGITAL<br />
DIGITAL AUDIO OUT<br />
IN<br />
VIDEO IN<br />
VIDEO OUT<br />
OUT<br />
DIGITAL S VIDEO<br />
IN<br />
PB<br />
REC (OUT) PLAY (IN)<br />
TAPE<br />
OUT<br />
VCR<br />
IN<br />
TV MONITOR TV IN DVD IN DVR/VCR IN<br />
OUT<br />
Tape deck<br />
REC<br />
(IN)<br />
AUDIO<br />
PLAY<br />
(OUT)<br />
<strong>SA</strong>-<strong>XR25</strong><br />
VCR<br />
OUT<br />
VCR<br />
(<br />
)<br />
IN<br />
<strong>SA</strong>-XR45<br />
<strong>SA</strong>-<strong>XR25</strong><br />
AUDIO IN<br />
AUDIO OUT<br />
Class 2 Wiring<br />
(<br />
)<br />
R L R L BACK<br />
FRONT<br />
CENTER SURROUND<br />
SPEAKERS (6∼8Ω) HAUT-PARLEURS<br />
DIGITAL<br />
VIDEO IN<br />
VIDEO OUT<br />
AC IN ∼<br />
CD recorder<br />
DIGITAL IN<br />
DIGITAL<br />
OUT (TV) IN (DVD) IN (DVR) IN IN<br />
OPTICAL OPTICAL1 OPTICAL2 OPTICAL3 COAXIAL<br />
DIGITAL IN<br />
OUT (TV) IN (DVD) IN IN<br />
OPTICAL<br />
OPTICAL1 OPTICAL2 COAXIAL<br />
Step 2<br />
RQT6840<br />
7
Step 2<br />
RQT6840<br />
8<br />
Equipment connections<br />
FM indoor antenna (included)<br />
Fix the other end of the antenna<br />
where reception is best.<br />
LOOP ANT<br />
GND<br />
LOOP ANT<br />
GND<br />
L<br />
R<br />
LOOP<br />
75 Ω GND LOOP EXT<br />
ANT<br />
GND<br />
2<br />
75 Ω GND LOOP EXT<br />
FM ANT AM ANT<br />
1<br />
FM ANT AM ANT<br />
OUT<br />
SECOND AUDIO OUT OPTICAL<br />
(TV) IN<br />
OPTICAL1<br />
(DVD) IN<br />
OPTICAL2<br />
(DVR) IN<br />
OPTICAL3<br />
IN<br />
COAXIAL<br />
Y<br />
CENTER<br />
DVD DVR/VCR<br />
L<br />
L<br />
PR<br />
R R<br />
IN REC (OUT) PLAY (IN) OUT IN IN SUBWOOFER SURROUND FRONT OUT MONITOR OUT IN MONITOR OUT IN IN<br />
CD TAPE<br />
DVR/VCR<br />
TV<br />
DVD/DVD 6CH<br />
SUBWOOFER<br />
TV<br />
TV<br />
DVD<br />
AUDIO<br />
VIDEO<br />
COMPONENT VIDEO<br />
Using the SECOND AUDIO OUT terminal<br />
Use SECOND AUDIO OUT to connect a<br />
stereo amplifier in another room. Choose<br />
whether to output the audio of the source<br />
playing on this unit or audio from another<br />
source (\ “SECOND-A” or “Second Audio<br />
Output”, page 20).<br />
R<br />
L<br />
1<br />
Black<br />
2<br />
Red<br />
White<br />
Keep the antenna cord away from tape decks, DVD players, and<br />
other cords.<br />
Note<br />
Antennas<br />
Adhesive tape<br />
IN<br />
LOOP ANT<br />
GND<br />
AM loop antenna<br />
(included)<br />
L<br />
R<br />
OUT<br />
DIGITAL S VIDEO<br />
IN<br />
PB<br />
75 Ω GND LOOP EXT<br />
<strong>SA</strong>-XR45<br />
FM ANT AM ANT SECOND AUDIO OUT O<br />
C<br />
IN REC (OUT) PLAY (IN) OUT IN IN S<br />
CD<br />
TAPE<br />
DVR/VCR<br />
TV<br />
AUDIO<br />
FM outdoor antenna<br />
¡ Disconnect the FM indoor antenna.<br />
¡ The antenna should be installed by a competent technician.<br />
¡ Twist the coaxial cable’s shield braid firmly and connect it to the<br />
GND terminal.<br />
R<br />
TV MONITOR TV IN DVD IN DVR/VCR IN<br />
OUT<br />
L<br />
FM outdoor antenna<br />
75 Ω coaxial cable<br />
;;;<br />
¡Connect the source to analog terminals. You cannot output sources connected only to the digital terminals.<br />
¡When you connect DVD 6CH input, only sound from the front left and right channels is output.<br />
(<br />
)<br />
75 Ω GND LOOP EXT<br />
LOOP ANT ;;;<br />
GND<br />
FM ANT AM ANT<br />
Class 2 Wiring<br />
(<br />
)<br />
R L R L BACK<br />
FRONT<br />
CENTER SURROUND<br />
SPEAKERS (6∼8Ω) HAUT-PARLEURS<br />
AUDIO IN<br />
20 mm (25/32")<br />
;;;<br />
;;;<br />
;;;<br />
Shield braid<br />
10 mm (3/8")<br />
;;<br />
Core wire ;;<br />
1<br />
2<br />
AC IN ∼<br />
Stereo amplifier
GITAL S VIDEO<br />
IN Y<br />
COAXIAL<br />
VCR<br />
IN<br />
PB<br />
PR<br />
IN MONITOR OUT IN IN<br />
TV DVD<br />
EO<br />
COMPONENT VIDEO<br />
UT IN IN<br />
TV DVD<br />
OMPONENT VIDEO<br />
Other video connections<br />
COMPONENT VIDEO<br />
This connection provides high quality pictures by separating the color<br />
(PB and PR) and the luminance (Y) signals.<br />
S VIDEO<br />
Use this connection <strong>for</strong> better picture quality than with the VIDEO<br />
terminals.<br />
Note<br />
Video input can only be output again through the same type of<br />
terminal.<br />
TV or monitor<br />
COMPONENT<br />
VIDEO<br />
IN (Y)<br />
COMPONENT<br />
VIDEO<br />
IN (PB)<br />
COMPONENT<br />
VIDEO<br />
IN (PR)<br />
S VIDEO<br />
TV MONITOR TV IN DVD IN DVR/VCR IN<br />
OUT<br />
S VIDEO<br />
TV MONITOR TV IN DVD IN DVR/VCR IN<br />
OUT<br />
(<br />
)<br />
(<br />
)<br />
Class 2 Wiring<br />
(<br />
)<br />
R L R L BACK<br />
FRONT<br />
CENTER SURROUND<br />
SPEAKERS (6∼8Ω) HAUT-PARLEURS<br />
Class 2 Wiring<br />
(<br />
)<br />
R L R L BACK<br />
FRONT<br />
CENTER SURROUND<br />
SPEAKERS (6∼8Ω) HAUT-PARLEURS<br />
Note<br />
The included AC power supply cord is <strong>for</strong> use with<br />
this unit only. Do not use it with other equipment.<br />
AC IN ∼<br />
AC IN ∼<br />
S-video connection cable<br />
Connecting the AC power supply cord and other in<strong>for</strong>mation<br />
The cooling fan operates at high power output<br />
levels only.<br />
Y<br />
PB<br />
PR<br />
TV MONITOR TV IN DVD IN DVR/VCR IN<br />
OUT<br />
MONITOR OUT IN<br />
TV<br />
COMPONENT VIDEO<br />
COMPONENT<br />
VIDEO<br />
OUT (Y)<br />
COMPONENT<br />
VIDEO<br />
OUT (PB)<br />
COMPONENT<br />
VIDEO<br />
OUT (PR)<br />
S-VIDEO IN<br />
S-VIDEO OUT<br />
Video connection cable<br />
DVD player<br />
AC power supply cord<br />
(included)<br />
Connect this cord after all other cables<br />
and cords are connected.<br />
DVD recorder/VCR <strong>SA</strong>-XR45<br />
VCR<br />
IN<br />
DVD<br />
COMPONENT VIDEO<br />
S VIDEO<br />
S VIDEO<br />
TV MONITOR TV IN DVD IN DVR/VCR IN<br />
OUT<br />
<strong>SA</strong>-<strong>XR25</strong><br />
S VIDEO<br />
TV MONITOR TV IN DVD IN VCR IN<br />
OUT<br />
TV MONITOR TV IN DVD IN DVR/VCR IN<br />
OUT<br />
CAUTION:<br />
TO PREVENT ELECTRIC<br />
SHOCK MATCH WIDE BLADE<br />
OF PLUG TO WIDE SLOT,<br />
FULLY INSERT.<br />
Household AC outlet<br />
(AC 120 V/60 Hz)<br />
S-VIDEO OUT<br />
S-VIDEO OUT<br />
COMPONENT VIDEO<br />
OUT (Y)<br />
COMPONENT VIDEO<br />
OUT (PB)<br />
COMPONENT VIDEO<br />
OUT (PR)<br />
S-VIDEO OUT<br />
Conserving power<br />
The unit consumes 1 W even when it is turned off<br />
with [POWER ^/l]. To save power when the unit is<br />
not to be used <strong>for</strong> a long time, unplug it from the<br />
household AC outlet.<br />
If the unit is left unplugged <strong>for</strong> longer than a few<br />
weeks, all settings will revert to the factory<br />
settings. Do the settings again if this occurs.<br />
Step 2<br />
RQT6840<br />
9
Step 3<br />
RQT6840<br />
10<br />
Step 1 2 3 4<br />
POWER 8<br />
POWER 8 ^ % DIGITAL EX % DIGITAL % PL2 DTS 96/24 DTS-ES DTS NEO:6 FM MODE MEMORY PRESET TUNE 2 TUNE 1<br />
^ ^<br />
INPUT MODE -TEST/–SETUP –/L +/R<br />
SLEEP<br />
RECEIVER<br />
RECEIVER <strong>AV</strong> SYSTEM<br />
DVD<br />
TUNER/BAND<br />
RECEIVER<br />
DIRECT TUNING<br />
2CH / 6CH<br />
CD VCR<br />
ENTER<br />
CH<br />
VOLUME<br />
SKIP<br />
SLOW / SEARCH<br />
u i t y<br />
– TV VOL +<br />
TOP MENU MENU<br />
DIRECT<br />
N<strong>AV</strong>IGATOR<br />
TAPE<br />
1 2 3<br />
4 5 6<br />
7 8 9<br />
ENTER<br />
DISC 0 ><br />
= 10<br />
g<br />
h<br />
TV<br />
PLAY<br />
LIST<br />
DISPLAY<br />
RETURN<br />
TV/VIDEO DIMMER SUBWOOFER MUTING<br />
TONE/<br />
BALANCE LEVEL EFFECT<br />
STEREO/ DOLBY<br />
2CH MIX PRO LOGIC NEO:6 SFC<br />
q<br />
Display<br />
VOLUME<br />
–/L +/R<br />
LEVEL<br />
<strong>SA</strong>-XR45<br />
-TEST/–SETUP<br />
<strong>SA</strong>-<strong>XR25</strong><br />
TEST<br />
INPUT SELECTOR<br />
TUNE 2 TUNE 1<br />
INPUT SELECTOR MULTI-SOURCE ENHANCED<br />
DIGITAL RE-MASTER SURROUND BAND<br />
POWER 8<br />
DOWN<br />
BAND<br />
Switch on<br />
INPUT SELECTOR<br />
BAND<br />
Press at the<br />
same time<br />
INPUT SELECTOR<br />
BAND<br />
TUNE 2 TUNE 1<br />
INPUT SELECTOR<br />
BAND<br />
Press at the<br />
same time<br />
Settings<br />
<strong>SA</strong>-XR45 also has an On Screen Display Mode <strong>for</strong> settings 1<br />
to 4 (\ pages 12 and 13).<br />
1<br />
SPEAKERS 2<br />
Set the size to suit your<br />
speakers<br />
LARGE: For speakers that can<br />
reproduce a full sound range,<br />
particularly the bass range<br />
below 100 Hz.<br />
SMALL: For speakers that cannot<br />
adequately reproduce the<br />
bass range. This setting is<br />
sufficient <strong>for</strong> most speakers if<br />
you are using a subwoofer.<br />
NONE: For speakers you haven’t<br />
connected (center or surround).<br />
The factory settings are: SMALL<br />
For the surround back (SUR BACK) and<br />
subwoofer (SUB-WFR), select YES if<br />
you have connected one (factory<br />
setting), or NO if you have not.<br />
Select “SPEAKERS”.<br />
SPEAKERS<br />
Select the speaker.<br />
FRONT<br />
FRONT, CENTER, SURROUND,<br />
SUR BACK, SUB-WFR<br />
Repeat.<br />
Change the setting.<br />
SMALL<br />
NONE, SMALL, LARGE<br />
NO, YES<br />
Enter the setting mode.<br />
Exit the setting mode.<br />
DISTANCE<br />
Enter the distance of the front,<br />
center and surround speakers<br />
from the seating position<br />
Change the distance so that the sound<br />
from all the speakers (except <strong>for</strong> the<br />
subwoofer) reaches you at the same<br />
time.<br />
You can select distances between 3<br />
and 30 feet at one-foot intervals.<br />
The factory settings are:<br />
FRONT and CENTER: 10 FEET<br />
SURROUND and SUR BACK:<br />
5 FEET<br />
Select “DISTANCE”.<br />
DISTANCE<br />
Select the speaker.<br />
FRONT<br />
FRONT, CENTER,<br />
SURROUND, SUR BACK<br />
Repeat.<br />
Change the setting.<br />
10 FEET<br />
3 FEET 30 FEET
Change the settings to suit your equipment to the environment in which you are using it. Be<strong>for</strong>e making any changes, read the descriptions of the<br />
settings, note the factory settings and ranges, and refer to the equipment’s instructions.<br />
3 FILTER 4 5<br />
D-INPUT<br />
Change the cut-off <strong>for</strong> bass<br />
output from the front speakers<br />
If you set the front speakers to “SMALL”,<br />
the filter is set to 100 Hz. Raise the cut-off<br />
if the bass from the front speakers is<br />
unsatisfactory so that this bass is output<br />
through the subwoofer.<br />
You can raise the cut-off from 100 Hz to<br />
either 150 Hz or 200 Hz.<br />
SETUP<br />
Select “FILTER”.<br />
FILTER<br />
Change the setting.<br />
100<br />
100, 150, 200<br />
COMPLETE<br />
Digital input<br />
Change these settings to suit the<br />
connections you have made to the optical<br />
(OPT) and coaxial (COAX) digital input<br />
terminals, so that the correct source is<br />
selected when you press [INPUT<br />
SELECTOR].<br />
The factory settings are:<br />
Select “D-INPUT”.<br />
Select the input position.<br />
<strong>SA</strong>-XR45<br />
<strong>SA</strong>-<strong>XR25</strong><br />
Change the setting.<br />
<strong>SA</strong>-XR45<br />
<strong>SA</strong>-<strong>XR25</strong><br />
<strong>SA</strong>-XR45<br />
TV: OPT 1<br />
DVD: OPT 2<br />
DVR: OPT 3<br />
CD: COAX<br />
D-INPUT<br />
TV<br />
TV, DVD, DVR, CD<br />
TV, DVD, CD<br />
Repeat.<br />
<strong>SA</strong>-<strong>XR25</strong><br />
TV: OPT 1<br />
DVD: OPT 2<br />
CD: COAX<br />
OPT 1<br />
OPT 1<br />
OPT 1, OPT 2, OPT 3, COAX<br />
OPT 1, OPT 2, COAX<br />
<strong>SA</strong>-XR45<br />
-TEST/–SETUP<br />
<strong>SA</strong>-<strong>XR25</strong><br />
TEST<br />
VOLUME<br />
LEVEL<br />
–/L +/R<br />
<strong>SA</strong>-XR45<br />
-TEST/–SETUP<br />
<strong>SA</strong>-<strong>XR25</strong><br />
TEST<br />
Adjusting speaker output<br />
level<br />
Adjust the level of the other speakers based on the<br />
output of the front speakers. (Speakers set as “NONE” or<br />
“NO” are skipped. Adjust the volume of the front speakers<br />
with [VOLUME].)<br />
C (center), RS (right surround), SB (surround back) and<br />
LS (left surround) can be adjusted between –10 dB and<br />
+10 dB, with 0 being the level of the front speakers.<br />
Adjust center, surround and surround back output to the<br />
same apparent level of the front speakers.<br />
For SW (subwoofer), you can select “– – –” so there is no<br />
output, “MIN” <strong>for</strong> minimum output, a level between 1 and<br />
19, or “MAX” <strong>for</strong> maximum output.<br />
Adjust subwoofer output so it is balanced with the front<br />
speakers. Subwoofer output is easily influenced by the<br />
source. You can also change its level while playing<br />
something <strong>for</strong> better effect (\ page 18).<br />
Output the signal.<br />
TEST L<br />
Two seconds each.<br />
L C R RS SB LS SW<br />
Adjust the main<br />
volume.<br />
Select the speaker<br />
channel.<br />
C 0dB<br />
C, RS, SB, LS, SW<br />
Repeat.<br />
Adjust the level.<br />
C 4dB<br />
-10 dB +10 dB<br />
---, MIN, 1 19, MAX<br />
Stop the test signal.<br />
Step 3<br />
RQT6840<br />
11
Step 3<br />
RQT6840<br />
12<br />
Settings<br />
^ ^<br />
INPUT MODE -TEST/–SETUP –/L +/R<br />
SLEEP<br />
RECEIVER<br />
RECEIVER <strong>AV</strong> SYSTEM<br />
DVD<br />
TUNER/BAND<br />
RECEIVER<br />
DIRECT TUNING<br />
2CH / 6CH<br />
CD VCR<br />
ENTER<br />
CH<br />
VOLUME<br />
SKIP<br />
SLOW / SEARCH<br />
u i t y<br />
– TV VOL +<br />
TOP MENU MENU<br />
DIRECT<br />
N<strong>AV</strong>IGATOR<br />
TAPE<br />
1 2 3<br />
4 5 6<br />
7 8 9<br />
ENTER<br />
DISC 0 ><br />
= 10<br />
g<br />
h<br />
TV<br />
PLAY<br />
LIST<br />
DISPLAY<br />
RETURN<br />
TV/VIDEO DIMMER SUBWOOFER MUTING<br />
TONE/<br />
BALANCE LEVEL EFFECT<br />
STEREO/ DOLBY<br />
2CH MIX PRO LOGIC NEO:6 SFC<br />
q<br />
On Screen Display mode<br />
¡Use the on screen display to change the settings to suit<br />
your equipment to the environment in which you are<br />
using it.<br />
Turn on the television and select the video input <strong>for</strong> this<br />
unit.<br />
¡Be<strong>for</strong>e making any changes, read the descriptions of<br />
the settings, note the factory settings and ranges, and<br />
refer to the equipment’s instructions.<br />
For your reference<br />
-TEST/–SETUP<br />
¡To return to the main menu<br />
Select “Return”<br />
Or<br />
Press [RETURN].<br />
ENTER<br />
RETURN<br />
To exit On Screen Display mode<br />
Select “Exit from SETUP” in the main<br />
menu.<br />
A/D Attenuation<br />
Or<br />
Second Audio Output<br />
Exit from SETUP<br />
Press [RETURN] until the setup menu<br />
disappears.<br />
¡Do 5 on page 11 to adjust speaker output<br />
level.<br />
<strong>SA</strong>-XR45<br />
-TEST/–SETUP<br />
Press and hold<br />
ENTER<br />
ENTER<br />
RETURN<br />
Or<br />
ENTER<br />
1<br />
Speaker Size<br />
Set the size to suit your speakers<br />
LARGE: For speakers that can reproduce a full sound<br />
range, particularly the bass range below 100 Hz.<br />
SMALL: For speakers that cannot adequately reproduce the<br />
bass range. This setting is sufficient <strong>for</strong> most<br />
speakers if you are using a subwoofer.<br />
NONE: For speakers you haven’t connected (center or<br />
surround).<br />
The factory settings are: SMALL<br />
For the surround back (Surr Back) and subwoofer<br />
(Subwoofer), select YES if you have connected one (factory<br />
setting), or NO if you have not.<br />
Enter the setup menu.<br />
SETUP ENTER<br />
Select the speaker.<br />
SETUP<br />
Front [ SMALL ]<br />
Center [ SMALL ]<br />
Surround [ SMALL ]<br />
Surr Back [ YES ]<br />
Subwoofer [ YES ]<br />
Repeat.<br />
Change the setting.<br />
SETUP<br />
ENTER<br />
ENTER<br />
Front [ SMALL ]<br />
Center [ SMALL ]<br />
Surround [ SMALL ]<br />
Surr Back [ YES ]<br />
Subwoofer [ YES ]<br />
Exit the setup menu.<br />
Continue making other settings.<br />
Center<br />
Surround<br />
Surr Back<br />
Subwoofer<br />
Or<br />
Other Setups<br />
[ SMALL ]<br />
[ YES ]<br />
[ YES ]
-TEST/–SETUP<br />
Press and hold<br />
ENTER<br />
ENTER<br />
ENTER<br />
ENTER<br />
ENTER<br />
Speaker Distance Filter Frequency 2 3<br />
4<br />
Enter the distance of the front,<br />
center and surround speakers<br />
from the seating position<br />
Change the distance so that the sound<br />
from all the speakers (except <strong>for</strong> the<br />
subwoofer) reaches you at the same time.<br />
You can select distances between 3 and<br />
30 feet at one-foot intervals.<br />
The factory settings are:<br />
Front and Center: 10 FEET<br />
Surround and Surr Back: 5 FEET<br />
Enter the setup menu. SETUP ENTER<br />
Select “Other Setups”. Center<br />
Surround<br />
Surr Back<br />
Subwoofer<br />
Other Setups<br />
[ SMALL ]<br />
[ YES ]<br />
[ YES ]<br />
Digital Input<br />
Select “Speaker Distance”. Select “Filter Frequency”. Select “Digital Input”.<br />
SETUP<br />
Speaker Size<br />
Speaker Distance<br />
Filter Frequency<br />
D-Range Compression<br />
Digital Input<br />
Select the speaker. Select the input position.<br />
SPEAKER<br />
DISTANCE<br />
Front [ 10 ]<br />
Center [ 10 ]<br />
Surround [ 5 ]<br />
Surr Back [ 5 ]<br />
Repeat.<br />
Change the setting.<br />
SPEAKER<br />
DISTANCE<br />
Front [ 10 ]<br />
Center [ 10 ]<br />
Surround [ 5 ]<br />
Surr Back [ 5 ]<br />
ENTER<br />
ENTER<br />
feet<br />
feet<br />
feet<br />
feet<br />
ENTER<br />
feet<br />
feet<br />
feet<br />
feet<br />
Return to the main menu.<br />
Return<br />
Change the cut-off <strong>for</strong> bass<br />
output from the front<br />
speakers<br />
If you set the front speakers to<br />
“SMALL”, the filter is set to 100 Hz.<br />
Raise the cut-off if the bass from the<br />
front speakers is unsatisfactory so<br />
bass is output through the<br />
subwoofer.<br />
You can raise the cut-off from 100 Hz<br />
to either 150 Hz or 200 Hz.<br />
SETUP<br />
ENTER<br />
Speaker Size<br />
Speaker Distance<br />
Filter Frequency<br />
D-Range Compression<br />
Digital Input<br />
Change the setting.<br />
FILTER ENTER<br />
FREQUENCY<br />
[ 100 ]<br />
[ 150]<br />
[ 200]<br />
Returns to the main menu.<br />
Change these settings to suit the<br />
connections you have made to the<br />
optical (OPT) and coaxial (COAX)<br />
digital input terminals, so that the<br />
correct source is selected when you<br />
press [INPUT SELECTOR].<br />
The factory settings are:<br />
CD: COAX<br />
TV: OPT 1<br />
DVD: OPT 2<br />
DVR: OPT 3<br />
SETUP<br />
ENTER<br />
Speaker Size<br />
Speaker Distance<br />
Filter Frequency<br />
D-Range Compression<br />
Digital Input<br />
DIGITAL<br />
INPUT<br />
CD [ COAX ]<br />
TV [ OPT1 ]<br />
DVD [ OPT2 ]<br />
DVR [ OPT3 ]<br />
Repeat.<br />
Change the setting.<br />
DIGITAL<br />
INPUT<br />
CD [ COAX ]<br />
TV [ OPT1 ]<br />
DVD [ OPT2 ]<br />
DVR [ OPT3 ]<br />
Return to the main<br />
menu.<br />
Return<br />
ENTER<br />
ENTER<br />
Step 3<br />
RQT6840<br />
13
Step 4<br />
RQT6840<br />
14<br />
POWER 8<br />
POWER 8 DTS<br />
^ DTS 96/24<br />
% DIGITAL EX % PL2<br />
% DIGITAL<br />
DTS-ES NEO:6 FM MODE MEMORY VOLUME<br />
PRESET TUNE 2 TUNE 1<br />
1<br />
2<br />
3<br />
4<br />
Step 1 2 3 4<br />
POWER 8<br />
INPUT SELECTOR<br />
DOWN UP<br />
VOLUME<br />
INPUT SELECTOR<br />
INPUT SELECTOR MULTI-SOURCE ENHANCED<br />
DIGITAL RE-MASTER SURROUND BAND<br />
DOWN UP<br />
Switch on.<br />
Select input.<br />
Start play of the<br />
source.<br />
The unit sets the sound mode to suit<br />
the input signal.<br />
Adjust the<br />
volume.<br />
ENHANCED<br />
SURROUND<br />
VOLUME<br />
DOWN UP PHONES<br />
<strong>SA</strong>-XR45 TUNER / CD / TV / DVD<br />
<strong>SA</strong>-<strong>XR25</strong><br />
TAPE , DVR/VCR ,<br />
TUNER / CD / TV / DVD<br />
TAPE , VCR ,<br />
When you finish listening<br />
Be sure to reduce the volume and press [POWER 8] to switch the unit<br />
to standby.<br />
Notes on digital input<br />
This unit can decode the following signals:<br />
¡ Dolby Digital, including Dolby Digital Surround EX<br />
¡ DTS, including DTS-ES or DTS 96/24 (<strong>SA</strong>-XR45)<br />
¡ PCM, including PCM with sampling frequencies of 192, 176.4<br />
(<strong>SA</strong>-XR45, OPTICAL2), 96 or 88.2 kHz<br />
It cannot decode:<br />
¡ Other digital signals, such as MPEG<br />
¡ Dolby Digital RF signals from a laser disc player<br />
Notes on sound modes<br />
When input is Dolby Digital or DTS:<br />
¡You cannot use SFC.<br />
When input is PCM with sampling frequencies of 192, 176.4 (<strong>SA</strong>-XR45,<br />
OPTICAL2), 96, or 88.2 kHz:<br />
¡You cannot add surround effects with Dolby Pro Logic 2, NEO:6 or<br />
SFC.<br />
When you have selected “NONE” <strong>for</strong> both the center and surround<br />
speakers:<br />
¡You cannot use Dolby Pro Logic 2, NEO:6, or SFC.<br />
,<br />
,<br />
Basic operations<br />
INPUT MODE<br />
STEREO/<br />
2CH MIX<br />
DOLBY<br />
PRO LOGIC2<br />
■ Using NEO:6<br />
N<strong>AV</strong>IGATOR<br />
INPUT MODE -TEST/–SETUP –/L +/R<br />
SLEEP<br />
STEREO/<br />
2CH MIX<br />
Sound modes<br />
ENTER<br />
DISPLAY<br />
RETURN<br />
TV/VIDEO DIMMER SUBWOOFER MUTING<br />
TONE/<br />
BALANCE LEVEL EFFECT<br />
DOLBY<br />
PRO LOGIC NEO:6 SFC<br />
The unit sets the sound mode to suit the signal.<br />
LIST<br />
–/L +/R<br />
LEVEL EFFECT<br />
SFC<br />
NEO:6<br />
Adding surround effects to stereo sources<br />
■ Using Dolby Pro Logic2<br />
Dolby Pro Logic 2 processor works not only on sources recorded<br />
with Dolby Surround, but also on any stereo source.<br />
The following modes are available when using Dolby Pro<br />
Logic 2.<br />
Listening to multi-channel sources in stereo<br />
When surround sources are played in this mode, the<br />
sounds intended <strong>for</strong> the other speaker channels are<br />
played through the front speakers.<br />
STEREO/<br />
2CH MIX<br />
The 2CH MIX mode remains in effect until you change input mode<br />
or turn off the unit.<br />
¡ To return to surround sound<br />
Press [STEREO/2CH MIX].<br />
DOLBY<br />
PRO LOGIC2<br />
Use NEO:6 to play 2-channel sources through multi-channels.<br />
The following modes are available when playing 2-channel<br />
NEO:6<br />
sources.<br />
■ Using the Sound Field <strong>Control</strong> (SFC)<br />
Enjoy an enhanced sound experience with greater presence and<br />
spread by using these SFC modes with PCM or analog<br />
SFC<br />
stereo sources.<br />
Choose from the following modes.<br />
Dolby Pro Logic 2, NEO:6 and SFC modes remain in effect until<br />
you change them.<br />
¡ To return to stereo sound<br />
Press [STEREO/2CH MIX].<br />
ENHANCED SURROUND mode<br />
This mode uses the surround back speaker to create a<br />
realistic sound field. It is especially effective when playing<br />
DTS-ES and Dolby Digital Surround EX, but can be used<br />
with other DTS and Dolby Digital sources, as well as<br />
ENHANCED<br />
SURROUND<br />
Dolby Pro Logic 2 and NEO:6. This mode engages automatically if<br />
the disc has a recognition signal <strong>for</strong> DTS-ES or Dolby Digital<br />
Surround EX (you can still turn the mode off).<br />
If the unit does not automatically recognize Dolby Digital<br />
Surround EX or DTS-ES and output is 5.1 channels:<br />
¡Press [ENHANCED SURROUND] to switch the mode on manually.<br />
Sound will now come from the surround back speaker.
For your reference<br />
In rare cases, the unit may have trouble recognizing the digital signals on<br />
discs.<br />
¡ With the PCM signals on CDs, this may cause the beginning of a track<br />
to be cut off. Engage the PCM FIX mode if this occurs.<br />
¡ With DTS, the signals may not be recognized at all. Engage the DTS<br />
FIX mode if this occurs.<br />
While the input source is selected:<br />
1.Press [INPUT MODE] to select “DIGITAL”<br />
2.Press and hold [INPUT MODE] <strong>for</strong> four seconds.<br />
The current mode is displayed. Press again to change the mode.<br />
Each time you press the button:<br />
AUTO / PCM FIX / DTS FIX<br />
,<br />
MOVIE<br />
Use this mode when playing movie software,<br />
especially videotapes, recorded in Dolby Surround.<br />
MUSIC<br />
Adds surround effects to stereo sources.<br />
PANORAMA<br />
Sound is spread out more so you feel like you are<br />
surrounded by music.<br />
CINEMA<br />
Use this mode when playing movie software.<br />
MUSIC<br />
Adds surround effects to stereo sources.<br />
Notes on using NEO:6<br />
You cannot select the above modes when the “DTS” or<br />
“% DIGITAL” indicator is on.<br />
HALL<br />
Imparts the reflection and spread of a large concert hall.<br />
CLUB<br />
Conveys the exciting and intimate atmosphere of a<br />
jazz club.<br />
LIVE<br />
Brings you up close <strong>for</strong> “live” stage per<strong>for</strong>mance and<br />
smoother vocals.<br />
THEATER<br />
Recreates natural sound ambience and direction.<br />
SIM SURR (Simulated Surround)<br />
Heightens the sensation of expanded space with<br />
stereo sources, and augments monaural sources.<br />
PARTY<br />
This mode uses the front and surround speakers so<br />
that sound is in stereo regardless of the direction you<br />
are facing.<br />
When a FIX mode is on, the unit cannot process other signals. This may<br />
cause noise to be output. Select “AUTO” if this occurs.<br />
The mode returns to AUTO when you switch the unit to standby.<br />
You can adjust the effect of MUSIC and PANORAMA with the center width<br />
and dimension controls.<br />
Center Width <strong>Control</strong> – C-WDTH<br />
This adjustment helps you realize a more natural sound image when listening<br />
to music. Move sound out into the front speakers to improve the overall front<br />
image, or add sound to the center speaker to fix the center image.<br />
You can choose a level between 0 (the center speaker is dominant) and<br />
7 (center sound is spread out).<br />
The default level is 3.<br />
1. Press [EFFECT] to select “C-WDTH”.<br />
2. Press [–/L] or [+/R] to adjust the effect.<br />
Dimension <strong>Control</strong> – DIMEN<br />
You can make up <strong>for</strong> differences in the output level of the front and surround<br />
speakers.<br />
You can choose a level between –3 and +3 – Increase the level to move<br />
sound to the front speakers, decrease to move it to the surround speakers.<br />
The default is level 0.<br />
1. Press [EFFECT] to select “DIMEN”.<br />
2. Press [–/L] or [+/R] to adjust the effect.<br />
You can adjust the effect of MUSIC with the center image control.<br />
Center Image <strong>Control</strong> – C-IMG<br />
This adjustment helps you realize a more natural sound image when listening<br />
to music. Move sound out into the front speakers to improve the overall front<br />
image, or add sound to the center speaker to fix the center image.<br />
You can choose a level between 0 (the center speaker is dominant) and<br />
5 (center sound is spread out).<br />
The default level is 3.<br />
1. Press [EFFECT] to select “C-IMG”.<br />
2. Press [–/L] or [+/R] to adjust the effect.<br />
You can adjust the sound field by adjusting the level of the speakers and the<br />
delay time of the surround speakers. These adjustments can be made <strong>for</strong><br />
each SFC mode.<br />
To adjust the speaker level<br />
1. Press [LEVEL] to select the speaker channel.<br />
Each time you press the button:<br />
C / RS / LS / SW<br />
,<br />
Sound does not come from the surround back speaker.<br />
Speakers set as “NONE” or “NO” are skipped.<br />
2. Press [–/L] or [+/R] to adjust the level.<br />
C, RS, and LS: –10 dB to +10 dB<br />
SW: – – – (off) ,/ MIN ,/ 1 – 19 ,/ MAX<br />
To adjust the delay time<br />
1. Press [EFFECT].<br />
2. Press [–/L] or [+/R] to change the delay time.<br />
Delay time can be set at 10-millisecond (ms) intervals between 10 and<br />
100 ms.<br />
The factory setting is 50 ms <strong>for</strong> each mode.<br />
¡ When DTS FIX mode is on<br />
You cannot use ENHANCED SURROUND.<br />
DTS-ES and DTS 96/24 (<strong>SA</strong>-XR45) are played as normal DTS (i.e.,<br />
there is no output from the surround back speaker).<br />
Step 4<br />
RQT6840<br />
15
Others<br />
RQT6840<br />
16<br />
<strong>Control</strong> guide<br />
Main unit<br />
[% DIGITAL EX, % DIGITAL, % PL2,<br />
DTS 96/24, DTS-ES, DTS, NEO:6] ( <strong>SA</strong>-XR45 )<br />
[% DIGITAL EX, % DIGITAL, % PL2, DTS-ES,<br />
DTS, NEO:6] ( <strong>SA</strong>-<strong>XR25</strong> )<br />
Light to indicate the source’s input signal and decoding <strong>for</strong>mat<br />
used.<br />
% DIGITAL EX: Dolby Digital Surround EX sources<br />
% DIGITAL: Dolby Digital sources<br />
% PL2: Dolby Pro Logic 2 decoder is being used<br />
DTS 96/24: DTS 96/24 sources ( <strong>SA</strong>-XR45 )<br />
DTS-ES: DTS-ES discrete or matrix sources<br />
DTS: DTS sources<br />
NEO:6: NEO:6 matrix decoder is being used<br />
[POWER 8]<br />
Press to switch the unit from on to standby mode or vice<br />
versa.<br />
In standby mode, the unit is still consuming a small amount of<br />
power.<br />
Standby indicator [^]<br />
When the unit is connected to the AC mains supply, this<br />
indicator lights up in standby mode and goes out when the<br />
unit is turned on.<br />
Remote control signal sensor<br />
Display<br />
[SLEEP]<br />
Sleep timer indicator.<br />
[˜, TUNED, ST, MONO]<br />
Radio indicators<br />
˜: Flashes or lights during presetting.<br />
TUNED: A station is tuned.<br />
ST: A stereo FM broadcast is tuned.<br />
MONO: You have switched to<br />
monaural mode with [FM<br />
MODE] to improve reception.<br />
General display<br />
Shows the input mode, radio<br />
frequency, and other general<br />
in<strong>for</strong>mation.<br />
[kHz, MHz]<br />
Frequency unit indicators<br />
kHz: AM, or PCM sampling frequency<br />
MHz: FM<br />
POWER 8 ^ % DIGITAL EX % DIGITAL % PL2 DTS 96/24 DTS-ES DTS NEO:6<br />
M TUNED ST MONO SLEEP 2CH DIGITAL L C R<br />
MIX<br />
kHz<br />
ENHANCED LS SB RS<br />
MHz SURROUND SFC S LFE
FM MODE MEMORY PRESET TUNE 2 TUNE 1<br />
VOLUME<br />
INPUT SELECTOR MULTI-SOURCE<br />
DIGITAL RE-MASTER<br />
ENHANCED<br />
SURROUND<br />
BAND<br />
[DIGITAL]<br />
Lights when digital input is selected.<br />
DOWN UP<br />
PHONES<br />
[L, C, R, LS, SB, RS, S, LFE]<br />
Program <strong>for</strong>mat indicators<br />
Show the channels contained in the digital input<br />
signal. They do not light when input is analog.<br />
L: Front left channel<br />
C: Center channel<br />
R: Front right channel<br />
LS: Surround left channel<br />
SB: Surround back channel<br />
RS: Surround right channel<br />
S: If the surround channel is monaural.<br />
LFE (Low Frequency Effects): Deep-bass effect.<br />
[2CH MIX, ENHANCED , SURROUND, SFC]<br />
2CH MIX: Appears when you are playing a multichannel<br />
source in 2CH MIX mode<br />
ENHANCED : Appears when enhanced surround<br />
mode is on<br />
SURROUND: Appears when you are using Dolby Pro<br />
Logic 2, NEO:6 or enhanced surround<br />
mode<br />
SFC: Appears when you are using an SFC mode<br />
[FM MODE]<br />
If reception is poor in FM, press so “MONO” appears to switch<br />
to monaural mode.<br />
[MEMORY]<br />
For presetting radio stations.<br />
[PRESET]<br />
Press to allow preset station selection with [TUNE, 2, 1].<br />
[TUNE, 2, 1]<br />
For tuning the radio and selecting preset stations.<br />
Press and hold until the frequency starts scrolling to start<br />
automatic tuning. Tuning stops when a station is found.<br />
[VOLUME]<br />
Volume control.<br />
[PHONES]<br />
Headphone jack<br />
Plug type: 6.3 mm (1/4") stereo<br />
¡Avoid listening <strong>for</strong> prolonged periods of time to prevent<br />
hearing damage.<br />
¡The STEREO/2CH MIX mode is engaged when you<br />
connect headphones and you cannot select any of the other<br />
sound modes.<br />
[BAND]<br />
For switching between FM and AM.<br />
[ENHANCED SURROUND]<br />
For turning on the enhanced surround mode.<br />
[MULTI-SOURCE DIGITAL RE-MASTER] ( <strong>SA</strong>-XR45 )<br />
For selecting a re-master mode. The button lights while a remaster<br />
mode is on.<br />
[INPUT SELECTOR]<br />
For selecting input.<br />
For your reference<br />
¡When playing video sources connected to DVR/VCR<br />
(<strong>SA</strong>-XR45) or VCR (<strong>SA</strong>-<strong>XR25</strong>)<br />
The picture remains on the screen even if you select TAPE,<br />
CD or TUNER.<br />
Manufactured under license from Dolby Laboratories.<br />
“Dolby”, “Pro Logic” and the double-D symbol are trademarks of<br />
Dolby Laboratories.<br />
Manufactured under license from Digital Theater Systems, Inc.<br />
US Pat. No. 5,451,942, 5,956,674, 5,974,380, 5,978,762 and other<br />
world-wide patents issued and pending.<br />
“DTS”, “DTS-ES Extended Surround” and “Neo:6” are trademarks of<br />
Digital Theater Systems, Inc. Copyright 1996, 2000 Digital Theater<br />
Systems, Inc. All rights reserved.<br />
Others<br />
RQT6840<br />
17
Others<br />
RQT6840<br />
18<br />
<strong>Control</strong> guide<br />
Remote control<br />
Buttons not explained on this page are used only to operate other equipment. Refer to the separate Remote<br />
<strong>Control</strong> Operation Guide <strong>for</strong> details.<br />
[^, RECEIVER]<br />
Standby/on button.<br />
[1, 2, 3, 4, 5, 6, 7, 8, 9, 0]<br />
To enter radio frequencies and<br />
channels.<br />
[> =10, ENTER]<br />
To enter two digit channels.<br />
[DISC, DIRECT TUNING]<br />
To enable selection of radio stations<br />
by frequency.<br />
[e,r,w, q, ENTER, RETURN]<br />
To operate the on screen menus.<br />
( <strong>SA</strong>-XR45<br />
)<br />
[DIMMER]<br />
For dimming the unit’s display and<br />
turning off the panel light.<br />
[INPUT MODE]<br />
For selecting AUTO, ANALOG or<br />
DIGITAL.<br />
[SLEEP]<br />
To start the sleep timer.<br />
[STEREO/2CH MIX]<br />
For selecting STEREO or 2CH MIX<br />
mode.<br />
[DOLBY PRO LOGIC 2]<br />
For selecting a Dolby Pro Logic 2<br />
mode: MOVIE, MUSIC or<br />
PANORAMA.<br />
[NEO:6]<br />
For selecting a NEO:6 mode:<br />
CINEMA or MUSIC.<br />
[SFC]<br />
For selecting SFC modes.<br />
RECEIVER<br />
^ ^<br />
TUNER/BAND<br />
RECEIVER<br />
DIRECT TUNING<br />
DISC<br />
INPUT MODE -TEST/–SETUP<br />
SLEEP<br />
STEREO/<br />
2CH MIX<br />
SKIP<br />
– TV VOL +<br />
RECEIVER<br />
<strong>AV</strong> SYSTEM<br />
ENTER<br />
CD VCR<br />
CH<br />
VOLUME<br />
TOP MENU MENU<br />
DIRECT<br />
N<strong>AV</strong>IGATOR<br />
DISPLAY<br />
TV/VIDEO<br />
TAPE<br />
1 2 3<br />
7<br />
0<br />
DVD<br />
2CH / 6CH<br />
4 5 6<br />
8 9<br />
ENTER<br />
><br />
= 10<br />
TV<br />
SLOW / SEARCH<br />
u i t y<br />
g<br />
h<br />
q<br />
RETURN<br />
DIMMER SUBWOOFER MUTING<br />
–/L +/R<br />
TONE/<br />
BALANCE LEVEL EFFECT<br />
DOLBY<br />
PRO LOGIC NEO:6 SFC<br />
PLAY<br />
LIST<br />
[DVD 2CH/6CH, TV,<br />
TUNER/BAND RECEIVER,<br />
TAPE, CD, VCR] ( <strong>SA</strong>-XR45 )<br />
[DVD 2CH/6CH, TV,<br />
TUNER/BAND, TAPE, CD, VCR]<br />
( <strong>SA</strong>-<strong>XR25</strong> )<br />
Input mode and remote control mode<br />
buttons.<br />
DVD 2CH/6CH:For switching between<br />
6-channel and<br />
2-channel DVD input.<br />
These buttons light when you press<br />
other buttons to indicate the current<br />
remote control mode. ( <strong>SA</strong>-XR45 )<br />
[1, CH, 2]<br />
For selecting preset radio channels.<br />
[+, –, VOLUME]<br />
To adjust the volume.<br />
[SUBWOOFER]<br />
For selecting subwoofer level.<br />
Adjust the level in 5 steps:<br />
SW MIN, SW 5, SW 10, SW 15, and<br />
SW MAX.<br />
Select SW – – – to stop output.<br />
[MUTING]<br />
To mute the volume.<br />
[-TEST/–SETUP] ( <strong>SA</strong>-XR45 )<br />
To start the speaker test signal or<br />
enter the setup menu.<br />
[TEST] ( <strong>SA</strong>-<strong>XR25</strong> )<br />
To start the speaker test signal.<br />
[TONE/BALANCE]<br />
To adjust the bass, treble and front<br />
speaker balance.<br />
[LEVEL]<br />
Use when adjusting speaker level.<br />
[EFFECT]<br />
Use when adjusting Dolby Pro Logic<br />
2, NEO:6 or SFC effects.<br />
[–/L, +/R]<br />
First select SLEEP, EFFECT, LEVEL,<br />
TONE or BALANCE, then press [–/L]<br />
or [+/R] to adjust.<br />
For your reference<br />
¡When DVD 6CH input is on<br />
Speaker settings are ineffective. Change the settings on the DVD player if necessary.<br />
¡When using the subwoofer<br />
You cannot adjust subwoofer level if DVD 6CH INPUT is selected.<br />
Sound can be distorted if you raise the volume while subwoofer level is high. Reduce<br />
subwoofer level if this occurs.<br />
¡When muting is on<br />
Muting is also canceled when the unit is turned off.
The radio<br />
Manual tuning<br />
You can tune radio stations manually by selecting the station’s<br />
frequency.<br />
1.Press [INPUT SELECTOR] to select “TUNER”.<br />
2.Press [BAND] to select “FM” or “AM”.<br />
3.Press [TUNE 2 or 1] to select the frequency.<br />
Tuning intervals: FM – 0.2 MHz<br />
AM – 10 kHz<br />
Improving reception<br />
FM MODE MEMORY PRESET TUNE 2 TUNE 1<br />
POWER 8 DTS<br />
^ DTS 96/24<br />
% DIGITAL EX % PL2<br />
% DIGITAL<br />
DTS-ES NEO:6 FM MODE MEMORY VOLUME<br />
PRESET TUNE 2 TUNE 1<br />
INPUT SELECTOR MULTI-SOURCE ENHANCED<br />
DIGITAL RE-MASTER SURROUND<br />
BAND<br />
INPUT SELECTOR BAND<br />
¡ FM mode<br />
You can improve FM reception by switching reception to monaural.<br />
Press [FM MODE].<br />
“MONO” lights.<br />
Press [FM MODE] again to cancel.<br />
¡ For your reference<br />
DVD players can interfere with radio reception. Turn the DVD player off<br />
or move it further away from the antennas if this occurs.<br />
Direct tuning (on the remote control)<br />
DOWN UP PHONES<br />
1.Press [TUNER/BAND RECEIVER]. ( <strong>SA</strong>-XR45 )<br />
Press [TUNER/BAND]. ( <strong>SA</strong>-<strong>XR25</strong> )<br />
The band changes each time you press the button.<br />
2.Press [DISC, DIRECT TUNING].<br />
3.Press the numbered buttons to enter the<br />
frequency.<br />
e.g. To select 107.9 MHz, press [1] / [0] / [7] / [9]<br />
Tuning intervals: FM – 0.1 MHz<br />
AM – 10 kHz<br />
¡ If you do not press a button while the cursor is flashing, the display<br />
returns to the frequency being received.<br />
¡ If the frequency has not been input correctly, “ERROR” will be<br />
displayed.<br />
<strong>SA</strong>-XR45<br />
TUNER/BAND<br />
RECEIVER<br />
TUNER/BAND<br />
1 2 3<br />
7<br />
DIRECT TUNING<br />
DISC<br />
0<br />
<strong>SA</strong>-<strong>XR25</strong><br />
4 5 6<br />
8 9<br />
ENTER<br />
><br />
= 10<br />
Automatic presetting<br />
1.Tune to “FM 87.9 MHz”.<br />
2.Press and hold [MEMORY].<br />
The FM stations the unit can receive are preset in channels 1 to 30.<br />
3.Tune to “AM 530 kHz”.<br />
4.Press and hold [MEMORY].<br />
The AM stations the unit can receive are preset in channels 21 to 30.<br />
(FM stations are replaced if any were preset in these channels.)<br />
During automatic presetting, the memory indicator (˜) flashes and the<br />
frequency scrolls. The memory indicator and channel numbers are<br />
displayed <strong>for</strong> a second when a station is preset.<br />
The last station to be preset is displayed when presetting finishes.<br />
For your reference<br />
Even if the power supply cord is disconnected from the household AC<br />
outlet, the stations remain in memory <strong>for</strong> approximately two weeks.<br />
Manual presetting<br />
Preset the stations one at a time.<br />
1.Tune to the station.<br />
2.Press [MEMORY].<br />
3.Press [TUNE 2 or 1] to select a channel.<br />
4.Press [MEMORY].<br />
For your reference<br />
FM stations can also be preset in the MONO mode.<br />
Selecting channels<br />
^ ^<br />
RECEIVER<br />
RECEIVER <strong>AV</strong> SYSTEM<br />
DVD<br />
TUNER/BAND<br />
RECEIVER<br />
DIRECT TUNING<br />
2CH / 6CH<br />
CD VCR<br />
1.Press [PRESET].<br />
The channel number flashes <strong>for</strong> about 5 seconds.<br />
2.Press [TUNE 2 or 1].<br />
Hold down the buttons to change channels faster.<br />
On the remote control<br />
Press [1 , CH, 2].<br />
or<br />
Press the numbered buttons.<br />
For channels 1 to 9, press the corresponding number.<br />
For channels 10 or over, press [> =10, ENTER], then the two digits.<br />
e.g. To select channel 21: [> =10, ENTER] / [2] / [1]<br />
TAPE<br />
1 2 3<br />
4 5 6<br />
7 8 9<br />
ENTER<br />
DISC 0 ><br />
= 10<br />
TV<br />
CH<br />
VOLUME<br />
SKIP<br />
SLOW / SEARCH<br />
u i t y<br />
– TV VOL +<br />
g<br />
h<br />
TOP MENU MENU<br />
q<br />
CH<br />
Others<br />
RQT6840<br />
19
Others<br />
RQT6840<br />
20<br />
Other settings<br />
POWER 8 DTS<br />
^ DTS 96/24<br />
% DIGITAL EX % PL2<br />
% DIGITAL<br />
DTS-ES NEO:6 FM MODE MEMORY VOLUME<br />
PRESET TUNE 2 TUNE 1<br />
A DR COMP - Dynamic range compression<br />
Change this setting to listen to software recorded with Dolby Digital at<br />
low volume (such as late at night) and maintain audio clarity. It<br />
reduces the peak level in loud scenes without affecting the sound<br />
field.<br />
OFF: The software is played with the original dynamic range (factory<br />
setting).<br />
STANDARD: The level recommended by the producer of the software<br />
<strong>for</strong> household viewing.<br />
MAX: The maximum allowable compression (recommended <strong>for</strong> night<br />
viewing).<br />
B A/D ATT - A/D attenuator<br />
Turn the A/D attenuator on if “OVERFLOW” lights frequently when<br />
using 2-channel analog input or DVD 6CH input.<br />
The factory setting is OFF.<br />
C SECOND-A - Second Audio output ( <strong>SA</strong>-XR45 )<br />
Select the source to output from SECOND AUDIO OUT.<br />
The factory setting is SOURCE (the source playing on this unit is<br />
output).<br />
Changing the settings<br />
INPUT SELECTOR<br />
INPUT SELECTOR MULTI-SOURCE ENHANCED<br />
DIGITAL RE-MASTER SURROUND BAND<br />
1. Press [INPUT SELECTOR] and [BAND] at the<br />
same time to enter the setting mode.<br />
2. Press [INPUT SELECTOR] to select the item you<br />
want to change.<br />
3. Change the settings.<br />
A DR COMP<br />
Press [TUNE 2 or 1] to select “OFF”, “STANDARD” or “MAX”.<br />
B A/D ATT<br />
Press [TUNE 2 or 1] to select “OFF” or “ON”.<br />
TUNE 2 TUNE 1<br />
DOWN UP PHONES<br />
BAND<br />
C SECOND-A ( <strong>SA</strong>-XR45 )<br />
Press [TUNE 2 or 1] to select “SOURCE”, “CD”, “TV”, “DVD”,<br />
“DVR/VCR” or “TAPE”.<br />
¡To listen to the radio, select SOURCE and tune to the station.<br />
4. Press [INPUT SELECTOR] and [BAND] at the<br />
same time to exit the setting mode.<br />
– TV VOL +<br />
TOP MENU MENU<br />
DIRECT<br />
N<strong>AV</strong>IGATOR<br />
g<br />
INPUT MODE -TEST/–SETUP –/L +/R<br />
SLEEP<br />
STEREO/ DOLBY<br />
h<br />
ENTER<br />
PLAY<br />
LIST<br />
DISPLAY<br />
RETURN<br />
TV/VIDEO DIMMER SUBWOOFER MUTING<br />
q<br />
TONE/<br />
BALANCE LEVEL EFFECT<br />
On the main unit On Screen Display mode<br />
-TEST/–SETUP<br />
ENTER<br />
RETURN<br />
A D-Range Compression - Dynamic range compression<br />
Change this setting to listen to software recorded with Dolby Digital at<br />
low volume (such as late at night) and maintain audio clarity. It<br />
reduces the peak level in loud scenes without affecting the sound<br />
field.<br />
OFF: The software is played with the original dynamic range (factory<br />
setting).<br />
STANDARD: The level recommended by the producer of the software<br />
<strong>for</strong> household viewing.<br />
MAX: The maximum allowable compression (recommended <strong>for</strong> night<br />
viewing).<br />
B A/D attenuation<br />
Turn the A/D attenuator on if “OVERFLOW” lights frequently when<br />
using 2-channel analog input or DVD 6CH input.<br />
The factory setting is OFF.<br />
C Second Audio Output<br />
Select the source to output from SECOND AUDIO OUT.<br />
The factory setting is SOURCE (the source playing on this unit is<br />
output).<br />
Changing the settings<br />
1. Press and hold [-TEST/–SETUP] to enter the<br />
setup menu.<br />
2. Press [e] or [r] to select “Other Setups”.<br />
3. Press [ENTER].<br />
4. Press [e] or [r] to select the item you want to<br />
change.<br />
5. Press [ENTER].<br />
6. Change the settings.<br />
A D-Range Compression<br />
Press [w] or [q] to select “OFF”, “STANDARD” or “MAX”.<br />
B A/D attenuation<br />
Press [w] or [q] to select “OFF” or “ON”.<br />
<strong>SA</strong>-XR45<br />
C Second Audio Output<br />
Press [w] or [q] to select the “SOURCE”, “CD”, “TV”, “DVD”,<br />
“DVR/VCR” or “TAPE”.<br />
¡To listen to the radio, select SOURCE and tune to the station.<br />
7. Press [ENTER].<br />
8. Press [e] or [r] to select “Exit from SETUP”.<br />
9. Press [ENTER].<br />
For your reference<br />
¡To exit On Screen Display mode<br />
Press [RETURN] until the setup menu disappears.<br />
¡To return to the main menu<br />
Press [RETURN].
Other functions<br />
DISPLAY<br />
RETURN<br />
TV/VIDEO DIMMER SUBWOOFER MUTING<br />
INPUT MODE -TEST/–SETUP –/L +/R<br />
SLEEP<br />
STEREO/<br />
2CH MIX<br />
TONE/<br />
BALANCE LEVEL EFFECT<br />
DOLBY<br />
PRO LOGIC NEO:6 SFC<br />
Input mode<br />
This unit automatically detects whether input is digital or analog, but you<br />
can fix the input mode.<br />
Press [INPUT MODE] to select “AUTO”, “ANALOG”<br />
or “DIGITAL”.<br />
Balance<br />
You can adjust the balance of the front speakers.<br />
1.Press [TONE/BALANCE] to select “BALANCE”.<br />
2.Press [–/L] or [+/R] to adjust.<br />
Tone<br />
INPUT MODE<br />
–/L +/R<br />
TONE/<br />
BALANCE<br />
You can adjust the level of the bass and treble.<br />
1.Press [TONE/BALANCE] to select “BASS” or<br />
“TREBLE”.<br />
2.Press [–/L] or [+/R] to adjust bass/treble.<br />
For your reference<br />
¡To adjust the tone<br />
The STEREO mode must be on and input must be either analog or<br />
PCM signals. You cannot adjust the tone if DVD 6CH is selected.<br />
Re-master<br />
<strong>SA</strong>-XR45<br />
FM MODE MEMORY PRESET TUNE 2 TUNE 1<br />
VOLUME<br />
INPUT SELECTOR MULTI-SOURCE ENHANCED<br />
DIGITAL RE-MASTER SURROUND BAND<br />
MULTI-SOURCE<br />
DIGITAL RE-MASTER<br />
DOWN UP PHONES<br />
This original <strong>Panasonic</strong> feature boosts the frequencies of the higher<br />
harmonics that are lost during recording due to compression.<br />
Press [MULTI-SOURCE DIGITAL RE-MASTER] to select<br />
“EFFECT 1”, “EFFECT 2”, “EFFECT 3” or “EFFECT 4”.<br />
When Re-master is on, the current level appears, then each time you<br />
press the button:<br />
EFFECT 1: <strong>for</strong> fast tracks (pop and rock)<br />
EFFECT 2: <strong>for</strong> tracks with a variety of tempos (jazz)<br />
EFFECT 3: <strong>for</strong> slow tracks (classical)<br />
EFFECT 4: <strong>for</strong> compressed audio signals<br />
OFF: the re-master processing is off.<br />
Making a recording<br />
POWER 8 DTS<br />
^ DTS 96/24<br />
% DIGITAL EX % PL2<br />
% DIGITAL<br />
DTS-ES NEO:6 FM MODE MEMORY VOLUME<br />
PRESET TUNE 2 TUNE 1<br />
Recording on other equipment<br />
You can record to a tape deck connected to TAPE REC (OUT), a VCR<br />
connected to VCR OUT (<strong>SA</strong>-<strong>XR25</strong>), a DVD recorder/VCR connected to<br />
DVR/VCR OUT (<strong>SA</strong>-XR45), or digital recording equipment connected to<br />
DIGITAL OPTICAL OUT.<br />
See the recording unit’s operating instructions <strong>for</strong> details on how to<br />
prepare it <strong>for</strong> recording.<br />
1.Press [INPUT SELECTOR] to select the source to<br />
be recorded.<br />
2.Begin recording.<br />
Follow your recording unit’s operating instructions.<br />
3.Start the source to be recorded.<br />
Follow your equipment’s operating instructions.<br />
¡ With a tape deck, you can record any analog source except TAPE.<br />
¡ With a VCR, you can record any analog source except VCR<br />
(<strong>SA</strong>-<strong>XR25</strong>).<br />
¡ With a DVD recorder/VCR, you can record any analog source except<br />
DVR/VCR (<strong>SA</strong>-XR45).<br />
¡ With digital recording equipment, you can record any digital source<br />
without copy protection.<br />
¡ When you select DVD 6CH INPUT mode, only sound from the front<br />
left and right channels is recorded.<br />
¡ Some sources do not allow digital recording. Connect through the<br />
analog terminals and select “ANALOG” input.<br />
Sleep timer<br />
The SLEEP timer can turn the unit off after a set time.<br />
It does not control any other components.<br />
1. Press [SLEEP].<br />
SLEEP / OFF<br />
,<br />
SLEEP<br />
INPUT MODE -TEST/–SETUP –/L +/R<br />
SLEEP<br />
TONE/<br />
BALANCE LEVEL EFFECT<br />
STEREO/ DOLBY<br />
2CH MIX PRO LOGIC NEO:6 SFC<br />
2. Within 5 seconds<br />
Press [–/L] or [+/R] to select the required time.<br />
The display changes as follows:<br />
30 ,/ 60 ,/ 90 ,/ 120 (in minutes)<br />
To check the setting<br />
Press [SLEEP] once.<br />
¡The time remaining appears.<br />
To change a setting<br />
Repeat the procedure from the beginning.<br />
INPUT SELECTOR<br />
INPUT SELECTOR MULTI-SOURCE ENHANCED<br />
DIGITAL RE-MASTER SURROUND BAND<br />
DOWN UP PHONES<br />
–/L +/R<br />
Others<br />
RQT6840<br />
21
Reference<br />
RQT6840<br />
22<br />
Troubleshooting guide<br />
Be<strong>for</strong>e requesting service, make the below checks. If you are in doubt about some of the check points, or if the remedies indicated in the<br />
chart do not solve the problem:<br />
In the U.S.A., contact the <strong>Panasonic</strong> Customer Call Center at 1-800-211-7262, or e-mail consumerproducts@panasonic.com, or web site<br />
(http://www.panasonic.com).<br />
In Canada, contact <strong>Panasonic</strong> Canada Inc. Customer Care Centre at 905-624-5505, or web site (www.panasonic.ca), or an authorized<br />
Servicentre close to you.<br />
No power.<br />
No sound.<br />
Sound stops. “F 76”,<br />
“OVERLOAD” or “FAN LOCK”<br />
appears on the display <strong>for</strong><br />
about a second, and the unit<br />
turns off.<br />
“F 70” appears on the display.<br />
Sound is not heard from the<br />
center, surround, or<br />
subwoofer speakers.<br />
Sound is not heard from the<br />
surround back speaker.<br />
Cannot use Dolby Pro Logic2,<br />
NEO:6 or SFC.<br />
The radio cannot be tuned in<br />
or there is a lot of noise and<br />
interference.<br />
There is a lot of noise when<br />
listening to AM.<br />
The RESET function<br />
POWER 8<br />
Common problems<br />
¡Ensure the power cord is connected.<br />
¡Turn the volume up.<br />
¡Check connections to speakers and other equipment.<br />
¡Select the correct source.<br />
¡Change the D-INPUT (or Digital Input) setting to suit the type of connection you have<br />
made.<br />
¡Check that the digital signals can be decoded by this unit.<br />
¡Turn PCM FIX or DTS FIX off.<br />
¡Determine and correct the cause, then switch the unit on.<br />
Causes include:<br />
–Shorting (bare wires touching) of positive and negative speaker wires.<br />
–Using speakers with an impedance lower than that rated <strong>for</strong> this unit.<br />
–Straining of the speakers through excessive volume or power.<br />
–Using the unit in a hot environment without proper ventilation.<br />
Consult your dealer if the problem occurs again after switching the unit on.<br />
¡Turn the unit off, disconnect the AC power supply cord, and consult your dealer.<br />
Sound modes<br />
¡Ensure the SPEAKERS (or Speaker Size) settings <strong>for</strong> your speakers are correct.<br />
¡Turn 2CH MIX off.<br />
¡The source may be stereo. Change the sound mode.<br />
¡Ensure the SPEAKERS (or Speaker Size) settings <strong>for</strong> your speakers are correct.<br />
¡Turn ENHANCED SURROUND on.<br />
¡Turn DVD 6CH INPUT off.<br />
¡You cannot use Dolby Pro Logic2, NEO:6 or SFC when input is PCM with sampling<br />
frequencies of 192, 176.4 (<strong>SA</strong>-XR45, OPTICAL2), 96, or 88.2 kHz.<br />
Radio<br />
POWER 8 DTS<br />
^ DTS 96/24<br />
% DIGITAL EX % PL2<br />
% DIGITAL<br />
DTS-ES NEO:6 FM MODE MEMORY VOLUME<br />
PRESET TUNE 2 TUNE 1<br />
While the unit is on<br />
While pressing and holding [INPUT SELECTOR],<br />
press [POWER 8].<br />
“RESET” appears on the display.<br />
The operation settings <strong>for</strong> the unit will be initialized to the settings made<br />
at the time of shipment.<br />
However, any preset radio stations will not be erased.<br />
¡Connect the appropriate antenna. (You may need an outdoor antenna or one with<br />
more elements.)<br />
¡Adjust the position of the FM or AM antenna.<br />
¡Reduce the treble.<br />
¡Turn off nearby televisions, video decks, DVD players, and satellite receivers.<br />
¡Separate the antenna from other cables, cords, and appliances.<br />
INPUT SELECTOR<br />
¡Try changing the A/D ATT (or A/D attenuation) setting. This may change the volume,<br />
but noise will also reduce.<br />
INPUT SELECTOR MULTI-SOURCE ENHANCED<br />
DIGITAL RE-MASTER SURROUND BAND<br />
DOWN UP PHONES<br />
Maintenance<br />
If the surfaces are dirty<br />
To clean this unit, wipe with a soft, dry cloth.<br />
Pages<br />
9<br />
14<br />
4–9<br />
14<br />
11,13<br />
14<br />
15<br />
4<br />
5<br />
–<br />
–<br />
–<br />
Pages<br />
10,12<br />
14<br />
14<br />
10,12<br />
14<br />
18<br />
14<br />
Pages<br />
8<br />
8<br />
21<br />
–<br />
–<br />
20<br />
¡ Never use alcohol, paint thinner or benzine to clean this unit.<br />
¡ Be<strong>for</strong>e using chemically treated cloth, read the instructions that came<br />
with the cloth carefully.
Warranty (U.S.A.)<br />
<strong>Panasonic</strong> Consumer Electronics Company,<br />
Division of Matsushita Electric Corporation of America<br />
One <strong>Panasonic</strong> Way Secaucus, New Jersey 07094<br />
<strong>Panasonic</strong> Sales Company, Division of Matsushita Electric<br />
of Puerto Rico, Inc.<br />
Ave. 65 de Infantería, Km. 9.5<br />
San Gabriel Industrial Park, Carolina, Puerto Rico 00985<br />
<strong>Panasonic</strong>/Technics Audio Products<br />
Limited Warranty Coverage<br />
If your product does not work properly because of a defect in materials or<br />
workmanship, <strong>Panasonic</strong> Consumer Electronics Company or <strong>Panasonic</strong> Sales<br />
Company (collectively referred to as “the warrantor”) will, <strong>for</strong> the length of the period<br />
indicated on the chart below, which starts with the date of original purchase<br />
(“warranty period”), at its option either (a) repair your product with new or refurbished<br />
parts, or (b) replace it with a new or a refurbished product. The decision to repair or<br />
replace will be made by the warrantor.<br />
Product or Part Name<br />
Audio Products (except items listed below)<br />
All Audio Racks (cabinets)<br />
Technics Stand Alone Speakers, Subwoofer<br />
Speakers<br />
USB Reader-Writer, Personal Computer<br />
Card Adapters<br />
(in exchange <strong>for</strong> defective item)<br />
Accessories: Headphones, Cartridges,<br />
Microphones, Adapters<br />
Rechargeable Batteries (in exchange <strong>for</strong><br />
defective item)<br />
SD Memory Cards, Rechargeable Battery<br />
Packs (in exchange <strong>for</strong> defective item)<br />
Parts<br />
One (1) year<br />
Thirty (30) days<br />
Three (3) years<br />
One (1) year<br />
Ninety (90) days<br />
Ten (10) days<br />
Ninety (90) days<br />
During the “Labor” warranty period there will be no charge <strong>for</strong> labor. During the “Parts”<br />
warranty period, there will be no charge <strong>for</strong> parts. You must carry-in or mail-in your product<br />
during the warranty period. If non-rechargeable batteries are included, they are not<br />
warranted. This warranty only applies to products purchased and serviced in the United<br />
States or Puerto Rico. This warranty is extended only to the original purchaser of a new<br />
product which was not sold “as is”. A purchase receipt or other proof of the original purchase<br />
date is required <strong>for</strong> warranty service.<br />
Limited Warranty<br />
Labor<br />
One (1) year<br />
Not Applicable<br />
Three (3) years<br />
Not Applicable<br />
Ninety (90) days<br />
Not Applicable<br />
Not Applicable<br />
Customer Services Directory (U.S.A.)<br />
Carry-In or Mail-In Service<br />
For Carry-In or Mail-In Service in the United States call 1-800-211-PANA (1-800-211-<br />
7262) or visit <strong>Panasonic</strong> web site: http://www.panasonic.com<br />
For assistance in Puerto Rico call <strong>Panasonic</strong> Sales Company (787)-750-4300 or fax<br />
(787)-768-2910.<br />
Limited Warranty Limits And Exclusions<br />
This warranty ONLY COVERS failures due to defects in materials or workmanship, and<br />
DOES NOT COVER normal wear and tear or cosmetic damage. The warranty ALSO<br />
DOES NOT COVER damages which occurred in shipment, or failures which are caused<br />
by products not supplied by the warrantor, or failures which result from accidents, misuse,<br />
abuse, neglect, mishandling, misapplication, alteration, faulty installation, set-up adjustments,<br />
misadjustment of consumer controls, improper maintenance, power line surge,<br />
lightning damage, modification, or commercial use (such as in a hotel, office, restaurant,<br />
or other business), rental use of the product, service by anyone other than a Factory<br />
Servicenter or other Authorized Servicer, or damage that is attributable to acts of God.<br />
THERE ARE NO EXPRESS WARRANTIES EXCEPT AS LISTED UNDER “ LIMITED<br />
WARRANTY COVERAGE”. THE WARRANTOR IS NOT LIABLE FOR INCIDENTAL<br />
OR CONSEQUENTIAL DAMAGES RESULTING FROM THE USE OF THIS<br />
PRODUCT, OR ARISING OUT OF ANY BREACH OF THIS WARRANTY. (As<br />
examples, this excludes damages <strong>for</strong> lost time, travel to and from the servicer, loss of<br />
media or images, data or other memory content. The items listed are not exclusive, but<br />
are <strong>for</strong> illustration only.) ALL EXPRESS AND IMPLIED WARRANTIES, INCLUDING<br />
THE WARRANTY OF MERCHANTABILITY, ARE LIMITED TO THE PERIOD OF THE<br />
LIMITED WARRANTY.<br />
Some states do not allow the exclusion or limitation of incidental or consequential damages, or<br />
limitations on how long an implied warranty lasts, so the exclusions may not apply to you.<br />
This warranty gives you specific legal rights and you may also have others rights which<br />
vary from state to state. If a problem with this product develops during or after the<br />
warranty period, you may contact your dealer or Servicenter. If the problem is not handled<br />
to your satisfaction, then write to the warrantor’s Consumer Affairs Department at the<br />
addresses listed <strong>for</strong> the warrantor.<br />
PARTS AND SERVICE WHICH ARE NOT COVERED BY THIS LIMITED WARRANTY<br />
ARE YOUR RESPONSIBILITY.<br />
For Product In<strong>for</strong>mation, <strong>Operating</strong> Assistance, Literature Request, Dealer Locations, and<br />
all Customer Service inquiries please contact:<br />
1-800-211-PANA (7262), Monday–Friday 9 am–9 pm; Saturday–Sunday 9 am–7 pm, EST.<br />
or send e-mail:<br />
consumerproducts@panasonic.com<br />
For hearing or speech impaired TTY users, TTY: 1-877-833-8855<br />
Web Site: http://www.panasonic.com<br />
You can purchase parts, accessories or<br />
locate your nearest servicenter by visiting<br />
our Web Site.<br />
Accessory Purchases:<br />
1-800-332-5368 (Customer Orders Only)<br />
For hearing or speech impaired TTY users, TTY: 1-866-605-1277<br />
<strong>Panasonic</strong> Services Company 20421 84th Avenue South, Kent, WA 98032<br />
(6 am to 5 pm Monday–Friday; 6 am to 10:30 am Saturday; PST)<br />
(Visa, MasterCard, Discover Card, American Express, Check)<br />
Service in Puerto Rico<br />
Matsushita Electric of Puerto Rico, Inc. <strong>Panasonic</strong> Sales Company/Factory Servicenter:<br />
Ave. 65 de Infanteria, Km. 9.5, San Gabriel Industrial Park, Carolina, Puerto Rico 00985<br />
Phone (787) 750-4300 Fax (787) 768-2910<br />
Reference<br />
RQT6840<br />
23
Specifications (IHF’78)<br />
■ AMPLIFIER SECTION<br />
Rated minimum sine wave RMS power output<br />
20 Hz–20 kHz both channels driven<br />
0.3 % total harmonic distortion 100 W per channel (6 Ω)<br />
1 kHz continuous power output both channels driven<br />
0.3 % total harmonic distortion<br />
Total harmonic distortion<br />
105 W per channel (6 Ω)<br />
rated power at 20 Hz–20 kHz<br />
Power output each channel driven<br />
0.9 % total harmonic distortion at 1kHz<br />
0.3 % (6 Ω)<br />
Front (L/R) 100 W (6 Ω)<br />
Center 100 W (6 Ω)<br />
Surround (L/R/BACK)<br />
Load impedance<br />
100 W (6 Ω)<br />
Front (L/R) 6–8 Ω<br />
Center 6–8 Ω<br />
Surround (L/R/BACK)<br />
Frequency response<br />
6–8 Ω<br />
<strong>SA</strong>-XR45 CD, TV, DVD/DVD 6CH, DVR/VCR, TAPE<br />
10 Hz–44 kHz, ±3 dB<br />
<strong>SA</strong>-<strong>XR25</strong> CD, TV, DVD/DVD 6CH, VCR, TAPE 10 Hz–44 kHz, ±3 dB<br />
Input sensitivity<br />
<strong>SA</strong>-XR45 CD, TV, DVD/DVD 6CH, DVR/VCR, TAPE<br />
27 mV (200 mV, IHF ’66)<br />
<strong>SA</strong>-<strong>XR25</strong> CD, TV, DVD/DVD 6CH, VCR, TAPE<br />
27 mV (200 mV, IHF ’66)<br />
Input impedance<br />
<strong>SA</strong>-XR45 CD, TV, DVD/DVD 6CH, DVR/VCR, TAPE 22 kΩ<br />
<strong>SA</strong>-<strong>XR25</strong><br />
S/N (IHF A)<br />
CD, TV, DVD/DVD 6CH, VCR, TAPE 22 kΩ<br />
<strong>SA</strong>-XR45 TV, DVD, DVR/VCR (Digital Input) 85 dB (98 dB, IHF ’66)<br />
<strong>SA</strong>-<strong>XR25</strong> TV, DVD (Digital Input) 85 dB (98 dB, IHF ’66)<br />
Tone controls<br />
BASS 50 Hz, +10 to –10 dB<br />
TREBLE 20 kHz, +10 to –10 dB<br />
Subwoofer frequency response (–6 dB) 7 Hz–200 Hz<br />
Digital input (OPTICAL)<br />
<strong>SA</strong>-XR45 (DVD: Fs 192 kHz Ready) 3<br />
<strong>SA</strong>-<strong>XR25</strong><br />
2<br />
(COAXIAL) 1<br />
Digital output (OPTICAL) 1<br />
Product Service<br />
1. Damage requiring service — The unit should be serviced by<br />
qualified service personnel if:<br />
(a) The AC power supply cord or the plug has been damaged; or<br />
(b) Objects or liquids have gotten into the unit; or<br />
(c) The unit has been exposed to rain; or<br />
(d) The unit does not operate normally or exhibits a marked change<br />
in per<strong>for</strong>mance; or<br />
(e) The unit has been dropped or the cabinet damaged.<br />
2. Servicing — Do not attempt to service the unit beyond that<br />
described in these operating instructions. Refer all other servicing to<br />
authorized servicing personnel.<br />
3. Replacement parts — When parts need replacing ensure the<br />
servicer uses parts specified by the manufacturer or parts that have<br />
the same characteristics as the original parts. Unauthorized<br />
substitutes may result in fire, electric shock, or other hazards.<br />
<strong>Panasonic</strong> Consumer Electronics<br />
Company, Division of Matsushita<br />
Electric Corporation of America<br />
One <strong>Panasonic</strong> Way Secaucus,<br />
New Jersey 07094<br />
http://www.panasonic.com<br />
© 2002 Matsushita Electric Industrial Co., Ltd.<br />
Printed in Malaysia<br />
<strong>Panasonic</strong> Sales Company,<br />
Division of Matsushita Electric of<br />
Puerto Rico, Inc. (“PSC”)<br />
Ave. 65 de Infantería, Km. 9.5<br />
San Gabriel Industrial Park, Carolina,<br />
Puerto Rico 00985<br />
■ FM TUNER SECTION<br />
Frequency range 87.9–107.9 MHz<br />
Sensitivity<br />
50 dB quieting sensitivity<br />
11.2 dBf (2 µV, IHF ’58)<br />
MONO 18.3 dBf (4.5 µV, IHF ’58)<br />
STEREO<br />
Total harmonic distortion<br />
38.3 dBf (45 µV, IHF ’58)<br />
MONO 0.2 %<br />
STEREO<br />
S/N<br />
0.3 %<br />
MONO 73 dB<br />
STEREO 67 dB<br />
Frequency response 20 Hz–15 kHz, +1 dB, –2 dB<br />
Alternate channel selectivity 65 dB<br />
Capture ratio 1.5 dB<br />
Image rejection at 98 MHz 40 dB<br />
Spurious response rejection at 98 MHz 75 dB<br />
AM suppression<br />
Stereo separation<br />
50 dB<br />
1 kHz 40 dB<br />
10 kHz 30 dB<br />
Antenna terminal<br />
■ AM TUNER SECTION<br />
75 Ω (unbalanced)<br />
Frequency range 530–1710 kHz<br />
Sensitivity 20 µV, 330 µV/m<br />
Selectivity 55 dB<br />
IF rejection at 1000 kHz<br />
■ VIDEO SECTION<br />
50 dB<br />
Output voltage at 1 V input (unbalanced) 1±0.1 Vp-p<br />
Maximum input voltage 1.5 Vp-p<br />
Input/output impedance 75 Ω<br />
S-Video Input <strong>SA</strong>-XR45 TV, DVD, DVR/VCR<br />
<strong>SA</strong>-<strong>XR25</strong> TV, DVD, VCR<br />
Output TV MONITOR<br />
Component Video Input TV, DVD<br />
■ GENERAL<br />
Output TV MONITOR<br />
Power supply AC 120 V, 60 Hz<br />
Power consumption 130 W<br />
Dimensions (W x H x D) 430 x 74 x 375 mm<br />
(16-15/16'' x 2-29/32'' x 14-3/4'')<br />
Mass <strong>SA</strong>-XR45 4.2 kg (9.2 lb.)<br />
■ DIN POWER<br />
<strong>SA</strong>-<strong>XR25</strong> 4 kg (8.8 lb.)<br />
1 kHz, T. H. D 1 % 2 x 100 W (6 Ω)<br />
Power consumption in standby mode:<br />
Notes:<br />
1 W<br />
1. Specifications are subject to change without notice.<br />
Mass and dimensions are approximate.<br />
2. Total harmonic distortion is measured by the digital spectrum<br />
analyzer.<br />
4. Safety check — After repairs or service, ask the servicer to per<strong>for</strong>m<br />
safety checks to confirm that the unit is in proper working condition.<br />
Product in<strong>for</strong>mation<br />
For product in<strong>for</strong>mation or assistance with product operation:<br />
In the U.S.A., contact the <strong>Panasonic</strong> Customer Call Center at 1-800-211-<br />
7262, or e-mail consumerproducts@panasonic.com, or web site<br />
(http://www.panasonic.com).<br />
In Canada, contact <strong>Panasonic</strong> Canada Inc. Customer Care Centre at<br />
905-624-5505, web site (www.panasonic.ca), or an authorized<br />
Servicentre closest to you.<br />
<strong>Panasonic</strong> Canada Inc.<br />
5770 Ambler Drive<br />
Mississauga, Ontario<br />
L4W 2T3<br />
www.panasonic.ca<br />
En<br />
RQT6840-P<br />
H1202RF0