Wireless TV Headphones - Brookstone
Wireless TV Headphones - Brookstone
Wireless TV Headphones - Brookstone
You also want an ePaper? Increase the reach of your titles
YUMPU automatically turns print PDFs into web optimized ePapers that Google loves.
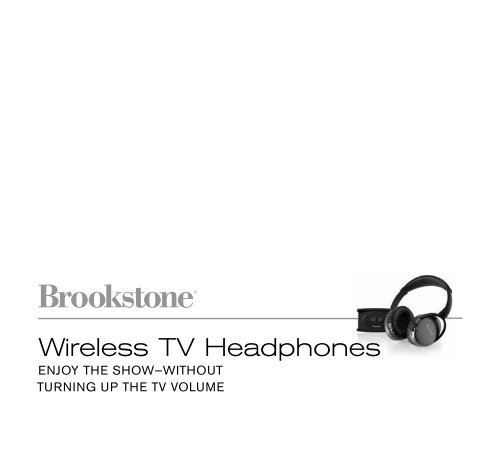
<strong>Wireless</strong> <strong>TV</strong> <strong>Headphones</strong><br />
ENjOy THE SHOW—WITHOuT<br />
TurNINg uP THE <strong>TV</strong> VOlumE
1<br />
Table of conTenTs<br />
Cautions and Warnings . . . . . . . . . . . . . . . . . . . . . . . . . . . . . . . . . . . . . . . . . . . . . . . . . . . . . . 2<br />
Location of Controls . . . . . . . . . . . . . . . . . . . . . . . . . . . . . . . . . . . . . . . . . . . . . . . . . . . . . . . . 7<br />
Installing the Batteries . . . . . . . . . . . . . . . . . . . . . . . . . . . . . . . . . . . . . . . . . . . . . . . . . . . . . . 8<br />
Connecting . . . . . . . . . . . . . . . . . . . . . . . . . . . . . . . . . . . . . . . . . . . . . . . . . . . . . . . . . . . . . . . . . 9<br />
Pairing . . . . . . . . . . . . . . . . . . . . . . . . . . . . . . . . . . . . . . . . . . . . . . . . . . . . . . . . . . . . . . . . . . . . 10<br />
Listening . . . . . . . . . . . . . . . . . . . . . . . . . . . . . . . . . . . . . . . . . . . . . . . . . . . . . . . . . . . . . . . . . . 11<br />
Specifications . . . . . . . . . . . . . . . . . . . . . . . . . . . . . . . . . . . . . . . . . . . . . . . . . . . . . . . . . . . . . . 13<br />
Troubleshooting . . . . . . . . . . . . . . . . . . . . . . . . . . . . . . . . . . . . . . . . . . . . . . . . . . . . . . . . . . . . 14<br />
Warranty . . . . . . . . . . . . . . . . . . . . . . . . . . . . . . . . . . . . . . . . . . . . . . . . . . . . . . . . . . . . . . . . . . 17
caUTIon<br />
• TO REDUCE THE RISK OF ELECTRIC SHOCK, DO NOT REMOVE COVER .<br />
THERE ARE NO SERVICEABLE PARTS INSIDE .<br />
• TO REDUCE THE RISK OF FIRE OR ELECTRIC SHOCK, DO NOT EXPOSE<br />
THIS UNIT TO RAIN OR MOISTURE .<br />
The lightning flash with arrow-head symbol within an equilateral triangle<br />
is intended to alert the user to the presence of uninsulated “dangerous<br />
voltage” within the unit’s enclosure that may be of sufficient magnitude<br />
to constitute a risk of electric shock .<br />
The exclamation point within an equilateral triangle is intended to alert<br />
the user to the presence of important operating and maintenance<br />
(servicing) instructions in the literature accompanying the unit .<br />
IMPoRTanT safeTY InsTRUcTIons<br />
All of the safety and operating instructions should be read, adhered to and followed<br />
before the unit is operated .<br />
save These InsTRUcTIons<br />
2
3<br />
DanGeR<br />
To reduce the risk of electric shock, burns, fire or injury:<br />
1 . Do not use while bathing or in a shower .<br />
2 . Do not place or store the unit where it can fall or be pulled into a tub<br />
or sink .<br />
3 . Do not place in, drop or submerge in water or other liquid .<br />
4 . Do not reach for a unit that has fallen into water . Unplug it immediately .<br />
5 . Care should be taken so that objects do not fall and liquids are not<br />
spilled onto the unit .<br />
WaRnInG<br />
1 . Close supervision is necessary when this product is used by or near children<br />
or mentally disabled individuals .<br />
2 . Use this unit only for its intended use as described in this manual .<br />
3 . Unplug this unit from the USB during lightning storms or when unused<br />
for long periods of time .<br />
4 . Never drop or insert an object into any opening .<br />
5 . Protect the USB cord from being walked on or pinched,<br />
particularly at plug outlets and the point where it exits the unit .<br />
6 . Do not allow the USB cord to touch hot surfaces .<br />
Wrap the cord loosely around the unit when storing .
7 . The unit should be situated away from direct sunlight or heat sources such<br />
as radiators, electric heaters, heat registers, stoves, or other units (including<br />
amplifiers) that produce heat . Avoid placing on top of stereo equipment that<br />
radiates heat .<br />
8 . Never block the air openings of the unit with materials such as clothing,<br />
plastic bags or papers, or place it on a soft surface such as a bed or couch,<br />
where the air openings may be blocked .<br />
9 . Do not overload any electrical outlet . Use only the power source as indicated .<br />
10 . Do not carry this unit by its USB cord or use the cord as a handle .<br />
11 . Never operate this unit if it has a damaged USB cord or port, if it is not working<br />
properly, or if it has been dropped or damaged, or dropped into water . If the<br />
unit’s USB cord or plug is damaged, do not attempt to fix it yourself .<br />
12 . To avoid the risk of electric shock, do not disassemble or attempt to repair<br />
the unit . Incorrect repair can cause risk of electric shock or injury to persons<br />
when unit is used .<br />
13 . Do not operate in the presence of explosive and/or flammable fumes .<br />
14 . Never remove the USB cord from the USB port by pulling the USB cord .<br />
4
5<br />
fcc InfoRMaTIon<br />
This equipment has been tested and found to comply with the limits for a Class B<br />
Digital Device, pursuant to Part 15 of the FCC Rules . These limits are designed<br />
to provide reasonable protection against harmful interference in a residential<br />
installation . This equipment generates, uses, and can radiate radio frequency<br />
energy and, if not installed and used in accordance with the instructions, may cause<br />
harmful interference to radio communications . However, there is no guarantee that<br />
interference will not occur in a particular installation .<br />
If this equipment does cause harmful interference to radio or television<br />
reception, which can be determined by turning the equipment off and on,<br />
the user is encouraged to try to correct the interference by one or more<br />
of the following measures:<br />
• Reorient or relocate the receiving antenna .<br />
• Increase the distance between the equipment and receiver .<br />
• Connect the equipment to an outlet on a circuit different from that to which<br />
the receiver is connected .<br />
• Consult the dealer or an experienced radio/<strong>TV</strong> technician for help .<br />
This equipment complies with part 15 of the FCC Rules . Operation is subject<br />
to the following two conditions:<br />
1 . This equipment may not cause harmful interference .<br />
2 . This equipment must accept any interference received, including interference<br />
that may cause undesired operation .<br />
Modifications not authorized by the manufacturer may void the user’s authority<br />
to operate this device .
aTTeRY PRecaUTIons<br />
• Dispose of the old batteries properly . Do not dispose of the old batteries<br />
in a fire .<br />
• Do not leave the batteries where a child or pet could play with or swallow<br />
them . If the batteries are swallowed, contact a physician immediately .<br />
• The batteries may explode if mistreated . Do not attempt to recharge or<br />
disassemble the batteries .<br />
• Use only fresh batteries of the required size and type . Do not mix old and<br />
new batteries, different types of batteries, or rechargeable batteries of<br />
different capacities .<br />
6
7<br />
locaTIon of conTRols<br />
1 . Transmitter Power Button<br />
2 . Transmitter Connect Button<br />
3 . Transmitter Mini USB Port<br />
4 . Transmitter Audio-In Port<br />
5 . USB/Audio-In Select Switch<br />
6 . Adjustable Headband<br />
7 . Padded Earcup (2)<br />
8 . Battery Compartment<br />
9 . Headset Power Button/LED<br />
3<br />
1 2<br />
Transmitter Top<br />
4<br />
Transmitter Back<br />
5<br />
10 . Headset Connect Button/<br />
Volume Switch<br />
11 . 3 .5mm Audio/Headphone Cable<br />
(not shown)<br />
12 . USB/AC Adapter (not shown)<br />
13 . USB/mini USB Cable (not shown)<br />
14 . 3 .5mm Audio-to-RCA Cable<br />
(not shown)<br />
8<br />
6<br />
7<br />
9<br />
10
InsTallInG The baTTeRIes<br />
1 . Open the BATTERY COMPARTMENT by sliding the BATTERY<br />
COMPARTMENT cover down in the direction of the arrow and removing .<br />
2 . Insert 2 AAA batteries (not included) according to the polarity indicators<br />
inside the compartment .<br />
3 . Replace the BATTERY COMPARTMENT cover, slide and snap it into<br />
place to secure .<br />
Battery Compartment<br />
8
9<br />
connecTInG<br />
ElEcTrIcal POWEr<br />
1 . Slide the USB/AUDIO-IN SWITCH on the back of the TRANSMITTER<br />
to AUDIO IN .<br />
2 . Connect your audio source (iPod ® player, CD player, <strong>TV</strong>) that will work with<br />
a universal audio output, to the TRANSMITTER with the 3 .5mm AUDIO/<br />
HEADPHONE CABLE (included) .<br />
3 . Connect the TRANSMITTER to the power source by plugging the USB end of<br />
the USB/mini USB CABLE into the MINI USB jACK on the TRANSMITTER .<br />
Plug the other end into the USB/AC ADAPTER .<br />
4 . Plug the USB/AC ADAPTER into a standard 110V wall outlet .<br />
The TRANSMITTER’s power LED will illuminate .<br />
uSB POWEr<br />
1 . Slide the USB/AUDIO-IN SWITCH on the back of the TRANSMITTER<br />
to USB .<br />
2 . Connect the TRANSMITTER to your computer by plugging the mini USB<br />
end of the USB/mini USB CABLE into the MINI USB jACK on the<br />
TRANSMITTER and the other end into a USB port on your computer .<br />
The TRANSMITTER’s power LED will illuminate .
POWErINg Off aNd ON<br />
1 . To power the transmitter off, press and hold the POWER button for 5 seconds<br />
(the power LED will go off) .<br />
Note: depending upon your audio setup, you may have to unplug the cable<br />
to your <strong>TV</strong>, computer, etc. to restore normal speaker operation.<br />
2 . To power the transmitter on, press and release the POWER button .<br />
PaIRInG<br />
You will need to pair the HEADPHONES and the TRANSMITTER the first time<br />
you use them with an audio source .<br />
1 . Connect the TRANSMITTER to a power source . The TRANSMITTER’s power<br />
LED will illuminate .<br />
2 . Push in and hold the CONNECT button on both the HEADPHONES and the<br />
TRANSMITTER . The CONNECT button LED on the TRANSMITTER will blink<br />
fast while pairing . When a beep is heard, release the buttons . The pairing is<br />
finalized when a long beep is heard .<br />
3 . Now connect the TRANSMITTER to an audio source and play an audio track .<br />
Both the CONNECT button on the TRANSMITTER and the POWER button<br />
on the HEADPHONES will illuminate solid .<br />
4 . When listening to this same audio source again, the HEADPHONES will<br />
automatically pair with the TRANSMITTER connected to that audio source .<br />
Note: The TraNSmITTEr will pair with only one set of HEADPHONES.<br />
10
11<br />
lIsTenInG<br />
uSINg THE <strong>TV</strong> HEadPHONES WITH rca/HEadPHONE jackS<br />
1a . Via RCA jacks: Plug the 3 .5mm AUDIO to RCA CABLE into the RCA audio<br />
jacks on your <strong>TV</strong> and into the AUDIO jACK on the TRANSMITTER .<br />
1b . Via Headphone jack: Plug the 3 .5mm AUDIO/HEADPHONE CABLE<br />
into the audio output jack on your <strong>TV</strong> and into the AUDIO-IN jack on the<br />
TRANSMITTER .<br />
Note: When using the Headphone jack, the <strong>TV</strong> volume must be on at an<br />
audible level in order to hear sound through the HEadPHONES.<br />
2 . Plug the USB CABLE into the MINI USB PORT on the TRANSMITTER and<br />
the other end into the USB/AC ADAPTER .<br />
3 . Plug the USB/AC ADAPTER into a regular 110V wall outlet . The<br />
TRANSMITTER’s power LED will illuminate .<br />
4 . Slide the USB/AUDIO-IN SELECT switch to AUDIO-IN .<br />
5 . Turn on the <strong>TV</strong> or other audio device .<br />
6 . Turn on the HEADPHONES by pressing the POWER button on the left ear cup .<br />
7 . Adjust the volume on your <strong>TV</strong> or other audio device, and on the <strong>TV</strong> <strong>Headphones</strong><br />
with the HEADSET CONNECT BUTTON/VOLUME switch .<br />
8 . Settle the HEADPHONES comfortably on your head and adjust the length<br />
of the HEADBAND accordingly .<br />
9 . Enjoy the audio at any volume level privately, without disturbing others—even if<br />
you’re in the same room!
uSINg THE <strong>TV</strong> HEadPHONES WITH yOur cOmPuTEr<br />
1 . Plug one end of the USB CABLE into the USB PORT on your computer .<br />
2 . Plug the other end of the USB CABLE into the MINI USB PORT<br />
on the back of the TRANSMITTER .<br />
3 . Slide the USB/AUDIO-IN SELECT switch to USB .<br />
4 . Turn on the computer and ensure the volume of the computer is turned<br />
all the way down .<br />
5 . Turn on the HEADPHONES by pushing the POWER button on the bottom<br />
of the left ear cup .<br />
6 . Adjust the volume with the CONNECT BUTTON/VOLUME switch .<br />
7 . Settle the HEADPHONES comfortably on your head, adjusting the length<br />
of the HEADBAND accordingly .<br />
8 . Enjoy the audio at any volume level privately, without disturbing<br />
others—even if you’re in the same room!<br />
12
13<br />
sPecIfIcaTIons<br />
Infrared Carrier Frequencies . . . . . . . . . . . . . . . . . . . .2 .4GHz<br />
Frequency Response . . . . . . . . . . . . . . . . . . . . . . . . . . .20-20kHz<br />
Speakers . . . . . . . . . . . . . . . . . . . . . . . . . . . . . . . . . . . . . .30mm<br />
S/N Ratio . . . . . . . . . . . . . . . . . . . . . . . . . . . . . . . . . . . . .>45dB<br />
Distortion . . . . . . . . . . . . . . . . . . . . . . . . . . . . . . . . . . . . . .
TRoUbleshooTInG<br />
PrOBlEm POSSIBlE cauSE SOluTION<br />
Not working and/or<br />
no sound .<br />
Power button blinking .<br />
No sound .<br />
Other wireless devices<br />
stop working .<br />
Continuous beeping in<br />
<strong>Headphones</strong> .<br />
Connections between<br />
the audio jack on the<br />
<strong>TV</strong> and the transmitter<br />
may be loose .<br />
You may be out of range<br />
of the transmitter .<br />
Batteries are low .<br />
Volume is set too<br />
low to hear .<br />
No audio signal<br />
at source .<br />
The <strong>TV</strong> <strong>Headphones</strong> are<br />
operating on the same<br />
frequency .<br />
Check all connections .<br />
Move to within 150 feet of<br />
the transmitter .<br />
Replace the batteries .<br />
Increase the volume .<br />
Check that audio source<br />
is on .<br />
Bad cable connection . Check all connections .<br />
Change the channel or<br />
frequency on the other<br />
device .<br />
Pairing not activated . Perform pairing<br />
procedure again .<br />
14
15<br />
noTes
noTes<br />
16
17<br />
one (1) YeaR lIMITeD WaRRanTY<br />
<strong>Brookstone</strong> ® warrants this product against defects in materials and/or workmanship<br />
under normal use for a period of ONE (1) YEAR from the date of purchase by the<br />
original purchaser (“Warranty Period”) . If a defect arises and a valid claim is received<br />
within the Warranty Period, at its option, <strong>Brookstone</strong> will either 1) repair the defect<br />
at no charge, using new or refurbished replacement parts, or 2) replace the product<br />
with a new product that is at least functionally equivalent to the original product, or<br />
3) provide a store credit in the amount of the purchase price of the original product .<br />
A replacement product or part, including a user-installable part installed in accordance<br />
with instructions provided by <strong>Brookstone</strong>, assumes the remaining warranty of the<br />
original product . When a product or part is exchanged, any replacement item becomes<br />
your property and the replaced item becomes <strong>Brookstone</strong>’s property . When a store<br />
credit is given, the original product must be returned to <strong>Brookstone</strong> and becomes<br />
<strong>Brookstone</strong>’s property .<br />
Obtaining Service: To obtain warranty service, call <strong>Brookstone</strong> Limited Warranty Service at<br />
1-800-292-9819 . Please be prepared to describe the product that needs service and<br />
the nature of the problem . A purchase receipt is required . All repairs and replacements<br />
must be authorized in advance . Service options, parts availability and response times<br />
will vary . You are responsible for delivery and the cost of delivery of the product or any<br />
parts to the authorized service center for replacement, per our instructions .<br />
limits and Exclusions: Coverage under this Limited Warranty is limited to the United<br />
States of America, including the District of Columbia and the U .S . Territories of<br />
Guam, Puerto Rico, and the U .S . Virgin Islands . This Limited Warranty applies only<br />
to products manufactured for <strong>Brookstone</strong> that can be identified by the “<strong>Brookstone</strong>”<br />
trademark, trade name, or logo affixed to them or their packaging . The Limited<br />
Warranty does not apply to any non-<strong>Brookstone</strong> products . Manufacturers or<br />
suppliers other than <strong>Brookstone</strong> may provide their own warranties to the purchaser,
ut <strong>Brookstone</strong>, in so far as permitted by law, provides these products “as is .”<br />
This warranty does not apply to: a) damage caused by failure to follow instructions<br />
relating to product’s use or the installation of components; b) damage caused by<br />
accident, abuse, misuse, fire, floods, earthquake or other external causes; c) damage<br />
caused by service performed by anyone who is not a representative of <strong>Brookstone</strong>;<br />
d) accessories used in conjunction with a covered product; e) a product or part<br />
that has been modified to alter functionality or capability; f) items intended to be<br />
periodically replaced by the purchaser during the normal life of the product including,<br />
without limitation, batteries or light bulbs; g) any product sold “as is” including, without<br />
limitation, floor demonstration models and refurbished items; or h) a product that is<br />
used commercially or for a commercial purpose .<br />
BrOOkSTONE SHall NOT BE lIaBlE fOr INcIdENTal Or cONSEQuENTIal<br />
damagES rESulTINg frOm THE uSE Of THIS PrOducT, Or arISINg<br />
OuT Of aNy BrEacH Of THIS WarraNTy. TO THE EXTENT PErmITTEd By<br />
aPPlIcaBlE laW, BrOOkSTONE dISclaImS aNy aNd all STaTuTOry Or<br />
ImPlIEd WarraNTIES, INcludINg, WITHOuT lImITaTION, WarraNTIES<br />
Of mErcHaNTaBIlITy, fITNESS fOr a ParTIcular PurPOSE aNd<br />
WarraNTIES agaINST HIddEN Or laTENT dEfEcTS. If BrOOkSTONE<br />
caNNOT laWfully dISclaIm STaTuTOry Or ImPlIEd WarraNTIES, THEN<br />
TO THE EXTENT PErmITTEd By laW, all SucH WarraNTIES SHall BE<br />
lImITEd IN duraTION TO THE duraTION Of THIS EXPrESS WarraNTy.<br />
Some states disallow the exclusion or limitation of incidental or consequential damages<br />
or how long an implied warranty lasts, so the above exclusions or limitations may not<br />
apply to you . This warranty gives you specific legal rights and you may also have other<br />
rights, which vary from state to state .<br />
18
Find thousands more<br />
great ideas online<br />
683417<br />
Merrimack, New Hampshire USA 03054 • 800-846-3000 • <strong>Brookstone</strong> .com


