Xerox Document Centre 440/432/420 User Guide
Xerox Document Centre 440/432/420 User Guide Xerox Document Centre 440/432/420 User Guide
1 1 Sided single-sided copies from single-sided originals. 2 1 Sided single-sided copies from double-sided originals. 1 2 Sided double-sided copies from single-sided originals. 2 2 Sided double-sided copies from double-sided originals. For 2 Sided options, also select the orientation: Head to Head the top of the document on each side is at the top of the page. This is the factory default setting. Head to Toe the image on the second side of each page is rotated 180°; therefore, the top of the document on the second side is at the bottom of the page. Portrait or Landscape If available, select either Portrait or Landscape. The following illustration depicts the results for Head to Head or Head to Toe selections for Portrait and Landscape images. Portrait Images Landscape Images. Head to Head Head to Head for binding on the long edge for binding on the short edge A Page 10-34 Xerox Document Centre 440/432/420 User Guide B Head to Toe Head to Toe for binding on the short edge for binding on the long edge A B A A B B
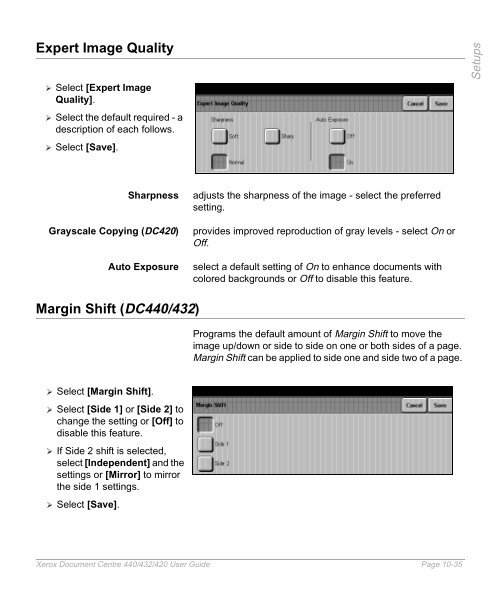
Expert Image Quality � Select [Expert Image Quality]. � Select the default required - a description of each follows. � Select [Save]. Sharpness adjusts the sharpness of the image - select the preferred setting. Grayscale Copying (DC420) provides improved reproduction of gray levels - select On or Off. Auto Exposure select a default setting of On to enhance documents with colored backgrounds or Off to disable this feature. Margin Shift (DC440/432) � Select [Margin Shift]. � Select [Side 1] or [Side 2] to change the setting or [Off] to disable this feature. � If Side 2 shift is selected, select [Independent] and the settings or [Mirror] to mirror the side 1 settings. � Select [Save]. Programs the default amount of Margin Shift to move the image up/down or side to side on one or both sides of a page. Margin Shift can be applied to side one and side two of a page. Xerox Document Centre 440/432/420 User Guide Page 10-35 Setups
- Page 233 and 234: � Pull out the paper tray towards
- Page 235 and 236: � Referring to the tray labels, l
- Page 237 and 238: � Following the copier labels, lo
- Page 239 and 240: � Pull open tray 1 and, holding t
- Page 241 and 242: � Use the handle on the front to
- Page 243 and 244: Storing and Handling Paper Always u
- Page 245 and 246: 8 1/2” x 11” Letter Paper 8 1/2
- Page 247 and 248: Media Use Specifications Preprinted
- Page 249 and 250: Media Use Specifications Card stock
- Page 251 and 252: 10 Setups The DC440/432/420 is desi
- Page 253 and 254: Fax Setups enable the Fax specific
- Page 255 and 256: � Select the button for the setup
- Page 257 and 258: Access the Machine Setups � Selec
- Page 259 and 260: Date/Time Setup � Select [Date/Ti
- Page 261 and 262: Walkup Screen To change the default
- Page 263 and 264: Power Save/Sleep Mode (Auto Off/Sle
- Page 265 and 266: � Select [Localization. � Selec
- Page 267 and 268: Touch Screen Contrast � Select [T
- Page 269 and 270: Xerox Supplies Number / Supplies Te
- Page 271 and 272: Unavailable Features Some types of
- Page 273 and 274: Disabled Component Service/ Feature
- Page 275 and 276: Disabled Component Foreign Interfac
- Page 277 and 278: Disabled Component Service/ Feature
- Page 279 and 280: Copy Setups Quick Pathway �Select
- Page 281 and 282: . � Select [Normal]. � Use the
- Page 283: Output � Select [Output]. � Use
- Page 287 and 288: � Select [Edge Erase]. � Use th
- Page 289 and 290: � Select [Fax Setups]. Fax Termin
- Page 291 and 292: � Select [Local ID]. If more than
- Page 293 and 294: � Select the second [Company Logo
- Page 295 and 296: � Select [Duplex Printing]. � M
- Page 297 and 298: � Select [A3 x 11” x 17”].
- Page 299 and 300: � Select [Transmission Report].
- Page 301 and 302: � Select [Lighter/Darker]. � Us
- Page 303 and 304: Fax Mailboxes G3 like Super G3, thi
- Page 305 and 306: � Select [Delete Mailbox]. � Se
- Page 307 and 308: � Select [Files for Polling]. �
- Page 309 and 310: Outgoing Fax Options. � Select [O
- Page 311 and 312: � Select [Redial Count]. � Sele
- Page 313 and 314: Incoming Fax Options � Select any
- Page 315 and 316: � Select [Receive Header Print].
- Page 317 and 318: Auditron Setups Quick Pathway �Se
- Page 319 and 320: � Select the option required. - F
- Page 321 and 322: � Select [Internal Auditron]. �
- Page 323 and 324: � Select the account number to be
- Page 325 and 326: � Select [Account Summary]. � M
- Page 327 and 328: � Access Auditron Setups. � Sel
- Page 329 and 330: � Select [Add Account]. � Enter
- Page 331 and 332: � Select [Job Completion Setup].
- Page 333 and 334: � Access Auditron Setups. � Sel
Expert Image Quality<br />
� Select [Expert Image<br />
Quality].<br />
� Select the default required - a<br />
description of each follows.<br />
� Select [Save].<br />
Sharpness adjusts the sharpness of the image - select the preferred<br />
setting.<br />
Grayscale Copying (DC<strong>420</strong>) provides improved reproduction of gray levels - select On or<br />
Off.<br />
Auto Exposure select a default setting of On to enhance documents with<br />
colored backgrounds or Off to disable this feature.<br />
Margin Shift (DC<strong>440</strong>/<strong>432</strong>)<br />
� Select [Margin Shift].<br />
� Select [Side 1] or [Side 2] to<br />
change the setting or [Off] to<br />
disable this feature.<br />
� If Side 2 shift is selected,<br />
select [Independent] and the<br />
settings or [Mirror] to mirror<br />
the side 1 settings.<br />
� Select [Save].<br />
Programs the default amount of Margin Shift to move the<br />
image up/down or side to side on one or both sides of a page.<br />
Margin Shift can be applied to side one and side two of a page.<br />
<strong>Xerox</strong> <strong>Document</strong> <strong>Centre</strong> <strong>440</strong>/<strong>432</strong>/<strong>420</strong> <strong>User</strong> <strong>Guide</strong> Page 10-35<br />
Setups


