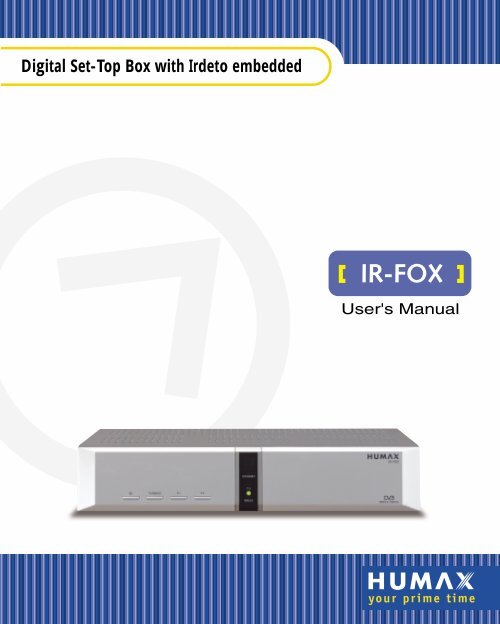
Digital Set-Top Box with Irdeto embedded - Humax
Digital Set-Top Box with Irdeto embedded - Humax
Digital Set-Top Box with Irdeto embedded - Humax

You also want an ePaper? Increase the reach of your titles
YUMPU automatically turns print PDFs into web optimized ePapers that Google loves.
<strong>Digital</strong> <strong>Set</strong>-<strong>Top</strong> <strong>Box</strong> <strong>with</strong> <strong>Irdeto</strong> <strong>embedded</strong>
Contents<br />
Safety<br />
Copyright & Glossary<br />
Reference<br />
STB Connections<br />
Remote Control Unit<br />
Function Guide<br />
Main Menu Guide<br />
Motorised System<br />
Troubleshooting Guide<br />
Menu Map<br />
Specification<br />
GB2<br />
GB3<br />
GB4 ~ GB5<br />
GB6 ~ GB9<br />
GB10 ~ GB11<br />
GB12 ~ GB16<br />
GB17 ~ GB45<br />
GB46 ~ GB50<br />
GB51<br />
GB52 ~ GB53<br />
GB54 ~ GB55<br />
GB1
GB2<br />
Safety<br />
This STB has been manufactured to satisfy international safety standards.<br />
Please read the following safety precautions carefully.<br />
MAINS SUPPLY : 90 - 250 V AC 50/60 Hz<br />
OVERLOADING : Do not overload a wall outlet, extension cord or adapter as this may result<br />
in fire or electric shock.<br />
LIQUIDS : The STB should not be exposed to dripping or splashing, and no objects<br />
containing liquids, such as base, should be placed on the apparatus.<br />
CLEANING : Disconnect the STB from the wall outlet before cleaning.<br />
Use a light damp cloth (no solvents) to dust the STB.<br />
VENTILATION : The slots on top of the STB must be left uncovered to allow proper airflow<br />
to the unit.<br />
Do not stand the STB on soft furnishings or carpets.<br />
Do not expose the STB to direct sunlight, nor place it near a heater.<br />
Do not stack electronic equipment on top of the STB.<br />
ATTACHMENTS : Do not use any non-recommended attachments, as these maybe<br />
hazardous or cause damage the STB.<br />
CONNECTION TO THE SATELLITE DISH LNB<br />
: Disconnect the STB from the mains before connecting or disconnecting the<br />
cable from the satellite dish.<br />
FAILURE TO DO SO CAN DAMAGE THE LNB.<br />
CONNECTION TO THE TV<br />
: Disconnect the STB from the mains before connecting or disconnecting the<br />
cable from the satellite dish.<br />
FAILURE TO DO SO CAN DAMAGE THE TV.<br />
EARTHING : The LNB cable MUST BE EARTHED.<br />
The earthing system must comply <strong>with</strong> SABS 061.<br />
LOCATION : Place the STB indoors to avoid exposing it to lightning, rain or sun.
Copyright & Glossary<br />
Copyright<br />
• VIACCESS TM is a trademark of France Telecom.<br />
• CryptoWorks(TM) is a trademark of Philips Electronics N.V.<br />
• <strong>Irdeto</strong> is a trademark of Mindport BV.<br />
• Nagravision is a registered trademark of Kudelski S.A.<br />
• Conax is a trademark of Telenor Conax AS.<br />
Warning<br />
• HUMAX cannot be held responsible for any problems caused by the use of unofficial<br />
software. The use of software versions other than HUMAX official software will void the<br />
manufacturer’s warranty. It is advised that only HUMAX formal software be used in all HUMAX<br />
product ranges.<br />
Glossary<br />
• Antenna<br />
A device that collects and radiates electromagnetic waves. This includes a satellite dish and<br />
a broadband antenna.<br />
• Forward Error Correction (FEC)<br />
An error control system for data transmission.<br />
• Frequency<br />
The number of cycles or events per second, expressed in of Hertz(Hz) units.<br />
• Intermediate Frequency (IF)<br />
A frequency to which a carrier frequency is shifted as an intermediate step in transmission or reception.<br />
• Low Noise Block (LNB) Downconverter<br />
A low noise microwave amplifier and converter which downconverts a range of frequencies to the IF<br />
range.<br />
• Packet Identifier (PID)<br />
A set of numbers that identifies transport stream packets containing data from a single data stream.<br />
• Polarisation<br />
Characteristic of an electromagnetic wave determined by the orientation of the electric field vector.<br />
• Quaternary Phase Shift Keying (QPSK)<br />
Phase-shift keying in which four different phase angles are used.<br />
• Service<br />
A channel into which a decoder or TV is tuned.<br />
• Transponder<br />
An automatic device that receives, amplifies and retransmits a signal on a different frequency.<br />
GB3
GB4<br />
References<br />
1. DiSEqC 1.0 Connection<br />
All our receivers are designed to be DiSEqC 1.0 compatible. This allows multiple antennae<br />
to be connected to the STB simultaneously.<br />
If you have two or more fixed antennae or LNBs, you can use a DiSEqC 1.0 switch.<br />
1. Connect the coaxial cable from the first LNB to the LNB 1 or LNB A DiSEqC switch input<br />
connector.<br />
2. Connect the coaxial cable from the second LNB to the LNB 2 or LNB B DiSEqC switch in<br />
put connector.<br />
3. Do the same for the other LNBs.<br />
4. Connect one end of a Coaxial cable to the RF DiSEqC switch output connector and the<br />
other end to the LNB IN socket on the STB.<br />
2. DiSEqC 1.2 Connection<br />
Please refer to page GB46.<br />
3. Connecting a Satellite antenna<br />
You can connect either a single satellite antenna directly to the digital receiver or several<br />
antennae via the converter box or multi-feed equipment LNB.<br />
You can connect a further Sat-receiver (for example analogue) to the common antenna<br />
equipment receiver that has satellite signals.<br />
4. Loop Via<br />
If you have another analogue or digital STB and you wish to use the same LNB, then you<br />
can connect it via the loop via. Connect one end of a Coaxial cable to the LNB OUT<br />
on the STB and connect the other end to the LNB IN on your second STB.
5. Software Upgradeing<br />
The HUMAX digital set-top box is a highly sophisticated product-incorporating one of the<br />
best software applications.<br />
Whenever a problem is found <strong>with</strong> this software or extra functions or enhanced<br />
applications are added, the software in the equipment must be upgraded.<br />
In order to maintain correct product performance, it is essential to have the most<br />
Up-to-date software. The latest news and releases on software versions may be found at<br />
the HUMAX website - http://www.humaxdigital.com.<br />
It is recommended that users register <strong>with</strong> HCSA (HUMAX Customer Service Area) and<br />
periodically check the availability of software upgrade.<br />
There are three methods for upgrading the software:<br />
(a) set-top box to set-top box download (copies the software from the main unit into the slave<br />
unit);<br />
(b) PC to set-top box download (downloads the software directly from the PC to the model<br />
requiring upgrading);<br />
(c) OTA over-the-air (downloads the software, where the manufacturer reserves the right to<br />
decide when and where to release via the satellite system).<br />
Over The Air (OTA) is simply another alternative for downloading software versions.<br />
However, the manufacturer reserves the right to decide when and where this software<br />
upgrade takes place by "beaming" the latest software versions over the air via satellite<br />
systems. Note that OTA is limited to certain geographical regions only, mainly due to<br />
different satellites having different footprints (areas where the signal can be received).<br />
SUSS (TM) is an official trademark and logo for HUMAX loader software to perform OTA.<br />
The software upgrade via the satellite system can only occur under the following<br />
circumstances:<br />
1) the equipment should have appropriate loader software;<br />
2) the manufacturer decides to release software downloading via a designated satellite<br />
system;<br />
3) the equipment must be properly "tuned" to the same satellite as the one used by the<br />
manufacturer.<br />
GB5
GB6<br />
STB Connections<br />
Front Panel<br />
1<br />
2<br />
3<br />
4<br />
5<br />
6<br />
7<br />
8<br />
1 2 3 4 5 6 7<br />
8<br />
STANDBY<br />
Press to switch between Operation and Standby modes.<br />
TV/RADIO<br />
Press to switch between TV and Radio modes.<br />
P-<br />
Use to change services down.<br />
P+<br />
Use to change services up.<br />
STANDBY LED (RED)<br />
Indicates that the STB is under standby.<br />
TV LED (GREEN)<br />
The LED light goes on when in TV mode.<br />
RADIO LED (YELLOW)<br />
The LED light goes on when in RADIO mode.<br />
SLOT<br />
For a CA Module <strong>with</strong> a smart card.
Rear Panel<br />
1<br />
2<br />
3<br />
4<br />
5<br />
6<br />
LNB IN<br />
Use to connect an antenna.<br />
LNB OUT<br />
Use when connecting to another STB.<br />
RS-232C<br />
Use when connecting to your PC.<br />
TV SCART<br />
For the TV audio/video input.<br />
VCR SCART<br />
For the VCR.<br />
AUDIO OUTPUT<br />
Audio signal from your STB to VCR or TV.<br />
GB7
GB8<br />
STB Connections<br />
There are several ways of connecting the STB to your existing Audio/TV system.<br />
For best results, we recommend using one of the following set-ups:<br />
TV only<br />
1. Connect one end of a 21-pin SCART cable to the TV SCART connector on the STB and<br />
the other end to a SCART socket on your TV.<br />
2. Connect the coaxial cable from the LNB to the LNB IN socket on the STB.<br />
TV <strong>with</strong> VCR<br />
1. Connect one end of a 21-pin SCART cable to the TV SCART connector on the STB<br />
and the other end to a SCART socket on your TV.<br />
2. Connect one end of a 21-pin SCART cable to the VCR SCART connector on the STB<br />
and the other end to a SCART socket on your VCR.<br />
3. Connect the coaxial cable from the LNB to the LNB IN socket on the STB.<br />
With a Hi-fi System<br />
1. Connect an RCA/Cinch stereo cable from the AUDIO L,R sockets on the back of the STB<br />
to the LINE, AUX, SPARE OR EXTRA input sockets on your Hi-fi system.
TV <strong>with</strong> VCR and Motorised System (DiSEqC 1.2)<br />
1. Connect one end of a 21-pin SCART cable to the TV SCART connector on the STB and<br />
the other end to a SCART socket on your TV.<br />
2. Connect one end of a 21-pin SCART cable to the VCR SCART connector on the STB<br />
and the other end to a SCART socket on your VCR.<br />
3. Connect the coaxial cable from the LNB of your motorised system(DiSEqC 1.2 Motor)<br />
to the LNB IN socket on the STB.<br />
GB9
GB10<br />
Remote Control Unit<br />
TV/RADIO STANDBY<br />
SOURCE<br />
NUMERIC BUTTONS<br />
FAV (FAVOURITE)<br />
GREEN<br />
RED<br />
OK<br />
P-/P+<br />
MENU<br />
i (INFORMATION)<br />
FREEZE<br />
GREEN<br />
RED<br />
YELLOW<br />
BLUE<br />
GUIDE<br />
YELLOW<br />
BLUE<br />
CURSOR<br />
EXIT<br />
V-/V+<br />
RCL (RECALL)<br />
HELP<br />
MUTE<br />
OPT+ (OPTION)
1 TV/RADIO<br />
Press to switch between TV and Radio modes.<br />
12<br />
2<br />
3<br />
4<br />
5<br />
6<br />
7<br />
8<br />
9<br />
10<br />
11<br />
SOURCE<br />
Press to select the TV/SAT mode.<br />
NUMERIC BUTTONS<br />
Press to select a service, enter your PIN code or<br />
number on a menu.<br />
FAV (FAVOURITE)<br />
Press to see the current service configuration<br />
or edit during A/V play.<br />
GREEN<br />
Press to select a Service Favourite in the Service<br />
List. This button functions in the same way as the<br />
GREEN button icon on a menu.<br />
RED<br />
Press to select a Service All in the Service List.<br />
This button functions in the same way as the RED<br />
button icon on a menu.<br />
OK<br />
Press to display the service list. This button can be<br />
used to select the item on the menus.<br />
P-/P+<br />
Programme up/down buttons.<br />
Press to move to the next or previous service.<br />
Press to move up or down pages on a menu.<br />
MENU<br />
Press to display the Main Menu on the screen<br />
or return to the screen from a sub menu screen.<br />
i (INFORMATION)<br />
Press to display the programme information box<br />
on the screen.<br />
FREEZE<br />
Press once to freeze the screen picture.<br />
Press again to return to normal mode.<br />
13<br />
14<br />
15<br />
16<br />
17<br />
18<br />
19<br />
20<br />
21<br />
22<br />
STANDBY<br />
Press to switch between Operation mode and<br />
Standby mode.<br />
GUIDE<br />
Press to display the TV/Radio Electronic Programme<br />
Guide<br />
YELLOW<br />
Press to select a Service Network in the Service<br />
List. This button functions in the same way as the<br />
YELLOW button icon on a menu.<br />
BLUE<br />
Press to select a Service Alphabet in the Service<br />
List. This button functions in the same way as the<br />
BLUE button icon on a menu.<br />
CURSOR<br />
Press to move the highlight bar for selecting<br />
options on the menus.<br />
This button can be used to change services<br />
(up/down) and increase or decrease the audio<br />
volume (left/right).<br />
EXIT<br />
Press to return to the previous menu or screen.<br />
V-/V+<br />
Volume up/down buttons.<br />
Press to increase or decrease the volume.<br />
RCL (RECALL)<br />
Press to select the service previously viewed.<br />
HELP<br />
Press to display the help box on the screen.<br />
MUTE<br />
Press to cut the sound off temporarily.<br />
OPT+ (OPTION)<br />
Press to enter the sub menu for selecting<br />
Soundtrack and Subtitle.<br />
This button can be used to reserve a<br />
programme in the TV Guide.<br />
• Please note : The design of the Remote Control Unit may be changed <strong>with</strong>out advance notice.<br />
GB11
GB12<br />
Function Guide<br />
Information <strong>Box</strong> (I-Plate)<br />
The detailed information on a service and its event is automatically<br />
displayed at the bottom of the screen (I-Plate) whenever a service<br />
changes. To obtain this information when watching a service, press<br />
thei ( ) button. If you press the i ( ) button again while the<br />
I-Plate is displayed, the I-Plate disappears.<br />
The I-Plate is divided into a “service information” part and an “event<br />
information” part.<br />
Service Part<br />
The service information is situated on the left side of the I-Plate and<br />
consists of the following items:<br />
• Current Time, Dolby <strong>Digital</strong> Symbol if there is an available Dolby<br />
service.<br />
• Service name, Service Number, icon.<br />
• Subtitle/Teletext/Scrambling symbol displayed according to the<br />
service attributes.<br />
• Progressive Signal Quality bar.<br />
Event Part<br />
The event information is situated on the right side of the I-Plate and<br />
consists of the following items:<br />
• Event name and, duration time of the event.<br />
• Description of the event, status of the reserved event.<br />
There are two types of event information, present event<br />
information and following event information.<br />
If the following one is available, the icon is displayed.<br />
To switch between the present and following ones, proceed as<br />
follows,<br />
1. Activate the I-Plate using the i ( ) button.<br />
2. If the present event information is available, it is displayed on the<br />
I-Plate.<br />
3. If the following event information is available, the icon is<br />
displayed.<br />
4. Press the button to switch to the following event information.<br />
5. Press the button to return to the present event information.<br />
If the present one is not available, the icon is not displayed<br />
and cannot return to from the following one.
If you press the HELP ( ) button while the I-Plate is displayed,<br />
the detailed description of the event will be displayed on the help<br />
window instead of help messages. If there is no available data for<br />
the detailed description on the air, the help message is displayed on<br />
the help window instead.<br />
Changing Services<br />
There are several ways to change a service.<br />
• Use the NUMERIC buttons: key in the service number using the<br />
NUMERIC buttons and press the OK ( ) button. If the OK ( )<br />
button is not pressed, the service is automatically changed to the<br />
service number keyed in after about 5 seconds.<br />
• Use the buttons: the service is changed up/down<br />
sequentially if the button is pressed.<br />
• Use the buttons: the service is changed up/down<br />
sequentially if the button is pressed.<br />
• Use the service list or Guide list: refer to the following description.<br />
• Use the RCL ( ) button: return to the latest viewed service<br />
when the RCL ( ) button is pressed.<br />
There are two types of service, TV and RADIO.<br />
To switch between them, press the TV/RADIO button.<br />
To change a service in the service list or guide list, proceed as<br />
follows:<br />
1. Activate the service list or guide list.<br />
(Refer to the following GB15, 17 pages on how to activate them)<br />
2. Select the desired service using the button.<br />
3. Press the OK ( ) button, and the service is changed to the<br />
desired one.<br />
Teletext Service<br />
The TELETEXT ( ) icon appears on the I-Plate if there is<br />
available teletext data in the service.<br />
(NOTE: The TV supports the teletext decoder internally for<br />
watching it, since the teletext data is decoded by the TV.)<br />
Volume Control<br />
To adjust the volume level, use the button or the button.<br />
To mute the audio, press the MUTE ( ) button. To recover the<br />
audio level, press the MUTE ( ) button again, or the ,<br />
button.<br />
GB13
GB14<br />
Function Guide<br />
Soundtrack<br />
To change the audio language in the current service, proceed as<br />
follows:<br />
1. Press the OPT+ ( ) button and select the Soundtrack item.<br />
2. Press the button to activate the list of supported audio<br />
languages.<br />
3. Select the desired audio language in the list using the keys.<br />
4. Select the audio mode (mono, stereo, Dolby) in the desired audio<br />
language using the buttons.<br />
5. Press the OK ( ) button to confirm the change,<br />
or the EXIT ( ) button to cancel the change.<br />
The selected audio language is preserved regardless of the<br />
change of service.<br />
If the selected audio language is invalid from some reason, the<br />
default audio language will be selected. (The default audio language<br />
can be set on the Language <strong>Set</strong>ting in the Main menu.)<br />
If an audio language is encoded by Dolby <strong>Digital</strong>, the Dolby <strong>Digital</strong><br />
Symbol will appear in the list of audio languages.<br />
NOTE: The Dolby decoder <strong>with</strong> optical port shall be connected<br />
externally to decode the Dolby <strong>Digital</strong> audio.<br />
Subtitle<br />
If there is a subtitle service available on the air, the subtitle icon ( )<br />
will appear in the I-Plate.<br />
To select the subtitle language, proceed as follows:<br />
1. Press the OPT+ ( ) button and select the Subtitle item.<br />
2. Press the button to activate the list of supported subtitle<br />
languages.<br />
3. Select the desired subtitle language in the list using the<br />
keys.<br />
4. Press the OK ( ) button to confirm the change or press the<br />
EXIT ( ) button to cancel the change.
Service List<br />
There are four service list types: All Service, Favourite Service,<br />
Network Service and Alphabetical Order Service.<br />
There is also a Configuration Service menu to change the<br />
attributes of each service in the list.<br />
In the service list, some buttons are used to switch the service list<br />
type or select the service.<br />
• buttons: Used to move the cursor up/down in the<br />
service list.<br />
• buttons: Used to move the cursor left/right in the<br />
service list.<br />
• RED button: Used to select the All type Service.<br />
• GREEN button: Used to select the Favourite type Service.<br />
• YELLOW button: Used to select the Network type Service.<br />
• BLUE button: Used to select the Alphabetical Order Service.<br />
Configuration Service<br />
To change the attributes of a service, proceed as follows:<br />
1. Change to the service whose attributes are to be changed using<br />
the , or other method.<br />
2. Press the FAV ( ) button.<br />
The Service Configuration <strong>Box</strong> then appears on the screen.<br />
3. Use the buttons to select the desired one among the<br />
attribute items (Favourite, Lock, Skip and Delete) in the Service<br />
Configuration <strong>Box</strong>.<br />
4. Use the buttons to enable/disable “LOCK”, “SKIP” or<br />
“DELETE” to select the desired favourite group. When done,<br />
press the OK ( ) button. To cancel, press the EXIT ( )<br />
button.<br />
All Service<br />
The All Service list is a normal one, where the service list is<br />
organised according to the order in which services are searched.<br />
(The latest service will be added at the end of the service list.)<br />
To select the “All Service” list, press the RED button <strong>with</strong> the<br />
service list displayed.<br />
If the RED button is pressed again in the All mode Service,<br />
the service list toggles between Simple List and Advanced List.<br />
GB15
GB16<br />
Function Guide<br />
Service Favourite<br />
Services can be grouped in the favourite list. To add a service to a<br />
group in the favourite list, the Configuration Service box or the<br />
Service Organising menu in the main menu can be used.<br />
(Refer to the related item for a more detailed description).<br />
To select the “Favourite Service” list, press the GREEN button <strong>with</strong><br />
the service list displayed.<br />
Service Network<br />
In the Network Service mode, the service list is organised according<br />
to the network to which a service belongs.<br />
To select the “Network Service” list, press the YELLOW button <strong>with</strong><br />
the service list displayed.<br />
Whenever the YELLOW button is pressed in the “Network Service”<br />
mode, the cursor will be toggled between the network name column<br />
and the service name column.<br />
When the cursor is in the network name list, the desired network<br />
can be selected using the button.<br />
All services belonging to the selected network will be listed in the<br />
service name column.<br />
Service Alphabetical<br />
In the Alphabetical Service mode, the list of services is given<br />
alphabetically according to the service name.<br />
To select the Alphabetical Service list, press the BLUE button <strong>with</strong><br />
the service list displayed.<br />
Whenever the BLUE button is pressed in the Alphabetical Service<br />
list, the cursor will be toggled between the alphabet character<br />
column and the service name column.<br />
When the cursor is in the alphabet character list, the desired<br />
alphabet character can be selected using the button.<br />
All services <strong>with</strong> the selected alphabet character as a first character<br />
in the service name will be listed in the service name column.
Main Menu Guide<br />
The Main menu contains the TV Guide, Parental Control, Installation<br />
and Utility menus. (For more detailed information about menu<br />
structure, please refer to the Menu Map page at the end of the<br />
User’s Manual.)<br />
1. TV Guide<br />
The TV Guide is useful when all the services are being navigated,<br />
since it offers all possible viewing options.<br />
The TV Guide supplies the following information:<br />
• Start/end time of all available services.<br />
• Short description of all available services.<br />
• Extended description of all available services.<br />
For easy navigation, the TV Guide supplies 4 modes: Now, Weekly,<br />
Reserved and Quick.<br />
2. Parental Control<br />
Parental Control offers all items related to the PIN code and<br />
parental control.<br />
• Censorship classification: the parental control level can be<br />
specified.<br />
• Change PIN: the PIN code can be modified.<br />
The PIN code is an important password when reconfiguring the<br />
STB, locking some services and giving access to the locked<br />
services.<br />
3. Installation<br />
Installation offers the following functions:<br />
• Reconfiguration of system settings.<br />
• Organisation of service list.<br />
• Search of services.<br />
• System status.<br />
• Information on the conditional access system.<br />
• Restoration to the default setting.<br />
4. Utility<br />
Utility offers useful functions such as:<br />
• Calendar.<br />
• Biorhythm.<br />
GB17
GB18<br />
Main Menu Guide<br />
1. TV Guide<br />
The TV Guide offers more detailed information on the service (both<br />
TV and Radio services) such as start/end time, short description<br />
and extended description. The service can be reserved in the TV<br />
Guide.<br />
To activate the TV Guide menu, do one of the following:<br />
• Press directly the GUIDE ( ) button<br />
• Select the TV Guide in the Main menu<br />
If the TV/RADIO ( ) button is pressed <strong>with</strong> the TV Guide<br />
displayed, the service list is toggled between the TV service and<br />
Radio service.<br />
There are 4 modes in TV Guide: NOW, WEEKLY, RESERVED and<br />
QUICK.<br />
• NOW: This mode displays information on the present services<br />
and following services.<br />
• WEEKLY: This mode displays information on all the services<br />
for one week.<br />
• RESERVED: This mode displays information on all the services<br />
reserved by a user.<br />
• QUICK: This mode displays information on the proceedings<br />
of the current service while a full video screen is displayed<br />
on the background.<br />
The colour buttons are used to change the mode of the TV Guide.<br />
• RED button: Used to select NOW mode.<br />
• GREEN button: Used to select WEEKLY mode.<br />
• YELLOW button: Used to select RESERVED mode.<br />
• WHITE button: Used to select QUICK mode.
Now mode<br />
The NOW mode displays information on the present services<br />
and following services. The information includes service name,<br />
event name and start/end time of an event.<br />
To activate the NOW mode and surf the services, proceed as<br />
follows:<br />
1. Activate the TV Guide menu using the GUIDE ( ) button or<br />
via the Main menu.<br />
2. Press the RED button to select the NOW mode. The NOW<br />
mode contains a service list <strong>with</strong> information on the left side of<br />
the screen, and the video is zoomed out on the right side of the<br />
screen.<br />
3. To watch the desired service, use the button to select it and<br />
press the OK ( ) button, or use the button to select it.<br />
(The service list can be paged-up/down using the button.)<br />
The service then plays in the video zoomed out and the<br />
associated information is displayed at the bottom of the screen.<br />
To reserve a programme in the NOW mode, proceed as follows:<br />
1. Use the button or button to select the desired<br />
service.<br />
2. If the desired service is selected, press the OPT+ ( ) button to<br />
reserve it.<br />
3. There are two modes in the reservation menu: “Daily” and<br />
“Weekly”. “Daily” means that a service event will play daily,<br />
and “Weekly” means that a service event will play weekly.<br />
GB19
GB20<br />
Main Menu Guide<br />
Weekly mode<br />
The WEEKLY mode displays information about all the services that<br />
will be transmitted over a week.<br />
The information includes service name, event name and start/end<br />
time of the event.<br />
To activate the WEEKLY mode, proceed as follows:<br />
1. Activate the TV Guide menu using the GUIDE ( ) button or<br />
via the Main menu.<br />
2. Press the GREEN button to select WEEKLY mode.<br />
To reserve a service event, proceed as follows:<br />
1. Select the desired service event using the button.<br />
2. Press the OPT+ ( ) button to reserve the event.<br />
If the selected event is currently playing, there are two modes in the<br />
reservation menu: “Daily” and “Weekly”.<br />
If the selected event is playing in the future, there are three modes<br />
in the reservation menu: ”Once”, “Daily” and “Weekly”.<br />
In “Daily” mode, a service event will play daily.<br />
In “Weekly” mode, a service event will play weekly.<br />
In “Once” mode, a service event will play only once.<br />
If the OK ( ) button is pressed, the small box <strong>with</strong> a service list<br />
appears. The service can be changed in this box using the<br />
and the OK ( ) buttons.
Reserved mode<br />
The RESERVED mode displays the services which have been<br />
reserved.<br />
In this mode, the reservation mode can be changed.<br />
The service can also be removed from the reservation list.<br />
To change the mode or remove a service event of, proceed as<br />
follows in RESERVED mode:<br />
• Activate the TV Guide menu using the GUIDE ( ) button or<br />
via the Main menu.<br />
• Press the YELLOW button to select the RESERVED mode.<br />
• Select the desired service event using the buttons.<br />
• Press the OPT+ ( ) to activate the reservation menu.<br />
Next, change the mode or remove the event.<br />
Quick mode<br />
The QUICK mode displays information on the proceedings<br />
of the current service while a full video screen is displayed in the<br />
background.<br />
To activate the QUICK mode, proceed as follows:<br />
1. Activate the TV Guide menu using the GUIDE ( ) button or<br />
via the Main menu.<br />
2. Press the BLUE button to select QUICK mode.<br />
3. Select the desired service using the button.<br />
4. Select the desired event (present event or following event) using<br />
the button.<br />
The time line consists of three blocks, each block <strong>with</strong> a 30-minute<br />
time-line.<br />
The blue vertical line indicates the current time in the time-line.<br />
The black and white bar indicates the start/end time of the event in<br />
time-line.<br />
(The bar will be black depending on the time the event took place.)<br />
GB21
GB22<br />
Main Menu Guide<br />
2. Parental Control<br />
In the Parental Control menu, it is possible to change the Parental<br />
Guidance Rating and the PIN code.<br />
To set the Parental Guidance Rating, proceed as follows:<br />
1. Activate the Parental Control menu via the Main menu.<br />
(To activate it, the PIN code should be entered).<br />
2. Select the Censorship classification item using the button.<br />
3. Select the desired Parental Guidance Rating using the<br />
button.<br />
4. The Parental Guidance Rating is given as age-based numbers,<br />
“no block”, “10”, “13”, “16”, “18” and “total block”.<br />
5. Press the OK ( ) button to confirm the change.<br />
** The default PIN code is 0000 .<br />
To change the PIN code, proceed as follows:<br />
1. Activate the Parental Control menu via the Main menu.<br />
(To activate it, the PIN code should be entered).<br />
2. Select the Old PIN code menu using the button.<br />
3. Enter the Old PIN code using numeric buttons. When four digits<br />
have been entered, the cursor will automatically be moved to the<br />
New PIN code menu.<br />
4. Enter the new PIN code in the New PIN code menu. When four<br />
digits have been entered, the cursor will automatically be moved<br />
to the Verify Changed PIN Code menu.<br />
5. Enter the new PIN code again to verify it. If it is correct, then the<br />
new PIN code will be saved. If incorrect, then the message<br />
“PIN code mismatch” will be displayed.<br />
3. Installation<br />
The INSTALLATION menu supplies the following functions:<br />
• Configuration of miscellaneous functions such as<br />
Language <strong>Set</strong>ting, Time <strong>Set</strong>ting, etc.<br />
• Organization of Service List<br />
• Search for services<br />
• Information on STB
3-1. System <strong>Set</strong>ting<br />
This sub-menu supplies the miscellaneous functions.<br />
Language <strong>Set</strong>ting<br />
The Language <strong>Set</strong>ting menu supplies Menu Language, Audio<br />
Language and Subtitle Language.<br />
Menu Language<br />
The menu language is a language used in the text of the menu.<br />
To change the menu language, proceed as follows:<br />
1. Activate the Language <strong>Set</strong>ting menu via the Main menu.<br />
2. Select the Menu Language using the button and press the<br />
OK ( ) button.<br />
3. When the small box <strong>with</strong> the supported language list appears,<br />
select the desired language using the button.<br />
4. If the desired menu language is selected, press the OK ( )<br />
button to confirm.<br />
Audio Language<br />
The audio language is a language selected as a default<br />
audio when a service is playing. It is also possible to change the<br />
audio language via the Soundtrack menu in the Option List menu.<br />
To change the audio language, proceed as follows:<br />
1. Activate the Language <strong>Set</strong>ting menu via the Main menu.<br />
2. Select the Audio Language menu using the button and<br />
press the OK ( ) button.<br />
3. When the small box <strong>with</strong> the supported language list appears,<br />
select the desired language using the button.<br />
4. If the desired audio language is selected, press the OK( )<br />
button to confirm.<br />
GB23
GB24<br />
Main Menu Guide<br />
Subtitle Language<br />
The subtitle language is a language selected as a default<br />
when a service <strong>with</strong> subtitles is playing. It is also possible to change<br />
the subtitle language via the Soundtrack menu in the Option List<br />
menu.<br />
To change the subtitle language, proceed as follows:<br />
1. Activate the Language <strong>Set</strong>ting menu via the Main menu.<br />
2. Select the Subtitle Language menu using the button and<br />
press the OK ( ) button.<br />
3. When the small box <strong>with</strong> the supported language list appears,<br />
select the desired language using the button.<br />
4. If the desired subtitle language is selected, press the OK<br />
( ) button to confirm it.<br />
Time <strong>Set</strong>ting<br />
The Time <strong>Set</strong>ting menu supplies the following functions:<br />
• <strong>Set</strong> the current time.<br />
• Disable/Enable the wake-up timer.<br />
• <strong>Set</strong> the wake-up service. The wake-up service is a service<br />
that will play when STB starts after a wake-up timer has expired.<br />
• Disable/Enable the sleep timer.<br />
Current Time<br />
To set the current time, proceed as follows:<br />
1. Activate the Time <strong>Set</strong>ting menu via the Main menu.<br />
2. Select the Current Time item using the button.<br />
3. <strong>Set</strong> the current time using the button (the current time<br />
increases by 30 minutes when the button is pressed and<br />
decreases by 30 minutes when the button is pressed.)<br />
4. Press the OK ( ) or EXIT ( ) button to confirm.
Wakeup Time<br />
To disable or enable/set the wake-up timer, proceed as follows:<br />
1. Activate the Time <strong>Set</strong>ting menu via the Main menu.<br />
2. Select the Wakeup Time item using the button.<br />
3. To disable the wake timer, set to “Disable” using the<br />
button.<br />
4. To enable and set the wakeup timer, set the item to “00:00” using<br />
the button. (The numeric mark, “0..9” appears on the right of the<br />
Wake Time item). <strong>Set</strong> the desired wake-up time using<br />
the NUMERIC buttons.<br />
5. Press the OK ( ) or EXIT ( ) button to confirm.<br />
Wakeup Service No.<br />
To set the wake-up service, proceed as follows:<br />
1. Activate the Time <strong>Set</strong>ting menu via the Main menu.<br />
2. Select the Wakeup Service No. item using the button.<br />
3. <strong>Set</strong> the service number using the button or NUMERIC<br />
buttons.<br />
The service type (TV or RADIO) can be changed using the<br />
TV/RADIO ( ) button. The service name is also displayed<br />
under the Wakeup Service No. item.<br />
4. Press the OK ( ) or EXIT ( ) button to confirm.<br />
Sleep Time<br />
To disable or enable/set the sleep timer, proceed as follows:<br />
1. Activate the Time <strong>Set</strong>ting menu via the Main menu.<br />
2. Select the Sleep Time using the button.<br />
3. To disable the sleep timer, set the item to “Disable”<br />
using the button.<br />
4. To enable and set the sleep timer, set the item to “00:00” using<br />
the button. (The numeric mark, “0...9” appears on the right<br />
of the Sleep Time item) In this state, set the desired sleep time<br />
using the NUMERIC buttons.<br />
5. Press the OK ( ) or EXIT ( ) button to confirm.<br />
GB25
GB26<br />
Main Menu Guide<br />
A/V Output <strong>Set</strong>ting<br />
The A/V Output <strong>Set</strong>ting menu supplies menus that configure the<br />
functions related to Audio and Video output.<br />
• Configure the Video output of TV SCART as CVBS, S-VIDEO or<br />
RGB mode.<br />
• Configure the Audio output of TV SCART and RCA (Cinch) Jack<br />
as Mono or Stereo mode.<br />
• Configure the screen aspect ratio (4:3 or 16:9) of the TV connected<br />
to STB.<br />
• Configure the video display format (Centre or Letter-box) on the<br />
TV.<br />
• Configure the NTSC mode. There are two NTSC modes, NTSC<br />
3.58 and NTSC 4.43. The NTSC 3.58 is more popular.<br />
According to the TV type, select the suitable NTSC mode.<br />
Video Output (CVBS/S-Video/RGB)<br />
To configure the Video output mode of TV SCART, proceed as<br />
follows:<br />
1. Activate the A/V Output <strong>Set</strong>ting via the Main menu.<br />
2. Select the Video Output item using the button.<br />
3. Select the desired video output using the button. There are<br />
three modes: CVBS, S-VIDEO and RGB mode.<br />
4. Press the OK ( ) or EXIT ( ) button to confirm.<br />
Audio Output<br />
To configure the audio output mode of TV SCART and RCA jack,<br />
proceed as follows:<br />
1. Activate the A/V Output <strong>Set</strong>ting via the Main menu.<br />
2. Select the Audio Output item using the button.<br />
3. Select the desired audio output using the button.<br />
There are two modes: STEREO and MONO.<br />
4. Press the OK ( ) or EXIT ( ) button to confirm.
Screen Mode<br />
To configure the TV screen mode, proceed as follows:<br />
1. Activate the A/V Output <strong>Set</strong>ting via the Main menu.<br />
2. Select the Screen Mode item using the button.<br />
3. Select the desired TV screen mode according to the connected<br />
TV using the button. There are two modes: 16:9 and 4:3.<br />
4. Press the OK ( ) or EXIT ( ) button to confirm.<br />
Display Format<br />
To configure the display format on the TV, proceed as follows:<br />
1. Activate the A/V Output <strong>Set</strong>ting via the Main menu.<br />
2. Select the Display Format item using the button.<br />
3. Select the desired display format depending on the TV using<br />
the button. There are two mode pairs depending on the type<br />
of TV. If the TV supports only the 4:3 mode, there is one mode<br />
pair such as Centre and Letter-<strong>Box</strong> mode. If the TV supports the<br />
16:9 mode, there is another mode pair such as Full and<br />
Pillar-box mode.<br />
4. Press the OK ( ) or EXIT ( ) button to confirm.<br />
The display format can be appropriately configured according to the<br />
selected Screen Mode.<br />
If the Screen Mode is selected as 4:3, there are two modes, Centre<br />
and Letter-box in the display format. If the video is formatted as<br />
16:9 and the display format selected as Centre mode, the right and<br />
left portions of the video are cut off to fit the 16:9 video into the 4:3<br />
TV screen. If the video is formatted as 16:9 and the display format<br />
selected as Letter-box mode, the video is vertically shrunk to fully<br />
display on the 4:3 TV screen. In that state, the top and bottom of<br />
the TV screen are blacked out. If the video is formatted as 4:3, the<br />
display format is not applicable when the screen mode is selected<br />
as 4:3.<br />
GB27
GB28<br />
Main Menu Guide<br />
If the Screen Mode is selected as 16:9, there are two modes, Full<br />
and Pillar-box, in the display format. If the video is formatted as 4:3<br />
and the display format selected as Full mode, the video is expanded<br />
to fit the 4:3 video into the 16:9 TV screen. If the video is formatted<br />
as 4:3 and the display format selected as Pillar-box mode, the video<br />
is displayed on the centre of the 16:9 TV screen <strong>with</strong>out<br />
modification. The right and left sides of the TV screen are blacked<br />
out. If the video formatted as 16:9, the display format is not<br />
applicable when the screen mode is selected as 16:9.<br />
NTSC Mode<br />
To configure the NTSC mode on the TV, proceed as follows:<br />
1. Activate the A/V Output <strong>Set</strong>ting via the Main menu.<br />
2. Select the NTSC Mode item using the button.<br />
3. Select the desired NTSC Mode using the button.<br />
4. Press the OK ( ) or EXIT ( ) button to confirm.<br />
Other <strong>Set</strong>ting<br />
The Other <strong>Set</strong>ting menu supplies the following functions:<br />
• <strong>Set</strong> the level of OSD transparency. There are two levels:<br />
opaque 50% transparent.<br />
• <strong>Set</strong> the duration time of the Info. <strong>Box</strong> display. The duration time<br />
can be set from 0 to 20 seconds.<br />
• <strong>Set</strong> the Menu Mode, which changes the menu format according to<br />
the video format (NTSC, PAL, Auto). If the TV supports only the<br />
NTSC format, set the menu mode to NTSC. If the TV supports<br />
only the PAL format, set the menu mode to PAL. If the menu mode<br />
is set at Auto, the menu format is automatically changed<br />
according to the format of the decoded video.
OSD Transparency<br />
To set the OSD transparency, proceed as follows:<br />
1. Activate the Other <strong>Set</strong>ting menu via the Main menu.<br />
2. Select the OSD Transparency item using the button.<br />
3. Select the desired level between Opaque and Transparent<br />
modes using the button.<br />
4. Press the OK ( ) or EXIT ( ) button to confirm.<br />
Info. <strong>Box</strong> Display Time<br />
To set the duration time of Info. <strong>Box</strong> display, proceed as follows:<br />
1. Activate the Other <strong>Set</strong>ting menu via the Main menu.<br />
2. Select the Info. <strong>Box</strong> Display Time using the button.<br />
3. Select the desired duration time using the button.<br />
4. Press the OK ( ) or EXIT ( ) button to confirm.<br />
Menu Mode<br />
To set the menu mode, proceed as follows:<br />
1. Activate the Other <strong>Set</strong>ting menu via the Main menu.<br />
2. Select the Menu Mode item using the button.<br />
3. Select the desired menu mode using the button.<br />
4. Press the OK ( ) or EXIT ( ) button to confirm.<br />
3-2 Service Organising<br />
The Service Organising menu supplies several organising methods:<br />
• Organisation of TV services,<br />
• Organisation of Radio services,<br />
• Organisation of services sorted by a network name,<br />
• Deletion of services belonging to a satellite.<br />
GB29
GB30<br />
Main Menu Guide<br />
Organise TV Services<br />
The Organise TV services menu supplies two organisation<br />
methods: Organise All Services and Organise Favourites.<br />
Each offers a method of organisation <strong>with</strong> its own characteristics.<br />
Organise All Services<br />
The services are sorted according to the service number in the<br />
Organise All Services menu.<br />
Each service can be deleted from the TV service list, moved to<br />
another position, locked or skipped when zapping the service.<br />
To delete the service from the service list, proceed as follows:<br />
1. Activate the Organise All Services menu for TV services via<br />
the Main menu.<br />
2. Select the desired service in the service list using the<br />
button.<br />
The button can be used to page up/down the service list.<br />
3. Press the RED button while the desired service is selected.<br />
The service is then marked in grey.<br />
4. Mark all the desired services using the above method. If a service<br />
is to be left unmarked, select it and press the RED button<br />
again (i.e. the RED button toggles the grey mark.)<br />
5. Press the OK ( ) button to delete all the marked services,<br />
otherwise press the EXIT ( ) button to cancel.<br />
To move a service to another position in the service list, proceed as<br />
follows:<br />
1. Activate the Organise All Services menu via the Main menu.<br />
2. Select the desired service in the service list using the<br />
button.<br />
The button can be used to page up/down the service list.<br />
3. Press the GREEN button while the desired service is selected.<br />
The icon then appears beside the service number.<br />
4. Move the selected service to the desired position using the<br />
button. The button can be used to move across<br />
a page in the service list.<br />
5. Press the OK ( ) or GREEN button to confirm, otherwise press<br />
the EXIT ( ) button to cancel.
To lock a service in the service list, proceed as follows:<br />
1. Activate the Organise All Services menu via the Main menu.<br />
2. Select the desired service in the service list using the<br />
button.<br />
3. The button can be used to page up/down the service list.<br />
4. Press the YELLOW button. The icon then appears at the end<br />
of the service name. If the YELLOW button is pressed again,<br />
the icon disappears.<br />
5. Press the OK ( ) button to confirm<br />
or the EXIT ( ) button to cancel.<br />
To skip the service when zapping it, proceed as follows:<br />
1. Activate the Organise All Services menu via the Main menu.<br />
2. Select the desired service in the service list using the<br />
button.<br />
3. The button can be used to page up/down the service list.<br />
4. Press the BLUE button. The icon then appears at<br />
the end of the service name. If the BLUE button is pressed<br />
again, the icon disappears.<br />
5. Press the OK ( ) button to confirm<br />
or the EXIT ( ) button to cancel.<br />
GB31
GB32<br />
Main Menu Guide<br />
Organise Favourite Services<br />
The services are sorted according to favourite groups in the<br />
Organise Favourites menu.<br />
There are three columns: the favourite group column,<br />
the favourite list column and the service list column containing<br />
services not belonging to any favourite group.<br />
The Organise Favourites menu supplies the following functions:<br />
• Add a service to a favourite group.<br />
• Remove a service from a favourite group.<br />
• Move a service to another position in a favourite list.<br />
• Lock a service in a favourite list.<br />
• Skip a service in a favourite list when zapping the service.<br />
To add a service to a favourite group, proceed as follows:<br />
1. Activate the Organise Favourite menu for TV services via the<br />
Main menu.<br />
2. Move the cursor to the favourite group column using the<br />
button. If the favourite group column is selected, the column is<br />
highlighted.<br />
3. Select a favourite group in the favourite group column using the<br />
button.<br />
4. Move the cursor to the service list column using the button.<br />
If the service list column is selected, the column is highlighted.<br />
5. Select the desired service in the service list column using the<br />
button, then press the OK ( ) button to move it.<br />
6. Press the EXIT ( ) button to confirm.<br />
To remove a service from a favourite group, proceed as follows:<br />
1. Activate the Organise Favourites menu for TV services via the<br />
Main menu.<br />
2. Move the cursor to the favourite group column using the<br />
button. If the favourite column is selected, the column is<br />
highlighted.<br />
3. Select a favourite group in the favourite group column using the<br />
button.<br />
4. Move the cursor to the favourite list column using the button.<br />
If the favourite list column is selected, the column is highlighted.<br />
5. Select the desired service in the favourite list column using the<br />
button and press the RED button to mark the service.<br />
6. Press the OK ( ) button to remove the marked services from a<br />
favourite list.
To skip or lock a service in a favourite list, proceed as follows:<br />
1. Activate the Organise Favourites menu for TV services via the<br />
Main menu.<br />
2. Move the cursor to the favourite group column using the<br />
button.<br />
If the favourite column is selected, the column is highlighted.<br />
3. Select a favourite group in the favourite group column using the<br />
button.<br />
4. Move the cursor to the favourite list column using the button.<br />
If the favourite list column is selected, the column is highlighted.<br />
5. Select the desired service in the favourite list column using the<br />
button and press the YELLOW/BLUE button to lock/skip the<br />
service. To undo the action, press the button again.<br />
6. Press the OK ( ) button to confirm.<br />
Organise Radio Services<br />
Organise All Services<br />
The services are sorted according to the service number in the<br />
Organise All Service menu.<br />
Each service can be deleted from the RADIO service list, moved to<br />
other position, locked or skipped when zapping the service.<br />
To delete the service from the service list, proceed as follows:<br />
1. Activate the Organise All Services menu for RADIO services<br />
via the Main menu.<br />
2. Select the desired service in the service list using the<br />
button.<br />
The button can be used to page up/down the service list.<br />
3. Press the RED button. The service is then marked in grey.<br />
4. Mark all desired services using the above method. If a service is<br />
to be left unmarked, select it and press the RED button again.<br />
The RED button toggles the grey mark.<br />
5. Press the OK ( ) button to delete all marked services.<br />
or press the EXIT ( ) button to cancel.<br />
GB33
GB34<br />
Main Menu Guide<br />
To move a service to another position in the service list, proceed as<br />
follows:<br />
1. Activate the Organise All Services menu via the Main menu.<br />
2. Select the desired service in the service list using the<br />
button.<br />
The button can be used to page up/down the service list.<br />
3. Press the GREEN button <strong>with</strong> the desired service selected.<br />
The icon then appears beside of the service number.<br />
4. Move the selected service to the desired position using the<br />
button. The button can be used to move across a<br />
page in the service list.<br />
5. Press the OK ( ) or GREEN button to confirm,<br />
otherwise press the EXIT ( ) button to cancel.<br />
To lock the service in the service list, proceed as follows:<br />
1. Activate the Organise All Services menu via the Main menu.<br />
2. Select the desired service in the service list using the<br />
button.<br />
The button can be used to page up/down the service list.<br />
3. Press the YELLOW button. The icon then appears at the end<br />
of the service name. If the YELLOW button is pressed again,<br />
the icon disappears.<br />
4. Press the OK ( ) button to confirm.<br />
Otherwise press the EXIT ( ) button to cancel.<br />
To skip the service in zapping the service, proceed as follows:<br />
1. Activate the Organise All Services menu via the Main menu.<br />
2. Select the desired service in the service list using the<br />
button.<br />
The button can be used to page up/down the service list.<br />
3. Press the BLUE button. The icon then appears at the end of<br />
the service name. If BLUE button is pressed again, the icon<br />
disappears.<br />
4. Press the OK ( ) button to confirm<br />
or press the EXIT ( ) button to cancel.
Organise Favourite Services<br />
The services are sorted according to the favourite groups in the<br />
Organise Favourites menu. There are three columns: the favourite<br />
group column, the favourite list column and the service list column<br />
containing services that do not belong to any favourite group.<br />
The Organise Favourites menu supplies the following functions:<br />
• Add a service to a favourite group.<br />
• Remove a service from a favourite group.<br />
• Move a service to another position in a favourite list.<br />
• Lock a service in a favourite list.<br />
• Skip a service in a favourite list when zapping the service.<br />
To add a service to a favourite group, proceed as follows:<br />
1. Activate the Organise Favourites menu for RADIO services via<br />
the Main menu.<br />
2. Move the cursor to the favourite group column using the<br />
button. If the favourite group column is selected, the column is<br />
highlighted.<br />
3. Select a favourite group in the favourite group column using the<br />
button.<br />
4. Move the cursor to the service list column using the button.<br />
If the service list column is selected, the column is highlighted.<br />
5. Select the desired service in the service list column using the<br />
button. The button can be used to page up/down the<br />
service list. Then press the OK ( ) button to move it.<br />
6. Press the EXIT ( ) button to confirm.<br />
GB35
GB36<br />
Main Menu Guide<br />
To remove a service from a favourite group, proceed as follows:<br />
1. Activate the Organise Favourite menu for RADIO services via<br />
the Main menu.<br />
2. Move the cursor to the favourite group column using the<br />
button.<br />
If the favourite column is selected, the column is highlighted.<br />
3. Select a favourite group in the favourite group column using the<br />
button.<br />
4. Move the cursor to the favourite list column using the button.<br />
If the favourite list column is selected, the column is highlighted.<br />
5. Select the desired service in the favourite list column using the<br />
button (the button can be used to page up/down the<br />
service list) and press the RED button to mark the service.<br />
6. Press the OK ( ) button to remove the marked services from a<br />
favourite list.<br />
To skip or lock a service in a favourite list, proceed as follows:<br />
1. Activate the Organise Favourite menu for RADIO services via<br />
the Main menu.<br />
2. Move the cursor to the favourite group column using the<br />
button.<br />
If the favourite column is selected, the column is highlighted.<br />
3. Select a favourite group in the favourite group column using the<br />
button.<br />
4. Move the cursor to the favourite list column using the button.<br />
If the favourite list column is selected, the column is highlighted.<br />
5. Select the desired service in the favourite list column using the<br />
button (the button can be used to page up/down the<br />
service list) and press the YELLOW/BLUE button to lock/skip the<br />
service. Press the button again to undo the action.<br />
6. Press the OK ( ) button to confirm.
Organise Networks<br />
The Organise Networks menu supplies the following functions:<br />
• Delete the network. This will delete all services belonging to the<br />
network.<br />
• Move/reorder the networks in the network list.<br />
• Sort the services according the network.<br />
In the Organise Networks menu, there are two columns: the network<br />
list column and the service list column.<br />
The services are displayed in the service column according to the<br />
their networks.<br />
To delete the network, proceed as follows:<br />
1. Activate the Organise Networks menu via the Main menu.<br />
2. Move the cursor to the network list column.<br />
3. Select the network name using the button.<br />
4. Press the RED button to mark the selected network.<br />
5. Press the OK ( ) button to delete the marked networks.<br />
To move/change the order of the network in the network list,<br />
proceed as follows:<br />
1. Activate the Organise Networks menu via the Main menu.<br />
2. Move the cursor to the network list column.<br />
3. Select the network name using the button.<br />
4. Press the GREEN button. The icon is then displayed beside<br />
the network name.<br />
5. Move the network name to the desired position using the<br />
button.<br />
6. Press the OK ( ) or EXIT ( ) button to confirm.<br />
GB37
GB38<br />
Main Menu Guide<br />
Delete Satellites<br />
The Delete Satellites menu supplies the following functions:<br />
• Delete a satellite. It will also delete all services belonging to the<br />
satellite.<br />
• Delete a transponder. It will also delete all services belonging to<br />
the transponder.<br />
• Sort the services according to the satellite and the transponder.<br />
In the Delete Satellite menu, there are three columns:<br />
‘SAT” (the satellite list column), “TP (MHz)” (the transponder list<br />
column) and “Services” (the service list column).<br />
To delete a satellite, proceed as follows:<br />
1. Activate the Delete Satellite menu via the Main menu.<br />
2. Move the cursor to the satellite list column using the button.<br />
3. Select the desired satellite name using the button.<br />
4. Press the RED button to mark the satellite name.<br />
5. If all the desired satellite names are marked, press the OK ( )<br />
button to delete all the marked satellite names.<br />
6. If all the satellites are to be deleted, mark the “ALL” item.<br />
To delete a satellite transponder, proceed as follows:<br />
1. Activate the Delete Satellite menu via the Main menu.<br />
2. Move the cursor to the transponder list column using the<br />
button.<br />
3. Select the desired transponder name using the button.<br />
4. Press the RED button to mark the transponder name.<br />
5. If all desired transponder names are marked, press the<br />
OK ( ) button to delete all marked transponders.
3-3. Service Searching<br />
Antenna <strong>Set</strong>ting<br />
The Antenna <strong>Set</strong>ting menu sets the characteristics of each antenna.<br />
32 antennae can be supported, one of which for SMATV.<br />
The Antenna <strong>Set</strong>ting menu supplies the following items to<br />
characterise the antenna.<br />
Antenna Alternative<br />
Assigns an index to each antenna. Hence, the value is unique for<br />
each antenna. It can assign up to 32 indexes.<br />
Satellite Name<br />
Assigns a satellite name to each antenna. The available satellite<br />
names supplied by default can be used. Moreover, the satellite<br />
name can be defined by the user <strong>with</strong> the “User Defined” item.<br />
LNB Frequency<br />
Assigns LNB frequency of LNB in each antenna. It can be set<br />
as “Universal”, “5150”, “9750”, “10600”, “10750” and “11475”.<br />
It can also be set as any value using the numeric buttons.<br />
22KHz Tone<br />
Disables/enables the 22KHz tone in the signal line.<br />
DiSEqC Input<br />
It sets the DiSEqC input to select a proper antenna.<br />
It can be set as “Tone Burst A”, “Tone Burst B”, “DiSEqC A”,<br />
“DiSEqC B”, “DiSEqC C” and “DiSEqC D”.<br />
Motorised System<br />
Disables/enables the motorise function.<br />
LNB Power<br />
Switches/off the LNB power.<br />
LNB Voltage<br />
<strong>Set</strong>s the LNB voltage level. The LNB voltage may drop too low to<br />
supply power to the LNB due to the long length of the signal cable.<br />
To compensate the voltage drop, the item should be set on “High”.<br />
GB39
GB40<br />
Main Menu Guide<br />
Manual Search<br />
The function of the Manual Search menu is to search services in<br />
one transponder using information from a satellite transponder.<br />
(If the Network Search option is enabled, services in other<br />
transponders are searched).<br />
The following items are supplied as parameters:<br />
Antenna Alternative<br />
Specifies the antenna used for searching.<br />
Frequency<br />
<strong>Set</strong>s the frequency of a transponder.<br />
Polarisation<br />
<strong>Set</strong>s the polarisation type (horizontal or vertical).<br />
Symbol Rate<br />
<strong>Set</strong>s the symbol rate of a transponder.<br />
FEC(Forward Error Correction)<br />
<strong>Set</strong>s the FEC value of a transponder.<br />
Network Search<br />
Enables/disables the network search option. If the option is enabled,<br />
all services in other transponders may be searched according to<br />
information in the NIT.<br />
Automatic Skip<br />
Enables/disables the automatic skip option. If this option is enabled,<br />
the scrambled services are skipped during the search.<br />
BAT Search<br />
Some operators define the order of services in a list using BAT.<br />
If this option is enabled, the services will be ordered according to<br />
the BAT information.
To manually search the services, proceed as follows:<br />
1. Activate the Manual Search menu via the Main menu.<br />
2. <strong>Set</strong> all the parameters according to transponder information.<br />
3. Use the progressive bars at the bottom of window to check<br />
whether or not the transponder is locked.<br />
4. Press the OK ( ) button to activate the search services.<br />
During the search, a sandglass rotates vertically.<br />
5. To cancel the search, press the EXIT ( ) button.<br />
6. If the search has been carried out, the searched services are<br />
displayed.<br />
7. Press the OK ( ) button to save the services,<br />
otherwise, press the EXIT ( ) button to discard all the services.<br />
GB41
GB42<br />
Guide of Main Menu<br />
Automatic Search<br />
The function of the Automatic Search menu is to search services<br />
using information from a satellite.<br />
The following items are supplied as parameters.<br />
Antenna Alternative<br />
Specifies the satellite in which the automatic search will be<br />
performed.<br />
Automatic Skip<br />
Enables/disables the automatic skip option. If this option is enabled,<br />
the scrambled services are skipped during the search.<br />
Search Type<br />
Specifies search type. If the search type is “Detail”, then four symbol<br />
rates are added and used during the search.<br />
Symbol Rate table(optional)<br />
Upsets up to four symbol rates for searching when the search type<br />
is “Detail”.<br />
To automatically search the services, proceed as follows:<br />
1. Activate the Automatic Search menu.<br />
2. <strong>Set</strong> all the parameters according to the satellite information.<br />
3. Press the OK ( ) button to start the search.<br />
4. Press the EXIT ( ) button to cancel during the search.<br />
The Automatic Search may take a long time to search all the<br />
services, depending on the parameter settings.<br />
Since the Automatic Search is based on hard-coded information,<br />
this information is properly updated to search all services.<br />
To obtain the updated information, please consult the HUMAX web<br />
site.
3-4. Status<br />
The function of the Status menu is to supply users <strong>with</strong> information<br />
on several STB statuses, such as:<br />
• Information on the Software version,<br />
• Information on the Hardware version,<br />
• Information on the signal level of the current locked TP,<br />
• Information on OTA availability.<br />
This information is mainly intended for operators or installers.<br />
STB Status<br />
The STB status menu supplies information on the software and<br />
hardware versions.<br />
To receive the information, proceed as follows:<br />
1. Activate the Status Menu via the Main menu.<br />
2. Select the Status menu using the button,<br />
then press the OK ( ) button to enter the menu.<br />
3. Press the EXIT ( ) button to exit the menu.<br />
Signal Detection<br />
The Signal Detection menu supplies information on signal level and<br />
signal quality.<br />
This can be used when the antenna is adjusted to the desired<br />
satellite as the signal level and quality are maximally high when the<br />
antenna is pointed directly at the satellite.<br />
To receive the information, proceed as follows:<br />
1. Activate the Status Menu via the Main menu.<br />
2. Select the Signal Detection menu using the button,<br />
then press the OK ( ) button to enter the menu.<br />
3.Press the EXIT ( ) button to exit the menu.<br />
STB Upgrade<br />
The OTA can be performed via the STB Upgrade menu.<br />
If there is an available OTA image on the air, the menu may be<br />
selected. Otherwise, the menu is greyed out and cannot be<br />
selected.<br />
Loader Status<br />
The Loader Status menu supplies information on the loader status.<br />
GB43
GB44<br />
Main Menu Guide<br />
3-5. Conditional Access<br />
The Conditional Access menu supplies information on<br />
IRDETO <strong>embedded</strong> CAS.<br />
There are four sub-menus in the menu:<br />
• Version Information,<br />
• Smart Card Information,<br />
• Transport Stream Information,<br />
• Monitoring ECM/EMM.<br />
Version Information<br />
The Version Information menu supplies technical information on<br />
IRDETO <strong>embedded</strong> CAS.<br />
To retrieve the information, proceed as follows:<br />
1. Activate the Conditional Access menu via the Main menu.<br />
2. Select the Version Information menu using the button and<br />
press the OK ( ) button to retrieve the information.<br />
3. Press the EXIT ( ) button to exit the menu.<br />
Smart card Information<br />
The Smart card Information menu supplies information on<br />
the smart card in the slot, such as serial number and nationality.<br />
If there is no smart card or an invalid one in the slot, the menu<br />
cannot be entered.<br />
To retrieve the information, proceed as follows:<br />
1. Activate the Conditional Access menu via the Main menu.<br />
2. Select the Smart card Information menu and press the OK ( )<br />
button to retrieve the information.<br />
3. Press the EXIT ( ) button to exit the menu.<br />
Transport Stream Information<br />
The Transport stream Information supplies information on the<br />
current service such as EMM PID and the service status.<br />
To retrieve the information, proceed as follows:<br />
1. Activate the Conditional Access menu via the Main menu.<br />
2. Select the Transport stream Information using the button<br />
and press the OK ( ) button to retrieve the information.<br />
3. Press the EXIT ( ) button to exit the menu.
Monitoring EMM/ECM<br />
The Monitoring EMM/ECM menu periodically supplies information<br />
on the ECM and EMM.<br />
To retrieve the information, proceed as follows:<br />
1. Activate the Conditional Access menu.<br />
2. Select the Monitoring EMM/ECM menu using the button and<br />
press the OK ( ) button to retrieve the information.<br />
3. Press the EXIT ( ) button to exit the menu.<br />
3-6. Mail Messages<br />
The Mail Messages menu shows the mail messages received over<br />
the air. The mail messages are intended for the operator, to inform<br />
users. If there is a new mail message available, the icon<br />
appears at the top right corner of the screen. There are four<br />
columns in the menu, such as the received date and time (DATE &<br />
TIME), view status (VIEW) and the type (TYPE).<br />
If the mail message has not yet been viewed, a ‘U’ is marked in the<br />
“VIEW” column. In the menu, the mail can be viewed or deleted<br />
from the mail list.<br />
The mark ‘M’ in the “TYPE” column means that the mail message<br />
received is a normal mail message.<br />
The mark ‘A’ in the “TYPE” column means that the received mail<br />
message is a message of announcement.<br />
To view or delete the mail message, proceed as follows:<br />
1. Activate the Mail Message menu via the Main menu.<br />
2. Select the desired mail message using the button.<br />
3. Press the GREEN button to view it.<br />
4. Press the YELLOW button to delete it.<br />
5. Press the EXIT ( ) or BLUE button to exit the menu.<br />
4. Utility<br />
The Utility menu supplies two functions: Calendar and Biorhythm.<br />
In “Calendar”, the current calendar is displayed on the screen.<br />
The desired month can be chosen using the button.<br />
In “Biorhythm”, if the date of birth is input, the specific biorhythm is<br />
displayed on the screen.<br />
GB45
GB46<br />
Motorised System<br />
DiSEqC 1.2 User Instructions<br />
If you have a DiSEqC 1.2 motorised system, you can use the available DiSEqC 1.2 functions.<br />
The following instruction describes how to use the DiSEqC 1.2 functions to store the positions of the<br />
satellites and search for the services (STAB Rotor Sat motor recommended).<br />
1. Satellite <strong>Set</strong>ting Menu Options<br />
When the DiSEqC Motorised System is Enabled in the Antenna <strong>Set</strong>ting, a new menu is available for<br />
configuring the motor. This menu is called “Satellite <strong>Set</strong>ting” and is accessed by pressing the OK<br />
( ) button <strong>with</strong> the Alternative Antenna option highlighted in the Manual Search menu.<br />
The following options are available on the Satellite <strong>Set</strong>ting menu:<br />
Satellite Name<br />
A selection of satellite names that can be used to identify a motor position. If the satellite name you<br />
require is not available, please use another one. In installer mode, the Satellite Name Reference<br />
refers to the 0 position of the motor.<br />
Movement<br />
In user mode, this is used to fine-tune the position of the motor for better reception.<br />
In Installer mode, this is used to manually search for the position of a satellite.<br />
Motor Control<br />
• Search: Searches for services on the chosen transponder.<br />
• Goto: Moves the motor to the stored position of the selected satellite name.<br />
• Store: Stores the current position of the motor for the selected satellite name.<br />
• Reset: Resets all stored positions of the motor relative to the 0 position (Installer mode only).<br />
DiSEqC Command Mode<br />
Changes the current mode between Installer and User.<br />
2. <strong>Set</strong>ting your Receiver for DiSEqC 1.2<br />
You must set your receiver up so that it is ready to use DiSEqC 1.2. To do so, proceed as follows:<br />
1. Press the MENU ( ) button to display the Main menu.<br />
2. Select the Service Searching option and press the OK ( )<br />
button to display the Service Searching menu.<br />
3. Select the Antenna <strong>Set</strong>ting option and press the OK ( )<br />
button to display the Antenna <strong>Set</strong>ting menu.<br />
4. You must set up a separate alternative antenna for each<br />
satellite position required.<br />
5. Select the name of the satellite you wish to use.<br />
6. Select the correct LNB frequency for the LNB you are using.<br />
7. <strong>Set</strong> the Motorised System to Enable to use the<br />
buttons.<br />
8. The option DiSEqC Input Selection should now be disabled. This option is used for DiSEqC 1.0<br />
and cannot be used in conjunction <strong>with</strong> DiSEqC 1.2. Your receiver is now ready to use DiSEqC<br />
1.2. To return to the Main Menu, use the EXIT ( ) button until you reach the Main menu.
3. Initial Satellite Position Search<br />
This is required when you first set your receiver up to use DiSEqC 1.2, and sets the positions of all<br />
pre-programmed satellites.<br />
1. Make sure your motor is installed correctly <strong>with</strong> the calibrations<br />
adjusted for the region in which you are located.<br />
(Please consult the user’s manual for your motor).<br />
2. Make sure your receiver is set up to use DiSEqC 1.2.<br />
(see Section 2 above).<br />
3. In the Main menu, select the Service Searching option and<br />
press the OK ( ) button. You should now see the Service<br />
Searching menu.<br />
4. Highlight the Alternative Antenna option and press the OK ( )<br />
button to display the Satellite <strong>Set</strong>ting menu.<br />
5. Highlight the DiSEqC Command Mode option and use the buttons to change the value to<br />
Installer, then press the OK ( ) button.<br />
6. Highlight the Motor Control option and use the buttons to change the value to reset, then<br />
press the OK ( ) button.<br />
7. You will now see a warning message. Press the OK ( ) button to continue. All the preprogrammed<br />
satellite motor positions should now be correct. If you have any other DiSEqC 1.2<br />
motor brand or model, then you may need to store the satellite positions yourself. (Please refer to<br />
the user’s manual for your motor).<br />
8. Highlight the DiSEqC Command Mode option and use the buttons to change the value to<br />
User, then press the OK ( ) button.<br />
9. You should now be ready to start storing services for the various satellites (see 5 onwards).<br />
4. Motor Limit <strong>Set</strong>ting<br />
Use this option to set the East and West limits of the motor. This should be used to prevent your dish<br />
from hitting anything that may obstruct the path of the dish.<br />
1. On the Main menu, select the Service Searching option and press the OK ( ) button.<br />
You should now see the Service Searching menu.<br />
2. Select the Manual Search option and press the OK ( )<br />
button. You should now see the Manual Search menu.<br />
3. Highlight the Alternative Antenna option and press the OK ( )<br />
button. You should now be in the Satellite <strong>Set</strong>tings menu.<br />
4. Press the RED button to access the Motor Limit <strong>Set</strong>ting menu.<br />
5. Highlight the Limit <strong>Set</strong>ting option and use the buttons to<br />
disable this. (Warning: When this option is disabled, your motor<br />
will be able to move beyond any limits previously<br />
stored - please make sure there is nothing obstructing<br />
the path of your dish.)<br />
GB47
GB48<br />
Motorised System<br />
6. To set the East Limit:<br />
a) Select “Movement” and use the buttons to move your<br />
motor East or West until it is at the position you wish<br />
to use as your East Limit. Use the buttons to stop the<br />
motor at the correct position.<br />
b) Highlight the Store East Limit option and press the OK ( )<br />
button to store the current position as your East Limit.<br />
To set the West Limit:<br />
a) Select “Movement” and use the buttons to move your<br />
motor East or West until it is at the position you wish<br />
to use as your West Limit. Use the buttons to stop the motor at the correct position.<br />
b) Highlight the Store West Limit option and press the OK ( ) button to store the current position<br />
as your West Limit.<br />
5. Manual Satellite Search<br />
The purpose of this is to set the motor position manually for each satellite.<br />
This is useful if the satellite you require is not available in the pre-programmed list (see 3 above).<br />
To do this, you must access the Satellite <strong>Set</strong>tings menu. Proceed as follows:<br />
1. Select “Service Searching” from the Main menu and press the OK ( ) button to display the<br />
Service Searching menu.<br />
2. Select the Manual Search option and press the OK ( ) button to display the Manual Search<br />
menu. Select the relevant Alternative Antenna you are using for this satellite.<br />
3. Enter the Frequency, Polarisation, Symbol Rate and FEC for a transponder on the satellite you<br />
wish to find. The transponder information should be unique to the satellite.<br />
4. Select the Alternative Antenna option and press the OK ( ) button to display the Satellite<br />
<strong>Set</strong>tings menu.<br />
5. Highlight the DiSEqC Command Mode option and, using the buttons, change this to Installer.<br />
6. Highlight the Satellite name option and use the buttons to select the satellite you want to find.<br />
Use others if the name of the satellite you want does not appear.<br />
7. When you have selected the satellite you are looking for, go down to the Movement option, and<br />
again using the buttons, start the motor moving.<br />
8. You should move the motor as far west as possible and then move it east so that you cover the<br />
motor’s complete movement range.<br />
9. During the move from west to east, the Signal Quality bar should register a signal once.<br />
This is the satellite’s position. If there two or more different positions register a<br />
signal, then you must choose another frequency that will be unique to the satellite you want.<br />
10. Use the Signal level and Strength Quality bar at the bottom of the screen to judge the best<br />
position for the dish.<br />
11. Use the buttons to stop the motor when required.<br />
12. When you have found the best position for the dish, go to the Motor Control option, and using the<br />
buttons, select “Store” and press the OK ( ) button. The position of the satellite should<br />
now be stored.<br />
13. If you have not stored this position, it will be lost when you exit the menu.<br />
14. Repeat the process for each satellite if required, remembering to use a different alternative<br />
antenna for each satellite.
6. Moving to a pre-set satellite<br />
Once you have stored the positions of the satellites you want (see below left) you can search for the<br />
services transmitted from them. Before doing this, you must move the motor to the position of the<br />
satellite you wish to search for. To do this, you must access the Satellite <strong>Set</strong>tings menu. Proceed as<br />
follows:<br />
1. Select “Service Searching” from the Main menu and press the OK ( ) button to display the<br />
Service Searching menu.<br />
2. Select the Manual Search option and press the OK ( ) button to display the Manual Search<br />
menu.<br />
3. Select the Alternative Antenna option and press the OK ( ) button to display the Satellite<br />
<strong>Set</strong>tings menu.<br />
4. In the Satellite <strong>Set</strong>tings menu ensure that you have the DiSEqC Command Mode option set to<br />
“User”.<br />
5. Highlight the option Satellite Name and use the buttons to select the satellite you want<br />
to view.<br />
6. When you have selected the satellite you wish to view, go down to the Motor Control option and,<br />
using the buttons again, select “Go to” and press the OK ( ) button.<br />
7. The motor will now move to the selected satellite’s position.<br />
8. The Movement option is used to fine-tune the motor’s position.<br />
9. When using the Movement option for fine-tuning, you must remember to store the changes you<br />
have made, otherwise they will be lost.<br />
7. Searching for services on your selected Satellite<br />
Once you have moved the motor into position, you can search for the channels transmitted from the<br />
relevant satellite. To search for services on your new selected satellite, proceed as follows:<br />
1. Move the motor to the position of the satellite you wish to<br />
search for (see section 6 above):<br />
2. Select “Service Searching” from the Main menu and press the<br />
OK ( ) button to display the Service Searching menu.<br />
3. Select the manual search option and press the OK ( ) button<br />
to display the Manual Search menu.<br />
4. Now enter the Frequency and Symbol Rate using the NUMERIC<br />
buttons (0~9).<br />
Next, enter the Polarisation and FEC values using the<br />
buttons.<br />
5. When you have entered all these details, press the OK ( )<br />
button and the search will begin.<br />
6. When the search has finished, press the OK ( ) button to<br />
view.<br />
7. Repeat the process for all the transponders you want from this<br />
satellite.<br />
GB49
GB50<br />
Motorised System<br />
8. Automatic Search<br />
It is possible to use automatic search using the DiSEqC 1.2 motorised system.<br />
1. Ensure that the position for the satellite you want to search for is correct (see Section 3 and 5<br />
above).<br />
2. In the Main menu, select the channel searching option and press the OK ( ) button.<br />
3. In the Service Searching menu, select the Alternative Antenna that you 3set for this satellite.<br />
4. When you search new services, please refer to Automatic Search on page GB42.<br />
5. When the search has ended, press the OK ( ) button to store and view the services.<br />
Now that you have stored all the satellite positions and searched for all the services you want, you<br />
can use your receiver as normal. When you change to a service transmitted from a different<br />
satellite, you will have to wait a few seconds to allow the motor to move into position to receive the<br />
new service.
Troubleshooting Guide<br />
GB51
GB52<br />
Menu Map
GB53
GB54<br />
Specification<br />
Conditional Access Interface<br />
<strong>Irdeto</strong> Embedded 1 Slot Smart card<br />
Tuner & Channel<br />
Input Connector<br />
Frequency Range<br />
Input Impedance<br />
Signal Level<br />
IF<br />
IF Band width<br />
LNB Power &<br />
Polarisation<br />
22 KHz Tone<br />
DiSEqC Control<br />
Demodulation<br />
Input Symbol Rate<br />
FEC Decode<br />
MPEG Transport Stream A/V Decoding<br />
Transport Stream<br />
Profile Level<br />
Input Rate<br />
Aspect Ratio<br />
Video Resolution<br />
Audio Decoding<br />
Audio Mode<br />
Sampling<br />
Memory<br />
Main Processor<br />
Flash Memory<br />
Graphic(MPEG) DRAM<br />
System DRAM<br />
F-type, IEC 169-24, Female<br />
950 MHz to 2150 MHz<br />
75Ω<br />
-25 to -65 dBm<br />
480 MHz<br />
36 MHz<br />
Vertical : +13.5 V<br />
Horizontal : +18 V<br />
Current : 500 mA Max. Overload Protection<br />
Frequency : 22 ± 4 KHz Amplitude : 0.6 ± 0.2 V<br />
Version 1.0/1.2 Compatible<br />
QPSK<br />
1-45 Ms/s<br />
Convolutional Code Rate 1/2, 2/3, 3/4, 5/6 and 7/8<br />
<strong>with</strong> Constraint Length K=7<br />
MPEG-2 ISO/IEC 13818<br />
Transport stream specification<br />
MPEG-2 MP@ML<br />
15 Mbit/s Max<br />
4:3, 16:9<br />
720 x 576<br />
MPEG/MusiCam Layer I & II<br />
Single channel/Dual channel/Joint stereo/Stereo<br />
32, 44,1 and 48 KHz<br />
TMIPS R3930 (81 MHz)<br />
3 Mbyte<br />
4 Mbyte<br />
2 Mbyte<br />
• Please note: The specification of the STB may be changed <strong>with</strong>out advance notice.
A/V & Data In/Out<br />
TV SCART<br />
VCR SCART<br />
AUDIO R/L<br />
RS-232C<br />
Power Supply<br />
Input Voltage<br />
Type<br />
Power Consumption<br />
Standby Power<br />
Protection<br />
Physical Specifications<br />
Size (W x H x D)<br />
Weight (Net)<br />
Operating Temp<br />
Storage Temp<br />
Storage Humidity<br />
Video Output (CVBS, RGB, S-Video)<br />
Audio Output<br />
(Resolution : 20 bits DAC, Max. 2 Vrms)<br />
Video Output (CVBS)<br />
Video Input (CVBS, RGB, S-Video)<br />
Audio Output (Resolution : 20 bits DAC, Max. 2 Vrms(fixed))<br />
RCA/Cinch Volume and Mute Control<br />
(Resolution : 20 bits DAC, Max. 2 Vrms)<br />
Transfer rate 115,200 bps, 9pin D-sub Type<br />
90 - 250V AC, 50/60 Hz<br />
SMPS<br />
Max. 30 W<br />
≤ 8 W<br />
Separate internal fuse. The input should be protected against<br />
lightning<br />
260 x 50 x 180 mm<br />
Around 1.3 kg<br />
0°C to + 45°C<br />
-10°C to + 70°C<br />
5% ~ 95% RH (Non-Condensing)<br />
• You can use a special antenna switch <strong>with</strong> DiSEqC commands.<br />
When changing ASTRA1 to EUTELSAT, for example, a DiSEqC command is sent<br />
<strong>with</strong> the 22KHz tone via the antenna cable. The antenna switch will change<br />
ASTRA1 to EUTELSAT. The DiSEqC concept is a protective trademark of<br />
EUTELSAT.<br />
• Data rate decides the picture quality of digital TV programmes.<br />
The data rate of about 5-6 Mbit/s coincides <strong>with</strong> the picture quality of an analogue<br />
TV programme.<br />
GB55