BFG Armada - Games Workshop
BFG Armada - Games Workshop BFG Armada - Games Workshop
ARMADA 138 THE THIRD ARMAGEDDON WAR SCENARIO THREE: PELUCIDAR The initial elements of Ghazghkull’s fleet entered the Armageddon system on the Day of the Feast of the Emperor’s Ascension, a time when the Imperial Navy was building up to full alert status. Admiral Parol knew that time was of the essence as the forces of the Imperium marshalled their strength on Armageddon itself and that it would be the task of his fleet to buy this valuable time in the face of an immense Ork fleet. The Defence of Pelucidar was actually a huge engagement and so this scenario concentrates on only a small portion of the battle. The Imperial player, representing Admiral Parol, must cause as much damage as possible to the Ork fleet whilst trying to minimise his own losses. Initially, the Ork fleet will be poorly organised, but their strength will soon increase and threaten to overwhelm the Imperial force. Forces The Imperial player may have a fleet of up to 1500 points, but may only choose Cruisers, Battlecruisers and Battleships from his fleet list. Up to four Minefields may also be purchased. Historically, only Armageddon-class Battleships were featured in this battle, but there is no reason that an Imperial player cannot use other classes just to ‘see what would have happened.’ The Ork player starts with no ships at all and will receive his fleet randomly throughout the battle. Battlezone This battle is fought in the Outer Reaches of the Armageddon system. After rolling for Celestial Phenomena randomly, the Imperial player may then place the planet of Pelucidar anywhere on the table he wishes. He must then deploy his entire fleet in the area indicated on the map below. The Ork player moves his ships on from any point along his table edge. Set-Up The defender deploys his whole fleet first. The defending fleet must be set up with all the ships facing the same table edge and at least 30cm from any table edge. Each defending ship or squadron must be set up at least 20cm apart. The attacker moves his fleet on to the table from any edge in his first turn. First Turn The Orks have the first turn in the Defence of Pelucidar. Special Rules At the start of each of his turns, the Ork player rolls on the chart below to see what forces turn up for battle. You will notice that the first few turns go by very quickly, but things will soon start hotting up as the Orks gradually receive more and more ships. A Squadron of Escorts will have D6 Escorts of whatever type the Ork player wishes. A Fighta-Bomma or Attack Craft Wing will have four counters. D6 ROLL Result + turn number 2-4 1 Fighta-Bommba/Attack Craft Wing 5-6 1 Escort Squadron 7-9 2 Escort Squadrons 10 3 Escort Squadrons 11 1 Kroozer or Terror Ship 12 2 Kroozers or Terror Ships 13-14 1 Rok 15+ 1 Space Hulk If the Ork player rolls a unit he cannot field due to a lack of models, use the next lowest item on the table instead. For example, if a Kroozer is rolled for, but the Ork player has already used all of his Kroozer models, then he would receive three Escort Squadrons instead. Game Length The battle lasts until the Imperial fleet is destroyed or has disengaged Victory Conditions The Imperial player scores Victory points for destroying and crippling Ork ships as normal, but not for ‘Holding the Field.’ In addition, the Victory Points for any of any Imperial ship that is destroyed or disengages is deducted from his total. The Ork player receives no Victory Points in this battle. The Imperial player must earn at least 2000 Victory Points at the end of the battle to claim a victory. Anything less is counted as being a victory for the Orks. Take particular note that the Imperial player will lose Victory Points at the end of the battle because his ships have to disengage, so he must take this into account or be very red faced when he pulls into space dock around Armageddon!
WEAPONS REFIT SHIP REFIT ENGINE REFIT ORK REFITS TABLES THE THIRD ARMAGEDDON WAR The ship’s engines are fitted with additional systems or improvements have been made to the power generators and energy relays in some fashion. Roll a D6 on the following table: D6 Engine Refits 1 Improved Engines. The Mekaniaks have improved the efficiency of the ship’s engines to an astonishing degree. The ship rolls an extra 2D6 when on All Ahead Full special orders. 2 A Bigger Red Button. The Mekaniaks have installed a switch next to the Red button. This channels a short burst of extra power to the engines. Once per game when you use the All Ahead Full special orders, you may double the result of the dice roll to see how far you go. You must travel this FULL distance. 3 More Thrusters. Additional thrusters have been placed all over the ship, enabling the ship make an additional turn after travelling the minimum distance (i.e. 45o /90o ). 4 Silent Running. The Mekaniaks on board have installed special relays (hammers) to shut down the engines quickly (knock-out the 5 Gretchin). When rolling to disengage add +2 to the Leadership value. Kustom Force Field. The Mekboys have managed to improve the shielding systems with a little tinkering. A ship with this refit may ignore the movement penalty for Blast Markers in contact with its base, or it travels though (including gas clouds and other celestial phenomenon). 6 Painted Red. While the ship was being repaired the Meks decided it needed a new coat of paint. Due to the Ork belief red ships go faster, increase the ships speed by 5cm. Note the model must be painted red to get this benefit. The structure of the ship is improved in some way or new equipment is installed. Roll a D6 on the following table: D6 Ship Refit 1 Improved Tellyportas. Orks are the undisputed masters of Tellyporta Teknologee, and have been able to improve this ship’s Tellyporta to carry extra boyz. Add +1 to all hit-and-run attacks made by the Tellyporta. 2 Extra Armour Plating. The Mekboys have been to work welding extra metal plates all over the ship. This has had the effect of increasing the ships damage by 25%, but decreasing its speed by 5cm. 3 Fire Grots. Due to an efficient and terrifying (for the Grots) training regime, a group of Gretchin have been taught how to fight fires with maximum efficiency. Fires are extinguished on a 5 or 6 roll to repair in the end phase, but normal damage is still repaired on a 6. 4 More Shields. If one is good two must be better, the Mekaniaks have added a shield to this ship. 5 Ram Spike. At the Kaptins order, the Mekaniaks have welded a huge ramming spike to the front of the ship. Due to the extra confidence this spike gives the Krew add +1 to leadership when rolling to ram. 6 Overloading the Shield Generators. Mekaniaks on board have put in switches, buttons, and lots of flashing lights, which somehow allow them to enhance the shield output. For each hit against the shield's roll 1D6, on a 6 the increased shielding absorbs the hit and it is ignored, place no blast marker. On a 1 roll a further 1D6, on a 6 take a critical hit. As the power meant for the shields overloads another system. The ship has been upgraded with additional or more sophisticated weapons systems, greatly enhancing its battle effectiveness. Roll a D6 on the following table: D6 Weapons Refit 1 Weirdboy Tower. During the last battle, the power of the Waagh was too much for one of the boyz on board and he manifested strange powers. Always inventive they have chained the new Weirdboy up and are using him as a weapon. The Weirdboy is the equivalent of a Strength 1 Lance, with a range of 15cm. 2 Kans. The Kaptin ordered the Mekboyz to build Kans to aid in the loading of torpedoes and the readying of attack craft. The ship adds +1 to its leadership when attempting Reload Ordnance special orders (re-roll this if the ship has no ordnance). 3 Dakka Central. The Mekboys have been able to rig all of the ships weapons through the Dakka Central. This allows the Orks to still fire with enthusiasm while the ship is performing special manoeuvres and still hit. While on special orders, the ships firepower is reduced by 25% (rounded up) rather than halved. 4 Mad Bombers. The particularly foolhardy Ork pilots from this ship push their Fighta-bommas past the known limits of Ork Technology. Rather than rolling D3 for the number of hits against ships, these Bombers may roll 1D6. 5 Grot Targeters. The Mekaniaks have installed display screens which show the enemy ships as Grots. As Orks have practiced from a very early age how to hit Grots, all of the firing by weapons batteries now benefits from a left column shift on the Gunnery Table (before any other modifiers for blast markers or range). 6 More Dakka. The Mekaniaks have been adding guns all over the ship, increase the Turrets value by 1. 139 ARMADA
- Page 1 and 2: THERE IS ONLY WAR CONFLICTS OF THE
- Page 3 and 4: Armageddon system, the Imperial shi
- Page 5 and 6: oarded landing craft and plunged vi
- Page 7 and 8: long distance sighting of another O
- Page 9: SCENARIO TWO: PAROL’S BAIT THE TH
- Page 13 and 14: M Keynes M Rogan P Semtexia Jopall
- Page 15 and 16: planetary assaults to corral and co
- Page 17 and 18: were already far past the point at
- Page 19 and 20: ABADDON’S 13 TH BLACK CRUSADE SCE
- Page 21 and 22: ABADDON’S 13 TH BLACK CRUSADE SCE
- Page 23 and 24: ABADDON’S 13 TH BLACK CRUSADE SCE
- Page 25 and 26: SCENARIO SEVEN: MACHARIA’S END Th
- Page 27 and 28: CORONA SECTOR Subiaco Diablo H C Be
- Page 29 and 30: SHORT BURN TORPEDOES Short burn tor
- Page 31 and 32: APPENDIX II: OTHER VESSELS Q-SHIPS,
ARMADA 138<br />
THE THIRD ARMAGEDDON WAR<br />
SCENARIO THREE: PELUCIDAR<br />
The initial elements of Ghazghkull’s fleet entered the Armageddon system on the Day of the Feast of the Emperor’s Ascension,<br />
a time when the Imperial Navy was building up to full alert status. Admiral Parol knew that time was of the essence as the<br />
forces of the Imperium marshalled their strength on Armageddon itself and that it would be the task of his fleet to buy this<br />
valuable time in the face of an immense Ork fleet.<br />
The Defence of Pelucidar was actually a huge engagement and so this scenario concentrates on only a small portion of the<br />
battle. The Imperial player, representing Admiral Parol, must cause as much damage as possible to the Ork fleet whilst trying<br />
to minimise his own losses. Initially, the Ork fleet will be poorly organised, but their strength will soon increase and threaten<br />
to overwhelm the Imperial force.<br />
Forces<br />
The Imperial player may have a fleet of up to 1500 points, but may only choose<br />
Cruisers, Battlecruisers and Battleships from his fleet list. Up to four Minefields<br />
may also be purchased. Historically, only Armageddon-class Battleships were<br />
featured in this battle, but there is no reason that an Imperial player cannot use<br />
other classes just to ‘see what would have happened.’<br />
The Ork player starts with no ships at all and will receive his fleet randomly<br />
throughout the battle.<br />
Battlezone<br />
This battle is fought in the Outer Reaches of the Armageddon system. After<br />
rolling for Celestial Phenomena randomly, the Imperial player may then place<br />
the planet of Pelucidar anywhere on the table he wishes. He must then deploy<br />
his entire fleet in the area indicated on the map below.<br />
The Ork player moves his ships on from any point along his table edge.<br />
Set-Up<br />
The defender deploys his whole fleet first. The defending fleet must be set up<br />
with all the ships facing the same table edge and at least 30cm from any table<br />
edge. Each defending ship or squadron must be set up at least 20cm apart. The<br />
attacker moves his fleet on to the table from any edge in his first turn.<br />
First Turn<br />
The Orks have the first turn in the Defence of Pelucidar.<br />
Special Rules<br />
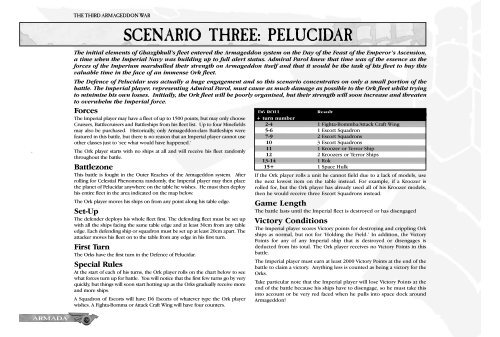
At the start of each of his turns, the Ork player rolls on the chart below to see<br />
what forces turn up for battle. You will notice that the first few turns go by very<br />
quickly, but things will soon start hotting up as the Orks gradually receive more<br />
and more ships.<br />
A Squadron of Escorts will have D6 Escorts of whatever type the Ork player<br />
wishes. A Fighta-Bomma or Attack Craft Wing will have four counters.<br />
D6 ROLL Result<br />
+ turn number<br />
2-4 1 Fighta-Bommba/Attack Craft Wing<br />
5-6 1 Escort Squadron<br />
7-9 2 Escort Squadrons<br />
10 3 Escort Squadrons<br />
11 1 Kroozer or Terror Ship<br />
12 2 Kroozers or Terror Ships<br />
13-14 1 Rok<br />
15+ 1 Space Hulk<br />
If the Ork player rolls a unit he cannot field due to a lack of models, use<br />
the next lowest item on the table instead. For example, if a Kroozer is<br />
rolled for, but the Ork player has already used all of his Kroozer models,<br />
then he would receive three Escort Squadrons instead.<br />
Game Length<br />
The battle lasts until the Imperial fleet is destroyed or has disengaged<br />
Victory Conditions<br />
The Imperial player scores Victory points for destroying and crippling Ork<br />
ships as normal, but not for ‘Holding the Field.’ In addition, the Victory<br />
Points for any of any Imperial ship that is destroyed or disengages is<br />
deducted from his total. The Ork player receives no Victory Points in this<br />
battle.<br />
The Imperial player must earn at least 2000 Victory Points at the end of the<br />
battle to claim a victory. Anything less is counted as being a victory for the<br />
Orks.<br />
Take particular note that the Imperial player will lose Victory Points at the<br />
end of the battle because his ships have to disengage, so he must take this<br />
into account or be very red faced when he pulls into space dock around<br />
Armageddon!


