owner's manual installation and operation - Michael W. Buder
owner's manual installation and operation - Michael W. Buder
owner's manual installation and operation - Michael W. Buder

Create successful ePaper yourself
Turn your PDF publications into a flip-book with our unique Google optimized e-Paper software.
OWNER’S MANUAL<br />
INSTALLATION<br />
AND OPERATION<br />
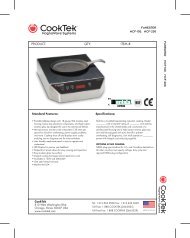
Use <strong>and</strong> Care of CookTek MagnaWave Cooktop –<br />
Models MC1500, MCD1500, MC1800, MCD1800,<br />
MC2500, MCD2500, MC3000, MCD3000,<br />
MC3500, MCD3500, MC2502F, MCD2502F,<br />
MC2502S, MCD2502S, MC3002S, MCD3002S,<br />
MC3502S, MCD3002F, MCD3502F<br />
CookTek, Inc.<br />
810 W. Washington • Chicago, IL 60607 U.S.A.<br />
Tel: 1-312-563-9600 • Fax: 1-312-432-6220<br />
102922
1<br />
PREPARING YOUR COOKTEK MAGNAWAVE COOKTOP FOR USE<br />
Before operating your Cooktop, do the following:<br />
1. Remove all packing material.<br />
2. Place the unit on a dry, level, hard, stable, <strong>and</strong> non-flammable surface.<br />
3. Keep unit away from other heat sources <strong>and</strong> allow at least 2 inches clearance for<br />
air circulation at sides, front <strong>and</strong> rear of the unit. If either the air intake or<br />
exhaust outlet is blocked, the internal temperature will rise, causing an error code<br />
to occur.<br />
Grounding Instructions:<br />
The Cooktop must be properly grounded. In the event of an electrical short circuit,<br />
grounding reduces the risk of electric shock by providing a safe path for the electric<br />
current. The Cooktop has a power cord with a 3-prong grounding plug, which must<br />
be used in a compatible <strong>and</strong> properly grounded outlet. It is the owner’s responsibility<br />
to replace any 2-prong wall outlet with a properly grounded 3-prong wall<br />
receptacle.<br />
For your safety, never cut, remove, or disable the electrical (ground) connection<br />
from the plug. Never use an adapter plug or an extension cord with the Cooktop.<br />
WARNING: Electric shock can result from an improperly grounded plug. Please<br />
consult a qualified electrician if you have any questions about these grounding<br />
instructions.<br />
Before You Begin:<br />
Some units may come equipped with a removable IEC Power Cord. Please make<br />
sure that this power cord is firmly attached to your CookTek unit BEFORE plugging<br />
the unit into the power receptacle <strong>and</strong> before attempting <strong>operation</strong>.<br />
ELECTRICAL INSTALLATION REQUIREMENTS*<br />
Every <strong>installation</strong> site has different electrical wiring. Because many different local<br />
codes exist, it is the Owner <strong>and</strong> Installer’s responsibility to comply with those codes.<br />
CookTek is not responsible for any consequential damages as a result of failure to<br />
comply with <strong>installation</strong> requirements.<br />
• Read all <strong>installation</strong> instructions carefully before starting <strong>installation</strong>.<br />
• Remove Cooktop carefully from carton.<br />
• Remove all loose packaging <strong>and</strong> accessories.<br />
• It is the responsibility of the installer to comply with all federal, state <strong>and</strong> local<br />
codes.<br />
• Any <strong>installation</strong> not matching the specifications discussed in this <strong>manual</strong> automatically<br />
voids the product’s warranty.<br />
• CookTek recommends that a dedicated electrical line be used for each Cooktop<br />
installed. Electrical circuits should not be shared with any other electrical<br />
equipment.
INSTALLATION OF DROP IN COOKTOPS<br />
• When installing the drop-in Cooktop, use the dimensions provided in this<br />
<strong>manual</strong> to trace the cutout dimensions onto the countertop.<br />
• Be sure to allow for a minimum clearance of 2” between all sides of the<br />
housing <strong>and</strong> any surface or obstacle, <strong>and</strong> 9” between the bottom of the housing<br />
<strong>and</strong> any surface or obstacle.<br />
• Cut out <strong>and</strong> drill holes as required in countertop.<br />
• Drill holes for control box mounting.<br />
• When installing the drop-in Cooktop , apply a bead of an NSF St<strong>and</strong>ard 51<br />
approved sealant (such as Dow Corning 732 Multi-Purpose Sealant or GE RTV<br />
108) around all four edges of the countertop cutout. Carefully follow sealant<br />
manufacturer's instructions to insure proper adhesion.<br />
• Multi-Purpose Sealant or GE RTV 108) around all four edges of the countertop<br />
cutout. Carefully follow sealant manufacturer’s instructions to insure proper<br />
adhesion.<br />
• Locate Cooktop over countertop cutout. Pass control panel <strong>and</strong> cord through<br />
cutout, then pass the base of the Cooktop through the hole until flange rests on<br />
the countertop.<br />
• Mount control panel using screws supplied. Mounting options are illustrated in<br />
attached drawing.<br />
• Plug Cooktop into a grounded 120V or 200-240V (depending on the model<br />
purchased), single-phase receptacle. Check rating plate on the Cooktop to<br />
verify correct voltage. NOTE: For proper <strong>operation</strong>, a dedicated circuit<br />
should be used for each unit installed. Each circuit should be protected<br />
with a 20 amp minimum circuit breaker. For best <strong>operation</strong>, the counter<br />
should have an opening near the unit for fresh air to circulate underneath.<br />
APPROVED FOR COMMERCIAL USE<br />
CookTek’s MagnaWave cooktops have been tested to be in conformance with UL<br />
197 <strong>and</strong> CSA C22.2 st<strong>and</strong>ards <strong>and</strong> bear the commercially rated approvals.<br />
CookTek’s Magna Wave cooktops have been tested to be in conformance with the<br />
European Economic Area st<strong>and</strong>ards <strong>and</strong> bear the CE marking signifying European<br />
Conformity.<br />
2<br />
COOKING BY POWER COOK (WATTAGE)*<br />
General Operation:<br />
Plug cooktop into a grounded, single-phase receptacle. Models will run on 100-<br />
120V drawing up to 1800W depending on model. Or on 208-240V drawing a maximum<br />
of 3500W depending on the model. Check rating plate on unit to verify<br />
correct voltage <strong>and</strong> wattage. Voltages below 120V or 240V can result in less than<br />
rated power <strong>and</strong> slower heating times.
3<br />
NOTE: For proper <strong>operation</strong>, an independent dedicated circuit should be used for<br />
each unit installed. Each circuit should be protected with a 20 amp circuit breaker.<br />
When your application requires a high intense heat or you want a quick temperature<br />
increase, the Power Cook mode should be used.<br />
What to Do:<br />
1. Turn the Cooktop “ON” by turning the control knob to the right.<br />
2. Momentarily depress the Power Cook button.<br />
3. Turn the control knob until the desired Power Cook setting (1-20) appears on the<br />
LED Display.<br />
4. Turn the control knob to the left to decrease power <strong>and</strong> to the right to increase<br />
power.<br />
5. To turn the Cooktop off, turn the control knob to the far left until it “clicks” <strong>and</strong><br />
the LED display no longer illuminates.<br />
IMPORTANT: You can switch between SmarTemp <strong>and</strong> Power Cook at anytime just<br />
by pressing the SmarTemp/Power Cook button.<br />
IMPORTANT INFORMATION<br />
• Never heat an empty pan, it may damage the Cooktop or cookware <strong>and</strong> overheat<br />
the unit. When overheating occurs, an error code will flash on the LED<br />
display <strong>and</strong> the Cooktop will shut itself off automatically. When the temperature<br />
returns to normal, the Cooktop will start to cook again.<br />
• Remember to turn the Cooktop off after each use.<br />
• Keep the Cooktop away from gas <strong>and</strong> electric ranges or open flames. Do not<br />
place in the oven. If the surrounding air temperature is too high, the Cooktop<br />
will cease to function properly.<br />
• Be sure to dry off the outside of the pan before use. Otherwise As If the pan<br />
temperature rises, the water droplets on the outside of the pan may begin to<br />
boil <strong>and</strong> spatter.<br />
• Do not touch the ceramic plate (or the top of the Cooktop) immediately after<br />
use. The heat from the pan will be transferred to the ceramic plate causing it to<br />
be hot to the touch.<br />
• Do not place any articles on the Cooktop other than inductive cookware. For<br />
example, do not place cans on top of the Cooktop as they may explode.<br />
• Do not use aluminum foil on top of the Cooktop.<br />
• Do not use the Cooktop near a faucet, swimming pool, sink, or other areas<br />
where water can be found. Never store the Cooktop outside or upside down.<br />
• Do not obstruct, block, or alter the air entrance or outlet. Do not stick foreign<br />
objects into these openings.<br />
• Do not strike or damage the Cooktop. Do not put the Cooktop in your luggage.<br />
Throwing or dropping the Cooktop can damage the internal components or<br />
crack the Cooktop, voiding your Warranty. If the Cooktop becomes cracked,<br />
unplug immediately <strong>and</strong> do not use.
4<br />
CARE & CLEANING<br />
Your CookTek Induction Cooktop is easy to keep clean. Be sure to follow these easy<br />
instructions:<br />
1. Turn the unit OFF <strong>and</strong> remove the plug from any power outlets prior to cleaning.<br />
2. When the unit is cool, wipe the surface <strong>and</strong> body with a damp cloth. Use a mild<br />
scouring agent on the stainless steel housing such as Bon Ami or Barkeeper’s<br />
Friend for greasy or resistant soiling. Do not use a lye-based cleaner, such as an<br />
oven cleaner, as it may damage the Cooktop.<br />
3. To clean the glass surface, use a mild detergent or glass Cooktop cleansing cream.<br />
4. Never immerse the Cooktop in water or put it in the dishwasher.<br />
Your CookTek MagnaWave Cooktop has two different cooking<br />
modes: SmarTemp <strong>and</strong> Power Cook. Professional cooks will appreciate<br />
the special features <strong>and</strong> advantages of each mode.<br />
COOKING BY SMARTEMP (TEMPERATURE)*<br />
When your recipe requires a precise <strong>and</strong> even temperature to be maintained over a<br />
period of time, the SmarTemp mode is ideal. Just follow these simple steps.<br />
What to Do:<br />
1. Turn the Cooktop “ON” by turning the control knob to the right.<br />
2. Place cookware containing ingredients on the Cooktop.<br />
3. Depress the SmarTemp button.<br />
4. Turn the control knob until the desired cooking temperature appears on the LED<br />
Display. The temperature displayed will change from the set temperature to the<br />
measured temperature 3 seconds after the control knob is moved. The LED will<br />
show the measured temperature until the desired temperature is achieved.<br />
5. To turn the Cooktop off, turn the control knob to the far left until it “clicks” <strong>and</strong><br />
the LED display is no longer illuminated.<br />
NOTE: If the unit is left on <strong>and</strong> has been left unattended for 5 or more minutes<br />
without a pan on its surface, the unit will enter a “Sleep Mode” to conserve energy.<br />
You will know that the unit is in “Sleep Mode” because the LED will display horizontal<br />
dashes. The Power Knob must be rotated in either direction to exit “Sleep<br />
Mode” <strong>and</strong> begin normal <strong>operation</strong>.<br />
SmarTemp monitors the temperature of the bottom of the pan.<br />
For actual temperature of the food contents, a contact thermometer should be used.<br />
WARRANTY STATEMENT<br />
All commercial cooking equipment manufactured by CookTek is warranted against<br />
defects in materials <strong>and</strong> workmanship for a period of one year from the date of Sale,<br />
or 18 months from the date of shipment from our factory, whichever comes first.<br />
IMPORTANT! Keep a copy of your sales receipt to verify date of purchase. A valid<br />
proof of purchase, indicating Serial Number (s) <strong>and</strong> date of purchase is required to
5<br />
obtain Warranty Service. This warranty is for the benefit of the original purchaser <strong>and</strong><br />
is non-transferable. Any defects in materials or workmanship, which are brought to the<br />
attention of CookTek by written notification within the aforesaid warranty period will<br />
be repaired or replaced, at CookTek’s discretion, with new or recertified products or<br />
parts. THIS IS THE SOLE REMEDY FOR ANY BREACH OF THIS WARRANTY.<br />
IN NO EVENT WILL COOKTEK BE LIABLE FOR DAMAGES OF ANY KIND,<br />
WHETHER DIRECT OR INDIRECT, SPECIAL OR CONSEQUENTIAL.<br />
THIS WARRANTY IS THE COMPLETE AND ONLY WARRANTY, EXPRESS<br />
OR IMPLIED IN LAW OR FACT, INCLUDING BUT NOT LIMITED TO, WAR-<br />
RANTIES OF MERCHANTABILITY, SUITABILITY, QUALITY, OR FITNESS<br />
FOR ANY PARTICULAR PURPOSE.<br />
This warranty is void if it is determined that upon inspection by an authorized<br />
service agent that the equipment has been modified, misused, misapplied, improperly<br />
installed, or damaged in transit or by fire, flood or act of God. Warranty will be<br />
considered void if the serial nameplate has been removed or if the unit has been<br />
opened or modified in any way, or service has been attempted by unauthorized personnel.<br />
IMPORTANT! Keep a copy of your sales receipt to verify date of purchase.<br />
A valid proof of purchase, indicating Serial Number(s) <strong>and</strong> date of purchase is<br />
required to obtain Warranty Service. The prices charged by CookTek for its products<br />
are based upon the limitations in this warranty. Seller’s obligation under this<br />
warranty is limited to the repair of covered defects without charge by a CookTek<br />
factory authorized service agent or one of its sub-service agencies.<br />
To receive Warranty Service, Please call CookTek at 312-563-9600 to obtain an RA<br />
number. This RA number must be printed on the outside of the return shipping container,<br />
or on the address label when returning units for service. Units received<br />
without an RA number will be refused at our shipping dock <strong>and</strong> may encounter a<br />
delay in service. Units must be taken or shipped to the required authorized service<br />
agency with transportation charges prepaid for service. CookTek will provide return<br />
freight. In addition to restrictions contained in this warranty, specific limitations are<br />
shown in the Service Policy <strong>and</strong> Procedure Guide. Please save all packaging materials<br />
for possible use in shipping. CookTek assumes no liabilities whatsoever for any<br />
damages incurred in transit.<br />
Warranty void if not purchased in country of origin or through an authorized<br />
CookTek service agent. For additional information <strong>and</strong> other details concerning<br />
warranty, please contact our Service Department at:<br />
In the United States:<br />
CookTek<br />
810 W. Washington Boulevard • Chicago, IL 60607<br />
Tel: (888) 266-5835 • Fax: (888) 266-5329<br />
Outside of the United States:<br />
Tel: 1-312-563-9600 • Fax: 1-312-432-6220<br />
Worldwide Web:<br />
WWW.CookTek.com<br />
Rev. 6/7/05
6<br />
IMPORTANT SAFETY PRECAUTIONS<br />
There are certain safeguards that should always be followed whenever this appliance<br />
is used:<br />
• To reduce the risk of fire, electric shock, or injury - please read, follow <strong>and</strong> save<br />
all instructions.<br />
• Never immerse cords, plugs or appliance in water.<br />
• Supervise carefully when appliance is used near children. Keep children away<br />
from appliance when in <strong>operation</strong>.<br />
• Always unplug appliance immediately after use <strong>and</strong> allow for cooling time if<br />
h<strong>and</strong>ling, transporting, or storing.<br />
• Do not use any appliance that has a damaged cord or plug, or one that has malfunctioned<br />
or been damaged. Consult the warranty <strong>and</strong> follow instructions for<br />
service.<br />
• Do not use any accessories or attachments that are not recommended by the manufacturer.<br />
Use of unapproved accessories may cause injuries <strong>and</strong> void the warranty.<br />
• The pan on the appliance will heat continuously as long as the power is ON. The<br />
pan will be hot <strong>and</strong> caution should be exercised when working on or near the<br />
appliance.<br />
• Do not let the power cord touch hot surfaces or hang over the edge of the<br />
counter. Do not move the appliance when electric power is connected.<br />
• Do not move the appliance while a hot pan or pan containing hot liquids is on top<br />
of the appliance.<br />
• To disconnect appliance, turn control knob to “OFF”. You will hear a “click”.<br />
You may then remove the plug from the outlet.<br />
• Do not use CookTek Induction Cooktop for anything other than its intended use<br />
as described in this <strong>manual</strong>. This unit is designed to heat <strong>and</strong> cook food <strong>and</strong> is<br />
not intended for laboratory or industrial use.<br />
• Do not put food or unopened cans on the Cooktop’s surface.<br />
• This product may only be serviced by an authorized service agent or by CookTek<br />
personnel. Do not attempt to open the unit or perform service of any kind. For<br />
service information contact CookTek at 1-312-563-9600.<br />
• This appliance must be grounded. Connect only to a properly grounded outlet.<br />
Before operating, read grounding instructions <strong>and</strong> Electrical Installation<br />
Requirements on Page 3 of this booklet. Do not use an extension cord.<br />
• Do not overcook food or leave appliance unattended while in use.<br />
• In the unlikely event of a grease fire, smother flame by covering pan with a tightfitting<br />
lid, cookie sheet, or flat tray. DO NOT USE WATER. When the fire is<br />
under control, turn off appliance <strong>and</strong> unplug from wall.<br />
• Use only with induction-compatible <strong>and</strong> efficient cookware.<br />
• Place Cooktop on a level, hard, stable, non-flammable surface before use.
TROUBLESHOOTING GUIDE<br />
Symptom Probable Cause Possible Solution<br />
No Power Unit Unplugged Plug Unit into Appropriate Receptacle<br />
(No Lights or Fan Noise)<br />
No Power to Receptacle Make Sure that Receptacle is Energized<br />
No Power to Receptacle Check Wall Switches<br />
No Power to Receptacle Check Circuit Breaker<br />
No Power to Receptacle Plug a different electronic device into the<br />
receptacle to make sure that power is<br />
present<br />
Pan Does Not Heat Pan is Not Induction Efficient Use Induction Efficient Pan<br />
Pan Diameter is less than 7 inches Use a larger Induction Efficient Pan<br />
Pan Not Centered Over<br />
Cooktop Logo<br />
Center Pan<br />
Cooktop Suddenly Possible Power Brown Out Assure proper voltage/power levels<br />
Stops Heating Circuit Shared with another Make sure that the Cooktop is not sharing<br />
Electrical Device a circuit with other Electrical Devices.<br />
Air Vents Blocked or Insufficient Check air vents to make sure that they are<br />
Air Circulation not blocked. Make sure that there is<br />
sufficient air flow around the appliance<br />
Safety Shut-Off Engaged The Safety Shut-Off will engage if an empty<br />
pan is left on the Cooktop surface while the<br />
unit is working at full power. Make sure that<br />
the Cooktop surface is clear. Wait 15-20<br />
minutes for the unit to reset.<br />
Pan Does Not Get Hot Extension Cord In Use Do Not use extension cords. Extension<br />
Enough Even Though cords may affect the power levels<br />
Power Levels Are Set reaching the appliance<br />
To Maximum-Induction<br />
Efficient Pan In Use<br />
Circuit Shared with Another<br />
Electrical Device<br />
Make sure that the Cooktop is not sharing<br />
a circuit with other Electrical Devices.<br />
Pan Cooks Unevenly, Pan is Not Induction Efficient Use Induction Efficient Pan<br />
Does Not maintain Heat Pan Bottom May Not Be Flat<br />
Level, or Overheats Enough<br />
Use Flatter Pan<br />
Pan Not Centered Over<br />
Cooktop Logo<br />
Center Pan<br />
Pan Diameter is Less Than 7 inches Use a larger Induction Efficient Pan<br />
7
In the event of a Possible Malfunction, your CookTek MagnaWave Cooktop<br />
will display an Error Code on the LED Display. Please consult the following<br />
table when encountering an Error Code.<br />
Error Error Description Potential Cause Action Required<br />
Code<br />
8<br />
1 RTD (temperature RTD sensor has shorted Reconnect or replace RTD.<br />
sensor) is malfunctioning Service may be required.<br />
2 RTD (temperature Glass surface is too hot or RTD Remove any pans from cooktop<br />
sensor) temperature is sensor has broken surface <strong>and</strong> let unit cool. Then<br />
too high turn unit off, then on. If problem<br />
was temperature related, the unit<br />
will return to normal <strong>operation</strong>,<br />
otherwise service is required.<br />
3 Current is too high Possible mechanical damage to Try different cookware. Service<br />
coil or foreign object on cooktop. may be required<br />
4 Electronics are Fan broken, bad ventilation, Check airflow. Clear air vents.<br />
overheating ambient temperature too hot Listen for fan <strong>operation</strong>.<br />
6 Input Line (From Power Something else is one the same To reset, unplug unit, wait<br />
Outlet) Voltage Too High circuit. Line voltage fluctuations 5 seconds, <strong>and</strong> plug in again.<br />
at end or beginning of work day. If problem persists, have an<br />
(Voltage > 132Vac for 120V electrician monitor the line<br />
model or > 264Vac for 240V<br />
model)<br />
voltage.<br />
7 Hardware failure Inverter I/O problem To reset, unplug unit, wait<br />
5 seconds, <strong>and</strong> plug in again.<br />
Service may be required.<br />
8 Zero cross error Bad AC source, board Turn unit off, then on. Plug unit<br />
component failure into outlet on different circuit<br />
breaker. If problem persists,<br />
service is required on device.<br />
16 System error CPU I/O problem To reset, unplug unit, wait<br />
5 seconds, <strong>and</strong> plug in again.<br />
Two Hob (Two Position) Cooktops<br />
Operation of the two hob (two position) Cooktop is exactly the same as the single<br />
position Cooktop. Each position will have its own, independently controlled, On-<br />
Off Control Knob <strong>and</strong> its own, separately controlled, SmarTemp button. It is not<br />
necessary to turn on both positions for the Cooktop to function.<br />
NOTE: For Proper <strong>operation</strong> a dedicated circuit should be used for each unit<br />
installed. Each unit should be protected with a 30A minimum circuit breaker.