


You also want an ePaper? Increase the reach of your titles
YUMPU automatically turns print PDFs into web optimized ePapers that Google loves.
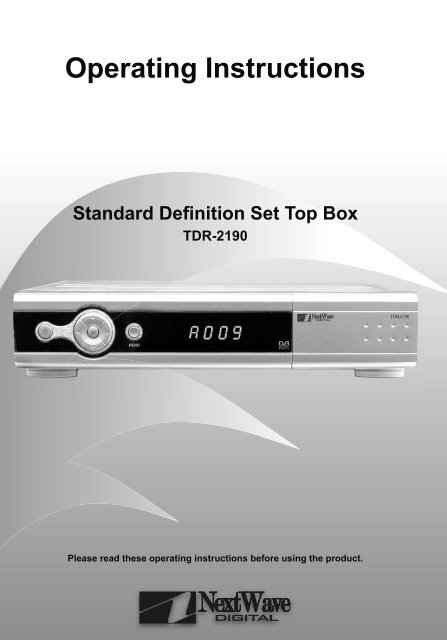
Operating Instructions<br />
Standard Defi nition Set Top Box<br />
TDR-2190<br />
Please read these operating instructions before using the product.
2<br />
Safety Instructions<br />
WARNING<br />
RISK OF ELECTRIC SHOCK<br />
DO NOT OPEN<br />
!<br />
Safety Tips.<br />
» Do not overload wall outlets, extension cords or integral convenience receptacles as this can result in a risk of<br />
fi re or electrical shock.<br />
» Never allow liquids, spray or other materials to come into contact with the inside of the STB.<br />
» Unplug the STB from the wall outlet before cleaning.<br />
» Use a soft cloth to clean the exterior of the STB.<br />
» Allow clear space around the STB for suffi cient ventilation.<br />
» Do not use the STB where it is exposed to direct sunlight or near a heater.<br />
» Never stack other electronic equipment on top of the STB.<br />
» Do not place the STB outdoors. Keep out of direct sunlight.<br />
» Do not connect or modify cables when the STB is plugged in.<br />
» Do not cover the STB or place it on a unit that emits heat.<br />
TO REDUCE THE RISK OF ELECTRIC SHOCK, DO NOT REMOVE<br />
COVER (OR BACK). NO USER SERVICEABLE PARTS INSIDE.<br />
REFER SERVICING TO QUALIFIED SERVICE PERSONNEL.<br />
This symbol indicates “dangerous<br />
voltage” inside the product that presents a<br />
risk of electric shock or personal injury.<br />
Please read the following<br />
safety instructions carefully.<br />
This symbol indicates important<br />
instructions accompanying product.<br />
Never stack other electronic equipment on top of the STB. The STB requires suffi cient<br />
ventilation space to prevent overheating. Failure to provide adequate ventilation could<br />
result in poor performance of the STB or void your warranty.
Table of Contents<br />
Welcome... 4<br />
Included within package ................................................................... 4<br />
Optional or Recommended Accessories (Not Included) ................ 4<br />
Important Points 5<br />
Rear Panel 6<br />
Connection Options 7<br />
Connecting the Antenna .................................................................. 7<br />
Basic Set Up - Standard TV ............................................................. 7<br />
Basic Set Up - Standard TV - S-Video ............................................ 8<br />
Standard TV & HiFi ......................................................................... 8<br />
Front Panel 9<br />
Front Panel ....................................................................................... 9<br />
Remote Control 10<br />
Navigating <strong>Menu</strong>s 12<br />
Using Remote Control to Navigate .................................................. 12<br />
Using contextual help ....................................................................... 12<br />
Main <strong>Menu</strong> 13<br />
<strong>Menu</strong> Structure ................................................................................. 13<br />
Installation Sub-menu ...................................................................... 14<br />
Auto Search ...................................................................................... 14<br />
Fast Search ................................................................................ 14<br />
Manual Search ................................................................................. 15<br />
Scan Complete <strong>Menu</strong> ...................................................................... 15<br />
Antenna Power ................................................................................. 16<br />
Initialise STB ..................................................................................... 16<br />
Edit Channels ................................................................................... 17<br />
Favourite Group ............................................................................... 18<br />
System Settings ............................................................................... 19<br />
Video Settings .................................................................................. 19<br />
Clock Settings ................................................................................... 20<br />
Language Settings ........................................................................... 21<br />
Lock Settings .................................................................................... 22<br />
System Information .......................................................................... 23<br />
Program Guide ................................................................................. 23<br />
Utility Sub-menu ............................................................................... 24<br />
Calendar ........................................................................................... 24<br />
On Screen Display (OSD) 25<br />
iplate .................................................................................................. 25<br />
Function Guide 26<br />
Changing Channels ......................................................................... 26<br />
Volume Control ................................................................................. 26<br />
Aspect Ratio ..................................................................................... 26<br />
Sleep ................................................................................................. 26<br />
TV / Radio ......................................................................................... 26<br />
Audio Settings .................................................................................. 27<br />
Teletext .............................................................................................. 28<br />
Closed Captions (subtitles) .............................................................. 28<br />
Screen Zoom .................................................................................... 28<br />
Troubleshooting ................................................................................ 29<br />
Specifi cations ................................................................................... 30<br />
3<br />
3
4<br />
Congratulations, and thank you for purchasing a <strong>NextWave</strong> <strong>Digital</strong> TDR-2190<br />
Standard Defi nition set top box.<br />
Included within package<br />
Your <strong>NextWave</strong> TDR-2190 should include the following items. If you are missing any of the following items, please contact your retailer.<br />
Electronic copies of the operating instructions and quick start guide are also available for download from the support section of<br />
www.nextwave-digital.com.<br />
RCA ~ RCA Flylead<br />
Optional or Recommended Accessories (Not Included)<br />
Depending on your particular audio/visual setup, certain third party products may need to be purchased such as:<br />
Coaxial <strong>Digital</strong> interconnects, S-Video Flyleads, RF Flyleads.<br />
to the <strong>NextWave</strong> of Technology...<br />
RCU + 2x AAA<br />
batteries<br />
<strong>NextWave</strong> <strong>Digital</strong> reccommends SignalMAX Home Theatre Interconnects<br />
www.signalmax.com.au<br />
Operating Instructions<br />
Standard Defi nition Set Top Box<br />
TDR-2190<br />
Please read these operating instructions before using the product.<br />
Operating<br />
Instructions
Important Points<br />
!<br />
1<br />
2<br />
3<br />
!<br />
Typographic conventions<br />
Several symbols are used throughout these<br />
operating instructions to identify actions, tasks<br />
and important safety information.<br />
Begin a task<br />
This symbol indicates the beginning of a<br />
specifi c task, and it is usually followed by a<br />
step by step listing of the actions needed to<br />
complete that task.<br />
Information<br />
This symbol indicates that a statement<br />
contains explanatory or additional information<br />
relevent to the particular task.<br />
Caution<br />
This symbol indicates that a statement<br />
contains important information that has a<br />
signifi cant impact on the opreation of the<br />
product.<br />
Ignoring this type of symbol could result in<br />
damage to the product or external equipment.<br />
Step by Step<br />
These symbols indicate a step by step<br />
process required to complete a particular task<br />
or use a specifi c function of the product. All<br />
the steps of a single task are joined by a grey<br />
bar, and other symbols such as and !<br />
may appear within that bar.<br />
Disclaimer:<br />
<strong>Menu</strong> structure and specifi cations can change<br />
without prior notice.<br />
While every care has been taken to<br />
ensure the accuracy of these operating<br />
instructions, neither <strong>NextWave</strong> <strong>Digital</strong> nor<br />
any of its employees make any warranty,<br />
expressed or implied, or assume any legal<br />
liability or responsibility for the accuracy or<br />
completeness of any information contained<br />
within these operating instructions.<br />
Please check<br />
http://nextwave-digital.com/products.php<br />
for the latest version of these operating<br />
instructions.<br />
5<br />
5
Rear Panel<br />
6<br />
1<br />
1<br />
2<br />
1<br />
3<br />
1<br />
4<br />
1<br />
5<br />
1<br />
6<br />
1<br />
7<br />
1 ANT IN RF - Terrestrial (conventional) TV aerial input.<br />
1<br />
2 RF LOOP RF - LOOP OUT to RF LOOP IN. (For continuation of analogue signal)<br />
1<br />
3 RF LOOP IN Connect to RF LOOP.<br />
1<br />
4 TV OUT RF output to RF socket on old style TV.<br />
1<br />
5 VIDEO RCA Composite video (CVBS) output to TV.<br />
1<br />
6 S/PDIF Coaxial - For 5.1 digital audio to AV processor.<br />
1<br />
7 Audio L/R 2xRCA Stereo audio left & right to TV.<br />
1<br />
8 RS232 Service port for software upgrades..<br />
1<br />
9 SVIDEO S-Video output to TV.<br />
1<br />
10 Mains Main power lead to wall outlet.<br />
1<br />
8<br />
1<br />
9<br />
1<br />
10
The following section details some common connection options that may assist. Please note that some of these connection options may<br />
require third party interconnects or cables beyond what is supplied in the box. Talk to your retailer about the best options for connecting<br />
your TDR-2190.<br />
Connecting the Antenna<br />
ANT 1<br />
DC 5V<br />
35mA max<br />
ANT 1<br />
RF LOOP IN<br />
RF LOOP TV OUT<br />
TV OUT<br />
VIDEO<br />
AUDIO<br />
Basic Set Up - Standard TV<br />
Use supplied RCA ~ RCA cable.<br />
ANT 1<br />
DC 5V<br />
35mA max<br />
ANT 1<br />
RF LOOP IN<br />
RF LOOP TV OUT<br />
VIDEO<br />
!<br />
RS232<br />
Connection Options<br />
The TDR-2190 can power a 5VDC active antenna. By default this functionality is disabled<br />
to prevent damaging standard passive antennas. To enable this feature, please refer to the<br />
‘Antenna Power’ sub-menu on page 16.<br />
CAUTION<br />
RISK OF ELECTRICAL SHOCK<br />
DO NOT OPEN<br />
7<br />
90-250V ~<br />
50/60Hz 40Wmax<br />
Please Note: If you would like to receive either community television channels<br />
or original analogue programming, you may use the RF LOOP OUT output<br />
signal to connect your VCR or TV receiver to it. (This signal carries the same<br />
signal that is received by the antenna and is not processed by the STB).<br />
AUDIO<br />
Video<br />
Audio<br />
RS232<br />
90-250V ~<br />
50/60Hz 40Wmax<br />
CAUTION<br />
RISK OF ELECTRICAL SHOCK<br />
DO NOT OPEN<br />
!<br />
!<br />
N1334<br />
N1334<br />
7
Connection Options<br />
8<br />
Basic Set Up - Standard TV - S-Video<br />
Use a S-Video cable purchased separately.<br />
Standard TV & HiFi<br />
ANT 1<br />
DC 5V<br />
35mA max<br />
ANT 1<br />
ANT 1<br />
DC 5V<br />
35mA max<br />
RF LOOP IN<br />
RF LOOP TV OUT<br />
ANT 1<br />
RF LOOP IN<br />
RF LOOP TV OUT<br />
VIDEO<br />
VIDEO<br />
Use a S-Video cable purchased separately.<br />
AUDIO<br />
AUDIO<br />
Audio<br />
Audio<br />
Connecting the Antenna<br />
Connect the coaxial cable from the VHF/UHF Antenna to the RF IN ( 1 90-250V ~<br />
7 )<br />
50/60Hz 40Wmax<br />
socket on the rear panel of the STB.<br />
RS232<br />
<strong>Digital</strong> Audio<br />
���� �<br />
RS232<br />
S-Video<br />
POWER<br />
S-Video<br />
90-250V ~<br />
50/60Hz 40Wmax<br />
CAUTION<br />
RISK OF ELECTRICAL SHOCK<br />
DO NOT OPEN<br />
CAUTION<br />
RISK OF ELECTRICAL SHOCK<br />
DO NOT OPEN<br />
!<br />
!<br />
N1334<br />
N1334
Front Panel<br />
1<br />
11<br />
1<br />
12<br />
1<br />
13<br />
1<br />
11 Standby Button Switch the STB between standby and power on mode.<br />
1<br />
12<br />
Navigate the main menu<br />
Volume Up/Down<br />
Channel up/DOwn<br />
OK<br />
1<br />
13 <strong>Menu</strong> Display the main menu.<br />
Front Panel<br />
9<br />
9
10<br />
Remote Control<br />
1<br />
31<br />
1<br />
27<br />
1<br />
28<br />
1<br />
24<br />
1<br />
29<br />
1<br />
25<br />
1<br />
30<br />
1<br />
26<br />
1<br />
23<br />
1<br />
21<br />
1<br />
19<br />
1<br />
17<br />
1<br />
16<br />
1<br />
13<br />
1<br />
10<br />
1<br />
8<br />
1<br />
9<br />
1<br />
11<br />
1<br />
12<br />
1<br />
15<br />
1<br />
18<br />
1<br />
22<br />
1<br />
14<br />
1<br />
20
1<br />
8 TV SAT N/A<br />
1<br />
9 Mute.<br />
1<br />
10 Standby. Put the STB in or out of standby mode.<br />
1<br />
11 0 ~ 9 Select channels by channel numbers or OK programming parameters.<br />
1<br />
12 TIMER Display the Timer List to reserve channel changes.<br />
1<br />
13 TV/R Switch between TV and Radio.<br />
1<br />
14 EPG Display the Electronic Program Guide (EPG).<br />
1<br />
15 CH/PG<br />
1. Change channels.<br />
2. Page between multipage summaries on the iplate.<br />
1<br />
16 VOL Increase and decrease the volume.<br />
1<br />
17 FAV Select Favourite channel groups.<br />
1<br />
18 INFO Display information plate (iplate).<br />
1<br />
19 MENU Display the Main <strong>Menu</strong>.<br />
1<br />
20 OK Select menu option, or to updated on entry and to OK List menu.<br />
1<br />
21<br />
� PR+<br />
� PR-<br />
1. Change channels up and down.<br />
2. Navigate up and down the main menu, Channel list and EPG.<br />
� VOL+ 1. increase or decrease the volume.<br />
⊳ VOL- 2. Navigate left and right the main menu, Channel list and EPG.<br />
1<br />
22 BACK Return to the previous menu, status or channel.<br />
1<br />
23 EXIT Cancel the user selection.<br />
1<br />
24 AUDIO Select audio options.<br />
1<br />
25 SUBT Display closed captions.<br />
1<br />
26 TEXT Display Teletext.<br />
1<br />
27 SLEEP Confi gure the Sleep timer.<br />
1<br />
28 WIDE Switch between aspect ratios (16:9, 4:3, 4:3 Letterbox).<br />
1<br />
29 TV OUT N/A<br />
1<br />
30 PAUSE Pause the screen.<br />
133 31 ZOOM Zoom into the screen.<br />
Remote Control<br />
11<br />
11
Navigating <strong>Menu</strong>s<br />
1<br />
2<br />
3<br />
4<br />
5<br />
6<br />
12<br />
Using Remote Control to Navigate<br />
Press MENU ( 1<br />
19 ) button to access the main menu.<br />
Press ��⊳� ( 1<br />
21 ) buttons to move the highlight upward or downward.<br />
Press OK ( 1<br />
20 ) button to confi rm a selection or OK a sub-menu.<br />
Within a sub-menu, use � � ⊳� ( 1<br />
21 ) to navigate. Press OK to activate<br />
the selected menu item.<br />
Press BACK ( 1<br />
22 ) button to return to the previous level menu.<br />
Press EXIT ( 1<br />
23 ) button to exit the main menu and return to your program.<br />
Using contextual help<br />
The functions that are listed in the following pages are very thoroughly<br />
detailed. Each task is laid out step by step, with numbered references to<br />
the remote control buttons listed on pages 10-11.<br />
However, depending on your confi dence and comfort with the set top box,<br />
it may not be neccessary to read the following instructions.<br />
All submenus, and pop up interfaces have contextualised help on the<br />
interface, listing the available functions and buttons.
<strong>Menu</strong> Structure<br />
Main <strong>Menu</strong><br />
Installation<br />
Edit Channels<br />
System Settings<br />
Program Guide<br />
Utility<br />
Installation<br />
Auto Search<br />
Fast Search<br />
Manual Search<br />
Antenna Power<br />
Initialise STB<br />
Channel Edit<br />
System Video Settings Settings<br />
Clock Settings<br />
Language Settings<br />
Lock Settings<br />
System information<br />
Utility<br />
Calendar<br />
Main <strong>Menu</strong><br />
Program Guide<br />
13<br />
13
Main <strong>Menu</strong><br />
14<br />
Installation Sub-menu<br />
The Installation sub-menu contains settings related specifi cally to installing and channel searching.<br />
1<br />
2<br />
3<br />
4<br />
5<br />
1<br />
2<br />
Auto Search<br />
The Auto Search will automatically scan all available frequecies for TV<br />
and digital radio.<br />
Auto Search:<br />
Navigate (page 12) to the Installation sub-menu and highlight Auto<br />
Search. Press OK ( 1<br />
20 ) to open ‘Auto Search’ sub-menu.<br />
Use the ⊳� ( 1<br />
21 ) buttons to select the search mode.<br />
Options: ALL: TV and <strong>Digital</strong> Radio stations<br />
Press the RED ( 1<br />
24 ) button to begin auto search.<br />
Press the BLUE ( 1<br />
27 ) button to cancel auto search.<br />
The Scanning menu then displays the progress of the auto search. To<br />
cancel the search, press the RED ( 1<br />
24 ) button or the<br />
EXIT ( 1<br />
23 ) button.<br />
When the channel search is either fi nished or cancelled, the Scan<br />
Complete menu is displayed.<br />
Fast Search<br />
The Fast Search will rapidly scan all available frequecies for both FTA TV<br />
and <strong>Digital</strong> Radio. This type of scan is performed by the TDR-2190 when<br />
it is switched on for the fi rst time.<br />
Fast Search:<br />
Navigate (page 12) to the Installation sub-menu and highlight Fast<br />
Search. Press OK ( 1<br />
20 ) to begin the fast search.<br />
The Scanning menu then displays the progress of the auto search. To<br />
cancel the search, press the RED ( 1<br />
24 ) button or the<br />
EXIT ( 1<br />
23 ) button.<br />
When the channel search is either fi nished or cancelled, the Scan<br />
Complete menu is displayed.
1<br />
1<br />
2<br />
3<br />
4<br />
5<br />
6<br />
1<br />
2<br />
3<br />
4<br />
1<br />
2<br />
Manual Search<br />
Navigate (page 12) to the Installation sub-menu and highlight Manual<br />
Search. Press OK ( 1<br />
20 ) to open the Manual Search menu.<br />
The Manual Search menu allows you to manually enter channel<br />
parameters, or scan a specifi c block of channels for broadcasts.<br />
To manually enter individual channel parameters:<br />
Use � � ( 1<br />
21 ) buttons to highlight an available channel.<br />
Press OK ( 1<br />
20 ) button to select that channel slot for scanning.<br />
Press the RED ( 1<br />
24 ) button to open the manual search sub-menu.<br />
Use � � ( 1<br />
21 ) buttons to highlight a parameter.<br />
Use ⊳� ( 1<br />
21 ) buttons to edit the parameter.<br />
When you have entered all of the desired parameters for that channel slot,<br />
Press the RED ( 1<br />
24 ) button to begin the manual search.<br />
To manually scan multiple channel slots:<br />
Use � � ( 1<br />
21 ) buttons to highlight an available channel.<br />
Press OK ( 1<br />
20 ) button to select that channel slot for scanning.<br />
Select another channel slot for scanning or press the RED ( 1<br />
24 ) button to<br />
begin manual search. The Search Mode sub-menu displays. This submenu<br />
is similar to the auto search sub-menu. Select whether to search for<br />
just FTA TV programming or for both FTA TV and Radio broadcasts.<br />
The Scanning menu then displays the progress of the auto search. To<br />
cancel the search, press the RED ( 1<br />
24 ) button or the<br />
EXIT ( 1<br />
23 ) button.<br />
When the channel search is either fi nished or cancelled, the Scan<br />
Complete menu is displayed.<br />
Scan Complete <strong>Menu</strong><br />
The Scan Complete menu is displayed at the end of a channel search<br />
or whenever a channel search is cancelled. This screen summarises the<br />
broadcasters and channels that are discovered by the set top box.<br />
Save & Exit:<br />
Press the RED ( 1<br />
24 ) button to save the discovered channels and begin<br />
viewing digital TV.<br />
Press OK ( 1<br />
20 ) button to view the highlighted channel.<br />
Main <strong>Menu</strong><br />
15<br />
15
Main <strong>Menu</strong><br />
!<br />
1<br />
2<br />
3<br />
!<br />
1<br />
2<br />
16<br />
Antenna Power<br />
The TDR-2190 can power a 5V active antenna. By default this<br />
functionality is disabled to prevent damaging standard passive antennas<br />
and masthead amplifi ers.<br />
Active antennas are commonly used in boats, caravans and recreational<br />
vehicles. A standard home installation with a passive antenna should not<br />
require this setting to be activated.<br />
Enabling Active 5VDC Antenna:<br />
Navigate (page 12) to the Installation sub-menu and highlight Antenna<br />
Power. Press OK ( 1<br />
20 ) to open the Antenna Power sub-menu.<br />
Use ⊳� ( 1<br />
21 ) buttons to select off or on.<br />
Press the RED ( 1<br />
24 ) button to accept the change, or press the BLUE ( 1<br />
27 )<br />
button to cancel.<br />
Initialise STB<br />
Initialising the TDR-2190 will wipe all of the channels and user settings,<br />
restoring the set top to a factory default state.<br />
Initialising The STB:<br />
Navigate (page 12) to the Installation sub-menu and highlight Initialise<br />
STB. Press OK ( 1<br />
20 ) to open the Enter Pin Code sub-menu.<br />
Use 0 ~9 ( 1<br />
11 ) buttons to enter the Pin code (default 0000).<br />
If the Pin code is incorrect you will be provided with the chance to enter it<br />
again. If the Pin code is correct, the STB will initialise and reboot.
1<br />
1<br />
2<br />
3<br />
1<br />
2<br />
3<br />
1<br />
2<br />
3<br />
4<br />
5<br />
Edit Channels<br />
Highlight the Edit Channels entry on the main menu and Press OK ( 1<br />
20 ).<br />
The Edit Channels menu allows you to create, rename, rearrange and<br />
delete channel lists and Favourite groups.<br />
Skip a channel:<br />
Use � � ( 1<br />
21 ) buttons to highlight an available channel.<br />
Press the RED ( 1<br />
24 ) button to skip the highlighted channel.<br />
To exit the Edit Channels menu, press the EXIT ( 1<br />
23 ) button.<br />
Lock a channel:<br />
Locking a channel will cause a Pin code box to be presented to the viewer<br />
to unlock that channel for viewing.<br />
Use � � ( 1<br />
21 ) buttons to highlight an available channel.<br />
Press the GREEN ( 1<br />
25 ) button to lock the highlighted channel.<br />
To exit the Edit Channels menu, press the EXIT ( 1<br />
23 ) button.<br />
Rename a channel:<br />
Use � � ( 1<br />
21 ) buttons to highlight an available channel.<br />
Press the YELLOW ( 1<br />
26 ) button to rename the highlighted channel. The<br />
Channel Rename sub-menu is displayed.<br />
Within the Channel Rename sub-menu:<br />
Use � � ⊳�( 1<br />
21 ) buttons to highlight a letter.<br />
Press the RED ( 1<br />
24 ) button to select a letter.<br />
Press the GREEN ( 1<br />
25 ) button to backspace.<br />
Press the YELLOW ( 1<br />
26 ) button to cancel and return to Edit Channels.<br />
Press the BLUE ( 1<br />
24 ) button to save the new channel name and return to<br />
Edit Channels menu.<br />
To exit the Edit Channels menu, press the EXIT ( 1<br />
23 ) button.<br />
Favourite Group:<br />
Please see the next page 22 for a detailed description of favourites.<br />
Main <strong>Menu</strong><br />
17<br />
17
Main <strong>Menu</strong><br />
1<br />
2<br />
1<br />
2<br />
1<br />
2<br />
3<br />
4<br />
1<br />
2<br />
4<br />
5<br />
1<br />
2<br />
3<br />
18<br />
Favourite Group<br />
Highlight the Edit Channels entry on the main menu and Press OK ( 1<br />
20 ).<br />
Press the BLUE ( 1<br />
27 ) button to enter the Favourite Group menu.<br />
Press the FAV ( 1<br />
17 ) button to select the desired Favourite Group. The<br />
currently selected Favourite Group is displayed at the top right of the<br />
screen.<br />
Sort Channels:<br />
Press the RED ( 1<br />
24 ) button to sort the channels.<br />
To exit the Favourite Group menu, press the EXIT ( 1<br />
23 ) button.<br />
Register Channel with selected favourite group:<br />
Registering a channel transfers it from the channel list on the left of the<br />
screen to the selected favourite group on the right.<br />
Use � � ( 1<br />
21 ) buttons to highlight an available channel.<br />
Press the OK ( 1<br />
20 ) button to select the highlighted channel.<br />
Press the GREEN ( 1<br />
25 ) button to register the selected channel.<br />
To exit the Favourite Group menu, press the EXIT ( 1<br />
23 ) button.<br />
Rename Favourite Group:<br />
Press the YELLOW ( 1<br />
26 ) button to rename the selected Favourite Group.<br />
Within the Favourite Rename sub-menu:<br />
Use � � ⊳�( 1<br />
21 ) buttons to highlight a letter.<br />
Press the RED ( 1<br />
24 ) button to select a letter.<br />
Press the GREEN ( 1<br />
25 ) button to backspace.<br />
Press the YELLOW ( 1<br />
26 ) button to cancel and return to Favourite Group.<br />
Press the BLUE ( 1<br />
27 ) button to save the new favourite name and return to<br />
Favourite Group menu.<br />
To exit the Favourite Group menu, press the BACK ( 1<br />
22 ) button.<br />
Delete:<br />
Use this function to remove channels from the selected Favourite Group.<br />
Use � � ⊳�( 1<br />
21 ) buttons to highlight a registered channel in the right<br />
hand column.<br />
Press the OK ( 1<br />
20 ) button to select the highlighted channel.<br />
Press the BLUE ( 1<br />
27 ) button to remove the selected channel name from<br />
the Favourite Group.
System Settings<br />
The system settings sub-menu contains settings related to the basic functioning of the TDR-2190.<br />
1<br />
2<br />
3<br />
4<br />
Video Settings<br />
The Video Settings menu allows you to alter confi guration parameters<br />
related to the output signal, aspect ratio and OSD.<br />
Changing Video Settings:<br />
Navigate (page 12) to the System Settings sub-menu and highlight Video<br />
Settings. Press OK ( 1<br />
20 ) to open the Video Settings menu.<br />
Within the Video Settings menu:<br />
Use � � ( 1<br />
21 ) buttons to highlight a particular setting.<br />
Use ⊳�( 1<br />
21 ) buttons to change the highlighted setting.<br />
Press the BACK ( 1<br />
22 ) button to save the new settings and return to the<br />
Main <strong>Menu</strong>.<br />
To exit the Video Settings menu, and return to viewing press the<br />
EXIT ( 1<br />
23 ) button.<br />
TV Screen Format:<br />
Options: 16:9 / 4:3<br />
Display Format:<br />
Options: Pan&Scan / Letterbox<br />
OSD Transparency:<br />
Options: 0 ~ 40<br />
Info Display Timeout:<br />
Options: Off / 1sec / 3sec / 5sec / 10sec<br />
Main <strong>Menu</strong><br />
19<br />
19
Main <strong>Menu</strong><br />
1<br />
2<br />
3<br />
4<br />
1<br />
2<br />
20<br />
Clock Settings<br />
The Clock Settings menu allows you to alter confi guration parameters<br />
related to the time.<br />
Changing Clock Settings:<br />
Navigate (page 12) to the System Settings sub-menu and highlight Clock<br />
Settings. Press OK ( 1<br />
20 ) to open the Clock Settings menu.<br />
Within the Clock Settings menu:<br />
Use � � ( 1<br />
21 ) buttons to highlight a particular setting.<br />
Use ⊳�( 1<br />
21 ) buttons to change the highlighted setting.<br />
Press the BACK ( 1<br />
22 ) button to save the new settings and return to the<br />
Main <strong>Menu</strong>.<br />
To exit the Clock Settings menu, and return to viewing press the<br />
EXIT ( 1<br />
23 ) button.<br />
Summer Time:<br />
Options: ON / OFF<br />
Time Zone:<br />
Options: GMT -12:00 ~ GMT +12:00 (default: GMT+10)<br />
On Timer:<br />
The On Timer sets the TDR-2190 to turn itself on at a particular time.<br />
Use ⊳�( 1<br />
21 ) buttons to move the cursor within the fi eld.<br />
Use 0 ~ 9 ( 1<br />
11 ) buttons to enter a new number.<br />
On Timer Mode:<br />
Options: Only Once / Daily
1<br />
2<br />
3<br />
4<br />
Language Settings<br />
The Language Settings menu allows you to alter the OSD language.<br />
Changing Language Settings:<br />
Navigate (page 12) to the System Settings sub-menu and highlight<br />
Language Settings. Press OK ( 1<br />
20 ) to open the Language Settings<br />
menu.<br />
Within the Language Settings menu:<br />
Use � � ( 1<br />
21 ) buttons to highlight a particular setting.<br />
Use ⊳�( 1<br />
21 ) buttons to change the highlighted setting.<br />
Press the BACK ( 1<br />
22 ) button to save the new settings and return to the<br />
Main <strong>Menu</strong>.<br />
To exit the Language Settings menu, and return to viewing press the<br />
EXIT ( 1<br />
23 ) button.<br />
<strong>Menu</strong> Language:<br />
Set the language to be used for the on screen display (OSD) such as the<br />
main menu and iplate.<br />
Options: English / Deutsch / Francais / Italiano / Espanol / Turkce / Cesky<br />
Audio <strong>Menu</strong> Language:<br />
Set the main audio language (for broadcasts that support multiple<br />
languages).<br />
Options:<br />
English / French / Italian / Spanish / Turkish / Danish / Dutch /<br />
Norwegian / Finnish / Swedish / Portugese / Czech / Russian /<br />
Polish / Hungarian / Croatian / Slovenian / Chinese / Arabic /<br />
German<br />
Main <strong>Menu</strong><br />
21<br />
21
Main <strong>Menu</strong><br />
1<br />
2<br />
3<br />
4<br />
5<br />
!<br />
1<br />
2<br />
22<br />
Lock Settings<br />
The Lock Settings menu allows you to restrict unauthorized access to<br />
your receiver.<br />
Changing Lock Settings:<br />
Navigate (page 12) to the System Settings sub-menu and highlight Lock<br />
Settings. Press OK ( 1<br />
20 ) to open the Lock Settings menu.<br />
Use the 0 ~ 9 ( 1<br />
11 ) buttons to enter the PIN code (default 0000).<br />
Within the Lock Settings menu:<br />
Use � � ( 1<br />
21 ) buttons to highlight a particular setting.<br />
Use ⊳�( 1<br />
21 ) buttons to change the highlighted setting.<br />
Press the BACK ( 1<br />
22 ) button to save the new settings and return to the<br />
Main <strong>Menu</strong>.<br />
To exit the Lock Settings menu, and return to viewing press the<br />
EXIT ( 1<br />
23 ) button.<br />
System Lock:<br />
Control access to the System Settings sub-menu to prevent unauthorized<br />
changes.<br />
Options: OFF // ON<br />
Channel Manager Lock:<br />
Control access to the Edit Channels menu to prevent unauthorized<br />
editing of channels and favourites.<br />
Options: OFF // ON<br />
Installation Lock:<br />
Control access to the Installation sub-menu to prevent unauthorized<br />
changes.<br />
Options: OFF / ON<br />
Change PIN Code:<br />
Change the PIN code from the default (0000) to any user defi ned number.<br />
CAUTION. Remember the new PIN code. If you forget your new PIN<br />
code you will have to contact <strong>NextWave</strong> <strong>Digital</strong> support to access the unit.<br />
Use the 0 ~ 9 ( 1<br />
11 ) buttons to enter the new PIN code.<br />
Confi rm the new Pin code using the 0 ~ 9 ( 1<br />
11 ) buttons.
1<br />
2<br />
3<br />
1<br />
2<br />
3<br />
4<br />
1<br />
!<br />
2<br />
System Information<br />
Navigate (page 12) to the System Settings sub-menu and highlight System<br />
Information. Press OK ( 1<br />
20 ) to open the System Information menu.<br />
The System Information displays technical information about the TDR-<br />
2190 such as hardware and software revision.<br />
Press the BACK ( 1<br />
22 ) button to return to the Main <strong>Menu</strong>.<br />
To exit the System Information menu, and return to viewing press the<br />
EXIT ( 1<br />
23 ) button.<br />
Program Guide<br />
The Program Guide displays now & next information for all channels or<br />
the currently selected Favourite Group.<br />
Viewing EPG:<br />
Navigate (page 12) to the Program Guide menu item and press the<br />
OK ( 1<br />
20 ) button to open the Program Guide menu. Alternatively you can<br />
access the Program Guide directly via the EPG ( 1<br />
14 ) button.<br />
Within the Program Guide menu:<br />
Use the � � ( 1<br />
21 ) buttons to highlight a channel.<br />
Press the OK ( 1<br />
20 ) button to change to that channel.<br />
Press the RED ( 1<br />
24 ) button to view the now information for that channel.<br />
Press the GREEN ( 1<br />
25 ) button to view the next information for that channel.<br />
Alternatively press the ⊳�( 1<br />
21 ) buttons to view the current/next programs.<br />
Press the YELLOW ( 1<br />
26 ) button to view the seven day schedule.<br />
Press the BLUE ( 1<br />
27 ) button to reserve the currently highlighted program.<br />
Press the BACK ( 1<br />
22 ) button to save the new settings and return to the<br />
Main <strong>Menu</strong>.<br />
To exit the Program Guide, and return to viewing press the<br />
EXIT ( 1<br />
23 ) button.<br />
View the Schedule:<br />
Press the YELLOW ( 1<br />
26 ) button to view the seven day schedule.<br />
Currently this page does not display information. However, as<br />
broadcasters begin transmitting seven day program guides, this page will<br />
be useful to reserve programs in the future.<br />
Press the BACK ( 1<br />
22 ) button to save the new settings and return to the<br />
favourite name and return to main menu.<br />
Main <strong>Menu</strong><br />
23<br />
23
Main <strong>Menu</strong><br />
1<br />
2<br />
3<br />
4<br />
24<br />
Utility Sub-menu<br />
The system settings sub-menu contains settings related to the basic functioning of the TDR-2190.<br />
Calendar<br />
View and navigate the calendar:<br />
Navigate (page 12) to the Utility sub-menu and highlight Calendar. Press<br />
OK ( 1<br />
20 ) to open the Calendar menu.<br />
Within the Calendar menu:<br />
Use � � ( 1<br />
21 ) buttons to change the year.<br />
Use ⊳�( 1<br />
21 ) buttons to change the month.<br />
Press the BACK ( 1<br />
22 ) button to return to the Utility sub-menu.<br />
To exit the Calendar sub-menu, and return to viewing press the<br />
EXIT ( 1<br />
23 ) button.
1<br />
iplate<br />
Press the INFO ( 1<br />
18 ) button to display the iplate.<br />
On Screen Display (OSD)<br />
The iplate provides easily accessable information about the current program. Additional information about the current program,<br />
including now/next scheduling is available by pressing the INFO ( 1<br />
18 ) button a second time.<br />
The Logical Channel number<br />
Displays the currently selected<br />
Favourite Group.<br />
Program summary<br />
1<br />
1<br />
Channel Name<br />
Now & Next information<br />
Change Favourite Groups:<br />
Displays the current date & time<br />
Technical inofrmation about the current channel<br />
Press the FAV ( 1<br />
17 ) buttons to change the selected Favourite Group.<br />
View multipage program summaries:<br />
Press the CH/PG ( 1<br />
15 ) buttons to read through multipage program<br />
summaries.<br />
Progress Bar, Aspect Ratio & Audio<br />
settings<br />
25<br />
25
Function Guide<br />
1<br />
2<br />
1<br />
2<br />
1<br />
1<br />
2<br />
3<br />
4<br />
1<br />
2<br />
3<br />
26<br />
Changing Channels<br />
move up and down the channel list:<br />
Use the � � ( 1<br />
21 ) buttons to change channels.<br />
Alternatively, use the CH/PG ( 1<br />
15 ) buttons to change channels.<br />
Volume Control<br />
Raise and lower the volume:<br />
Use the ⊳�( 1<br />
21 ) buttons to raise and lower the volume.<br />
Alternatively, use the VOL ( 1<br />
16 ) buttons to raise and lower the<br />
volume.<br />
Aspect Ratio<br />
Switch between the availalble aspect ratios:<br />
Press the OPTION ( 1<br />
28 ) button to switch between the available aspect<br />
ratios.<br />
Options: 16:9 WIDE / 4:3 LETTER / 4:3 PAN&SCAN<br />
Sleep<br />
Setting the sleep timer:<br />
Press the SLEEP ( 1<br />
27 ) button to display the Sleep Timer sub-menu.<br />
Use the ⊳� ( 1<br />
21 ) buttons to select on or off.<br />
Options: 5 / 10 / 15 / 20 / 30 / 45 / 60 / 90 / 120 min<br />
Press the RED ( 1<br />
24 ) button to accept the changes.<br />
Press the BLUE ( 1<br />
27 ) button to cancel and return to your program.<br />
TV / Radio<br />
Press TV/R ( 1<br />
13 ) to switch to radio mode.<br />
Use the � � ( 1<br />
21 ) buttons to change stations.<br />
To return to viewing TV press TV/R ( 1<br />
13 ) again.
1<br />
2<br />
3<br />
3<br />
Audio Settings<br />
Press the AUDIO ( 1<br />
24 ) button to display the Audio <strong>Menu</strong>.<br />
Use � � ( 1<br />
21 ) buttons to highlight a particular setting.<br />
Use ⊳�( 1<br />
21 ) buttons to change the highlighted setting.<br />
Options:<br />
Audio: 1: MPEG / 2:AC3<br />
Mode: Stereo / (L) / (R) / Mono<br />
Press the RED ( 1<br />
24 ) button to accept the changes.<br />
Press the BLUE ( 1<br />
27 ) button to cancel and return to your program.<br />
Function Guide<br />
27<br />
27
Function Guide<br />
1<br />
2<br />
3<br />
4<br />
1<br />
2<br />
3<br />
4<br />
1<br />
2<br />
3<br />
28<br />
Teletext<br />
Viewing Teletext:<br />
Ensure you are on channel 7 and press the TEXT ( 1<br />
26 ) button to display<br />
the AUSTEXT index page.<br />
Use the � � ( 1<br />
21 ) buttons to move up / down a page.<br />
Use the 0 ~ 9 ( 1<br />
11 ) buttons to navigate directly to a particular page.<br />
To exit Teletext and return to viewing press the TEXT ( 1<br />
26 ) button or<br />
alternatively the EXIT ( 1<br />
23 ) button.<br />
Closed Captions (subtitles)<br />
Viewing Closed Captions (subtitles):<br />
Press the SUBT ( 1<br />
25 ) to display closed captions. The subtitle sub-menu is<br />
displayed.<br />
Use ⊳�( 1<br />
21 ) buttons to select the subtitle language (eng).<br />
Press the RED ( 1<br />
24 ) button to accept the changes.<br />
Press the BLUE ( 1<br />
27 ) button to cancel the changes.<br />
Screen Zoom<br />
Setting zoom levels<br />
Press the ZOOM ( 1<br />
31 ) button to zoom into the screen.<br />
Use � �⊳�( 1<br />
21 ) buttons to pan around the zoomed in screen.<br />
Keep pressing the ZOOM ( 1<br />
31 ) button until the screen returns to normal<br />
size. Alternatively, press the EXIT ( 1<br />
23 ) button.
Troubleshooting<br />
Symptom Solution<br />
No power. • Plug the power cord into the outlet securely.<br />
No picture. • Check your antenna input or location.<br />
•<br />
•<br />
•<br />
Make sure the correct video display format is selected.<br />
29<br />
Appendix<br />
Check to make sure all the cables are installed correctly and that the proper source is<br />
selected on your TV.<br />
The antenna signal strength may be low. Check the signal strength and adjust the<br />
antenna location and direction.<br />
Normal picture but no sound. • Make sure AC3 is not selected (available via digital output).<br />
Picture is distorted.<br />
•<br />
•<br />
•<br />
•<br />
•<br />
•<br />
Check volume levels.<br />
Make sure the TV is not muted.<br />
Check the STB is connected properly.<br />
Make sure the proper format is slected.<br />
Make sure the proper aspect ratio is slected.<br />
Make sure the video output is connected to the TV.<br />
Available channels are missing. • The only way that you can find all the available channels is by running the auto search<br />
in the program menu.<br />
No teletext.<br />
The remote control does not<br />
work properly.<br />
•<br />
•<br />
•<br />
•<br />
•<br />
Make sure the channel you are watching carries teletext information.<br />
Point the remote control at the remote sensor of the STB.<br />
Operate the remote control within 23ft (7m).<br />
Remove any obstacles in the way.<br />
Replace the batteries with new ones.<br />
29
Appendix<br />
30<br />
Specifi cations<br />
Front End<br />
Input Frequency 51 ~ 860MHz<br />
Input Impedance 75ohm<br />
Connector 1x IEC (Male, Female)<br />
RF Input Level -20 dBm ~ -75 dBm<br />
Demodulation COFDM<br />
Bandwidth 7MHz<br />
A/V Mode<br />
Video MPEG-II Main Profi le/Main Level<br />
Audio MPEG-I Layer I & II<br />
Aspect Ratio 4:3, 16:9, 4:3 Letterbox<br />
Audio Sampling Rate 32, 44.1, 48KHz<br />
Audio Type Mono, Dual Mono, Stereo, Joint Stereo<br />
Graphic Display 720x576 (PAL), 720x480 (NTSC)<br />
Connectors<br />
Aerial Tuner IEC 169-2 Female [ch6~69]<br />
Loop Out IEC 169-2 Male [ch0~69]<br />
Loop In IEC 169-2 Female [ch0~69]<br />
RF Modulator (TV OUT) IEC 169-2 Male [ch28~69]<br />
RCA Jack Stereo Audio L/R, CVBS<br />
Serial Port RS232C 9pin D-sub Male<br />
S-VHS port Mini - DIN 4pin<br />
<strong>Digital</strong> Audio Coaxial (Dolby <strong>Digital</strong> Bitstream Output)<br />
General Characteristics<br />
Supply Voltage 230 VAC, 50 Hz<br />
Power Consumption Max. 12W<br />
Weight 1.65 Kg<br />
Dimensions 300(w) x 200(d) x 60(h) mm
31<br />
Glossary<br />
CVBS - (Composite Video Baseband Signal)<br />
Video system in which the entire video signal is sent via an individual cable. Available<br />
through RCA connections.<br />
EPG - Electronic Program Guide<br />
Contains information about current program (‘Now’) and the next program (‘Next’).<br />
Additionally, provides short descriptions about the current program.<br />
Resolution<br />
Refers to the number of pixels (horizontally & vertically) a display device has. The greater the<br />
number of pixels, the sharper the picture quality will be.<br />
STB - Set Top Box.<br />
Standard Defi nition Television (SDTV)<br />
SDTV is a high quality <strong>Digital</strong> TV signal, with greater quality than traditional analogue TV<br />
signals. Users will require a <strong>Digital</strong> Set Top Box or a TV that supoprts SDTV signals to<br />
receive the new broadcast signal.<br />
S/PDIF - Sony Philips <strong>Digital</strong> Interface<br />
<strong>Digital</strong> audio available via optical and coaxial connections. Use with Audio/Video Processor.<br />
5.1 <strong>Digital</strong> and MPEG audio available through these outputs.<br />
S-Video - Super Video<br />
Video system in which the colour and brightness signals are sent seperately via an individual<br />
cable. Avaiable via a mini-DIN connection.<br />
Teletext<br />
Teletext is a one-way information retrieval service. A fi xed number of information pages<br />
are repetitively broadcast on unused portions of a TV channel bandwidth. This STB allows<br />
teletext to be displayed on a non-teletext TV.<br />
31
NOTES
�<br />
WARRANTY CERTIFICATE<br />
FOR THE NEXTWAVE TDR-2190<br />
AUSTRALIAN DIGITAL TV RECEIVER<br />
Please keep this Warranty Certifi cate with your tax invoice as proof of purchase. It will be needed when claiming service in terms<br />
of this warranty.<br />
The Warranty shall not apply to malfunction or damage after installation, resulting from transport and/or handling or to malfunction<br />
or damage due to incorrect voltages or faults in the house wiring, Product misuse, improper use, abuse, neglect or negligence<br />
by the Purchaser or anybody else, or any use of the Product other than that described in the operating manual, malfunction or<br />
damage due to fi re, earthquake, fl ood, lightning or any other natural disaster, abnormal voltage, war or any other disturbance<br />
(revolution, riot etc),unforeseen accidents, wear and tear, or any other external factors beyond the Manufacturer’s control or the<br />
control of any Authorised Service Centre, or to any product installed, repaired, adjusted, rebuilt, modifi ed, changed or converted<br />
by any person (including the Purchaser) other than Authorised installers or Service Centres, and any Product on which the serial<br />
number has been changed, tampered with or removed.<br />
This warranty shall not apply to batteries or any other parts of a limited natural life.<br />
Where the Purchaser wishes to return the Product other than by hand to an Authorised Service Centre for warranty service, the<br />
Purchaser should contact the Authorised Service Centre to make the necessary arrangements and the Product should be returned,<br />
at the Purchaser’s risk and expense together with a copy of the Warranty Certifi cate, a valid proof of purchase and a detailed<br />
written explanation of the problem.<br />
IMPORTED and DISTRIBUTED BY<br />
NATIONWIDE ANTENNA SYSTEMS<br />
(ACN 010 372 362 ABN 46 010 372 362)<br />
28 Newstead Tce,<br />
Newstead Qld, 4006<br />
Ph: [07]3252 2947<br />
Fax: [07] 3252 8541<br />
Email: support@nextwave-digital.com<br />
Web: www.nextwave-digital.com<br />
Support Ph: 1800 338 859
THIS PAGE LEFT INTENTIONALLY BLANK
NOTES
NWM-2190-1.0 22/01/2006 NASDTP