Create successful ePaper yourself
Turn your PDF publications into a flip-book with our unique Google optimized e-Paper software.
OBRA<br />
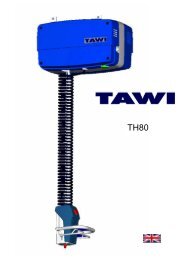
<strong>VacuCobra</strong> max 35 kg<br />
Users <strong>manual</strong> and spare parts list<br />
1<br />
www.TAWI.com<br />
Tel +46 300 185 00 Kungsbacka, Sweden
<strong>VacuCobra</strong> assembled<br />
Art nr 671000<br />
Amount<br />
Nr<br />
Description <strong>VacuCobra</strong> Art nr 671000<br />
Assembled Art nr<br />
1 Top swivel 1 671601<br />
2 Clamp 87-112 mm 2 631943<br />
3 Lift tube dia 100 mm 2.5 m 1 631940<br />
4 Rubber hose, lower 100x55 mm 1 631942<br />
5 Suctionhead incl suction foot 1 671020<br />
<strong>VacuCobra</strong> top swivel<br />
Art nr 671601<br />
Description <strong>VacuCobra</strong> Art nr 671601<br />
Nr<br />
Art. Nr<br />
1 Swivel tube 1 685011<br />
2 Ballbearing 6006-2RS1 1 31010<br />
3 Ballbearing house 1 31001<br />
4 Locking washer MB6 1 31013<br />
5 Locking nut KM6 1 31011<br />
6 O-ring 69.5x3 mm 2 31012<br />
7 Delrin ring 1 31002<br />
8 Bottom plate 1 31007<br />
9 Popnut M5 1 *<br />
10 Non retdurn valve, stainless steel 2 31006SS<br />
11 Screw M6S M5x35 4 *<br />
12 Nut LM6M M5 1 *<br />
13 Screw MF6S M5x70 1 *<br />
14 Washer M5 D10 8 *<br />
15 Rubber hose, upper 100x110 mm<br />
*Article number not available<br />
1 31944<br />
Swivel Amount<br />
Drawing nr: 671000_expl2<br />
Drawing nr: 671601_expl2<br />
2<br />
www.TAWI.com<br />
Tel +46 300 185 00 Kungsbacka, Sweden
<strong>VacuCobra</strong> suction head incl suction foot<br />
Art nr 671020<br />
Nr Description <strong>VacuCobra</strong> Art nr 67102Amount Art nr<br />
1 Co ver, upper 1 671101<br />
2 Cover, lower 1 671102<br />
3 Co ntro l thro ttle 1 671103<br />
4 Release throttle part 1 1 671104<br />
5 Release throttle part 2 1 671105<br />
6 Throttle tube 1 671106<br />
7 Valve disc 1 671107<br />
8 Height co ntro l spring 1 671108<br />
9 Co ntro l ro d 1 671109<br />
10 Release rod 1 6 71110<br />
11 Control socket 2 6 71111<br />
12 Socket for release knob 2 6 71112<br />
13 Elevator rod 1 6 71113<br />
14 Release knob 1 6 71114<br />
15 Control knob 1 6 71115<br />
16 Elevator knob 1 6 71116<br />
17 O-ring 4.1x1,.6 7550-61 2 6 71117<br />
18 O-ring 17.3x 2.4, 7551-173 2 6 71118<br />
19 Spring 1281 2 6 71119<br />
20 Spring 3339 1 671120<br />
21 Spring 3307 1 671121<br />
22 Spring bracket 4658 3 671122<br />
23 Cylinder pin SS CP SM S 2374 4x8 4 671123<br />
24 Clamp ring SGA 8mm 1 671124<br />
25 Clamp ring SGA 13mm 1 671125<br />
26 Springing thrust screw GN615 KM 4 4 671126<br />
27 Aluminiumcover 1 671130<br />
28 Screw M C6S 8.8 M 5x60 3 *<br />
29 Screw M C6S 8.8 M 5x35 2 *<br />
30 Screw M C6S 8.8 M 5x20 2 *<br />
31 Screw M C6S 8.8 M 5x80 2 *<br />
32 Screw M RX STEEL 4.8 M 3x25 FZB 1 *<br />
33 Nut M6M Klass 8 M6 5 *<br />
34 Nut M6M Klass 8 M5 9 *<br />
35 Nut LM 6M Klass 8 M 3 1 *<br />
36 Washer BRB STEEL 5.3x10x1 4 *<br />
37 Tube 1 671201<br />
38 Handle 1 671202<br />
39 Locking nut KM 5 1 671203<br />
40 O-ring 19.1x1.6, 7550-221 1 671204<br />
41 P6SS A2 M5x16 1 *<br />
42 Aluminium housing, right 1 671331<br />
43 Aluminium housing, left 1 671332<br />
44 Slide bearing SFB 3025 (split) 1 671301<br />
45 Screw M C6S 8.8 M 5x25 5 *<br />
46 Swivel, upper part 1 671401<br />
47 Swivel, lower part 1 671402<br />
48 Swivel tube 1 671403<br />
49 Swivel washer 1 671404<br />
50 Bearing 68052RS/IBS 1 671405<br />
51 Locking washer MB5 1 671406<br />
52 B150.30.W 1 671501<br />
53 Screw M F6S 8.8 M 4x10 8 *<br />
54 O-ring 10.3x2.4 5 671127<br />
55 Washer Tredo 57 2 *<br />
*Article number not available<br />
Drawing nr: 671020_expl2<br />
3<br />
www.TAWI.com<br />
Tel +46 300 185 00 Kungsbacka, Sweden
Vacuum pump<br />
Art nr 685950 (SA200)<br />
Nr Description P ump 685950<br />
15 R o t o r<br />
16 Clamping disc<br />
17 Star tolerance ring<br />
18 Toothed spring washer<br />
19 Socket head screw<br />
21 P ump body<br />
23 Socket head screw<br />
24 Carbon vanes<br />
25 Locating peg<br />
28 Lid<br />
29 Socket head screw<br />
30 Gasket<br />
46 Fan<br />
48 Key<br />
49 Washer<br />
50 Drive shaft<br />
61 Filter cover<br />
67 Leaf spring<br />
69 Locating peg<br />
72 Filter cartridge<br />
74 Filter cartridge<br />
76 Socket head screw<br />
77 Sealing ring<br />
78 O-ring<br />
83 P rotecting hood<br />
84 A ntivibrating strip<br />
85 Rubber element<br />
85 Roubber buffer<br />
86 Washer<br />
87 Hex. Nut<br />
88 P rotecting hood<br />
89 Rubber buffer<br />
90 Socket head screw<br />
92 Edge protection<br />
94 Foot<br />
95 Rubber element<br />
96 Spacer block<br />
97 Socket head screw<br />
98 Washer<br />
99 Spring washer<br />
100 Handle<br />
101 Socket head screw<br />
101 Valve disc<br />
102 Spacer block<br />
102 Rubber bushing<br />
103 B o l t<br />
103 Spacer tube<br />
104 Ring screw<br />
124 P ressure regulating valve<br />
124 Vacuum regulating valve<br />
127 B low-off valve<br />
Technical data<br />
Pipe work up to
Vacuumpump<br />
Art nr 685950 (SA200)<br />
Application<br />
These operating instructions apply to:<br />
-Vacuum pumps VT 4.10-4.16-4.25-4.40<br />
-Compressors DT 4.10-4.16<br />
Safety Regulations<br />
Please comply with Accident Prevention Regulations<br />
VBG 16, Compressors, in particular Section<br />
IIIc ”Installation” and IV ”Operation” plus VBG 4<br />
”Electrical equipment and tools”.<br />
Pumps may only be converted or modified after<br />
approval by the manufacturer.<br />
Application<br />
The pumps can be used to generate a vacuum<br />
(VT).<br />
Inlet air must be standard dry atmospheric air.<br />
The pumps are dry-running. Avoid intake of oil<br />
mist.<br />
The specification is valid up to a height of 800 m<br />
above sea level.<br />
Transport and storage<br />
Store pump in a dry area. Prevent condensation<br />
caused by vapour.<br />
Lift and transport only by using the ring screws.<br />
Installation<br />
It is recommended to install the pumps with easy<br />
access for maintenance.<br />
Clearance between compressors and adjacent<br />
walls should be no less than 10 cm of free space<br />
in order to ensure sufficient air flow for cooling.<br />
Contact TAWI prior to installation<br />
under noise insulation canopies.<br />
Ambient temperatures must not exceed 45°C.<br />
Connection and installation<br />
Ensure correct dimensions (see Table) and clean<br />
pipelines (no weld spatter, chips or similar contamination).<br />
With pipelines exceeding 5 m in length we<br />
recommend the installation of non-return valves.<br />
Keep connections free from oil, grease, water<br />
and other contaminants.<br />
Remove end caps at DA and SA. Do not connect<br />
to pipeline yet.<br />
Motor connection<br />
Connect the pump to the electricity supply<br />
observing all applicable safety regulations. Comply<br />
with EN 60204 T1.<br />
Connect motor based on connecting diagram (in<br />
terminal box) or ready-made plugs. This work<br />
should be carried out by an experienced electrician<br />
only. Check for connecting voltage and frequency.<br />
Install motor circuit-breaker and set to nominal<br />
motor current. (For data see motor rating plate).<br />
Avoid switching of more than 10 times per hour.<br />
Briefly start motor and check rotation (arrow on<br />
casing). Exchange phases if rotation is incorrect.<br />
Commissioning<br />
Connect pressure line at DA and inlet line at SA.<br />
Vacuum control valve VR is preset to a suitable value.<br />
VR<br />
GD<br />
SA<br />
SD<br />
SA<br />
KK<br />
(The arrow pointing to 12.00 hrs.) The preset values<br />
may not be changed. For some extremely porous/dense<br />
materials resetting may be necessary, contact TAWI for<br />
more information.<br />
Maintenance<br />
Maintain pump regularly to achieve the best operating<br />
results. Maintenance intervals will depend<br />
on the pump´s use and ambient conditions.<br />
Before commencing maintenance, remove mains<br />
plug from socket to avoid unintentional restarting.<br />
The filter cartridges are inserted behind the<br />
enclosure cover GD. Clean depending on dust<br />
accumulation. Blow out filter from inside to outside.<br />
Replace blocked, oily or greasy cartridges.<br />
The built-in filter is designed for clean environments.<br />
Additional filters are available and recommended for<br />
operation in dusty environments.<br />
Blow out dirt in cooling air channels KK by compressed<br />
air.<br />
The vanes are subject to wear due to abrasion<br />
from the walls of the enclosure.<br />
Check vane width every 3000 operating hours or<br />
annually (for minimum widths see Table). Remove<br />
housing cover GD and side cover SD for this.<br />
On replacement blow out enclosure by dry compressed<br />
air.<br />
The roller bearings are prelubricated for life and<br />
will thus not require maintenance. Replace by original<br />
roller bearings only.<br />
5<br />
www.TAWI.com<br />
Tel +46 300 185 00 Kungsbacka, Sweden
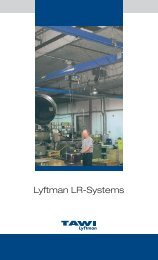
What is a <strong>VacuCobra</strong>?<br />
<strong>VacuCobra</strong> is a lifting device that uses vacuum from<br />
a vacuum pump to hold and move a load thus<br />
creating a smooth, safe and efficient operation.<br />
Maximum lifting height for <strong>VacuCobra</strong> is 1,8 metres<br />
and maximum load capacity 30 kg.<br />
<strong>VacuCobra</strong> consists of 2 main parts:<br />
Lift unit:<br />
- Swivel with suspension point<br />
- Lift tube<br />
- Suction head<br />
- Suction foot<br />
Motor unit:<br />
- Vacuum pump with built-in silencer and filter unit<br />
- Air tube<br />
Assembly Instructions<br />
- Connect air tube to nozzle on the top swivel.<br />
- Suspend the lift unit onto the trolley of a jib<br />
crane or over head crane system. The unit must<br />
hang freely so that unnecessary wear is avoided.<br />
The lowest point of the suction foot must not be<br />
closer to the floor than 15 cm. If the work place<br />
has more than one level the unit must be<br />
adjusted to the lowest level.<br />
- The over head crane system for the lift tube must<br />
be designed for minimum 1,5 x lifting capacity of<br />
the lift tube.<br />
- Check that the crane system is level and moving<br />
freely. When not in operation the lift unit must<br />
not drift or move.<br />
- Mount the vacuum pump unit in a suitable<br />
position and connect it to the power supply.<br />
Check that a motor circuit-breaker is fitted and<br />
set to the normal current shown on the motor<br />
serial plate.<br />
- Follow the separate instructions for the pump.<br />
- Connect the air tube to the vacuum pump.<br />
WARNING!<br />
VacuEasylift must not be used by anyone who has not<br />
received proper training. Stay clear of the area<br />
underneath and above the load.<br />
This unit must be operated only<br />
by trained operators.<br />
If incorrectly used it may cause<br />
damage and injury to operators.<br />
All instructions in <strong>manual</strong> must<br />
be followed at all times.<br />
WARNING!<br />
Do not walk under<br />
suspended goods.<br />
WARNING!<br />
Eliminate risk of<br />
hands or feet getting<br />
caught under<br />
suspended load.<br />
WARNING!<br />
Use only the handle<br />
to move the load.<br />
WARNING!<br />
Always check the<br />
unloading area before<br />
lowering the load.<br />
6<br />
www.TAWI.com<br />
Tel +46 300 185 00 Kungsbacka, Sweden
USERS GUIDE<br />
1. Start the motor<br />
2. Balance the unit<br />
The <strong>VacuCobra</strong> can be vertically balanced without<br />
load so that it is always at a convenient and<br />
comfortable distance from the operator. See picture<br />
below for instructions.<br />
Adjusting the lift unit vertically, view from below.<br />
Turn the adjustment knob slowly for desired level of<br />
balance.<br />
3. Get to know the controls<br />
The fingertip control (green arrow) is pushed toward<br />
the operator for downwards motion.<br />
The thumb control (red arrow) is a quick-release<br />
function. Press away from operator to release load.<br />
(See picture below).<br />
Controls for downwards motion and quick-release function.<br />
7<br />
www.TAWI.com<br />
Tel +46 300 185 00 Kungsbacka, Sweden
4. Adjusting the hand controls<br />
The quick-release control can be installed on the<br />
right- AND the lefthand side to fit both left- and right<br />
handed operators. Moving the control is easy: pull to<br />
free and press to install in new position. (See picture<br />
below).<br />
Changing position for the quick-release control.<br />
<strong>VacuCobra</strong> is now ready to operate!<br />
5. Grip the <strong>VacuCobra</strong> handle!<br />
6. Lift the load<br />
Place the <strong>VacuCobra</strong> above the load. Lower the<br />
<strong>VacuCobra</strong> by pulling the fingertip control (silver)<br />
towards the operator. As soon as the suction cup<br />
reaches the surface of the load it will automatically<br />
grip. The load can now be lifted.<br />
Upwards motion is automatic. Use the fingertip<br />
control (silver, for downwards motion) to decrease the<br />
lifting speed to a desired level.<br />
Move the load horisontally using the overhead crane<br />
system or jib crane in which the <strong>VacuCobra</strong> is<br />
suspended.<br />
8<br />
www.TAWI.com<br />
Tel +46 300 185 00 Kungsbacka, Sweden
7. Release the load<br />
When the load is in position above the point of<br />
release it can be released using one of two<br />
alternative methods:<br />
Alternative 1. Push the quick-release control (red)<br />
away from the operator. The suction cup will<br />
IMMEDIATELY release the load. Make sure that no<br />
person is occupying the area under the lift unit<br />
when load is released!<br />
Alternative 2. Pull the fingertip control (silver) towards the<br />
operator for downwards motion. When the load is resting<br />
on a surface, tilt the suction cup to allow air to pass<br />
between the load and the suction cup. At the same time,<br />
release the fingertip control and the lift unit will move<br />
upwards without the load.<br />
8. Rotate the load<br />
The standard version <strong>VacuCobra</strong> is delivered with two<br />
swivels. One top swivel which rotates (unlimited) the<br />
complete lift unit in the point of suspension. And a<br />
bottom swivel which allows individual rotation<br />
(unlimited) of the load, a very helpful feature for high<br />
precision handling demands.<br />
A bottom swivel allows unlimited rotation of the load around the<br />
lift unit axis. (Horisontal rotation).<br />
When there is no need for high precision positioning<br />
demands, the <strong>VacuCobra</strong> can be delivered without the<br />
bottom swivel. A rigid grip on the load (as opposed to a<br />
rotatable grip) makes it possible to work the unit with one<br />
hand only.<br />
9<br />
www.TAWI.com<br />
Tel +46 300 185 00 Kungsbacka, Sweden
9. Lift from the side<br />
<strong>VacuCobra</strong> has an angle adapter which makes it just<br />
as easy to grip the load from the side as from the top.<br />
Place the suction cup next to the load, above the<br />
centre. Use the fingertip control (silver) to move the<br />
lift unit downwards while simultaneously pushing the<br />
cup towards the load slightly. The suction cup will<br />
automatically turn 90 degrees and grip the side of the<br />
load. Release the control and the <strong>VacuCobra</strong> will<br />
move upwards, allowing the load to be swung down<br />
under the lift unit in a steady grip.<br />
Side lifter<br />
10<br />
www.TAWI.com<br />
Tel +46 300 185 00 Kungsbacka, Sweden
Maintenance<br />
Check daily:<br />
- That the lift unit achieves<br />
maximum lifting capacity<br />
(lifting capacity is reduced if a<br />
vacuum leak occurs in the lift<br />
tube or air tube.)<br />
- That the rubber gasket on the<br />
suction foot shows no signs of<br />
damage or wear. A damaged<br />
gasket must be replaced.<br />
- That the air filter is cleaned<br />
on a regular basis, daily,<br />
weekly or monthly depending<br />
on the working environment.<br />
Instruction for this are found<br />
in the pump section of this<br />
<strong>manual</strong>.<br />
- Check the overhead crane<br />
system or jib crane in which<br />
the lift unit is suspended on a<br />
regular basis. Look for sign of<br />
wear and fatigue in all parts.<br />
See separate maintenance<br />
instructions for these products.<br />
The top swivel joint includes a<br />
safety valve. The valve<br />
automatically closes if the power<br />
fails and the load sinks to the<br />
floor under control. Check the<br />
operation of the safety valve by<br />
suspending a load and then<br />
stopping the vacuum pump.<br />
A controlled sinking motion is<br />
correct – anything else: contact<br />
your <strong>VacuCobra</strong> dealer<br />
immediately. Check the safety<br />
valve operation on a weekly basis.<br />
NEVER WALK UNDER LOAD.<br />
USE ONLY TAWI manufactured<br />
suction feet.<br />
WARNING!<br />
To ensure a safe working<br />
environment when operating the<br />
<strong>VacuCobra</strong> follow instructions<br />
below:<br />
- The operator must be trained<br />
on the product.<br />
- All instructions in the <strong>manual</strong><br />
must be followed.<br />
- A motor circuit breaker must<br />
be used.<br />
- The overhead crane system<br />
must be installed by qualified<br />
technicians and all safety and<br />
maintenance instructions must<br />
be followed.<br />
- When in operation the<br />
operator must never place his<br />
head above the load/unit.<br />
- The operator must never be<br />
under a hanging load.<br />
- Maintenance instructions must<br />
be followed.<br />
- Service record must be<br />
accessible for inspection.<br />
- Only original parts may be<br />
used for this product.<br />
- The maximum load capacity<br />
must not be exceeded.<br />
- The lift tube must only be<br />
used in a vertical position.<br />
- All connections must be<br />
checked regularly.<br />
- All parts connecting the<br />
overhead system and the unit<br />
must be checked for wear.<br />
- The vacuum pump must not<br />
be taken apart.<br />
- The electrical installation must<br />
be carried out by qualified<br />
electricians.<br />
- Never leave a load hanging<br />
for an extended period of<br />
time. This can cause the<br />
vacuum pump to overheat.<br />
Trouble shooting guide when the<br />
VacuEasylift will not lift:<br />
1. Check the weight of the load.<br />
It must not exceed the rated<br />
max capacity of the unit. Test<br />
the unit with a light load using<br />
a non-porous surface e.g. a<br />
steel plate.<br />
Check, and if necessary clean<br />
the air filter.<br />
2. Has the vacuum pump<br />
started?<br />
YES – Go to 3.<br />
NO – start the pump.<br />
If it still does not work, contact<br />
an authorised electrician.<br />
3. Check the direction of<br />
rotation of the vacuum pump.<br />
Is air blowing from the<br />
silencer?<br />
YES – Go to 4.<br />
NO – Change two phases over.<br />
This must be done by an<br />
authorised electrician.<br />
4. Is there any air leakage from<br />
the air tube?<br />
NO – Go to 5.<br />
YES – the air tube needs to be<br />
changed.<br />
5. Is there any air leakage from<br />
the connection between air<br />
tube and pump/top swivel?<br />
NO – Go to 6.<br />
YES – Tighten the clamps that<br />
connect the air tube to the<br />
pump and the top swivel of lift<br />
unit.<br />
6. Check the lift tube for<br />
damage. This must be done<br />
with the lift tube extended to<br />
maximum length.<br />
Damaged?<br />
NO – Go to 7.<br />
YES – Change the lift tube.<br />
7. Is the rubber seal on the<br />
suction foot damaged or<br />
worn?<br />
NO – Go to 8.<br />
YES – Change the seal.<br />
8. Call your <strong>VacuCobra</strong> dealer for<br />
service.<br />
11<br />
www.TAWI.com<br />
Tel +46 300 185 00 Kungsbacka, Sweden
12<br />
www.TAWI.com<br />
Tel +46 300 185 00 Kungsbacka, Sweden<br />
<strong>GB</strong>0904