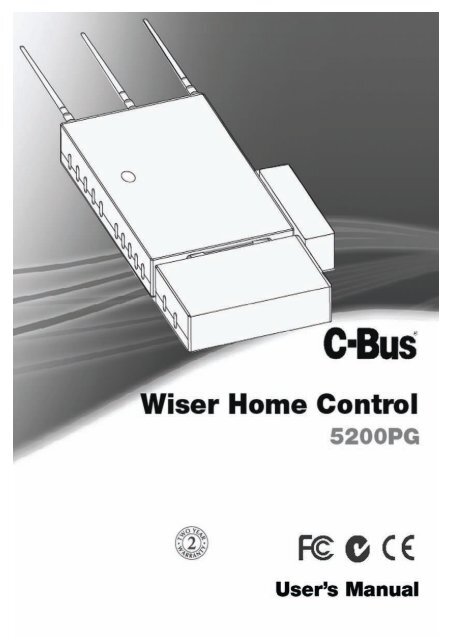
Wiser home controller user guide - Clever Home Automation
Wiser home controller user guide - Clever Home Automation
Wiser home controller user guide - Clever Home Automation
Create successful ePaper yourself
Turn your PDF publications into a flip-book with our unique Google optimized e-Paper software.
© Copyright Clipsal Australia Pty Ltd, 2009. All rights reserved. This material is<br />
copyright under Australian and international laws. Except as permitted under the<br />
relevant law, no part of this work may be reproduced by any process without prior<br />
written permission of and acknowledgement to Clipsal Australia Pty Ltd.<br />
Clipsal and C-Bus are registered trademarks of Clipsal Australia Pty Ltd.<br />
The information in this manual is provided in good faith. Clipsal Australia Pty Ltd<br />
(CAPL) has endeavoured to ensure the relevance and accuracy of the information,<br />
but it assumes no responsibility for any loss incurred as a result of its use. CAPL<br />
does not warrant that the information is fit for any particular purpose, nor does it<br />
endorse its use in applications that are critical to the health or life of any human<br />
being. CAPL reserves the right to update the information at any time without notice.<br />
Version 0.1<br />
Release date: March 2009.
Contents<br />
<strong>Wiser</strong> <strong>Home</strong> Controller User's Manual<br />
1.0 Introduction 5<br />
2.0 Installation 6<br />
2.1 <strong>Wiser</strong> <strong>Home</strong> Gateway Components 6<br />
2.2 Status Indicator LEDs 7<br />
3.0 Concepts 9<br />
4.0 The <strong>Wiser</strong> <strong>Home</strong> Controller User Interface 11<br />
4.1 Status Icons 11<br />
4.2 RSS Feeds 12<br />
4.3 Email Notification 13<br />
4.4 Date and Time 13<br />
5.0 Basic Guidelines and Use 14<br />
5.1 Opening the <strong>Wiser</strong> User Interface 14<br />
5.2 Sequence of Operations 14<br />
5.3 Terminology 15<br />
5.4 Navigation 15<br />
5.5 Tools 16<br />
5.5.1 Remote Access 16<br />
5.5.2 Configure Router Settings 17<br />
5.5.3 C-Bus Date and Time 17<br />
5.6 Full Screen View 18<br />
6.0 Widgets 19<br />
6.1 Icons 19<br />
7.0 C-Bus Widgets 19<br />
7.1 General Lighting Relay 19<br />
7.2 Two-State Lighting Relay 20<br />
7.3 General Lighting Dimmer 20<br />
7.4 Bellpress 21<br />
7.5 Curtain Control 21<br />
7.6 Shutter Relay 22<br />
7.7 Lighting Preset 22<br />
7.8 Lighting Status 23<br />
3
<strong>Wiser</strong> <strong>Home</strong> Controller User's Manual<br />
7.9 General Lighting Timer 23<br />
7.10 Enable Preset 24<br />
7.11 Two-State Enable 24<br />
7.12 Fan Controller 24<br />
7.13 Scene Trigger 25<br />
7.14 Local Scene Controller 25<br />
7.15 Multi Room Audio Zone 26<br />
7.16 Media Transport 26<br />
7.17 <strong>Home</strong> Safe Panel 27<br />
7.18 MinderPro Panel 28<br />
7.19 Climate Control 29<br />
8.0 Logic Widgets 30<br />
8.1 User System IO Integer 30<br />
8.2 User System IO Real 30<br />
8.3 User System IO String 31<br />
8.4 User System IO Boolean 32<br />
8.5 User System IO Date 32<br />
8.6 User System IO Time 33<br />
9.0 Other Widgets 34<br />
9.1 Web Camera 34<br />
4
1.0 Introduction<br />
<strong>Wiser</strong> <strong>Home</strong> Controller User's Manual<br />
The <strong>Wiser</strong> <strong>Home</strong> Controller allows you to access your C-Bus using a<br />
graphical <strong>user</strong> interface, sometimes referred to as the <strong>Wiser</strong> UI. The <strong>Wiser</strong><br />
<strong>Home</strong> Controller arrives with a sample project loaded and the <strong>user</strong> interface<br />
accessible from you local <strong>home</strong> network. With certain options set, you can<br />
access the <strong>Wiser</strong> UI from anywhere using the Internet.<br />
Using the <strong>Wiser</strong> <strong>Home</strong> Controller you can:<br />
• control equipment such as IP cameras, C-Bus devices and non C Bus<br />
wired and wireless equipment on the <strong>home</strong> LAN.<br />
• schedule events in the <strong>home</strong>.<br />
• create and store scenes on-board.<br />
• customise a C-Bus system using the onboard Logic Engine.<br />
• monitor the <strong>home</strong> environment including C-Bus and security systems.<br />
Note: Examples of equipment you might access with <strong>Wiser</strong> <strong>Home</strong><br />
Controller include lighting, HVAC, curtains, sprinkler systems, and security<br />
controls.<br />
The User's Manual is provided to familiarise you with some of the features<br />
of the <strong>user</strong> interface and to help you to use it more effectively. Some of the<br />
illustrations in this document might not look exactly like what you see on<br />
your screen. This is because there are several different 'skin' designs and<br />
there are many different devices available for accessing your <strong>Wiser</strong> <strong>Home</strong><br />
Controller.<br />
5
2.0 Installation<br />
<strong>Wiser</strong> <strong>Home</strong> Controller User's Manual<br />
2.1 <strong>Wiser</strong> <strong>Home</strong> Gateway Components<br />
For details of installation of the <strong>Wiser</strong> <strong>Home</strong> Controller, refer to the <strong>Wiser</strong><br />
<strong>Home</strong> Controller Installation Instructions and the <strong>Wiser</strong> <strong>Home</strong> Controller<br />
Setup Sheet.<br />
The <strong>Wiser</strong> <strong>Home</strong> Controller has the following hardware components:<br />
• <strong>Wiser</strong> <strong>Home</strong> Controller router<br />
• C-Bus Network Interface (CNI)<br />
• Busbar to connect the router and CNI<br />
• Power supply (for the router and the Ethernet side of the CNI)<br />
• LAN cable<br />
• <strong>Wiser</strong> 1GB USB drive (for product information)<br />
• Setup sheet<br />
6
<strong>Wiser</strong> <strong>Home</strong> Controller User's Manual<br />
The <strong>Wiser</strong> <strong>Home</strong> Controller router connects to the following:<br />
• Power - provided by a plug-pack connected to the busbar<br />
• Wide Area Network (WAN) - this is the Internet connection, usually via<br />
the busbar<br />
• Connection to CNI - this is normally done by the busbar<br />
• Other Ethernet Devices - these are plugged into the spare Ethernet<br />
ports<br />
The CNI connects to:<br />
• Power - provided by a plug-pack connected to the busbar<br />
• C-Bus - this is the connection to C-Bus and is normally a pink cable<br />
• Connection to <strong>Wiser</strong> <strong>Home</strong> Controller - this is normally done by the<br />
busbar<br />
The certified installer uses Clipsal PICED and C-Bus Toolkit software to<br />
create a unique project for the customer's <strong>home</strong>. The project is transferred<br />
to the <strong>Wiser</strong> router unit. It is then ready to be used with the <strong>Wiser</strong> User<br />
Interface (<strong>Wiser</strong> UI). With the appropriate settings, the configuration can be<br />
modified later and the project loaded, as needed.<br />
The installer provides the <strong>home</strong>owner with the IP address and security<br />
codes needed to access the project. The <strong>Wiser</strong> UI can be accessed at <strong>home</strong><br />
or remotely over the Internet.<br />
2.2 Status Indicator LEDs<br />
The LEDs on the <strong>Wiser</strong> <strong>Home</strong> Controller and CNI provide useful information<br />
about the status of the system.<br />
<strong>Wiser</strong> <strong>Home</strong> Controller router<br />
The locations and meanings of the various LEDs on the <strong>Wiser</strong> <strong>Home</strong><br />
Controller router unit are shown below.<br />
7
LED on the <strong>Wiser</strong><br />
<strong>Home</strong> Controller<br />
<strong>Wiser</strong> <strong>Home</strong> Controller User's Manual<br />
Purpose or Meaning<br />
Power The Power LED lights when power is applied to the<br />
unit and stays lit, as long a power is present.<br />
Security (orange) The <strong>Wiser</strong> <strong>Home</strong> Controller does not make use of<br />
this LED.<br />
Wireless Lit when wireless is available. Blinks when<br />
transmitting or receiving data.<br />
Router When router is working as a 'router' the LED is lit.<br />
DIAG (red) Lit during self-test and a few moments thereafter. If<br />
the light stays on it indicates a problem.<br />
Internet Flashes when data is transferred.<br />
LAN Lit when the Ethernet port is connected to a LAN.<br />
The numbered LEDs indicate which ports are active.<br />
C-Bus Network Interface (CNI)<br />
The meaning of the two CNI LEDs is shown below.<br />
Ethernet Indicator<br />
Status<br />
Meaning<br />
Green Communication link is good<br />
Orange/Green flash Link is good with active data transfer<br />
Red Non-existent or problematic link<br />
Off Power problem, for example no power connection<br />
C-Bus Indicator Status Meaning<br />
Orange C-Bus clock signal is present, voltage is good<br />
Orange/Red flash C-Bus good, active communication between C-Bus<br />
and Ethernet<br />
Off No C-Bus connection<br />
8
3.0 Concepts<br />
<strong>Wiser</strong> <strong>Home</strong> Controller User's Manual<br />
The <strong>Wiser</strong> <strong>Home</strong> Controller web interface appearance depends on many<br />
factors, including the 'skin' used and the selected 'widgets.' A typical screen<br />
is shown below.<br />
A widget is a graphical component displayed on the <strong>Wiser</strong> <strong>Home</strong><br />
Controller that is used to control and/or display the state of something.<br />
Typical functions for widgets include:<br />
• Controlling lighting<br />
• Controlling a <strong>home</strong> audio system<br />
• Controlling and monitoring a security system<br />
• Displaying a Web camera<br />
The <strong>Wiser</strong> <strong>Home</strong> Controller displays the Widgets using the selected skin.<br />
The skin defines the appearance of the background and the Widgets, as well<br />
as the way the <strong>user</strong> interface operates.<br />
The <strong>Wiser</strong> <strong>Home</strong> Controller automatically arranges the Widgets onto pages<br />
according to their 'Location' and/or 'Function Group.'<br />
9
<strong>Wiser</strong> <strong>Home</strong> Controller User's Manual<br />
Locations are used to arrange Widgets according to their physical location<br />
in a site. A project can have between 1 and 20 locations. Typical Locations<br />
in a <strong>Home</strong> might include:<br />
• Lounge<br />
• Dining<br />
• Bedrooms<br />
• Outside<br />
Function Groups are used to arrange Widgets according to their usage. A<br />
project can have no Function Groups, or up to 20. Typical Function Groups<br />
in a <strong>Home</strong> might include:<br />
• Lighting<br />
• Security<br />
• Climate Control<br />
• Media (Audio/Video)<br />
10
<strong>Wiser</strong> <strong>Home</strong> Controller User's Manual<br />
4.0 The <strong>Wiser</strong> <strong>Home</strong> Controller User Interface<br />
4.1 Status Icons<br />
Several icons might be displayed in the top right corner of the screen.<br />
The Connection status icon is the only icon you will see if all is operating<br />
correctly.<br />
This icon reflects the state and of the <strong>user</strong> interface's (web browser)<br />
connection to the <strong>Wiser</strong> <strong>Home</strong> Controller. The plug on the icon will be<br />
shown in one of three colours:<br />
• Green: all is working correctly<br />
• Orange: has a connection to the <strong>Wiser</strong> <strong>Home</strong> Controller, but the data is<br />
out of date or has not recently received a keep-alive message (see<br />
below)<br />
• Red: there is no connection to the <strong>Wiser</strong> <strong>Home</strong> Controller. This can<br />
happen for many reasons. Typically, this happens when using the web<br />
browser over WiFi and the WiFi is going out of range.<br />
The C-Bus icon with a red slash across it means that the <strong>Wiser</strong> <strong>Home</strong><br />
Controller does not have C-Bus connectivity. This could be caused by no<br />
C-bus connection, wrong CNI IP Address or no CNI.<br />
The wrench icon means that the <strong>Wiser</strong> <strong>Home</strong> Controller is currently in CNI<br />
mode meaning that the device is being used as a CNI and thus the web<br />
browser control will not function until the CNI mode is disconnected. Once<br />
CNI mode is disconnected, the icon will disappear and the <strong>Wiser</strong> <strong>Home</strong><br />
Controller can be used like normal.<br />
In case of problems, you can click on the icons and you will see some<br />
additional status details:<br />
11
<strong>Wiser</strong> <strong>Home</strong> Controller User's Manual<br />
At the bottom left, it shows whether you are connected or not. The meaning<br />
of the other information is as follows:<br />
• Attempted reconnects: this is the number of times a re-connect to the<br />
<strong>Wiser</strong> <strong>Home</strong> Controller has been attempted. This will normally be 0 for<br />
a wired Ethernet connection. For a wireless connection, this number will<br />
increase while the connection is lost.<br />
• Keepalive signals: this is the number of keep-alive signals received<br />
from the <strong>Wiser</strong> <strong>Home</strong> Controller. These are sent on a regular basis so<br />
that the <strong>user</strong> interface knows that the <strong>Wiser</strong> <strong>Home</strong> Controller is still<br />
connected.<br />
• Watchdog Counter: this is the number of times the <strong>user</strong> interface has<br />
checked to see if a keep-alive signal has been received. It gets reset to<br />
0 each time a keep-alive is received.<br />
• Successful Connections: this is the number of times a connection has<br />
been successfully made to the <strong>Wiser</strong> <strong>Home</strong> Controller. This will normally<br />
be 1 for a wired Ethernet connection. For a wireless connection, this<br />
number will increase each time a new connection is made.<br />
4.2 RSS Feeds<br />
If RSS feeds have been set up for use on your <strong>Wiser</strong> <strong>Home</strong> Controller, you<br />
will see the headlines appear at the bottom of the screen.<br />
If you click on the up arrow (bottom right corner), the area for displaying<br />
the RSS data will expand and you will see the full text.<br />
12
4.3 Email Notification<br />
<strong>Wiser</strong> <strong>Home</strong> Controller User's Manual<br />
If an Email account has been selected for use with the <strong>Wiser</strong> <strong>Home</strong><br />
Controller, you will see the Email icon at the bottom of the screen, along<br />
with the number of messages waiting to be read. If the number of Emails is<br />
unknown, a question mark will be shown.<br />
When Email messages are received, the number will be shown.<br />
If you click ^ , you will be able to select and Email and see the sender and<br />
subject of the Email. The full text of Emails is not available for reading on<br />
the <strong>Wiser</strong> <strong>Home</strong> Controller.<br />
4.4 Date and Time<br />
The date and time is shown in the bottom, left corner of the screen.<br />
If the RSS Feed panel is expanded, you will see an analogue clock.<br />
To set the date and time, go to the Tools page.<br />
13
<strong>Wiser</strong> <strong>Home</strong> Controller User's Manual<br />
5.0 Basic Guidelines and Use<br />
5.1 Opening the <strong>Wiser</strong> User Interface<br />
You control of the <strong>Wiser</strong> <strong>Home</strong> Controller using a Web-based <strong>user</strong> interface,<br />
usually a web browser. This could be a web browser connected to the Local<br />
Area Network (LAN), or connected remotely via the Internet.<br />
It is also possible to control the <strong>Wiser</strong> <strong>Home</strong> Controller via a "projector"<br />
application running on a device like a mobile phone or PDA.<br />
To display the <strong>Wiser</strong> <strong>Home</strong> Controller <strong>user</strong> interface on a web browser that<br />
is connected to the LAN, enter the following URL in the web browser:<br />
http://192.168.2.1/ or the address as configured during installation.<br />
Note: You will need to use the actual IP Address of the <strong>Wiser</strong> <strong>Home</strong><br />
Controller in the above URL.<br />
When you first open the <strong>Wiser</strong> <strong>Home</strong> Controller <strong>user</strong> interface, you are<br />
prompted for a <strong>user</strong> name and password. The default values are:<br />
User name: admin<br />
Password: admin<br />
The <strong>user</strong> name cannot be changed. It is recommended that the password be<br />
changed for security.<br />
5.2 Sequence of Operations<br />
Power On and Initialisation<br />
Power on the <strong>Wiser</strong> <strong>Home</strong> Controller before accessing the <strong>Wiser</strong> <strong>user</strong><br />
interface. Allow time for the router to establish connection with the C-Bus<br />
network and to poll the states of the C-Bus devices through the C-Bus<br />
Network Interface (CNI). This is important to give a true picture of the status<br />
of the equipment and to allow scenes to begin from know start points. Try<br />
to avoid disconnecting power from the <strong>Wiser</strong> equipment. It is better to let it<br />
remained powered on than to remove power on a random basis<br />
You can get a good indication of the status of the system from the indicator<br />
LEDs on the <strong>Wiser</strong> router and CNI. Most indicators should be green or<br />
flashing green during normal operation. Some activity between the router<br />
and C-Bus network is normal at any time, even when not being controlled<br />
or monitored by you using the <strong>Wiser</strong> UI.<br />
14
<strong>Wiser</strong> <strong>Home</strong> Controller User's Manual<br />
The monitor and control functions might not be available during<br />
maintenance events such as using Toolkit, transferring a project<br />
to the <strong>Wiser</strong> unit using PICED, or when the router is rebooting or<br />
performing power-on self tests. Also, during <strong>Wiser</strong> project<br />
maintenance, other programs running on your <strong>home</strong> LAN might<br />
be interrupted or slowed down.<br />
5.3 Terminology<br />
Short Press<br />
The term short press is used to describe clicking the mouse button and then<br />
releasing within about 1/2 second. If you are using a touch screen device,<br />
you will be pressing the screen with your finger, rather than using a mouse.<br />
In this document, it is assumed you are using a mouse.<br />
Long Press<br />
The term long press is used to describe clicking the mouse button and then<br />
holding for more than 1/2 second before releasing.<br />
5.4 Navigation<br />
Groups of widgets can be selected based on either their Location or their<br />
Function Group.<br />
The Function Groups are displayed down the left side of the<br />
screen.<br />
To change the Function Group:<br />
Click one of the icons. The selected Function Group will be<br />
shown highlighted.<br />
Click the arrow at the top or bottom to see more Function<br />
Groups (if there are any).<br />
15
<strong>Wiser</strong> <strong>Home</strong> Controller User's Manual<br />
The Locations are displayed across the top of the screen.<br />
To change the Location:<br />
Click the name of one of the Locations. The selected Location will be shown<br />
centred and highlighted.<br />
5.5 Tools<br />
On the Tools page you can select Enable Remote Access, Configure Router<br />
settings and Set C-Bus Date and Time.<br />
To select the Tools page, click on the Tools icon at the bottom of the<br />
Function Groups list.<br />
5.5.1 Remote Access<br />
The Remote Access settings can be set or reset using the <strong>Wiser</strong> UI. To<br />
access the screen with the remote access settings buttons, go to the Tools<br />
page.<br />
Changing remote access settings will prevent certain access<br />
modes from working. Be sure you know what the effects of a<br />
change will be before you change the current setting. Some<br />
changes will cause a reboot and could interrupt activity on your<br />
network.<br />
Toolkit Control allows the device to be used as a CNI over the Internet.<br />
This means that anyone on the Internet, if they knew the Internet address of<br />
your device, can connect on port 10001 and perform C Bus tasks. Disabling<br />
16
<strong>Wiser</strong> <strong>Home</strong> Controller User's Manual<br />
closes this port. The port is closed by default. This feature is intended to<br />
allow installers to use C-Bus Toolkit to manage a C-Bus network remotely<br />
when they need to. IT IS IMPORTANT TO MAKE SURE TO CLOSE THE PORT<br />
AFTER USE. LEAVING IT OPEN ALLOWS ANYONE TO MANIPULATE YOUR<br />
C-BUS NETWORK.<br />
Projector Control allows the web <strong>user</strong> interface to function even when run<br />
remotely over the Internet. This feature is intended to allow an end-<strong>user</strong> or<br />
installer to interact with their C-Bus network even when outside of their<br />
<strong>home</strong> or premise.<br />
Project Update allows a PICED project to be uploaded to the device over<br />
the Internet. This means that anyone on the Internet, if they knew the<br />
Internet address of your device, can connect to the device and transfer a<br />
project to the unit and/or retrieve a project from the unit. It is important to<br />
make sure to close the port after usage as leaving it open will allow anyone<br />
to manipulate your C-Bus network.<br />
5.5.2 Configure Router Settings<br />
You can access the router to view or change the settings. Some of the<br />
settings relate to network security and wireless operation and might require<br />
you to make a change<br />
Changing settings on the router can cause unexpected results.<br />
Unless you are absolutely certain, do not attempt to modify the<br />
settings.<br />
To open the router setup screen display, use the Configure Router button<br />
on the Tools page. Most of the router setting screen fields require text<br />
entries. After making a change, it must be saved. Saving changes causes the<br />
router to reboot<br />
5.5.3 C-Bus Time and Date<br />
The C-Bus Date and Time widget on the Tools page allows you to set the<br />
network time from the <strong>Wiser</strong> UI.<br />
17
<strong>Wiser</strong> <strong>Home</strong> Controller User's Manual<br />
To increase a value, select the up triangle. To decrease a value, select the<br />
down triangle. Click the Set button to change the date or time to the new<br />
value.<br />
The default display is DD/MM/YYYY and the default is a 24-hour clock.<br />
You can enable or disable automatic adjustment for Daylight Savings Time.<br />
Daylight Savings can be set automatically using a schedule. Refer to the<br />
PICED help file for details.<br />
Note: Make sure the C-Bus network is connected when changing the time<br />
and date settings.<br />
5.6 Full Screen View<br />
To have the window fill the screen, press or click the full screen icon in the<br />
top left corner.<br />
Press or click the icon again to return to normal.<br />
18
6.0 Widgets<br />
6.1 Icons<br />
<strong>Wiser</strong> <strong>Home</strong> Controller User's Manual<br />
There are many icons available for use with this skin. They can be selected<br />
for use with Function Groups and for some widgets. Some of the icons<br />
available are shown below.<br />
Air conditioner Blinds Lights<br />
7.0 C-Bus Widgets<br />
7.1 General Lighting Relay<br />
The General Lighting Relay widget is used for on/off control of a load.<br />
The appearance will depend on the icon selected. The icon will show<br />
whether the load is on or off, indicated by the brightness of the icon. The<br />
name of the controlled load is underneath the icon.<br />
A Short Press on the icon will change the state from on to off or vice versa.<br />
19
<strong>Wiser</strong> <strong>Home</strong> Controller User's Manual<br />
7.2 Two-State Lighting Relay<br />
The Two-State Lighting Relay widget is used for on/off control of a load.<br />
The appearance will depend on the icons selected; one for the off state, and<br />
one for the on state. The name of the controlled load is underneath the<br />
icon.<br />
A Short Press on the icon changes the state from on to off or vice versa.<br />
7.3 General Lighting Dimmer<br />
The General Lighting Dimmer widget is used for level control of a load, from<br />
0% to 100%.<br />
The appearance will depend on the icon selected. The icon will show<br />
whether the load is on or off, indicated by the brightness of the icon. The<br />
level of the load (0% to 100%) is shown above the icon. The name of the<br />
controlled load is underneath the icon.<br />
A Short Press on the icon will change the state from on to off or vice versa.<br />
A Long Press on the icon will cause the load to dim up or down. An arrow<br />
next to the widget indicates the direction of the change. The dimming<br />
change will stop when the mouse button is released.<br />
20
7.4 Bellpress<br />
<strong>Wiser</strong> <strong>Home</strong> Controller User's Manual<br />
The Bellpress widget is used for on/off control of a load.<br />
The appearance will depend on the icon selected. The icon will show<br />
whether the load is on or off, indicated by the brightness of the icon. The<br />
name of the controlled load is underneath the icon.<br />
A pressing (clicking) the icon will change the state to on. Releasing will<br />
change the state back to off.<br />
7.5 Curtain Control<br />
The Curtain Controller widget is used for opening and closing electric<br />
curtains, blinds and shutters.<br />
The general appearance of the widget is fixed. The button labels and the<br />
name of the controlled device can be set.<br />
There are three options:<br />
• One button control - a single button is used to open, close and stop<br />
• Two button control - one button is used to open/stop and the other is<br />
used to close/stop<br />
• Three button control - one button is used to open, one is used to close<br />
and the third is to stop<br />
Functions of buttons:<br />
21
Number of<br />
buttons<br />
<strong>Wiser</strong> <strong>Home</strong> Controller User's Manual<br />
Button One Button Two Button Three<br />
1 Open/Close/Stop - -<br />
2 Open/Stop Close/Stop -<br />
3 Open Close Stop<br />
7.6 Shutter Relay<br />
The Sutter Relay widget is used to open and close electric curtains, blinds<br />
and shutters. The Shutter Relay widget is very similar to the Curtain<br />
Controller widget. Refer to the icon shown for the Curtain Control widget.<br />
The general appearance of the widget is fixed. The button labels and the<br />
name of the controlled device can be set.<br />
Function of buttons:<br />
Number of<br />
buttons<br />
Button One Button Two Button Three<br />
1 Open/Close/Stop - -<br />
2 Open/Stop Close/Stop -<br />
3 Open Close Stop<br />
7.7 Lighting Preset<br />
The Lighting Preset widget is used for setting a load to a preset level, from<br />
0% to 100%.<br />
The appearance will depend on the icon selected. The icon will show<br />
whether the load is at the preset level, indicated by the brightness of the<br />
icon. The name of the controlled load is underneath the icon.<br />
A Short Press on the icon will set the load to the preset level.<br />
22
7.8 Lighting Status<br />
<strong>Wiser</strong> <strong>Home</strong> Controller User's Manual<br />
The Lighting Status widget shows when a load is on. It is not used for<br />
controlling the load. The status can be shown with an icon or a level from 0<br />
- 100%.<br />
The appearance will depend on the icon selected. The icon will show<br />
whether the load is on or not, indicated by the brightness of the icon. The<br />
name of the controlled load is underneath the icon.<br />
The level of the load will be displayed (0 - 100%). The name of the<br />
controlled load is underneath the icon.<br />
Any press on the Widget will be ignored.<br />
7.9 General Lighting Timer<br />
The General Lighting Timer widget is used for switching on a load for a<br />
specific period.<br />
The appearance will depend on the icon selected. The icon will show<br />
whether the load is on or off, indicated by the brightness of the icon. The<br />
animated clock will show if the timer is currently running. The name of the<br />
controlled load is underneath the icon.<br />
A Short Press on the icon will switch on the load and start the timer<br />
running. A second press will stop the timer and switch off the load. If left<br />
running, the load will switch off at the end of the period.<br />
23
7.10 Enable Preset<br />
<strong>Wiser</strong> <strong>Home</strong> Controller User's Manual<br />
The Enable Preset widget is generally used for enabling a function of the<br />
C-Bus system, such as a scheduled event.<br />
The appearance will depend on the icon selected. The icon will show<br />
whether the preset level is selected, indicated by the brightness of the icon.<br />
The name of the controlled item is underneath the icon.<br />
A Short Press on the icon will set the item to the preset level.<br />
7.11 Two-State Enable<br />
The Enable Preset widget is generally used for enabling a function of the<br />
C-Bus system, such as a scheduled event.<br />
The appearance will depend on the icons selected; one for the off state, and<br />
one for the on state. The name of the controlled item is underneath the<br />
icon.<br />
7.12 Fan Controller<br />
The Fan Controller widget is used for controlling the speed of a ceiling fan.<br />
The current speed of the fan is shown above the widget. The name of the<br />
controlled load is underneath the widget.<br />
A Short Press on the left or right arrows changes the fan speed. If the fan is<br />
on, a short press on the fan will switch it off.<br />
24
7.13 Scene Trigger<br />
<strong>Wiser</strong> <strong>Home</strong> Controller User's Manual<br />
The Scene Controller widget is used for setting a scene. This allows many<br />
lights to be set to pre-determined levels all at once.<br />
The appearance will depend on the Icon selected. The icon will show<br />
whether the scene is set or not, indicated by the brightness of the icon. The<br />
name of the scene is underneath the icon.<br />
A Short Press on the icon will set the scene.<br />
7.14 Local Scene Controller<br />
The Scene Controller widget is used for setting a scene. This allows many<br />
lights to be set to pre-determined levels all at once.<br />
The appearance will depend on the Icon selected. The icon will show<br />
whether the scene is set or not, indicated by the brightness of the icon. The<br />
name of the scene is underneath the icon.<br />
A Short Press on the icon will set the scene. Clicking the Up and Down<br />
arrows will 'nudge' the level of the scene by a small amount. This is useful if<br />
the lighting level is not quite right and needs to be adjusted brighter or<br />
dimmer.<br />
25
7.15 Multi Room Audio Zone<br />
<strong>Wiser</strong> <strong>Home</strong> Controller User's Manual<br />
The MRA Zone Widget is used for controlling a Clipsal Multi-Room Audio<br />
(MRA) system. The widget allows you to:<br />
• Select a music source<br />
• Adjust the volume<br />
• Adjust the bass and treble levels<br />
A Long Press on the + or - buttons will allow the volume to be adjusted up<br />
(louder) or down (quieter) respectively. The mute button (the picture of a<br />
speaker) allows you to switch the sound off and on.<br />
The source selection buttons at the bottom allow you to select which music<br />
source you want to listen to. The selected source will be highlighted.<br />
Clicking the back button will take you back to the other controls page<br />
A Long Press on the + or - buttons will allow the bass and treble levels to<br />
be adjusted.<br />
Clicking the "back" button will take you back to the other controls.<br />
7.16 Media Transport<br />
The Media Transport Widget is used for controlling an audio/video system.<br />
The widget allows you to activate any of the following functions of an<br />
audio/video device:<br />
26
• Play, Pause, Stop<br />
• Next, Previous<br />
• Rewind, Fast Forward<br />
<strong>Wiser</strong> <strong>Home</strong> Controller User's Manual<br />
• Record<br />
The name of the controlled device is above the widget.<br />
A Short Press on an icon will activate that function.<br />
7.17 <strong>Home</strong> Safe Panel<br />
The <strong>Home</strong> Safe Panel widget is used for controlling and monitoring a C-Bus<br />
security panel. There are several areas of the widget:<br />
• Panel status (at the top) - this shows whether the security panel is<br />
connected to the <strong>Wiser</strong> <strong>Home</strong> Controller<br />
• Keypad - this is used in the same way as a regular security panel keypad<br />
• Panel status indicators (at the bottom) - these show the status of the<br />
panel, including any alarms<br />
• Zone status (at the right) - these show whether the zones are secure or<br />
not<br />
27
7.18 MinderPro Panel<br />
<strong>Wiser</strong> <strong>Home</strong> Controller User's Manual<br />
The MinderPro Panel widget is used for controlling and monitoring a<br />
MinderPro security panel.<br />
There are several areas of the widget:<br />
• Panel status (at the top) - this shows whether the security panel is<br />
connected to the <strong>Wiser</strong> <strong>Home</strong> Controller<br />
• Keypad - this is used in the same way as a regular security panel keypad<br />
• Panel status indicators (at the bottom) - these show the status of the<br />
panel, including any alarms<br />
Zone status (at the right) - these show whether the zones are secure or not<br />
28
7.19 Climate Control<br />
<strong>Wiser</strong> <strong>Home</strong> Controller User's Manual<br />
The Climate Control widget allows the <strong>user</strong> to control and monitor the<br />
following aspects of an air conditioning system:<br />
1. Switch the air conditioner on and off<br />
2. Monitor the room temperature<br />
3. Set the operating type:<br />
Heat<br />
Cool<br />
Heat/Cool<br />
Fan/vent<br />
4. Set the temperature set-point<br />
5. Set the fan speed<br />
6. Switch the zone air flow (damper) on and off<br />
29
8.0 Logic Widgets<br />
<strong>Wiser</strong> <strong>Home</strong> Controller User's Manual<br />
Logic widgets are used by the <strong>Wiser</strong> logic engine. These are used to provide<br />
customised behaviour for the <strong>Wiser</strong> <strong>Home</strong> Controller. Their usage will be<br />
unique for each project.<br />
8.1 User System IO Integer<br />
The widget is used to select an integer (whole number) for controlling some<br />
aspect of the C-Bus system. The details of the usage will depend on the<br />
project.<br />
The name of the controlled item is above the Widget.<br />
A Short Press on the up or down arrows will change the value by one.<br />
A Long Press on the up or down arrows will cause the value to change<br />
continually until released.<br />
When the desired value has been reached, press the Set button. To reset<br />
the value and undo any changes, press the Reset button.<br />
8.2 User System IO Real<br />
The widget is used to select a 'real' value (number with decimal point) for<br />
controlling some aspect of the C-Bus system. The details of the usage will<br />
depend on the project.<br />
The name of the controlled item is above the widget.<br />
30
<strong>Wiser</strong> <strong>Home</strong> Controller User's Manual<br />
A Short Press on the up or down arrows will change the column value by<br />
one.<br />
A Long Press on the up or down arrows will cause the value to change<br />
continually until released.<br />
When the desired value has been reached, press the Set button. To reset<br />
the value and undo any changes, press the Reset button.<br />
8.3 User System IO String<br />
The widget is used to display information of some aspect of the C-Bus<br />
system. The details of the usage will depend on the project.<br />
The name of the item is above the widget.<br />
Pressing the Widget will have no effect.<br />
31
8.4 User System IO Boolean<br />
<strong>Wiser</strong> <strong>Home</strong> Controller User's Manual<br />
The widget is used to select a 'Boolean' value (ON or OFF) for controlling<br />
some aspect of the C-Bus system. The details of the usage will depend on<br />
the project.<br />
The appearance will depend on the icons selected; one for the off state, and<br />
one for the on state. The name of the controlled item is underneath the<br />
icon.<br />
A Short Press on the icon will change the state from on to off or vice versa.<br />
8.5 User System IO Date<br />
The widget is used to select a date for controlling some aspect of the C-Bus<br />
system. The details of the usage will depend on the project.<br />
The name of the controlled item is above the Widget.<br />
A Short Press on the up or down arrows will change the column value by<br />
one.<br />
A Long Press on the up or down arrows will cause the value to change<br />
continually until released.<br />
When the desired value has been reached, press the Set button. To reset<br />
the value and undo any changes, press the Reset button.<br />
32
8.6 User System IO Time<br />
<strong>Wiser</strong> <strong>Home</strong> Controller User's Manual<br />
The widget is used to select a time for controlling some aspect of the C-Bus<br />
system. The details of the usage will depend on the project.<br />
The name of the controlled item is above the widget.<br />
A Short Press on the up or down arrows will change the column value by<br />
one.<br />
A Long Press on the up or down arrows will cause the value to change<br />
continually until released.<br />
When the desired value has been reached, press the Set button. To reset<br />
the value and undo any changes, press the Reset button.<br />
33
9.0 Other Widgets<br />
9.1 Web Camera<br />
<strong>Wiser</strong> <strong>Home</strong> Controller User's Manual<br />
The Web Camera widget is used for displaying the video from a Web<br />
camera. Click the Web camera picture to display the image full screen. Click<br />
the <strong>home</strong> button (the picture of the house in the bottom right corner) to<br />
return to normal view.<br />
34
<strong>Wiser</strong> <strong>Home</strong> Controller User's Manual<br />
This page is blank for formatting purposes.<br />
35
Product of Clipsal Australia Pty Ltd<br />
A member of Schneider Electric<br />
CIS Technical Support Hotline: 1300 722 247 (Australia)<br />
Technical Support email: cis_support@clipsal.com.au<br />
Contact us: clipsal.com/feedback<br />
National Customer Service Enquiries<br />
Tel 1 300 202 525<br />
Fax 1 300 202 556<br />
clipsal.com<br />
Clipsal Australia Pty Ltd reserves the right to change<br />
specifications, modify designs and discontinue items<br />
without incurring obligation and whilst every effort is made<br />
to ensure that descriptions, specifications and other<br />
information in this document are correct, no warranty is<br />
given in respect thereof and the company shall not be<br />
liable for any error therein.<br />
© Clipsal Australia Pty Ltd.<br />
F2164 March 2009 1036671


