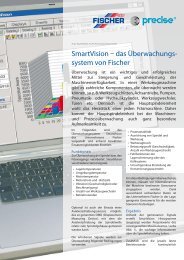
Fischer's Monitoring System SmartVision - Fischer Precise
Fischer's Monitoring System SmartVision - Fischer Precise
Fischer's Monitoring System SmartVision - Fischer Precise
Create successful ePaper yourself
Turn your PDF publications into a flip-book with our unique Google optimized e-Paper software.
Author: Rudolf Walter, <strong>Fischer</strong> <strong>Precise</strong> Deutschland GmbH<br />
<strong>Fischer</strong>’s <strong>Monitoring</strong> <strong>System</strong><br />
<strong>SmartVision</strong><br />
Among others, monitoring is a significant and successful<br />
tool to increase and maintain machine availability.<br />
Numerous components can be monitored in a machine<br />
tool, like slides, axis drives, pumps, pneumatic or<br />
hydraulic cylinders, tool changer, doors, etc. However,<br />
the main spindle unit is probably the core element of<br />
a milling machine. Therefore, the main spindle unit is<br />
the key element when it comes to machine or process<br />
monitoring.<br />
In the following <strong>Fischer</strong>’s <strong>Monitoring</strong><br />
<strong>System</strong>, <strong>SmartVision</strong>, is explained<br />
and examples of its successful use are<br />
presented.<br />
Features<br />
<strong>SmartVision</strong> uses several sensor signals<br />
to monitor the spindle or the milling<br />
process. These signals are:<br />
•<br />
•<br />
•<br />
•<br />
•<br />
•<br />
•<br />
As an option, an axial displacement<br />
sensor can be used, so called DMD<br />
(Displacement Measuring Device), to<br />
measure the axial growth of a spindle<br />
shaft relatively to the spindle housing.<br />
These signals are used to monitor the<br />
following conditions:<br />
•<br />
•<br />
•<br />
•<br />
Bearing temperatures<br />
Ambient temperature<br />
Motor temperature<br />
Motor current and speed<br />
Vibration (velocity or acceleration)<br />
Number of tool changes<br />
Operating hours<br />
Process stability<br />
Spindle and tool balance<br />
Crash<br />
Stress profile (speed, number of<br />
tool changes)<br />
•<br />
•<br />
Malfunction of the bearing<br />
lubrication or cooling system<br />
Improper converter parameter<br />
settings<br />
In order to be able to monitor these<br />
conditions, limits have to be set prior to<br />
operation. For the most cases, <strong>Fischer</strong><br />
has obtained data and derived suitable<br />
limits.<br />
Output<br />
As an output, <strong>SmartVision</strong> generates<br />
histograms (in percent of the pre–<br />
set maximum value) for the signals<br />
measured (figure1) that provide<br />
important information about the<br />
stresses a spindle has to endure.<br />
Additionally, the last hour of the<br />
operation is continuously monitored<br />
(figure 2). When the pre–set limits<br />
are exceeded, an error message is<br />
generated and filed.<br />
Online <strong>Monitoring</strong><br />
The error message and an<br />
online–access are options that help<br />
<strong>Fischer</strong> in cooperation with the machine<br />
user to work on manufacturing or<br />
spindles issues via the internet or<br />
telephone.
A <strong>SmartVision</strong> set–up that offers this<br />
option displays.<br />
Case Study<br />
Due to heavily unbalanced tooling (as<br />
we know today), several premature<br />
spindle failures occurred at a German<br />
end user that manufactures aircraft<br />
parts. Spindles used achieved a total<br />
life of only 50 up to 250 hours. The<br />
machine was used in a three–shift<br />
operation, seven days a week. The<br />
failures caused critical delivery<br />
reliability and generated one month<br />
Figure 1. <strong>SmartVision</strong> histograms (for example for<br />
vibration).<br />
production backlog. When a spindle<br />
failure occurred, parts machined were<br />
scrapped.<br />
Then end user’s decision was to invest<br />
into <strong>SmartVision</strong> to monitor the<br />
process conditions. By post processing<br />
the <strong>SmartVision</strong> data, all found out<br />
that vibrations up to 9,5 mm/s (RMS)<br />
overstrained the spindles and their<br />
components (figure 3).<br />
According to the spindle manual,<br />
vibrations up to 4 mm/s (RMS) can be<br />
Figure 2. Last hour of operation (for example for vibration). Figure 5. Vibration profile after implementing the corrective<br />
actions.<br />
FISCHER AG Präzisionsspindeln<br />
P.O. Box 31<br />
3360 Herzogenbuchsee<br />
Switzerland<br />
T +41 62 956 22 22<br />
F +41 62 956 22 00<br />
fch@fischerprecise.ch<br />
PRECISE Präzisionsspindeln GmbH<br />
Am Wallgraben 2<br />
42799 Leichlingen<br />
Germany<br />
T +49 2175 971 0<br />
F +49 2175 971 99<br />
pd@fischerprecise.de<br />
Figure 3. Analysis of vibration values measured<br />
© FISCHER PRECISE GROUP • 2st Edition, 9/2008 • E 00 Copies<br />
ARTWORK AND PREPRESS: FISCHER PRECISE GROUP • TEXT: Rudolf Walter, FISCHER PRECISE Deutschland GmbH • PRINTED BY: Lüthi–Druck AG, www.luethi–druck.ch<br />
tolerated without negatively influencing<br />
life of oil–air lubricated spindles.<br />
The error messages and their time<br />
stamps (figure 4) then were used<br />
to identify critical tools and identify<br />
corrective actions. As a result the<br />
vibration profile has been decreased<br />
successfully (figure 5) and a major<br />
productivity improve has been<br />
achieved. Spindle life was increased up<br />
to 6800 hours.<br />
Figure 4. Example of error messages.<br />
www.fischerprecise.ch • www.precise.de


