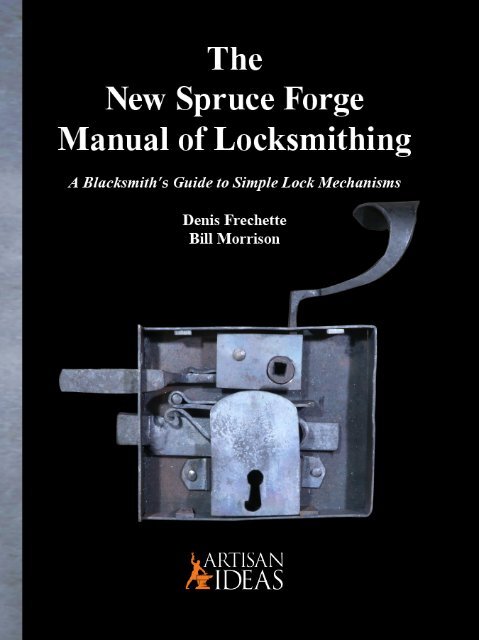
The New Spruce Forge Manual of Locksmithing: A Blacksmith’s Guide to Simple Lock Mechanisms
The New Spruce Forge Manual of Locksmithing: a Blacksmith’s Guide to Simple Lock Mechanisms is a totally revised and expanded version of the original work from 1999. This new hardcover edition, at 304 pages and with more than 800 color photos and illustrations, is more than double the size of the original manual. It is divided into two distinct sections: Technical Information - This section is a reference manual in itself that covers the specific tools and techniques needed to build all the parts for each lock, as well as providing the information needed to understand the assembly instructions outlined in the second section. The Locks: Patterns & Instructions - This section provides the plans and detailed instructions for each of the 14 lock projects in this new edition. The clear assembly instructions describe when and how to use the technical information provided in section one. The authors have maintained their original trademark style that relies on well-illustrated step-by-step instructions that guide you through the whole lock-making process. They have also kept their low-tech approach that demonstrates how to go about creating good work using only a handful of simple tools. Making blacksmith locks is an age-old skill the authors of this manual are helping to preserve by passing on their knowledge to this book’s readers. The New Spruce Forge Manual of Locksmithing is also an excellent introduction to benchwork, which is a useful skill for any blacksmith to acquire. This manual will become a valuable, trusted and often referred to sourcebook in your blacksmithing library. Hardcover, 304 pages, more than 800 photos and illustrations.
The New Spruce Forge Manual of Locksmithing: a Blacksmith’s Guide to Simple Lock Mechanisms is a totally revised and expanded version of the original work from 1999. This new hardcover edition, at 304 pages and with more than 800 color photos and illustrations, is more than double the size of the original manual.
It is divided into two distinct sections:
Technical Information - This section is a reference manual in itself that covers the specific tools and techniques needed to build all the parts for each lock, as well as providing the information needed to understand the assembly instructions outlined in the second section.
The Locks: Patterns & Instructions - This section provides the plans and detailed instructions for each of the 14 lock projects in this new edition. The clear assembly instructions describe when and how to use the technical information provided in section one.
The authors have maintained their original trademark style that relies on well-illustrated step-by-step instructions that guide you through the whole lock-making process. They have also kept their low-tech approach that demonstrates how to go about creating good work using only a handful of simple tools.
Making blacksmith locks is an age-old skill the authors of this manual are helping to preserve by passing on their knowledge to this book’s readers. The New Spruce Forge Manual of Locksmithing is also an excellent introduction to benchwork, which is a useful skill for any blacksmith to acquire. This manual will become a valuable, trusted and often referred to sourcebook in your blacksmithing library.
Hardcover, 304 pages, more than 800 photos and illustrations.

Create successful ePaper yourself
Turn your PDF publications into a flip-book with our unique Google optimized e-Paper software.
SECTION I<br />
- Technical Information -<br />
Tools, Techniques and Procedures<br />
6
This section will introduce you <strong>to</strong> all the basic metalworking skills that will allow you <strong>to</strong> turn raw materials<br />
in<strong>to</strong> <strong>to</strong>ols, hardware or mechanical parts.<br />
Terms Used in This Book<br />
<strong>The</strong> following is a list <strong>of</strong> terms and phrases used throughout the book. Unless specified in the accompanying<br />
text, their meaning is listed below.<br />
• Sheet metal. All sheet metal used is 16 gauge.<br />
• Steel, metal, s<strong>to</strong>ck, round bar (s<strong>to</strong>ck), square bar (s<strong>to</strong>ck), flat bar (s<strong>to</strong>ck), bar s<strong>to</strong>ck = mild steel unless it<br />
is specified as carbon steel.<br />
• Carbon steel. All carbon steel used is from recycled coil or leaf springs.<br />
• Any forging term, e.g.: drawing down, forge down <strong>to</strong> …, fuller, cross peen, implies a heat cycle even if it is<br />
not specified in the description.<br />
• Offsets, shoulder, step, transitions, refer <strong>to</strong> the way a forging changes from one cross section <strong>to</strong> another.<br />
• Rivets & tenons are forged cold unless specified.<br />
• Temper <strong>to</strong> a (color). Parts that need <strong>to</strong> be heat treated will usually have only the final temper color<br />
mentioned. However, it is unders<strong>to</strong>od that it has undergone a complete normalizing and hardening<br />
process before tempering.<br />
• <strong>Spruce</strong> <strong>Forge</strong> <strong>Manual</strong> = the first edition <strong>of</strong> <strong>The</strong> <strong>New</strong> <strong>Spruce</strong> <strong>Forge</strong> <strong>Manual</strong> <strong>of</strong> <strong><strong>Lock</strong>smithing</strong>.<br />
• <strong>The</strong> quenching oil we use is Canola oil (cooking oil). Recycled oils such as mo<strong>to</strong>r oil or hydraulic fluid<br />
can put out <strong>to</strong>xic fumes.<br />
Standard Tools<br />
In any trade, there are always <strong>to</strong>ols that make the difference between doing a job well and merely doing<br />
serviceable work. Making locks is no exception. This section describes some <strong>of</strong> the basic <strong>to</strong>ols that should be<br />
in every shop.<br />
RULERS: A good quality stainless steel ruler is a must<br />
for any shop. <strong>The</strong>se rulers have engraved markings<br />
graduated <strong>to</strong> 1/64” (0.5 mm). <strong>The</strong> 6” (150 mm) is the<br />
most valuable for measuring s<strong>to</strong>ck and setting up<br />
dividers. <strong>The</strong> longer rules can be <strong>of</strong> lesser quality since<br />
they are mainly used as straight edges.<br />
DIVIDERS can be easily set up with rulers that have<br />
engraved markings.<br />
7
VERNIER CALIPERS: <strong>The</strong>se are the inexpensive calipers that are only accurate <strong>to</strong> 1/16” (2 mm). <strong>The</strong>y are<br />
used <strong>to</strong> quickly measure a piece <strong>of</strong> s<strong>to</strong>ck. <strong>The</strong>y should be made <strong>of</strong> metal since the plastic calipers melt very<br />
easily around hot work.<br />
SMALL SQUARES: <strong>The</strong> carpenter-style square is probably the most versatile and should be the first type <strong>of</strong><br />
square that you buy. It can be laid flat on the surface <strong>of</strong> the work, and it can be used <strong>to</strong> measure the accuracy<br />
<strong>of</strong> an inside or outside corner. Many sizes are available.<br />
Sample square<br />
Square being used<br />
HACKSAWS: Buy the best hacksaw frame and the best blades you can afford. Hacksaws do a lot <strong>of</strong> work<br />
when you are starting out and the time lost trying <strong>to</strong> work with a saw that doesn’t hold the blade securely<br />
can really add up. Hacksaw blades are easier <strong>to</strong> start if at least two <strong>of</strong> the teeth are in contact with the work.<br />
PROPANE TORCH: A regular plumber’s propane<br />
<strong>to</strong>rch can be used <strong>to</strong> draw the temper on small <strong>to</strong>ols<br />
(see Heat Treating, p. 42), light the tinder <strong>to</strong> start a<br />
coal forge, or burn the paper pattern from a pattern<br />
piece.<br />
8
PLIERS: An assortment <strong>of</strong> lineman’s pliers, needle nose pliers and locking pliers will be needed <strong>to</strong> hold or<br />
shape small parts.<br />
SCRIBERS: A scriber is used <strong>to</strong> trace the outlines <strong>of</strong> pattern pieces and scribe reference lines on<strong>to</strong> metal.<br />
Standard metalworking scribers usually have a straight point and a bent point <strong>to</strong> reach in<strong>to</strong> awkward spots.<br />
Sample scriber Scriber tracing a pattern Bent leg, tracing s<strong>to</strong>ck<br />
DIVIDERS: <strong>The</strong>re are three different forms <strong>of</strong> dividers: winged, firm joint, and spring. Each type is made up<br />
<strong>of</strong> two legs that are pointed at one end and connected by a pivoting joint at the opposite end. <strong>The</strong>y are each<br />
designed <strong>to</strong> do a specific job.<br />
Winged dividers are used when the divider setting needs <strong>to</strong> stay fixed regardless <strong>of</strong> how the divider is used.<br />
<strong>The</strong>se dividers have an additional curved arm that is used <strong>to</strong> lock the two legs firmly in place. This allows<br />
them <strong>to</strong> withstand a great deal <strong>of</strong> handling and abuse without losing their setting.<br />
Firm joint dividers are strictly a measuring <strong>to</strong>ol used <strong>to</strong> make a series <strong>of</strong> very quick comparative<br />
measurements. <strong>The</strong>y are not the best choice as a gauge while forging since the points <strong>of</strong> the dividers are<br />
held in place only by the friction built in<strong>to</strong> the hinge joint. Many smiths compensate for this by hammering<br />
the joint so tightly that the dividers require a hammer <strong>to</strong> change the adjustment. Firm joint dividers used<br />
for measuring need <strong>to</strong> have just enough resistance <strong>to</strong> hold the setting yet be easily adjusted by hand. <strong>The</strong>y<br />
should also have a consistent tension through the entire range <strong>of</strong> motion.<br />
9
Tools for Precision Work<br />
LIGHTING: Adequate lighting is the most important<br />
item <strong>to</strong> consider when setting up a space for doing<br />
precision work. It is impossible <strong>to</strong> cut out or shape a<br />
pattern piece accurately if you cannot see the outline<br />
drawn on the metal. Portable lighting that can be set up<br />
as needed <strong>of</strong>fers the simplest solution <strong>to</strong> this problem.<br />
EYE LOUPES OR HEADSETS: Some form <strong>of</strong><br />
magnification is a great help for aligning center punch<br />
marks accurately or when doing precision cuts or file<br />
work on small parts.<br />
BENCHWORK VISE: A machinist’s vise or a<br />
blacksmith’s leg vise can be used for locksmithing<br />
provided the vise jaws are in good condition.<br />
To hold small work securely, the jaws must have faces<br />
with square edges that align perfectly at the <strong>to</strong>p and<br />
sides.<br />
12
Vise inserts are an additional set <strong>of</strong> jaws made <strong>to</strong> fit<br />
inside the jaws <strong>of</strong> a larger vise. <strong>The</strong>y are a simple way <strong>of</strong><br />
adapting a vise <strong>to</strong> hold oddly shaped pieces. Each vise<br />
insert is made <strong>to</strong> solve a specific problem.<br />
A small machinist’s vise mounted <strong>to</strong> a square pipe is a<br />
good way <strong>to</strong> adapt a vise with worn jaws. It also raises<br />
the vise jaws <strong>to</strong> a more comfortable working height for<br />
chiseling or filing.<br />
PLANISHING ANVIL: <strong>The</strong> face <strong>of</strong> your forging anvil can be used <strong>to</strong> hammer refine the finish <strong>of</strong> a forged piece.<br />
However, it would be more comfortable <strong>to</strong> work on a separate smaller anvil that is mounted approximately<br />
10” (250 mm) higher than the face <strong>of</strong> a forging anvil.<br />
This smaller anvil should be reserved for finer work. It must have a smooth face and well-defined edges. It<br />
is used <strong>to</strong> make pieces that must be left “as forged” or that need <strong>to</strong> be further refined with a file. <strong>The</strong> smooth<br />
anvil face, combined with careful hammering, will leave a fine-textured finish on the piece. This anvil could<br />
be a stake anvil, a small bench anvil, or a polished section <strong>of</strong> railroad rail. If shop space is at a premium, this<br />
anvil must be light enough <strong>to</strong> be moved in and out <strong>of</strong> the workspace. If it can be permanently mounted, place<br />
it within arm’s reach <strong>of</strong> the fire. This will minimize the heat lost by small parts before they reach the anvil.<br />
A small block <strong>of</strong> steel can be mounted<br />
in the anvil or a vise.<br />
<strong>The</strong> stake anvil is usually shaped <strong>to</strong><br />
resemble an anvil.<br />
A railroad rail fastened <strong>to</strong> a solid base<br />
can make a good planishing anvil.<br />
13
Blacksmithing and Benchwork<br />
Introduction<br />
Blacksmiths use a forge <strong>to</strong> heat bar s<strong>to</strong>ck until it is s<strong>of</strong>t enough <strong>to</strong> be hammered in<strong>to</strong> a different shape.<br />
This process is called forging and it was how most iron and steel parts were made, up until the Industrial<br />
Revolution. <strong>The</strong> forging process enabled the smith <strong>to</strong> move metal very efficiently but it did leave the surface<br />
<strong>of</strong> the metal covered with hammer marks and a coating <strong>of</strong> oxidized metal called forge scale. Some things<br />
made by the smith could be used without further refinement, however, if the piece needed <strong>to</strong> have a smooth<br />
flat surface or precisely fitting parts the work was taken <strong>to</strong> the workbench and further refined using hand<br />
<strong>to</strong>ols.<br />
<strong>The</strong> process <strong>of</strong> working at a workbench with hand <strong>to</strong>ols <strong>to</strong> refine the shape or overall dimensions <strong>of</strong> a rough<br />
forging or piece <strong>of</strong> s<strong>to</strong>ck is called benchwork. Before the machine age, all precision metal parts were either<br />
finished or <strong>to</strong>tally cut out by hand using only chisels, files, hacksaws and powdered abrasives. <strong>The</strong> work<br />
could be very demanding, also the skill needed <strong>to</strong> achieve the accuracy required <strong>to</strong> assemble mechanical<br />
parts <strong>to</strong>ok years <strong>to</strong> master. Fortunately, this level <strong>of</strong> accuracy is not needed <strong>to</strong> finish and assemble most locks.<br />
Even though the benchwork trade has long been replaced with faster and more accurate machines, it is still<br />
an essential skill for any blacksmith wanting <strong>to</strong> fully understand the role that hand <strong>to</strong>ols played prior <strong>to</strong> the<br />
machine age.<br />
We feel that the locksmithing projects in this book will provide an excellent opportunity <strong>to</strong> explore this form<br />
<strong>of</strong> “medieval machining”. <strong>The</strong> scale <strong>of</strong> the parts is small enough <strong>to</strong> enable the work <strong>to</strong> proceed quite quickly<br />
and it is rewarding <strong>to</strong> see a part being shaped using only the <strong>to</strong>ols that you have made.<br />
This section will cover the basic information needed <strong>to</strong> go back <strong>to</strong> a time when owning a forge meant you<br />
had the technology <strong>to</strong> make all the <strong>to</strong>ols needed <strong>to</strong> build everything else.<br />
16
Setting Up a Blacksmith Shop:<br />
Equipment & Supplies<br />
<strong>The</strong> <strong>Forge</strong><br />
Having your own forge is a real asset in any shop and since this book is designed <strong>to</strong> introduce the making<br />
<strong>of</strong> locks <strong>to</strong> blacksmiths, forging does play a big part in most <strong>of</strong> the projects. A forge does not need <strong>to</strong> be a<br />
dedicated building or space in your workshop. Many smiths have portable units that they set up whenever<br />
they need <strong>to</strong> do some forging.<br />
Solid Fuel <strong>Forge</strong>s<br />
A blacksmith’s forge requires a very hot fire <strong>to</strong> get the steel <strong>to</strong> a working temperature. Burning some form <strong>of</strong><br />
solid fuel has been the only option available <strong>to</strong> smiths for centuries. To this day, the versatility and quality <strong>of</strong><br />
heat from a properly managed fire cannot be matched. If you live in a rural area that is close <strong>to</strong> a good supply<br />
<strong>of</strong> fuel, this type <strong>of</strong> forge is an excellent choice.<br />
Commonly Used Fuels<br />
Coal, charcoal, and coke are the most common options available for a solid fuel forge. <strong>The</strong> availability <strong>of</strong><br />
these fuels varies quite a bit. If you are interested in setting up a traditional forge, the first thing you will need<br />
<strong>to</strong> do is find out which fuel, if any, is available in your area.<br />
<strong>The</strong> coal most commonly used by blacksmiths<br />
is a s<strong>of</strong>t, bituminous coal. It contains a lot <strong>of</strong><br />
volatile material that must be burned <strong>of</strong>f before it<br />
can be used in the center <strong>of</strong> the forge fire. It does<br />
produce a very hot fire, however it requires a time<br />
commitment in order <strong>to</strong> learn how <strong>to</strong> manage the<br />
fire properly.<br />
How <strong>to</strong> Manage a Bituminous Coal Fire<br />
<strong>The</strong> first time you build a fire with raw coal, it will<br />
produce a lot <strong>of</strong> smoke and it will likely need a lot<br />
<strong>of</strong> kindling <strong>to</strong> keep the fire going.<br />
As the coal turns in<strong>to</strong> coke, the center <strong>of</strong> the fire will<br />
start <strong>to</strong> burn cleaner and produce more heat. From<br />
this point on, it is important <strong>to</strong> keep the coke in the<br />
center <strong>of</strong> the fire and have the raw coal around the<br />
outside edges. <strong>The</strong> heat from the fire will turn the<br />
coal <strong>to</strong> coke, and the flames from the center <strong>of</strong> the<br />
fire will consume most <strong>of</strong> the smoke from the coal.<br />
17
TONGS<br />
Tongs are long handled pliers designed <strong>to</strong> hold specific shapes and sizes <strong>of</strong> bar s<strong>to</strong>ck. Here is a brief description<br />
<strong>of</strong> how <strong>to</strong> use some <strong>of</strong> the most common <strong>to</strong>ng shapes.<br />
Flat bit <strong>to</strong>ngs are the general-purpose <strong>to</strong>ngs in the<br />
blacksmith shop. <strong>The</strong>y are not the best choice for<br />
holding work while forging. However, they are<br />
a very versatile form <strong>of</strong> <strong>to</strong>ngs that can easily be<br />
adapted <strong>to</strong> do the many jobs around the shop that<br />
involve handling hot metal.<br />
Flat bit <strong>to</strong>ngs can be used <strong>to</strong> forge flat s<strong>to</strong>ck but they<br />
are not as secure as box <strong>to</strong>ngs for forging flat s<strong>to</strong>ck<br />
since the s<strong>to</strong>ck can work loose while hammering<br />
the edge. This pho<strong>to</strong> shows how flat bit <strong>to</strong>ngs<br />
cannot prevent the work from moving sideways in<br />
the jaws. As a result they are not the best choice<br />
for forging flat s<strong>to</strong>ck. We recommend using box<br />
jaw <strong>to</strong>ngs (see below) for holding flat s<strong>to</strong>ck while<br />
forging whenever possible.<br />
Bolt <strong>to</strong>ngs are the best choice for holding round or<br />
square s<strong>to</strong>ck. <strong>The</strong> shape <strong>of</strong> the bits wraps around<br />
the outside <strong>of</strong> the s<strong>to</strong>ck providing a very secure<br />
grip on the metal.<br />
Box <strong>to</strong>ngs are used <strong>to</strong> hold flat s<strong>to</strong>ck. Like bolt<br />
<strong>to</strong>ngs they hold the work securely because the jaws<br />
surround the s<strong>to</strong>ck on all sides.<br />
20
BLACKSMITHING ANVILS<br />
<strong>The</strong> image <strong>of</strong> the blacksmith’s anvil is familiar <strong>to</strong> everyone.<br />
<strong>The</strong>y come in many shapes and sizes, and they all tend <strong>to</strong><br />
have the same elements.<br />
Horn<br />
Face<br />
Pritchel hole<br />
Hardie hole<br />
It is natural <strong>to</strong> assume that this iconic <strong>to</strong>ol must be found<br />
before any work can be done. In fact, a good forging anvil<br />
can be made from readily available bar s<strong>to</strong>ck.<br />
A simple forging anvil can be made from any block <strong>of</strong> steel<br />
that can be securely fastened <strong>to</strong> a heavy base. If the anvil and<br />
base can be fastened <strong>to</strong>gether as a unit, the <strong>to</strong>tal weight <strong>of</strong><br />
the unit will contribute <strong>to</strong> the effectiveness <strong>of</strong> the anvil. For<br />
example, a 50 lb. steel block welded <strong>to</strong> a well-designed 150<br />
lb. frame filled with 100 lbs. <strong>of</strong> concrete will turn in<strong>to</strong> a very<br />
stable 300 lb. anvil. On the other hand, the same 50 lb. block<br />
simply sitting on the same frame is just a 50 lb. anvil that<br />
happens <strong>to</strong> be sitting on a very stable 250 lb. base.<br />
Since almost all <strong>of</strong> the work done by a blacksmith involves<br />
reshaping metal, a simple square block is all you need.<br />
FORGING VISE<br />
<strong>The</strong> traditional post vise is specifically designed <strong>to</strong> take the<br />
amount <strong>of</strong> hammering that needs <strong>to</strong> be done <strong>to</strong> shape some<br />
larger parts. However, any large machinist’s style vise will<br />
work as a forging vise provided it is made from a good<br />
quality casting or solid steel.<br />
21
More hammering will create more fullers and the<br />
result will be a section <strong>of</strong> bar that is thinner and<br />
longer than the original bar s<strong>to</strong>ck.<br />
To complete the fullering process it is necessary <strong>to</strong><br />
hammer all the high spots back in<strong>to</strong> the bar. This is<br />
done by returning the hammer <strong>to</strong> a vertical position<br />
and hammering until the surface becomes smooth.<br />
Driving these high spots back in<strong>to</strong> the bar also forces<br />
the metal <strong>to</strong> become longer.<br />
<strong>The</strong> Process <strong>of</strong> Drawing Down<br />
When you are forging a bar in<strong>to</strong> a new shape, it is important <strong>to</strong> always do the fullering on a four-sided<br />
forging regardless <strong>of</strong> the final shape you are trying <strong>to</strong> achieve. If the final shape happens <strong>to</strong> be square or<br />
rectangular, then you can go directly <strong>to</strong> roughing out that shape. However, if the finished piece needs <strong>to</strong> be<br />
round, you will need <strong>to</strong> start the process by creating a square bar before starting any fullering.<br />
On a square or rectangular forging, any<br />
irregularities in the size or shape <strong>of</strong> the bar can<br />
be easily seen because you have only two planes<br />
<strong>of</strong> reference <strong>to</strong> keep track <strong>of</strong>. <strong>The</strong> two sides <strong>of</strong><br />
the forging can be checked quickly by simply<br />
rotating the bar 90-degrees. On a round forging,<br />
missed hammer blows or thin sections can show<br />
up anywhere around the circumference. This<br />
makes it a lot harder <strong>to</strong> decide how <strong>to</strong> correct any<br />
irregularities in the shape.<br />
On a four sided shape the anvil always<br />
creates a flat face that can be used as a<br />
reference edge for the opposite side<br />
Iregular shapes with multiple sides rarely<br />
have a face that can be used as a reference<br />
during the forging process<br />
When you have the size and shape the way you<br />
want it, you can turn the square in<strong>to</strong> a round bar<br />
by first hammering the corners <strong>of</strong> the square back<br />
in<strong>to</strong> the bar <strong>to</strong> create an octagonal shape, and<br />
then hammering the corners <strong>of</strong> the octagon in<strong>to</strong> a<br />
hexagonal shape.<br />
28
Forging Points/Tapers<br />
Fullering a flat taper<br />
Forging a taper or a point<br />
is another example <strong>of</strong> how<br />
drawing down is used <strong>to</strong> shape<br />
a bar. Forging a flat taper<br />
involves gradually increasing<br />
the amount <strong>of</strong> fullering that is<br />
done <strong>to</strong> one side <strong>of</strong> the bar as<br />
the forging moves <strong>to</strong> the tip.<br />
Finished forging<br />
1 2 3 4 5<br />
As the thickness <strong>of</strong> the bar decreases the effect that the hammer<br />
weight has on the metal increases dramatically. To counteract this,<br />
it is important <strong>to</strong> greatly reduce the intensity <strong>of</strong> the hammering<br />
as the bar begins <strong>to</strong> thin down.<br />
Fullering side 1<br />
Forging a point is simply<br />
creating a taper on both sides <strong>of</strong><br />
the bar at once. It is important<br />
that the same amount <strong>of</strong><br />
fullering be done <strong>to</strong> each side<br />
<strong>of</strong> the bar in each heat.<br />
Fullering side 2<br />
1 2 3 4 5<br />
1<br />
2<br />
3<br />
4<br />
5<br />
1<br />
2<br />
1<br />
2<br />
Rotate the bar from side 1 <strong>to</strong><br />
side 2 during the heat <strong>to</strong> make<br />
sure the same number <strong>of</strong> fullers<br />
are applied <strong>to</strong> each face.<br />
29
Planishing<br />
Planishing is refining the outer surface <strong>of</strong> the forging without changing the cross section. It is <strong>of</strong>ten combined<br />
with any forging operation that results in a change <strong>to</strong> the cross section <strong>of</strong> the bar. <strong>The</strong> hottest part <strong>of</strong> the heat<br />
is always used for all the rough forging. Once the bar has cooled down past the lower end <strong>of</strong> the forging<br />
range the smith can start correcting any irregularities in the forging that might have happened during that<br />
heat. This is an effective way <strong>to</strong> use the lowest end <strong>of</strong> the forging range <strong>to</strong> clean up problems that may be<br />
developing and give you a solid frame <strong>of</strong> reference for the next heat. Light hammering with the flat face <strong>of</strong><br />
the hammer combined with the low heat will confine the effects <strong>of</strong> the hammering <strong>to</strong> the surface <strong>of</strong> the metal.<br />
<strong>The</strong> work must be completely supported by the anvil in order <strong>to</strong> prevent any further dis<strong>to</strong>rtion.<br />
Cross Peening<br />
Cross peening is fullering the bar by spreading its volume across the width <strong>of</strong> the bar. <strong>The</strong> cross peen <strong>of</strong><br />
the hammer is used for this operation. Unlike the main hammer face, the peen <strong>of</strong> the hammer is only used<br />
for fullering, so it is wedge shaped with a narrow, rounded face. <strong>The</strong> narrow face <strong>of</strong> the cross peen sits at<br />
90-degrees <strong>to</strong> the handle. Driving the cross peen in the center <strong>of</strong> the bar will create fullers that are parallel <strong>to</strong><br />
the length <strong>of</strong> the bar causing the bar <strong>to</strong> become wider, without affecting the length very much.<br />
30
Bending<br />
Bending is changing the shape <strong>of</strong> a bar without changing the dimensions <strong>of</strong> the bar. <strong>The</strong> pressure applied<br />
<strong>to</strong> the bar, in this case, will not change the cross section <strong>of</strong> the bar, just move that part <strong>of</strong> the bar <strong>to</strong> different<br />
location. Bending can be done over the edge <strong>of</strong> the anvil or horn or by using a jig that has the shape you need.<br />
Freehand bending is used for simple bends when the exact<br />
shape or size <strong>of</strong> the bend is not critical.<br />
Bending around a jig is the best way <strong>to</strong> forge several bends that<br />
must be identical.<br />
<strong>The</strong> most common application <strong>of</strong> freehand bending used in<br />
locksmithing is <strong>to</strong> bend a simple hinge barrel at the end <strong>of</strong> a bar.<br />
<strong>The</strong> bend is started over the edge <strong>of</strong> the anvil. <strong>The</strong> length <strong>of</strong><br />
the bar that is hanging over the edge will determine the radius<br />
<strong>of</strong> the bend. It is important <strong>to</strong> hit the end <strong>of</strong> the bar <strong>to</strong> create a<br />
smooth curve.<br />
Hitting close <strong>to</strong> the anvil will create a sharp bend.<br />
31
It is important <strong>to</strong> use the right sized punch for<br />
the drift that will be used <strong>to</strong> shape the hole. <strong>The</strong><br />
perimeter <strong>of</strong> the slot punch must be slightly smaller<br />
than the circumference <strong>of</strong> the drift. For example, a<br />
slot punch that is 1/4” x 1/2” (6 mm x 13 mm) has a<br />
perimeter <strong>of</strong> 1-1/2” (38 mm). This punch is used for<br />
a 5/8” (16 mm) drift which has a circumference <strong>of</strong><br />
1-7/8” (48 mm).<br />
B<br />
A<br />
Cir. = 2A + 2B<br />
Brazing in the <strong>Forge</strong><br />
Brazing is a way <strong>of</strong> joining metal parts <strong>to</strong>gether. <strong>The</strong> bond is made by melting a metal that has a lower<br />
melting point than the parts being brazed. When the brazing metal becomes molten it will flow in<strong>to</strong> the joint<br />
and fuse <strong>to</strong> each part. This creates a very strong bond with little risk <strong>of</strong> damaging the original parts.<br />
Using a forge <strong>to</strong> braze pieces <strong>to</strong>gether is a very primitive but effective way <strong>of</strong> joining pieces that are either <strong>to</strong>o<br />
small <strong>to</strong> be riveted <strong>to</strong>gether or <strong>to</strong>o delicate <strong>to</strong> be forge welded.<br />
Brazing in a forge is simple in concept but not always that simple <strong>to</strong> do.<br />
Brazing in the forge usually requires creating an<br />
assembly that will prevent the parts <strong>to</strong> be brazed<br />
from moving out <strong>of</strong> position. In most cases the parts<br />
can be held <strong>to</strong>gether with heavy steel wire.<br />
<strong>The</strong> metal doing the brazing is added <strong>to</strong> this<br />
assembly. A bronze alloy is usually used for brazing;<br />
however, copper wire produces similar results and<br />
is more readily available in a variety <strong>of</strong> sizes.<br />
When the assembly begins <strong>to</strong> get hot, a flux is added<br />
<strong>to</strong> the parts. <strong>The</strong> flux allows the molten copper <strong>to</strong><br />
adhere <strong>to</strong> the parts. <strong>The</strong> flux is household Borax<br />
found in the laundry detergent aisle <strong>of</strong> any grocery<br />
s<strong>to</strong>re.<br />
38
A flux spoon is a long-handled spoon that is used <strong>to</strong><br />
place flux on a joint while the piece is in the fire.<br />
All <strong>of</strong> this is then slowly heated until the copper<br />
becomes molten and flows in<strong>to</strong> the joint between the<br />
parts. <strong>The</strong> surface <strong>of</strong> the copper will turn iridescent<br />
a few seconds before it becomes molten.<br />
When the parts have cooled, the wire can be cut <strong>of</strong>f<br />
the piece. Any sharp points or edges can be cleaned<br />
up with a file.<br />
Everything will be covered with a crude form <strong>of</strong><br />
glass created by the molten flux.<br />
To remove the flux bring the piece back up <strong>to</strong> a dull red heat. A wire brush can then be used remove the<br />
heavy coating <strong>of</strong> flux from the surface. Let the piece cool <strong>to</strong> room temperature. Use a file <strong>to</strong> clean up the<br />
excess copper and any remaining flux that has flowed on<strong>to</strong> the surface.<br />
39
<strong>The</strong> sequence <strong>of</strong> colors above will appear in order as more heat is applied.<br />
As the colors start moving <strong>to</strong>wards the tip, remove<br />
the <strong>to</strong>rch <strong>to</strong> allow the heat <strong>to</strong> equalize. This will<br />
widen the bands <strong>of</strong> color and slow down the<br />
progression <strong>of</strong> colors <strong>to</strong>wards the tip. Apply the<br />
heat only when the colors have s<strong>to</strong>pped advancing.<br />
Note: when tempering in a <strong>to</strong>aster oven only the<br />
desired temper color will appear.<br />
When the desired color reaches the tip, quench the<br />
<strong>to</strong>ol in water <strong>to</strong> s<strong>to</strong>p the color from advancing any<br />
further. Some experimentation will be required <strong>to</strong><br />
determine the proper temper color. <strong>The</strong> <strong>to</strong>ol can<br />
now be tested. If the cutting edge is <strong>to</strong>o brittle,<br />
you will be able <strong>to</strong> reheat the <strong>to</strong>ol and continue the<br />
tempering process by moving a darker temper color<br />
<strong>to</strong> the cutting edge. If the cutting edge is <strong>to</strong>o s<strong>of</strong>t, the<br />
entire heat treating process will need <strong>to</strong> be repeated<br />
in order <strong>to</strong> <strong>to</strong> reintroduce a lighter temper color <strong>to</strong><br />
the cutting edge.<br />
44
Benchwork<br />
Benchwork covers all the traditional hand <strong>to</strong>ol techniques that were once used <strong>to</strong> cut, shape, or assemble a<br />
piece <strong>of</strong> metal when it was cold. All the metalworking trades relied on benchwork <strong>to</strong> some extent. Blacksmiths<br />
could produce most <strong>of</strong> their work using only the forge and anvil, however, they did work at a bench <strong>to</strong> fit<br />
and assemble parts for <strong>to</strong>ols or hardware. Tinsmiths, on the other hand, worked exclusively at the bench. <strong>The</strong><br />
locksmithing projects in this book fall somewhere in the middle. Some locks are almost <strong>to</strong>tally made in the<br />
forge and others are almost <strong>to</strong>tally benchwork.<br />
Even though benchwork no longer has any place in industry, we feel that it can be a great benefit <strong>to</strong> anyone<br />
willing <strong>to</strong> take on the challenge <strong>of</strong> learning an old way <strong>of</strong> doing things.<br />
BASIC CHISELS AND FULLERS<br />
Benchwork requires several types <strong>of</strong> chisels that are<br />
designed <strong>to</strong> do specific jobs. Cold chisels need <strong>to</strong><br />
withstand heavy hammering. <strong>The</strong>y are used <strong>to</strong> cut<br />
very thick shavings or <strong>to</strong> be driven directly in<strong>to</strong> the<br />
surface <strong>of</strong> the metal.<br />
Engraving chisels are more delicate. <strong>The</strong>y have a<br />
thinner pr<strong>of</strong>ile and are struck with light hammers.<br />
<strong>The</strong>y are used only <strong>to</strong> remove fine shaving from a<br />
piece.<br />
Each type can be made in any shape <strong>to</strong> suit the requirements <strong>of</strong> the job.<br />
45
Filing<br />
Files are used <strong>to</strong> remove metal in a precise and<br />
controlled manner.<br />
Files normally have cutting edges on all four sides.<br />
This is not a problem when filing a flat surface,<br />
however, a common file can easily start cutting in<strong>to</strong><br />
an adjacent surface when working in a confined<br />
space.<br />
To avoid this problem a safe edge file is used any<br />
time a tenon is cut in<strong>to</strong> a bar. Here the narrow edge<br />
<strong>of</strong> the file has been ground away so it can safely slide<br />
along the <strong>to</strong>p <strong>of</strong> the vise while the face <strong>of</strong> the file cuts<br />
in<strong>to</strong> the bar.<br />
Any surface can be ground away <strong>to</strong> create a safe<br />
edge. In this example both faces have been ground<br />
smooth <strong>to</strong> create a narrow safe edge file <strong>to</strong> clean up<br />
the bot<strong>to</strong>m <strong>of</strong> a deep notch.<br />
In locksmithing, it is common <strong>to</strong> have <strong>to</strong> file small<br />
pieces that are hard <strong>to</strong> clamp in a vise. Hardwood<br />
blocks can be cut <strong>to</strong> shape <strong>to</strong> make jigs <strong>to</strong> hold<br />
irregularly shaped pieces.<br />
46
Bending Sheet Metal<br />
A simple method for bending sheet metal parts, where the part that is being bent will not be put under any<br />
stress, is <strong>to</strong> use a sheet metal fuller <strong>to</strong> create a shallow groove in the metal. This groove will force the part <strong>to</strong><br />
bend at that location.<br />
A fuller is a <strong>to</strong>ol that is specifically designed <strong>to</strong> create a groove<br />
or “fuller” in<strong>to</strong> the surface <strong>of</strong> a piece <strong>of</strong> metal. It is made the<br />
same way as a cold chisel however the sharp bevel is replaced<br />
by an edge with a radius.<br />
This fuller is used <strong>to</strong> create a shallow groove along the entire<br />
length <strong>of</strong> the line that needs <strong>to</strong> be bent.<br />
<strong>The</strong> fuller is driven directly in<strong>to</strong> the surface <strong>of</strong> the metal. <strong>The</strong><br />
shallow groove created by the fuller will create a thin area<br />
that will be easier <strong>to</strong> bend than the surrounding metal.<br />
<strong>The</strong> depth <strong>of</strong> this groove should only be 1/3 the thickness <strong>of</strong><br />
the metal.<br />
Flexing the metal will cause it <strong>to</strong> bend in a very tight radius<br />
along that line.<br />
47
Metal parts that need <strong>to</strong> have the full thickness <strong>of</strong> the metal at the bend area will require a different approach.<br />
One half <strong>of</strong> the bend will need <strong>to</strong> be clamped in a vise or along the edge <strong>of</strong> a heavy bar that is clamped in a vise.<br />
Using a pair <strong>of</strong> flat bit <strong>to</strong>ngs or an adjustable wrench, pressure is applied <strong>to</strong> the free end <strong>of</strong> the metal. Using a<br />
wooden mallet or a wood block, strike the bend area <strong>to</strong> focus the pressure in that location. This will cause the<br />
metal <strong>to</strong> bend slightly just above the jaws <strong>of</strong> the vise.<br />
Longer parts that cannot fit in the vise jaws will need<br />
<strong>to</strong> be supported on a heavy bar held in a vise or<br />
clamped <strong>to</strong> the edge <strong>of</strong> a workbench.<br />
48<br />
A longer bend will also need <strong>to</strong> be done in small increments. <strong>The</strong> process starts at one edge <strong>of</strong> the plate. This<br />
edge is bent as described above. Next, the unbent section beside the first bent section is bent until the edge<br />
aligns with the edge <strong>of</strong> first section. When the entire length <strong>of</strong> the bend is at the same angle, you can repeat<br />
the process <strong>to</strong> move the bend slightly further. A full 90-degree bend will need <strong>to</strong> be done in several stages.
A square corner can be shaped in sheet metal using the same<br />
principles that are used on hot metal.<br />
<strong>The</strong> corner is shaped by hammering the metal when it is cold.<br />
Cold hammering will create stress in the metal. This stress will<br />
reduce the malleability <strong>of</strong> the metal and cause it <strong>to</strong> harden.<br />
This is referred <strong>to</strong> as work hardening. <strong>The</strong> first sign <strong>of</strong> work<br />
hardening is the metal starting <strong>to</strong> resist being shaped by the<br />
hammer. Continued hammering will continue <strong>to</strong> stress the<br />
work area and will eventually result in a fracture that will ruin<br />
the work. To res<strong>to</strong>re the metal’s malleability, it will need <strong>to</strong> be<br />
normalized (see Heat Treating Carbon Steel, page 42).<br />
Hatchet Stake<br />
A hatchet stake is specialized anvil with a very thin blade-like<br />
pr<strong>of</strong>ile that is used <strong>to</strong> support metal while it is being bent. It<br />
is normally used <strong>to</strong> shape the light gauge sheet metal used by<br />
tinsmiths, but it can also be used on heavier s<strong>to</strong>ck. <strong>The</strong> hatchet<br />
stake is used when a bend needs <strong>to</strong> be made close <strong>to</strong> one edge.<br />
<strong>The</strong> work is struck with a wooden mallet or a simple hardwood<br />
block. <strong>The</strong> narrow pr<strong>of</strong>ile and steep angled edge <strong>of</strong> the stake<br />
makes it possible <strong>to</strong> bend very small parts.<br />
49
<strong>The</strong> hatchet stake is <strong>of</strong>ten used <strong>to</strong> start the bend on<br />
small cylinders. <strong>The</strong> outside edges <strong>of</strong> the cylinder<br />
are bent first.<br />
<strong>The</strong>se edges must be shaped as closely as possible<br />
<strong>to</strong> the final radius before bending the center <strong>of</strong> the<br />
cylinder. Cardboard gauges work well for this.<br />
<strong>The</strong> bend in the center <strong>of</strong> the cylinder is done by<br />
driving a fuller along the inside edge. <strong>The</strong> cylinder<br />
is supported by a heavy round bar that is bent in<br />
half.<br />
<strong>The</strong> basic shape <strong>of</strong> the cylinder is finished by<br />
hammering the outside edge <strong>of</strong> the cylinder around<br />
its circumference. It may be necessary <strong>to</strong> normalize<br />
(see p. 42) the cylinder during this process <strong>to</strong> remove<br />
any spring tension that may have developed. Once<br />
the cylinder has been fully s<strong>of</strong>tened it will be possible<br />
<strong>to</strong> hammer the seam completely shut.<br />
50
Using the Plans <strong>to</strong> Create Full Scale Patterns<br />
Each lock project in this manual has a set <strong>of</strong> plans that show every detail <strong>of</strong> the lock mechanism as well as<br />
all the parts needed <strong>to</strong> assemble the lock. <strong>The</strong> plans are not drawn <strong>to</strong> any scale. <strong>The</strong> information in the plans<br />
will need <strong>to</strong> be translated in<strong>to</strong> a full-scale drawing. <strong>The</strong> full-scale drawing can then be copied and used as the<br />
working patterns. Some <strong>of</strong> the parts are easier <strong>to</strong> translate in<strong>to</strong> full scale drawings by using the grid method<br />
rather than a series <strong>of</strong> measurements. For those parts, we also included a grid pattern as an option.<br />
All the plans have been built around either<br />
reference lines or reference edges. Reference<br />
lines are lines added <strong>to</strong> the drawings that<br />
can be used as a baseline for measuring.<br />
<strong>The</strong>y do not represent a detail that needs <strong>to</strong><br />
be cut out.<br />
Reference lines<br />
Reference edges<br />
Reference edges are the lines that define<br />
the outline <strong>of</strong> the part itself.<br />
To translate the plans in<strong>to</strong> a full-scale<br />
drawing, start by transferring any<br />
reference lines or reference edges outlined<br />
in the plans. You can then work from those<br />
lines <strong>to</strong> transfer all the measurements<br />
from the plans <strong>to</strong> the full-scale pattern.<br />
X 2<br />
X 1<br />
X 3<br />
Y 1 Y 2<br />
Y 3<br />
Reference edges or lines<br />
51
1/2” x 1/2” Grid<br />
(13 mm) Additional grid lines can be added<br />
<strong>to</strong> help estimate location <strong>of</strong> points<br />
<strong>The</strong> grid patterns are a made up <strong>of</strong> a series <strong>of</strong> reference lines that cross each other. <strong>The</strong> scale <strong>of</strong> the grid will<br />
be on the drawing. To translate these plans in<strong>to</strong> full scale patterns you must first create a full-scale grid <strong>to</strong><br />
use as a reference. Using this grid, you can then plot the location <strong>of</strong> all the points that intersect the grid and<br />
finally connect all those points <strong>to</strong> create the pattern.<br />
Using the Patterns <strong>to</strong> Cut Out<br />
the Sheet Metal Parts<br />
Using saws and cold chisels <strong>to</strong> cut away unwanted pieces from a sheet metal part was the only technology<br />
available <strong>to</strong> the medieval smith. It is a lot more labor intensive than using a metal cutting bandsaw for long<br />
straight cuts, however chisels can be used <strong>to</strong> work in much smaller spaces. In many cases they are still the<br />
only technology available <strong>to</strong> the average smith.<br />
<strong>The</strong> simplest method <strong>of</strong> transferring the pattern <strong>to</strong> a<br />
workpiece is <strong>to</strong> use spray adhesive <strong>to</strong> glue a pho<strong>to</strong>copy<br />
<strong>of</strong> the pattern <strong>to</strong> the s<strong>to</strong>ck <strong>to</strong> be cut out.<br />
<strong>The</strong> first step in the process is <strong>to</strong> use a center punch <strong>to</strong><br />
mark the endpoints <strong>of</strong> all reference lines and any hole<br />
locations on the pattern.<br />
52
Next, place the pattern piece on an anvil and begin cutting<br />
the outline <strong>of</strong> the pattern piece in<strong>to</strong> the surface <strong>of</strong> the metal.<br />
A narrow cold chisel is used <strong>to</strong> lightly score a groove along<br />
the edge <strong>of</strong> the pattern piece.<br />
<strong>The</strong> chisel is driven directly in<strong>to</strong> the face <strong>of</strong> the sheet metal.<br />
Move the chisel over slightly and drive the chisel in<strong>to</strong> the<br />
plate at that location. Continue this process until the entire<br />
line has a groove that is approximately half the thickness <strong>of</strong><br />
the metal. This sharp groove creates a stress point that will<br />
greatly weaken the metal and force it <strong>to</strong> break along that line.<br />
<strong>The</strong> waste piece <strong>of</strong> metal can now be broken away from the<br />
pattern piece. Pattern pieces with straight lines can be taken<br />
directly <strong>to</strong> the vise, and the waste piece flexed back and forth<br />
until it breaks away. It is usually easier <strong>to</strong> start on one side <strong>of</strong><br />
the line and work the crack over <strong>to</strong> the other side.<br />
For curved lines, the waste piece may need <strong>to</strong> be cut in<strong>to</strong><br />
sections first. A series <strong>of</strong> pieces with slightly curved lines will<br />
be easier <strong>to</strong> flex than a single piece that follows a longer curved<br />
line. A hacksaw is used <strong>to</strong> saw the waste in<strong>to</strong> manageable<br />
pieces.<br />
53
<strong>The</strong> pipe lock is a fine example <strong>of</strong> a blacksmith made lock. <strong>The</strong> design is uncomplicated. <strong>The</strong> parts are easily<br />
forged, and it works even if it is crudely made. Unfortunately, there is no way <strong>of</strong> knowing when this lock was<br />
first made or how that smith came up with the idea, but this is definitely one <strong>of</strong> the simplest lock mechanisms<br />
you will ever find.<br />
1/8”<br />
(3 mm)<br />
<strong>The</strong> body <strong>of</strong> the lock is made<br />
from a standard 3/4” (19 mm)<br />
I.D. schedule 40 black pipe.<br />
1-1/16”<br />
(27 mm)<br />
Use the forging gauge <strong>to</strong> establish<br />
the length <strong>of</strong> the body.<br />
Total length<br />
Use the upper edge <strong>of</strong> the forging<br />
gauge <strong>to</strong> transfer the locations <strong>of</strong><br />
the opening for the shackle and<br />
the hinge flaps.<br />
74
A 1/2” (13 mm) wide opening is needed <strong>to</strong> accept the shackle. To determine the actual length <strong>of</strong> the saw cut,<br />
place the circular cu<strong>to</strong>ut on the forging gauge on the centerline <strong>of</strong> the lock body. Scribe the location <strong>of</strong> the<br />
outside edges <strong>of</strong> the gauge.<br />
<strong>The</strong> same gauge is used <strong>to</strong> outline the saw cut for the hinge flaps.<br />
Hinge flaps sawn out<br />
Hinge flaps straightened out and shaped<br />
Rough out the opening for the shackle with a<br />
hacksaw and narrow chisel.<br />
Rough out the hinge area by drilling a 1/4”(6 mm)<br />
hole on the <strong>to</strong>p centerline and making a saw cut that<br />
connects the end <strong>of</strong> the lock body <strong>to</strong> the drill hole.<br />
75
Use a 1/2”(13mm) square bar <strong>to</strong> size the opening.<br />
Drill the hole for the pivot pin <strong>of</strong> the shackle.<br />
1/2”<br />
(13 mm)<br />
1/2”<br />
(13 mm)<br />
<strong>The</strong> shackle is made from a length <strong>of</strong> 1/2” (13 mm) square bar. For the ease <strong>of</strong> handling, it should be at least<br />
12” (305 mm) long.<br />
<strong>The</strong> hinge section is forged first. Place the bar on the<br />
anvil so that one side <strong>of</strong> the bar is sitting on the anvil.<br />
Next rotate the bar 45-degrees so that one corner<br />
<strong>of</strong> the bar is resting on the anvil face. Align the <strong>to</strong>p<br />
corner <strong>of</strong> the bar so that it is directly above the corner<br />
sitting on the anvil. All <strong>of</strong> the forging for the shackle<br />
will be done with the bar oriented this way. This is<br />
done solely for decorative reasons, and this simple<br />
change adds a great deal <strong>of</strong> interest <strong>to</strong> an otherwise<br />
plain looking lock.<br />
Create an <strong>of</strong>fset at 3/4” (19 mm) from the end <strong>of</strong> the<br />
bar and forge the end section down <strong>to</strong> 1/4” x 1/2”<br />
(6 mm x 13 mm) and 1-1/2” (38 mm) long.<br />
<strong>Forge</strong> the barrel <strong>of</strong> the hinge by rolling the end in<strong>to</strong><br />
a tight curl. <strong>The</strong> inside needs <strong>to</strong> accept a 1/4” (6 mm)<br />
pin.<br />
76
Minimum<br />
1”<br />
(25 mm)<br />
9”<br />
(229 mm)<br />
3/8”<br />
(10 mm)<br />
1/2”<br />
(13 mm)<br />
<strong>The</strong> open end <strong>of</strong> the shackle is made next. Measure down 9” (229 mm) from the center <strong>of</strong> the hinge barrel and<br />
forge a flat section in the shackle, as shown.<br />
Place the bending fork in the vise. Heat<br />
a section <strong>of</strong> the shackle and place it in<br />
the fork. Pull the cool end <strong>of</strong> the bar<br />
around <strong>to</strong> create a slight bend. Move the<br />
shackle further in<strong>to</strong> the fork and try <strong>to</strong><br />
put the same curvature in that section.<br />
Repeat the process until the heat is lost.<br />
Start by bending a smooth curve that<br />
is oversized, and then continue the<br />
process until the shackle has a smooth<br />
horseshoe shape and conforms <strong>to</strong> the<br />
forging gauge.<br />
Bend the shackle until the shape is a<br />
smooth curve, and the pivot point <strong>of</strong><br />
the hinge is aligned at (A) and the sides<br />
<strong>of</strong> the flat section <strong>of</strong> the shackle are in<br />
the middle and parallel <strong>to</strong> the sides <strong>of</strong><br />
the opening in the gauge at (B). <strong>The</strong><br />
shackle is cut from the bar at (C).<br />
77
<strong>The</strong> bolt head is used as a drift that will shape the<br />
key. Use two nuts <strong>to</strong> protect the threads <strong>of</strong> the bolt<br />
while it is clamped in the vise. Place the bolt upright<br />
in the vise. Heat the drilled end <strong>of</strong> the key and drive<br />
it over the head <strong>of</strong> the bolt.<br />
Beveled edges help<br />
<strong>to</strong> shape the opening<br />
1-1/2”<br />
(38 mm)<br />
<strong>The</strong> other end <strong>of</strong> the key can<br />
now be shaped in<strong>to</strong> a bow.<br />
<strong>Forge</strong> a flat section 1-1/2” (38<br />
mm) long and 5/8” (16 mm)<br />
wide and 1/8” (3 mm) thick.<br />
5/8”<br />
(16 mm)<br />
1/8”<br />
(3 mm)<br />
A narrow slot will be punched in<strong>to</strong> the flat face, and<br />
then shaped in<strong>to</strong> a ring <strong>to</strong> form the bow <strong>of</strong> the key.<br />
Heat the bar, and lay out the location <strong>of</strong> the slot by<br />
driving a slot punch lightly in<strong>to</strong> the surface. Examine<br />
the position <strong>of</strong> the punch mark. If it is not exactly in<br />
the middle <strong>of</strong> the bar, make a new mark <strong>to</strong> try <strong>to</strong><br />
center the slot. <strong>The</strong> mark for the hole should be in<br />
the middle <strong>of</strong> the bar with an equal amount <strong>of</strong> metal<br />
on all sides. When the mark is in the correct location,<br />
cut the slot in<strong>to</strong> the bar. Carefully pry open the slot<br />
with a narrow round punch. Clean up any ragged<br />
edges with a file, and forge <strong>to</strong> shape<br />
80
[2] Classic Pipe <strong>Lock</strong><br />
Shackle<br />
Hinge flaps<br />
Hinge pin<br />
Shackle opening<br />
<strong>Lock</strong> body<br />
Key<br />
<strong>Lock</strong>ing pin<br />
81
<strong>Lock</strong> Body Pattern<br />
19.3 deg.<br />
7-5/8” radius<br />
194 mm<br />
Bevel on <strong>to</strong>p <strong>of</strong><br />
pattern<br />
3”<br />
(75 mm)<br />
2-1/2”<br />
(63 mm)<br />
Bevel on underside<br />
<strong>Lock</strong> body<br />
radius gauge<br />
R = 7/16”<br />
(11 mm)<br />
R = 9/32”<br />
(7 mm)<br />
1-7/8”<br />
(48 mm)<br />
82<br />
This style <strong>of</strong> pipe lock uses a key that threads on<strong>to</strong> a bolt inside the lock. <strong>The</strong> bolt is connected <strong>to</strong> a springloaded<br />
locking pin that secures the free end <strong>of</strong> the shackle. Turning the key will pull back the locking pin <strong>to</strong><br />
release the shackle. Since the key is threaded <strong>to</strong> the locking pin inside the lock, the key is quite <strong>of</strong>ten left in<br />
the lock while the lock is open.
<strong>The</strong> pipe lock has a tapered tube that contains the<br />
locking mechanism. Use the pattern provided <strong>to</strong> cut<br />
out the sheet metal blank for the lock body.<br />
File the long edges <strong>of</strong> the lock body until they are as<br />
straight as possible.<br />
<strong>The</strong> edges also need <strong>to</strong> be beveled so<br />
they can overlap each other once the<br />
lock body is bent in<strong>to</strong> shape.<br />
<strong>The</strong> hatchet stake is used <strong>to</strong> form both <strong>of</strong><br />
the outside edges <strong>of</strong> the tube. Remember<br />
that the tube is tapered. <strong>The</strong> bend lines<br />
will need <strong>to</strong> follow a tapering pattern<br />
<strong>to</strong>wards the small end <strong>of</strong> the tube.<br />
Bend along radial lines<br />
83
File away the taper from the outside<br />
edge <strong>of</strong> the lock body <strong>to</strong> create a rim<br />
that is parallel <strong>to</strong> the centerline. File<br />
the inside edge <strong>of</strong> the collar until it<br />
can be driven on<strong>to</strong> the end <strong>of</strong> the lock<br />
body. Cut the collar from the bar and<br />
file the outside shape.<br />
1/2”<br />
(13 mm)<br />
<strong>The</strong> hinge collar is forged from 1/2”<br />
(13 mm) square bar. Punch a slot that<br />
is 1/2” (13 mm) long and drift the<br />
hole until it is slightly smaller than<br />
the small end <strong>of</strong> the pipe.<br />
1/2”<br />
(13 mm)<br />
3/4”<br />
(19 mm)<br />
1/4”<br />
(6 mm)<br />
Measure approximately 3/4” (19 mm) from the <strong>to</strong>p <strong>of</strong> the collar and cut the collar from the bar. <strong>The</strong> hinge<br />
slot is cut in<strong>to</strong> the bar by first drilling a 1/4" (6 mm) hole near the <strong>to</strong>p <strong>of</strong> the collar. <strong>The</strong> sides are cut out using<br />
a hacksaw.<br />
86
<strong>The</strong> inside <strong>of</strong> the collar must be filed at an angle <strong>to</strong><br />
match the taper <strong>of</strong> the lock body. Continue shaping<br />
the collar until it can be driven on<strong>to</strong> the end <strong>of</strong> the<br />
pipe.<br />
<strong>The</strong> collar is completed by drilling the hole for the<br />
hinge pin.<br />
Drive the two collars on<strong>to</strong> the pipe lock body.<br />
Feed a heavy steel wire through the lock body <strong>to</strong> tie<br />
the collars in place. Wire the collars in three places.<br />
<strong>The</strong> wires are needed even if the parts appear <strong>to</strong><br />
be secure. <strong>The</strong> heat from the fire can loosen parts<br />
during brazing.<br />
Add a thin copper wire <strong>to</strong> the <strong>to</strong>p <strong>of</strong> the collar and<br />
place the lock body upright in the fire (see p. 38).<br />
<strong>The</strong> same process is used <strong>to</strong> braze the small collar.<br />
87
Cross peen the end <strong>of</strong> the shackle <strong>to</strong> widen it slightly.<br />
This will provide the material needed <strong>to</strong> shape the<br />
shackle around the base <strong>of</strong> the collar.<br />
File the hinge section <strong>of</strong> the shackle until it conforms<br />
<strong>to</strong> the shape <strong>of</strong> the collar.<br />
Mark the location <strong>of</strong> the hinge pin on the shackle.<br />
Drill the hole in the shackle, but do not rivet the<br />
shackle in place.<br />
With the shackle in position, scribe the approximate<br />
centerline <strong>of</strong> the pipe lock body on the free end <strong>of</strong><br />
the shackle.<br />
Cut a 1/4” (6 mm) square notch across the inside<br />
edge <strong>of</strong> the shackle.<br />
90
<strong>The</strong> shackle is locked in position with<br />
a spring-loaded pin that fits in<strong>to</strong> the<br />
open end <strong>of</strong> the shackle.<br />
<strong>The</strong> pin is made from a 3/8” (10 mm)<br />
round bar.<br />
3/8”<br />
(10 mm)<br />
File a 1/4" (6 mm) square tenon on the<br />
end <strong>of</strong> the bar that is 1-1/4” (32 mm)<br />
long.<br />
3/8”<br />
(10 mm)<br />
1/4”<br />
(6 mm)<br />
1-1/4”<br />
(32 mm)<br />
File the 1/4" (6 mm) square tenon in<strong>to</strong><br />
an octagonal tenon. File each corner<br />
<strong>of</strong> the bar evenly until all 8 facets are<br />
parallel <strong>to</strong> the bar and the face <strong>of</strong> each<br />
facet is exactly the same width.<br />
Complete the tenon by filing the<br />
corners <strong>of</strong> the octagon in<strong>to</strong> a 1/4" (6<br />
mm) rod.<br />
1/4”<br />
(6 mm)<br />
1/4”<br />
(6 mm)<br />
3/4”<br />
(19 mm)<br />
91
Cut the small washer from the bar.<br />
Place the washer on a 1/4" (6 mm) s<strong>to</strong>ve bolt that will<br />
serve as a handle when testing the fit <strong>of</strong> the washer<br />
inside the lock.<br />
This washer will need <strong>to</strong> have a beveled edge that<br />
matches the side <strong>of</strong> the lock body.<br />
Carefully file the circumference <strong>of</strong> the washer until<br />
the centerline <strong>of</strong> the washer is 1-7/8” (48 mm) from<br />
the large end <strong>of</strong> the lock body.<br />
1-7/8”<br />
(48 mm)<br />
When the washer is the correct size it can be brazed<br />
<strong>to</strong> the lock body.<br />
<strong>The</strong> bolt that was used as a handle can be transformed<br />
in<strong>to</strong> a clamp for the washer by filing a square tapered<br />
head that will lock in<strong>to</strong> the square hole <strong>of</strong> the washer.<br />
File the flat faces in line with the screwdriver slot<br />
so that it can be used <strong>to</strong> determine the correct<br />
orientation inside the lock.<br />
<strong>The</strong> sides <strong>of</strong> the square hole in the washer should be<br />
parallel <strong>to</strong> the sides <strong>of</strong> the hinge flaps <strong>of</strong> the small<br />
collar on the lock body.<br />
Place a short length <strong>of</strong> copper wire inside the<br />
lock body. <strong>The</strong> small end <strong>of</strong> the lock body should<br />
be placed in the cold side <strong>of</strong> the fire <strong>to</strong> prevent<br />
overheating.<br />
94
Check the fit <strong>of</strong> the locking pin inside the lock. It<br />
should still slide freely in the lock.<br />
5/16”<br />
(8 mm)<br />
1/8”<br />
(3 mm)<br />
Slide the locking pin in<strong>to</strong> the lock body until the end <strong>of</strong> the locking pin is flush with the small end <strong>of</strong> the lock<br />
body.<br />
Scribe the location <strong>of</strong> the hasp opening on<strong>to</strong> the locking pin.<br />
Align the washer <strong>to</strong> this mark and scribe the outside edge <strong>of</strong> the washer on<strong>to</strong> the locking pin.<br />
Cut out a 1/8” x 5/16” (3 mm x 8 mm) square tenon on the end <strong>of</strong> the pin.<br />
Undercut the outside edges <strong>of</strong> the tenon.<br />
Place the washer on<strong>to</strong> the locking pin.<br />
Use a small fuller <strong>to</strong> lock the washer in<strong>to</strong> position.<br />
95
1-1/2”<br />
(38 mm)<br />
1/8”<br />
(3 mm)<br />
Hatchet stake<br />
<strong>The</strong> arm <strong>of</strong> the shackle must be bent <strong>to</strong> 90-degrees so<br />
that it can be inserted in<strong>to</strong> the tail piece <strong>of</strong> the lock.<br />
This bend should be made at approximately 1-1/2”<br />
(38 mm) above the centerline <strong>of</strong> the spring holder. A<br />
hatchet stake or a piece <strong>of</strong> flat bar held in a vise can<br />
be used <strong>to</strong> support the work.<br />
Set the spring assembly on <strong>to</strong>p <strong>of</strong> the lock body.<br />
Trim the end <strong>of</strong> the spring holder so that the tip is<br />
1/8” (3 mm) behind the opening for the key at the<br />
base <strong>of</strong> the lock body.<br />
5”<br />
(127 mm)<br />
1/8”<br />
(3 mm)<br />
3/64”<br />
(1.5 mm)<br />
3/16”<br />
(5 mm)<br />
110<br />
<strong>The</strong> spring is forged from a 5” (125 mm) length <strong>of</strong> carbon steel wire that is 1/8” (3 mm) in diameter. <strong>Forge</strong><br />
and file the spring blank <strong>to</strong> a 3/64” x 3/16” (1.5 mm x 5 mm) flat bar.
Heat the center <strong>of</strong> the spring and bend it in<br />
half. Place the spring on the spring holder<br />
<strong>to</strong> check the fit. Heat and adjust the spring<br />
tip until it fits the spring holder without any<br />
gaps between the spring and the tip <strong>of</strong> the<br />
holder.<br />
3/16” x 3/16”<br />
(5 mm x 5 mm)<br />
File the base <strong>of</strong> the spring holder <strong>to</strong> a square<br />
section that is slightly smaller than the hole<br />
in the end panel <strong>of</strong> the lock.<br />
<strong>The</strong> shoulders on the <strong>to</strong>p and bot<strong>to</strong>m <strong>of</strong> the<br />
spring holder are filed back until they are<br />
sitting 1/16” (2 mm) in front <strong>of</strong> the shackle.<br />
<strong>The</strong> transition between the shoulders <strong>of</strong><br />
the spring holder and the blade should be<br />
just deep enough <strong>to</strong> fit the thickness <strong>of</strong> the<br />
spring.<br />
1/16”<br />
(2 mm)<br />
<strong>The</strong> spring can now be trimmed <strong>to</strong> fit the<br />
holder. Start by cutting the ends <strong>of</strong> the<br />
spring until they just clear the shoulders <strong>of</strong><br />
the spring holder.<br />
Test the spring by placing it on the holder<br />
and inserting the shackle in<strong>to</strong> the lock. If<br />
the spring does not open inside the lock,<br />
continue trimming the ends until they can<br />
clear the end panel <strong>of</strong> the lock body.<br />
111
Place the spring back on the spring holder and slide<br />
the key over the spring until it s<strong>to</strong>ps. Ideally, this<br />
should happen when the key is halfway up the<br />
spring holder. Also, at this point the spring should<br />
be flat against the spring holder. If the key cannot<br />
move far enough <strong>to</strong> fully compress the spring,<br />
additional material will need <strong>to</strong> be removed from<br />
the opening in the key.<br />
If the spring <strong>of</strong>fers <strong>to</strong>o much resistance, it must be<br />
thinned down by filing equal amounts from each<br />
face. Make a cus<strong>to</strong>m wedge block that supports the<br />
spring while filing. Continue filing and testing until<br />
the desired tension is reached.<br />
A makeshift holder will need <strong>to</strong> be made <strong>to</strong> handle<br />
the spring assembly during brazing. This holder will<br />
also prevent the heat from traveling up the spring<br />
holder.<br />
Drill a hole in<strong>to</strong> a heavy bar. <strong>The</strong> holes must be sized<br />
so that the bar can be driven firmly in place without<br />
damaging the spring or the spring holder.<br />
<strong>The</strong> tip <strong>of</strong> the spring holder needs <strong>to</strong> be pointing<br />
downward in the fire during brazing. It may be<br />
necessary <strong>to</strong> bend the arm <strong>of</strong> the shackle out <strong>of</strong> the<br />
way during this process. This bend should be placed<br />
in a location that can be easily reached without<br />
affecting the spring holder.<br />
112
To complete the shackle, clean up the spring<br />
assembly, adjust the shackle arm so that it is parallel<br />
<strong>to</strong> the spring holder, and do a final test <strong>of</strong> the key<br />
inside the lock.<br />
<strong>The</strong> end block that secures the tail <strong>of</strong> the shackle is<br />
the last piece <strong>of</strong> the lock <strong>to</strong> be made. It is forged from<br />
a length <strong>of</strong> 1/2” (13 mm) square bar.<br />
A 3/8” (10 mm) hole is punched at one end.<br />
Insert the shackle in<strong>to</strong> the body <strong>of</strong> the lock, and slide the key partway in<strong>to</strong> the lock. This will hold the shackle<br />
in the correct position in the lock. Slide the end block over the tail <strong>of</strong> the shackle, and cut the end block level<br />
with the bot<strong>to</strong>m edge <strong>of</strong> the body <strong>of</strong> the lock. File the cut smooth and rivet in place.<br />
113
[4] Classic Medieval<br />
Spring Padlock<br />
Shackle & base plate<br />
Key<br />
Shackle opening<br />
<strong>Lock</strong> body<br />
Spring assembly<br />
114
1/2” Grid<br />
(13 mm)<br />
115
This is another common form <strong>of</strong> spring padlock. Unlike most spring locks with the distinctive straight bar<br />
shackle arm, this lock design resembles a typical padlock with a hinged shackle. <strong>The</strong> free end <strong>of</strong> the shackle<br />
is locked inside the lock body by the spring assembly. <strong>The</strong> spring assembly is not part <strong>of</strong> the shackle. It is a<br />
separate unit that must be removed from the lock <strong>to</strong> release the shackle.<br />
1-1/16”<br />
(27 mm)<br />
1/8”<br />
(3 mm)<br />
4”<br />
(101 mm)<br />
3/4”<br />
(19 mm)<br />
116<br />
<strong>The</strong> lock body is made from a short length <strong>of</strong> standard 3/4" (19 mm) I.D. black pipe.<br />
SAFETY WARNING: Do not use galvanized pipe. Burning galvanized metal produces <strong>to</strong>xic fumes.<br />
<strong>Forge</strong> a taper that is 4” (101 mm) long at the end <strong>of</strong> a longer piece <strong>of</strong> pipe. <strong>The</strong> small diameter <strong>of</strong> the taper<br />
should be approximately 3/4” (19 mm) O.D.
Begin by forging a very steep taper at the end <strong>of</strong> the<br />
pipe. Try <strong>to</strong> keep the heat <strong>to</strong> the very end <strong>of</strong> the pipe<br />
as much as possible. This will prevent the pipe from<br />
dis<strong>to</strong>rting as it is being forged. Use a light hammer<br />
and strike the end <strong>of</strong> the pipe at a 45-degree angle.<br />
Work systematically around the circumference <strong>of</strong> the<br />
pipe until the inside diameter reaches approximately<br />
1/2” (13 mm). Do not try <strong>to</strong> forge <strong>to</strong>o much at one<br />
time. Take several passes around the pipe <strong>to</strong> create a<br />
very smooth opening.<br />
This forged chamfer at the end <strong>of</strong> the pipe is used <strong>to</strong><br />
reinforce the pipe walls while forging the main taper<br />
<strong>of</strong> the lock body.<br />
1-1/16”<br />
(27 mm)<br />
Centerline <strong>of</strong> pipe<br />
4”<br />
(101 mm)<br />
3/4”<br />
(19 mm)<br />
Return the pipe <strong>to</strong> the fire and heat up a 3” (75 mm) length at the end <strong>of</strong> the pipe.<br />
Move the pipe <strong>to</strong> the face <strong>of</strong> the anvil and lightly hammer the side <strong>of</strong> the pipe near the end. Once again<br />
systematically work around the circumference <strong>of</strong> the pipe until that section <strong>of</strong> pipe blends in with the short<br />
taper at the end. This will produce a slightly longer taper.<br />
Continue this process, working up the pipe until it has a smooth taper from 1” (25 mm) OD <strong>to</strong> 3/4” (19 mm)<br />
OD.<br />
During forging, make sure that the centerline <strong>of</strong> the small opening stays lined up with the centerline <strong>to</strong> the<br />
unforged portion <strong>of</strong> the pipe.<br />
117
This padlock has a very elaborate ring for the<br />
shackle. <strong>The</strong> base plate <strong>of</strong> this ring extends <strong>to</strong> the<br />
front <strong>of</strong> the lock where it is used <strong>to</strong> reinforce the<br />
opening for the shackle.<br />
This ring is assembled from three separate pieces<br />
that are brazed <strong>to</strong>gether. <strong>The</strong> ring and the center bar<br />
detail are forged from one piece and the decorative<br />
end plates are added <strong>to</strong> it.<br />
1/2”<br />
(13 mm)<br />
1”<br />
(25 mm)<br />
2”<br />
(51 mm)<br />
1/2”<br />
(13 mm)<br />
120<br />
<strong>The</strong> ring is shaped from a 1/2" x 1” (13 mm x 25 mm) bar. A 3/4" (19 mm) long slot is punched on the centerline<br />
<strong>of</strong> the bar. <strong>The</strong> outside <strong>of</strong> the slot must be at least 2" (51 mm) from the end <strong>of</strong> the bar.<br />
<strong>The</strong> slot is drifted <strong>to</strong> a 1/2" (13 mm) round.
3”<br />
(76 mm)<br />
With the drift in place, hammer the bar over the<br />
edge <strong>of</strong> the anvil until a straight edge is created on<br />
the bot<strong>to</strong>m <strong>of</strong> the ring detail.<br />
Continue drifting and realigning the hole until the<br />
inside diameter is 3/4" (19 mm).<br />
<strong>The</strong> remainder <strong>of</strong> the base in front <strong>of</strong> the ring is<br />
forged <strong>to</strong> a 1/2” (13 mm) square bar.<br />
File the bot<strong>to</strong>m <strong>of</strong> the base flat and use a hacksaw <strong>to</strong><br />
cut out the bot<strong>to</strong>m section <strong>of</strong> the ring.<br />
3/16”<br />
(5 mm)<br />
2”<br />
(51 mm)<br />
1/2”<br />
(13 mm)<br />
1/8”<br />
(3 mm)<br />
Cut away the base <strong>of</strong> the shackle ring as shown.<br />
121
1/8” (3 mm) spacer<br />
keeps springs aligned<br />
<strong>The</strong> edge <strong>of</strong> the plug must be tapered <strong>to</strong> fit the lock<br />
body.<br />
Remove the plug from the bolt. Assemble the springs<br />
in the plug with the filed edges facing each other.<br />
Both springs should be parallel with each other and<br />
with each spring facing up. Place a 1/8” (3 mm) spacer<br />
between the springs. Braze the springs <strong>to</strong> the plug.<br />
1/2”<br />
(13 mm)<br />
1/2”<br />
(13 mm)<br />
3-1/2”<br />
(89 mm)<br />
130<br />
<strong>The</strong> key is used <strong>to</strong> compress the springs until they clear the shackle. It is forged from a length <strong>of</strong> 1/2" (13 mm)<br />
square bar.
<strong>The</strong> notches on the key should be sized so that the<br />
springs are fully compressed when the key is 3/4 <strong>of</strong><br />
the way up the spring holder. This will allow the key<br />
<strong>to</strong> push the springs past the shackle as well as push<br />
the spring assembly partway outside the lock.<br />
Insert the spring assembly in<strong>to</strong> the lock and test the<br />
key.<br />
1/2”<br />
(13 mm)<br />
1/2”<br />
(13 mm)<br />
<strong>The</strong> outside <strong>of</strong> the lock body has three ornamental details in the form <strong>of</strong> medieval serpents. <strong>The</strong>se details are<br />
optional but they are simple <strong>to</strong> make and add a great deal <strong>to</strong> the overall look <strong>of</strong> the lock.<br />
<strong>The</strong> serpents are forged from a length <strong>of</strong> 1/2" (13 mm) square bar.<br />
131
Cover Plate<br />
5/16”<br />
(8 mm)<br />
7/16”<br />
(11 mm)<br />
1/16”<br />
(2 mm)<br />
1-1/2”<br />
(38 mm)<br />
5/8”<br />
(16 mm)<br />
3-1/4”<br />
(83 mm)<br />
Key Blank<br />
3/4”<br />
(19 mm)<br />
2-1/2”<br />
(64 mm)<br />
R = 3/32”<br />
(2.5 mm)<br />
1/4”<br />
(6 mm)<br />
3/4”<br />
(19 mm)<br />
3/8”<br />
(10 mm)<br />
138
Mainspring Bending Jig<br />
1/8”<br />
(3 mm)<br />
R = 1/4”<br />
(6 mm)<br />
2-5/16”<br />
(58 mm)<br />
2”<br />
(51 mm)<br />
5/8”<br />
(16 mm)<br />
3/8”<br />
(10 mm)<br />
5/8”<br />
(16 mm)<br />
7/8”<br />
(22 mm) 3/16”<br />
(5 mm)<br />
15/16”<br />
(24 mm)<br />
3/4”<br />
(19 mm)<br />
1/2”<br />
(13 mm)<br />
2-7/8”<br />
(73 mm)<br />
5”<br />
(125 mm)<br />
Mainspring Grid Pattern<br />
1/4” Grid<br />
(6 mm)<br />
139
3/16” dia.<br />
(5 mm)<br />
3/4”<br />
(19 mm)<br />
2-1/2”<br />
(63 mm)<br />
1/4”<br />
(6 mm)<br />
3/4”<br />
(19 mm)<br />
3/8”<br />
(10 mm)<br />
148<br />
<strong>The</strong> key is made from a 2-1/2” (63 mm) piece <strong>of</strong> 1/4” x 3/4” (6 mm x 19 mm) flat bar. Drill a 3/16” (5 mm) hole<br />
where the bow <strong>of</strong> the key transitions <strong>to</strong> the stem. Use a series <strong>of</strong> hacksaw cuts <strong>to</strong> outline the shape.<br />
<strong>The</strong> bow <strong>of</strong> the key is the 3/4” (19 mm) square section at the end <strong>of</strong> the bar. Heat the bow and rotate it<br />
45-degrees until it lines up with the centerline <strong>of</strong> the key.<br />
Drill a 1/2" (13 mm) hole in the center <strong>of</strong> the square section for the bow. Shape the pr<strong>of</strong>ile <strong>of</strong> the bow with a<br />
file.<br />
Finish the key by filing the stem <strong>of</strong> the key, as well as the pivot pin in front <strong>of</strong> the key bit <strong>to</strong> a round cross<br />
section that is 1/4” (6 mm).
[6] Classic Crab <strong>Lock</strong><br />
Backplate<br />
Latches<br />
Key<br />
Lever<br />
Cover plates<br />
Mainspring<br />
149
Backplate 1<br />
Bend allowance<br />
1/16”<br />
(1.6 mm)<br />
3-1/2”<br />
(88 mm)<br />
1-1/8”<br />
(29 mm)<br />
3-1/4”<br />
(81 mm)<br />
4-13/16”<br />
(121 mm)<br />
R = 1-7/8”<br />
(47 mm)<br />
1-1/2”<br />
(38 mm)<br />
7-1/4”<br />
(184 mm)<br />
1/2”<br />
(13 mm)<br />
5/8”<br />
(16 mm)<br />
1/4” x 1/4” Grid<br />
(6 mm x 6 mm)<br />
1/2”<br />
(13 mm)<br />
150
Backplate 2<br />
3-7/8”<br />
(98 mm)<br />
2-1/2”<br />
(63 mm)<br />
A<br />
4-7/8”<br />
(124 mm)<br />
A = 3/16” dia.<br />
(5 mm)<br />
A<br />
3/4”<br />
(19 mm)<br />
3/8” dia.<br />
(10 mm)<br />
1/4”<br />
(6 mm)<br />
5/8”<br />
(16 mm)<br />
3/8”<br />
(10 mm)<br />
151
Lay the latches in position on the backplate.<br />
Use dividers <strong>to</strong> make sure that the inside<br />
face <strong>of</strong> each leg is exactly 3/8” (10 mm)<br />
from the centerline on the backplate. <strong>The</strong><br />
<strong>to</strong>tal distance between the legs must be 3/4”<br />
(19 mm) for the lever that opens the jaws <strong>to</strong><br />
work properly.<br />
Distance = 3/8”<br />
(10 mm)<br />
Make any adjustments needed <strong>to</strong> have the<br />
hinge barrels on the legs match up as closely<br />
as possible <strong>to</strong> the pattern on the backplate.<br />
<strong>The</strong> length from the <strong>to</strong>p <strong>of</strong> the jaws <strong>to</strong> the<br />
center <strong>of</strong> the hinge is 3-5/8” (92 mm). <strong>The</strong><br />
legs with a single wrap should be slightly<br />
longer than necessary. Fine tune the length<br />
by continuing <strong>to</strong> roll the hinge barrel until<br />
the legs are the correct length.<br />
Extra curl on hinge<br />
barrel brings it in<strong>to</strong> line<br />
If the hinge barrels on the legs do not match<br />
the pattern exactly, mark the new location<br />
for the pivot pins on the backplate.<br />
1/4”<br />
(6 mm)<br />
156<br />
Cut out the pattern for the cover plate.<br />
Scribe a line on the backplate that is 1/4” (6 mm) below the <strong>to</strong>p edge <strong>of</strong> the backplate.<br />
Extend the reference lines for the pivot pins on the backplate so they will extend beyond the outline <strong>of</strong> the<br />
cover plate.<br />
Set the cover plate on the backplate. Line up the bend line on the cover plate with the 1/4” (6 mm) mark at<br />
the <strong>to</strong>p <strong>of</strong> the cover plate. Both centerlines should be lined up.<br />
Use a straight edge <strong>to</strong> transfer the scribe lines for the pivot pins from the backplate <strong>to</strong> the cover plate.<br />
If the location does not match perfectly, use painter’s tape <strong>to</strong> cover the original lines on the pattern. Mark the<br />
new locations.
Drill a 3/16” (5 mm) hole at one <strong>of</strong> the pivot pin locations on the backplate and cover plate.<br />
Assemble the two plates by inserting a 3/16” (5 mm) pin through the hole. Align the other side <strong>of</strong> the cover<br />
plate on the backplate and clamp the two <strong>to</strong>gether.<br />
Drill the other pivot hole. Remove the cover plate and drill only the cover plate holes <strong>to</strong> 1/4” (6 mm).<br />
1”<br />
(25 mm)<br />
1/4”<br />
(6 mm)<br />
1/4”<br />
(6 mm)<br />
3/16”<br />
(5 mm)<br />
<strong>The</strong> pivot pins for the claws are 1/4” (6 mm) round bars that are at least 1” (25 mm) long.<br />
File a 3/16” (5 mm) round tenon on one end <strong>of</strong> each bar that is 1/4” (6 mm) long.<br />
157
Place the bolt on the backplate in a locked position. Scribe the location <strong>of</strong> the end <strong>of</strong> the bolt on<strong>to</strong> the backplate.<br />
Place the rear bolt guide over the bolt just in front <strong>of</strong> the tail <strong>of</strong> the bolt. Scribe that location on<strong>to</strong> the backplate.<br />
Remove the bolt and position the spring so that the contact point for the spring is level, or slightly above the<br />
reference line for the <strong>to</strong>p <strong>of</strong> the bolt. <strong>The</strong> spring should be sitting slightly forward <strong>of</strong> the reference line for<br />
the end <strong>of</strong> the bolt when it is in the locked position. This will put the spring under tension when the bolt is<br />
installed.<br />
Clamp the spring in place and scribe the location <strong>of</strong> the square tenon on<strong>to</strong> the backplate. Cut the slot for the<br />
tenon in<strong>to</strong> the backplate.<br />
Place the spring in position on the backplate. Cut the end <strong>of</strong> the spring <strong>to</strong> length and forge the end in<strong>to</strong> a<br />
decorative scroll. Reinstall the spring in the backplate and make any final adjustments that may be necessary.<br />
Heat treat the spring and temper <strong>to</strong> a full blue. Reheat the end block with a <strong>to</strong>rch <strong>to</strong> anneal the tenons.<br />
Rivet the spring <strong>to</strong> the backplate. Rivet the cover plate <strong>to</strong> the <strong>to</strong>p <strong>of</strong> the spring.<br />
178<br />
Clamp the bolt <strong>to</strong> the backplate. Prepare the bolt by first clamping it <strong>to</strong> a square block or a short piece <strong>of</strong> angle<br />
iron. <strong>The</strong> wider footprint <strong>of</strong> the block will make it easier <strong>to</strong> position and clamp the bolt <strong>to</strong> the backplate.<br />
Install the clamping block in the middle <strong>of</strong> the bolt so that it will not be in the way <strong>of</strong> the front or rear bolt<br />
guides. Use a light hammer <strong>to</strong> make fine adjustments <strong>to</strong> the position <strong>of</strong> the bolt along the <strong>to</strong>p reference line.<br />
Line up the rear bolt guide <strong>to</strong> the reference line made earlier and rivet it in place.<br />
Hold the front bolt guide in place by clamping one side <strong>of</strong> the guide. Undo the clamp holding the bolt and<br />
test the operation <strong>of</strong> the bolt in the lock. If it works smoothly, rivet the open side <strong>of</strong> the front bolt guide. <strong>The</strong>n<br />
remove the clamp and rivet the other side.
[8] Classic Medieval<br />
Spring <strong>Lock</strong><br />
Key<br />
Backplate<br />
Bolts<br />
Mainspring<br />
Levers<br />
Bolt guides<br />
Cover plate<br />
179
<strong>The</strong> medieval spring lock is similar in design and<br />
function <strong>to</strong> the cupboard lock. However, for this<br />
lock, the mechanism is hidden inside a heavy door<br />
panel. As a result, the mechanism is plain, and the<br />
cover plate features the decorative elements <strong>of</strong> the<br />
lock. This lock features a double bolt design and a<br />
more complicated ward system.<br />
Cut out the cover plate and transfer all the reference<br />
lines from the pattern <strong>to</strong> the cover plate.<br />
<strong>The</strong> keyhole and the square hole for the bolts on the<br />
end panel can be cut out.<br />
Fuller and bend the end panel <strong>to</strong> 90-degrees.<br />
1/4”<br />
(6 mm)<br />
3/4”<br />
(19 mm)<br />
182<br />
Cut out the bolts’ blanks from 1/4" x 3/4” (6 mm x 19 mm) flat bar. <strong>The</strong> tail <strong>of</strong> each bolt must be bent <strong>to</strong><br />
90-degrees. Start the bend by placing each bolt upright in a vise and hammering the tail at a slight angle. This<br />
can be done cold. <strong>The</strong> tail for the lower bolt must be bent so that it is pointing downward in the lock. <strong>The</strong> tail<br />
for the upper bolt must be bent so that it will be facing upwards.
1/4”<br />
(6 mm)<br />
Clamp the two bolts <strong>to</strong>gether. Heat the ends <strong>of</strong> both bolts. Place the bolt assembly in the vise and hammer<br />
the tails in<strong>to</strong> a sharp bend.<br />
Place both bolts on the cover plate in a locked position. <strong>The</strong> reference line on the cover plate pattern is the<br />
location <strong>of</strong> the centerline <strong>of</strong> the dogs. Mark that line on each bolt.<br />
3/8”<br />
(10 mm)<br />
3/8”<br />
(10 mm)<br />
1/2”<br />
(13 mm)<br />
1/4”<br />
(6 mm)<br />
3/8”<br />
(10 mm)<br />
1/4”<br />
(6 mm)<br />
<strong>The</strong> bolt dogs are made from 3/8” (10 mm) square bar. For each dog, forge a short length <strong>of</strong> the square bar<br />
down <strong>to</strong> a 1/4“ (6 mm) thickness. This will result in a flat bar that is approximately 1/4" x 1/2” (6 mm x 13<br />
mm).<br />
<strong>The</strong> dog for the lower bolt is made by cutting a 1/4” (6 mm) square tenon in the middle <strong>of</strong> the 1/2” (13 mm)<br />
wide section <strong>of</strong> the bar. Scribe the length <strong>of</strong> the dog on the bar. Cut the dog slightly longer than the length<br />
given on the pattern.<br />
183
3/4”<br />
(19 mm)<br />
Slide the two levers on<strong>to</strong> the pin.<br />
Adjust the shape <strong>of</strong> the levers until they sit at right angles <strong>to</strong> the pin. <strong>The</strong> gap between the levers should be<br />
parallel. <strong>The</strong> ends <strong>of</strong> the levers are not the correct dimensions or length. Extra material has been added <strong>to</strong><br />
the pattern <strong>to</strong> allow for any adjustments that may be needed when the bolts are installed in the lock. File the<br />
width <strong>of</strong> the arms <strong>of</strong> each lever <strong>to</strong> 3/8” (10 mm). <strong>The</strong> lower edge <strong>of</strong> the paddle on the arm <strong>of</strong> the lever for the<br />
upper dog should be resting on the cover plate. File the bot<strong>to</strong>m edge <strong>of</strong> the paddle <strong>to</strong> adjust the height <strong>of</strong> the<br />
upper lever. <strong>The</strong> gap between the two levers should be no more than 1/16” (2 mm). <strong>The</strong> <strong>to</strong>tal height <strong>of</strong> both<br />
levers when installed on the pin should be approximately 3/4" (19 mm).<br />
Place the bolts in a fully locked position on the cover plate. <strong>The</strong> position <strong>of</strong> the pivot pin for the levers will be<br />
located directly below the ends <strong>of</strong> the bolts when they are in this position. Mark a vertical line on<strong>to</strong> the cover<br />
plate at this location. Move the bolts <strong>to</strong> a fully unlocked position. Adjust the position <strong>of</strong> the upper lever until<br />
the center <strong>of</strong> the paddle is in line with the middle <strong>of</strong> the tail <strong>of</strong> the upper bolt. Swing the hinge barrel over <strong>to</strong><br />
the reference line for the hinge pin. Mark the location <strong>of</strong> the centerline <strong>of</strong> the hinge barrel on<strong>to</strong> the backplate.<br />
Drill the cover plate and rivet the pivot pin in place.<br />
Reposition the bolts on the cover plate in a fully locked position and set the upper lever against the upper bolt.<br />
Trim the length <strong>of</strong> the lever until it is level with the upper edge <strong>of</strong> the tail on the bolt. Trim the inside edge <strong>of</strong><br />
the paddle <strong>of</strong> the upper lever until it is above the centerline between the two bolts.<br />
Install the lever for the lower bolt. Trim the length <strong>of</strong> the lever until it is below the centerline between the two<br />
bolts. Scribe the location <strong>of</strong> the <strong>to</strong>p <strong>of</strong> the hinge barrel across the centerline for the hinge pin.<br />
Remove the bolts and levers and place the<br />
mainspring on the pattern. Position the tip <strong>of</strong> the<br />
spring above the scribe line for the <strong>to</strong>p <strong>of</strong> the hinge<br />
barrel and in front the scribe line that marks the<br />
centerline for the hinge pin.<br />
Scribe the location <strong>of</strong> the tenons on the mounting<br />
block for the spring on<strong>to</strong> the cover plate. Drill out<br />
the center <strong>of</strong> the slot. Use chisels and files <strong>to</strong> shape<br />
the slot until it conforms <strong>to</strong> the tenon on the spring.<br />
190
Install the spring in<strong>to</strong> the cover plate and clamp in position. Install the levers and test the spring tension.<br />
<strong>The</strong> spring should be under tension when the levers reach the reference line for the ends <strong>of</strong> the bolts when<br />
they are fully locked. It should also apply an even tension on the levers as they are rotated from the locked<br />
<strong>to</strong> unlocked positions. <strong>The</strong> curvature <strong>of</strong> the spring can be adjusted until the correct spring tension is reached.<br />
When the correct spring tension is reached, the mainspring can be riveted <strong>to</strong> the cover plate.<br />
Point <strong>of</strong> contact for the levers should<br />
be a smooth curve<br />
<strong>The</strong> bolts can now be installed in the lock. Rotate the levers until the ends are below the bolt locations.<br />
Place the bolts on the backplate in a fully unlocked position. Place the center <strong>of</strong> the front bolt guide over the<br />
beveled edge <strong>of</strong> the bolts.<br />
Scribe and cut the slots for the front bolt guide. Con<strong>to</strong>ur the edges <strong>of</strong> the bolt tails <strong>to</strong> conform <strong>to</strong> the levers.<br />
Return the levers <strong>to</strong> their working position. Install the bolts and clamp both bolt guides <strong>to</strong> the cover plate.<br />
Test the operation <strong>of</strong> the bolts. <strong>The</strong>y should slide easily from the locked <strong>to</strong> the unlocked position regardless<br />
<strong>of</strong> whether they are moved <strong>to</strong>gether or independently. Make any adjustments that may be necessary.<br />
Clamp the bolts <strong>to</strong> the cover plate. Remove the clamps from the bolt guides and rivet the guides in place.<br />
<strong>The</strong> end <strong>of</strong> the pivot pin is lightly riveted. This will flare the end <strong>to</strong> prevent the levers from working their<br />
way <strong>of</strong>f the pin.<br />
191
[9] Door <strong>Lock</strong><br />
Key<br />
Backplate<br />
Bolt<br />
Front bolt guide<br />
Rear bolt guide<br />
Mainspring<br />
Cover plate<br />
202
Backplate<br />
Vertical reference line<br />
Bolt reference line<br />
5-1/4”<br />
(133 mm)<br />
3”<br />
(75 mm)<br />
1-1/2”<br />
(38 mm)<br />
1”<br />
(25 mm)<br />
5”<br />
(125 mm)<br />
2-3/4”<br />
(70 mm)<br />
Horizontal reference line<br />
1-3/8”<br />
(35 mm)<br />
6-1/2”<br />
(165 mm)<br />
Ward Box<br />
2-5/8”<br />
(67 mm)<br />
2-3/8”<br />
(61 mm)<br />
1”<br />
(25 mm)<br />
2-1/2”<br />
(64 mm)<br />
2”<br />
(51 mm)<br />
1-7/8”<br />
(48 mm)<br />
1-1/4”<br />
(32 mm)<br />
3/4”<br />
(19 mm)<br />
203
Place the ward box on the backplate and do a<br />
final test <strong>of</strong> the key from both sides <strong>of</strong> the lock.<br />
Make any adjustments that may be necessary.<br />
<strong>The</strong> final adjustment <strong>to</strong> the bolt can now be<br />
made that will allow the key <strong>to</strong> move the bolt<br />
within the lock.<br />
Remove the ward box from the backplate.<br />
Lay two support blocks on a flat surface that<br />
will raise the backplate high enough <strong>of</strong>f the<br />
surface <strong>to</strong> allow the pivot pin for the key <strong>to</strong><br />
extend below the backplate. Install the bolt in<br />
the front bolt guide.<br />
Set the rear bolt guide over the bolt, but do<br />
not rivet it in place. Align the center <strong>to</strong>oth<br />
<strong>of</strong> the bolt directly over the centerline <strong>of</strong> the<br />
keyhole. Scribe the location <strong>of</strong> the center<br />
notch found on the <strong>to</strong>p <strong>of</strong> the bolt, on<strong>to</strong> the<br />
backplate.<br />
Hold the bolt in this position. Insert the key<br />
in the backplate and turn it clockwise until it<br />
hits the bot<strong>to</strong>m corner <strong>of</strong> the bolt. Remove the<br />
bolt, and file that corner slightly. Reinstall the<br />
bolt as above and test the key again.<br />
Repeat this process until the key can clear the<br />
bot<strong>to</strong>m edge <strong>of</strong> the bolt and reach the center<br />
<strong>to</strong>oth.<br />
212
Next, turn the key counterclockwise and follow the same process for the other side <strong>of</strong> the bolt. Only remove<br />
what is needed for the key <strong>to</strong> move past the corner <strong>of</strong> the notch.<br />
Critical contact points<br />
when the bolt is being unlocked<br />
Critical contact points<br />
when the bolt is being locked<br />
It is important <strong>to</strong> remember that both sides <strong>of</strong> each notch as well as the center <strong>to</strong>oth must be precisely fitted<br />
<strong>to</strong> the key for the lock <strong>to</strong> work properly. When material is removed from the bolt <strong>to</strong> allow the key <strong>to</strong> pass,<br />
it is being removed from the side <strong>of</strong> the bolt that the key must press against <strong>to</strong> return the bolt <strong>to</strong> that exact<br />
position in the lock. If <strong>to</strong>o much material is removed, the key will not be able <strong>to</strong> move the bolt far enough<br />
because it will now slip out <strong>of</strong> the bolt <strong>to</strong>o soon when returning the bolt <strong>to</strong> that position. This will leave the<br />
bolt in the wrong location in the lock.<br />
<strong>The</strong> same process is used <strong>to</strong> fine tune the center<br />
<strong>to</strong>oth <strong>of</strong> the bolt. This time, align the scribe lines for<br />
the spring with the right-hand notch.<br />
Turn the key clockwise until it reaches the bot<strong>to</strong>m<br />
edge <strong>of</strong> the center <strong>to</strong>oth. File that corner until the<br />
key passes through. Only remove what is necessary<br />
<strong>to</strong> allow the key <strong>to</strong> pass that corner.<br />
Next, align the left notch with the scribe line. This<br />
time turn the key counterclockwise until it <strong>to</strong>uches<br />
the center <strong>to</strong>oth, and file away that corner until the<br />
key passes through.<br />
213
[11] Classic Rim <strong>Lock</strong><br />
Side panel<br />
Key<br />
Backplate<br />
Latch spring<br />
Latch bolt cam<br />
Latch bolt<br />
Bolt<br />
Rear bolt & latch<br />
guide<br />
Night latch<br />
Ward box<br />
Tumbler<br />
Cover plate<br />
218
Backplate and Side Plates<br />
Rear bolt guide<br />
reference line<br />
5/8” x 3/4”<br />
(16 mm x 19 mm)<br />
Side plate<br />
Bolt reference line<br />
1/4”<br />
(6 mm)<br />
5/8” x 1”<br />
(16 mm x 25 mm)<br />
1/2” x 1/2”<br />
(13 mm x 13 mm)<br />
3/4”<br />
(19 mm)<br />
3-5/8”<br />
(92 mm)<br />
5”<br />
(127 mm)<br />
2”<br />
(51 mm)<br />
Rivet blocks<br />
Side plate<br />
cross section<br />
3/16”<br />
(5 mm)<br />
9/16”<br />
(14 mm)<br />
2”<br />
(51 mm)<br />
3”<br />
(76 mm)<br />
219
Cover Plate & Ward Box<br />
4-3/4”<br />
(121 mm)<br />
4”<br />
(101 mm)<br />
3/8” dia.<br />
(10 mm)<br />
3/8”<br />
(10 mm)<br />
3-1/2”<br />
(89 mm)<br />
3-3/4”<br />
(95 mm)<br />
1-5/8”<br />
(41 mm)<br />
2-11/16”<br />
(68 mm)<br />
1-1/2”<br />
(38 mm)<br />
2-1/2”<br />
(64 mm)<br />
1-1/2”<br />
(38 mm)<br />
1”<br />
(25 mm)<br />
1-1/8”<br />
(29 mm)<br />
2-9/16”<br />
(65 mm)<br />
1/2” dia.<br />
(13 mm)<br />
1-7/2”<br />
(64 mm)<br />
5/8”<br />
(16 mm)<br />
1/2”<br />
(13 mm)<br />
23/32”<br />
(18 mm)<br />
1-5/32”<br />
(29 mm)<br />
1-13/32”<br />
(35.5 mm)<br />
1-15/16”<br />
(49 mm)<br />
3-1/4”<br />
(83 mm)<br />
3-1/8”<br />
(79 mm)<br />
1”<br />
(25 mm)<br />
7/8”<br />
(22 mm)<br />
R = 2-1/4”<br />
(57 mm)<br />
1”<br />
(25 mm)<br />
1-3/16”<br />
(30 mm)<br />
1-17/32”<br />
(38.5 mm)<br />
1-15/16”<br />
(49 mm)<br />
2-5/16”<br />
(59 mm)<br />
222
Bolt <strong>Guide</strong>s, Ring Ward,<br />
Night Latch, Latch Spring & Lever,<br />
Latch Bolt Cam & Bolt Tumbler<br />
5/8” 3/4”<br />
(16 mm) (19 mm)<br />
2-3/16”<br />
(56 mm)<br />
3/16”<br />
(5 mm)<br />
1-3/8”<br />
(35 mm)<br />
7/8”<br />
(22 mm)<br />
1/8”<br />
(3 mm)<br />
13/16”<br />
(20 mm)<br />
5/32”<br />
(4 mm)<br />
1/8”<br />
(3 mm)<br />
1/2”<br />
(13 mm)<br />
1/2”<br />
(13 mm)<br />
3/8”<br />
(10 mm)<br />
3/4”<br />
(19 mm)<br />
1-7/8”<br />
(48 mm)<br />
1-5/16”<br />
(33 mm)<br />
1/4” Grid<br />
(6 mm)<br />
1/4” Grid<br />
(6 mm)<br />
223
1/4”<br />
(6 mm)<br />
3/16”<br />
(5 mm)<br />
3/16”<br />
(5 mm)<br />
1/2”<br />
(13 mm)<br />
<strong>The</strong> final assembly <strong>of</strong> the lock mechanism will require two pins that need <strong>to</strong> be riveted <strong>to</strong> the cover plate.<br />
<strong>The</strong> pins are made from 1/4” (6 mm) round bar. File a 3/16” (5 mm) tenon on the end <strong>of</strong> a 1/4” (6 mm) round<br />
bar. Cut the pin from the bar at approximately 1/2” (13 mm) from the shoulder <strong>of</strong> the tenon.<br />
<strong>The</strong> deadbolt and the latch bolt are fabricated by joining <strong>to</strong>gether the two pieces that make up each bolt. On<br />
the original lock the parts would have been forge welded <strong>to</strong>gether. Since forge welding is beyond the scope<br />
<strong>of</strong> this book, we will be brazing these parts <strong>to</strong>gether.<br />
Use the pattern <strong>to</strong> cut the main shape <strong>of</strong> the deadbolt and latch bolt from 1/8” (3 mm) plate. <strong>The</strong> center<br />
section in the notch <strong>of</strong> the deadbolt is bent <strong>to</strong>wards the back <strong>of</strong> the bolt. <strong>The</strong> tail <strong>of</strong> the latch bolt is bent<br />
<strong>to</strong> a 90-degree angle. <strong>The</strong> end <strong>of</strong> each bolt is thicker than the main body <strong>of</strong> the bolt. This extra thickness is<br />
obtained by adding an extra block <strong>to</strong> the end <strong>of</strong> the bolt.<br />
<strong>The</strong> bolt block for the latch bolt is cut from a 1-3/4” (44 mm) length <strong>of</strong> 5/8” (16 mm) square bar. <strong>The</strong> bolt block<br />
for the deadbolt is cut from a 1-3/4” (44 mm) length <strong>of</strong> 1/2" x 1” (13 mm x 25 mm) flat bar.<br />
Assemble the two parts <strong>of</strong> each bolt with small rivets<br />
<strong>to</strong> keep the end block <strong>of</strong> the bolt in position while in<br />
the fire.<br />
Lay the copper wire against the inside corner <strong>of</strong> the<br />
bolt and slowly heat until the copper flows in<strong>to</strong> the<br />
joint.<br />
228
Transfer the pattern for the rear deadbolt guide <strong>to</strong><br />
a piece <strong>of</strong> 1/8” (3 mm) flat s<strong>to</strong>ck. Fit the tenons <strong>of</strong><br />
the bolt guide <strong>to</strong> the slots in the cover plate. Do not<br />
rivet the bolt guide in place.<br />
File <strong>to</strong>p edge <strong>of</strong> bolt guide until latch bolt is<br />
parallel <strong>to</strong> the <strong>to</strong>p edge <strong>of</strong> cover plate<br />
<strong>The</strong> latch bolt does not have its own dedicated rear bolt guide. <strong>The</strong> long horizontal arm <strong>of</strong> the latch bolt is<br />
guided by sliding along the <strong>to</strong>p edge <strong>of</strong> the rear deadbolt guide. As a result, the <strong>to</strong>p edge <strong>of</strong> the rear bolt<br />
guide must be filed down so that the arm <strong>of</strong> the latch bolt sits parallel <strong>to</strong> the <strong>to</strong>p edge <strong>of</strong> the cover plate.<br />
<strong>The</strong> latch bolt and the deadbolt are held in place by two sheet metal brackets. Each bracket spans across the<br />
<strong>to</strong>p <strong>of</strong> both bolts. Cut out the pattern <strong>of</strong> the brackets from a strip <strong>of</strong> sheet metal. Bend the brackets <strong>to</strong> shape.<br />
<strong>The</strong> base at the <strong>to</strong>p <strong>of</strong> each bracket will need <strong>to</strong> fit in<strong>to</strong> the narrow space between the upper side plate and the<br />
latch bolt. Measure the distance from the edge <strong>of</strong> the latch bolt <strong>to</strong> the inside face <strong>of</strong> the side panel. Transfer<br />
that measurement <strong>to</strong> the cover plate. <strong>The</strong> base plate <strong>of</strong> the bracket will need <strong>to</strong> be trimmed until the inside<br />
edge <strong>of</strong> the leg <strong>of</strong> the bracket is above the reference line for the <strong>to</strong>p edge <strong>of</strong> the bolt. Test the latch bolt in the<br />
lock with the rear bolt guide and the cleat in place. Adjust the shape <strong>of</strong> the cleat until the latch bolt can move<br />
freely. Use the rear bracket as a pattern <strong>to</strong> shape the front bracket. <strong>The</strong>se brackets are attached <strong>to</strong> the cover<br />
plate with threaded bolts. Drill a 1/8” (3 mm) hole in the center <strong>of</strong> each <strong>of</strong> the bases <strong>of</strong> the brackets. Transfer<br />
the locations <strong>of</strong> the holes <strong>to</strong> the cover plate. Enlarge the holes in the brackets <strong>to</strong> 9/32” (7 mm). Drill the cover<br />
plate with a 13/64” (5 mm) hole and tap it with a 1/4" NC (M6 x 1) thread.<br />
229
[12] Classic Lever <strong>Lock</strong><br />
Cover plate<br />
Latch bar & interior<br />
lever handle<br />
Key<br />
Latch spring &<br />
cover plate<br />
Exterior lever<br />
handle<br />
Side panel<br />
Bolt<br />
Tumbler<br />
Ward box<br />
252
<strong>Lock</strong> Backplate<br />
4-5/8”<br />
(117 mm)<br />
1-1/2”<br />
(38 mm)<br />
7/8”<br />
(22 mm)<br />
3-1/2”<br />
(89 mm)<br />
3/16”<br />
(5 mm)<br />
3/4”<br />
(19 mm)<br />
4”<br />
(101 mm)<br />
3”<br />
(76 mm)<br />
1-3/4”<br />
(44 mm)<br />
9/16”<br />
(14 mm)<br />
2-1/2”<br />
(64 mm)<br />
1”<br />
(25 mm)<br />
3-3/4”<br />
(95 mm)<br />
4-3/4”<br />
(121 mm)<br />
3”<br />
(76 mm)<br />
4-1/4”<br />
(108 mm)<br />
5-3/4”<br />
(146 mm)<br />
<strong>Lock</strong> Bolt<br />
1/4”<br />
(6 mm)<br />
11/16”<br />
(17 mm)<br />
1/4”<br />
(6 mm)<br />
3-3/8”<br />
(86 mm)<br />
1”<br />
(25 mm)<br />
4-1/2”<br />
(114 mm)<br />
5-3/4”<br />
(146 mm)<br />
253
Use the key <strong>to</strong> move the bolt<br />
from the locked <strong>to</strong> the unlocked<br />
position. <strong>The</strong> tumbler should fall<br />
within the marks on the bolt.<br />
Place the bolt in the unlocked<br />
position. Mark the location <strong>of</strong> the<br />
front panel on the bolt.<br />
Remove the bolt. Cut the notches<br />
for the tumbler along the <strong>to</strong>p edge<br />
<strong>of</strong> the bolt. Cut the end <strong>of</strong> the bolt<br />
<strong>to</strong> length.<br />
<strong>The</strong> spring for the tumbler rests<br />
against a pin in the cover plate.<br />
Clamp a bar <strong>to</strong> the cover plate so<br />
that the end <strong>of</strong> the bar is resting on<br />
the end <strong>of</strong> the spring. Tap the bar<br />
with a hammer <strong>to</strong> move it forward<br />
<strong>to</strong> apply pressure <strong>to</strong> the spring. Test<br />
the tension with the key. When the<br />
correct tension is reached, mark<br />
the location <strong>of</strong> the end <strong>of</strong> the bar<br />
on the cover plate. Remove the<br />
clamp and the tumbler. Install a<br />
pin at that location.<br />
Do a final test with the key. If<br />
everything is working smoothly<br />
rivet the rear bolt guide in place.<br />
262
<strong>The</strong> ward box for this lock is a simple<br />
bent plate that has the keyhole needed<br />
for the other side <strong>of</strong> the lock.<br />
Cut and shape the outside <strong>of</strong> the pattern<br />
piece as well as the keyhole.<br />
<strong>The</strong> latch assembly is made up <strong>of</strong> two<br />
parts. <strong>The</strong> main latch combines a lever<br />
handle, the pivot pin for the latch<br />
assembly, and the latch bar.<br />
<strong>The</strong> second part <strong>of</strong> the latch is the lever<br />
handle that is used <strong>to</strong> open the latch from<br />
the opposite side <strong>of</strong> the door. This smaller<br />
handle is bolted <strong>to</strong> the main latch.<br />
263
Cut the handle from the bar.<br />
Place a center punch mark on the<br />
centerline <strong>of</strong> the flat section. Use a<br />
pair <strong>of</strong> dividers <strong>to</strong> scribe a round<br />
end <strong>to</strong> the handle. Cut and shape<br />
the end.<br />
3/8”<br />
(10 mm)<br />
<strong>The</strong> shaft that connects the two handles <strong>to</strong>gether is made from a 3/8” (10 mm) round bar. <strong>Forge</strong> a rough<br />
taper on the end <strong>of</strong> the bar that approximates the taper <strong>of</strong> the punch used <strong>to</strong> drift the hole in the pivot pin. A<br />
straight section for a round tenon is left at the very end <strong>of</strong> the bar.<br />
File a round tenon that is 1/4” (6 mm) in diameter and at least 1/2” (13 mm) long. Carefully file the flat sides<br />
<strong>of</strong> the taper until they match the taper on the pivot pin.<br />
Thread the end <strong>of</strong> the tenon with a<br />
1/4-20NC (M6X1) die.<br />
A square nut is made by first<br />
threading a hole through a 3/8” x<br />
1/2” (10 mm x 13 mm) flat bar and<br />
cutting it from the bar. File the cut<br />
edges and create a bevel around<br />
the <strong>to</strong>p corners <strong>of</strong> the nut.<br />
Install the shaft in<strong>to</strong> the lock and<br />
cut the round bar <strong>to</strong> a length<br />
that will be long enough <strong>to</strong> pass<br />
through the door and extend<br />
beyond the outside face by 1-1/2”<br />
(38 mm).<br />
3/8”<br />
(10 mm)<br />
1/2”<br />
(13 mm)<br />
276
File a round tenon <strong>to</strong> the end <strong>of</strong> the<br />
bar. Drill the hole <strong>to</strong> fit the tenon.<br />
<strong>The</strong> inside face <strong>of</strong> the door handle<br />
should be counter bored slightly.<br />
Align the handle as closely as<br />
possible <strong>to</strong> the main handle. Rivet<br />
the handle in place. <strong>The</strong> handle is<br />
secured further by brazing it <strong>to</strong> the<br />
shaft.<br />
277
[14] Basic Padlock<br />
Shackle<br />
Backplate<br />
Side plate<br />
Bolt guides<br />
Tumbler<br />
Cover plate<br />
Bolt<br />
Key<br />
288
Basic Padlock Cover Plate & Backplate<br />
15/16”<br />
(24 mm)<br />
R = 5/8”<br />
(16 mm)<br />
3/4”<br />
(19 mm)<br />
3-3/4”<br />
(95 mm)<br />
3-1/8”<br />
(79 mm)<br />
R = 2-1/2”<br />
(64 mm)<br />
2-3/8”<br />
(61 mm)<br />
R = 2-1/4”<br />
(57 mm)<br />
R = 2-5/16”<br />
(59 mm)<br />
1-11/16”<br />
(42 mm)<br />
Bolt reference line<br />
1”<br />
(25 mm)<br />
3-3/8”<br />
(86 mm)<br />
3/4”<br />
(19 mm)<br />
7/8”<br />
(22 mm)<br />
2-11/16”<br />
(68 mm)<br />
1-1/2”<br />
(38 mm)<br />
289
Bend the tail <strong>of</strong> the tumbler so that it sits just above the bot<strong>to</strong>m <strong>of</strong> the bolt.<br />
Hacksaw a 1/4” (6 mm) long notch at the intersection <strong>of</strong> the spring and the tail <strong>of</strong> the tumbler and bend that<br />
section <strong>of</strong> spring downward so that it will rest on the <strong>to</strong>p edge <strong>of</strong> the bolt.<br />
Bend the spring <strong>to</strong> shape and form a loop that will fit over a 16d common nail. Curve the remainder <strong>of</strong> the<br />
spring upwards until it crosses slightly past the <strong>to</strong>p <strong>of</strong> the side plate reference line on the backplate pattern.<br />
Trim the end so that it fits inside the lock.<br />
File a 1/8” (3 mm) round tenon on the end <strong>of</strong> the pin. Install the pin and slide the tumbler over the pin.<br />
Slide the bolt against the front bolt<br />
guide and scribe the location <strong>of</strong> the<br />
tumbler locking the pin on<strong>to</strong> the bolt.<br />
Slide the bolt against the rear bolt<br />
guide and scribe the location <strong>of</strong> the<br />
locking pin on<strong>to</strong> the bolt.<br />
Use a round file <strong>to</strong> cut detents at each<br />
scribe mark on the bolt. This will<br />
create a working lock that is simple<br />
<strong>to</strong> open where there would be no<br />
damage <strong>to</strong> the lock should the key be<br />
misplaced.<br />
298
A small spacer pin needs <strong>to</strong> be added<br />
<strong>to</strong> the end <strong>of</strong> the bolt. This pin rides<br />
against the inside face <strong>of</strong> the cover<br />
plate and keeps the bolt in position<br />
in the rear bolt guide.<br />
Place a small piece <strong>of</strong> sheet metal on<br />
the <strong>to</strong>p edge <strong>of</strong> the side plate so that<br />
it covers the end <strong>of</strong> the bolt. This will<br />
simulate the location <strong>of</strong> the cover<br />
plate. Test the key in the lock and<br />
carefully file the <strong>to</strong>p <strong>of</strong> the pin until it<br />
is sitting just below the inside face <strong>of</strong><br />
the cover plate.<br />
3/8”<br />
(10 mm)<br />
7/16”<br />
(11 mm)<br />
1/4”<br />
(6 mm)<br />
<strong>The</strong> shackle rotates on a pin that is 3/8” (10 mm) round. A 1/4” (6 mm) tenon is filed at each end. This will<br />
create a shoulder that will prevent the backplate and cover plate from pressing against the hinge barrel <strong>of</strong> the<br />
shackle when the pin is riveted in place.<br />
<strong>The</strong> free end <strong>of</strong> the shackle is forged slightly <strong>to</strong> create a flat surface on the inside face near the end. Set the<br />
pivot pin for the shackle in the backplate. Cut and file the end <strong>of</strong> the shackle <strong>to</strong> shape so that it will fit in<strong>to</strong><br />
the opening <strong>of</strong> the lock.<br />
Remove the bolt. Scribe the location <strong>of</strong> the front bolt guide opening on<strong>to</strong> the shackle.<br />
Cut the opening in<strong>to</strong> the end <strong>of</strong> the shackle and test the bolt until it works smoothly.<br />
299