
Create successful ePaper yourself
Turn your PDF publications into a flip-book with our unique Google optimized e-Paper software.
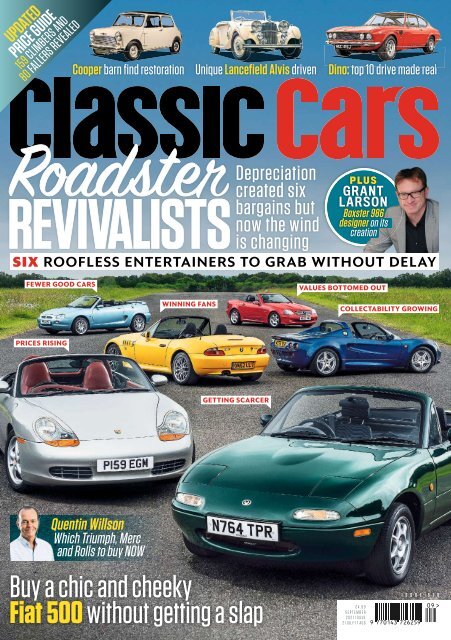
UPDATED<br />
PRICE GUIDE<br />
159 CLIMBERS AND<br />
80 FALLERS REVEALED<br />
Cooper barn find restoration<br />
Unique Lancefield Alvis driven<br />
Dino: top 10 drive made real<br />
Roadster<br />
Depreciation<br />
created six<br />
REVIVALISTS<br />
bargains but<br />
now the wind<br />
is changing<br />
PLUS<br />
GRANT<br />
LARSON<br />
Boxster 986<br />
designer on its<br />
creation<br />
SIX ROOFLESS ENTERTAINERS TO GRAB WITHOUT DELAY<br />
FEWER GOOD CARS<br />
VALUES BOTTOMED OUT<br />
WINNING FANS<br />
COLLECTABILITY GROWING<br />
PRICES RISING<br />
GETTING SCARCER<br />
Quentin Willson<br />
Which Triumph, Merc<br />
and Rolls to buy NOW<br />
Buy a chic and cheeky<br />
Fiat 500 without getting a slap<br />
£ 4 . 9 9<br />
<strong>SEP</strong>TEMBER<br />
20<strong>21</strong> ISSUE<br />
<strong>21</strong> JULY-17 AUG<br />
I S S U E 5 7 8
66<br />
[Epic Restoration] Land Rover Series I
Land Rover Series I [Epic Restoration]<br />
[Epic[ Restoration] ]<br />
‘Somebody had used<br />
part of a Castrol oil<br />
can to repair a hole’<br />
Having narrowly dodged the scrapyard, this Mini Cooper then<br />
languished for almost three decades in its owner’s garage<br />
before beginning its journey back to factory perfection<br />
Words ROSS ALKUREISHI Photography STUART COLLINS<br />
67
[Epic Restoration] Mini Cooper 998<br />
I<br />
bought this 1969 MkII Mini Cooper nearly 30 years ago<br />
from a friend of my wife, because I didn’t want to see<br />
it go to scrap,’ explains self-employed builder Gerald<br />
Thorman. His recalls the car requiring significant<br />
work, even back then. ‘It was in a bit of a state. I<br />
towed it home and can remember trying to start it,<br />
but I didn’t push it because it hadn’t been running in<br />
a while – I never even got to drive it. I then decided to<br />
try to restore it myself, but work and life intervened.’<br />
As with many a project, everyday detritus soon<br />
submerged the Mini in his garage; and yet it lurked,<br />
always at the back of his mind as the years passed.<br />
‘Over the last few years the idea of it being a retirement<br />
project began to form, but I’m 71 and still haven’t retired. If I didn’t<br />
do something about it then it just wasn’t going to get done. A friend<br />
mentioned Richard Browning at Brownings Restoration in Keysoe,<br />
Beds. After a chat I decided to go with him.’<br />
So the Mini finally emerged from its suburban slumber, with<br />
its suspension slumped on one side and exhaust scraping along<br />
the tarmac. ‘There was obviously a lot of filler in it,’ says Richard<br />
Browning, as he recalls collecting it. ‘But it still looked fairly good.’<br />
Mini looked<br />
solid, but was<br />
riddled with rust<br />
Rotten floor was<br />
replaced by an<br />
adapted Mini<br />
van section<br />
Rot, rot and yet more rot – oh, and bodges<br />
In the workshop, stripping began in earnest. With the bodyshell<br />
exposed, it became clear that there were significant structural<br />
rigidity issues. ‘It’s a cliché but the best way of describing it is<br />
as a colander or sieve,’ says Richard. ‘The boot floor, cabin floor<br />
and sills had gone completely. The bottom four inches of the<br />
car was rotten. The front roof corner had gone too – they always<br />
do, because foam was inserted during manufacture to hold the<br />
wiring loom; condensation gets in and it rusts from the inside out.<br />
Somebody had also tried putting new wings on it, but the gaps<br />
were miles out and they didn’t match up over the wheel arches.’<br />
With the Mini’s bodywork revealed to be more suitable for rinsing<br />
salad, the best was yet to come. Body man<br />
Robert Szkotak takes up the story, ‘The<br />
bottom of the battery box was rusty, but<br />
when I looked underneath somebody had<br />
used part of a Castrol oil can to replace<br />
a hole! But, believe it or not, it’s not the<br />
worst we’ve seen – at least there were no<br />
pop rivets with fibreglass over the top.’<br />
The first job was to get some strength<br />
into the body, so Robert set to fabricating<br />
a jig to pick up points on the steering,<br />
front crossmember and front and rear subframe mounting points<br />
– bolted to them, everything would stay where it was supposed to<br />
during cutting and replacement of metal. ‘We can fabricate little<br />
parts on site, but it’s more cost-effective to buy panels,’ explains<br />
Richard. ‘That said, floors aren’t available so we had to buy one for<br />
a Mini Van and shorten it by six inches.’<br />
Luckily, Brownings had another Mini Cooper restoration in<br />
progress – Richard’s own car – and that provided the perfect threedimensional<br />
point of reference. ‘When Robert tacked something<br />
in, he could check it before welding. He tends to MIG weld a panel<br />
in place and then gas weld for a smoother and stronger weld. I’d<br />
say the floor was definitely the biggest challenge on this car; again,<br />
the jig is key here, because Robert is able to ensure that any new<br />
panels meet its contact points correctly. This also helps further<br />
down the line with fittings items such as doors and front wings;<br />
the better a job you do here, the less adjustment is required.’<br />
He then added new metal to the bases of the crumbling A- and<br />
B-pillars before the strengthened bodyshell, the sub-frames and<br />
crossmember were sent to Edds Sandblasting in Great Staughton.<br />
‘It’s more aggressive, and you’ll find more holes, but we had issues<br />
after having an Audi Ur-Quattro dipped – the acid wasn’t correctly<br />
neutralised and the sills began rotting out before our eyes.’<br />
Low point<br />
‘Disappointment at just<br />
how rusty it was, when<br />
it initially looked in<br />
fairly good nick’<br />
Richard Browning<br />
Better than expected<br />
Mechanic Tim Soames says, ‘The engine<br />
hadn’t seized and wasn’t that bad inside.<br />
The overhaul included the usual re-bore<br />
because the bores had lost their crosshatch<br />
honing and were rusted, porting<br />
of the cylinder head to improve gas flow,<br />
and fitting a 731 Kent camshaft.’ The remit<br />
from owner Gerald was to keep the car as<br />
close to period-correct as possible.<br />
‘The cam was a period upgrade, thus acceptable, and fitted for<br />
a bit of extra zip. But as an aftermarket camshaft the position is<br />
different from standard, so it required a variable chain pulley to<br />
allow the cam to be moved to get the correct timing. Also it’s a<br />
duplex, giving more strength at high rpm. As it’s a 998cc unit and<br />
not a 1275cc one, it adds more peak power, making it more drivable.’<br />
Having completed no more than 40,000 miles, the gearbox<br />
internals were in good condition with unworn synchromesh and<br />
the differential – with its Cooper-specific ratios – was also good.<br />
Tim rebuilt with new gasket kit, seals and bearings.<br />
After servicing the carburettors with a rebuild kit, which replaced<br />
worn parts that included the butterfly spindles and included fresh<br />
gaskets, Tim set the engine up on a little stand-mounted rig. ‘I ran<br />
it for 15 minutes just to get it up to temperature, bed it in, tune<br />
the twin carburettors and check everything. The carbs have to be<br />
balanced to give twin draw, involving a suction vac gauge over the<br />
mouth of one carb at low idle and high idle to set, then repeat on<br />
the other carb and match the draw by adjusting the needle control.’<br />
Nerves of steel<br />
‘It’s important that the owner sees the car after it’s been sandblasted,<br />
so they can see what we’re looking at – it’s amazing what paint<br />
68
Chas Lee<br />
applies the<br />
final polish<br />
Land Rover Series I [Epic Restoration]<br />
Aftermarket<br />
sunroof visible on<br />
fully braced car<br />
Steel wheels replaced<br />
alloys fitted for that<br />
period correct look<br />
Rebuilt engine<br />
refinished in<br />
correct Middle<br />
Bronze Green<br />
Matthew Pirks<br />
carries out a final<br />
bleed of the brakes<br />
Crumbly door jambs<br />
were part of a complex<br />
panelwork challenge
Removing<br />
aftermarket<br />
sunroof<br />
Tim Soames tunes<br />
the twin SU HS2<br />
carburettors<br />
Instrument cluster<br />
kicked off interior<br />
reassembly<br />
Gearbox rebuilt<br />
with new gasket kit,<br />
seals and bearings<br />
Gerald opted<br />
for a bespoke<br />
leather interior<br />
The time spent on<br />
metalwork alone<br />
ran to in excess<br />
of <strong>21</strong>0 hours
Mini Cooper 998 [Epic Restoration]<br />
can hide,’ says Richard. Despite its new floor and provisional<br />
strengthening, the Mini clearly still required extensive panel work.<br />
Says Gerald, ‘After viewing it on return from sandblasting it was<br />
worse than I first thought and did look quite bad. I was aware of<br />
the work required, which was substantially more than originally<br />
thought, but it needed finishing. I already had a rough idea of<br />
what the cost was going to be, but it went a bit further than that.’<br />
The bottom four inches of the car that first appeared to need<br />
replacement had now grown to more like six. BPG Motor Sport in<br />
Beds supplied replacement panels and body<br />
man Robert set to work once again, fitting a<br />
new front valance, rear valance, inner and<br />
outer wings, rear quarter panels and door skins.<br />
Up top, Gerald had decided against keeping<br />
the aftermarket sunroof so the front half of a<br />
roof section came from a donor second-hand<br />
bodyshell that Richard had bought for his own<br />
Mini’s restoration. ‘You have the seam right<br />
across the middle, because you have the shape<br />
of the two roofs, but it’s much easier to hold<br />
its shape than it’d be using unformed sheet<br />
metal. That said, it’s still tricky to do – it’s a large panel so there’s<br />
a lot of movement in it; it’s essential to avoid warping. Bracing is<br />
key, so we secure the windscreen frame and doors. Robert also uses<br />
a notch step-down on the metal, so it overlaps when welded in –<br />
this endows it with strength and gives a nicer finish, with less filler<br />
required. He did a great job on it – you can’t see a join,’ says Richard.<br />
Layer upon layer...<br />
The returned body had gone into Lechler epoxy primer straight<br />
away and paint man Chas Lee continued to apply it to protect any<br />
fresh metal. ‘Robert does his best to avoid minor warping of panels<br />
and he did a great job on the Mini’s bodywork – it didn’t require any<br />
rectification before I finished it with filler. The key to that skill is to<br />
separate your spot welds out and then work your way a few inches<br />
at a time. After filler I like to try bits of trim back on the car – such as<br />
the windscreen and rear screen – to ensure they fit, and nothing’s<br />
moved. Seam sealing, to prevent moisture build-up between<br />
panels, took a day and a half. As a company we like a nice and neat<br />
finish, so I run an inch tape masking all the seams, apply the sealer<br />
and brush it flat before removing the tape. It’s a time-consuming<br />
piece of art – you need to tape cross-joining panels in a certain way,<br />
cutting the shapes out with a Stanley blade – but definitely worth it.’<br />
He applied a high-build primer with a flat<br />
block to ensure everything was straight and<br />
smooth. ‘Minor dents stay darker, so I add filler<br />
and sand it back, repeating the process until I<br />
can see no more low spots.’ Chas used a 320-grit<br />
block, followed by a 610 disc on the doubleaction<br />
sander to remove scratches.<br />
With the bodyshell now upside down on<br />
a 360-degree jig, he painted the underside<br />
relatively thickly in its original colour of Old<br />
English White two-pack before applying stonechip<br />
through a spray gun, then following with<br />
another coat of paint. ‘Two-pack gives it the<br />
period-correct, slightly orange-peely look – the<br />
modern clearcoat-lacquer-over-basecoat route<br />
would look out of place on this type of car. I also<br />
sprayed all the areas that you don’t normally get<br />
to; the underside of the roof, under the dash, and<br />
the upper sections of the engine bay and boot<br />
area, so everything was covered and protected.’<br />
The jig allowed the body to be flipped back<br />
over and Chas sprayed the remainder of the<br />
body before finishing the roof in black; he then<br />
completed the doors, bonnet and bootlid in one<br />
High point<br />
‘A lot of people would<br />
have considered it<br />
just too far gone, but<br />
another genuine one<br />
has been saved!’<br />
Matthew Pirkin<br />
MY FAVOURITE TOOL<br />
Richard Browning’s sewing machine<br />
‘My Consew industrial sewing<br />
machine is at least 40 years old,<br />
but I love using it to sew leather<br />
shapes together. The walking<br />
foot means that the top and the<br />
bottom of the material are pulled<br />
through at the same time [rather<br />
than just the bottom on lesser<br />
machines], which gives more<br />
control and results in a better<br />
finish. It can also deal with more<br />
layers at a time. I can lose hours<br />
using it; last Christmas I used it to<br />
make a leather handbag for my<br />
wife Jane to match her boots.’<br />
sitting. Gerald decided to reinstate the original steel wheels; after<br />
sandblasting, they underwent an identical process.<br />
Finally, Chas masked and sprayed the engine in original Middle<br />
Bronze Green, ready for final assembly. ‘All colours are original<br />
from factory, and easily found in the old manuals we have. I used<br />
two-pack for the engine, spraying at 20 degrees C and then baked<br />
off at 50 degrees, with two days curing for a more resilient finish.’<br />
He then used a 3000-grit disc to deal with any final imperfections.<br />
‘I polished it in three stages to make it as shiny as possible.’<br />
The final furlong<br />
Trim is proprietor Richard’s domain and luckily,<br />
despite being split, cut and faded, the entire<br />
interior was present. ‘I was able to take patterns<br />
and transfer to new,’ he explains. ‘I literally did<br />
the whole lot – headlining, rear shelf, all sidecards<br />
in the back, door-cards, and new carpets.<br />
It’s best to buy the latter in a roll and make it<br />
yourself, because you get a neater and better<br />
finish. Gerald wanted the seats in leather, which<br />
wasn’t an option when new, but the door cards<br />
in vinyl, so we matched the embossing. Someone had made a dash<br />
to go in it, but it was horrible. My friend David Robins, who I used<br />
to race Minis with in my youth, actually owns BPG Motor Sport,<br />
and luckily he sorted me out with a lot of little things that you can’t<br />
normally get, including a plastic centre console.’ Other hard-to-find<br />
items like door switches for the courtesy light were sourced from<br />
someone who knew someone who had some, while diffcult to find<br />
replacements for the cracked rear lenses came from eBay.<br />
Matthew Pirks carried out most of the final assembly work. ‘It was<br />
quite straightforward; when you’ve done as many Minis as I have…’<br />
After fitting brake lines, he added the Hydrolastic suspension pipes<br />
and spheres. Richard explains, ‘The spheres are essentially metal<br />
cones with rubber bags inside them; if the cones are rotten they’ll<br />
leak when pressurised. This we do at double the rate at which they<br />
run, before leaving for four hours. Two leaked, so second-hand<br />
replacements had to be sourced, again from eBay, before being<br />
painted and fitted. It is possible to have the system refurbished, but<br />
it’s just the pipes that are replaced – nobody actually restores the<br />
units themselves, so you have to locate good ones to begin with.’<br />
With the built-up sub-frames in, Matthew fitted the engine and<br />
ancillaries. ‘We salvaged the original wiring loom,’ says Richard.<br />
‘Testing it for continuity, to ensure each wire went to the right place,<br />
and replacing any iffy joints or minor damage.<br />
The front brakes required new calipers and<br />
discs, but the rears were beyond saving and<br />
replaced. Where we could, we tried to service<br />
the original parts; seat frames and the dynamo<br />
were refurbished in house. A correct MkII<br />
steering rack (again, supplied by Dave Robins)<br />
replaced its MkIII rack – the only differences are<br />
the castings – purely for the sake of originality.<br />
‘It turned out stunning, considering our<br />
starting point. I’m proud of the team’s ability<br />
to recreate its factory look and being able to<br />
restore it from start to finish, with everything<br />
being done in-house, feels brilliant.’<br />
That said, Gerald did allow himself one<br />
final upgrade – a stainless steel exhaust<br />
system was sourced from Mini Spares.<br />
‘I’m delighted with the finished car,’ he says.<br />
‘Brownings have done a great job, and it’s as<br />
near original as they could get it – I can’t wait<br />
to take delivery. I haven’t actually got any<br />
plans as such, although my wife and I still<br />
know the people I bought it from, so it’d be<br />
nice to show them it. I’m just going to enjoy it.’<br />
71