NZPhotographer Issue 53, March 2022
As of December 2022, NZPhotographer magazine is only available when you purchase an annual or monthly subscription via the NZP website. Find out more: www.nzphotographer.nz As of December 2022, NZPhotographer magazine is only available when you purchase an annual or monthly subscription via the NZP website. Find out more: www.nzphotographer.nz
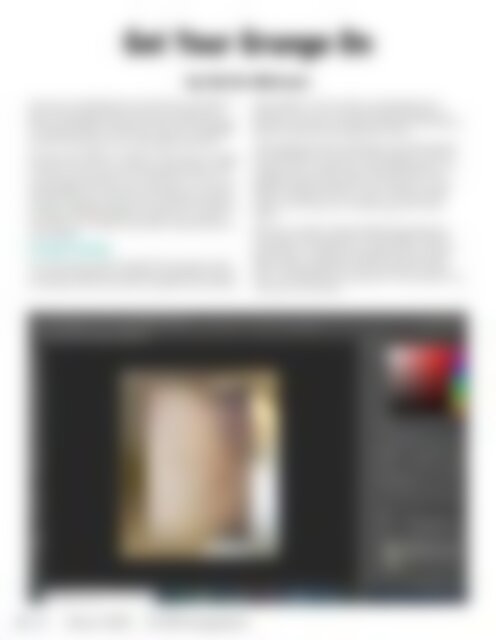
Get Your Grunge On by Fairlie Atkinson Have you wondered how some photos manage to give off a grungy vibe? Or have you looked at a photo and asked yourself how they have managed to create texture in a shot that would not ordinarily have it? The answer is by using editing software. Grunges are different to filters as they are an overlay that you pop onto your photo during editing. A filter is what you use when you’re shooting. If you’re of the Instagram era this may confuse you, as you add the filter after you take the shot. What this is doing though is creating a photo that looks like it has been shot with that filter already in place on a camera. A grunge is an overlay to provide a textured look to your images. GETTING STARTED It’s quite easy to find copyright free grunges online. If you go to WikiMedia Commons and type ‘texture’ in the search bar you will find a plethora of textured free images of wood, grains, and grunges that are free to use. You can also find free grunges on Pixabay and other commercial sites but you have to sign up and then the emails don’t stop! I downloaded a brown distressed concrete grunge from WikiMedia Commons and popped it onto an image I took of a gannet at Cape Kidnappers. The grunge enhances the yellows and browns in the original image and gives it a nice texture, not only does it look good on the screen, it will print really nicely on a canvas for a unique piece of home décor. Here you can see I have popped the grunge as a new layer over the gannet. I will enlarge it until the entire bird is covered by the grunge, then choose a blend mode, change the opacity and then erase parts of the grunge that cover the bird that I don’t want. We will look at this process in more detail in the next part of this article. 62 March 2022 NZPhotographer
NZPhotographer March 2022 63
- Page 11 and 12: Photographic Expeditions 2022/2023
- Page 13 and 14: What's In The Bag? with Shaun Barne
- Page 15 and 16: WHAT’S IN THE BAG? My camera body
- Page 17 and 18: Wellington-based Shaun Barnett has
- Page 19 and 20: Subscribe today and download all ba
- Page 21 and 22: NZPhotographer March 2022 21
- Page 23 and 24: and Pixabay, etc continue promoting
- Page 25 and 26: Remarkable Form, Exceptional Functi
- Page 27 and 28: Elaborately Dressed Canon 5D Mk IV,
- Page 29 and 30: Hey. Are You Listening? Canon 5D Mk
- Page 31 and 32: Ice Bubble Canon 5D Mk IV, Canon 10
- Page 33 and 34: Print On Demand Why not read your f
- Page 35 and 36: such as light, context, and composi
- Page 37 and 38: Which brings me to my response to t
- Page 40 and 41: ADEN MESER 40 March 2022 NZPhotogra
- Page 44 and 45: ANDRE KIRSTEIN 44 March 2022 NZPhot
- Page 46 and 47: 46 March 2022 NZPhotographer
- Page 48 and 49: ANNETTE CHING 48 March 2022 NZPhoto
- Page 50 and 51: 50 March 2022 NZPhotographer
- Page 52 and 53: BRUCE HANCOCK 52 March 2022 NZPhoto
- Page 54 and 55: 54 March 2022 NZPhotographer
- Page 56 and 57: 56 March 2022 NZPhotographer
- Page 58 and 59: From the Road: Karachi by Susan Bli
- Page 60 and 61: 60 March 2022 NZPhotographer
- Page 64 and 65: MAKING YOUR OWN GRUNGES Photographi
- Page 66 and 67: MAKING YOUR OWN GRUNGES WITH BRUSHE
- Page 68 and 69: MONOCHROME READERS' SUBMISSIONS Cha
- Page 70 and 71: RASPBERRY AND WASPS Delicious and j
- Page 72 and 73: STEAMPUNK PARASOL Shot at the annua
- Page 74 and 75: BIG RED On a forest walk at Kaikour
- Page 76 and 77: HOT LOVE I purchased a bunch of chi
- Page 78 and 79: STANDING OUT Last October, a group
- Page 80 and 81: THIKSEY AND HEMIS MONKS Ladakh is a
- Page 82 and 83: LOVE IS ALL AROUND These heart shap
- Page 84: "OF ALL OF OUR INVENTIONS FOR MASS
Get Your Grunge On<br />
by Fairlie Atkinson<br />
Have you wondered how some photos manage to<br />
give off a grungy vibe? Or have you looked at a<br />
photo and asked yourself how they have managed<br />
to create texture in a shot that would not ordinarily<br />
have it? The answer is by using editing software.<br />
Grunges are different to filters as they are an overlay<br />
that you pop onto your photo during editing. A filter<br />
is what you use when you’re shooting. If you’re of<br />
the Instagram era this may confuse you, as you add<br />
the filter after you take the shot. What this is doing<br />
though is creating a photo that looks like it has been<br />
shot with that filter already in place on a camera.<br />
A grunge is an overlay to provide a textured look to<br />
your images.<br />
GETTING STARTED<br />
It’s quite easy to find copyright free grunges online.<br />
If you go to WikiMedia Commons and type ‘texture’<br />
in the search bar you will find a plethora of textured<br />
free images of wood, grains, and grunges that<br />
are free to use. You can also find free grunges on<br />
Pixabay and other commercial sites but you have to<br />
sign up and then the emails don’t stop!<br />
I downloaded a brown distressed concrete grunge<br />
from WikiMedia Commons and popped it onto an<br />
image I took of a gannet at Cape Kidnappers. The<br />
grunge enhances the yellows and browns in the<br />
original image and gives it a nice texture, not only<br />
does it look good on the screen, it will print really<br />
nicely on a canvas for a unique piece of home<br />
décor.<br />
Here you can see I have popped the grunge as a<br />
new layer over the gannet. I will enlarge it until the<br />
entire bird is covered by the grunge, then choose a<br />
blend mode, change the opacity and then erase<br />
parts of the grunge that cover the bird that I don’t<br />
want. We will look at this process in more detail in the<br />
next part of this article.<br />
62 <strong>March</strong> <strong>2022</strong> <strong>NZPhotographer</strong>


