OMEGA STUDIO™ - Lexicon
OMEGA STUDIO™ - Lexicon
OMEGA STUDIO™ - Lexicon

Create successful ePaper yourself
Turn your PDF publications into a flip-book with our unique Google optimized e-Paper software.
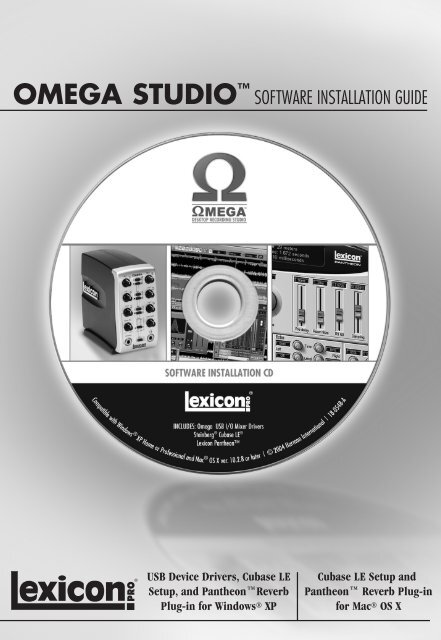
<strong>OMEGA</strong> STUDIO SOFTWARE INSTALLATION GUIDE<br />
USB Device Drivers, Cubase LE<br />
Setup, and PantheonReverb<br />
Plug-in for Windows ® XP<br />
Cubase LE Setup and<br />
Pantheon Reverb Plug-in<br />
for Mac ® OS X
Congratulations on your purchase of the <strong>Lexicon</strong> Omega Studio. This guide contains the information<br />
needed to install the required USB drivers and Steinberg’s Cubase LE recording software for use with<br />
your <strong>Lexicon</strong> Omega hardware on either Windows ® XP or Mac ® OSX computer systems. Please follow<br />
these instructions carefully to ensure smooth installation of each of these components.<br />
<strong>OMEGA</strong> STUDIO FOR WINDOWS ® XP USERS<br />
A. INSTALLING THE LEXICON USB DRIVERS<br />
You must install the USB drivers to use your <strong>Lexicon</strong> Omega’s USB connection with your computer.<br />
Follow the directions listed in the following section to complete the installation process.<br />
1. Start your computer. Close any open programs you have running.<br />
2. Take your <strong>Lexicon</strong> Omega hardware out of the box and plug the power in.<br />
3. Connect the included USB cable to your computer and to the Omega.<br />
4. You will see multiple messages pop up from the task bar indicating that your computer has found a<br />
new USB device. There will be multiple messages because there are four USB devices in the Omega.<br />
When Windows displays the message “Your new hardware is installed and ready to use”, Windows has<br />
completed identifying your new hardware. However, your software installation IS NOT complete.<br />
5. Put the Omega Studio Software Installation disk into your computer’s CD-ROM drive. If you have<br />
Autorun enabled, the Omega Driver Installer Setup Wizard will automatically launch. If it does not<br />
launch automatically, you can open it by selecting Start>Run and entering D:\Omega.exe<br />
(where D:\ is the letter of your CD-ROM drive).<br />
6. Next, select the language that you’d like to run the installer in.<br />
7. Continue selecting Next and choose I agree to the terms of the License Agreement.<br />
8. Select the Omega Driver Installer Software components (Cubase LE, Pantheon Reverb Plug-In, and<br />
Help Files) that you wish to install and click Next.<br />
9. Choose your desired installation folder, or use the default setting and select Install.<br />
10. You will now see the window shown below. Click Next to continue and follow the onscreen<br />
instructions for the remainder of the installation.
11. During this process you may be asked (4 times) to continue or stop the installation. Click<br />
Continue Anyway each time as shown below.<br />
12. Click Finish to complete the Driver Installation.<br />
Note: If you chose to install Cubase LE in Step 8, the installation of Cubase LE will now<br />
begin. Skip Steps 1 and 2 of the next section and continue following the rest of<br />
the instructions to correctly install Cubase LE.<br />
B. INSTALLING CUBASE LE RECORDING SOFTWARE<br />
1. Start your computer. Close any open programs you have running. Put the Omega Studio Software<br />
Installation disk into your CD-ROM drive.<br />
2. If the disk doesn’t Autorun, you can open it by selecting Start>Run and entering<br />
D:\CubaseNotSilient\Cubase_LE.exe (where D:\ is the letter of your CD-ROM drive) then click<br />
OK.<br />
3. Enter your information as directed by the Cubase LE Installer (all required fields are denoted with an<br />
asterisk). Your Serial Number is printed on the back of the <strong>Lexicon</strong> Omega Studio Software CD case<br />
(as shown below). Select OK to continue with the installation after you’ve entered all the required<br />
information.<br />
4. Follow the onscreen installation instructions as directed. You will be prompted to restart your<br />
computer when the installation has completed.
C. SETUP WINDOWS AUDIO AND MIDI<br />
When the <strong>Lexicon</strong> USB Audio and MIDI drivers were installed, Windows may have automatically selected<br />
them as your default audio and MIDI outputs. This means that your Windows sounds will be sent to the<br />
Omega rather than your computer’s sound card. We need to check if these have been changed and<br />
return the settings to what they were before.<br />
1. Select Start>Control Panel>Sound and Audio Devices.<br />
2. Select the Audio tab.<br />
3. Under Sound Playback>Default device, open the pull-down menu and make sure your<br />
computer’s sound card is selected.<br />
4. Under Sound Recording>Default device, open the pull-down menu and make sure your<br />
computer’s sound card is selected.<br />
5. Under MIDI Music Playback>Default device, open the pull-down menu and make sure your<br />
MIDI device is selected.<br />
D. USING CUBASE LE WITH THE LEXICON <strong>OMEGA</strong> STUDIO<br />
1. Start Cubase LE. The first time you use Cubase LE with the <strong>Lexicon</strong> Omega Studio your may be<br />
asked to run the Multimedia test as shown below. Select No.<br />
2. Cubase LE will display the following warning that configuration has not been tested. Click OK.
3. Once you are into Cubase, go to Device>Device Setup.<br />
4. Under ASIO Drivers, click on VST Multitrack and select <strong>Lexicon</strong> USB ASIO if it is not already<br />
selected. Click on Switch to switch the driver and click OK. You are now ready to begin recording<br />
using your Omega Studio and Cubase LE.
<strong>OMEGA</strong> FOR MAC ® USERS<br />
The Omega hardware is designed to interface directly with your Mac computer via USB using OS X’s<br />
Core Audio drivers. This means no separate driver installation is needed as long as your Mac system<br />
software is 10.2.8 or greater (see Apple’s website for software update information if your system software<br />
is 10.2.8 or earlier).<br />
A. INSTALLING CUBASE LE RECORDING SOFTWARE FOR MAC<br />
1. Start your computer. Close any open programs you have running. Place the Omega Studio Software<br />
Installation disk in your CD-ROM drive.<br />
2. Double-click the <strong>Lexicon</strong> Installer CD icon when it appears on your desktop.<br />
3. When the <strong>Lexicon</strong> Installer window opens, double-click on the Cubase LE Installer icon and then<br />
click Continue.<br />
4. Click Accept to agree to the terms of the Software Licensing Contract and continue.<br />
5. Choose your desired installation folder, or use the default setting and select Install.<br />
6. Enter your registration information as directed by the Cubase LE Installer. Your Authorization<br />
Number is printed on the back of the <strong>Lexicon</strong> Omega Studio Software Installation CD case (as shown<br />
below). You must include the hyphens when entering the number. Select OK to continue with the<br />
installation after you’ve entered your name and serial number.<br />
7. Follow the instructions of the onscreen prompts. When the installation is finished, click on Quit.<br />
B. INSTALLING THE LEXICON PANTHEON FOR MAC<br />
1. Click on the Pantheon VST Installer icon. Next, click Continue and then Install. When the<br />
License Agreement appears, click Agree then wait for the Installer to finish and click Quit.
C. SETTING UP CUBASE LE FOR USE WITH THE <strong>OMEGA</strong> STUDIO<br />
1. Take your <strong>Lexicon</strong> Omega hardware out of the box and plug the power in.<br />
2. Connect the included USB cable to your computer and to the Omega.<br />
3. Open Cubase LE, and go to Devices>Device Setup as shown below.<br />
2. Click on VST Multitrack and select <strong>Lexicon</strong> Mac USB 1 as the ASIO Driver (as shown below).<br />
3. Cubase LE will now ask you if you would like to switch the driver. Select Switch then OK.<br />
4. Now, go to Devices>VST Inputs. Make each of the 4 Mac USB inputs active by clicking on the<br />
Active buttons and close the box. (If only 2 ports are shown, expand the window to show all 4 ports.)<br />
You are now ready to start recording with Cubase LE.
<strong>Lexicon</strong> Omega Support<br />
As new recording software becomes available, the <strong>Lexicon</strong> Omega can be updated to ensure it works properly<br />
with these applications. Please check the <strong>Lexicon</strong> website for future update information.<br />
8760 South Sandy Parkway<br />
Sandy, UT 84070<br />
Tel: (801) 568-7567<br />
Fax: (801) 568-7662<br />
http://www.lexiconpro.com<br />
Cubase and ASIO are trademarks of Steinberg Media Technologies GmBH.<br />
<strong>Lexicon</strong> uses the Nullsoft Scriptable Install System (NSIS) - Copyright ©1999-2004 Nullsoft, Inc.<br />
18-0542-B