
Create successful ePaper yourself
Turn your PDF publications into a flip-book with our unique Google optimized e-Paper software.
Focused on performance TM<br />
© Stanley Hydraulic <strong>Tool</strong>s 1996<br />
OPS USA & CE VERSION<br />
Printed in U.S.A.<br />
31846 11/02 VER 2<br />
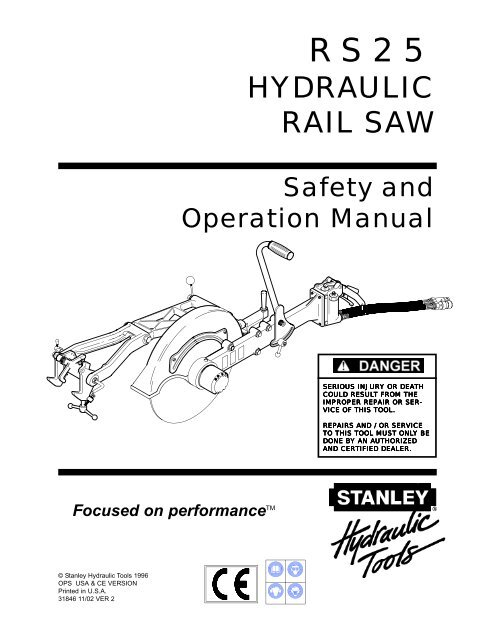
RS25<br />
<strong>HYDRAULIC</strong><br />
<strong>RAIL</strong> <strong>SAW</strong><br />
Safety and<br />
Operation Manual<br />
SERIOUS SERIOUS INJURY INJURY OR OR DEA DEATH DEA TH<br />
COULD COULD RESUL RESULT RESUL RESULT<br />
T FROM FROM THE<br />
THE<br />
IMPROPER IMPROPER IMPROPER REP REPAIR REP AIR OR OR SER-<br />
SER-<br />
VICE VICE VICE OF OF THIS THIS TOOL TOOL. TOOL TOOL<br />
REP REPAIRS REP AIRS AND AND / / OR OR SERVICE SERVICE<br />
SERVICE<br />
TO TO TO THIS THIS TOOL TOOL MUST MUST ONL ONL ONLY ONL ONL Y BE<br />
BE<br />
DONE DONE B BBY<br />
B Y AN AN A AAUTHORIZED<br />
A UTHORIZED<br />
AND AND CERTIFIED CERTIFIED DEALER DEALER. DEALER
CERTIFICATE OF CONFORMITY<br />
ÜBEREINSTIMMUNGS-ZERTIFIKAT<br />
CERTIFICAT DE CONFORMITE CEE<br />
D’UN MARTEAU-PIQUEUR OU D’UN BRISE-BETON EXAMINE<br />
CERTIFICADO DE CONFORMIDAD<br />
CERTIFICATO DI CONFORMITA<br />
I, the undersigned:<br />
Ich, der Unterzeichnende:<br />
Je soussigné:<br />
El abajo firmante:<br />
Io sottoscritto:<br />
hereby certify that the construction plant or equipment specified hereunder:<br />
bestätigt hiermit, daß die Konstruktion und Ausrüstung wie folgt spezifiziert ist:<br />
atteste que le brise-béton:<br />
por el presente certifico que la fabrica o el equipo especificado a continuacion:<br />
certifico che l’impianto o l’attrezzatura sotto specificata:<br />
1. Category:<br />
Kategorie:<br />
Catégorie:<br />
Categoria:<br />
Categoria:<br />
2. Make/Ausführung/Marque/Marca/Fabbricazione Stanley<br />
3. Type/Typ/Type/Tipo/Tipo:<br />
4. Type serial number of equipment:<br />
Typ und Serien - Nr. der Ausrüstung:<br />
Numéro dans la série du type de matériel:<br />
Numero de serie tipo del equipo:<br />
Matricola dell´attrezzatura:<br />
5. Year of manufacture/Baujahr/année de fabrication/Año de fabricacion/Anno di fabbricazione 2001<br />
Has been manufactured in conformity with - EEC Type examination as shown.<br />
wurde hergestellt in Übereinstimmung mit - EEC Typ-Prüfung nach.<br />
est fabriqué conformément - au(x) type(s) examiné(s) comme indiqué dans le tableau di-après.<br />
ha sido fabricado de acuerdo con - tipo examen EEC como dice.<br />
è stata costruita in conformitá con - le norme CEE come illustrato.<br />
Examen CEE de type<br />
Hydraulic<br />
<strong>Tool</strong>s<br />
Directive No. Date Approved body Date of expiry<br />
Richtlinie Nr Datum Prüfung durch Ablauf datum<br />
Directives particulières Numéro Date Organisme agréé Date d´expiration<br />
Directriz No Fecha Aprobado Fecha de caducidad<br />
Direttiva n. Data Collaudato Data di scadenza<br />
EN 28662-1 1988 Self N/A<br />
EN 1454 1996 Self N/A<br />
EN ISO 3744 1994 Self N/A<br />
6. Special Provisions: None 7. Measurements: Sound Power Level 108 dBA<br />
Spezielle Bestimmungen: Vibration Level 6.0 m/s2 Dispositions particulières:<br />
Provisiones especiales:<br />
Misure special:<br />
Done at/Ort/Fait à/Dado en/Fatto a<br />
Stanley Hydraulic <strong>Tool</strong>s, Milwaukie, Oregon USA<br />
Date/Datum/le/Fecha/Data<br />
2001<br />
Signature/Unterschrift/Signature/Firma/Firma<br />
Position/Position/Fonction/Puesto/Posizione<br />
Mellits, Kirk E.<br />
Surname and First names/Familienname und Vernamen/Nom et prénoms/Nombre y apellido/Cognome e nome<br />
Rail Saw (Hydraulic)<br />
RS25100<br />
All<br />
Engineering Manager<br />
P/N 35511
1<br />
Accessories ........................................................................................... 16<br />
Index (this page) ......................................................................................1<br />
Hydraulic Hose Requirements .................................................................7<br />
Hydraulic Requirements ........................................................................... 9<br />
Local Safety Regulations ......................................................................... 4<br />
Operation ........................................................................................10 - 12<br />
Parts Drawing ........................................................................................ 15<br />
Parts List ................................................................................................ 14<br />
Safety Precautions ............................................................................. 2 - 3<br />
Specifications ......................................................................................... 16<br />
Stickers and Tags............................................................................... 5 - 6<br />
Troubleshooting ..................................................................................... 13<br />
Warranty ................................................................................................ 17<br />
INDEX<br />
SERVICING THE RS25 <strong>RAIL</strong> <strong>SAW</strong>: This manual contains safety, operation, and general maintenance<br />
instructions. It does not contain specific disassembly, assembly and repair instructions.<br />
Stanley Hydraulic <strong>Tool</strong>s recommends that servicing of hydraulic tools, other than routine maintenance,<br />
must be performed by an authorized and certified dealer. The service and repair manual is<br />
p/n 31847 and may be obtained from your dealer. Please read the following warning.<br />
SERIOUS SERIOUS INJURY INJURY OR OR DEA DEA DEATH DEA DEA TH COULD COULD COULD RESUL RESUL RESULT RESUL RESUL T FROM FROM THE THE<br />
THE<br />
IMPROPER IMPROPER REP REPAIR REP REPAIR<br />
AIR OR OR SERVICE SERVICE OF OF THIS THIS THIS EQUIPMENT<br />
EQUIPMENT.<br />
EQUIPMENT<br />
REP REP REPAIRS REP REP AIRS AND AND / / / OR OR SERVICE SERVICE TO TO THIS THIS EQUIPMENT EQUIPMENT MUST<br />
MUST<br />
ONL ONLY ONL ONLY<br />
Y BE BE BE DONE DONE B BBY<br />
B Y AN AN A AAUTHORIZED<br />
A UTHORIZED AND AND CERTIFIED<br />
CERTIFIED<br />
CERTIFIED<br />
DEALER DEALER DEALER. DEALER DEALER<br />
For the nearest authorized and certified dealer, call Stanley Hydraulic <strong>Tool</strong>s, 1-800-549-0517 and<br />
ask for a Customer Service Representative.
<strong>Tool</strong> operators and maintenance personnel must always comply with the safety precautions given in this<br />
manual and on the stickers and tags attached to the equipment.<br />
These safety precautions are given for your safety. Review them carefully before operating the tool and<br />
before performing general maintenance or repairs.<br />
Supervising personnel should develop additional precautions relating to the specific work area and local<br />
safety regulations. If so, place the added precautions in the space provided on page 5.<br />
GENERAL SAFETY PRECAUTIONS<br />
The model RS25 Hydraulic Rail Saw will provide safe and dependable service if operated in accordance<br />
with the instructions given in this manual. Read and understand this manual and any stickers and tags<br />
attached to the tool and hoses before operation. Failure to do so could result in personal injury or equipment<br />
damage.<br />
• Operator must start in a work area without bystanders. The operator must be familiar with all prohibited<br />
work areas such as excessive slopes and dangerous terrain conditions.<br />
• Establish a training program for all operators to ensure safe operation.<br />
• Do not operate the tool unless thoroughly trained or under the supervision of an instructor.<br />
• Always wear safety equipment such as goggles, ear and head protection, and safety shoes at all times<br />
when operating the tool.<br />
• Do not inspect or clean the tool while the hydraulic power source is connected. Accidental engage<br />
ment of the tool can cause serious injury.<br />
• Always connect hoses to the tool hose couplers before energizing the hydraulic power source. Be<br />
sure all hose connections are tight.<br />
• Do not operate the tool at oil temperatures above 140°F/60°C. Operation at higher temperatures can<br />
cause higher than normal temperatures at the tool which can result in operator discomfort.<br />
• Do not operate a damaged, improperly adjusted, or incompletely assembled rail saw.<br />
• Do not operate the tool with the wheel guard removed.<br />
• Never wear loose clothing that can get entangled in the working parts of the tool.<br />
• Keep all parts of your body away from the rotating wheel. Long hair or loose clothing can become<br />
drawn into rotating components.<br />
• Keep the wheel off all surfaces when starting the rail saw.<br />
SAFETY PRECAUTIONS<br />
Do not operate this equipment or associated<br />
equipment until the following safety instructions<br />
have been thoroughly read and understood!<br />
Read this manual before installing,<br />
operating or maintaining this equipment.<br />
2
• Always hold the tool with both hands when the unit is running. Use a firm grip.<br />
• Make sure the wheel has stopped before setting the tool down. Always carry the tool with the wheel<br />
stopped.<br />
• Inspect the wheel guard and collars for damage after any wheel breakage.<br />
• Do not operate the tool in the vicinity of flamable materials.<br />
• Never exceed the maximum operating speed marked on the wheel.<br />
• Do not attempt to adjust the flow control in the valve handle.<br />
• Eye injury, and cutting or severing of body parts is possible if proper procedures are not followed.<br />
CUTTING WHEEL SAFETY<br />
• Do not store or transport the saw with the wheel installed.<br />
• Ensure that the cutting wheel is correctly mounted and tightened before use.<br />
• Operate the Rail Saw at "no load" for 30 seconds in a safe position and ensure there is no vibration or<br />
other defects detected. If considerable vibration or other defects are detected, stop operation of the<br />
tool immediately and determine the cause. Do not use the tool until the defect is corrected.<br />
• If the Rail Saw is dropped with a cutting wheel installed, the cutting wheel should be examined<br />
throughly before use.<br />
• Only use cutting wheels that comply with ANSI B7.5/ISO 525, 603.<br />
• Check that the maximum operating speed (rpm - revolutions per minute) of the cutting wheel is<br />
equal to or greater than the rated shaft speed of the grinder. Stanley recommends wheels rated at<br />
4700 RPM for 16 inch models and 5300 RPM for 14 inch models.<br />
SAFETY SYMBOLS<br />
Safety symbols are used to emphasize all operator, maintenance and repair actions which, if not strictly<br />
followed, could result in a life-threatening situation, bodily injury or damage to equipment.<br />
DANGER<br />
This safety symbol may appear<br />
on the tool. It is used to alert<br />
the operator of an action that<br />
could place him/her or others in<br />
a life threatening situation.<br />
This safety symbol appears in<br />
these instructions to identify<br />
an action that could cause<br />
bodily injury to the operator or<br />
other personnel.<br />
IMPORTANT<br />
This safety symbol appears in<br />
these instructions to identify an<br />
action or condition that could<br />
result in damage to the tool or<br />
other equipment.<br />
Always observe safety symbols. They are included for your safety and for the protection of the tool.<br />
3<br />
DANGER
LOCAL SAFETY REGULATIONS<br />
Enter any local safety regulations here. Keep these instructions in an area accessible to the operator and<br />
maintenance personnel.<br />
4
5<br />
2<br />
WHEEL SIZE<br />
RPM: SPINDLE:<br />
PRESS: BAR PSI<br />
FLOW: LPM GPM<br />
1<br />
28811 INFORMATION PLAQUE<br />
(CE models only)<br />
1<br />
CAUTION<br />
PROTECT YOUR EYES...<br />
WEAR SAFETY GOGGLES<br />
1. DO NOT USE DAMAGED WHEELS.<br />
2. USE FULL TROTTLE ONLY WHILE CUTTING.<br />
3. USE ONLY WHEELS MARKED HIGH SPEED REINFORCED THAT MEET<br />
REQUIREMENTS OF ANSI B7.5. WHEELS SHOULD BE NO LARGER THAN<br />
14" DIA X 5/32" THICK WITH A 1" OR 22 mm ARBOR HOLE & RATED FOR<br />
5300 RPM MINIMUM SPEED.<br />
4. INSPECT WHEEL GUARD & COLLARS FOR DAMAGE AFTER ANY WHEEL<br />
BREAKAGE ON THE MACHINE.<br />
5. MAXIMUM SPINDLE SPEED IS 5300 RPM.<br />
2<br />
05868 ABRASIVE CUT-OFF SAFETY LABEL<br />
(14 inch models only - except CE)<br />
TOOL STICKERS & TAGS<br />
3<br />
Stanley Hydraulic <strong>Tool</strong>s<br />
3810 SE Naef Rd<br />
Milwaukie, Oregon 97267 U.S.A.<br />
Model No. 26-38 lpm/7-10 gpm<br />
RS25 140 bar/2000 psi<br />
4<br />
5<br />
6<br />
7<br />
3 (16" model) or 4 (14" model)<br />
28728 NAME TAG<br />
(14 inch & 16 inch models)<br />
MODEL & SERIAL<br />
NO. STAMPINGS<br />
CAUTION<br />
PROTECT YOUR EYES...<br />
WEAR SAFETY GOGGLES<br />
1. DO NOT USE DAMAGED WHEELS.<br />
2. USE FULL TROTTLE ONLY WHILE CUTTING.<br />
3. USE ONLY WHEELS MARKED HIGH SPEED REINFORCED THAT MEET<br />
REQUIREMENTS OF ANSI B7.5. WHEELS SHOULD BE NO LARGER THAN<br />
16" DIA X 5/32" THICK WITH A 1" ARBOR HOLE & RATED FOR 4700 RPM<br />
MINIMUM SPEED.<br />
4. INSPECT WHEEL GUARD & COLLARS FOR DAMAGE AFTER ANY WHEEL<br />
BREAKAGE ON THE MACHINE.<br />
5. MAXIMUM SPINDLE SPEED IS 4700 RPM.<br />
2<br />
17641 ABRASIVE CUT-OFF SAFETY LABEL<br />
(16 inch models only)<br />
3<br />
28409 COMPOSITE STICKER<br />
(CE models only)
TOOL STICKERS & TAGS (Continued)<br />
The safety tag (p/n 15875)<br />
at right is attached to the<br />
tool when shipped from<br />
the factory. Read and<br />
understand the safety<br />
instructions listed on this<br />
tag before removal. We<br />
suggest you retain this tag<br />
and attach it to the tool<br />
when not in use.<br />
<strong>RAIL</strong>ROAD HELP DESK<br />
1-800-549-0517<br />
FOR CUSTOMER SERVICE OR<br />
TECHNICAL QUESTIONS<br />
4<br />
25610 <strong>RAIL</strong>ROAD HELP DESK STICKER<br />
(16 inch models only - except CE)<br />
5<br />
28322 CE STICKER<br />
(CE models only)<br />
6<br />
11207 CIRCUIT TYPE "D" STICKER<br />
(CE models only)<br />
DANGER<br />
1. FAILURE TO USE <strong>HYDRAULIC</strong> HOSE LABELED AND CERTI-<br />
FIED AS NON-CONDUCTIVE WHEN USING <strong>HYDRAULIC</strong> TOOLS<br />
ON OR NEAR ELECTRICAL LINES MAY RESULT IN DEATH OR<br />
SERIOUS INJURY.<br />
BEFORE USING HOSE LABELED AND CERTIFIED AS NON-<br />
CONDUCTIVE ON OR NEAR ELECTRIC LINES BE SURE THE<br />
HOSE IS MAINTAINED AS NON-CONDUCTIVE. THE HOSE<br />
SHOULD BE REGULARLY TESTED FOR ELECTRIC CURRENT<br />
LEAKAGE IN ACCORDANCE WITH YOUR SAFETY DEPART-<br />
MENT INSTRUCTIONS.<br />
2. A <strong>HYDRAULIC</strong> LEAK OR BURST MAY CAUSE OIL INJECTION<br />
INTO THE BODY OR CAUSE OTHER SEVERE PERSONAL IN-<br />
JURY.<br />
A DO NOT EXCEED SPECIFIED FLOW AND PRESSURE FOR<br />
THIS TOOL. EXCESS FLOW OR PRESSURE MAY CAUSE A<br />
LEAK OR BURST.<br />
B DO NOT EXCEED RATED WORKING PRESSURE OF HYDRAU<br />
LIC HOSE USED WITH THIS TOOL. EXCESS PRESSURE MAY<br />
CAUSE A LEAK OR BURST.<br />
C CHECK TOOL HOSE COUPLERS AND CONNECTORS DAILY<br />
FOR LEAKS. DO NOT FEEL FOR LEAKS WITH YOUR HANDS.<br />
CONTACT WITH A LEAK MAY RESULT IN SEVERE PERSONAL<br />
INJURY.<br />
IMPORTANT<br />
READ OPERATION MANUAL AND<br />
SAFETY INSTRUCTIONS FOR THIS<br />
TOOL BEFORE USING IT.<br />
USE ONLY PARTS AND REPAIR<br />
PROCEDURES APPROVED BY<br />
STANLEY AND DESCRIBED IN THE<br />
OPERATION MANUAL.<br />
TAG TO BE REMOVED ONLY BY<br />
TOOL OPERATOR.<br />
SEE OTHER SIDE<br />
15875<br />
SAFETY TAG P/N 15875(shown smaller than actual size)<br />
7-10 GPM/26-38 LPM<br />
DO NOT EXCEED 2000 PSI/140 BAR<br />
�DO NOT EXCEED SPECIFIED FLOW OR PRESSURE. �USE CLOSED-<br />
CENTER TOOL ON CLOSED-CENTER SYSTEM. �USE OPEN-CENTER<br />
TOOL ON OPEN-CENTER SYSTEM. �CORRECTLY CONNECT HOSES<br />
TO TOOL "IN" AND "OUT" PORTS. �IMPROPER HANDLING, USE OR<br />
MAINTENANCE OF TOOL COULD RESULT IN A LEAK, BURST, OR<br />
OTHER TOOL FAILURE. �CONTACT AT A LEAK OR BURST CAN<br />
CAUSE OIL INJECTION INTO THE BODY. �FAILURE TO OBSERVE<br />
THESE PRECAUTIONS CAN RESULT IN SERIOUS PERSONAL INJURY.<br />
03787<br />
5<br />
03787 FLOW & GPM STICKER<br />
(14 & 16 inch models only - except CE)<br />
7<br />
11210 SOUND POWER LEVEL STICKER<br />
(CE models only)<br />
DANGER<br />
D DO NOT LIFT OR CARRY TOOL BY THE HOSES. DO NOT<br />
ABUSE HOSE. DO NOT USE KINKED, TORN OR DAMAGED<br />
HOSE.<br />
3. MAKE SURE <strong>HYDRAULIC</strong> HOSES ARE PROPERLY CONNECTED<br />
TO THE TOOL BEFORE PRESSURING SYSTEM. SYSTEM<br />
PRESSURE HOSE MUST ALWAYS BE CONNECTED TO TOOL<br />
"IN" PORT. SYSTEM RETURN HOSE MUST ALWAYS BE CON-<br />
NECTED TO TOOL "OUT" PORT. REVERSING CONNECTIONS<br />
MAY CAUSE REVERSE TOOL OPERATION WHICH CAN RE-<br />
SULT IN SEVERE PERSONAL INJURY.<br />
4. DO NOT CONNECT OPEN-CENTER TOOLS TO CLOSED-CEN-<br />
TER <strong>HYDRAULIC</strong> SYSTEMS. THIS MAY RESULT IN LOSS OF<br />
OTHER <strong>HYDRAULIC</strong> FUNCTIONS POWERED BY THE SAME<br />
SYSTEM AND/OR SEVERE PERSONAL INJURY.<br />
5. BYSTANDERS MAY BE INJURED IN YOUR WORK AREA. KEEP<br />
BYSTANDERS CLEAR OF YOUR WORK AREA.<br />
6. WEAR HEARING, EYE, FOOT, HAND AND HEAD PROTECTION.<br />
7. TO AVOID PERSONAL INJURY OR EQUIPMENT DAMAGE, ALL<br />
TOOL REPAIR MAINTENANCE AND SERVICE MUST ONLY BE<br />
PERFORMED BY AUTHORIZED AND PROPERLY TRAINED<br />
PERSONNEL.<br />
IMPORTANT<br />
READ OPERATION MANUAL AND<br />
SAFETY INSTRUCTIONS FOR THIS<br />
TOOL BEFORE USING IT.<br />
USE ONLY PARTS AND REPAIR<br />
PROCEDURES APPROVED BY<br />
STANLEY AND DESCRIBED IN THE<br />
OPERATION MANUAL.<br />
TAG TO BE REMOVED ONLY BY<br />
TOOL OPERATOR.<br />
SEE OTHER SIDE<br />
15875<br />
6
HOSE TYPES<br />
Hydraulic hose types authorized for use with Stanley Hydraulic <strong>Tool</strong>s are as follows:<br />
1<br />
2<br />
3<br />
DO NOT REMOVE THIS TAG<br />
Certified non-conductive<br />
Wire-braided (conductive)<br />
Fabric-braided (not certified or labeled non-conductive)<br />
Hose 1 listed above is the only hose authorized for use near electrical conductors.<br />
Hoses 2 and 3 listed above are conductive and must never be used near electrical conductors.<br />
To help ensure your safety, the following DANGER tags are attached to all hose purchased from Stanley<br />
Hydraulic <strong>Tool</strong>s. DO NOT REMOVE THESE TAGS.<br />
If the information on a tag is illegible because of wear or damage, replace the tag immediately. A new tag<br />
may be obtained at no charge from your Stanley Distributor.<br />
1<br />
CERTIFIED NON-CONDUCTIVE HOSE<br />
This tag is attached to all certified non-conductive hose.<br />
DO NOT REMOVE THIS TAG<br />
<strong>HYDRAULIC</strong> HOSE REQUIREMENTS<br />
D A N G E R<br />
1 FAILURE TO USE <strong>HYDRAULIC</strong> HOSE LABELED AND CERTIFIED AS NON-CONDUCTIVE<br />
WHEN USING <strong>HYDRAULIC</strong> TOOLS ON OR NEAR ELECTRIC LINES MAYRESULT IN DEATH<br />
OR SERIOUS INJURY.<br />
FOR PROPER AND SAFE OPERATION MAKE SURE THAT YOU HAVE BEEN PROPERLY<br />
TRAINED IN CORRECT PROCEDURES REQUIRED FOR WORK ON OR AROUND<br />
ELECTRIC LINES.<br />
2. BEFORE USING <strong>HYDRAULIC</strong> HOSE LABELED AND CERTIFIED AS NON-CONDUCTIVE ON<br />
OR NEAR ELECTRIC LINES. WIPE THE ENTIRE LENGTH OF THE HOSE AND FITTING<br />
WITH A CLEAN DRY ABSORBENT CLOTH TO REMOVE DIRT AND MOSISTURE AND TEST<br />
HOSE FOR MAXIMUM ALLOWABLE CURRENT LEAKAGE IN ACCORDANCE WITH SAFETY<br />
DEPARTMENT INSTRUCTIONS.<br />
SEE OTHER SIDE<br />
D A N G E R<br />
3. DO NOT EXCEED HOSE WORKING PRESSURE OR ABUSE HOSE. IMPROPER USE OR<br />
HANDLING OF HOSE COULD RESULT IN BURST OR OTHER HOSE FAILURE. KEEP HOSE<br />
AS FAR AWAY AS POSSIBLE FROM BODY AND DO NOT PERMIT DIRECT CONTACT<br />
DURING USE. CONTACT AT THE BURST CAN CAUSE BODILY INJECTION AND SEVERE<br />
PERSONAL INJURY.<br />
4. HANDLE AND ROUTE HOSE CAREFULLY TO AVOID KINKING, ABRASION, CUTTING, OR<br />
CONTACT WITH HIGH TEMPERATURE SURFACES. DO NOT USE IF KINKED. DO NOT USE<br />
HOSE TO PULL OR LIFT TOOLS, POWER UNITS, ETC.<br />
5. CHECK ENTIRE HOSE FOR CUTS CRACKS LEAKS ABRASIONS, BULGES, OR DAMAGE TO<br />
COUPLINGS IF ANY OF THESE CONDITIONS EXIST, REPLACE THE HOSE IMMEDIATELY.<br />
NEVER USE TAPE OR ANY DEVICE TO ATTEMPT TO MEND THE HOSE.<br />
6. AFTER EACH USE STORE IN A CLEAN DRY AREA.<br />
SEE OTHER SIDE<br />
SIDE 1 (shown smaller than actual size)<br />
SIDE 2<br />
2 AND 1 3 WIRE-BRAIDED AND FABRIC-BRAIDED (NOT CERTIFIED OR LABELED NON-CONDUC-<br />
TIVE) HOSE<br />
This tag is attached to all conductive hose.<br />
D A N G E R<br />
1 DO NOT USE THIS <strong>HYDRAULIC</strong> HOSE IN OR NEAR ELECTRIC LINES. THIS HOSE IS NOT<br />
LABELED OR CERTIFIED AS NON-CONDUCTIVE. USING THIS HOSE ON OR NEAR<br />
ELECTRICAL LINES MAY RESULT IN DEATH OR SERIOUS INJURY.<br />
2. FOR PROPER AND SAFE OPERATION MAKE SURE THAT YOU HAVE BEEN PROPERLY<br />
TRAINED IN CORRECT PROCEDURES REQUIRED FOR WORK ON OR AROUND<br />
ELECTRIC LINES.<br />
3. DO NOT EXCEED HOSE WORKING PRESSURE OR ABUSE HOSE. IMPROPER USE OR<br />
HANDLING OF HOSE COULD RESULT IN BURST OR OTHER HOSE FAILURE. KEEP HOSE<br />
AS FAR AWAY AS POSSIBLE FROM BODY AND DO NOT PERMIT DIRECT CONTACT<br />
DURING USE. CONTACT AT THE BURST CAN CAUSE BODILY INJECTION AND SEVERE<br />
PERSONAL INJURY.<br />
4. HANDLE AND ROUTE HOSE CAREFULLY TO AVOID KINKING, CUTTING, OR CONTACT<br />
WITH HIGH TEMPERATURE SURFACES. DO NOT USE IF KINKED. DO NOT USE HOSE TO<br />
PULL OR LIFT TOOLS, POWER UNITS, ETC.<br />
SEE OTHER SIDE<br />
HOSE PRESSURE RATING<br />
D A N G E R<br />
5. CHECK ENTIRE HOSE FOR CUTS CRACKS LEAKS ABRASIONS, BULGES, OR DAMAGE TO<br />
COUPLINGS IF ANY OF THESE CONDITIONS EXIST, REPLACE THE HOSE IMMEDIATELY.<br />
NEVER USE TAPE OR ANY DEVICE TO ATTEMPT TO MEND THE HOSE.<br />
6. AFTER EACH USE STORE IN A CLEAN DRY AREA.<br />
SEE OTHER SIDE<br />
SIDE 1 (shown smaller than actual size)<br />
SIDE 2<br />
The rated working pressure of the hydraulic hose must be equal or higher than the relief valve setting on the<br />
hydraulic system.<br />
7<br />
DO NOT REMOVE THIS TAG<br />
DO NOT REMOVE THIS TAG
ADDITIONAL REQUIREMENTS<br />
IMPORTANT<br />
In addition to the Safety<br />
Precautions on pages 2 thru 3<br />
of this manual, observe the<br />
following for equipment<br />
protection and care.<br />
• Always store an idle rail saw in a clean dry space,<br />
safe from damage or pilferage. Make sure the<br />
cutting wheel is removed.<br />
• Do not exceed the rated limits or use the rail saw<br />
for applications beyond its design capacity.<br />
• Always keep critical tool markings, such as lables<br />
and warning stickers legible.<br />
• Always replace hoses, couplings and other parts<br />
with replacement parts recommended by Stanley<br />
Hydraulic <strong>Tool</strong>s. Supply hoses must have a minimum<br />
working pressure rating of 2500 psi/175 bar.<br />
• Permit only experienced personnel to perform<br />
tool repair.<br />
• Be sure to wipe all couplers clean before connecting.<br />
Use only lint-free cloths.<br />
• The hydraulic circuit control valve must be in the<br />
"OFF" position when coupling or uncoupling the rail<br />
saw. Failure to do so may result in damage to the<br />
quick couplers and cause overheating of the<br />
hydraulic system.<br />
• Check fastener tightness often and before each<br />
use daily.<br />
• Quick disconnect couplings must conform to<br />
EHTMA/HTMA specifications.<br />
• The Stanley HPR Twin Circuit Power Unit is<br />
recommended for use as the Rail Saw's hydraulic<br />
supply.<br />
8
Hydraulic System<br />
Requirements<br />
Flow rate<br />
<strong>Tool</strong> Operating Pressure<br />
(at the power supply outlet)<br />
System relief valve setting<br />
(at the power supply outlet)<br />
Maximum back pressure<br />
(at tool end of the return hose)<br />
Measured at a max. fluid viscosity of:<br />
(at min. operating temperature)<br />
Temperature<br />
Sufficient heat rejection capacity<br />
to limit max. fluid temperature to:<br />
(at max. expected ambient temperature)<br />
Min. cooling capacity<br />
at a temperature difference of<br />
between ambient and fluid temps<br />
<strong>Tool</strong><br />
Category:<br />
HTMA Requirements<br />
Type I Type II Type III<br />
NOTE: Do not operate the tool at oil temperatures above 140°<br />
F (60° C). Operation at higher temperatures can cause operator<br />
discomfort at the tool.<br />
Filter<br />
25 microns 25 microns<br />
Min. full-flow filtration<br />
30 GPM (114 lpm) 30 GPM (114 lpm)<br />
sized for flow of at least:<br />
(For cold temp. startup and max. dirt-holding capacity)<br />
Hydraulic fluid<br />
Petroleum based<br />
(premium grade, anti-wear, non-conductive)<br />
Viscosity<br />
(at min. and max. operating temps)<br />
NOTE: When choosing hydraulic fluid, the expected oil temperature extremes that will be experienced in service determine the<br />
most suitable temperature viscosity characteristics. Hydraulic fluids with a viscosity index over 140 will meet the requirements over<br />
a wide range of operating temperatures.<br />
*SSU = Saybolt Seconds Universal<br />
20Lpm at 138bar<br />
BHTMA CATEGORY<br />
4-6 GPM (15-23 7-9 GPM (26-34 11-13 GPM (42-49<br />
lpm)<br />
Lpm)<br />
lpm)<br />
2000 psi (138 bar) 2000 psi (138 bar) 2000 psi (138 bar)<br />
2100-2250<br />
(145-155 bar)<br />
250 psi<br />
(17 bar)<br />
400 SSU<br />
(82 centistokes)<br />
140°<br />
F (60° C)<br />
3 hp (2.24 kW)<br />
40°<br />
F (22° C)<br />
100-400 SSU*<br />
(20-82 centistokes)<br />
2100-2250<br />
(145-155 bar)<br />
250 psi<br />
(17 bar)<br />
3 0Lpm a t 13 8ba r<br />
BHTMA CATEGORY<br />
400 SSU<br />
(82 centistokes)<br />
140°<br />
F (60° C)<br />
5 hp (3.73 kW)<br />
40°<br />
F (22° C)<br />
100-400 SSU*<br />
(20-82 centistokes)<br />
2100-2250<br />
(145-155 bar)<br />
250 psi<br />
(17 bar)<br />
400 SSU<br />
(82 centistokes)<br />
140°<br />
F (60° C)<br />
7 hp (5.22 kW)<br />
40°<br />
F (22° C)<br />
25 microns<br />
30 GPM (114 lpm)<br />
100-400 SSU*<br />
(20-82 centistokes)<br />
9-10.5 GPM (34-40<br />
lpm)<br />
2000 psi (138 bar)<br />
2200-2300<br />
(152-159 bar)<br />
250 psi<br />
(17 bar)<br />
Type RR<br />
400 SSU<br />
(82 centistokes)<br />
140°<br />
F (60° C)<br />
6 hp (4.5 kW)<br />
40°<br />
F (22° C)<br />
25 microns<br />
30 GPM (114 lpm)<br />
100-400 SSU*<br />
(20-82 centistokes)<br />
NOTE: These are general hydraulic system requirements. See tool Specification page for tool specific<br />
requirements.<br />
9
PREOPERATION<br />
PROCEDURES<br />
CHECK <strong>HYDRAULIC</strong> POWER<br />
SOURCE<br />
1. Using a calibrated flowmeter and pressure<br />
gauge, check that the hydraulic power source<br />
develops a flow of 9-10.5 gpm/34-40 lpm at 2000<br />
psi/140 bar.<br />
2. Make certain the hydraulic power source is<br />
equipped with a relief valve set to open at 2200-<br />
2300 psi/152-159 bar minimum.<br />
3. Check that the hydraulic circuit matches the tool<br />
for open-center (OC) or closed-center (CC) operation.<br />
CHECK TOOL<br />
1. Make sure all tool accessories are correctly<br />
installed. Failure to install tool accessories properly<br />
can result in damage to the tool or personal injury.<br />
2. There should be no signs of leaks.<br />
3. The tool should be clean, with all fittings and<br />
fasteners tight.<br />
CHECK TRIGGER MECHANISM<br />
1. Check that the trigger operates smoothly and is<br />
free to travel between the "ON" and "OFF" positions.<br />
CHECK GUARD ASSEMBLY<br />
1. Inspect the wheel guard assembly for cracks<br />
and other structural damage.<br />
10<br />
PREPARATION FOR INITIAL USE<br />
Each unit as shipped has no special unpacking or<br />
assembly requirements prior to usage. Inspection<br />
to assure the unit was not damaged in shipping<br />
and does not contain packing debris is all that is<br />
required. After installation of a cutting wheel a unit<br />
may be put to use.<br />
OPERATION<br />
INSTALLING AND REMOVING<br />
ABRASIVE CUTTING WHEELS<br />
NOTE: Use 14 in. / 350 mm diameter (for 14 in.<br />
model) or 16 in. / 400 mm diameter (for 16 in.<br />
model) abrasive cutting wheels with a 1 in.<br />
arbor hole. Only use cutting wheels which<br />
comply with ANSI B7.5/ISO 525, 603. Make sure<br />
the paper labels or blotters are installed between<br />
the wheel and collars.<br />
1. Before installing abrasive wheels, "sound" the<br />
wheel for possible damage by hanging the wheel<br />
vertically be the arbor hole and rapping lightly with a<br />
screwdriver handle or similar instrument. Thin,<br />
organic bond wheels will produce a low drumming<br />
tone if it is physically sound. If the wheel produces a<br />
"dead" or "flat" sound, it may be cracked. Cracked<br />
or damaged wheels must never be used.<br />
2. Check that the surfaces of the wheel that come<br />
in contact with blotters and flanges are free of dirt<br />
and other foreign particles.<br />
3. Remove the jam nut (77) and outside collar (78)<br />
by using a box type wrench while gripping the<br />
cutting wheel.<br />
3. Install the cutting wheel. Make sure blotters or<br />
labels remain on the cutting wheel.<br />
5. Reinstall the outside collar and jam nut. Tighten<br />
the jam nut with a box type wrench while gripping<br />
the cutting wheel. Only tighten sufficiently to<br />
prevent slippage of the wheel between the collars<br />
(78 & 79).<br />
DRIVESHAFT SPEED CHECK<br />
The speed of the motor output shaft should be<br />
checked at least every 100 hours of operation by<br />
trained and experienced personnel. A record of the<br />
speed checks should be maintained. The rated<br />
speed of the RS25 Rail Saw is 3600 rpm at 10 gpm<br />
/ 38 lpm for the 16 inch/400 mm model and 4500<br />
rpm at 10 gpm / 38 lpm for the 14 inch/350 mm<br />
model. The cutting wheel must be rated for a<br />
minimum of 4700 rpm for the 16 inch/400 mm<br />
model and 5300 rpm for the 14 inch/350 mm<br />
model. Tests should be conducted while operating<br />
the normal power supply used with the saw.
CONNECT HOSES<br />
1. Wipe all hose couplers with a clean lint-free<br />
cloth before making connections.<br />
2. Connect the hoses from the hydraulic power<br />
source to the hose couplers on the rail saw. It is a<br />
good practice to connect the return hose first and<br />
disconnect it last to minimize or avoid trapped<br />
pressure within the rail saw motor.<br />
3. Observe flow indicators stamped on hose<br />
couplers to be sure that oil will flow in the proper<br />
direction. The female coupler is the inlet coupler.<br />
NOTE: The pressure increase in uncoupled<br />
hoses left in the sun may result in making them<br />
difficult to connect. When possible, connect<br />
the free ends of operating hoses together.<br />
OPERATING<br />
PROCEDURES<br />
CLAMPING THE <strong>RAIL</strong> <strong>SAW</strong> TO<br />
THE <strong>RAIL</strong><br />
1. Observe all safety precautions.<br />
2. Make sure the disconnect pivot bolt (24) is tight<br />
to the disconnect pivot (60) by turning the handle<br />
(20) to tighten the disconnect pivot bolt..<br />
3. Fully extend the indicator (69) and position the<br />
rail clamp (76) on the rail so the clamp arms bear<br />
on the top and sides of the rail and the bell crank<br />
(6) bears under the rail as shown in figure 1.<br />
LOWER<br />
CAPSCREW<br />
BELL<br />
CRANK<br />
Figure 1.<br />
CLAMP<br />
CLAMP<br />
4. Move the rail saw along the rail until the indicator<br />
is next to the cut as shown in figure 2.<br />
5. Tighten the bell crank to the rail by turning the<br />
clamp screw (75) clockwise.<br />
6. While holding onto the upper link (18), release<br />
the detent (13) by turning the knob (7) and then<br />
position the lower link forward (away from the<br />
operator) until the detent can be re-engaged in one<br />
or the other of the two holes away from the "top<br />
dead center hole". This positions the saw so that<br />
the operator may stand erect while cutting the rail<br />
and also allows the saw to cut down to the flange of<br />
the rail.<br />
An optional method is to disengage the detent and<br />
adjust the capscrews (see figure 1) as required.<br />
7. Adjust the wheel guard (87) so that it does not<br />
interfere with the cutting process and cuttings are<br />
directed away from the operator.<br />
EDGE OF<br />
CUT LINE<br />
<strong>RAIL</strong><br />
Figure 2.<br />
<strong>SAW</strong>ING THE <strong>RAIL</strong><br />
1. Always start the rail saw with the cutting wheel<br />
away from the work surface.<br />
2. Start the cut with the wheel rotating.<br />
INDICATOR<br />
NOTE: Do not "bump" the rail. Feed the wheel<br />
through the material as fast as possible without<br />
allowing the wheel to reduce its speed. Cutting<br />
through the material too slowly allows heat expansion<br />
and can cause wheel "pinching" in the material.<br />
"Pinching" the wheel from heat expansion is<br />
one of the most common causes of wheel breakage.<br />
3. Starting at the top of the rail, cut straight down<br />
while rocking the handle back and forth. Cut down<br />
until near the flange.<br />
11
4. When near the flange, stop the saw, release the<br />
detent and move the lower link toward the operator<br />
until the detent can be re-engaged in one of the<br />
holes away from the "top dead center hole". This<br />
positions the saw lower so that the flange of the rail<br />
may be easily cut.<br />
If the detent has been removed in favor of using the<br />
capscrews as stops for the lower link, simply move<br />
the lower link toward the capscrew closest to the<br />
operator.<br />
If the wheel is worn such that it will not completely<br />
cut through the rail, loosen the clamp lever on the<br />
saw, and rotate the saw to allow cutting from the<br />
opposite side. Readjust the lower link as required<br />
and finish the cut.<br />
DETACHING THE UPPER AND<br />
LOWER LINKS<br />
The upper (18) and lower (16) links can be detached<br />
from the motor mount (50) by unscrewing<br />
the disconnect pivot bolt (24).<br />
<strong>SAW</strong> STORAGE<br />
By disengaging the double cam (52), the upper link<br />
(18) and lower link (16) and clamp (76) can be<br />
rotated so that the entire saw has a flatter profile for<br />
storage.<br />
Do not store the saw with the abrasive wheel<br />
attached.<br />
12<br />
CARE OF ABRASIVE CUT-OFF<br />
WHEELS<br />
All abrasive cut-off wheels are breakable and,<br />
therefore, care must be exercised during handling<br />
and storage to prevent damage.<br />
Wheels should be laid on a flat, rigid, surface away<br />
from excessive heat or moisture. Wheels should<br />
not be stored where they will be exposed to high<br />
humidity, water, other liquids or freezing temperature.<br />
If wheels are supplied with blotters attached,<br />
suitable separators should be used to preserve<br />
flatness.<br />
COLD WEATHER OPERATION<br />
If the saw is to be used during cold weather,<br />
preheat the hydraulic fluid at low engine speed.<br />
When using the normally recommended fluids, fluid<br />
temperature should be at or above 50° F/<br />
10° C (400 ssu/82 centistokes) before use.<br />
INVESTIGATION OF WHEEL<br />
BREAKAGE<br />
If a wheel breaks during use, a careful investigation<br />
should be conducted by to determine the cause of<br />
the breakage. The cause must then be corrected<br />
before using the saw again.<br />
If unable to determine the cause of breakage, the<br />
wheel manufacturer should be consulted.
If symptoms of poor performance develop, the<br />
following chart can be used as a guide to correct<br />
the problem.<br />
When diagnosing faults in operation of the rail saw,<br />
always check that the hydraulic power source is<br />
TROUBLESHOOTING<br />
supplying the correct hydraulic flow and pressure<br />
to the saw as listed in the table. Use a flowmeter<br />
known to be accurate. Check the flow with the<br />
hydraulic oil temperature at least 80°F/27°C.<br />
Saw does not run. Hydraulic power source not Check power source for proper<br />
functioning correctly<br />
flow and pressure (7-10 gpm/26-<br />
38 lpm, 2000 psi/140 bar.<br />
Saw runs backwards.<br />
Coupler or hoses blocked Remove obstruction.<br />
Mechanical failure. Have tool serviced by authorized<br />
dealer.<br />
Pressure and return lines<br />
incorrectly connected.<br />
Saw cuts too slow. Insufficient fluid flow or too high<br />
back pressure or relief valve set<br />
too low.<br />
Wrong wheel for material being<br />
cut.<br />
Correct hose connections. Motor<br />
shaft rotates counter-clockwise<br />
as viewed from the end of the<br />
motor shaft.<br />
Check hydraulic supply. If<br />
hydraulic supply is correct, have<br />
unit serviced by authorized<br />
dealer.<br />
Use correct wheel.<br />
Fluid leakage. Seal failure. Do not use and have serviced by<br />
authorized dealer.<br />
Off center cut and binding. Bearings worn on link arms.<br />
Incorrect cutting technique.<br />
Have unit serviced by authorized<br />
dealer.<br />
Review operating procedures.<br />
13
RS25 (14 in. & 16 in. Blade) PARTS LIST<br />
Item<br />
No<br />
1<br />
2<br />
3<br />
4<br />
5<br />
6<br />
7<br />
8<br />
9<br />
10<br />
11<br />
12<br />
13<br />
14<br />
15<br />
16<br />
17<br />
18<br />
19<br />
20<br />
21<br />
22<br />
23<br />
24<br />
25<br />
26<br />
27<br />
Part<br />
No<br />
-------<br />
-------<br />
-------<br />
-------<br />
-------<br />
28181<br />
-------<br />
-------<br />
-------<br />
-------<br />
-------<br />
-------<br />
-------<br />
-------<br />
30958<br />
-------<br />
-------<br />
-------<br />
-------<br />
-------<br />
-------<br />
-------<br />
-------<br />
-------<br />
-------<br />
-------<br />
30671<br />
Qty<br />
4<br />
5<br />
5<br />
3<br />
1<br />
1<br />
1<br />
1<br />
1<br />
1<br />
1<br />
1<br />
1<br />
1<br />
1<br />
1<br />
1<br />
1<br />
1<br />
1<br />
1<br />
1<br />
1<br />
1<br />
1<br />
1<br />
1<br />
Description<br />
(see item # 131) * (see item # 131) * (see item # 131) * (see item # 131) * (see item # 131) * Bell Crank<br />
(see item # 129) * (see item # 129) * (see item # 129) * (see item # 129) * (see item # 129) * (see item # 129) * (see item # 129) * (see item # 131) * "D" Washer<br />
(see item # 131) * (see item # 131) * (see item # 131) * (see item # 131) * (see item # 131) * (see item # 131) * (see item # 131) * (see item # 131) * (see item # 131) * (see item # 131) * (see item # 131)� * Assist Handle<br />
28 31030 1 Handle Grip<br />
29 31181 5 Belleville Washer<br />
30 30667 1 Shoulder Bolt<br />
31 31138 1 Valve Spool<br />
32 01604 2 O-ring, .755 x .949 x .097 R17 �<br />
33 02931 1 Valve Cap<br />
34 00112 1 Quad Ring, 1/4 x 3/8 x 1/16 R16 �<br />
35 31853 1 Flow Control (16 in. model only)<br />
31854 1 Flow Control (14 in. model only)<br />
36 28108 1 Pipe Plug<br />
38 02920 1 Spacer<br />
39 22707 1 Trigger<br />
40 22704 1 Safety Catch<br />
41 22701 1 Torsion Spring<br />
42 03009 1 Roll Pin<br />
43 00165 1 Screw<br />
44 02911 1 Hose Clip<br />
45 31186 1 Poppet<br />
46 28552 1 Valve Handle Assy (Incld Item 36)<br />
47 17641 1 Wheel Safety Label (16" model only)<br />
05868 1 Wheel Safety Label (14" model only)<br />
48 17681 1 Roll Pin<br />
49 24869 1 Handle<br />
50 35289 1 Motor Mount<br />
51 02688 4 Capscrew<br />
52 30632 1 Double Cam<br />
53 30635 1 Spirol Pin<br />
54 29510 1 Eye Bolt<br />
55 04856 1 Retaining Ring<br />
56<br />
57<br />
58<br />
30841<br />
-------<br />
28673<br />
2<br />
1<br />
1<br />
Washer<br />
(see item # 131) * Spring<br />
59 30412 1 Motor Mount Pivot<br />
60 30530 1 Disconnect Pivot<br />
61 28711 1 Tolerance Ring<br />
62 30543 1 Stud<br />
63<br />
64<br />
65<br />
66<br />
67<br />
68<br />
69<br />
70<br />
71<br />
72<br />
73<br />
74<br />
75<br />
76<br />
77<br />
04353<br />
-------<br />
-------<br />
-------<br />
-------<br />
-------<br />
-------<br />
-------<br />
-------<br />
-------<br />
-------<br />
-------<br />
56708<br />
-------<br />
03012<br />
1<br />
1<br />
1<br />
1<br />
2<br />
1<br />
1<br />
1<br />
1<br />
1<br />
1<br />
1<br />
1<br />
1<br />
1<br />
Locknut<br />
(see item # 131) * (see item # 131) * (see item # 131) * (see item # 131) * (see item # 131) * (see item # 131) * (see item # 131) * (see item # 131) * (see item # 131) * (see item # 131) * (see item # 131) * Clamp Screw Assy<br />
(see item # 131) * Jam Nut<br />
78 31028 1 Outer Collar<br />
79 04876 1 Inside Collar<br />
80 00720 1 Set Screw<br />
81 23246 1 Dowel Pin<br />
82 17656 1 Thrust Collar<br />
83 03013 1 Retaining Ring<br />
84 31034 A/R .005 Shim<br />
Item<br />
No<br />
Part<br />
No<br />
Qty Description<br />
85 31032 A/R .020 Shim<br />
86 31033 A/R .010 Shim<br />
87 30957 1 Wheel Guard (16 in. model only)<br />
28709 1 Wheel Guard (14 in. model only)<br />
88 17652 1 Sector<br />
89 28729 1 Carriage Bolt<br />
90 01594 2 Washer<br />
91 03906 1 Locknut<br />
92 17676 2 Capscrew<br />
93 03006 2 Machine Screw<br />
28712 1 Motor Assy (Incl Items 94-102,<br />
105-109, 118-121, & 125-126 - 16 in.<br />
model only)<br />
28763 1 Motor Assy (Incl Items 94-102,<br />
105-109, 118-121, & 125-126 - 14 in.<br />
model only)<br />
94 31852 1 Bearing Hsg Assy (16 in. model only)<br />
(Incld item 100 & 125)<br />
31851 1 Bearing Hsg Assy (14 in. model only)<br />
(Incld item 100 & 125)<br />
95 372055 2 Dowel Pin (16 in. model only)<br />
00713 2 Dowel Pin (14 in. model only)<br />
96 00049 1 O-ring, 2 x 2-1/8 x 1/16 -033 (16 in.<br />
model only)�<br />
00178 1 O-ring (14 in. model only)<br />
97 18362 1 Idler Shaft (16 in. model only)<br />
06854 1 Idler Shaft (14 in. model only)<br />
98 18360 1 Drive Gear (16 in. model only)<br />
25718 1 Drive Gear (14 in. model only)<br />
99 18363 1 Idler Gear (16 in. model only)<br />
25717 1 Idler Gear (14 in. model only)<br />
100 06316 2 Bushing<br />
101 18389 1 Retaining Ring (16 in. model only)<br />
00166 1 Retaining Ring (14 in. model only)<br />
102 18388 1 Bearing (16 in. model only)<br />
00148 1 Bearing (14 in. model only)<br />
103 00283 3 Lockwasher<br />
104 16260 3 Capscrew<br />
105 00772 1 Key<br />
106 28733 1 Motor Shaft (16 in. model only)<br />
28762 1 Motor Shaft (14 in. model only)<br />
107 18364 1 Key (16 in. model only)<br />
06881 1 Needle Roller (14 in. model only)<br />
108 00664 1 Retaining Ring (16 in. model only)<br />
00170 1 Retaining Ring (14 in. model only)<br />
109 30590 1 Seal Gland (16 in. model only)<br />
30333 1 Seal Gland (14 in. model only)<br />
110 00698 2 Helicoil<br />
111 24059 1 Male Coupler Body<br />
112 24058 1 Female Coupler Body<br />
113 31137 1 Plug<br />
114 02916 1 Spring<br />
115 07226 2 Hose Assy<br />
116 00175 4 O-ring, 1/2 x 5/8 x 1/16 (16 in. model<br />
only)�<br />
117 29604 2 Oil Tube<br />
118 30922 1 O-ring, 13/16 x 15/16 x 1/16 -015 (16<br />
in. model only)�<br />
350771 1 O-ring (14 in. model only)<br />
119 30921 1 Quad Ring (16 in. model only)�<br />
00214 1 Quad Ring (14 in. model only)<br />
120 31850 1 Gear Hsg Assy (16 in. model only)<br />
(Incld item 100 & 125)<br />
31849 1 Gear Hsg Assy (14 in. model only)<br />
(Incld item 100 & 125)<br />
121 18602 8 Capscrew (16 in. model only)<br />
00120 8 Capscrew (14 in. model only)<br />
122 28728 1 Name Tag (16 in. model only)<br />
28409 1 Composite Sticker (14" model only)<br />
123 25610 1 Railroad Help Desk Sticker (16 in.<br />
model only)<br />
28728 1 Name Tag (14 in. model only)<br />
124 03787 1 Flow & GPM Sticker (16" model only)<br />
28322 1 CE Sticker (14 in. model only)<br />
125 04040 2 Bushing (16 in. model only)<br />
06316 2 Bushing (14 in. model only)<br />
126 00145 8 Lockwasher (16 in. model only)<br />
127 11207 1 "D" Sticker (14 in. model only)<br />
128 28811 1 Info Plaque (14 in. model only)<br />
129 56706 1 Detent Assy (S/N 2548 and Above)<br />
130<br />
131<br />
34880<br />
-------<br />
52537<br />
1<br />
1<br />
1<br />
Detent Assy (S/N 2547 and Below)<br />
(See item # 129) * Rail Clamp Assy.<br />
132 11210 1 Sound Power level sticker 108 dBA<br />
14 * NOT SOLD INDIVIDUALLY
15<br />
ITEM # 129<br />
DETENT ASSY<br />
S/N 2548 and Above P/N 56706<br />
S/N 2547 and Below P/N 34880
SPECIFICATIONS<br />
Wheel Capacity<br />
14 inch model ..................................... 14 in / 35.5 cm dia. x 25.4 mm arbor (ANSI B7.5/ISO 525, 603)<br />
16 inch model ................................................. 16 in / 41 cm dia. x 1 in arbor (ANSI B7.5/ISO 525, 603)<br />
Pressure Range.................................................................................................1800-2000 psi / 124-140 bar<br />
Maximum Back Pressure.......................................................................................................250 psi / 17 bar<br />
Flow Range.....................................................................................HTMA Class RR, 9-10.5 gpm/34-40 lpm<br />
EHTMA (D) 30 Lpm 138 Bar<br />
EHTMA (E) 40 Lpm 138 Bar<br />
Porting*.....................................................................................................................................-8 SAE O-ring<br />
Hose Whips*..............................................................................................................................................Yes<br />
Couplers ............................................................................................................ EHTMA/HTMA Flush Face<br />
Overall Length (unfolded) ................................................................................................ 36 inches / 92 cm<br />
Overall Width ................................................................................................................... 11 inches / 28 cm<br />
Height (with wheel - guard rotated to any position) .......................................................... 13 inches / 33 cm<br />
Weight (less wheel)<br />
14 inch model ................................................................................................................ 55 lbs / 24.4 kg<br />
16 inch model ................................................................................................................... 56 lbs / 25 kg<br />
Spindle Speed<br />
14 inch model (@ 10 gpm / 38 lpm) ....................................................................................... 4500 rpm<br />
16 inch model (@ 10 gpm / 38 lpm) ....................................................................................... 3600 rpm<br />
Maximum Fluid Temperature ................................................................................................. 140° F / 60° C<br />
Rail Size ......................................................................................................... 75-165 lb / yard /37-82 Kg/M<br />
Sound Power Level............................................................................................................................108 dBA<br />
Sound Pressure Level At Operator (1 m)............................................................................................97 dBA<br />
Vibration Level...................................................................................................................................6.0 m/s 2<br />
* Couplers and whip hoses are furnished as standard equipment.<br />
SEAL KIT 31845<br />
��Denotes part in seal kit<br />
Railsaw Blade - 16 in. Norton Norzone III Fastcut 29745<br />
Railsaw Blade - 16 in. Norton AT-36 22439<br />
Railsaw Blade - 14 in. Norton Norzone III Fastcut 30974<br />
Universal Bellcrank Kit (Grooved Rail) 34733<br />
ACCESSORIES<br />
16
WARRANTY<br />
Stanley Hydraulic <strong>Tool</strong>s (hereinafter called “Stanley”), subject to the exceptions contained below, warrants new hydraulic tools for a<br />
period of one year from the date of sale to the first retail purchaser, or for a period of 2 years from the shipping date from Stanley,<br />
whichever period expires first, to be free of defects in material and/or workmanship at the time of delivery, and will, at its option,<br />
repair or replace any tool or part of a tool, or new part, which is found upon examination by a Stanley authorized service outlet or by<br />
Stanley’s factory in Milwaukie, Oregon to be DEFECTIVE IN MATERIAL AND/OR WORKMANSHIP.<br />
EXCEPTIONS FROM WARRANTY<br />
FREIGHT COSTS: Freight costs to return parts to Stanley, if requested by Stanley for the purpose of evaluating a warranty claim<br />
for warranty credit, are covered under this policy if the claimed part or parts are approved for warranty credit. Freight costs for any<br />
part or parts which are not approved for warranty credit will be the responsibility of the individual.<br />
SEALS & DIAPHRAGMS: Seals and diaphragms installed in new tools are warranted to be free of defects in material and/or<br />
workmanship for a period of 6 months after the date of first usage, or for a period of 2 years from the shipping date from Stanley,<br />
whichever period expires first.<br />
CUTTING ACCESSORIES: Cutting accessories such as breaker tool bits are warranted to be free of defects in material and or<br />
workmanship at the time of delivery only.<br />
ITEMS PRODUCED BY OTHER MANUFACTURERS: Components which are not manufactured by Stanley and are<br />
warranted by their respective manufacturers.<br />
a. Costs incurred to remove a Stanley manufactured component in order to service an item manufactured by other<br />
manufacturers.<br />
ALTERATIONS & MODIFICATIONS: Alterations or modifications to any tool or part. All obligations under this warranty shall be<br />
terminated if the new tool or part is altered or modified in any way.<br />
NORMAL WEAR: any failure or performance deficiency attributable to normal wear and tear such as tool bushings, retaining pins,<br />
wear plates, bumpers, retaining rings and plugs, rubber bushings, recoil springs, etc.<br />
INCIDENTAL/CONSEQUENTIAL DAMAGES: To the fullest extent permitted by applicable law, in no event will STANLEY be liable<br />
for any incidental, consequential or special damages and/or expenses.<br />
FREIGHT DAMAGE: Damage caused by improper storage or freight handling.<br />
LOSS TIME: Loss of operating time to the user while the tool(s) is out of service.<br />
IMPROPER OPERATION: Any failure or performance deficiency attributable to a failure to follow the guidelines and/or procedures<br />
as outlined in the tool’s operation and maintenance manual.<br />
MAINTENANCE: Any failure or performance deficiency attributable to not maintaining the tool(s) in good operating condition as<br />
outlined in the Operation and Maintenance Manual.<br />
<strong>HYDRAULIC</strong> PRESSURE & FLOW: Any failure or performance deficiency attributable to excess hydraulic pressure, excess<br />
hydraulic back-pressure, or excess hydraulic flow.<br />
REPAIRS OR ALTERATIONS: Any failure or performance deficiency attributable to repairs by anyone which in Stanley’s sole<br />
judgement caused or contributed to the failure or deficiency.<br />
MIS-APPLICATION: Any failure or performance deficiency attributable to mis-application. “Mis-application” is defined as usage of<br />
products for which they were not originally intended or usage of products in such a matter which exposes them to abuse or<br />
accident, without first obtaining the written consent of Stanley.<br />
WARRANTY REGISTRATION: STANLEY ASSUMES NO LIABILITY FOR WARRANTY CLAIMS SUBMITTED FOR WHICH NO<br />
TOOL REGISTRATION IS ON RECORD. In the event a warranty claim is submitted and no tool registration is on record, no<br />
warranty credit will be issued without first receiving documentation which proves the sale of the tool or the tools’ first date of usage.<br />
The term “DOCUMENTATION” as used in this paragraph is defined as a bill of sale, or letter of intent from the first retail customer.<br />
A WARRANTY REGISTRATION FORM THAT IS NOT ALSO ON RECORD WITH STANLEY WILL NOT BE ACCEPTED AS<br />
“DOCUMENTATION”.<br />
NO ADDITIONAL WARRANTIES OR REPRESENTATIONS<br />
This limited warranty and the obligation of Stanley thereunder is in lieu of all other warranties, expressed or implied including<br />
merchantability or fitness for a particular purpose except for that provided herein. There is no other warranty. This warranty gives<br />
the purchaser specific legal rights and other rights may be available which might vary depending upon applicable law.<br />
17
CORPORATE<br />
HEADQUARTERS<br />
Stanley Hydraulic <strong>Tool</strong>s<br />
3810 S.E. Naef Road<br />
Milwaukie, Oregon U.S.A. 97267-5698<br />
Tel: 503 659 5660<br />
Fax: 503 652 1780<br />
EUROPEAN HEADQUARTERS<br />
Stanley Hydraulic <strong>Tool</strong>s<br />
West Quay Road<br />
Sunderland Enterprise Park<br />
Sunderland, England SR5 2TE<br />
Tel: 44 (0) 191 501 1000<br />
Fax: 44 (0) 191 501 1005<br />
SALES & SERVICE DIRECTORY<br />
CENTRAL EUROPE<br />
Stanley Hydraulic <strong>Tool</strong>s<br />
West Quay Road<br />
Sunderland Enterprise Park<br />
Sunderland, England SR5 2TE<br />
Tel: 44 (0) 191 501 1000<br />
Fax: 44 (0) 191 501 1005<br />
NORTHERN EUROPE<br />
Stanley Svenska Ab<br />
Box 1054<br />
Datavagen 51<br />
S436 22 Askim, Sweden<br />
Tel: 46 31 289775<br />
Fax: 46 31 288099<br />
Stanley Hydraulic <strong>Tool</strong>s<br />
Division of The Stanley Works<br />
3810 S.E. Naef Road<br />
Milwaukie, Oregon 97267-5698<br />
Phone: 503/659-5660<br />
Fax: 503/652-1780<br />
SOUTHERN EUROPE<br />
Stanley <strong>Tool</strong>s S.p.A.<br />
Via Trieste 1<br />
22060 Figino Serenza (Co.)<br />
Italy<br />
Tel: 39 31 785111<br />
Fax: 39 31 781766 / 781094