ATH-Heinl Bedienungsanleitung Single Lift 25M
ATH-Heinl Bedienungsanleitung Single Lift 25M Deutsch: Dieses Handbuch enthält Anweisungen zur sicheren Verwendung, Installation, Wartung und Reparatur der ATH-Heinl 1-Säulen-Hebebühne ATH Single Lift 25M. Englisch: This manual provides instructions for the safe use, installation, maintenance, and repair of the ATH-Heinl 1-column lift ATH Single Lift 25M. Französisch: Ce manuel fournit des instructions pour l'utilisation, l'installation, l'entretien et la réparation en toute sécurité du lève-colonne ATH Single Lift 25M de ATH-Heinl. Polnisch: Instrukcja obsługi zawiera informacje dotyczące bezpiecznego użytkowania, instalacji, konserwacji i naprawy kolumnowego podnośnika ATH Single Lift 25M firmy ATH-Heinl.
ATH-Heinl Bedienungsanleitung Single Lift 25M
Deutsch: Dieses Handbuch enthält Anweisungen zur sicheren Verwendung, Installation, Wartung und Reparatur der ATH-Heinl 1-Säulen-Hebebühne ATH Single Lift 25M.
Englisch: This manual provides instructions for the safe use, installation, maintenance, and repair of the ATH-Heinl 1-column lift ATH Single Lift 25M.
Französisch: Ce manuel fournit des instructions pour l'utilisation, l'installation, l'entretien et la réparation en toute sécurité du lève-colonne ATH Single Lift 25M de ATH-Heinl.
Polnisch: Instrukcja obsługi zawiera informacje dotyczące bezpiecznego użytkowania, instalacji, konserwacji i naprawy kolumnowego podnośnika ATH Single Lift 25M firmy ATH-Heinl.

Create successful ePaper yourself
Turn your PDF publications into a flip-book with our unique Google optimized e-Paper software.
Deutsch English Polskie Français Čeština Español Nederlands<br />
Slovák<br />
<strong>Bedienungsanleitung</strong> / User Manual<br />
Seite 002<br />
DE<br />
ES<br />
page 054<br />
EN<br />
NL<br />
FR<br />
CHOOSE YOUR<br />
LANGUAGE<br />
PL<br />
page 106 click to select<br />
Strona 158<br />
CZ<br />
SK<br />
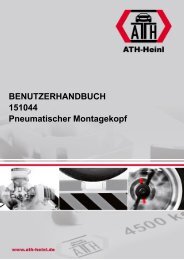
<strong>ATH</strong>-<strong>Single</strong> <strong>Lift</strong><br />
<strong>Single</strong> <strong>Lift</strong> <strong>25M</strong><br />
Seriennummer: C282140200089<br />
<strong>ATH</strong>-<strong>Heinl</strong> GmbH & Co. KG | Gewerbepark 9<br />
D-92278 Illschwang | Germany | www.ath-heinl.de<br />
Stand: August 2021. Fehler und Irrtümer vorbehalten. Verkauf nur über <strong>ATH</strong>-Vertriebspartner.
<strong>Bedienungsanleitung</strong><br />
<strong>ATH</strong>-<strong>Single</strong> <strong>Lift</strong><br />
<strong>Single</strong> <strong>Lift</strong> <strong>25M</strong><br />
Seriennummer: C282140200089<br />
<strong>ATH</strong>-<strong>Heinl</strong> GmbH & Co. KG | Gewerbepark 9<br />
D-92278 Illschwang | Germany | www.ath-heinl.de<br />
Stand: September 2021. Fehler und Irrtümer vorbehalten. Verkauf nur über <strong>ATH</strong>-Vertriebspartner.
Inhalt<br />
1.0 EINLEITUNG .........................................................................................................................- 3 -<br />
1.1 Allgemeine Informationen ..................................................................................................- 3 -<br />
1.2 Beschreibung ....................................................................................................................- 4 -<br />
1.3 Bedienung ........................................................................................................................- 6 -<br />
1.4 Technische Daten ..............................................................................................................- 9 -<br />
1.5 Maßzeichnung .................................................................................................................- 11 -<br />
2.0 INSTALLATION ...................................................................................................................- 13 -<br />
2.1 Transport & Lagerbedingungen .........................................................................................- 13 -<br />
2.2 Auspacken der Maschine ..................................................................................................- 13 -<br />
2.3 Lieferumfang ...................................................................................................................- 14 -<br />
2.4 Standort .........................................................................................................................- 15 -<br />
2.5 Befestigung .....................................................................................................................- 16 -<br />
2.6 Elektrischer Anschluss ......................................................................................................- 16 -<br />
2.7 Pneumatischer Anschluss .................................................................................................- 16 -<br />
2.8 Hydraulischer Anschluss ...................................................................................................- 17 -<br />
2.9 Montage .........................................................................................................................- 18 -<br />
2.10 Abschlussarbeiten ..............................................................................................................- 24 -<br />
3.0 BETRIEB ............................................................................................................................- 28 -<br />
3.1 Betriebsanweisung ...........................................................................................................- 28 -<br />
3.2 Grundsätzliche Hinweise ...................................................................................................- 29 -<br />
4.0 WARTUNG ..........................................................................................................................- 30 -<br />
4.1 Verbrauchsmaterialien für Montage, Wartung und Pflege ....................................................- 30 -<br />
4.2 Sicherheitsbestimmungen für Öl........................................................................................ - 31 -<br />
4.3 Hinweise .........................................................................................................................- 32 -<br />
4.4 Wartungsplan bzw. Pflegeplan ..........................................................................................- 32 -<br />
4.5 Fehlersuche / Fehleranzeige und Abhilfe ............................................................................- 33 -<br />
4.6 Wartungs- und Serviceanleitungen ....................................................................................- 35 -<br />
4.7 Entsorgung .....................................................................................................................- 36 -<br />
5.0 EG-/EU-KONFORMITÄTSERKLÄRUNG / EC-/EU-DECLARATION OF CONFORMITY...................... - 37 -<br />
6.0 ANHANG ............................................................................................................................- 38 -<br />
6.1 Pneumatik-Schaltplan .......................................................................................................- 38 -<br />
6.2 Elektrik-Schaltplan ...........................................................................................................- 39 -<br />
6.3 Hydraulik-Schaltplan ........................................................................................................- 40 -<br />
7.0 GARANTIEKARTE ................................................................................................................- 41 -<br />
7.1 Umfang der Produktgarantie .............................................................................................- 42 -<br />
8.0 PRÜFBUCH .........................................................................................................................- 43 -<br />
8.1 Aufstellungs- und Übergabeprotokoll .................................................................................- 44 -<br />
8.2 Prüfplan ..........................................................................................................................- 45 -<br />
8.3 Sichtprüfung (Befugte Sachkundige Person) .......................................................................- 46 -<br />
9.0 NOTIZEN ...........................................................................................................................- 50 -<br />
® Urheberrecht <strong>ATH</strong>-<strong>Heinl</strong> GmbH & CO.KG, Alle Rechte vorbehalten / Druckfehler und technische Änderungen vorbehalten / Stand: 2021-09<br />
Produkthersteller <strong>ATH</strong>-<strong>Heinl</strong> GmbH & CO.KG<br />
- 2 -
1.0 EINLEITUNG<br />
1.1 Allgemeine Informationen<br />
DIESE ANLEITUNG IST EIN FESTER BESTANDTEIL DER MASCHINE.<br />
SIE MUSS VOM BENUTTZER GELESEN UND VERSTANDEN WERDEN.<br />
FÜR SCHÄDEN, DIE DURCH NICHTBEACHTUNG DIESER ANLEITUNG ODER DEN<br />
GÜLTIGEN SICHERHEITSVORSCHRIFTEN ENTSTEHEN, WIRD KEINE HAFTUNG<br />
ÜBERNOMMEN.<br />
ACHTUNG: Folgen Sie den Anweisungen, um Verletzungen oder Beschädigungen<br />
vorzubeugen.<br />
TIPP: Gibt nähere Informationen zur Funktionsweise und Tipps, um das Gerät effizient zu<br />
nutzen.<br />
Für alle Arbeiten an der beschriebenen Anlage muss entsprechende Schutzkleidung<br />
getragen werden.<br />
® Urheberrecht <strong>ATH</strong>-<strong>Heinl</strong> GmbH & CO.KG, Alle Rechte vorbehalten / Druckfehler und technische Änderungen vorbehalten / Stand: 2021-09<br />
Produkthersteller <strong>ATH</strong>-<strong>Heinl</strong> GmbH & CO.KG<br />
- 3 -
1.2 Beschreibung<br />
Abdeckung oben<br />
Um die Säule abzudecken<br />
Hebesäule<br />
Der Hubwagen wird von Gleitblöcken geführt während er sich die Hebesäule nach oben und<br />
unten bewegt. Der Hydraulikzylinder und die Hebekette befinden sich ebenfalls an der<br />
Hebesäule.<br />
Hubwagen<br />
Der Hubwagen stützt den Arm (tragende Ausrüstung). Er wird vom Hydraulikzylinder mittels<br />
Ketten angehoben und gesenkt; dabei wird er an der Hebesäule von Plastikgleitblöcken geführt.<br />
Hintere Tragarme<br />
Teleskoparme, deren Länge eingestellt werden kann.<br />
Arme “H” Unterstützung<br />
® Urheberrecht <strong>ATH</strong>-<strong>Heinl</strong> GmbH & CO.KG, Alle Rechte vorbehalten / Druckfehler und technische Änderungen vorbehalten / Stand: 2021-09<br />
Produkthersteller <strong>ATH</strong>-<strong>Heinl</strong> GmbH & CO.KG<br />
- 4 -
Vordere Tragarme<br />
Teleskoparme, deren Länge eingestellt werden kann.<br />
Grundrahmen<br />
Dient zur Stabilisierung der Hebebühne und enthält die vorderen Rollen zum bewegen der<br />
Bühne.<br />
Antriebssatz<br />
Dient zum Fahren und Positionieren der Hebebühne. Der Vorgang darf nur im leeren Zustand<br />
ohne Last durchgeführt werden.<br />
Kontrollkasten<br />
Hier ist das komplette elektrische Kontrollsystem untergebracht. Alle Tasten sind durch einen<br />
Ring geschützt, um ein versehentliches Drücken zu verhindern. Darüber hinaus werden alle<br />
Bewegungen sofort gestoppt, wenn die Tasten losgelassen werden.<br />
Elektromagnet<br />
Elektromagnet zum Lösen des Sicherheitsverschlusses während des Absenkvorgangs.<br />
Der Sicherheitsverschluss verhindert unautorisiertes Absenken im Fehlerfall.<br />
Hydraulikeinheit<br />
Das Hydrauliköl wird von einer elektrischen Zahnradpumpe vom Tank zum Hebezylinder<br />
gepumpt. Das Senkventil regelt den Rückfluss des Öls in den Tank.<br />
® Urheberrecht <strong>ATH</strong>-<strong>Heinl</strong> GmbH & CO.KG, Alle Rechte vorbehalten / Druckfehler und technische Änderungen vorbehalten / Stand: 2021-09<br />
Produkthersteller <strong>ATH</strong>-<strong>Heinl</strong> GmbH & CO.KG<br />
- 5 -
1.3 Bedienung<br />
Taster Heben<br />
um Hebebühne zu heben<br />
Taster Senken 1<br />
um Hebebühne komplett zu senken<br />
(Rasten und Senkventil werden geöffnet)<br />
KFZ-Steckdose 12V DC<br />
Einbausteckdose 1 x 230V<br />
Taster Parken (LOCK)<br />
um Hebebühne in die Raste zu senken<br />
(nur das Senkventil wird geöffnet)<br />
Betriebsleuchte zeigt an ob sich die<br />
Hebebühne im Bereitschaftsbetrieb befindet<br />
Abschließbarer Hauptschalter mit Notaus-<br />
Funktion zum Ein- und Ausschalten der<br />
Hebebühne und um die Hebebühne vor einer<br />
Bedienung von unbefugten Personen zu<br />
sichern.<br />
® Urheberrecht <strong>ATH</strong>-<strong>Heinl</strong> GmbH & CO.KG, Alle Rechte vorbehalten / Druckfehler und technische Änderungen vorbehalten / Stand: 2021-09<br />
Produkthersteller <strong>ATH</strong>-<strong>Heinl</strong> GmbH & CO.KG<br />
- 6 -
HEBEN<br />
• Stellen Sie sicher, dass die Hebebühne vollständig abgesenkt ist.<br />
• Bewegen Sie die Bühne mit Hilfe des Hubwagens zum zu hebenden Fahrzeug. Achten Sie auf eine<br />
vertikale Position der Hebesäule und dass diese nicht an das Fahrzeug stößt.<br />
• Positionieren Sie die Tragarme unter dem Fahrzeug.<br />
• Stellen Sie die Arme so ein, dass die Gummipads die vom Fahrzeughersteller empfohlenen<br />
Hebepunkte des Fahrzeugs berühren können.<br />
• Schalten Sie den Netzschalter ein.<br />
• Heben Sie die Bühne an, indem Sie die Taste Heben drücken, bis die Arme die Unterseite des<br />
Fahrzeugs berühren.<br />
• Stellen Sie sicher, dass das Fahrzeug gesichert ist.<br />
• Drücken Sie die Taste Heben weiter, bis die von Ihnen gewünschte Höhe erreicht ist.<br />
PARKEN<br />
• Drücken Sie die Sicherheitstaste um die mechanischen Sicherheitsvorkehrungen zu aktivieren.<br />
• Stellen Sie immer sicher, dass die Sicherheitsvorkehrungen aktiviert sind, bevor Sie am oder in der<br />
Nähe des Fahrzeugs arbeiten.<br />
SENKEN<br />
• Senken Sie das Fahrzeug durch Drücken der Absenktaste ab: Die Hebebühne benötigt ein paar<br />
Sekunden, um die Sicherheitsrasten zu lösen und beginnt im Anschluss mit dem Absenkprozess.<br />
• Senken Sie die Bühne ab, indem Sie den Absenkknopf bis zur Sicherheitshöhe drücken.<br />
• Stellen Sie sicher dass der Sicherheitsbereich frei von Personen und Gegenständen ist.<br />
• Halten Sie die Taste Senken gedrückt, bis die Hebebühne vollständig agbesenkt ist.<br />
• Schließen Sie den Netzschalter mit einem Vorhängeschloss.<br />
• Bewegen Sie die Hebebühne aus dem Arbeitsbereich. Achten Sie darauf, nicht an das Fahrzeug zu<br />
stoßen.<br />
® Urheberrecht <strong>ATH</strong>-<strong>Heinl</strong> GmbH & CO.KG, Alle Rechte vorbehalten / Druckfehler und technische Änderungen vorbehalten / Stand: 2021-09<br />
Produkthersteller <strong>ATH</strong>-<strong>Heinl</strong> GmbH & CO.KG<br />
- 7 -
Sicherheitshinweise<br />
1. Achten Sie auf korrekte<br />
Gewichtsverteilung des Fahrzeugs<br />
2. Veränderungen jeglicher Art an<br />
der Hebebühne sind nicht<br />
gestattet<br />
3. Verlassen Sie den<br />
Gefahrenbereich beim Absenken<br />
der Hebebühne<br />
4. Beim Heben & Senken muss der<br />
Gefahrenbereich freigehalten<br />
werden<br />
5. Bei Gefahr des Fallens eines<br />
Fahrzeugs verlassen Sie sofort<br />
den Gefahrenbereich<br />
6. Vermeiden Sie starke Schwenkbewegungen<br />
am Fahrzeug<br />
7. Hebebühne darf nur von<br />
geschultem Personal bedient<br />
werden<br />
8. Benutzen Sie die vorgegebenen<br />
Aufnahmepunkte der<br />
Fahrzeughersteller und schließen<br />
Sie alle Türen beim Anheben des<br />
Fahrzeugs<br />
9. Nur autorisierten Personen ist das<br />
Betreten des Gefahrenbereichs<br />
gestattet<br />
10. Bei Bedarf geeignete Adapter<br />
verwenden<br />
11. Bei Ein- und Ausbau von<br />
schweren Gegenständen<br />
benutzen Sie immer eine<br />
Sicherung gegen Abkippen<br />
12. Adapter reduzieren die<br />
angegebene Traglast<br />
13. Zur sicheren Arbeit sind<br />
ordnungsgemäße Wartungen und<br />
Inspektionen notwendig<br />
14. Lesen und verstehen Sie die<br />
<strong>Bedienungsanleitung</strong> bevor Sie<br />
die Hebebühne bedienen<br />
15. Arbeiten Sie nicht an<br />
beschädigten Hebebühnen<br />
16. Auf der Hebebühne, den<br />
Tragarmen bzw. auf dem zu<br />
hebenden KFZ dürfen keine<br />
Gegenstände sowie Personen<br />
befördert werden.<br />
17. Beim Absenken auf Hindernisse<br />
achten<br />
18. 18. Hebebühne darf nicht unter<br />
fließendem Wasser gereinigt<br />
werden.<br />
® Urheberrecht <strong>ATH</strong>-<strong>Heinl</strong> GmbH & CO.KG, Alle Rechte vorbehalten / Druckfehler und technische Änderungen vorbehalten / Stand: 2021-09<br />
Produkthersteller <strong>ATH</strong>-<strong>Heinl</strong> GmbH & CO.KG<br />
- 8 -
1.4 Technische Daten<br />
Typ<br />
Tragkraft<br />
Zeit für Hubvorgang<br />
(2,000 kg)<br />
Zeit für Senkvorgang<br />
(2,000 kg)<br />
Elektrosystem<br />
Hubhöhe<br />
Steuerspannung<br />
Leistung Motor<br />
Vorgeschaltete Sicherung<br />
Anschlussleitung<br />
<strong>ATH</strong>-<strong>Single</strong> <strong>Lift</strong> <strong>25M</strong><br />
2,500 kg<br />
60 s<br />
60 s<br />
3/400V/50 Hz<br />
115-1870 mm<br />
DC24V<br />
1.5 KW<br />
1 C 16 A / 3 C 16 A<br />
Min. 3 x 1.5 mm² oder 5 x 2.5 mm²<br />
Schutzart IP 54<br />
Arbeitsdruck ²<br />
Empfohlenes Hydrauliköl<br />
Öl-Menge<br />
Schallwert<br />
Gewicht<br />
Betonanforderungen<br />
Ca. 180 bar<br />
Sommer: HVLP-D 46 (e.g.: ENI Precis HVLP-D 46)<br />
Winter: HVLP-D 32<br />
Ca. 6 l<br />
≤ 76 dB<br />
900 kg<br />
Min. 250mm verstärkter Beton C25<br />
Bodenneigung Max. 3°<br />
® Urheberrecht <strong>ATH</strong>-<strong>Heinl</strong> GmbH & CO.KG, Alle Rechte vorbehalten / Druckfehler und technische Änderungen vorbehalten / Stand: 2021-09<br />
Produkthersteller <strong>ATH</strong>-<strong>Heinl</strong> GmbH & CO.KG<br />
- 9 -
Traglastverteilung<br />
Q<br />
Gesamtgewicht des KFZ<br />
P1<br />
Max 2/5 x Q<br />
P2<br />
Max 3/5 x Q<br />
Lastverteilung 2/3<br />
A Min. 1,000 mm ²<br />
® Urheberrecht <strong>ATH</strong>-<strong>Heinl</strong> GmbH & CO.KG, Alle Rechte vorbehalten / Druckfehler und technische Änderungen vorbehalten / Stand: 2021-09<br />
Produkthersteller <strong>ATH</strong>-<strong>Heinl</strong> GmbH & CO.KG<br />
- 10 -
1.5 Maßzeichnung<br />
® Urheberrecht <strong>ATH</strong>-<strong>Heinl</strong> GmbH & CO.KG, Alle Rechte vorbehalten / Druckfehler und technische Änderungen vorbehalten / Stand: 2021-09<br />
Produkthersteller <strong>ATH</strong>-<strong>Heinl</strong> GmbH & CO.KG<br />
- 11 -
® Urheberrecht <strong>ATH</strong>-<strong>Heinl</strong> GmbH & CO.KG, Alle Rechte vorbehalten / Druckfehler und technische Änderungen vorbehalten / Stand: 2021-09<br />
Produkthersteller <strong>ATH</strong>-<strong>Heinl</strong> GmbH & CO.KG<br />
- 12 -
2.0 INSTALLATION<br />
Die Maschine muss durch autorisiertes Personal gemäß der Anleitung aufgestellt werden.<br />
Die <strong>Bedienungsanleitung</strong> (inklusive Protokoll) ist wichtiger Bestandteil<br />
der Maschine bzw. des Produktes.<br />
!!!BITTE SORGFÄLTIG AUFBEWAHREN!!!<br />
Das Produkt ist nach Fertigstellung der Montage, Übergabe, ggf. Einweisung und anschließend regelmäßig<br />
gemäß den im Betreiberland gültigen Vorschriften und gesetzlichen Bestimmungen durch eine hierfür<br />
geeignete und zugelassene Firma oder Einrichtung überprüfen zu lassen.<br />
2.1 Transport & Lagerbedingungen<br />
Zum Transport und Positionierung der Maschine immer geeignete Anschlag-, Hebe- bzw.<br />
Flurfördergeräte verwenden und auf den Schwerpunkt der Maschine achten.<br />
Die Maschine sollte nur mit der Originalverpackung transportiert werden.<br />
Daten: ----<br />
Breite ----<br />
Länge ----<br />
Höhe ----<br />
Lagertemperatur -10 bis +50 °C<br />
2.2 Auspacken der Maschine<br />
Entfernen Sie die obere Abdeckung der Verpackung und stellen Sie sicher, dass keine<br />
Schäden während des Transports verursacht wurden.<br />
Entfernen Sie den Sicherungsbolzen, um die Maschine von der Palette/Gestell zu<br />
entfernen.<br />
Zum Herunterheben der Maschine von der Palette/Gestell verwenden Sie ein geeignetes<br />
Hebemittel (evtl. mit Anschlagseil).<br />
Das für die Maschine verwendete Verpackungsmaterial sollte sorgfältig aufbewahrt<br />
werden.<br />
Bewahren Sie das Verpackungsmaterial unzugänglich für Kinder auf, da es eine<br />
Gefahrenquelle darstellen kann.<br />
® Urheberrecht <strong>ATH</strong>-<strong>Heinl</strong> GmbH & CO.KG, Alle Rechte vorbehalten / Druckfehler und technische Änderungen vorbehalten / Stand: 2021-09<br />
Produkthersteller <strong>ATH</strong>-<strong>Heinl</strong> GmbH & CO.KG<br />
- 13 -
2.3 Lieferumfang<br />
Transportbox mit:<br />
- Säuleneinheit inklusive Zubehör, Hebearme, Elektrosteuereinheit verpackt in einem Stahlrahmen<br />
verpackt im Stahlrahmen<br />
Tipps für Transport und Aufbewahrung:<br />
- Vorsichtig anheben. Heben Sie nur mit geeigneter und gut gewarteter Ausrüstung.<br />
- Vermeiden Sie unerwartete Erhöhungen und ruckartige Bewegungen. Vorsicht vor Stößen, Hängen<br />
bleiben usw.<br />
- Lagern Sie die entfernte Verpackung an einer Sammelstelle, die für Kinder und Tiere bis zur Entsorgung<br />
unzugänglich ist.<br />
- Lagertemperatur: -25°C ~ +55°C<br />
® Urheberrecht <strong>ATH</strong>-<strong>Heinl</strong> GmbH & CO.KG, Alle Rechte vorbehalten / Druckfehler und technische Änderungen vorbehalten / Stand: 2021-09<br />
Produkthersteller <strong>ATH</strong>-<strong>Heinl</strong> GmbH & CO.KG<br />
- 14 -
2.4 Standort<br />
Die Maschine sollte von brennbaren und explosiven Materialien, sowie vor Sonneneinstrahlung und<br />
intensivem Licht ferngehalten werden. Die Maschine sollte ebenso an einen gut belüfteten Ort aufgestellt<br />
werden.<br />
Die Maschine ist auf ausreichend festem Untergrund ggf. nach Mindestanforderungen der Angaben im<br />
Fundamentplan aufzustellen.<br />
Bei der Wahl des Aufstellortes sind außer der Bodenbeschaffenheit auch die Richtlinien und Hinweise der<br />
Unfallverhütungsvorschrift sowie der Arbeitsstättenverordnung zu beachten.<br />
Bei Montage auf Etagendecken ist deren ausreichende Tragfähigkeit zu prüfen. Generell ist zu empfehlen,<br />
bei Montage auf Etagendecken einen Bausachverständigen zur Begutachtung hinzuzuziehen.<br />
Die Maschine ist nur innerhalb von geschlossenen Räumen zu montieren und zu verwenden. Sie weist<br />
keine entsprechenden Sicherheitsausstattungen (z.B. IP-Schutz, verzinkte Ausführung etc.) auf.<br />
Temperatur 4-40 °C<br />
Meeresspiegel<br />
< 1500 m<br />
Luftfeuchtigkeit 50% bei 40°C – 90% bei 20 °C<br />
Zeichnung<br />
® Urheberrecht <strong>ATH</strong>-<strong>Heinl</strong> GmbH & CO.KG, Alle Rechte vorbehalten / Druckfehler und technische Änderungen vorbehalten / Stand: 2021-09<br />
Produkthersteller <strong>ATH</strong>-<strong>Heinl</strong> GmbH & CO.KG<br />
- 15 -
2.5 Befestigung<br />
Hierbei sind die allgemeinen sowie die örtlichen Bestimmungen zu beachten. Daher<br />
sollten diese Schritte nur durch eine ausgebildete Fachkraft erledigt werden.<br />
Die Maschine ist auf ausreichend festem Untergrund ggf. nach Mindestanforderungen der Angaben im<br />
Fundamentplan aufzustellen und zu befestigen.<br />
Die Maschine muss an den vorgesehenen Punkten mit dazu geeigneten ggf. vorgegeben<br />
Befestigungsmaterial befestigt werden.<br />
Bei der Wahl des Aufstellortes sind außer der Bodenbeschaffenheit auch die Richtlinien und Hinweise der<br />
Unfallverhütungsvorschrift sowie der Arbeitsstättenverordnung zu beachten.<br />
Bei Montage auf Etagendecken ist deren ausreichende Tragfähigkeit zu prüfen. Generell ist zu empfehlen,<br />
bei Montage auf Etagendecken einen Bausachverständigen zur Begutachtung hinzuzuziehen.<br />
2.6 Elektrischer Anschluss<br />
Hierbei sind die allgemeinen sowie die örtlichen Bestimmungen zu beachten. Daher darf<br />
dieser Schritt nur durch eine ausgebildete Fachkraft erledigt werden.<br />
Achten Sie dabei auf die notwendige Zuleitung (siehe technische Daten).<br />
Der Anschluss sollte entsprechend mit einem 230V Schuko Stecker bzw. 5-phasigen 16 A CEE-Stecker<br />
(teilweise mitgeliefert) erfolgen.<br />
Spannungsabweichungen sollten maximal 0,9 – 1,1 fache des Nennspannungsbereichs und die<br />
Frequenzabweichung sollte das 0,99 – 1,01 fache des Frequenzbereichs betragen.<br />
Um dies gewährleisten zu können, müssen notwendige Schutzmaßnahmen getroffen werden.<br />
Zum Abschluss der Arbeiten muss die Drehrichtung des Motors geprüft werden.<br />
2.7 Pneumatischer Anschluss<br />
Bei allen pneumatischen Anlagen muss eine Druckluftwartungseinheit (teilweise im<br />
Lieferumfang) zwischen Zuleitung und Anlage montiert sein.<br />
Der Luftdruck der Zuleitung muss mindestens den technischen Daten entsprechen.<br />
Die richtige Einstellung der Druckluftwartungseinheit muss geprüft werden.<br />
Die Druckluftwartungseinheit muss in regelmäßigen Abständen gewartet werden.<br />
Der Maximal- bzw. Minimaldruck gewährleistet eine einwandfreie Funktion ohne eventuelle<br />
Beschädigungen.<br />
® Urheberrecht <strong>ATH</strong>-<strong>Heinl</strong> GmbH & CO.KG, Alle Rechte vorbehalten / Druckfehler und technische Änderungen vorbehalten / Stand: 2021-09<br />
Produkthersteller <strong>ATH</strong>-<strong>Heinl</strong> GmbH & CO.KG<br />
- 16 -
2.8 Hydraulischer Anschluss<br />
Bevor die Anlage in Betrieb genommen wird bzw. das erste Mal mit Öl betrieben wird,<br />
muss folgendes in Bezug auf optimale, störungsfreie sowie nahezu luftfreie Funktion<br />
beachtet werden<br />
Alle Hydraulikleitungen nach Hydraulikplan ggf. nach Schlauchbezeichnung müssen angeschlossen und<br />
festgezogen sein.<br />
Alle Hydraulikleitungen und Zylinder nach Hydraulikplan ggf. nach Schlauchbezeichnung müssen entlüftet<br />
werden.<br />
Um die einwandfreie und sichere Funktion der Anlage und der eingesetzten Schlauchleitungen zu<br />
gewähren, ist unbedingt darauf zu achten, dass die verwendeten Hydraulikflüssigkeiten mit den<br />
spezifischen Vorgaben und Empfehlungen des Herstellers übereinstimmen.<br />
Eingesetzte Medien, die nicht den spezifischen Anforderungen entsprechen oder unerlaubt<br />
Verschmutzungen aufweisen, schädigen das ganze Hydrauliksystem und verkürzen die Verwendungsdauer<br />
der eingesetzten Hydrauliksysteme. Achtung: (Eine Verschmutzung der Anlage ist auch über eine neue<br />
Befüllung mit Öl möglich)<br />
Es ist die Mindestanforderung und Mindestölmenge zu prüfen bzw. herzustellen.<br />
® Urheberrecht <strong>ATH</strong>-<strong>Heinl</strong> GmbH & CO.KG, Alle Rechte vorbehalten / Druckfehler und technische Änderungen vorbehalten / Stand: 2021-09<br />
Produkthersteller <strong>ATH</strong>-<strong>Heinl</strong> GmbH & CO.KG<br />
- 17 -
2.9 Montage<br />
Diese Anleitung ist nicht als Aufbauanleitung zu sehen, es werden hier nur Hinweise und<br />
Hilfen für sach- und fachkundige Monteure gegeben. Für folgende Arbeiten sind<br />
angemessene Kleidung und individuelle Schutzvorrichtungen zu tragen.<br />
Fehlerhafte Montage und Einstellungen führen zu Haftungs- und<br />
Gewährleistungsausschluss.<br />
Teilweise vormontierte Maschinen müssen vor der Inbetriebnahme durch eine sach- und fachkundige<br />
Person geprüft, eingewiesen und abgenommen werden.<br />
Montagen von Maschinen müssen durch eine sach- und fachkundige Person vorgenommen werden.<br />
Installation der Säule auf der Basis<br />
Schraube M20x60<br />
Schraube M8x20<br />
Beilagscheibe D.20 Beilagscheibe D.12<br />
Sicherungsring D.20<br />
Schraube M12x40<br />
Seegerring D.16 Sicherungsring D.12<br />
Stahlkugel D.20<br />
Mutter M12<br />
® Urheberrecht <strong>ATH</strong>-<strong>Heinl</strong> GmbH & CO.KG, Alle Rechte vorbehalten / Druckfehler und technische Änderungen vorbehalten / Stand: 2021-09<br />
Produkthersteller <strong>ATH</strong>-<strong>Heinl</strong> GmbH & CO.KG<br />
- 18 -
Einbau der Hubarme<br />
Installieren Sie den Armrahmen mit den mitgelieferten Schrauben und Unterlegscheiben am Wagen, wie in<br />
der folgenden Zeichnung gezeigt:<br />
Schraube M16x45 Sicherungsring D.16<br />
Beilagscheibe D.16<br />
Befestigen Sie die Teleskoparme wie in der folgenden Zeichnung gezeigt an den Armrahmen:<br />
® Urheberrecht <strong>ATH</strong>-<strong>Heinl</strong> GmbH & CO.KG, Alle Rechte vorbehalten / Druckfehler und technische Änderungen vorbehalten / Stand: 2021-09<br />
Produkthersteller <strong>ATH</strong>-<strong>Heinl</strong> GmbH & CO.KG<br />
- 19 -
Installation des Netzteils<br />
Setzen Sie das Netzteil mit den Schrauben und Unterlegscheiben wie in der folgenden Zeichnung gezeigt<br />
auf die Halterung auf der Rückseite der Säule:<br />
Sicherungsring D.10<br />
Beilagscheibe D.10<br />
Schraube M10x25<br />
• Der Zylinder befindet sich im mittleren Loch im Säulenfuß, wie in der folgenden Zeichnung<br />
gezeigt:<br />
Hydraulikzylinder<br />
® Urheberrecht <strong>ATH</strong>-<strong>Heinl</strong> GmbH & CO.KG, Alle Rechte vorbehalten / Druckfehler und technische Änderungen vorbehalten / Stand: 2021-09<br />
Produkthersteller <strong>ATH</strong>-<strong>Heinl</strong> GmbH & CO.KG<br />
- 20 -
Installieren Sie den Kettenschutz an der Riemenscheibe<br />
Schraube M6x14 Sicherungsring D.14<br />
Beilagscheibe D.14<br />
Kettenschutz<br />
® Urheberrecht <strong>ATH</strong>-<strong>Heinl</strong> GmbH & CO.KG, Alle Rechte vorbehalten / Druckfehler und technische Änderungen vorbehalten / Stand: 2021-09<br />
Produkthersteller <strong>ATH</strong>-<strong>Heinl</strong> GmbH & CO.KG<br />
- 21 -
Anschluss der Hydraulikleitung<br />
Achten Sie darauf, dass die Schläuche und Verbindungsstücke sauber und frei von Verunreinigungen sind.<br />
Reinigen Sie die Teile bei Bedarf.<br />
Überprüfen Sie alle Teile auf Beschädigungen und stellen Sie sicher, dass alle Schraubverbindungen und<br />
Verbindungsstücke in gutem Zustand sind.<br />
Schließen Sie die Schläuche gemäß der folgenden Zeichnung an das Hydraulikaggregat und den Zylinder<br />
an. Ziehen Sie alle Verbindungen fest, um Öllecks zu vermeiden.<br />
Kunststoffschlauch 10x6.5x1850<br />
Drossel<br />
Hydraulikschlauch ¼ L730<br />
® Urheberrecht <strong>ATH</strong>-<strong>Heinl</strong> GmbH & CO.KG, Alle Rechte vorbehalten / Druckfehler und technische Änderungen vorbehalten / Stand: 2021-09<br />
Produkthersteller <strong>ATH</strong>-<strong>Heinl</strong> GmbH & CO.KG<br />
- 22 -
Installieren Sie die Systemsteuerung<br />
Installieren Sie das Bedienfeld wie in der folgenden Abbildung gezeigt auf der Säule:<br />
Schraube M6x16<br />
Elektrische Steuerbaugruppe<br />
Befestigen Sie die elektrische Steuerung mit den mitgelieferten Schrauben an der Säule, wie in der<br />
nebenstehenden Abbildung gezeigt.<br />
Überprüfen Sie das Typenschild, um sicherzustellen, dass der Motor für die beim Kunden verfügbare<br />
Spannung geeignet ist.<br />
Stellen Sie die elektrischen Verbindungen wie im Schaltplan gezeigt her (Kapitel 6.2). Verwenden Sie<br />
dazu die mitgelieferten Kabel und Leitungen.<br />
Die Arbeiten müssen gemäß den örtlichen Vorschriften durchgeführt werden. Stellen Sie sicher, dass<br />
die Phasen richtig angeschlossen sind (Drehrichtung) und die Hebebühne ordnungsgemäß geerdet ist.<br />
® Urheberrecht <strong>ATH</strong>-<strong>Heinl</strong> GmbH & CO.KG, Alle Rechte vorbehalten / Druckfehler und technische Änderungen vorbehalten / Stand: 2021-09<br />
Produkthersteller <strong>ATH</strong>-<strong>Heinl</strong> GmbH & CO.KG<br />
- 23 -
2.10 Abschlussarbeiten<br />
Prüfen Sie vor Inbetriebnahme alle Befestigungsschrauben, Elektro-, Pneumatik- und<br />
Hydraulikleitungen und ziehen Sie diese ggf. nach. Achtung: Teileweise muss dies in<br />
regelmäßigen Abständen geprüft ggf. nachgezogen werden (Hinweis in der Anleitung).<br />
Einstellung des oberen Endschalters<br />
Endschalter<br />
Heben Sie die Bühne in eine Höhe von 1870 mm an, um die richtige Position zu überprüfen.<br />
Wenn der Schalter nicht richtig eingestellt ist, lösen Sie den Hebel und stellen Sie ihn in die richtige<br />
Position, bis die Hebebühne die gewünschte Höhe erreicht hat.<br />
Ziehen Sie die Schraube nach dem Einstellen fest.<br />
Einstellung des CE-Grenzwerts<br />
Stellen Sie die Hebebühne auf eine Höhe von 200 mm<br />
CE-Schalter<br />
Quertraverse<br />
Wenn der Schalter nicht richtig eingestellt ist, lösen Sie den Hebel und stellen Sie ihn auf die richtige Höhe<br />
ein (es wird empfohlen, 1-3 mm niedriger als der Querträger zu sein).<br />
Ziehen Sie die Schraube nach dem Einstellen fest.<br />
® Urheberrecht <strong>ATH</strong>-<strong>Heinl</strong> GmbH & CO.KG, Alle Rechte vorbehalten / Druckfehler und technische Änderungen vorbehalten / Stand: 2021-09<br />
Produkthersteller <strong>ATH</strong>-<strong>Heinl</strong> GmbH & CO.KG<br />
- 24 -
Öl einfüllen und entlüften<br />
Verwenden Sie nur das in der <strong>Bedienungsanleitung</strong> angegebene Hydrauliköl. Öffnen Sie den Öleinfülldeckel<br />
und füllen Sie ca. 6 Liter Hydrauliköl in den Tank. Durch Drücken der Heben-Taste wird die Bühne nach<br />
oben bewegt, bis die max. Höheerreicht wurde. Lassen Sie die Taste los, wenn die maximale Höhe erreicht<br />
ist, ansonsten kann der Elektromotor oder die Zahnradpumpe Schaden nehmen. Durch Drücken der<br />
Senken-Taste wird die Hebebühne ganz nach unten bewegt. Halten Sie die Senken Taste ca. 3 Sekunden<br />
lang gedrückt nachdem die Bühne ihren tiefsten Punkt erreicht hat, damit eingeschlossene Luft entweichen<br />
kann. Wiederholen Sie diesen Heben und Senken Prozess dreimal.<br />
Warnung: Der Versuch, ohne Öl zu testen oder wenn sich der Motor in die falsche Richtung dreht, kann<br />
die Hydraulikpumpe zerstören.<br />
Kontrolle vor Inbetriebnahme<br />
Allgemeine Kontrolle<br />
- Stellen Sie sicher dass alle Stifte und Bolzen ordnungsgemäß montiert sind.<br />
- Stellen Sie sicher das die Kette ordnungsgemäß installiert ist.<br />
- Stellen Sie sicher, dass die Einspeisespannung der auf dem Typenschild des Motors<br />
angegebenen Spannung entspricht. Vergewissern Sie sich, dass das elektrische System laut dem<br />
Elektorschaltplan angeschlossen und ordnungsgemäß geerdet ist.<br />
- Stellen Sie sicher dass die Hebebühne geerdet ist.<br />
- Folgende Überprüfungen müssen ebenfalls durchgeführt werden:<br />
Mechanische Sicherheitsvorkehrungen für eine ordnungsgemäße Installation<br />
- Stellen Sie sicher dass beim Drücken des Tasters “Lock-up” die Sicherheitsraste ordnungsgemäß<br />
aktiviert ist. Diese kann durch drücken des Tasters “Senken” gelöst werden.<br />
- Achten Sie beim Anheben darauf, dass die Sicherheitsrasten einrasten. Wenn nicht, überprüfen Sie<br />
die Ursache.<br />
Kontrolle des Hydrauliksystems für einen ordnungsgemäßen Betrieb<br />
- Kontrollieren Sie den Ölstand und füllen diesen bei Bedarf auf.<br />
- Heben Sie die Tragarme auf die volle Höhe an und lassen Sie den Motor 5 Sekunden lang laufen.<br />
- Überprüfen Sie alle Schlauchverbindungen um evtl. undichte Stellen zu finden. Ziehen Sie ggf.<br />
die Anschlüsse fest oder verschließen Sie die undichten Stellen.<br />
- Überprüfen Sie die Hebebühne auf maximaler Höhe.<br />
- Wiederholen Sie ggf. das Entlüften der Zylinder.<br />
® Urheberrecht <strong>ATH</strong>-<strong>Heinl</strong> GmbH & CO.KG, Alle Rechte vorbehalten / Druckfehler und technische Änderungen vorbehalten / Stand: 2021-09<br />
Produkthersteller <strong>ATH</strong>-<strong>Heinl</strong> GmbH & CO.KG<br />
- 25 -
Kontrolle des Endschalters für einen ordnungsgemäßen Betrieb<br />
- Überprüfen Sie, ob der obere Endschalter ordnungsgemäß funktioniert. Stellen Sie sicher, dass das<br />
Aggregat nicht mehr arbeitet, wenn die Tragarme die maximale Höhe erreicht haben.<br />
- Überprüfen Sie, ob der Sicherheitshöhen-Endschalter ordnungsgemäß funktioniert. Stellen Sie<br />
sicher, dass das Netzteil nicht mehr arbeitet, wenn die Tragarme eine Höhe von ca. 200 mm<br />
erreicht hat.<br />
Installation der vorderen Abdeckung<br />
Abdeckband<br />
Beilagscheibe D.5<br />
Schraube M5x12<br />
Schraube M3x8<br />
Bandfixierungsplatte<br />
Mutter M6 Hacken<br />
Schraube M6x20<br />
® Urheberrecht <strong>ATH</strong>-<strong>Heinl</strong> GmbH & CO.KG, Alle Rechte vorbehalten / Druckfehler und technische Änderungen vorbehalten / Stand: 2021-09<br />
Produkthersteller <strong>ATH</strong>-<strong>Heinl</strong> GmbH & CO.KG<br />
- 26 -
NOTABSENKUNG<br />
• Im Notfall kann das gehobene Fahrzeug ohne Strom wie folgt manuell abgesenkt werden:<br />
• Schließen Sie den Netzschalter mit einem Vorhängeschloss.<br />
• Entfernen Sie die Abdeckungen auf der Rückseite der Säule, um zu überprüfen, ob die<br />
mechanischen Sicherheitsvorkehrungen aktiviert sind.<br />
• Wenn die Sicherheitsvorkehrungen aktiviert sind, betätigen Sie die Nothandpumpe (falls mit der<br />
Hebebühne bestellt), um die Hebebühne ein wenig anzuheben und die Sicherheitsvorkehrungen zu<br />
lösen.<br />
• Setzen Sie nach dem Entfernen der Sicherheitsvorkehrungen wie in der Grafik unten gezeigt einen<br />
geeigneten Bolzen unter jeden Sicherheitshaken, um die Sicherheitsvorkehrungen zu umgehen.<br />
• Lösen Sie die Notabsenkschraube, indem Sie sie gegen den Uhrzeigersinn drehen, bis das Fahrzeug<br />
vollständig abgesenkt ist. Durch festziehen oder lösen der Schraube kann die<br />
Absenkgeschwindigkeit verringert oder erhöht werden.<br />
• Drehen Sie die Notabsenkschraube wieder fest, indem Sie sie im Uhrzeigersinn drehen.<br />
• Entfernen Sie die Bolzen unter den Sicherheitshaken.<br />
• Bringen Sie die hinteren Abdeckungen wieder an der Säule an und ziehen Sie die Schrauben fest.<br />
Bolzen<br />
Sicherheitsraste<br />
Notablassventil<br />
Not-Handpumpe (opt.)<br />
® Urheberrecht <strong>ATH</strong>-<strong>Heinl</strong> GmbH & CO.KG, Alle Rechte vorbehalten / Druckfehler und technische Änderungen vorbehalten / Stand: 2021-09<br />
Produkthersteller <strong>ATH</strong>-<strong>Heinl</strong> GmbH & CO.KG<br />
- 27 -
3.0 BETRIEB<br />
3.1 Betriebsanweisung<br />
Firma:<br />
Arbeitsplatz:<br />
Tätigkeit:<br />
Betriebsanweisung<br />
für<br />
Hebebühnen<br />
Gefahren für Mensch und Umwelt<br />
• Abstürzen oder Abfallen von Lasten oder Teilen<br />
• Quetsch- und Scherstellen beim Bewegen der Hebebühne<br />
• Gefahr durch unkontrolliert bewegte Teile<br />
Schutzmaßnahmen und Verhaltensregeln<br />
Vor Arbeitsantritt:<br />
• Hebebühnen dürfen nur von mindestens 18 Jahre alten, unterwiesenen und<br />
schriftlich beauftragten Personen selbständig benutzt werden.<br />
• Bei Arbeiten mehrerer Personen ist ein Aufsichtsführender zu bestimmen<br />
• Werktägliche Funktionsüberprüfung<br />
• <strong>Bedienungsanleitung</strong> des Herstellers beachten<br />
Während des Betriebes:<br />
• Auf Quetsch- und Scherstellen zur Umgebung achten<br />
• Hebebühne nicht über zulässige Höchstlast belasten<br />
• Keine Personen heben<br />
• Hebebühne nicht in Schwingungen versetzen, Aufschaukeln vermeiden.<br />
• Beim Senken nicht im Bewegungsbereich der Hebebühne aufhalten<br />
• Regelmäßige Prüfung der Hebebühne veranlassen<br />
Verhalten bei Störungen und im Gefahrenfall<br />
• Bei Störungen sofort den Betrieb der Hebebühne einstellen<br />
• Gegen weitere Benutzung sichern<br />
• Mängel dem Installateur oder Hersteller melden<br />
Erste Hilfe<br />
• Den Ersthelfer informieren (siehe Alarm- bzw. Notfallplan)<br />
• Verletzungen sofort versorgen<br />
• Eintragung in das Verbandbuch vornehmen<br />
• Bei schweren Verletzungen Notruf kontaktieren<br />
Datum:<br />
Unterschrift:<br />
Notruf: _____________ Krankentransport: _______________<br />
Instandhaltung<br />
• Instandsetzung nur durch beauftragte und unterwiesene Personen<br />
• Bei Rüst-, Einstellungs-, Wartungs- und Pflegearbeiten Hebebühne vom Netz<br />
trennen bzw. sichern<br />
• Hebebühne nach Arbeitsende reinigen und Füllstandmenge der Hydraulik prüfen<br />
• Jährlicher Check der Hebebühne durch eine beauftragte und unterwiesene<br />
Person<br />
® Urheberrecht <strong>ATH</strong>-<strong>Heinl</strong> GmbH & CO.KG, Alle Rechte vorbehalten / Druckfehler und technische Änderungen vorbehalten / Stand: 2021-09<br />
Produkthersteller <strong>ATH</strong>-<strong>Heinl</strong> GmbH & CO.KG<br />
- 28 -
3.2 Grundsätzliche Hinweise<br />
Mit der selbständigen Bedienung der Maschine dürfen nur Personen beschäftigt werden, die das 18.<br />
Lebensjahr vollendet haben, in der Bedienung der Maschine unterwiesen sind und ihre Befähigung hierzu<br />
gegenüber dem Unternehmer nachgewiesen haben.<br />
Sie müssen vom Unternehmer ausdrücklich mit dem Bedienen der Maschine beauftragt sein. Der Auftrag<br />
zum Bedienen der Maschine muss schriftlich erteilt werden.<br />
Die Maschine ist nur für die bestimmungsgemäße Verwendung zu benutzen.<br />
Verwenden sie immer vorschriftgemäßes Material bei Montage und Betrieb.<br />
Vor der Montage bzw. Demontage prüfen Sie alle Bauteile, diese dürfen keinerlei Beschädigungen<br />
aufweisen.<br />
Beachten Sie gegebenenfalls spezielle Hinweise der Hersteller zur Montage bzw. Demontage von<br />
fahrzeugspezifischen Arbeiten.<br />
Wichtiger Bestandteil der Garantie / Gewährleistung ist die Erfüllung des Wartungsplan. Insbesondere die<br />
Sauberkeit, Korrosionsschutz, Kontrolle ggf. sofortige Behebung von Schäden.<br />
Während des Betriebes sollten Sie stets auf Gefahren achten. Sobald Gefahren auftreten, schalten Sie<br />
sofort die Maschine ab, entfernen den Netzstecker und trennen die Luftzufuhr.<br />
Anschließend kontaktieren Sie ihren Händler.<br />
Sämtliche Warnschilder müssen immer gut lesbar sein. Bei eventueller Beschädigung müssen diese sofort<br />
ersetzt werden.<br />
Achten Sie auf mögliche Scherstellen der Maschine.<br />
Während des Betriebs kann der Lärm 85dB (A) erreichen, deswegen sollte der Bediener<br />
entsprechende Schutzmaßnahmen ergreifen.<br />
Bewegliche Teile der Maschine können lose Kleidung, lange Haare oder Schmuck erfassen.<br />
® Urheberrecht <strong>ATH</strong>-<strong>Heinl</strong> GmbH & CO.KG, Alle Rechte vorbehalten / Druckfehler und technische Änderungen vorbehalten / Stand: 2021-09<br />
Produkthersteller <strong>ATH</strong>-<strong>Heinl</strong> GmbH & CO.KG<br />
- 29 -
4.0 WARTUNG<br />
Um einen sicheren Betrieb der Maschine zu gewährleisten, ist der Verwender dazu verpflichtet, die<br />
Maschine regelmäßig zu warten.<br />
Reparaturarbeiten dürfen nur von autorisierten Servicepartnern oder nach Rücksprache mit dem Hersteller<br />
durch den Kunden durchgeführt werden.<br />
Vor Wartungs- und Reparaturarbeiten muss:<br />
- Die Maschine von ALLEN Versorgungsnetzen getrennt werden<br />
- Hauptschalter aus Netzstecker ziehen ggf. Druckluft aus dem System ablassen<br />
- Gegen ein Wiedereinschalten sind geeignete Maßnahmen zu treffen<br />
Arbeiten an elektrischen Elementen bzw. an der Zuleitung dürfen nur von Sachkundigen<br />
bzw. Elektrofachkräften ausgeführt werden.<br />
4.1 Verbrauchsmaterialien für Montage, Wartung und Pflege<br />
Hydraulik-ÖL<br />
Mindestanforderung allgemein:<br />
Eni PRECIS HVLP-D ART.Nr.00066018<br />
Sommer (15° bis 45°): HVLP-D 46 (z.B.: Eni PRECIS HVLP-D)<br />
Winter (unter 10°): HVLP-D 32 (z.B.: Eni PRECIS HVLP-D)<br />
Mindestanforderung speziell für 2-Säulen-Hebebühnen:<br />
Eni PRECIS HVLP-D ART.Nr.00067218<br />
Sommer (15° bis 45°): HVLP-D 32 (z.B.: Eni PRECIS HVLP-D)<br />
Winter (unter 10°): HVLP-D 22 (z.B.: Eni PRECIS HVLP-D)<br />
Konservierungsmittel für Seile, Schweißnähte, Schrauben, Ecken, Kanten und Hohlräume.<br />
Mindestanforderung:<br />
Petec Spray translucent - 500 ml Art. Nr. 73550 / Petec Saugdose translucent - 1000ml Art. Nr. 73510<br />
Petec UBS-Pistole Art. Nr. 98507<br />
Schmiermittel für Gleitbahnen<br />
Mindestanforderung:<br />
LAGERMEISTER WHS 2002 Weißes EP-Hochleistungsfett. Art. Nr. KPF1-2K-20<br />
Schmiermittel für Buchsen, Ketten, Rollen & bewegliche Teile<br />
Mindestanforderung:<br />
White Ultra Luber, 500 ml Sprühdose. Art. Nr. 34403 – WUL – White Ultra Lube<br />
Bodenverankerung<br />
Mindestanforderung für Hebebühnen:<br />
Fischer FIS A M 16 x 250 galvanisch verzinkt in Kombination mit Fischer Superbond Reaktionspatrone<br />
Mindestanforderung für PKW Montier- und PKW/LKW Wuchtmaschine:<br />
Schlaganker M8 x 100<br />
® Urheberrecht <strong>ATH</strong>-<strong>Heinl</strong> GmbH & CO.KG, Alle Rechte vorbehalten / Druckfehler und technische Änderungen vorbehalten / Stand: 2021-09<br />
Produkthersteller <strong>ATH</strong>-<strong>Heinl</strong> GmbH & CO.KG<br />
- 30 -
Mindestanforderung für LKW Montiermaschine:<br />
Schlaganker M12 x 100<br />
Druckluftanlage<br />
Mindestanforderung:<br />
PROMAT chemicals Druckluftöl Spezial Art. Nr.: 4000355209<br />
Reinigung<br />
Mindestanforderung:<br />
Caramba Intensiv Bremsenreiniger acetonfrei<br />
Pflege und Schutz von Metallen, lackierten oder pulverbeschichteten Oberflächen<br />
Mindestanforderung:<br />
Petec Spray translucent - 500 ml Art. Nr. 73550<br />
Petec Saugdose translucent - 1000ml Art. Nr. 73510<br />
Petec UBS-Pistole Art. Nr. 98507<br />
Pflege und Schutz von Metallen, lackierten oder pulverbeschichten Oberflächen im<br />
Trittbereich und Kunststoffteilen<br />
Mindestanforderung:<br />
Valet Pro Classic Protectant Kunststoffversiegelung 500ml<br />
4.2 Sicherheitsbestimmungen für Öl<br />
Beachten Sie immer die gesetzlichen Vorgaben bzw. Verordnungen zur Behandlung von Altöl.<br />
Entsorgen Sie Altöl immer durch einen zertifizierten Betrieb.<br />
Bei Leckagen muss Öl sofort mit Hilfe von Bindemittel oder Schalen aufgefangen werden, damit dieses<br />
nicht ins Erdreich eindringen kann.<br />
Vermeiden Sie jeglichen Hautkontakt zum Öl.<br />
Lassen Sie keine Öl-Dämpfe in die Atmosphäre austreten.<br />
Öl ist ein brennbares Medium. Achten Sie auf mögliche Gefahrenquellen.<br />
Tragen Sie ölresistente Schutzkleidung wie z.B. Handschuhe, Schutzbrille, Schutzkleidung usw.<br />
® Urheberrecht <strong>ATH</strong>-<strong>Heinl</strong> GmbH & CO.KG, Alle Rechte vorbehalten / Druckfehler und technische Änderungen vorbehalten / Stand: 2021-09<br />
Produkthersteller <strong>ATH</strong>-<strong>Heinl</strong> GmbH & CO.KG<br />
- 31 -
4.3 Hinweise<br />
Die Maschine ist, unabhängig von der Verschmutzung, in regelmäßigen Abständen zu<br />
Warten, Reinigen und Pflegen.<br />
Die Maschine ist danach mit einem Pflegemittel (z.B. Öl oder Wachsspray) zu behandeln.<br />
Verwenden Sie keine Reinigungsmittel, die für die Haut schädlich sind.<br />
SOLLTEN DIE GENANNTEN PUNKTE NICHT ERFÜLLT WERDEN, ERLISCHT DER<br />
GARANTIEANSPRUCH<br />
4.4 Wartungsplan bzw. Pflegeplan<br />
Intervall<br />
Sofort<br />
Wöchentlich<br />
Monatlich<br />
¼ jährlich<br />
½ jährlich<br />
Prüfung von ALLEN sicherheitsrelevanten Teilen<br />
Reinigen<br />
Oberflächenschutz kontrollieren bzw. wiederherstellen<br />
Dichtheit vom Hydrauliksystem kontrollieren<br />
Oberflächenschutz bzw. Korrosionsschutz kontrollieren bzw. wiederherstellen<br />
Schäden an der Lackierung und Bauteilen kontrollieren bzw. wiederherstellen<br />
Auf Rostschäden kontrollieren bzw. beheben<br />
Hohlräume und nicht lackierte Stellen kontrollieren bzw. Nachbehandeln<br />
Dichtheit des Pneumatiksystems kontrollieren<br />
Kontrolle der Festigkeit von Schrauben<br />
Lagerspiel kontrollieren, schmieren & einstellen<br />
Verschleißteile kontrollieren<br />
Flüssigkeiten prüfen (Füllstand, Verschleiß, Verunreinigung, Qualität)<br />
Gleitflächen kontrollieren & schmieren<br />
Innenliegenden Schmutz entfernen<br />
Elektrische Bauteile reinigen und prüfen<br />
Motor und Getriebe auf Funktion und Verschleiß prüfen<br />
Schweißnähte und Konstruktion prüfen<br />
Sichtprüfung (nach Prüfplan) durchführen<br />
X<br />
X<br />
X<br />
X<br />
X<br />
X<br />
X<br />
X<br />
X<br />
X<br />
X<br />
X<br />
X<br />
X<br />
X<br />
X<br />
X<br />
X<br />
X<br />
® Urheberrecht <strong>ATH</strong>-<strong>Heinl</strong> GmbH & CO.KG, Alle Rechte vorbehalten / Druckfehler und technische Änderungen vorbehalten / Stand: 2021-09<br />
Produkthersteller <strong>ATH</strong>-<strong>Heinl</strong> GmbH & CO.KG<br />
- 32 -
4.5 Fehlersuche / Fehleranzeige und Abhilfe<br />
Symptome Ursache Lösung<br />
Probleme beim Heben<br />
Hebebühne hebt nicht wenn<br />
Taste gedrückt wird (Motor<br />
läuft nicht)<br />
Hebebühne hebt nicht wenn<br />
Taste gedrückt wird (Motor<br />
läuft)<br />
Hebebühne hebt ruckartig<br />
Hebebühne hebt nach Loslassen<br />
des Tasters weiter an<br />
Beschädigungen am Motor<br />
Durchgebrannte Sicherungen<br />
durch z.B.<br />
Spannungsschwankungen<br />
Defekter Taster und/oder<br />
Kontakt<br />
Defekter Hauptschalter<br />
und/oder Kontakt<br />
Defekte oder ungenügende<br />
Zuleitung<br />
Schwankende oder nicht<br />
korrekte Eingangsspannung<br />
Defektes Motorschütz<br />
Thermorelais hat ausgelöst<br />
Endschalter defekt oder<br />
blockiert<br />
Hydraulikölmangel<br />
Ölfilter verstopft<br />
Ölverlust<br />
Geöffnetes Senkventil<br />
Falsche Drehrichtung des<br />
Motors<br />
Defekte Zahnradpumpe<br />
Zulässige Traglast wurde<br />
überschritten<br />
Druckbegrenzungsventil zu<br />
niedrig eingestellt<br />
zu wenig Platz zwischen<br />
Gleitschienen<br />
Luft im Hydrauliksystem<br />
Verschmutztes Hydrauliköl<br />
Gleitbahnen sind nicht<br />
geschmiert<br />
Defekter Taster<br />
Motor überprüfen ggf. ersetzen<br />
Ursachen beheben und<br />
Sicherungen ersetzen<br />
Taster und/oder Kontakt<br />
ersetzen<br />
Hauptschalter und/oder Kontakt<br />
ersetzen<br />
Kabel ersetzen<br />
Spannung kontrollieren<br />
Motorschütz ersetzen<br />
Thermorelais und Motor<br />
überprüfen<br />
Endschalter überprüfen ggf.<br />
ersetzen<br />
Öl nachfüllen<br />
Ölfilter reinigen<br />
Austausch der beschädigten<br />
Bauteile<br />
Überprüfen und ersetzen Sie bei<br />
Bedarf das Senkventil<br />
Phasen tauschen<br />
Prüfen Sie die Pumpe und<br />
ersetzen Sie diese bei Bedarf<br />
Arbeiten Sie innerhalb der<br />
angegebenen Traglast<br />
Druckbegrenzungsventil auf<br />
maximale Traglast einstellen<br />
Abstand zwischen Gleitschienen<br />
und Führung muss 1,5 - 2,5 mm<br />
betragen<br />
Entlüften Sie das<br />
Hydrauliksystem<br />
Tauschen Sie das Hydrauliköl<br />
Schmieren Sie die Gleitbahnen<br />
Tauschen Sie den defekten<br />
Taster aus<br />
® Urheberrecht <strong>ATH</strong>-<strong>Heinl</strong> GmbH & CO.KG, Alle Rechte vorbehalten / Druckfehler und technische Änderungen vorbehalten / Stand: 2021-09<br />
Produkthersteller <strong>ATH</strong>-<strong>Heinl</strong> GmbH & CO.KG<br />
- 33 -
Probleme beim Senken<br />
Sicherheitsrasten reagieren<br />
nicht<br />
Kabelverbindung prüfen<br />
Elektromagneten prüfen ggf.<br />
tauschen<br />
Rasten entlasten durch anheben<br />
Steuerrelais überprüfen<br />
Defektes Steuerrelais<br />
Hindernis unter Bühne Hindernis entfernen<br />
Schlauchbruchsicherung Bühne kurz anheben, und<br />
Hebebühne senkt nicht ab ausgelöst<br />
wieder "DOWN" betätigen<br />
Senkventil wird nicht<br />
angesteuert<br />
Elektroverbindung prüfen<br />
Magnetspule des Senkventils<br />
defekt<br />
Magnetspule austauschen<br />
Senkventil defekt<br />
Austausch<br />
Ventil für Senkgeschwindigkeit<br />
falsch eingestellt<br />
Einstellen<br />
Falls die Fehler nicht behoben werden können, senken Sie die Hebebühne mittels Notablass-<br />
Schraube ab und kontaktieren Sie unser Service-Team<br />
Senkventil verschmutzt Senkventil reinigen<br />
Bühne senkt zu langsam bzw.<br />
Ventil für Senkgeschwindigkeit<br />
ruckartig<br />
Einstellen<br />
falsch eingestellt<br />
Undichte<br />
Verbindungen nachziehen ggf.<br />
Hydraulikverbindungen abdichten<br />
Undichte Hydraulikleitungen Hydraulikleitung ersetzen<br />
Hebebühne senkt von alleine ab Undichte Hydraulikzylinder<br />
Dichtungen austauschen und<br />
reinigen des Hydrauliksystems<br />
Schmutziges oder defektes Reinigen oder tauschen des<br />
Senkventil<br />
Senkventils<br />
Undichtes Rückschlagventil Reinigen oder tauschen<br />
Sonstige Probleme<br />
Luft im Hydraulikkreislauf Hydraulikkreislauf entlüften<br />
Hebebühne hebt und senkt<br />
Ungenügende Spannung der Einstellen der Spannung bzw.<br />
nicht synchron<br />
Gleichlaufseile<br />
des Gleichlaufes<br />
Beschädigung oder<br />
Produkt weist (starke)<br />
Stellen entrosten, reinigen und<br />
mangelnder Korrosionsschutz<br />
Rostschäden auf<br />
Oberfläche wiederherstellen.<br />
ggf. Wartung<br />
Ölfilter verunreinigt<br />
Ölfilter reinigen<br />
ungewöhnliche Lautstärke des<br />
Entlüften Sie das<br />
Luft im Hydraulikkreislauf<br />
Motors<br />
Hydrauliksystem<br />
Verschmutztes Hydrauliköl Tauschen Sie das Hydrauliköl<br />
Kontrolle des Kontakts am<br />
Schütz<br />
Ersetzen Sie das Schütz<br />
Schutzschalter wurde aktiviert<br />
Kontrolle der Kapazität von<br />
Schutzschaltern<br />
Ersetzen Sie die Sicherungen<br />
Kontrolle auf Beschädigungen<br />
am Kabel<br />
Ersetzen des Kabels<br />
ACHTEN SIE STETS DARAUF, ORIGINALTEILE UND -ZUBEHÖR ZU VERWENDEN.<br />
® Urheberrecht <strong>ATH</strong>-<strong>Heinl</strong> GmbH & CO.KG, Alle Rechte vorbehalten / Druckfehler und technische Änderungen vorbehalten / Stand: 2021-09<br />
Produkthersteller <strong>ATH</strong>-<strong>Heinl</strong> GmbH & CO.KG<br />
- 34 -
4.6 Wartungs- und Serviceanleitungen<br />
Sämtliche Wartungs- und Servicearbeiten sollten mindestens nach Wartungsplan erfolgen<br />
DRUCKLUFTWARTUNGSEINHEIT<br />
(Teilweise Bestand ggf. notwendig für die Tätigkeit)<br />
EINSTELLUNG DES ARBEITSDRUCKES:<br />
• Kontrollieren Sie den Arbeitsdruck, der im<br />
Manometer (1) angezeigt wird. Dieser muss den<br />
technischen Daten entsprechen.<br />
• Der Arbeitsdruck kann mittels Druckregler (A)<br />
eingestellt werden.<br />
• Ziehen Sie den Druckregler nach oben, um<br />
Einstellungen vornehmen zu können.<br />
• Um den Druck in der Maschine zu erhöhen, müssen<br />
Sie den Regler im Uhrzeigersinn drehen, zum<br />
Verringern drehen Sie ihn gegen den Uhrzeigersinn.<br />
C<br />
A 1<br />
ÖLER<br />
• Kontrollieren Sie den Ölstand im Ölbehälter (3).<br />
• Entfernen Sie den Ölbehälter.<br />
• Füllen Sie nun den Behälter mit einem<br />
Pneumatik-Öl mit der Viskosität SAE20<br />
entsprechend nach.<br />
• Kontrollieren Sie die Einspritzmenge des Öles<br />
durch das Schauglas (4).<br />
• In der Regel muss die Schraube im<br />
Uhrzeigersinn komplett geschlossen werden und<br />
anschließend ca. ¼ bis ½ Umdrehung durch<br />
Drehen gegen den Uhrzeigersinn wieder<br />
geöffnet werden.<br />
4<br />
3<br />
B<br />
2<br />
WASSERABSCHEIDER<br />
• Kontrollieren Sie den Wasserstand im<br />
Abscheider (2).<br />
• Durch Öffnen des Ventils (B) wird das Wasser<br />
abgelassen.<br />
® Urheberrecht <strong>ATH</strong>-<strong>Heinl</strong> GmbH & CO.KG, Alle Rechte vorbehalten / Druckfehler und technische Änderungen vorbehalten / Stand: 2021-09<br />
Produkthersteller <strong>ATH</strong>-<strong>Heinl</strong> GmbH & CO.KG<br />
- 35 -
4.7 Entsorgung<br />
• Entfernen Sie die Luft- und Stromzufuhr.<br />
• Entfernen Sie alle nichtmetallischen Stoffe und bewahren Sie sie gemäß den örtlichen Vorschriften auf.<br />
• Entfernen Sie das Öl von der Maschine und bewahren Sie es gemäß den örtlichen Vorschriften auf.<br />
• Verwerten Sie alle metallischen Stoffe.<br />
Die Maschine enthält einige Substanzen, die die Umwelt belasten und dem menschlichen<br />
Körper Schaden zufügen können, wenn sie nicht richtig behandelt werden.<br />
® Urheberrecht <strong>ATH</strong>-<strong>Heinl</strong> GmbH & CO.KG, Alle Rechte vorbehalten / Druckfehler und technische Änderungen vorbehalten / Stand: 2021-09<br />
Produkthersteller <strong>ATH</strong>-<strong>Heinl</strong> GmbH & CO.KG<br />
- 36 -
5.0 EG-/EU-KONFORMITÄTSERKLÄRUNG / EC-/EU-DECLARATION OF CONFORMITY<br />
gemäß Maschinenrichtlinie 2006/42/EG, Anhang II 1A, EMV-Richtlinie 2014/30/EU, Anh. IV<br />
In accordance to Machine Directive 2006/42/EG, Appendix II 1A, EMC Directive 2014/30/EU, App. IV<br />
Seriennummer<br />
Serial number<br />
Firmenbezeichnung und vollständige Anschrift des Herstellers<br />
Business name and full address of the manufacturer<br />
Name und Anschrift des Dokumentations-Bevollmächtigten<br />
Name and address of the Technical Files authorized<br />
representative<br />
<strong>ATH</strong>-<strong>Heinl</strong> GmbH &Co. KG<br />
Gewerbepark 9<br />
DE – 92278 Illschwang<br />
<strong>ATH</strong>-<strong>Heinl</strong> GmbH &Co. KG<br />
Gewerbepark 9<br />
DE – 92278 Illschwang<br />
Hiermit erklären wir, dass die nachfolgend bezeichnete Maschine in der von uns in Verkehr gebrachten Ausführung den einschlägigen,<br />
grundlegenden Sicherheits- und Gesundheitsanforderungen der EG-Richtlinie 2006/42/EG sowie den unten aufgeführten<br />
Harmonisierungsrechtsvorschriften entspricht.<br />
We herewith declare that that the machine described below, as a result have been brought on to the general market comply with the relevant<br />
fundamental Safety and Health regulations of the of Directive 2000/60/EC and the harmonized standards listed below.<br />
Typbezeichnung<br />
Model name<br />
Beschreibung der Maschine<br />
Descriptions of the machine<br />
Hebebühne für Fahrzeuge<br />
Car lift<br />
<strong>ATH</strong>-<strong>Single</strong> <strong>Lift</strong> <strong>25M</strong><br />
Der oben beschriebene Gegenstand der Erklärung erfüllt die<br />
folgenden einschlägigen Harmonisierungs-Rechtsvorschriften der<br />
Union<br />
The object of the declaration described above meets the<br />
following applicable Community harmonisation legislation<br />
Folgende harmonisierten Normen und Vorschriften wurden<br />
eingehalten<br />
The following harmonized standards and regulations are applied<br />
Prüfinstitut<br />
Institute of Quality<br />
Referenznummer der technischen Daten<br />
Reference number for the technical data<br />
Nummer des Zertifikats<br />
Number of the certificate<br />
2006/42/EG (Machine-Directive)<br />
2006/95/EC (Low voltage directive)<br />
DIN EN 1493:2010 (Machine-Directive)<br />
DIN EN 60204-1: 2006+A1:2009 (Low voltage directive)<br />
EN ISO 121 :2010 (Risk assessment and risk reduction)<br />
CCQS UK Ltd.<br />
Level 7; Westgate House; Westgate Road<br />
London – W5 1YY<br />
UNITED KINGDOM<br />
TF-C-0722-16-143-02-5A<br />
CE-C-0722-16-143-02-5A<br />
<strong>ATH</strong>-<strong>Heinl</strong> GmbH &Co. KG<br />
Gewerbepark 9<br />
DE – 92278 Illschwang<br />
Datum<br />
Hans <strong>Heinl</strong><br />
(Geschäftsführer / General Manager)<br />
DURCH UMBAUTEN UND/ODER VERÄNDERUNGEN AN DER MASCHINE WIRD DIE CE-PRÜFUNG AUSSER KRAFT GESETZT UND<br />
EINE HAFTUNG AUSGESCHLOSSEN.<br />
BY MODIFICATION AND / OR CHANGES TO THE MACHINE, THE CE EXAMINATION IS EXCLUDED WITHOUT LIMITATION AND A<br />
LIABILITY SHALL BE EXCLUDED.<br />
® Urheberrecht <strong>ATH</strong>-<strong>Heinl</strong> GmbH & CO.KG, Alle Rechte vorbehalten / Druckfehler und technische Änderungen vorbehalten / Stand: 2021-09<br />
Produkthersteller <strong>ATH</strong>-<strong>Heinl</strong> GmbH & CO.KG<br />
- 37 -
6.0 ANHANG<br />
6.1 Pneumatik-Schaltplan<br />
® Urheberrecht <strong>ATH</strong>-<strong>Heinl</strong> GmbH & CO.KG, Alle Rechte vorbehalten / Druckfehler und technische Änderungen vorbehalten / Stand: 2021-09<br />
Produkthersteller <strong>ATH</strong>-<strong>Heinl</strong> GmbH & CO.KG<br />
- 38 -
6.2 Elektrik-Schaltplan<br />
Q1 Hauptschalter JD Signaltongeber<br />
KM1/KM2 Motorschütz H1 Betriebsleuchte<br />
S1 Taster Heben SV Senkventil<br />
S2 Taster Senken M Motor 1.5KW/4P<br />
S3 Taster Lock-up MR1/MR2 CE-Schalter<br />
® Urheberrecht <strong>ATH</strong>-<strong>Heinl</strong> GmbH & CO.KG, Alle Rechte vorbehalten / Druckfehler und technische Änderungen vorbehalten / Stand: 2021-09<br />
Produkthersteller <strong>ATH</strong>-<strong>Heinl</strong> GmbH & CO.KG<br />
- 39 -
6.3 Hydraulik-Schaltplan<br />
1 Ölfilter 6 Elektromotor<br />
2 Zahnradpumpe 7 Senkventil<br />
3 Not-Handpumpe – optional 8 Durchflussbegrenzer<br />
4 Rückschlagventil 9 Hydraulikzylinder<br />
5 Druckbegrenzungsventil 10 Startventil - für 1PH Antrieb<br />
® Urheberrecht <strong>ATH</strong>-<strong>Heinl</strong> GmbH & CO.KG, Alle Rechte vorbehalten / Druckfehler und technische Änderungen vorbehalten / Stand: 2021-09<br />
Produkthersteller <strong>ATH</strong>-<strong>Heinl</strong> GmbH & CO.KG<br />
- 40 -
7.0 GARANTIEKARTE<br />
Fachhändler Anschrift:<br />
Fima (ggf. Kundennummer):<br />
Ansprechpartner:<br />
Straße:<br />
PLZ & Ort:<br />
Tel. & Fax:<br />
E-Mail:<br />
Kunden Anschrift:<br />
Fima (ggf. Kundennummer):<br />
Ansprechpartner:<br />
Straße:<br />
PLZ & Ort:<br />
Tel. & Fax:<br />
E-Mail:<br />
Hersteller & Modell: Seriennummer: Baujahr: Referenz-Nummer:<br />
Beschreibung der Meldung:<br />
Beschreibung der benötigten Ersatzteile:<br />
Ersatzteil: Artikelnummer: Menge:<br />
WICHTIGER HINWEISE:<br />
Schäden, die durch unsachgemäße Handhabung, unterlassene Wartung oder mechanische Beschädigung<br />
entstehen, fallen nicht in die Gewährleistung. Für Anlagen, die nicht durch einen zugelassenen Monteur<br />
der Fa. <strong>ATH</strong> montiert wurden, beschränkt sich die Gewährleistung auf die Bereitstellung der<br />
erforderlichen Ersatzteile.<br />
Transportschäden:<br />
Offener Mangel (Sichtbare Transportschäden, Vermerk auf Lieferschein des Spediteurs, Kopie des<br />
Lieferscheins und Fotos umgehend zu <strong>ATH</strong>-<strong>Heinl</strong> senden)<br />
Versteckter Mangel (Transportschaden wird erst beim Auspacken der Ware festgestellt,<br />
Schadensanzeige mit Bildern innerhalb 24 Stunden an <strong>ATH</strong>-<strong>Heinl</strong> senden)<br />
Ort & Datum<br />
Unterschrift & Stempel<br />
® Urheberrecht <strong>ATH</strong>-<strong>Heinl</strong> GmbH & CO.KG, Alle Rechte vorbehalten / Druckfehler und technische Änderungen vorbehalten / Stand: 2021-09<br />
Produkthersteller <strong>ATH</strong>-<strong>Heinl</strong> GmbH & CO.KG<br />
- 41 -
7.1 Umfang der Produktgarantie<br />
• Fünf Jahre auf die Geräte Struktur<br />
• Netzgeräte, Hydraulikzylinder und alle anderen Verschleiß-Komponenten wie Drehteller, Gummiplatten,<br />
Seile, Ketten, Ventile, Schalter usw. werden, bei normalen Umständen/Gebrauch im Rahmen der<br />
Garantie auf ein Jahr begrenzt.<br />
Die Garantie erstreckt sich nicht auf:<br />
• Mängel, die durch normalen Verschleiß, Missbrauch, Transportschäden, unsachgemäße Installation,<br />
Spannung oder fehlende erforderliche Wartung entstanden sind.<br />
• Schäden die aus Vernachlässigung oder Nichteinhaltung der angegebenen Hinweise in dieser<br />
<strong>Bedienungsanleitung</strong> und / oder anderen begleitenden Anweisungen entstanden sind.<br />
• Den normalen Verschleiß an Einzelteilen, die einen Service benötigen, um das Produkt in einem<br />
sicheren Betriebszustand zu halten.<br />
• Jede Komponente die beim Transport beschädigt worden ist.<br />
• Andere Komponenten, die nicht explizit aufgeführt worden sind, aber als allgemeine Verschleißteile<br />
gehandhabt werden.<br />
• Wasserschäden, die durch z.B. Regen, übermäßiger Feuchtigkeit, korrosive Umgebungen oder andere<br />
Verunreinigungen verursacht worden sind.<br />
• Schönheitsfehler, welche die Funktion nicht beeinträchtigen.<br />
GARANTIE GILT NICHT,<br />
WENN DIE GARANTIEKARTE NICHT AN <strong>ATH</strong>-HEINL ZUGESENDET WORDEN IST.<br />
Es wird darauf hingewiesen, dass Schäden und Störungen, die durch Nichteinhalten von Wartungs- und<br />
Einstellarbeiten (gem. <strong>Bedienungsanleitung</strong> und/oder Einweisung), fehlerhafte Elektroanschlüsse (Drehfeld,<br />
Nennspannung, Absicherung) oder unsachgemäße Nutzung (Überlastung, Aufstellung im Freien, techn.<br />
Veränderungen) entstanden sind, den Gewährleistungsfall ausschließen!<br />
® Urheberrecht <strong>ATH</strong>-<strong>Heinl</strong> GmbH & CO.KG, Alle Rechte vorbehalten / Druckfehler und technische Änderungen vorbehalten / Stand: 2021-09<br />
Produkthersteller <strong>ATH</strong>-<strong>Heinl</strong> GmbH & CO.KG<br />
- 42 -
8.0 PRÜFBUCH<br />
Dieses Prüfbuch (inklusive Protokoll) ist wichtiger Bestandteil<br />
der <strong>Bedienungsanleitung</strong> bzw. des Produktes.<br />
!!!BITTE SORGFÄLTIG AUFBEWAHREN!!!<br />
Prüfung<br />
Das Produkt ist nach Fertigstellung der Montage, Übergabe, ggf. Einweisung und anschließend regelmäßig<br />
gemäß den im Betreiberland gültigen Vorschriften und gesetzlichen Bestimmungen durch eine hierfür<br />
geeignete und zugelassene Firma oder Einrichtung überprüfen zu lassen.<br />
Bei Änderungen oder Erweiterungen des Produkt-Typs muss ein zusätzliches Prüfbuch geführt und<br />
abgenommen werden.<br />
Prüfungsumfang<br />
Neben der einwandfreien Funktion, Sauberkeit und Wartungsvorgaben, sind vor allem die<br />
sicherheitsrelevanten Komponenten der gesamten Anlage zu überprüfen.<br />
Technische Daten<br />
- entnehmen Sie bitte der beiliegenden <strong>Bedienungsanleitung</strong>.<br />
Typenschild<br />
- Notieren Sie sich nachfolgend alle Daten<br />
- Hersteller & Typ der verwendeten Montagematerialien:<br />
® Urheberrecht <strong>ATH</strong>-<strong>Heinl</strong> GmbH & CO.KG, Alle Rechte vorbehalten / Druckfehler und technische Änderungen vorbehalten / Stand: 2021-09<br />
Produkthersteller <strong>ATH</strong>-<strong>Heinl</strong> GmbH & CO.KG<br />
- 43 -
8.1 Aufstellungs- und Übergabeprotokoll<br />
Aufstellungsort:<br />
Firma:<br />
Straße:<br />
Ort:<br />
Land:<br />
Gerät / Anlage:<br />
Hersteller:<br />
Typ / Modell:<br />
Serien-Nr.:<br />
Baujahr:<br />
Zuständiges Verkaufshaus:<br />
Das oben angegebene Produkt wurde montiert, auf Funktion und Sicherheit überprüft und in Betrieb genommen. Die<br />
Aufstellung erfolgte durch:<br />
den Betreiber<br />
den Sachkundigen<br />
Der Betreiber bestätigt das ordnungsgemäße Aufstellen des Produkt-Typs, alle Informationen dieser<br />
Betriebsanleitung und Protokoll gelesen sowie verstanden zu haben und entsprechend zu beachten, sowie diese<br />
Unterlagen den eingewiesenen Bediener jederzeit zugänglich aufzubewahren.<br />
Der Betreiber bestätigt, dass nach Montage und Inbetriebnahme durch eine geschulte Person des<br />
Herstellers oder eines Vertragshändlers (Sachkundiger) eine Einweisung in der Funktion, Handhabung,<br />
sicherheitsrelevanten Vorgaben, Wartung und Pflege der Maschine stattgefunden hat, die Unterlagen, Informationen<br />
und Vorgaben der Maschine erhalten hat und das Produkt einwandfrei funktioniert.<br />
WICHTIGER HINWEISE:<br />
SOLLTEN DIE GENANNTEN PUNKTE NICHT ERFÜLLT WERDEN, ERLISCHT DER GARANTIEANSPRUCH:<br />
Die Gewährleistung ist nur gültig bei Einhaltung und Nachweis der ordnungsgemäßen Montage, Übergabe, ggf.<br />
Einweisung der Maschine wie der jährlichen Wartung durch einen vom Hersteller autorisierten Sachkundigen. Der<br />
Abstand zwischen 2 Wartungen darf 12 Monate nicht überschreiten. Bei außerstandardmäßiger Nutzung bzw.<br />
Mehrschicht oder Saisonnutzung, ist eine ½ jährliche Prüfung und Wartung zu vereinbaren.<br />
Gewährleistungsansprüche werden nur anerkannt, wenn alle Punkte im Protokoll und in der <strong>Bedienungsanleitung</strong><br />
erfüllt wurden, der Anspruch unverzüglich nach Feststellung geltend gemacht wird und dieses Protokoll im<br />
Zusammenhang des Wartungs- und ggf. Serviceprotokoll an den Hersteller geschickt wird.<br />
Weiter spezifische Informationen zur Gewährleistung wie Umfang, Ansprüche und Vorgaben, sind in der<br />
<strong>Bedienungsanleitung</strong> beschrieben und sind zu beachten.<br />
Schäden und Reklamationen die durch unsachgemäße Handhabung, unterlassene Wartung und Pflege, Verwendung<br />
von ungeeigneten oder nicht vorgegeben Montage-, Bertriebs-, Wartungs- und Pflegemittel, mechanische<br />
Beschädigung, Eingreifen in das Gerät ohne Absprache oder durch nicht autorisierten Sachkundigen entstehen, sind<br />
von der Gewährleistung ausgeschlossen. Für Anlagen, die nicht durch einen autorisierten Sachkundigen montiert<br />
wurden, beschränkt sich die Gewährleistung per Absprache des Herstellers max. auf die Bereitstellung der<br />
erforderlichen Ersatzteile.<br />
Name und Firmenstempel des Sachkundigen<br />
ggf. Nummer und Name VKH<br />
Datum und Unterschrift des Sachkundigen<br />
Name und Firmenstempel des Betreibers<br />
Datum und Unterschrift des Betreibers<br />
® Urheberrecht <strong>ATH</strong>-<strong>Heinl</strong> GmbH & CO.KG, Alle Rechte vorbehalten / Druckfehler und technische Änderungen vorbehalten / Stand: 2021-09<br />
Produkthersteller <strong>ATH</strong>-<strong>Heinl</strong> GmbH & CO.KG<br />
- 44 -
8.2 Prüfplan<br />
Typenschild<br />
Kurzbedienungsanleitung<br />
<strong>Bedienungsanleitung</strong><br />
Sicherheitskennzeichen<br />
Kennzeichnung für Bedienung<br />
Weitere Kennzeichnung<br />
Konstruktion (Verformung, Risse)<br />
Befestigungsdübel und Standsicherheit<br />
Zustand Betonboden (Risse)<br />
Zustand / Allgemeinzustand<br />
Zustand / Sauberkeit<br />
Zustand / Pflege und Versiegelung<br />
Zustand / Flüssigkeiten<br />
Zustand / Schmierung<br />
Zustand / Aggregat<br />
Zustand / Antrieb<br />
Zustand / Motor<br />
Zustand / Getriebe<br />
Zustand / Zylinder<br />
Zustand / Ventil<br />
Zustand / Elektrische Steuerung<br />
Zustand / Elektrische Taster<br />
Zustand / Elektro-Schalter<br />
Zustand / Elektro-Leitungen<br />
Zustand / Hydraulik-Leitungen<br />
Zustand / Hydraulik-Verschraubung<br />
Zustand / Pneumatik-Leitungen<br />
Zustand / Pneumatik-Verschraubung<br />
Zustand / Dichtheit<br />
Zustand / Bolzen und Lagerstellen<br />
Zustand / Verschleißteile<br />
Zustand / Abdeckungen<br />
Zustand / Funktionen unter Last<br />
Zustand / Sicherheitsrelevanter Bauteile<br />
Zustand / Elektrische Sicherheitseinrichtung<br />
Zustand / Hydraulische Sicherheitseinrichtung<br />
Zustand / Pneumatische Sicherheitseinrichtung<br />
Zustand / Mechanische Sicherheitseinrichtung<br />
Zustand / Funktionen unter Last<br />
Prüfplakette erteilt<br />
® Urheberrecht <strong>ATH</strong>-<strong>Heinl</strong> GmbH & CO.KG, Alle Rechte vorbehalten / Druckfehler und technische Änderungen vorbehalten / Stand: 2021-09<br />
Produkthersteller <strong>ATH</strong>-<strong>Heinl</strong> GmbH & CO.KG<br />
- 45 -
8.3 Sichtprüfung (Befugte Sachkundige Person)<br />
Prüfungsbefund<br />
über eine regelmäßige / außerordentliche Prüfung / Nachprüfung*)<br />
Das Gerät wurde einer Prüfung auf Betriebsbereitschaft unterzogen.<br />
Dabei wurden keine / folgende *) Mängel festgestellt:<br />
_________________________________________________________________________________<br />
_________________________________________________________________________________<br />
_________________________________________________________________________________<br />
_________________________________________________________________________________<br />
_________________________________________________________________________________<br />
Prüfumfang: Funktions- und Sichtprüfung nach Vorgaben<br />
Noch ausstehende Teilprüfung:<br />
_________________________________________________________________________________<br />
_________________________________________________________________________________<br />
Einem Weiterbetrieb stehen keine *) Bedenken entgegen, Nachprüfung ist nicht *) erforderlich.<br />
(Ort, Datum)<br />
(Unterschrift Sachkundiger)<br />
Bestätigung der Abnahme:<br />
(Name des Sachkundigen)<br />
(Berufsbezeichnung)<br />
(Anschrift)<br />
(Beschäftigt bei)<br />
Betreiber (Firmenstempel, Datum, Unterschrift)<br />
Mängel zur Kenntnis genommen **) ________________________________________________________<br />
Mängel behoben **) ____________________________________________________________________<br />
*) Nichtzutreffendes bitte streichen<br />
**) Bestätigung des Betreibers oder eines Beauftragten mit Datum und Unterschrift<br />
® Urheberrecht <strong>ATH</strong>-<strong>Heinl</strong> GmbH & CO.KG, Alle Rechte vorbehalten / Druckfehler und technische Änderungen vorbehalten / Stand: 2021-09<br />
Produkthersteller <strong>ATH</strong>-<strong>Heinl</strong> GmbH & CO.KG<br />
- 46 -
Sichtprüfung (Befugte Sachkundige Person)<br />
Prüfungsbefund<br />
über eine regelmäßige / außerordentliche Prüfung / Nachprüfung*)<br />
Das Gerät wurde einer Prüfung auf Betriebsbereitschaft unterzogen.<br />
Dabei wurden keine / folgende *) Mängel festgestellt:<br />
_________________________________________________________________________________<br />
_________________________________________________________________________________<br />
_________________________________________________________________________________<br />
_________________________________________________________________________________<br />
_________________________________________________________________________________<br />
Prüfumfang: Funktions- und Sichtprüfung nach Vorgaben<br />
Noch ausstehende Teilprüfung:<br />
_________________________________________________________________________________<br />
_________________________________________________________________________________<br />
Einem Weiterbetrieb stehen keine *) Bedenken entgegen, Nachprüfung ist nicht *) erforderlich.<br />
(Ort, Datum)<br />
(Unterschrift Sachkundiger)<br />
Bestätigung der Abnahme:<br />
(Name des Sachkundigen)<br />
(Berufsbezeichnung)<br />
(Anschrift)<br />
(Beschäftigt bei)<br />
Betreiber (Firmenstempel, Datum, Unterschrift)<br />
Mängel zur Kenntnis genommen **) ________________________________________________________<br />
Mängel behoben **) ____________________________________________________________________<br />
*) Nichtzutreffendes bitte streichen<br />
**) Bestätigung des Betreibers oder eines Beauftragten mit Datum und Unterschrift<br />
® Urheberrecht <strong>ATH</strong>-<strong>Heinl</strong> GmbH & CO.KG, Alle Rechte vorbehalten / Druckfehler und technische Änderungen vorbehalten / Stand: 2021-09<br />
Produkthersteller <strong>ATH</strong>-<strong>Heinl</strong> GmbH & CO.KG<br />
- 47 -
Sichtprüfung (Befugte Sachkundige Person)<br />
Prüfungsbefund<br />
über eine regelmäßige / außerordentliche Prüfung / Nachprüfung*)<br />
Das Gerät wurde einer Prüfung auf Betriebsbereitschaft unterzogen.<br />
Dabei wurden keine / folgende *) Mängel festgestellt:<br />
_________________________________________________________________________________<br />
_________________________________________________________________________________<br />
_________________________________________________________________________________<br />
_________________________________________________________________________________<br />
_________________________________________________________________________________<br />
Prüfumfang: Funktions- und Sichtprüfung nach Vorgaben<br />
Noch ausstehende Teilprüfung:<br />
_________________________________________________________________________________<br />
_________________________________________________________________________________<br />
Einem Weiterbetrieb stehen keine *) Bedenken entgegen, Nachprüfung ist nicht *) erforderlich.<br />
(Ort, Datum)<br />
(Unterschrift Sachkundiger)<br />
Bestätigung der Abnahme:<br />
(Name des Sachkundigen)<br />
(Berufsbezeichnung)<br />
(Anschrift)<br />
(Beschäftigt bei)<br />
Betreiber (Firmenstempel, Datum, Unterschrift)<br />
Mängel zur Kenntnis genommen **) ________________________________________________________<br />
Mängel behoben **) ____________________________________________________________________<br />
*) Nichtzutreffendes bitte streichen<br />
**) Bestätigung des Betreibers oder eines Beauftragten mit Datum und Unterschrift<br />
® Urheberrecht <strong>ATH</strong>-<strong>Heinl</strong> GmbH & CO.KG, Alle Rechte vorbehalten / Druckfehler und technische Änderungen vorbehalten / Stand: 2021-09<br />
Produkthersteller <strong>ATH</strong>-<strong>Heinl</strong> GmbH & CO.KG<br />
- 48 -
Sichtprüfung (Befugte Sachkundige Person)<br />
Prüfungsbefund<br />
über eine regelmäßige / außerordentliche Prüfung / Nachprüfung*)<br />
Das Gerät wurde einer Prüfung auf Betriebsbereitschaft unterzogen.<br />
Dabei wurden keine / folgende *) Mängel festgestellt:<br />
_________________________________________________________________________________<br />
_________________________________________________________________________________<br />
_________________________________________________________________________________<br />
_________________________________________________________________________________<br />
_________________________________________________________________________________<br />
Prüfumfang: Funktions- und Sichtprüfung nach Vorgaben<br />
Noch ausstehende Teilprüfung:<br />
_________________________________________________________________________________<br />
_________________________________________________________________________________<br />
Einem Weiterbetrieb stehen keine *) Bedenken entgegen, Nachprüfung ist nicht *) erforderlich.<br />
(Ort, Datum)<br />
(Unterschrift Sachkundiger)<br />
Bestätigung der Abnahme:<br />
(Name des Sachkundigen)<br />
(Berufsbezeichnung)<br />
(Anschrift)<br />
(Beschäftigt bei)<br />
Betreiber (Firmenstempel, Datum, Unterschrift)<br />
Mängel zur Kenntnis genommen **) ________________________________________________________<br />
Mängel behoben **) ____________________________________________________________________<br />
*) Nichtzutreffendes bitte streichen<br />
**) Bestätigung des Betreibers oder eines Beauftragten mit Datum und Unterschrift<br />
® Urheberrecht <strong>ATH</strong>-<strong>Heinl</strong> GmbH & CO.KG, Alle Rechte vorbehalten / Druckfehler und technische Änderungen vorbehalten / Stand: 2021-09<br />
Produkthersteller <strong>ATH</strong>-<strong>Heinl</strong> GmbH & CO.KG<br />
- 49 -
9.0 NOTIZEN<br />
® Urheberrecht <strong>ATH</strong>-<strong>Heinl</strong> GmbH & CO.KG, Alle Rechte vorbehalten / Druckfehler und technische Änderungen vorbehalten / Stand: 2021-09<br />
Produkthersteller <strong>ATH</strong>-<strong>Heinl</strong> GmbH & CO.KG<br />
- 50 -
® Urheberrecht <strong>ATH</strong>-<strong>Heinl</strong> GmbH & CO.KG, Alle Rechte vorbehalten / Druckfehler und technische Änderungen vorbehalten / Stand: 2021-09<br />
Produkthersteller <strong>ATH</strong>-<strong>Heinl</strong> GmbH & CO.KG<br />
- 51 -
www.ath-heinl.de<br />
<strong>ATH</strong>-<strong>Heinl</strong> GmbH & Co. KG<br />
Gewerbepark 9<br />
D-92278 Illschwang<br />
Germany<br />
Tel.: +49 (0)9666 18801 00<br />
Fax: +49 (0)9666 18801 01<br />
info@ath-heinl.de<br />
www.ath-heinl.de<br />
DE<br />
ES<br />
EN<br />
NL<br />
FR<br />
PL<br />
CZ<br />
SK
Operating Instructions<br />
<strong>ATH</strong>-<strong>Single</strong> <strong>Lift</strong><br />
<strong>Single</strong> <strong>Lift</strong> <strong>25M</strong><br />
Serial number: C282140200089<br />
<strong>ATH</strong>-<strong>Heinl</strong> GmbH & Co. KG | Gewerbepark 9<br />
D-92278 Illschwang | Germany | www.ath-heinl.de<br />
Stand: September 2021. Fehler und Irrtümer vorbehalten. Verkauf nur über <strong>ATH</strong>-Vertriebspartner.
Contents<br />
1.0 INTRODUCTION ...................................................................................................................- 3 -<br />
1.1 General Information ...........................................................................................................- 3 -<br />
1.2 Description ........................................................................................................................- 4 -<br />
1.3 Operation.......................................................................................................................... - 6 -<br />
1.4 Technical Data ..................................................................................................................- 9 -<br />
1.5 Dimensions Drawing ........................................................................................................- 11 -<br />
2.0 INSTALLATION ...................................................................................................................- 13 -<br />
2.1 Transport & Storage Conditions ........................................................................................- 13 -<br />
2.2 Unpacking the machine ....................................................................................................- 13 -<br />
2.3 Delivery Contents ............................................................................................................- 14 -<br />
2.4 Location ..........................................................................................................................- 15 -<br />
2.5 Fixing .............................................................................................................................- 16 -<br />
2.6 Electrical Connection ........................................................................................................- 16 -<br />
2.7 Pneumatic Connection ......................................................................................................- 16 -<br />
2.8 Hydraulic Connection .......................................................................................................- 17 -<br />
2.9 Assembly ........................................................................................................................- 18 -<br />
2.10 Completion of Work ......................................................................................................- 24 -<br />
3.0 OPERATION .......................................................................................................................- 28 -<br />
3.1 Operating Instructions .....................................................................................................- 28 -<br />
3.2 Basic Information ............................................................................................................- 29 -<br />
4.0 MAINTENANCE ...................................................................................................................- 30 -<br />
4.1 Consumables for installation, maintenance and servicing..................................................... - 30 -<br />
4.2 Safety Regulations for Oil .................................................................................................- 31 -<br />
4.3 Notes .............................................................................................................................- 32 -<br />
4.4 Maintenance or Service Plan .............................................................................................- 32 -<br />
4.5 Troubleshooting / Error Display and Solutions ....................................................................- 33 -<br />
4.6 Maintenance and Service Instructions ................................................................................- 35 -<br />
4.7 Disposal ..........................................................................................................................- 36 -<br />
5.0 EG-/EU-KONFORMITÄTSERKLÄRUNG / EC-/EU-DECLARATION OF CONFORMITY...................... - 37 -<br />
6.0 APPENDIX ..........................................................................................................................- 38 -<br />
6.1 Pneumatic circuit diagram ................................................................................................- 38 -<br />
6.2 Electric circuit diagram .....................................................................................................- 39 -<br />
6.3 Hydraulic circuit diagram ..................................................................................................- 40 -<br />
7.0 WARRANTY CARD ...............................................................................................................- 41 -<br />
7.1 Scope of the Product Warranty .........................................................................................- 42 -<br />
8.0 INSPECTION LOG ...............................................................................................................- 43 -<br />
8.1 Installation and Handover Log ..........................................................................................- 44 -<br />
8.2 Inspection Plan ................................................................................................................- 45 -<br />
8.3 Visual inspection (authorised expert) .................................................................................- 46 -<br />
9.0 NOTES ...............................................................................................................................- 50 -<br />
® Copyright <strong>ATH</strong>-<strong>Heinl</strong> GmbH & Co. KG, All rights reserved / Misprints and technical changes reserved / As of: 2021-09<br />
Manufacturer <strong>ATH</strong>-<strong>Heinl</strong> GmbH & CO.KG<br />
- 2 -
1.0 INTRODUCTION<br />
1.1 General Information<br />
THESE INSTRUCTIONS ARE AN INTEGRAL PART OF THE MACHINE.<br />
THEY MUST BE READ AND UNDERSTOOD BY THE USER.<br />
NO LIABILITY IS ASSUMED FOR ANY DAMAGES CAUSED BY FAILURE TO<br />
FOLLOW THESE INSTRUCTIONS OR THE VALID SECURITY PROVISIONS.<br />
WARNING: Follow the instructions to prevent injury or damage.<br />
TIP: Provides more information on functionality and tips for using the device efficiently.<br />
Appropriate protective clothing must be worn for all work on the described system.<br />
® Copyright <strong>ATH</strong>-<strong>Heinl</strong> GmbH & Co. KG, All rights reserved / Misprints and technical changes reserved / As of: 2021-09<br />
Manufacturer <strong>ATH</strong>-<strong>Heinl</strong> GmbH & CO.KG<br />
- 3 -
1.2 Description<br />
Hat<br />
To cover the column<br />
<strong>Lift</strong>ing column<br />
The lifting carriage is guided by sliding blocks as it moves up and down the lifting column.<br />
The hydraulic lifting cylinder and the lifting chain are also located here.<br />
<strong>Lift</strong>ing carriage<br />
The lifting carriage supports the arm (load bearing equipment). It is lifted and lowered by the<br />
hydraulic cylinder by means of chains; it is guided in the column by plastic sliding blocks.<br />
Rear Arms<br />
Telescopic arms, their length of the arm can be adjusted.<br />
Arms “H” support<br />
Front Arms<br />
Telescopic arms, their length of the arm can be adjusted.<br />
® Copyright <strong>ATH</strong>-<strong>Heinl</strong> GmbH & Co. KG, All rights reserved / Misprints and technical changes reserved / As of: 2021-09<br />
Manufacturer <strong>ATH</strong>-<strong>Heinl</strong> GmbH & CO.KG<br />
- 4 -
Base frame<br />
Serves to stabilise the lift and contains the front rollers which drive the lift.<br />
Drive kit<br />
Serves to drive and position the lift. The procedure may only be carried out when empty<br />
without a load.<br />
Control box<br />
The complete electrical control system is located here. All buttons are protected by a front ring<br />
in order to prevent them being pressed accidentally. Furthermore, all movements are<br />
immediately stopped when the buttons are released (dead man’s control).<br />
Release magnet<br />
Electromagnet for releasing the safety catch during the lowering process.<br />
The safety catch prevents the lift from lowering autonomously in the case of an error.<br />
Hydraulic unit<br />
The hydraulic oil is fed from the tank to the lifting cylinder by a gear pump driven by an<br />
electric motor. The lowering valve allows the oil to flow back into the tank.<br />
® Copyright <strong>ATH</strong>-<strong>Heinl</strong> GmbH & Co. KG, All rights reserved / Misprints and technical changes reserved / As of: 2021-09<br />
Manufacturer <strong>ATH</strong>-<strong>Heinl</strong> GmbH & CO.KG<br />
- 5 -
1.3 Operation<br />
Push button lifting (Up),<br />
lifts the carriages<br />
Push button lowering (Down),<br />
lowers the carriages complete<br />
(the safety notch and the lowering valve will<br />
be activated)<br />
12-volt vehicle socket<br />
Socket Outlet 1 X 230V<br />
Push button parking (Lock up),<br />
parks (locks) the carriage (just the lowering<br />
valve will be activated)<br />
Signal lamp,<br />
indicates whether that the lift is in stand-by.<br />
Lockable main switch with emergency stop<br />
function, prevents switch on / off of the power<br />
of the lift from any unauthorized persons<br />
® Copyright <strong>ATH</strong>-<strong>Heinl</strong> GmbH & Co. KG, All rights reserved / Misprints and technical changes reserved / As of: 2021-09<br />
Manufacturer <strong>ATH</strong>-<strong>Heinl</strong> GmbH & CO.KG<br />
- 6 -
LIFTING<br />
• Make sure that the lift is completely lowered.<br />
• Use the lift truck to move the platform to the vehicle to be lifted. Make sure that the lifting column<br />
is in a vertical position and that it does not hit the vehicle.<br />
• Position the support arms under the vehicle.<br />
• Adjust the arms so that the rubber pads can touch the vehicle manufacturer's recommended lifting<br />
points on the vehicle.<br />
• Turn on the power switch.<br />
• Raise the platform by pressing the lifiting button until the arms touch the underside of the vehicle.<br />
• Make sure the vehicle is secured.<br />
• Keep pressing the <strong>Lift</strong> button until you reach the height you want.<br />
PARKING<br />
• Press the safety button to activate the mechanical safety precautions.<br />
• Always ensure that safety precautions are in place before working on or near the vehicle.<br />
LOWERING<br />
• Lower the vehicle by pressing the lowering button: the lift needs a few seconds to release the<br />
safety catch and then starts the lowering process.<br />
• Lower the platform by pressing the lowering button to the safety height.<br />
• Make sure that the safety area is free of people and objects.<br />
• Keep pressing the lowering button until the lift is fully lowered.<br />
• Close the power switch with a padlock.<br />
• Move the lift out of the work area. Be careful not to hit the vehicle.<br />
® Copyright <strong>ATH</strong>-<strong>Heinl</strong> GmbH & Co. KG, All rights reserved / Misprints and technical changes reserved / As of: 2021-09<br />
Manufacturer <strong>ATH</strong>-<strong>Heinl</strong> GmbH & CO.KG<br />
- 7 -
Safety instructions<br />
1. Check the correct load capacity<br />
and load distribution of vehicles.<br />
2. Do not override the self-closing<br />
lifts control<br />
3. Keep feet clear of lift while<br />
lowering.<br />
4. Keep free the area by lifting or<br />
lowering of the vehicles.<br />
5. Clear area if vehicle is in danger<br />
of falling.<br />
6. Avoid excessive raking of the<br />
vehicle while on the lift.<br />
7. The lift have to be used by<br />
trained operator only.<br />
8. Use vehicle manufacturer’s lifting<br />
points and close the doors before<br />
lifting of the vehicle<br />
9. Allow no unauthorized persons in<br />
the working area.<br />
10. Use height extenders when<br />
necessary to ensure a good<br />
contact.<br />
11. Always use safety stands when<br />
removing or installing heavy<br />
components.<br />
12. Auxiliary adapters may reduce<br />
load capacity.<br />
13. Proper maintenance and<br />
inspection is necessary for safe<br />
operation.<br />
14. Read operating and safety<br />
manuals before using the lift<br />
15. Do no operate with a damaged lift<br />
16. On the lift, lifting arms inside of<br />
the lifted vehicles any objects or<br />
people have not to be carried.<br />
17. Before lowering the lift check that<br />
there are not obstructions under<br />
the vehicle or the lifting arms.<br />
18. <strong>Lift</strong> must not be cleand under<br />
running water<br />
® Copyright <strong>ATH</strong>-<strong>Heinl</strong> GmbH & Co. KG, All rights reserved / Misprints and technical changes reserved / As of: 2021-09<br />
Manufacturer <strong>ATH</strong>-<strong>Heinl</strong> GmbH & CO.KG<br />
- 8 -
1.4 Technical Data<br />
Model<br />
Load capacity<br />
<strong>Lift</strong>ing time (2,000 kg)<br />
Lowering time (2,000 kg)<br />
Electrical system<br />
<strong>Lift</strong>ing height<br />
Control voltage<br />
Motor<br />
Upstream fuse<br />
Connection cable<br />
<strong>ATH</strong>-<strong>Single</strong> <strong>Lift</strong> <strong>25M</strong><br />
2,500 kg<br />
60 s<br />
60 s<br />
3/400V/50 Hz<br />
115-1870 mm<br />
DC24V<br />
1.5 KW<br />
1 C 16 A / 3 C 16 A<br />
Min. 3 x 1.5 mm² or 5 x 2.5 mm²<br />
Protection type IP 54<br />
Working pressure ²<br />
Recommended hydraulic oil<br />
Oil quantity<br />
Permissible sound level<br />
Weight<br />
Concreate requirements<br />
Approx. 180 bar<br />
Summer: HVLP-D 46 (e.g.: ENI Precis HVLP-D 46)<br />
Winter: HVLP-D 32<br />
Approx. 6 l<br />
≤ 76 dB<br />
900 kg<br />
Min. 250mm reinforced concrete C25<br />
Floor slope Max. 3°<br />
If the indicated rated load cannot be lifted, please contact our<br />
service team.<br />
® Copyright <strong>ATH</strong>-<strong>Heinl</strong> GmbH & Co. KG, All rights reserved / Misprints and technical changes reserved / As of: 2021-09<br />
Manufacturer <strong>ATH</strong>-<strong>Heinl</strong> GmbH & CO.KG<br />
- 9 -
Load distribution<br />
Q<br />
Total weight of the<br />
vehicle<br />
P1<br />
Max 2/5 x Q<br />
P2<br />
Max 3/5 x Q<br />
Load<br />
distribution<br />
2/3<br />
A Min. 1,000 mm ²<br />
® Copyright <strong>ATH</strong>-<strong>Heinl</strong> GmbH & Co. KG, All rights reserved / Misprints and technical changes reserved / As of: 2021-09<br />
Manufacturer <strong>ATH</strong>-<strong>Heinl</strong> GmbH & CO.KG<br />
- 10 -
1.5 Dimensions Drawing<br />
® Copyright <strong>ATH</strong>-<strong>Heinl</strong> GmbH & Co. KG, All rights reserved / Misprints and technical changes reserved / As of: 2021-09<br />
Manufacturer <strong>ATH</strong>-<strong>Heinl</strong> GmbH & CO.KG<br />
- 11 -
® Copyright <strong>ATH</strong>-<strong>Heinl</strong> GmbH & Co. KG, All rights reserved / Misprints and technical changes reserved / As of: 2021-09<br />
Manufacturer <strong>ATH</strong>-<strong>Heinl</strong> GmbH & CO.KG<br />
- 12 -
2.0 INSTALLATION<br />
The machine must be installed by an authorised person according to the instructions.<br />
The operating instructions (including the log) are an important part<br />
of the machine / product.<br />
!!!PLEASE STORE CAREFULLY!!!<br />
The product must be checked after completion of the installation, handover, if necessary briefing and then<br />
regularly in accordance with the applicable regulations and legal provisions in the country of operation by a<br />
suitable and approved company or facility.<br />
2.1 Transport & Storage Conditions<br />
When transporting and positioning the machine, always use suitable lifting and material handling<br />
equipment and consider the machine’s centre of gravity.<br />
The machine should only be transported with the original packaging.<br />
Data: ----<br />
Width ----<br />
Length ----<br />
Height ----<br />
Storage temperature -10 to +50 °C<br />
2.2 Unpacking the machine<br />
Remove the top cover of the packaging and make sure that no damage has occurred<br />
during transport.<br />
Remove the safety bolt to remove the machine from the pallet / rack.<br />
Use a suitable lifting device (possibly with a stopping rope) to lower the machine from the<br />
pallet / frame.<br />
The packaging material used for the machine should be stored carefully.<br />
Keep the packaging material out of the reach of children as it may be hazardous.<br />
® Copyright <strong>ATH</strong>-<strong>Heinl</strong> GmbH & Co. KG, All rights reserved / Misprints and technical changes reserved / As of: 2021-09<br />
Manufacturer <strong>ATH</strong>-<strong>Heinl</strong> GmbH & CO.KG<br />
- 13 -
2.3 Delivery Contents<br />
Transport box with:<br />
- column unit included accessories, lifting arms, electric control Box packed in a steel frame<br />
Tips for transport and storage:<br />
- <strong>Lift</strong> carefully. Support the weight properly using suitable equipment that is in a good condition and in<br />
good working order.<br />
- Avoid unexpected raises and jerky movements. Beware of bumps, gutters, etc.<br />
- Store the removed packaging at a collection point inaccessible to children and animals until it has been<br />
disposed of.<br />
- Storage temperature: -25°C ~ +55°C<br />
® Copyright <strong>ATH</strong>-<strong>Heinl</strong> GmbH & Co. KG, All rights reserved / Misprints and technical changes reserved / As of: 2021-09<br />
Manufacturer <strong>ATH</strong>-<strong>Heinl</strong> GmbH & CO.KG<br />
- 14 -
2.4 Location<br />
The machine should be kept away from flammable and explosive materials, as well as from sunlight and<br />
intense light. The machine should be placed in a well-ventilated location.<br />
The machine must be set up on sufficiently firm ground, if necessary, according to the minimum<br />
requirements of the information given in the foundation plan.<br />
In addition to the ground conditions, the guidelines and instructions of the accident prevention regulations<br />
as well as the workplace regulations must be observed when selecting an installation site.<br />
When assembling on floor coverings, check their load-bearing capacity. A construction expert should be<br />
consulted for inspection when mounting on floor coverings.<br />
The machine should only be mounted and used within closed rooms. It has no corresponding safety<br />
features (e.g. IP protection, galvanised design, etc.).<br />
Temperature 4-40 °C<br />
Sea level<br />
< 1500 m<br />
Humidity 50% at 40 °C – 90% at 20 °C<br />
Drawing<br />
® Copyright <strong>ATH</strong>-<strong>Heinl</strong> GmbH & Co. KG, All rights reserved / Misprints and technical changes reserved / As of: 2021-09<br />
Manufacturer <strong>ATH</strong>-<strong>Heinl</strong> GmbH & CO.KG<br />
- 15 -
2.5 Fixing<br />
General and local regulations must be observed. Therefore, these steps should only be<br />
carried out by a trained professional.<br />
The machine must be set up and fixed on sufficiently firm ground, if necessary, according to the minimum<br />
requirements of the information given in the foundation plan.<br />
The machine must be fastened at the points provided with suitable or specified fastening material.<br />
In addition to the ground conditions, the guidelines and instructions of the accident prevention regulations<br />
as well as the workplace regulations must be observed when selecting an installation site.<br />
When assembling on floor coverings, check their load-bearing capacity. A construction expert should be<br />
consulted for inspection when mounting on floor coverings.<br />
2.6 Electrical Connection<br />
General and local regulations must be observed. Therefore, these steps may only be<br />
carried out by a trained professional.<br />
Pay attention to the necessary supply line (see technical data).<br />
The connection should be made with a 230V Schuko plug or 5-phase 16 A CEE plug (partially included).<br />
Voltage deviations should be 0.9 - 1.1 times the nominal voltage range and the frequency deviation should<br />
be 0.99 - 1.01 times the frequency range.<br />
Necessary protective measures must be taken to guarantee this.<br />
At the end of the work, the direction that the motor rotates must be checked.<br />
2.7 Pneumatic Connection<br />
For all pneumatic systems, a compressed air maintenance unit (partially included) must<br />
be installed between the supply line and the system.<br />
The air pressure of the supply line must at least correspond to the technical data.<br />
The compressed air maintenance unit must be set correctly and checked.<br />
The compressed air maintenance unit must be serviced at regular intervals.<br />
The maximum or minimum pressure ensures perfect functioning without any damage.<br />
® Copyright <strong>ATH</strong>-<strong>Heinl</strong> GmbH & Co. KG, All rights reserved / Misprints and technical changes reserved / As of: 2021-09<br />
Manufacturer <strong>ATH</strong>-<strong>Heinl</strong> GmbH & CO.KG<br />
- 16 -
2.8 Hydraulic Connection<br />
Before the system is put into operation or operated for the first time with oil, the<br />
following must be observed with regard to the optimal, trouble-free and almost air-free<br />
functioning<br />
All hydraulic lines must be connected and tightened according to the hydraulic plan and, if applicable<br />
according to the hose designation.<br />
All hydraulic lines and cylinders must be vented according to the hydraulic plan and, if applicable, according<br />
to the hose designation.<br />
In order to ensure the faultless and safe functioning of the system and the hose assemblies used, the<br />
hydraulic fluids used must comply with the specific instructions and recommendations of the manufacturer.<br />
Used media that do not meet the specific requirements or which have unauthorised contamination damage<br />
the entire hydraulic system and shorten the service life of the hydraulic systems used. Warning: (system<br />
contamination can also occur when oil is refilled)<br />
The minimum requirement and minimum oil quantity must be checked and ensured.<br />
® Copyright <strong>ATH</strong>-<strong>Heinl</strong> GmbH & Co. KG, All rights reserved / Misprints and technical changes reserved / As of: 2021-09<br />
Manufacturer <strong>ATH</strong>-<strong>Heinl</strong> GmbH & CO.KG<br />
- 17 -
2.9 Assembly<br />
These instructions are not to be viewed as assembly instructions; hints and tips are<br />
provided only for trained expert installers. Suitable clothing and personal protection must<br />
be worn for the following work.<br />
Incorrect installation and settings lead to exclusion of liability and warranty.<br />
Installing of the column on the base<br />
Screw M20x60<br />
Screw M8x20<br />
Washer D.20 Washer D.12<br />
Locking washer D.20<br />
Screw M12x40<br />
Seeger D.16 Locking washer D.12<br />
Steel ball D.20<br />
Nut M12<br />
® Copyright <strong>ATH</strong>-<strong>Heinl</strong> GmbH & Co. KG, All rights reserved / Misprints and technical changes reserved / As of: 2021-09<br />
Manufacturer <strong>ATH</strong>-<strong>Heinl</strong> GmbH & CO.KG<br />
- 18 -
Installing of the lifting arms<br />
Install the arm frame to the carriage using the supplied screws and washers as shown in the following<br />
drawing:<br />
Screw M16x45 Locking washer D.16<br />
Washer D.16<br />
Fit the telescopic arms to the arm frames as shown in the following drawing:<br />
® Copyright <strong>ATH</strong>-<strong>Heinl</strong> GmbH & Co. KG, All rights reserved / Misprints and technical changes reserved / As of: 2021-09<br />
Manufacturer <strong>ATH</strong>-<strong>Heinl</strong> GmbH & CO.KG<br />
- 19 -
Installation Of Power Unit<br />
Place the power unit onto the bracket on the back side of the column with the screws and washes attached<br />
as shown in the following drawing:<br />
Locking washer D.10<br />
Washer D.10<br />
Screw M10x25<br />
Fit the cylinder is located in the center hole in the column base as shown in the following drawing:<br />
Hydraulic cylinder<br />
® Copyright <strong>ATH</strong>-<strong>Heinl</strong> GmbH & Co. KG, All rights reserved / Misprints and technical changes reserved / As of: 2021-09<br />
Manufacturer <strong>ATH</strong>-<strong>Heinl</strong> GmbH & CO.KG<br />
- 20 -
Install the chain protection on the pulley<br />
Screw M6x14 Locking washer D.14<br />
Washer D.14<br />
Chain protection<br />
® Copyright <strong>ATH</strong>-<strong>Heinl</strong> GmbH & Co. KG, All rights reserved / Misprints and technical changes reserved / As of: 2021-09<br />
Manufacturer <strong>ATH</strong>-<strong>Heinl</strong> GmbH & CO.KG<br />
- 21 -
Hydraulic line connection<br />
Take care that the hoses and connection pieces are clean and free of contamination. Clean the parts if<br />
required.<br />
Check all parts for damage and ensure that all screw connections and connecting pieces are in good order.<br />
Connect the hoses to the hydraulic unit and the cylinder in accordance with the drawing below. Tighten all<br />
connections to prevent any oil leaks.<br />
Rilsan hose 10x6.5x1850<br />
Restrictor<br />
Hydraulic hose ¼ L730<br />
® Copyright <strong>ATH</strong>-<strong>Heinl</strong> GmbH & Co. KG, All rights reserved / Misprints and technical changes reserved / As of: 2021-09<br />
Manufacturer <strong>ATH</strong>-<strong>Heinl</strong> GmbH & CO.KG<br />
- 22 -
Install The Control Panel<br />
Install the control panel onto the column as shown in the following Diagram:<br />
Screw M6x20<br />
Electric control assembly<br />
Fit the electric control to the column using the supplied screws as shown in the adjacent diagram.<br />
Check the nameplate to ensure that the motor is suitable for the voltage available at the customer’s<br />
premises.<br />
Establish the electrical connections as shown in the circuit diagram (point 6.2). Use the cables and<br />
lines supplied for this purpose.<br />
Work must be carried out in accordance with local regulations. Make sure that the phases are properly<br />
connected (direction of rotation) and<br />
the lift is properly grounded.<br />
® Copyright <strong>ATH</strong>-<strong>Heinl</strong> GmbH & Co. KG, All rights reserved / Misprints and technical changes reserved / As of: 2021-09<br />
Manufacturer <strong>ATH</strong>-<strong>Heinl</strong> GmbH & CO.KG<br />
- 23 -
2.10 Completion of Work<br />
Before commissioning, check all fastening screws, electrical, pneumatic and hydraulic<br />
lines and, if necessary, tighten these. Warning: in some cases, this must be checked at<br />
regular intervals and tightened if necessary (note in the instructions).<br />
Adjustment of the top end-limit switch<br />
Limit switch<br />
Raise the lift at a height of 1870 mm to check for the proper position.<br />
If the switch does not function properly, unloosen its lever and adjust it at a proper position until the lift<br />
can reach at the desired height.<br />
Tighten the screw after adjustment.<br />
Adjustment of the CE-limit switch<br />
Place the lift at a height of 200 mm<br />
Limit switch<br />
Cross beam<br />
If the switch does not function properly, unloosen its lever and adjust it at a proper height (it is suggested<br />
to be lower 1-3mm than the cross beam).<br />
Tighten the screw after adjustment.<br />
® Copyright <strong>ATH</strong>-<strong>Heinl</strong> GmbH & Co. KG, All rights reserved / Misprints and technical changes reserved / As of: 2021-09<br />
Manufacturer <strong>ATH</strong>-<strong>Heinl</strong> GmbH & CO.KG<br />
- 24 -
Filling the oil and venting<br />
Use only the hydraulic oil specified in the operating instructions. Open the oil filler cap and fill approx. 6<br />
litres of hydraulic oil into the tank. Pressing the LIFT button moves the lift upwards until the max. height<br />
has been reached. Release the button when the maximum height has been reached, as otherwise<br />
the electric motor or the gear pump may be damaged. Pressing the LOWER button moves the lift right to<br />
the bottom. Keep holding the LOWER button for around 3 seconds after the lift has reached its lowest point<br />
to allow any trapped air to escape.<br />
Repeat this LIFT and LOWER procedure three times.<br />
Warning: Attempting to test without oil or when the motor is rotating in the wrong direction can destroy<br />
the hydraulic pump.<br />
Check before start-up<br />
General checks<br />
- Make sure all pins and bolts to insure proper mounting.<br />
- Make sure the chain for proper installation.<br />
- Make sure the electrical system feeding voltage is equal to that specified in the nameplate on the<br />
motor, the electric system connection in conformity of the electric plan shown as the electric<br />
diagram and for proper grounding.<br />
- Make sure the lift is connected to the ground.<br />
- Particularly, below checks must be followed:<br />
Mechanical safeties for proper installation<br />
- Check to make sure that safeties will properly engage by pushing the locking button and can be<br />
released properly by pushing the lowering button.<br />
- When raising the carriages, listen to the safety hook fall into the safety rack. If not, check the cause<br />
if necessary.<br />
Hydraulic system for proper operation<br />
- Proper oil level in the tank, refill if needed.<br />
- Raise the carriage to the full height and keep the motor running for 5 seconds.<br />
- Check all hoses connections to make sure no leakage. Tighten the connections or reseal if<br />
necessary.<br />
- Check the carriage for reaching its maximum height.<br />
- Repeat the air bleeding of cylinders if necessary.<br />
Limit switch for proper operation<br />
- Check to make sure the top limit switch for proper operation. Verify that the power unit stops<br />
working when the carriages reaches the maximum height.<br />
- Check to make sure the safety height limit switch for proper operation. Verify the power unit stops<br />
working when the carriage is lowered at about 200mm high.<br />
® Copyright <strong>ATH</strong>-<strong>Heinl</strong> GmbH & Co. KG, All rights reserved / Misprints and technical changes reserved / As of: 2021-09<br />
Manufacturer <strong>ATH</strong>-<strong>Heinl</strong> GmbH & CO.KG<br />
- 25 -
Installation of front cover<br />
Front cover<br />
Screw M6x20<br />
Fastening plate<br />
Screw M3x8<br />
Nut M6 Bolt hook<br />
® Copyright <strong>ATH</strong>-<strong>Heinl</strong> GmbH & Co. KG, All rights reserved / Misprints and technical changes reserved / As of: 2021-09<br />
Manufacturer <strong>ATH</strong>-<strong>Heinl</strong> GmbH & CO.KG<br />
- 26 -
MANUAL EMERGENCY LOWERING<br />
• In case of emergency with no electric power, lower the loaded vehicle manually to its initial position<br />
as follows:<br />
• Padlock the power switch.<br />
• Remove the covers on back of the column to check if the mechanical safeties are engaged.<br />
• If the safeties are engaged, operate the emergency hand pump (if ordered with the lift) to raise the<br />
lift a little bit to clear off the safeties.<br />
• After the safeties are clear off, put a proper bolt under each safety hook as shown to keep the<br />
safeties released.<br />
• Unscrew the emergency lowering screw by turning it anticlockwise until the vehicle is lowered fully.<br />
Screwing or unscrewing can reduce or increase the lowering speed.<br />
• Retighten the emergency lowering screw by turning it clockwise.<br />
• Remove the bolts from the safety hooks.<br />
• Refit the back covers onto the column and tighten the screws.<br />
Bolt<br />
Safety catch<br />
Emergency lowering valve<br />
Emergency hand pump (opt.)<br />
® Copyright <strong>ATH</strong>-<strong>Heinl</strong> GmbH & Co. KG, All rights reserved / Misprints and technical changes reserved / As of: 2021-09<br />
Manufacturer <strong>ATH</strong>-<strong>Heinl</strong> GmbH & CO.KG<br />
- 27 -
3.0 OPERATION<br />
3.1 Operating Instructions<br />
Company:<br />
Place of work:<br />
Operating Instructions<br />
for<br />
<strong>Lift</strong>ing Platform<br />
Risks to People and the Environment<br />
• Falling of loads or parts<br />
• Crushing and shearing points when moving the lifting platform<br />
• Danger due to uncontrolled moving parts<br />
Protective Measures and Rules of Conduct<br />
Before starting work:<br />
• <strong>Lift</strong>ing platforms may only be used independently by trained persons over the age<br />
of 18 who have been instructed in writing.<br />
• When working with more than one person, a supervisor must be appointed<br />
• Daily functional check<br />
• Observe the manufacturer’s operating instructions<br />
During operation:<br />
• Pay attention to crush and shear points in the environment<br />
• Do not load the lifting platform above the permitted maximum load<br />
• Do not lift people<br />
• Do not shake the lifting platform, avoid rocking.<br />
• When lowering, do not stand in the lifting platform movement area<br />
• Arrange regular checks of the lifting platform<br />
Response to faults and hazards<br />
• In case of fault, stop the lifting platform immediately<br />
• Secure against further use<br />
• Report defects to the installer or manufacturer<br />
First Aid<br />
• Inform first aiders (see alarm/emergency plan)<br />
• Treat injuries immediately<br />
• Enter into the accident book<br />
• Contact emergency services for serious injuries<br />
Emergency number: _____________<br />
Ambulance service: _______________<br />
Date:<br />
Signature:<br />
Maintenance<br />
• Repair only by instructed and trained persons<br />
• Disconnect or secure the lifting platform from the mains power supply for set-up,<br />
adjustment, maintenance or servicing<br />
• Clean the lifting platform after operation and check the hydraulic level<br />
• Annual check of the lifting platform by an authorised and trained person<br />
® Copyright <strong>ATH</strong>-<strong>Heinl</strong> GmbH & Co. KG, All rights reserved / Misprints and technical changes reserved / As of: 2021-09<br />
Manufacturer <strong>ATH</strong>-<strong>Heinl</strong> GmbH & CO.KG<br />
- 28 -
3.2 Basic Information<br />
Independent operation of the machine may only be carried out by persons over the age of 18 who have<br />
been trained in the operation of the machine and have demonstrated their ability to do so to the employer.<br />
They must be expressly contracted by the employer to operate the machine. The order to operate the<br />
machine must be given in writing.<br />
The machine must only be used for its intended use.<br />
Always use appropriate material during installation and operation.<br />
Before assembly or disassembly check all components for damage.<br />
If necessary, observe special manufacturer instructions for mounting or dismounting of vehicle-specific<br />
work.<br />
An important part of the guarantee / warranty is fulfilment of the maintenance plan. This includes in<br />
particular, ensuring cleanliness, corrosion protection, checks and repairing damages immediately if<br />
required.<br />
During operation attention should always be paid to hazards. As soon as dangers occur, switch off the<br />
machine immediately, remove the mains plug and disconnect the air supply.<br />
Then contact your dealer.<br />
All warning labels must always be easy to read. If damaged, they must be replaced immediately.<br />
Pay attention to possible shearing points around the machine.<br />
During operation, the noise can reach 85dB (A), so the operator should take appropriate<br />
protective measures.<br />
Moving parts of the machine can catch loose clothing, long hair or jewellery.<br />
® Copyright <strong>ATH</strong>-<strong>Heinl</strong> GmbH & Co. KG, All rights reserved / Misprints and technical changes reserved / As of: 2021-09<br />
Manufacturer <strong>ATH</strong>-<strong>Heinl</strong> GmbH & CO.KG<br />
- 29 -
4.0 MAINTENANCE<br />
The user must maintain the machine regularly to ensure safe operation.<br />
Repair work may only be carried out by authorised service partners or after customer consultation with the<br />
manufacturer.<br />
Before maintenance and repair work:<br />
- The machine must be disconnected from ALL supply networks<br />
- Pull main switch out of mains plug, if necessary, discharge compressed air from<br />
system<br />
- Appropriate measures must be taken against a restart<br />
Work on electrical elements or on the supply line may only be carried out by experts or<br />
electricians.<br />
4.1 Consumables for installation, maintenance and servicing<br />
Hydraulic Oil<br />
General minimum requirement:<br />
Eni PRECIS HVLP-D Item No. 00066018<br />
Summer (15° to 45°): HVLP-D 46 (e.g.: Eni PRECIS HVLP-D)<br />
Winter (under 10°): HVLP-D 32 (e.g.: Eni PRECIS HVLP-D)<br />
Minimum requirement especially for 2-post lifts:<br />
Eni PRECIS HVLP-D Item No. 00067218<br />
Summer (15° to 45°): HVLP-D 32 (e.g.: Eni PRECIS HVLP-D)<br />
Winter (under 10°): HVLP-D 22 (e.g.: Eni PRECIS HVLP-D)<br />
Preservative for ropes, welds, screws, corners, edges and cavities.<br />
Minimum requirement:<br />
Petec spray translucent - 500 ml Item No. 73550 / Petec wall inlet translucent - 1000 ml<br />
73510<br />
Petec UBS pistol Item No. 98507<br />
Item No.<br />
Slideway lubricant<br />
Minimum requirement:<br />
STORER WHS 2002 White EP high performance grease. Item No. KPF1-2K-20<br />
Lubricant for bushes, chains, rollers & moving parts<br />
Minimum requirement:<br />
White ultra lube, 500 ml aerosol. Item No. 34403 – WUL – White Ultra Lube<br />
Floor anchor<br />
Minimum requirement for lifting platforms:<br />
Fischer FIS A M 16 x 250 galvanised in combination with Fischer Superbond reaction cartridge<br />
Minimum requirement for passenger car and passenger car/truck balancing machine:<br />
Impact anchor M8 x 100<br />
Minimum requirement for truck mounting machine:<br />
Impact anchor M12 x 100<br />
® Copyright <strong>ATH</strong>-<strong>Heinl</strong> GmbH & Co. KG, All rights reserved / Misprints and technical changes reserved / As of: 2021-09<br />
Manufacturer <strong>ATH</strong>-<strong>Heinl</strong> GmbH & CO.KG<br />
- 30 -
Compressed air system<br />
Minimum requirement:<br />
PROMAT chemicals special compressed air oil Item No.: 4000355209<br />
Cleaning<br />
Minimum requirement:<br />
Caramba intensive brake cleaner acetone-free<br />
Care and protection of metals, painted or powder-coated surfaces<br />
Minimum requirement:<br />
Petec spray translucent - 500 ml Item No. 73550<br />
Petec wall inlet translucent - 1000 ml Item No. 73510<br />
Petec UBS pistol Item No. 98507<br />
Care and protection of metals, painted or powder-coated surfaces in the tread area and plastic<br />
parts<br />
Minimum requirement:<br />
Valet Pro Classic Protectant Plastic Sealant 500 ml<br />
4.2 Safety Regulations for Oil<br />
Always observe the legal requirements or regulations for handling used oil.<br />
Always dispose of used oil through a certified organisation.<br />
In the case of leaks, oil must be collected immediately with binders or trays so that it cannot penetrate into<br />
the soil.<br />
Avoid any skin contact with the oil.<br />
Do not allow oil vapours to escape into the atmosphere.<br />
Oil is a combustible medium. Pay attention to possible hazards.<br />
Wear oil-resistant protective clothing, such as gloves, goggles, protective clothing, etc.<br />
® Copyright <strong>ATH</strong>-<strong>Heinl</strong> GmbH & Co. KG, All rights reserved / Misprints and technical changes reserved / As of: 2021-09<br />
Manufacturer <strong>ATH</strong>-<strong>Heinl</strong> GmbH & CO.KG<br />
- 31 -
4.3 Notes<br />
Regardless of the level of dirt, the machine must be maintained, cleaned and serviced at<br />
regular intervals.<br />
The machine should then be treated with a care product (such as oil or wax spray).<br />
Do not use cleaning agents that are harmful to the skin.<br />
IF THE ABOVEMENTIONED POINTS ARE NOT FULFILLED, THE WARRANTY CLAIM IS<br />
EXCLUDED<br />
4.4 Maintenance or Service Plan<br />
Interval<br />
Immediately<br />
Weekly<br />
Monthly<br />
Every 3<br />
months<br />
Every 6<br />
months<br />
Check of ALL safety-relevant parts<br />
Cleaning<br />
Check or restore surface protection<br />
Check for leaks in the hydraulic system<br />
Check or restore surface protection or corrosion protection<br />
Check or restore damage to the paint and components<br />
Check or restore rust damage<br />
Check or treat cavities and non-painted areas<br />
Check for leaks in the pneumatic system<br />
Control the tightness of screws<br />
Check, lubricate & adjust bearing slack<br />
Check wear parts<br />
Check fluids (level, wear, contamination, quality)<br />
Check and lubricate sliding surfaces<br />
Remove any dirt inside<br />
Clean and check electrical components<br />
Check motor and transmission for function and wear<br />
Check welds and construction<br />
Visual inspection (according to inspection plan)<br />
X<br />
X<br />
X<br />
X<br />
X<br />
X<br />
X<br />
X<br />
X<br />
X<br />
X<br />
X<br />
X<br />
X<br />
X<br />
X<br />
X<br />
X<br />
X<br />
® Copyright <strong>ATH</strong>-<strong>Heinl</strong> GmbH & Co. KG, All rights reserved / Misprints and technical changes reserved / As of: 2021-09<br />
Manufacturer <strong>ATH</strong>-<strong>Heinl</strong> GmbH & CO.KG<br />
- 32 -
4.5 Troubleshooting / Error Display and Solutions<br />
Symptoms Cause Solution<br />
<strong>Lift</strong>ing Problems<br />
<strong>Lift</strong>ing platform does not lift<br />
when button is pressed (motor<br />
does not run)<br />
<strong>Lift</strong>ing platform does not lift<br />
when button is pressed (motor<br />
runs)<br />
<strong>Lift</strong>ing platform lifts jerkily<br />
<strong>Lift</strong>ing platform continues to lift<br />
after releasing the button<br />
Damage to the motor<br />
Blown fuses from e.g. voltage<br />
fluctuations<br />
Defective button and/or<br />
contact<br />
Defective main switch and/or<br />
contact<br />
Defective or insufficient supply<br />
line<br />
Fluctuating or incorrect input<br />
voltage<br />
Defective motor contactor<br />
Thermal relay has tripped<br />
Limit switch defective or<br />
blocked<br />
Hydraulic oil shortage<br />
Oil filter blocked<br />
Oil leakage<br />
Opened lowering valve<br />
Motor rotates in wrong<br />
direction<br />
Broken gear pump<br />
Permissible load has been<br />
exceeded<br />
Pressure relief valve set too<br />
low<br />
Not enough space between<br />
rails<br />
Air in hydraulic system<br />
Contaminated hydraulic oil<br />
Slideways are not lubricated<br />
Defective button<br />
Check motor and replace if<br />
necessary<br />
Remedy the causes and replace<br />
the fuses<br />
Replace button and/or contact<br />
Replace main switch and/or<br />
contact<br />
Replace cable<br />
Check power<br />
Replace motor contactor<br />
Check thermal relay and motor<br />
Check limit switch and replace if<br />
necessary<br />
Refill oil<br />
Clean the oil filter<br />
Replacement of damaged<br />
components<br />
Check and replace the lowering<br />
valve if required<br />
Replace phases<br />
Check the pump and replace if<br />
necessary<br />
Work within the specified load<br />
Set pressure relief valve to<br />
maximum load<br />
Distance between rails and<br />
guide must be 1.5 - 2.5 mm<br />
Bleed the hydraulic system<br />
Change the hydraulic oil<br />
Lubricate the slideways<br />
Replace the defective button<br />
® Copyright <strong>ATH</strong>-<strong>Heinl</strong> GmbH & Co. KG, All rights reserved / Misprints and technical changes reserved / As of: 2021-09<br />
Manufacturer <strong>ATH</strong>-<strong>Heinl</strong> GmbH & CO.KG<br />
- 33 -
Lowering Problems<br />
Check cable connection<br />
Safety catches do not respond<br />
Check electromagnets, replace if<br />
necessary<br />
Relieve the catches by lifting<br />
Defective control relay Check control relay<br />
Obstruction under platform Remove obstruction<br />
<strong>Lift</strong>ing platform does not lower<br />
Hose rupture protection <strong>Lift</strong> the platform briefly and<br />
triggered<br />
press "DOWN" again<br />
Lowering valve is not activated Check electrical connection<br />
Defective lowering valve<br />
solenoid<br />
Replace solenoid<br />
Defective lowering valve Replace<br />
Valve for lowering speed set<br />
incorrectly<br />
Set<br />
If the errors cannot be rectified, lower the lifting platform with the emergency lowering<br />
screw and contact our service team<br />
Contaminated lowering valve Clean lowering valve<br />
Platform lowers too slowly or<br />
Valve for lowering speed set<br />
jerkily<br />
Set<br />
incorrectly<br />
Leaking hydraulic connections<br />
Retighten connections if<br />
necessary<br />
Leaking hydraulic lines Replace hydraulic line<br />
<strong>Lift</strong>ing platform lowers by itself Leaking hydraulic cylinder<br />
Replace and clean the seals of<br />
the hydraulic system<br />
Dirty or defective lowering<br />
valve<br />
Clean or replace the lowering<br />
valve<br />
Leaking check valve<br />
Clean or replace<br />
Other Problems<br />
<strong>Lift</strong>ing platform does not raise<br />
or lower synchronously<br />
Product shows (heavy) rust<br />
damage<br />
Abnormal motor volume<br />
Circuit breaker has been<br />
activated<br />
Air in hydraulic circuit<br />
Synchronising cables not tight<br />
enough<br />
Damage or lack of corrosion<br />
protection, possibly<br />
maintenance<br />
Dirty oil filter<br />
Air in hydraulic circuit<br />
Contaminated hydraulic oil<br />
Check the contact on the<br />
contactor<br />
Check the capacity of circuit<br />
breakers<br />
Check for damage to the cable<br />
Bleed the hydraulic circuit<br />
Adjust the tension or the<br />
synchronicity<br />
Remove rust, clean and restore<br />
surface.<br />
Clean the oil filter<br />
Bleed the hydraulic system<br />
Change the hydraulic oil<br />
Replace the contactor<br />
Replace the fuses<br />
Replace the cable<br />
ALWAYS USE ORIGINAL PARTS AND ACCESSORIES.<br />
® Copyright <strong>ATH</strong>-<strong>Heinl</strong> GmbH & Co. KG, All rights reserved / Misprints and technical changes reserved / As of: 2021-09<br />
Manufacturer <strong>ATH</strong>-<strong>Heinl</strong> GmbH & CO.KG<br />
- 34 -
4.6 Maintenance and Service Instructions<br />
All maintenance and service work should be carried out at least according to the<br />
maintenance schedule<br />
COMPRESSED AIR MAINTENANCE UNIT<br />
(Partial stock if necessary for the activity)<br />
SETTING THE WORKING PRESSURE:<br />
• Check the working pressure displayed by the<br />
manometer (1). This must correspond to the<br />
technical data.<br />
• The working pressure can be adjusted with a<br />
pressure regulator (A).<br />
• Pull the pressure regulator upwards to make<br />
adjustments.<br />
• Turn the knob clockwise to increase the pressure in<br />
the machine, turn it counter clockwise to decrease.<br />
C<br />
A 1<br />
OILER<br />
• Check the oil level in the oil reservoir (3).<br />
• Remove the oil reservoir.<br />
• Now refill the tank with a pneumatic oil with a<br />
viscosity of SAE20.<br />
• Check the injection quantity of the oil through<br />
the viewing glass (4).<br />
• Generally, the screw must be closed completely<br />
in a clockwise direction and then opened again<br />
about ¼ to ½ turn by turning it counter<br />
clockwise.<br />
4<br />
3<br />
B<br />
2<br />
WATER SEPARATOR<br />
• Check the water level in the separator (2).<br />
• Water is drained when the valve (B) is opened.<br />
® Copyright <strong>ATH</strong>-<strong>Heinl</strong> GmbH & Co. KG, All rights reserved / Misprints and technical changes reserved / As of: 2021-09<br />
Manufacturer <strong>ATH</strong>-<strong>Heinl</strong> GmbH & CO.KG<br />
- 35 -
4.7 Disposal<br />
• Remove the air and power supply.<br />
• Remove all non-metallic substances and store them in accordance with local regulations.<br />
• Remove the oil from the machine and store it in accordance with local regulations.<br />
• Recycle all metallic substances.<br />
The machine contains some substances that can pollute the environment and cause harm<br />
to the human body if not handled correctly.<br />
® Copyright <strong>ATH</strong>-<strong>Heinl</strong> GmbH & Co. KG, All rights reserved / Misprints and technical changes reserved / As of: 2021-09<br />
Manufacturer <strong>ATH</strong>-<strong>Heinl</strong> GmbH & CO.KG<br />
- 36 -
5.0 EG-/EU-KONFORMITÄTSERKLÄRUNG / EC-/EU-DECLARATION OF CONFORMITY<br />
gemäß Maschinenrichtlinie 2006/42/EG, Anhang II 1A, EMV-Richtlinie 2014/30/EU, Anh. IV<br />
In accordance to Machine Directive 2006/42/EG, Appendix II 1A, EMC Directive 2014/30/EU, App. IV<br />
Seriennummer<br />
Serial number<br />
Firmenbezeichnung und vollständige Anschrift des Herstellers<br />
Business name and full address of the manufacturer<br />
Name und Anschrift des Dokumentations-Bevollmächtigten<br />
Name and address of the Technical Files authorized<br />
representative<br />
<strong>ATH</strong>-<strong>Heinl</strong> GmbH &Co. KG<br />
Gewerbepark 9<br />
DE – 92278 Illschwang<br />
<strong>ATH</strong>-<strong>Heinl</strong> GmbH &Co. KG<br />
Gewerbepark 9<br />
DE – 92278 Illschwang<br />
Hiermit erklären wir, dass die nachfolgend bezeichnete Maschine in der von uns in Verkehr gebrachten Ausführung den einschlägigen,<br />
grundlegenden Sicherheits- und Gesundheitsanforderungen der EG-Richtlinie 2006/42/EG sowie den unten aufgeführten<br />
Harmonisierungsrechtsvorschriften entspricht.<br />
We herewith declare that that the machine described below, as a result have been brought on to the general market comply with the relevant<br />
fundamental Safety and Health regulations of the of Directive 2000/60/EC and the harmonized standards listed below.<br />
Typbezeichnung<br />
Model name<br />
Beschreibung der Maschine<br />
Descriptions of the machine<br />
Hebebühne für Fahrzeuge<br />
Car lift<br />
<strong>ATH</strong>-<strong>Single</strong> <strong>Lift</strong> <strong>25M</strong><br />
Der oben beschriebene Gegenstand der Erklärung erfüllt die<br />
folgenden einschlägigen Harmonisierungs-Rechtsvorschriften der<br />
Union<br />
The object of the declaration described above meets the<br />
following applicable Community harmonisation legislation<br />
Folgende harmonisierten Normen und Vorschriften wurden<br />
eingehalten<br />
The following harmonized standards and regulations are applied<br />
Prüfinstitut<br />
Institute of Quality<br />
Referenznummer der technischen Daten<br />
Reference number for the technical data<br />
Nummer des Zertifikats<br />
Number of the certificate<br />
2006/42/EG (Machine-Directive)<br />
2006/95/EC (Low voltage directive)<br />
DIN EN 1493:2010 (Machine-Directive)<br />
DIN EN 60204-1: 2006+A1:2009 (Low voltage directive)<br />
EN ISO 121 :2010 (Risk assessment and risk reduction)<br />
CCQS UK Ltd.<br />
Level 7; Westgate House; Westgate Road<br />
London – W5 1YY<br />
UNITED KINGDOM<br />
TF-C-0722-16-143-02-5A<br />
CE-C-0722-16-143-02-5A<br />
<strong>ATH</strong>-<strong>Heinl</strong> GmbH &Co. KG<br />
Gewerbepark 9<br />
DE – 92278 Illschwang<br />
Datum<br />
Hans <strong>Heinl</strong><br />
(Geschäftsführer / General Manager)<br />
DURCH UMBAUTEN UND/ODER VERÄNDERUNGEN AN DER MASCHINE WIRD DIE CE-PRÜFUNG AUSSER KRAFT GESETZT UND<br />
EINE HAFTUNG AUSGESCHLOSSEN.<br />
BY MODIFICATION AND / OR CHANGES TO THE MACHINE, THE CE EXAMINATION IS EXCLUDED WITHOUT LIMITATION AND A<br />
LIABILITY SHALL BE EXCLUDED.<br />
® Copyright <strong>ATH</strong>-<strong>Heinl</strong> GmbH & Co. KG, All rights reserved / Misprints and technical changes reserved / As of: 2021-09<br />
Manufacturer <strong>ATH</strong>-<strong>Heinl</strong> GmbH & CO.KG<br />
- 37 -
6.0 APPENDIX<br />
6.1 Pneumatic circuit diagram<br />
® Copyright <strong>ATH</strong>-<strong>Heinl</strong> GmbH & Co. KG, All rights reserved / Misprints and technical changes reserved / As of: 2021-09<br />
Manufacturer <strong>ATH</strong>-<strong>Heinl</strong> GmbH & CO.KG<br />
- 38 -
6.2 Electric circuit diagram<br />
Q1 Main switch JD Buzzer<br />
KM1/KM2 Motor contactor H1 Signal lamp<br />
S1 Push button up SV Lowering valve<br />
S2 Push button down M Motor 1.5KW/4P<br />
S3 Push button Lock-up MR1/MR2 CE-switch<br />
® Copyright <strong>ATH</strong>-<strong>Heinl</strong> GmbH & Co. KG, All rights reserved / Misprints and technical changes reserved / As of: 2021-09<br />
Manufacturer <strong>ATH</strong>-<strong>Heinl</strong> GmbH & CO.KG<br />
- 39 -
6.3 Hydraulic circuit diagram<br />
1 Oil filter 6 Electric motor<br />
2 Gear pump 7 Lowering valve<br />
3 Emergency hand pump – optional 8 Flow restrictor<br />
4 Non return valve 9 Hydraulic cylinder<br />
5 Pressure limiting valve 10 Startup Valve- for 1PH power unit<br />
® Copyright <strong>ATH</strong>-<strong>Heinl</strong> GmbH & Co. KG, All rights reserved / Misprints and technical changes reserved / As of: 2021-09<br />
Manufacturer <strong>ATH</strong>-<strong>Heinl</strong> GmbH & CO.KG<br />
- 40 -
7.0 WARRANTY CARD<br />
Dealer address:<br />
Company (or customer number):<br />
Contact partner:<br />
Street:<br />
Postcode & town:<br />
Tel. & Fax:<br />
Email:<br />
Customer address:<br />
Company (or customer number):<br />
Contact partner:<br />
Street:<br />
Postcode & town:<br />
Tel. & Fax:<br />
Email:<br />
Manufacturer & model: Serial number: Year of construction: Reference number:<br />
Message description:<br />
Description of required spare parts:<br />
Spare part: Item number: Amount:<br />
IMPORTANT:<br />
Damage resulting from improper handling, lack of maintenance or mechanical damage is not covered by<br />
the warranty. For systems that have not been installed by an <strong>ATH</strong> approved installer, the warranty is<br />
limited to the provision of the necessary spare parts.<br />
Transport damages:<br />
Visible defect (visible transport damage, note on freight forwarder delivery note, immediately send<br />
copy of the delivery note and photos to <strong>ATH</strong>-<strong>Heinl</strong>)<br />
Hidden defect (transport damage is only detected when unpacking the goods, send damage report<br />
with pictures to <strong>ATH</strong>-<strong>Heinl</strong> within 24 hours)<br />
Place & Date<br />
Signature & Stamp<br />
® Copyright <strong>ATH</strong>-<strong>Heinl</strong> GmbH & Co. KG, All rights reserved / Misprints and technical changes reserved / As of: 2021-09<br />
Manufacturer <strong>ATH</strong>-<strong>Heinl</strong> GmbH & CO.KG<br />
- 41 -
7.1 Scope of the Product Warranty<br />
• Five years for the devices structure<br />
• Power supplies, hydraulic cylinders and all other wear components such as turntables, rubber plates,<br />
ropes, chains, valves, switches, etc., are limited to one year under normal circumstances/use under<br />
warranty conditions.<br />
The warranty does not extend to:<br />
• Defects caused by normal wear and tear, misuse, transport damage, improper installation, tension or<br />
lack of required maintenance.<br />
• Damage caused by neglect or failure to follow the instructions in this manual and/or other<br />
accompanying instructions.<br />
• Normal wear and tear on parts requiring service to keep the product in safe working condition.<br />
• Any component that has been damaged during transport.<br />
• Other components that have not been explicitly listed but are considered to be general consumables.<br />
• Water damage caused by e.g. rain, excessive humidity, corrosive environments or other contaminants.<br />
• Blemishes that do not affect function.<br />
WARRANTY IS NOT VALID,<br />
IF THE WARRANTY CARD WAS NOT SENT TO <strong>ATH</strong>-HEINL.<br />
Damage and malfunctions caused by non-compliance with maintenance and adjustment work (according to<br />
operating instructions and/or training), faulty electrical connections (rotating field, rated voltage,<br />
protection) or improper use (overload, outdoor installation, technical changes) are excluded from the<br />
warranty!<br />
® Copyright <strong>ATH</strong>-<strong>Heinl</strong> GmbH & Co. KG, All rights reserved / Misprints and technical changes reserved / As of: 2021-09<br />
Manufacturer <strong>ATH</strong>-<strong>Heinl</strong> GmbH & CO.KG<br />
- 42 -
8.0 INSPECTION LOG<br />
This inspection manual (including log) is an important part<br />
of the operating instructions and product.<br />
!!!PLEASE STORE CAREFULLY!!!<br />
Check<br />
The product must be checked after completion of the installation, handover, if necessary briefing and then<br />
regularly in accordance with the applicable regulations and legal provisions in the country of operation by a<br />
suitable and approved company or facility.<br />
In the case of changes or extensions to the product type, an additional inspection book must be<br />
maintained and accepted.<br />
Scope of Inspection<br />
In addition to perfect function, cleanliness and maintenance requirements, it is vital that the safety-relevant<br />
components of the entire system are checked.<br />
Technical Data<br />
- Please refer to the enclosed operating instructions.<br />
Nameplate<br />
- Make a note of all the data below<br />
- Manufacturer & type of mounting materials used:<br />
® Copyright <strong>ATH</strong>-<strong>Heinl</strong> GmbH & Co. KG, All rights reserved / Misprints and technical changes reserved / As of: 2021-09<br />
Manufacturer <strong>ATH</strong>-<strong>Heinl</strong> GmbH & CO.KG<br />
- 43 -
8.1 Installation and Handover Log<br />
Site:<br />
Company:<br />
Street:<br />
Town:<br />
Country:<br />
Device / system:<br />
Manufacturer:<br />
Type / model:<br />
Serial no.:<br />
Year of<br />
construction:<br />
Responsible retailer:<br />
The above product has been assembled, checked for function and safety and put into operation. Installation was<br />
carried out by:<br />
the operator<br />
the technical expert<br />
The operator confirms that the product type has been set up correctly, that he/she has read and understood all<br />
information contained in these<br />
operating instructions and the log, and that he/she keeps this documentation accessible to the instructed operator at<br />
all times.<br />
The operator confirms that after installation and commissioning by a person trained by the<br />
manufacturer or an authorised dealer (expert), instruction in the function, handling, safety-relevant specifications,<br />
maintenance and care of the machine has taken place, documents, information and specifications of the machine<br />
have been provided and the product is working properly.<br />
IMPORTANT NOTES:<br />
IF THE ABOVEMENTIONED POINTS ARE NOT FULFILLED, THE WARRANTY CLAIM IS EXCLUDED:<br />
The warranty is only valid in conjunction with compliance and evidence of proper assembly, handover, and if<br />
necessary training, as well as yearly maintenance carried out by an expert authorised by the manufacturer. The<br />
interval between services must not exceed 12 months. In case of non-standard use or multi-shift or seasonal use, a<br />
bi-annual inspection and maintenance must be arranged.<br />
Warranty claims are only recognised if all points in the log and operating instructions have been met, the claim is<br />
asserted immediately after detection and this log is sent to the manufacturer along with the maintenance<br />
and service logs.<br />
Further specific information about the warranty, such as scope, requirements and specifications, are described in the<br />
operating instructions and must be observed.<br />
Damages and complaints caused by improper handling; failure to maintain and service; use of unsuitable or<br />
unspecified assembly, operating, maintenance or service products; mechanical damage; intervening in the unit<br />
without consultation or by an unauthorised expert are excluded from the warranty. For systems that have not been<br />
installed by an authorised expert, the warranty is limited by agreement of the manufacturer to the provision of the<br />
necessary spare parts.<br />
Expert name and company stamp<br />
if necessary, number and name of retailer<br />
Date and expert signature<br />
Operator name and company stamp<br />
Date and operator signature<br />
® Copyright <strong>ATH</strong>-<strong>Heinl</strong> GmbH & Co. KG, All rights reserved / Misprints and technical changes reserved / As of: 2021-09<br />
Manufacturer <strong>ATH</strong>-<strong>Heinl</strong> GmbH & CO.KG<br />
- 44 -
8.2 Inspection Plan<br />
Nameplate<br />
Quick reference guide<br />
Operating instructions<br />
Safety label<br />
Operation label<br />
Other labels<br />
Construction (deformation, cracks)<br />
Fixing dowels and stability<br />
Condition of concrete flor (cracks)<br />
Condition / general condition<br />
Condition / cleanliness<br />
Condition / care and sealing<br />
Condition / liquids<br />
Condition / lubrication<br />
Condition / aggregate<br />
Condition / drive<br />
Condition / motor<br />
Condition / transmission<br />
Condition / cylinder<br />
Condition / valve<br />
Condition / electrical control<br />
Condition / electric buttons<br />
Condition / electric switches<br />
Condition / electric lines<br />
Condition / hydraulic lines<br />
Condition / hydraulic screws<br />
Condition / pneumatic lines<br />
Condition / pneumatic screws<br />
Condition / tightness<br />
Condition / bolts and bearings<br />
Condition / consumables<br />
Condition / covers<br />
Condition / functions under load<br />
Condition / safety-relevant components<br />
Condition / electrical safety device<br />
Condition / hydraulic safety device<br />
Condition / pneumatic safety device<br />
Condition / mechanical safety device<br />
Condition / functions under load<br />
Inspection sticker issued<br />
® Copyright <strong>ATH</strong>-<strong>Heinl</strong> GmbH & Co. KG, All rights reserved / Misprints and technical changes reserved / As of: 2021-09<br />
Manufacturer <strong>ATH</strong>-<strong>Heinl</strong> GmbH & CO.KG<br />
- 45 -
8.3 Visual inspection (authorised expert)<br />
Inspection Certificate<br />
relating to a regular / extraordinary inspection / audit *)<br />
The device has undergone a readiness test.<br />
No / the following *) defects were found:<br />
_________________________________________________________________________________<br />
_________________________________________________________________________________<br />
_________________________________________________________________________________<br />
_________________________________________________________________________________<br />
_________________________________________________________________________________<br />
Inspection contents: functional and visual inspection according to specifications<br />
Pending partial inspection:<br />
_________________________________________________________________________________<br />
_________________________________________________________________________________<br />
There were no *) concerns arising from commissioning, an audit is not *) required.<br />
(Place, date)<br />
(Technical expert signature)<br />
Confirmation of acceptance:<br />
(Name of technical expert)<br />
(Title)<br />
(Address)<br />
(Employed at)<br />
Operator (company stamp, date, signature)<br />
Faults noted **) ________________________________________________________<br />
Faults remedied **) ____________________________________________________________________<br />
*) Delete if not applicable<br />
**) Confirmation of operator or a representative with date and signature<br />
® Copyright <strong>ATH</strong>-<strong>Heinl</strong> GmbH & Co. KG, All rights reserved / Misprints and technical changes reserved / As of: 2021-09<br />
Manufacturer <strong>ATH</strong>-<strong>Heinl</strong> GmbH & CO.KG<br />
- 46 -
Visual inspection (authorised expert)<br />
Inspection Certificate<br />
relating to a regular / extraordinary inspection / audit *)<br />
The device has undergone a readiness test.<br />
No / the following *) defects were found:<br />
_________________________________________________________________________________<br />
_________________________________________________________________________________<br />
_________________________________________________________________________________<br />
_________________________________________________________________________________<br />
_________________________________________________________________________________<br />
Inspection contents: functional and visual inspection according to specifications<br />
Pending partial inspection:<br />
_________________________________________________________________________________<br />
_________________________________________________________________________________<br />
There were no *) concerns arising from commissioning, an audit is not *) required.<br />
(Place, date)<br />
(Technical expert signature)<br />
Confirmation of acceptance:<br />
(Name of technical expert)<br />
(Title)<br />
(Address)<br />
(Employed at)<br />
Operator (company stamp, date, signature)<br />
Faults noted **) ________________________________________________________<br />
Faults remedied **) ____________________________________________________________________<br />
*) Delete if not applicable<br />
**) Confirmation of operator or a representative with date and signature<br />
® Copyright <strong>ATH</strong>-<strong>Heinl</strong> GmbH & Co. KG, All rights reserved / Misprints and technical changes reserved / As of: 2021-09<br />
Manufacturer <strong>ATH</strong>-<strong>Heinl</strong> GmbH & CO.KG<br />
- 47 -
Visual inspection (authorised expert)<br />
Inspection Certificate<br />
relating to a regular / extraordinary inspection / audit *)<br />
The device has undergone a readiness test.<br />
No / the following *) defects were found:<br />
_________________________________________________________________________________<br />
_________________________________________________________________________________<br />
_________________________________________________________________________________<br />
_________________________________________________________________________________<br />
_________________________________________________________________________________<br />
Inspection contents: functional and visual inspection according to specifications<br />
Pending partial inspection:<br />
_________________________________________________________________________________<br />
_________________________________________________________________________________<br />
There were no *) concerns arising from commissioning, an audit is not *) required.<br />
(Place, date)<br />
(Technical expert signature)<br />
Confirmation of acceptance:<br />
(Name of technical expert)<br />
(Title)<br />
(Address)<br />
(Employed at)<br />
Operator (company stamp, date, signature)<br />
Faults noted **) ________________________________________________________<br />
Faults remedied **) ____________________________________________________________________<br />
*) Delete if not applicable<br />
**) Confirmation of operator or a representative with date and signature<br />
® Copyright <strong>ATH</strong>-<strong>Heinl</strong> GmbH & Co. KG, All rights reserved / Misprints and technical changes reserved / As of: 2021-09<br />
Manufacturer <strong>ATH</strong>-<strong>Heinl</strong> GmbH & CO.KG<br />
- 48 -
Visual inspection (authorised expert)<br />
Inspection Certificate<br />
relating to a regular / extraordinary inspection / audit *)<br />
The device has undergone a readiness test.<br />
No / the following *) defects were found:<br />
_________________________________________________________________________________<br />
_________________________________________________________________________________<br />
_________________________________________________________________________________<br />
_________________________________________________________________________________<br />
_________________________________________________________________________________<br />
Inspection contents: functional and visual inspection according to specifications<br />
Pending partial inspection:<br />
_________________________________________________________________________________<br />
_________________________________________________________________________________<br />
There were no *) concerns arising from commissioning, an audit is not *) required.<br />
(Place, date)<br />
(Technical expert signature)<br />
Confirmation of acceptance:<br />
(Name of technical expert)<br />
(Title)<br />
(Address)<br />
(Employed at)<br />
Operator (company stamp, date, signature)<br />
Faults noted **) ________________________________________________________<br />
Faults remedied **) ____________________________________________________________________<br />
*) Delete if not applicable<br />
**) Confirmation of operator or a representative with date and signature<br />
® Copyright <strong>ATH</strong>-<strong>Heinl</strong> GmbH & Co. KG, All rights reserved / Misprints and technical changes reserved / As of: 2021-09<br />
Manufacturer <strong>ATH</strong>-<strong>Heinl</strong> GmbH & CO.KG<br />
- 49 -
9.0 NOTES<br />
® Copyright <strong>ATH</strong>-<strong>Heinl</strong> GmbH & Co. KG, All rights reserved / Misprints and technical changes reserved / As of: 2021-09<br />
Manufacturer <strong>ATH</strong>-<strong>Heinl</strong> GmbH & CO.KG<br />
- 50 -
® Copyright <strong>ATH</strong>-<strong>Heinl</strong> GmbH & Co. KG, All rights reserved / Misprints and technical changes reserved / As of: 2021-09<br />
Manufacturer <strong>ATH</strong>-<strong>Heinl</strong> GmbH & CO.KG<br />
- 51 -
www.ath-heinl.de<br />
<strong>ATH</strong>-<strong>Heinl</strong> GmbH & Co. KG<br />
Gewerbepark 9<br />
D-92278 Illschwang<br />
Germany<br />
Tel.: +49 (0)9666 18801 00<br />
Fax: +49 (0)9666 18801 01<br />
info@ath-heinl.de<br />
www.ath-heinl.de<br />
DE<br />
ES<br />
EN<br />
NL<br />
FR<br />
PL<br />
CZ<br />
SK
Manuel d‘Utilisation<br />
<strong>ATH</strong>-<strong>Single</strong> <strong>Lift</strong><br />
<strong>Single</strong> <strong>Lift</strong> <strong>25M</strong><br />
numéro de série: C282140200089<br />
<strong>ATH</strong>-<strong>Heinl</strong> GmbH & Co. KG | Gewerbepark 9<br />
D-92278 Illschwang | Germany | www.ath-heinl.de<br />
Stand: September 2021. Fehler und Irrtümer vorbehalten. Verkauf nur über <strong>ATH</strong>-Vertriebspartner.
Sommaire<br />
1.0 INTRODUCTION ...................................................................................................................- 3 -<br />
1.1 Informations générales ......................................................................................................- 3 -<br />
1.2 Description ........................................................................................................................- 4 -<br />
1.3 Utilisation ..........................................................................................................................- 6 -<br />
1.4 Caractéristiques techniques ................................................................................................- 9 -<br />
1.5 Croquis coté ....................................................................................................................- 11 -<br />
2.0 INSTALLATION ...................................................................................................................- 13 -<br />
2.1 Transport et conditions de stockage ..................................................................................- 13 -<br />
2.2 Déballage de la machine ..................................................................................................- 13 -<br />
2.3 Livraison .........................................................................................................................- 14 -<br />
2.4 Lieu ................................................................................................................................- 15 -<br />
2.5 Fixation ..........................................................................................................................- 16 -<br />
2.6 Raccordement électrique ..................................................................................................- 16 -<br />
2.7 Raccordement pneumatique .............................................................................................- 16 -<br />
2.8 Raccordement hydraulique ...............................................................................................- 17 -<br />
2.9 Montage .........................................................................................................................- 18 -<br />
2.10 Travaux finaux ..................................................................................................................- 24 -<br />
3.0 EXPLOITATION ...................................................................................................................- 28 -<br />
3.1 Manuel d'utilisation ..........................................................................................................- 28 -<br />
3.2 Remarques générales .......................................................................................................- 29 -<br />
4.0 MAINTENANCE ...................................................................................................................- 30 -<br />
4.1 Consommables pour le montage, la maintenance et l'entretien ............................................- 30 -<br />
4.2 Dispositions de sécurité pour l'huile ...................................................................................- 31 -<br />
4.3 Remarques .....................................................................................................................- 32 -<br />
4.4 Plan de maintenance ou d'entretien ..................................................................................- 32 -<br />
4.5 Dépannage / Affichage des défauts et solution ...................................................................- 33 -<br />
4.6 Instructions de maintenance et de service .........................................................................- 35 -<br />
4.7 Élimination ......................................................................................................................- 36 -<br />
5.0 EG-/EU-KONFORMITÄTSERKLÄRUNG / EC-/EU-DECLARATION OF CONFORMITY...................... - 37 -<br />
6.0 ANNEXE .............................................................................................................................- 38 -<br />
6.1 Schéma pneumatique ......................................................................................................- 38 -<br />
6.2 Schéma électrique ...........................................................................................................- 39 -<br />
6.3 Schéma hydraulique ........................................................................................................- 40 -<br />
7.0 CARTE DE GARANTIE ..........................................................................................................- 41 -<br />
7.1 Étendue de la garantie produit ..........................................................................................- 42 -<br />
8.0 REGISTRE DE CONTRÔLE ....................................................................................................- 43 -<br />
8.1 Procès-verbal d'installation et de remise ............................................................................- 44 -<br />
8.2 Plan de contrôle ..............................................................................................................- 45 -<br />
8.3 Contrôle visuel (personne qualifiée autorisée) ....................................................................- 46 -<br />
9.0 NOTICES ............................................................................................................................- 50 -<br />
® Droit d'auteur <strong>ATH</strong>-<strong>Heinl</strong> GmbH & CO.KG, Tous droits réservés / Sous réserve d'erreurs et de modifications techniques / version: 2021-09<br />
Fabricant du produit <strong>ATH</strong>-<strong>Heinl</strong> GmbH & CO.KG<br />
- 2 -
1.0 INTRODUCTION<br />
1.1 Informations générales<br />
CE MANUEL D'UTLISATION FAIT PARTIE INTÉGRANTE DE LA MACHINE.<br />
IL DOIT ÊTRE LU ET COMPRIS PAR L'UTILISATEUR.<br />
NOUS DECLINONS TOUTE RESPONSABILITÉ POUR LES DOMMAGES POUVANT<br />
RÉSULTER DU NON-RESPECT DES INSTRUCTIONS DE CE MANUEL.<br />
ATTENTION : Suivez les instructions afin de prévenir toute blessure ou tout dommage.<br />
CONSEIL : Donne des informations complémentaires sur le fonctionnement et des<br />
conseils pour une utilisation efficace de l'appareil.<br />
Le port de vêtements de protection adéquats est obligatoire pour tous les travaux sur<br />
l'installation décrite.<br />
® Droit d'auteur <strong>ATH</strong>-<strong>Heinl</strong> GmbH & CO.KG, Tous droits réservés / Sous réserve d'erreurs et de modifications techniques / version: 2021-09<br />
Fabricant du produit <strong>ATH</strong>-<strong>Heinl</strong> GmbH & CO.KG<br />
- 3 -
1.2 Description<br />
Couvrir sur le dessus<br />
Pour couvrir la colonne<br />
Colonne de levage<br />
Le chariot élévateur est guidé par des blocs coulissants pendant qu'il déplace la colonne<br />
élévatrice de haut en bas. Le vérin hydraulique et la chaîne de levage sont également situés sur<br />
la colonne de levage.<br />
Transpalette<br />
Le transpalette supporte le bras (équipement porteur). Il est soulevé et abaissé par le vérin<br />
hydraulique au moyen de chaînes; il est guidé sur la colonne élévatrice par des coulisseaux en<br />
plastique.<br />
Bras de support arrière<br />
Bras télescopiques dont la longueur peut être ajustée.<br />
Support de bras "H"<br />
® Droit d'auteur <strong>ATH</strong>-<strong>Heinl</strong> GmbH & CO.KG, Tous droits réservés / Sous réserve d'erreurs et de modifications techniques / version: 2021-09<br />
Fabricant du produit <strong>ATH</strong>-<strong>Heinl</strong> GmbH & CO.KG<br />
- 4 -
Bras de support avant<br />
Bras télescopiques dont la longueur peut être ajustée.<br />
Châssis de base<br />
Sert à stabiliser la plate-forme élévatrice et contient les rouleaux avant pour déplacer la plateforme.<br />
Ensemble d'entraînement<br />
Utilisé pour conduire et positionner l'ascenseur. Le processus ne peut être effectué qu'à vide et<br />
sans charge.<br />
Boîtier de commande<br />
Le système de contrôle électrique complet est logé ici. Tous les boutons sont protégés par un<br />
anneau pour éviter les pressions accidentelles. De plus, tous les mouvements s'arrêteront<br />
immédiatement lorsque les boutons seront relâchés.<br />
Électro-aimant<br />
Électro-aimant pour libérer le verrou de sécurité pendant le processus de descente.<br />
Le verrou de sécurité empêche la descente non autorisée en cas de panne.<br />
Unité hydraulique<br />
L'huile hydraulique est pompée du réservoir vers le vérin de levage par une pompe à<br />
engrenages électrique. La vanne de descente régule le débit de retour de l'huile dans le<br />
réservoir.<br />
® Droit d'auteur <strong>ATH</strong>-<strong>Heinl</strong> GmbH & CO.KG, Tous droits réservés / Sous réserve d'erreurs et de modifications techniques / version: 2021-09<br />
Fabricant du produit <strong>ATH</strong>-<strong>Heinl</strong> GmbH & CO.KG<br />
- 5 -
1.3 Utilisation<br />
Bouton d'ascenseur<br />
monter l'ascenseur<br />
Bouton inférieur 1<br />
pour abaisser complètement l'ascenseur<br />
(L'encoche et la soupape d'abaissement sont<br />
ouvertes)<br />
Prise voiture 12V DC<br />
Prise encastrable 1 x 230V<br />
Bouton de stationnement (VERROUILLAGE)<br />
pour abaisser l'ascenseur dans la détente<br />
(seule la vanne de descente est ouverte)<br />
Le voyant de fonctionnement indique si<br />
l'ascenseur est en mode veille<br />
Interrupteur principal verrouillable avec<br />
fonction d'arrêt d'urgence pour allumer et<br />
éteindre l'ascenseur et pour empêcher<br />
l'ascenseur d'être utilisé par des personnes<br />
non autorisées.<br />
® Droit d'auteur <strong>ATH</strong>-<strong>Heinl</strong> GmbH & CO.KG, Tous droits réservés / Sous réserve d'erreurs et de modifications techniques / version: 2021-09<br />
Fabricant du produit <strong>ATH</strong>-<strong>Heinl</strong> GmbH & CO.KG<br />
- 6 -
SOULEVER<br />
• Assurez-vous que le pont élévateur est complètement abaissé.<br />
• Utilisez le chariot élévateur pour déplacer la plate-forme jusqu'au véhicule à soulever. Assurez-vous<br />
que la colonne de levage est en position verticale et qu'elle ne heurte pas le véhicule.<br />
• Positionnez les bras de support sous le véhicule.<br />
• Réglez les bras de manière à ce que les patins en caoutchouc puissent toucher les points de levage<br />
recommandés par le constructeur du véhicule sur le véhicule.<br />
• Allumez l'interrupteur d'alimentation.<br />
• Soulevez la plate-forme en appuyant sur le bouton Raise jusqu'à ce que les bras touchent le<br />
dessous du véhicule.<br />
• Assurez-vous que le véhicule est sécurisé.<br />
• Continuez à appuyer sur le bouton de levage jusqu'à ce que vous atteigniez la hauteur souhaitée.<br />
SE GARER<br />
• Appuyez sur le bouton de sécurité pour activer les précautions mécaniques de sécurité.<br />
• Assurez-vous toujours que les mesures de sécurité sont en place avant de travailler sur ou à<br />
proximité du véhicule.<br />
RÉDUIRE<br />
• Abaissez le véhicule en appuyant sur le bouton de descente : le pont élévateur a besoin de<br />
quelques secondes pour libérer le loquet de sécurité puis démarre le processus de descente.<br />
• Abaissez la plate-forme en appuyant sur le bouton d'abaissement jusqu'à la hauteur de sécurité.<br />
• Assurez-vous que la zone de sécurité est libre de personnes et d'objets.<br />
• Maintenez le bouton inférieur enfoncé jusqu'à ce que le pont élévateur soit complètement abaissé.<br />
• Fermez l'interrupteur d'alimentation avec un cadenas.<br />
• Déplacez l'élévateur hors de la zone de travail. Attention à ne pas heurter le véhicule.<br />
® Droit d'auteur <strong>ATH</strong>-<strong>Heinl</strong> GmbH & CO.KG, Tous droits réservés / Sous réserve d'erreurs et de modifications techniques / version: 2021-09<br />
Fabricant du produit <strong>ATH</strong>-<strong>Heinl</strong> GmbH & CO.KG<br />
- 7 -
consignes de sécurité<br />
1. Faites attention à la bonne<br />
répartition du poids du véhicule<br />
2. Les modifications de quelque<br />
nature que ce soit à l'ascenseur<br />
ne sont pas autorisées<br />
3. Quitter la zone dangereuse lors<br />
de la descente du pont élévateur<br />
4. La zone de danger doit être<br />
dégagée lors du levage et de<br />
l'abaissement<br />
5. S'il y a un risque de chute d'un<br />
véhicule, quittez immédiatement<br />
la zone de danger<br />
6. Éviter les mouvements de<br />
pivotement forts sur le véhicule<br />
7. L'ascenseur ne doit être utilisé<br />
que par du personnel qualifié<br />
8. Utilisez les points de ramassage<br />
spécifiés par le constructeur du<br />
véhicule et fermez toutes les<br />
portes lorsque vous soulevez le<br />
véhicule<br />
9. Seules les personnes autorisées<br />
sont autorisées à pénétrer dans la<br />
zone de danger<br />
10. Utilisez des adaptateurs<br />
appropriés si nécessaire<br />
11. Lors de l'installation et du retrait<br />
d'objets lourds, utilisez toujours<br />
un dispositif de sécurité pour les<br />
empêcher de basculer<br />
12. Les adaptateurs réduisent la<br />
capacité de charge spécifiée<br />
13. Un entretien et des inspections<br />
appropriés sont nécessaires pour<br />
un travail en toute sécurité<br />
14. Lisez et comprenez le manuel<br />
d'instructions avant d'utiliser<br />
l'ascenseur<br />
15. Ne travaillez pas sur des<br />
ascenseurs endommagés<br />
16. Aucun objet ou personne ne peut<br />
être transporté sur la plate-forme<br />
élévatrice, les bras de support ou<br />
sur le véhicule à soulever.<br />
17. Attention aux obstacles lors de la<br />
descente<br />
18. L'ascenseur ne doit pas être<br />
nettoyé sous l'eau courante.<br />
® Droit d'auteur <strong>ATH</strong>-<strong>Heinl</strong> GmbH & CO.KG, Tous droits réservés / Sous réserve d'erreurs et de modifications techniques / version: 2021-09<br />
Fabricant du produit <strong>ATH</strong>-<strong>Heinl</strong> GmbH & CO.KG<br />
- 8 -
1.4 Caractéristiques techniques<br />
Taper<br />
Capacité de chargement<br />
Temps pour le processus<br />
de levage (2 000 kg)<br />
Temps pour le processus<br />
d'abaissement (2 000 kg)<br />
Système électrique<br />
Hauteur de levage<br />
Tension de commande<br />
Puissance du moteur<br />
Fusible en amont<br />
Câble de connexion<br />
<strong>ATH</strong>-<strong>Single</strong> <strong>Lift</strong> <strong>25M</strong><br />
2,500 kg<br />
60 s<br />
60 s<br />
3/400V/50 Hz<br />
115-1870 mm<br />
DC24V<br />
1.5 KW<br />
1 C 16 A / 3 C 16 A<br />
Au moins 3 x 1,5 mm² ou 5 x 2,5 mm²<br />
classe de protection IP 54<br />
La pression de travail ²<br />
Huile hydraulique<br />
recommandée<br />
Quantité d'huile<br />
Niveau sonore<br />
poids<br />
Exigences concrètes<br />
Environ 180 bars<br />
Eté : HVLP-D 46 (ex : ENI Precis HVLP-D 46)<br />
Hiver : HVLP-D 32<br />
Environ 6 l<br />
≤ 76 dB<br />
900 kg<br />
Béton armé min 250 mm C25<br />
Pente au sol Max. 3°<br />
® Droit d'auteur <strong>ATH</strong>-<strong>Heinl</strong> GmbH & CO.KG, Tous droits réservés / Sous réserve d'erreurs et de modifications techniques / version: 2021-09<br />
Fabricant du produit <strong>ATH</strong>-<strong>Heinl</strong> GmbH & CO.KG<br />
- 9 -
Répartition de la charge<br />
Q<br />
Poids total du véhicule<br />
P1<br />
Max 2/5 x Q<br />
P2<br />
Max 3/5 x Q<br />
Partage de<br />
charge<br />
2/3<br />
A Min. 1,000 mm ²<br />
® Droit d'auteur <strong>ATH</strong>-<strong>Heinl</strong> GmbH & CO.KG, Tous droits réservés / Sous réserve d'erreurs et de modifications techniques / version: 2021-09<br />
Fabricant du produit <strong>ATH</strong>-<strong>Heinl</strong> GmbH & CO.KG<br />
- 10 -
1.5 Croquis coté<br />
® Droit d'auteur <strong>ATH</strong>-<strong>Heinl</strong> GmbH & CO.KG, Tous droits réservés / Sous réserve d'erreurs et de modifications techniques / version: 2021-09<br />
Fabricant du produit <strong>ATH</strong>-<strong>Heinl</strong> GmbH & CO.KG<br />
- 11 -
® Droit d'auteur <strong>ATH</strong>-<strong>Heinl</strong> GmbH & CO.KG, Tous droits réservés / Sous réserve d'erreurs et de modifications techniques / version: 2021-09<br />
Fabricant du produit <strong>ATH</strong>-<strong>Heinl</strong> GmbH & CO.KG<br />
- 12 -
2.0 INSTALLATION<br />
La machine doit être mise en place conformément au manuel par un personnel autorisé.<br />
Le manuel d'utilisation (ainsi que le procès-verbal) est un élément important<br />
de la machine ou du produit.<br />
À CONSERVER PRÉCIEUSEMENT<br />
Après le montage, la remise et l'initiation le cas échéant, le produit doit être contrôlé régulièrement<br />
conformément aux prescriptions et dispositions légales en vigueur dans le pays d'exploitation par une<br />
société ou un organisme qualifié(e) et agréé(e) à cet effet.<br />
2.1 Transport et conditions de stockage<br />
Pour le transport et le positionnement de la machine, veuillez toujours utiliser des appareils d'arrimage,<br />
de levage et de manutention adaptés et veiller au centre de gravité.<br />
La machine ne devrait être transportée qu'avec son emballage d'origine.<br />
Données : ----<br />
Largeur ----<br />
Longueur ----<br />
Hauteur ----<br />
Température de stockage -10 à +50 °C<br />
2.2 Déballage de la machine<br />
Retirez le couvercle supérieur de l'emballage et assurez-vous que le transport n'a causé<br />
aucun dommage.<br />
Retirez le boulon de sécurité afin de libérer la machine de la palette/du cadre.<br />
Utilisez un moyen de levage adapté (éventuellement avec élingues) pour descendre la<br />
machine de la palette/du cadre.<br />
Le matériel d'emballage utilisé pour emballer la machine devrait être conservé<br />
précieusement.<br />
Conservez le matériel d'emballage hors de portée des enfants car il peut représenter une<br />
source de danger.<br />
® Droit d'auteur <strong>ATH</strong>-<strong>Heinl</strong> GmbH & CO.KG, Tous droits réservés / Sous réserve d'erreurs et de modifications techniques / version: 2021-09<br />
Fabricant du produit <strong>ATH</strong>-<strong>Heinl</strong> GmbH & CO.KG<br />
- 13 -
2.3 Livraison<br />
Caisse de transport avec:<br />
- Unité de colonne avec accessoires, bras de levage, unité de commande électrique emballée dans un<br />
cadre en acier<br />
Conseils pour le transport et le stockage :<br />
- Soulevez avec précaution. Ne soulever qu'avec du matériel adapté et bien entretenu.<br />
- Évitez les élévations inattendues et les mouvements saccadés. Attention aux chocs, aux prises, etc.<br />
- Stocker les emballages retirés dans un point de collecte inaccessible aux enfants et aux animaux<br />
jusqu'à leur élimination.<br />
- Température de stockage : -25 °C ~ + 55 °C<br />
® Droit d'auteur <strong>ATH</strong>-<strong>Heinl</strong> GmbH & CO.KG, Tous droits réservés / Sous réserve d'erreurs et de modifications techniques / version: 2021-09<br />
Fabricant du produit <strong>ATH</strong>-<strong>Heinl</strong> GmbH & CO.KG<br />
- 14 -
2.4 Lieu<br />
La machine doit être tenue à l'écart de matériaux inflammables et explosifs ainsi que des rayons du soleil<br />
et d'une lumière intense. La machine devrait également être installée à un emplacement bien aéré.<br />
La machine doit être installée sur un sol suffisamment ferme, le cas échéant selon les exigences minimales<br />
du plan de fondation.<br />
Lors du choix du lieu d'installation, outre les propriétés du sol, il convient également de respecter les règles<br />
de prévention des accidents ainsi que l'ordonnance sur les lieux de travail.<br />
Dans le cas d'un montage dans les étages, il convient de vérifier la capacité de portance du sol. Il est<br />
généralement recommandé de faire appel à un expert en construction pour une expertise.<br />
La machine ne doit être montée et utilisée que dans des espaces fermés. Elle ne dispose d'aucun dispositif<br />
de sécurité (p. ex. protection IP, modèle zingué, etc.).<br />
Température 4 à 40 °C<br />
Niveau de la mer<br />
< 1500 m<br />
Taux d'humidité dans l'air 50% à 40°C – 90% à 20 °C<br />
Croquis<br />
® Droit d'auteur <strong>ATH</strong>-<strong>Heinl</strong> GmbH & CO.KG, Tous droits réservés / Sous réserve d'erreurs et de modifications techniques / version: 2021-09<br />
Fabricant du produit <strong>ATH</strong>-<strong>Heinl</strong> GmbH & CO.KG<br />
- 15 -
2.5 Fixation<br />
Il convient ici de respecter les dispositions générales et locales. C'est la raison pour<br />
laquelle ces étapes ne devraient être réalisées que par du personnel qualifié et formé.<br />
La machine doit être installée et fixée sur un sol suffisamment ferme selon les exigences minimales du plan<br />
de fondation.<br />
La machine doit être fixée aux points prévus à cet effet avec le matériel adapté, le matériel de fixation<br />
éventuellement prescrit.<br />
Lors du choix du lieu d'installation, outre les propriétés du sol, il convient également de respecter les règles<br />
de prévention des accidents ainsi que l'ordonnance sur les lieux de travail.<br />
Dans le cas d'un montage dans les étages, il convient de vérifier la capacité de portance du sol. Il est<br />
généralement recommandé de faire appel à un expert en construction pour une expertise.<br />
2.6 Raccordement électrique<br />
Il convient ici de respecter les dispositions générales et locales. C'est la raison pour<br />
laquelle cette étape ne devrait être réalisée que par du personnel qualifié et formé.<br />
Veillez ce faisant à l'alimentation nécessaire (voir les données techniques).<br />
L'installation doit être raccordée soit avec une fiche Schuko 230V, soit avec une fiche CEE à 5 phases 16A<br />
(fournie en partie).<br />
Les variations de tension devraient représenter au maximum 0,9 à 1,1 fois la plage de tension nominale et<br />
la variation de fréquence devrait être comprise entre 0,99 à 1,01 fois la plage de fréquence.<br />
Les mesures de protection nécessaires doivent être prises pour que ceci puisse être assuré.<br />
Pour terminer, il convient de contrôler le sens de rotation du moteur.<br />
2.7 Raccordement pneumatique<br />
Pour toutes les installations pneumatiques, une unité d'entretien à air comprimé (fournie<br />
en partie) doit être montée entre l'alimentation et l'installation.<br />
La pression d'air de l'alimentation doit au moins correspondre aux caractéristiques techniques.<br />
Il convient de contrôler le bon réglage de l'unité d'entretien à air comprimé.<br />
L'unité d'entretien à air comprimé doit faire l'objet d'une maintenance à intervalles réguliers.<br />
La pression maximale ou minimale assure un fonctionnement parfait sans éventuels dommages.<br />
® Droit d'auteur <strong>ATH</strong>-<strong>Heinl</strong> GmbH & CO.KG, Tous droits réservés / Sous réserve d'erreurs et de modifications techniques / version: 2021-09<br />
Fabricant du produit <strong>ATH</strong>-<strong>Heinl</strong> GmbH & CO.KG<br />
- 16 -
2.8 Raccordement hydraulique<br />
Avant de mettre en service l'installation ou lors du premier fonctionnement avec de<br />
l'huile, il convient de surveiller les éléments suivants pour un fonctionnement optimal,<br />
sans dysfonctionnement ainsi qu'un fonctionnement quasiment exempt d'air<br />
Toutes les conduites hydrauliques doivent être raccordées et serrées conformément au schéma hydraulique<br />
ou selon la désignation des conduites.<br />
Toutes les conduites hydrauliques et vérins doivent être purgés conformément au schéma hydraulique ou à<br />
la désignation des conduites.<br />
Afin d'assurer le fonctionnement parfait et sûr de l'installation ainsi que des conduites utilisées, il convient<br />
de veiller à ce que les fluides hydrauliques utilisés soient conformes aux prescriptions et recommandations<br />
du fabricant.<br />
Les fluides utilisés qui ne correspondent pas aux exigences spécifiques ou qui présentent un encrassement<br />
non autorisé endommagent l'ensemble du système hydraulique et réduisent la durée d'utilisation des<br />
systèmes hydrauliques. Attention : (Un encrassement de l'installation est également possible lors d'un<br />
remplissage d'huile)<br />
Il convient de contrôler les exigences minimales et la quantité minimale d'huile et d'en rajouter le cas<br />
échéant.<br />
® Droit d'auteur <strong>ATH</strong>-<strong>Heinl</strong> GmbH & CO.KG, Tous droits réservés / Sous réserve d'erreurs et de modifications techniques / version: 2021-09<br />
Fabricant du produit <strong>ATH</strong>-<strong>Heinl</strong> GmbH & CO.KG<br />
- 17 -
2.9 Montage<br />
Ce manuel ne doit pas être considéré comme une notice de montage. Les conseils et<br />
aides sont destinés à des monteurs spécialisés. Pour les travaux suivants, il convient de<br />
porter des vêtements adaptés ainsi que des équipements de protection.<br />
Un montage et des réglages erronés conduisent à une exclusion de responsabilité et de<br />
garantie.<br />
Les machines en partie prémontées doivent être réceptionnées, contrôlées et faire l'objet d'une instruction<br />
pour l'utilisation par un personnel qualifié.<br />
Les montages de machines doivent être effectués par un personnel spécialisé.<br />
Installation de la colonne sur la base<br />
Vis M20x60<br />
Vis M8x20<br />
Rondelle D.20 Rondelle D.12<br />
Circlip D.20<br />
Vis M12x40<br />
Bague Seeger D.16 Circlip D.12<br />
Bille en acier D.20<br />
Écrou M12<br />
® Droit d'auteur <strong>ATH</strong>-<strong>Heinl</strong> GmbH & CO.KG, Tous droits réservés / Sous réserve d'erreurs et de modifications techniques / version: 2021-09<br />
Fabricant du produit <strong>ATH</strong>-<strong>Heinl</strong> GmbH & CO.KG<br />
- 18 -
Installation des bras de levage<br />
Installez le cadre du bras sur le chariot à l'aide des vis et des rondelles fournies, comme indiqué sur le<br />
schéma suivant :<br />
Vis M16x45 Circlip D.16<br />
Rondelle D.16<br />
Fixez les bras télescopiques au cadre du bras comme indiqué sur le schéma ci-dessous:<br />
® Droit d'auteur <strong>ATH</strong>-<strong>Heinl</strong> GmbH & CO.KG, Tous droits réservés / Sous réserve d'erreurs et de modifications techniques / version: 2021-09<br />
Fabricant du produit <strong>ATH</strong>-<strong>Heinl</strong> GmbH & CO.KG<br />
- 19 -
Installation de l'alimentation<br />
Placez l'alimentation avec les vis et les rondelles sur le support à l'arrière de la colonne comme indiqué sur<br />
le schéma suivant :<br />
Anneau de retenue D.10<br />
Rondelle D.10<br />
Vis M10x25<br />
• Le cylindre est situé dans le trou central de la base de la colonne, comme illustré dans le<br />
dessin suivant:<br />
Vérin hydraulique<br />
® Droit d'auteur <strong>ATH</strong>-<strong>Heinl</strong> GmbH & CO.KG, Tous droits réservés / Sous réserve d'erreurs et de modifications techniques / version: 2021-09<br />
Fabricant du produit <strong>ATH</strong>-<strong>Heinl</strong> GmbH & CO.KG<br />
- 20 -
Installer le garde-chaîne sur la poulie<br />
Vis M6x14 Circlip D.14<br />
Rondelle D.14<br />
Garde-chaîne<br />
® Droit d'auteur <strong>ATH</strong>-<strong>Heinl</strong> GmbH & CO.KG, Tous droits réservés / Sous réserve d'erreurs et de modifications techniques / version: 2021-09<br />
Fabricant du produit <strong>ATH</strong>-<strong>Heinl</strong> GmbH & CO.KG<br />
- 21 -
Raccordement de la ligne hydraulique<br />
Assurez-vous que les tuyaux et les connecteurs sont propres et exempts de contamination. Nettoyer les<br />
pièces si nécessaire.<br />
Vérifiez que toutes les pièces ne sont pas endommagées et assurez-vous que toutes les connexions à vis et<br />
les connecteurs sont en bon état.<br />
Raccordez les flexibles au groupe hydraulique et au vérin selon le schéma suivant. Serrez toutes les<br />
connexions pour éviter les fuites d'huile.<br />
Tuyau plastique 10x6,5x1850<br />
Manette de Gaz<br />
Tuyau hydraulique ¼ L730<br />
® Droit d'auteur <strong>ATH</strong>-<strong>Heinl</strong> GmbH & CO.KG, Tous droits réservés / Sous réserve d'erreurs et de modifications techniques / version: 2021-09<br />
Fabricant du produit <strong>ATH</strong>-<strong>Heinl</strong> GmbH & CO.KG<br />
- 22 -
Installer le panneau de contrôle<br />
Installez le panneau de commande sur la colonne comme indiqué dans la figure suivante:<br />
Vis M6x16<br />
Ensemble de commande électrique<br />
Fixez la commande électrique à la colonne avec les vis fournies, comme indiqué sur la figure ci-contre.<br />
Vérifiez la plaque signalétique pour vous assurer que le moteur est adapté à la tension disponible du<br />
client.<br />
Effectuez les raccordements électriques comme indiqué sur le schéma électrique (Chapitre 6.2).<br />
Utilisez pour cela les câbles et les lignes fournis.<br />
Les travaux doivent être effectués conformément aux réglementations locales. Assurez-vous que les<br />
phases sont correctement connectées (sens de rotation) et que l'ascenseur est correctement mis à la<br />
terre.<br />
® Droit d'auteur <strong>ATH</strong>-<strong>Heinl</strong> GmbH & CO.KG, Tous droits réservés / Sous réserve d'erreurs et de modifications techniques / version: 2021-09<br />
Fabricant du produit <strong>ATH</strong>-<strong>Heinl</strong> GmbH & CO.KG<br />
- 23 -
2.10 Travaux finaux<br />
Avant la mise en service, vérifiez toutes les vis de fixation, les conduites électriques,<br />
pneumatiques et hydrauliques et resserrez-les le cas échéant. Attention : Ces éléments<br />
doivent en partie être contrôlés régulièrement et être resserrés le cas échéant (remarque<br />
dans le manuel).<br />
Réglage du fin de course supérieur<br />
Fin de course<br />
Relevez la scène à une hauteur de 1870 mm pour vérifier la bonne position.<br />
Si l'interrupteur n'est pas réglé correctement, desserrez le levier et placez-le dans la bonne position jusqu'à<br />
ce que l'élévateur ait atteint la hauteur souhaitée. Après réglage, serrer la vis.<br />
Réglage de la limite CE<br />
Réglez l'ascenseur à une hauteur de 200 mm<br />
Commutateur CE<br />
Traverse<br />
Si l'interrupteur n'est pas réglé correctement, desserrez le levier et réglez-le à la bonne hauteur (il est<br />
recommandé d'être 1 à 3 mm plus bas que la traverse).<br />
Après réglage, serrez la vis.<br />
® Droit d'auteur <strong>ATH</strong>-<strong>Heinl</strong> GmbH & CO.KG, Tous droits réservés / Sous réserve d'erreurs et de modifications techniques / version: 2021-09<br />
Fabricant du produit <strong>ATH</strong>-<strong>Heinl</strong> GmbH & CO.KG<br />
- 24 -
Remplir d'huile et purger<br />
Utilisez uniquement l'huile hydraulique spécifiée dans les instructions d'utilisation. Ouvrez le bouchon de<br />
remplissage d'huile et versez environ 6 litres d'huile hydraulique dans le réservoir. Une pression sur le<br />
bouton de levage déplace la plate-forme vers le haut jusqu'à ce que la hauteur maximale soit atteinte.<br />
Relâchez le bouton lorsque la hauteur maximale est atteinte, sinon le moteur électrique ou la pompe à<br />
engrenages peuvent être endommagés. En appuyant sur le bouton inférieur, le lève-personne s'abaisse<br />
complètement. Maintenez le bouton bas pendant environ 3 secondes après que la platine a atteint son<br />
point le plus bas pour permettre à l'air emprisonné de s'échapper. Répétez ce processus de montée et de<br />
descente trois fois.<br />
Avertissement : Tenter de tester sans huile ou si le moteur tourne dans le mauvais sens peut détruire la<br />
pompe hydraulique.<br />
Vérifier avant la mise en service<br />
contrôle general<br />
- Assurez-vous que toutes les goupilles et boulons sont correctement installés.<br />
- Assurez-vous que la chaîne est correctement installée.<br />
- S'assurer que la tension d'alimentation correspond à la tension indiquée sur la plaque signalétique<br />
du moteur. Assurez-vous que le système électrique est connecté conformément au schéma de<br />
câblage électrique et qu'il est correctement mis à la terre.<br />
- Assurez-vous que l'ascenseur est mis à la terre.<br />
- Les contrôles suivants doivent également être effectués:<br />
Protections mécaniques pour une installation correcte<br />
- Assurez-vous que le loquet de sécurité est bien activé lorsque vous appuyez sur le bouton « Lockup<br />
». Cela peut être libéré en appuyant sur le bouton « Inférieur ».<br />
- Lors du levage, assurez-vous que les loquets de sécurité s'enclenchent. Sinon, vérifiez la cause.<br />
Vérifier le bon fonctionnement du système hydraulique<br />
- Vérifier le niveau d'huile et faire l'appoint si nécessaire.<br />
- Relevez les bras de support à leur hauteur maximale et laissez tourner le moteur pendant 5<br />
secondes.<br />
- Vérifiez toutes les connexions de tuyaux pour trouver des fuites. Si nécessaire, resserrez les<br />
connexions ou colmatez les fuites.<br />
- Vérifier l'ascenseur à hauteur maximale.<br />
- Si nécessaire, répéter la purge des cylindres.<br />
® Droit d'auteur <strong>ATH</strong>-<strong>Heinl</strong> GmbH & CO.KG, Tous droits réservés / Sous réserve d'erreurs et de modifications techniques / version: 2021-09<br />
Fabricant du produit <strong>ATH</strong>-<strong>Heinl</strong> GmbH & CO.KG<br />
- 25 -
Vérifier le bon fonctionnement de l'interrupteur de fin de course<br />
- Vérifier que le fin de course haut fonctionne correctement. Assurez-vous que l'unité ne fonctionne<br />
plus lorsque les bras de support ont atteint la hauteur maximale.<br />
- Vérifier le bon fonctionnement du fin de course de sécurité. Assurez-vous que l'alimentation<br />
électrique ne fonctionne plus lorsque les bras de support ont atteint une hauteur d'environ 200 mm.<br />
Installer le capot avant<br />
Ruban de masquage<br />
Rondelle D.5<br />
Vis M5x12<br />
Vis M3x8<br />
Plaque de fixation du ruban<br />
Écrou M6 houes<br />
Vis M6x20<br />
® Droit d'auteur <strong>ATH</strong>-<strong>Heinl</strong> GmbH & CO.KG, Tous droits réservés / Sous réserve d'erreurs et de modifications techniques / version: 2021-09<br />
Fabricant du produit <strong>ATH</strong>-<strong>Heinl</strong> GmbH & CO.KG<br />
- 26 -
DESCENTE D'URGENCE<br />
• En cas d'urgence, le véhicule soulevé peut être abaissé manuellement sans électricité comme suit :<br />
• Fermez l'interrupteur d'alimentation avec un cadenas.<br />
• Retirer les couvercles au dos de la colonne pour vérifier que les sécurités mécaniques sont activées.<br />
• Si les dispositifs de sécurité sont activés, actionnez la pompe manuelle de secours (si commandée<br />
avec le pont élévateur) pour soulever un peu le pont élévateur et libérer les dispositifs de sécurité.<br />
• Après avoir retiré les dispositifs de sécurité, comme indiqué dans le graphique ci-dessous, insérez<br />
un boulon approprié sous chaque crochet de sécurité pour contourner le dispositif de sécurité.<br />
• Desserrez la vis de descente d'urgence en la tournant dans le sens inverse des aiguilles d'une<br />
montre jusqu'à ce que le véhicule soit complètement abaissé. La vitesse de descente peut être<br />
réduite ou augmentée en serrant ou desserrant la vis.<br />
• Resserrez la vis de descente d'urgence en la tournant dans le sens des aiguilles d'une montre.<br />
• Retirez les boulons sous les crochets de sécurité.<br />
• Remettez les couvercles arrière sur la colonne et serrez les vis.<br />
verrouiller<br />
Loquet de sécurité<br />
Soupape de décharge d'urgence<br />
Pompe à main de secours (en option)<br />
® Droit d'auteur <strong>ATH</strong>-<strong>Heinl</strong> GmbH & CO.KG, Tous droits réservés / Sous réserve d'erreurs et de modifications techniques / version: 2021-09<br />
Fabricant du produit <strong>ATH</strong>-<strong>Heinl</strong> GmbH & CO.KG<br />
- 27 -
3.0 EXPLOITATION<br />
3.1 Manuel d'utilisation<br />
Société :<br />
Poste de travail :<br />
Manuel d'utilisation<br />
pour<br />
Ponts élévateurs<br />
Date :<br />
Signature :<br />
Dangers pour la santé et l'environnement<br />
• Chute de charges ou de pièces<br />
• Points d'écrasement et de cisaillement lors du fonctionnement du<br />
pont élévateur<br />
• Risque en raison de pièces mobiles incontrôlées<br />
Mesure de protection et code de conduite<br />
Avant de commencer à travailler :<br />
• Seules des personnes d'au moins 18 ans formées et mandatées par écrit peuvent<br />
utiliser de manière autonome les ponts élévateurs.<br />
• Dans le cas où plusieurs personnes travaillent en même temps, il convient de<br />
désigner un surveillant<br />
• Contrôle du fonctionnement tous les jours ouvrables<br />
• Respecter le manuel d'utilisation du fabricant<br />
Pendant le travail :<br />
• Faire attention aux points d'écrasement et de cisaillement<br />
• Ne pas dépasser la charge maximale autorisée sur le pont élévateur<br />
• Ne pas soulever de personnes<br />
• Ne pas faire vibrer le pont élévateur, ni le faire osciller.<br />
• Ne pas se tenir dans la zone de mouvement du pont élévateur lors de la descente<br />
• Faire régulièrement contrôle le pont élévateur<br />
Conduite à tenir en cas de panne et de danger<br />
• En cas de panne, mettre immédiatement le pont élévateur hors service<br />
• S'assurer qu'il ne puisse pas être utilisé<br />
• Signaler les défauts au monteur ou au fabricant<br />
Premiers secours<br />
• Informer le premier intervenant (voir plan d'alerte et d'urgence)<br />
• Soigner immédiatement les blessures<br />
• Consigner dans le cahier des pansements<br />
• En cas de blessure grave, veuillez composer le numéro d'urgence<br />
Appel d'urgence :<br />
Transport de malades :<br />
_______________<br />
_______________<br />
Maintenance<br />
• La maintenance doit être assurée uniquement par des personnes mandatées et<br />
formées<br />
• Débrancher ou sécuriser l'appareil du secteur pour tous travaux de préparation, de<br />
réglage, de maintenance et d'entretien du pont élévateur<br />
• Nettoyer le pont élévateur après la fin du travail et contrôler le niveau d'huile<br />
hydraulique<br />
• Contrôle annuel du pont élévateur par une personne mandatée et formée<br />
® Droit d'auteur <strong>ATH</strong>-<strong>Heinl</strong> GmbH & CO.KG, Tous droits réservés / Sous réserve d'erreurs et de modifications techniques / version: 2021-09<br />
Fabricant du produit <strong>ATH</strong>-<strong>Heinl</strong> GmbH & CO.KG<br />
- 28 -
3.2 Remarques générales<br />
Seules des personnes de plus de 18 ans ayant reçu une formation sur cette machine et qui ont prouvé leur<br />
aptitude à l'entrepreneur peuvent utiliser cette machine de manière autonome.<br />
Elles doivent être expressément être chargées par l'entrepreneur d'utiliser cette machine. Le mandat pour<br />
le droit d'utiliser cette machine doit être délivré par écrit.<br />
La machine ne doit être utilisée que pour l'usage prévu.<br />
Utilisez toujours les matériaux prescrits lors du montage et du service.<br />
Avant le montage ou le démontage, veuillez vérifier toutes les pièces ; celles-ci ne doivent présenter aucun<br />
endommagement.<br />
Respectez le cas échéant les conseils spécifiques des fabricants au montage ou au démontage de travaux<br />
spécifiques sur le véhicule.<br />
Le respect du plan de maintenance est une partie importante de la garantie. Cela concerne en particulier la<br />
propreté, la protection contre la corrosion et le cas échéant la réparation immédiate de dommages.<br />
Durant le fonctionnement, vous devez toujours être attentif aux risques. Dès que des dangers<br />
apparaissent, mettez immédiatement la machine hors service, débranchez la prise secteur et coupez<br />
l'arrivée d'air.<br />
Contactez ensuite votre revendeur.<br />
Tous les panneaux d'avertissement doivent toujours être bien lisibles. En cas d'endommagement, ils<br />
doivent être immédiatement remplacés.<br />
Faites attention aux éventuels points de cisaillement de la machine.<br />
Durant le fonctionnement, le bruit peut atteindre 85dB (A), c'est pourquoi l'utilisateur<br />
devrait prendre les mesures de protection adaptées.<br />
Les vêtements lâches, cheveux longs ou des bijoux peuvent être happés par les pièces<br />
mobiles de la machine.<br />
® Droit d'auteur <strong>ATH</strong>-<strong>Heinl</strong> GmbH & CO.KG, Tous droits réservés / Sous réserve d'erreurs et de modifications techniques / version: 2021-09<br />
Fabricant du produit <strong>ATH</strong>-<strong>Heinl</strong> GmbH & CO.KG<br />
- 29 -
4.0 MAINTENANCE<br />
Afin de garantir le fonctionnement sûr de la machine, l'utilisateur est tenu de l'entretenir régulièrement.<br />
Les travaux de réparation ne doivent être effectués que par des partenaires de maintenance autorisés ou<br />
par le client après concertation avec le fabricant.<br />
Avant tous travaux de maintenance et de réparation :<br />
- TOUS les types d'alimentation de la machine doivent être coupés<br />
- Débrancher la prise principale et purger l'air comprimé de l'installation le cas<br />
échéant<br />
- Des mesures adéquates doivent être prises pour éviter toute remise en service de<br />
l'installation<br />
Les travaux sur des éléments électriques ou sur l'alimentation ne doivent être exécutés<br />
que par du personnel qualifié ou des électriciens spécialisés.<br />
4.1 Consommables pour le montage, la maintenance et l'entretien<br />
Huile hydraulique<br />
Exigence minimale générale :<br />
Eni PRECIS HVLP-D Art. n° 00066018<br />
Eté (15° à 45°) : HVLP-D 46 (p. ex. : Eni PRECIS HVLP-D)<br />
Hiver (moins de 10°) : HVLP-D 32 (p. ex. : Eni PRECIS HVLP-D)<br />
Exigences minimales spéciales pour ponts élévateurs à 2 colonnes :<br />
Eni PRECIS HVLP-D art. n°00067218<br />
Eté (15° à 45°) : HVLP-D 32 (p. ex. : Eni PRECIS HVLP-D)<br />
Hiver (moins de 10°) : HVLP-D 22 (p. ex. : Eni PRECIS HVLP-D)<br />
Produit de conservation pour les câbles, soudures, vis, coins, bords et espaces creux.<br />
Exigence minimale :<br />
Petec Spray translucent - 500 ml art. n° 73550 / Petec canette sous vide translucent - 1000 ml art. n°<br />
73510<br />
Petec Pistolet UBS Art. n° 98507<br />
Lubrifiant pour les guides<br />
Exigence minimale :<br />
Graisse blanche haute performance EP LAGERMEISTER WHS 2002. Art. n° KPF1-2K-20<br />
Lubrifiant pour manchons, chaînes, galets et pièces mobiles<br />
Exigence minimale :<br />
White Ultra Luber, 500 ml bombe aérosol. Art. n° 34403 – WUL – White Ultra Lube<br />
Ancrage au sol<br />
Exigence minimale pour ponts élévateurs :<br />
Fischer FIS A M 16 x 250 acier galvanisé en combinaison avec Fischer ancrage Superbond<br />
Exigence minimale pour machine de montage VL et machine pour équilibrage VL/PL :<br />
Cheville d'ancrage M8 x 100<br />
® Droit d'auteur <strong>ATH</strong>-<strong>Heinl</strong> GmbH & CO.KG, Tous droits réservés / Sous réserve d'erreurs et de modifications techniques / version: 2021-09<br />
Fabricant du produit <strong>ATH</strong>-<strong>Heinl</strong> GmbH & CO.KG<br />
- 30 -
Exigence minimale pour machines de levage PL :<br />
Cheville d'ancrage M12 x 100<br />
Installation d'air comprimé<br />
Exigence minimale :<br />
PROMAT chemicals Huile spéciale pour air comprimé Art. n° : 4000355209<br />
Nettoyage<br />
Exigence minimale :<br />
Caramba Nettoyant intensif pour freins sans acétone<br />
Entretien et protection de métaux, de surfaces peintes ou laquées<br />
Exigence minimale :<br />
Petec canette sous vide translucent - 500 ml Art. n° 73550<br />
Petec canette sous vide translucent - 1000 ml Art. n° 73510<br />
Petec Pistolet UBS Art. n° 98507<br />
Entretien et protection de métaux, de surfaces peintes ou laquées dans la zone piétonne et<br />
parties en plastique<br />
Exigence minimale :<br />
Valet Pro Classic Protectant Etancheisation plastique 500 ml<br />
4.2 Dispositions de sécurité pour l'huile<br />
Veuillez toujours respecter les prescriptions ou ordonnances relatives au traitement de l'huile usagée.<br />
Faites toujours éliminer l'huile usagée par une entreprise certifiée.<br />
En cas de fuite, l'huile doit immédiatement être retenue à l'aide d'un agent liant ou de récipients pour<br />
qu'elle ne puisse pas atteindre le sol.<br />
Évitez tout contact entre l'huile et la peau.<br />
Ne laissez pas de vapeur d'huile s'échapper dans l'atmosphère.<br />
L'huile est un fluide inflammable. Faites attention aux sources de dangers potentiels.<br />
Portez des vêtements de protection résistants à l'huile comme p. ex. des gants, lunettes de protection,<br />
vêtements de protection, etc.<br />
® Droit d'auteur <strong>ATH</strong>-<strong>Heinl</strong> GmbH & CO.KG, Tous droits réservés / Sous réserve d'erreurs et de modifications techniques / version: 2021-09<br />
Fabricant du produit <strong>ATH</strong>-<strong>Heinl</strong> GmbH & CO.KG<br />
- 31 -
4.3 Remarques<br />
Quel que soit l'état d'encrassement, la machine doit régulièrement<br />
faire l'objet d'une maintenance, être nettoyée et entretenue.<br />
La machine doit ensuite être traitée avec un produit d'entretien (p. ex. huile ou aérosol<br />
lubrifiant).<br />
N'utilisez aucun détergent dommageable pour la peau.<br />
DANS LE CAS OÙ CES POINTS NE SONT PAS REMPLIS, AUCUNE RÉCLAMATION EN<br />
GARANTIE N'EST ACCEPTÉE<br />
4.4 Plan de maintenance ou d'entretien<br />
Intervalle<br />
Immédiatement<br />
Hebdomadaire<br />
Mensuel<br />
Trimestriel<br />
Semestriel<br />
Vérification de TOUTES les pièces importantes du point de vue de la sécurité<br />
Nettoyer<br />
Contrôler ou restaurer la protection des surfaces<br />
Contrôler l'étanchéité du système hydraulique<br />
Contrôler ou restaurer la protection des surfaces ou la protection contre la<br />
corrosion<br />
Contrôler ou restaurer les dommages sur la peinture et les pièces<br />
Contrôler ou réparer les dommages liés à la rouille<br />
Contrôler et traiter les espaces creux et les endroits non peints<br />
Contrôler l'étanchéité du système pneumatique<br />
Contrôle de la solidité des vis<br />
Contrôler le jeu dans le palier, lubrifier et régler<br />
Contrôler les pièces d'usure<br />
Vérifier les fluides (niveau, usure, encrassement, qualité)<br />
Contrôler et lubrifier les guides<br />
Retirer l'encrassement à l'intérieur<br />
Nettoyer et contrôler les pièces électriques<br />
Contrôler le fonctionnement et l'usure du moteur et de l'entraînement<br />
Contrôler les soudures et la construction<br />
Effectuer les contrôles visuels (conformément au plan de contrôle)<br />
X<br />
X<br />
X<br />
X<br />
X<br />
X<br />
X<br />
X<br />
X<br />
X<br />
X<br />
X<br />
X<br />
X<br />
X<br />
X<br />
X<br />
X<br />
X<br />
® Droit d'auteur <strong>ATH</strong>-<strong>Heinl</strong> GmbH & CO.KG, Tous droits réservés / Sous réserve d'erreurs et de modifications techniques / version: 2021-09<br />
Fabricant du produit <strong>ATH</strong>-<strong>Heinl</strong> GmbH & CO.KG<br />
- 32 -
4.5 Dépannage / Affichage des défauts et solution<br />
Symptôme Cause Solution<br />
Problèmes lors du levage<br />
Le pont élévateur ne monte pas<br />
lorsque l'on appuie sur le bouton<br />
(le moteur<br />
ne tourne pas)<br />
Le pont élévateur ne monte pas<br />
lorsque l'on appuie sur le bouton<br />
(le moteur tourne)<br />
Le pont élévateur monte par à-<br />
coups<br />
Le pont élévateur continue de<br />
monter même après avoir relâché<br />
le bouton<br />
Dommages sur le moteur<br />
Fusibles grillés en raison de<br />
fluctuations de tension, par<br />
exemple<br />
Bouton et/ou contact défectueux<br />
Interrupteur principal et/ou<br />
contact défectueux<br />
Alimentation défectueuse ou<br />
insuffisante<br />
Tension d'entrée fluctuante ou<br />
incorrecte<br />
Protection moteur défectueuse<br />
Le relais thermique s'est<br />
déclenché<br />
Interrupteur de fin de course<br />
défectueux ou bloqué<br />
Manque d'huile hydraulique<br />
Filtre à huile bouché<br />
Fuite d'huile<br />
Soupape d'abaissement ouverte<br />
Sens de rotation du moteur<br />
erronée<br />
Pompe à engrenages défectueuse<br />
La capacité de charge a été<br />
dépassée<br />
Réglage du limiteur de pression<br />
trop bas<br />
Espace insuffisant entre les<br />
glissières<br />
Air dans le système hydraulique<br />
Huile hydraulique sale<br />
Les glissières ne sont pas<br />
lubrifiées<br />
Bouton défectueux<br />
Contrôler le moteur et le remplacer<br />
le cas échéant<br />
Supprimer les causes et remplacer<br />
les fusibles<br />
Remplacer le bouton et/ou le<br />
contact<br />
Remplacer l'interrupteur principal<br />
et/ou le contact<br />
Remplacer le câble<br />
Contrôler la tension<br />
Remplacer la protection moteur<br />
Contrôler le relais thermique et le<br />
moteur<br />
Contrôler l'interrupteur de fin de<br />
course et le remplacer le cas<br />
échéant<br />
Rajouter de l'huile<br />
Nettoyer le filtre à huile<br />
Remplacement des pièces<br />
endommagées<br />
Contrôler et remplacer la soupape<br />
d'abaissement en cas de besoin<br />
Inverser les phases<br />
Contrôlez la pompe et remplacez-la<br />
si nécessaire<br />
Ne dépassez pas la capacité de<br />
charge indiquée<br />
Régler le limiteur de pression sur la<br />
charge maximale<br />
L'espace entre les deux glissières et<br />
le guide doit être compris entre 1,5<br />
et 2,5 mètres<br />
Purgez le système hydraulique<br />
Remplacez l'huile hydraulique<br />
Lubrifiez les glissières<br />
Remplacez le bouton défectueux<br />
® Droit d'auteur <strong>ATH</strong>-<strong>Heinl</strong> GmbH & CO.KG, Tous droits réservés / Sous réserve d'erreurs et de modifications techniques / version: 2021-09<br />
Fabricant du produit <strong>ATH</strong>-<strong>Heinl</strong> GmbH & CO.KG<br />
- 33 -
Problèmes lors de l'abaissement<br />
Le pont élévateur descend tout seul<br />
Les crans de sécurité ne<br />
réagissent pas<br />
Contrôler le câblage<br />
Contrôler les électroaimants et les<br />
remplacer le cas échéant<br />
Décharger les supports par un<br />
levage<br />
Contrôler le relais de commande<br />
Retirer l'obstacle<br />
Relever brièvement le pont puis<br />
appuyer à nouveau sur « DOWN »<br />
Contrôler le raccordement<br />
électrique<br />
Relais de commande défectueux<br />
Obstacle sous le pont<br />
Sécurité rupture de tuyau<br />
Le pont élévateur ne s'abaisse pas déclenchée<br />
La soupape d'abaissement ne<br />
répond pas<br />
Bobine magnétique de la soupape<br />
Remplacer la bobine magnétique<br />
d'abaissement défectueuse<br />
Soupape d'abaissement<br />
Remplacement<br />
défectueuse<br />
Soupape pour la vitesse<br />
Régler<br />
d'abaissement mal réglée<br />
Dans le cas où les erreurs ne peuvent pas être corrigées, baissez le pont élévateur au moyen du<br />
boulon de descente de secours puis contactez notre équipe d'assistance<br />
Soupape d'abaissement encrassée Nettoyer la soupape d'abaissement<br />
Le pont descend trop lentement ou<br />
Soupape pour la vitesse<br />
par à-coups<br />
Régler<br />
d'abaissement mal réglée<br />
Raccords hydrauliques non Resserrer les liaisons et<br />
étanches<br />
éventuellement étanchéifier<br />
Conduites hydrauliques non<br />
Remplacer la conduite hydraulique<br />
étanches<br />
Autres problèmes<br />
Cylindre hydraulique non étanche<br />
Soupape d'abaissement encrassée<br />
ou défectueuse<br />
Clapet anti-retour non étanche<br />
Replacer les joints et nettoyer le<br />
système hydraulique<br />
Nettoyer ou remplacer la soupape<br />
d'abaissement<br />
Nettoyer ou remplacer<br />
Le pont élévateur monte et<br />
descend de manière non synchrone<br />
Le produit présente des dommages<br />
(importants) de rouille<br />
Bruit anormal du moteur<br />
Le disjoncteur s'est déclenché<br />
Air dans le circuit hydraulique<br />
Tension insuffisante des câbles<br />
synchrones<br />
Dommages ou protection contre<br />
la corrosion insuffisante ou<br />
maintenance le cas échéant<br />
Filtre à huile encrassé<br />
Air dans le circuit hydraulique<br />
Huile hydraulique sale<br />
Contrôle du contacteur<br />
Contrôle de la capacité des<br />
disjoncteurs<br />
Contrôle des dommages sur le<br />
câble<br />
Purger le circuit hydraulique<br />
Réglage de la tension ou de la<br />
synchronisation<br />
Dérouiller, nettoyer et restaurer la<br />
surface.<br />
Nettoyer le filtre à huile<br />
Purgez le système hydraulique<br />
Remplacez l'huile hydraulique<br />
Remplacer le contacteur<br />
Remplacez les fusibles<br />
Remplacement du câble<br />
VEILLEZ À TOUJOURS UTILISER DES PIÈCES ET ACCESSOIRES D'ORIGINE.<br />
® Droit d'auteur <strong>ATH</strong>-<strong>Heinl</strong> GmbH & CO.KG, Tous droits réservés / Sous réserve d'erreurs et de modifications techniques / version: 2021-09<br />
Fabricant du produit <strong>ATH</strong>-<strong>Heinl</strong> GmbH & CO.KG<br />
- 34 -
4.6 Instructions de maintenance et de service<br />
Tous les travaux de maintenance et de service doivent être effectués au moins selon le<br />
plan de maintenance<br />
UNITÉ DE TRAITEMENT DE L'AIR COMPRIMÉ<br />
(En partie fourni ou nécessaire pour l'activité)<br />
RÉGLAGE DE LA PRESSION DE SERVICE :<br />
• Contrôlez la pression de service affichée sur le<br />
manomètre (1). Elle doit correspondre aux<br />
spécifications techniques.<br />
• La pression de service peut être réglée à l'aide du<br />
régulateur de pression (A).<br />
• Tirez le régulateur de pression vers le haut pour<br />
effectuer le réglage.<br />
• Pour augmenter la pression dans la machine,<br />
tournez le régulateur dans le sens des aiguilles<br />
d'une montre, pour la réduire, tournez-le dans le<br />
sens inverse.<br />
C<br />
A 1<br />
Lubrificateur<br />
• Contrôlez le niveau d'huile dans le réservoir<br />
d'huile (3).<br />
• Retirez le réservoir d'huile.<br />
• Ajoutez à présent de l'huile pneumatique de<br />
viscosité SAE20 dans le réservoir.<br />
• Contrôlez la quantité d'huile injectée par le<br />
regard (4).<br />
• Généralement, la vis doit être vissée à fond<br />
dans le sens des aiguilles d'une montre puis<br />
desserrée d'environ ¼ à ½ tour dans le sens<br />
inverse.<br />
4<br />
3<br />
B<br />
2<br />
SÉPARATEUR D'EAU<br />
• Contrôlez le niveau d'eau dans le séparateur<br />
(2).<br />
• L'eau est évacuée en ouvrant la soupape (B).<br />
® Droit d'auteur <strong>ATH</strong>-<strong>Heinl</strong> GmbH & CO.KG, Tous droits réservés / Sous réserve d'erreurs et de modifications techniques / version: 2021-09<br />
Fabricant du produit <strong>ATH</strong>-<strong>Heinl</strong> GmbH & CO.KG<br />
- 35 -
4.7 Élimination<br />
• Coupez l'alimentation en air et électrique.<br />
• Retirez toutes les substances non métalliques et conservez-les conformément aux prescriptions locales.<br />
• Vidangez l'huile de la machine et conservez-la conformément aux prescriptions locales.<br />
• Recyclez les substances métalliques.<br />
La machine contient certaines substances nuisibles à l'environnement et qui peuvent<br />
causer des blessures sur le corps humain si elles ne sont pas correctement traitées.<br />
® Droit d'auteur <strong>ATH</strong>-<strong>Heinl</strong> GmbH & CO.KG, Tous droits réservés / Sous réserve d'erreurs et de modifications techniques / version: 2021-09<br />
Fabricant du produit <strong>ATH</strong>-<strong>Heinl</strong> GmbH & CO.KG<br />
- 36 -
5.0 EG-/EU-KONFORMITÄTSERKLÄRUNG / EC-/EU-DECLARATION OF CONFORMITY<br />
gemäß Maschinenrichtlinie 2006/42/EG, Anhang II 1A, EMV-Richtlinie 2014/30/EU, Anh. IV<br />
In accordance to Machine Directive 2006/42/EG, Appendix II 1A, EMC Directive 2014/30/EU, App. IV<br />
Seriennummer<br />
Serial number<br />
Firmenbezeichnung und vollständige Anschrift des Herstellers<br />
Business name and full address of the manufacturer<br />
Name und Anschrift des Dokumentations-Bevollmächtigten<br />
Name and address of the Technical Files authorized<br />
representative<br />
<strong>ATH</strong>-<strong>Heinl</strong> GmbH &Co. KG<br />
Gewerbepark 9<br />
DE – 92278 Illschwang<br />
<strong>ATH</strong>-<strong>Heinl</strong> GmbH &Co. KG<br />
Gewerbepark 9<br />
DE – 92278 Illschwang<br />
Hiermit erklären wir, dass die nachfolgend bezeichnete Maschine in der von uns in Verkehr gebrachten Ausführung den einschlägigen,<br />
grundlegenden Sicherheits- und Gesundheitsanforderungen der EG-Richtlinie 2006/42/EG sowie den unten aufgeführten<br />
Harmonisierungsrechtsvorschriften entspricht.<br />
We herewith declare that that the machine described below, as a result have been brought on to the general market comply with the relevant<br />
fundamental Safety and Health regulations of the of Directive 2000/60/EC and the harmonized standards listed below.<br />
Typbezeichnung<br />
Model name<br />
Beschreibung der Maschine<br />
Descriptions of the machine<br />
Hebebühne für Fahrzeuge<br />
Car lift<br />
<strong>ATH</strong>-<strong>Single</strong> <strong>Lift</strong> <strong>25M</strong><br />
Der oben beschriebene Gegenstand der Erklärung erfüllt die<br />
folgenden einschlägigen Harmonisierungs-Rechtsvorschriften der<br />
Union<br />
The object of the declaration described above meets the<br />
following applicable Community harmonisation legislation<br />
Folgende harmonisierten Normen und Vorschriften wurden<br />
eingehalten<br />
The following harmonized standards and regulations are applied<br />
Prüfinstitut<br />
Institute of Quality<br />
Referenznummer der technischen Daten<br />
Reference number for the technical data<br />
Nummer des Zertifikats<br />
Number of the certificate<br />
2006/42/EG (Machine-Directive)<br />
2006/95/EC (Low voltage directive)<br />
DIN EN 1493:2010 (Machine-Directive)<br />
DIN EN 60204-1: 2006+A1:2009 (Low voltage directive)<br />
EN ISO 121 :2010 (Risk assessment and risk reduction)<br />
CCQS UK Ltd.<br />
Level 7; Westgate House; Westgate Road<br />
London – W5 1YY<br />
UNITED KINGDOM<br />
TF-C-0722-16-143-02-5A<br />
CE-C-0722-16-143-02-5A<br />
<strong>ATH</strong>-<strong>Heinl</strong> GmbH &Co. KG<br />
Gewerbepark 9<br />
DE – 92278 Illschwang<br />
Datum<br />
Hans <strong>Heinl</strong><br />
(Geschäftsführer / General Manager)<br />
DURCH UMBAUTEN UND/ODER VERÄNDERUNGEN AN DER MASCHINE WIRD DIE CE-PRÜFUNG AUSSER KRAFT GESETZT UND<br />
EINE HAFTUNG AUSGESCHLOSSEN.<br />
BY MODIFICATION AND / OR CHANGES TO THE MACHINE, THE CE EXAMINATION IS EXCLUDED WITHOUT LIMITATION AND A<br />
LIABILITY SHALL BE EXCLUDED.<br />
® Droit d'auteur <strong>ATH</strong>-<strong>Heinl</strong> GmbH & CO.KG, Tous droits réservés / Sous réserve d'erreurs et de modifications techniques / version: 2021-09<br />
Fabricant du produit <strong>ATH</strong>-<strong>Heinl</strong> GmbH & CO.KG<br />
- 37 -
6.0 ANNEXE<br />
6.1 Schéma pneumatique<br />
® Droit d'auteur <strong>ATH</strong>-<strong>Heinl</strong> GmbH & CO.KG, Tous droits réservés / Sous réserve d'erreurs et de modifications techniques / version: 2021-09<br />
Fabricant du produit <strong>ATH</strong>-<strong>Heinl</strong> GmbH & CO.KG<br />
- 38 -
6.2 Schéma électrique<br />
Q1 Interrupteur principal JD Bip<br />
KM1/KM2 Contacteur moteur H1 Voyant de fonctionnement<br />
S1 Bouton d'ascenseur SV Vanne de descente<br />
S2 Bouton inférieur M Moteur 1.5KW/4P<br />
S3 Bouton de verrouillage MR1/MR2 Commutateur CE<br />
® Droit d'auteur <strong>ATH</strong>-<strong>Heinl</strong> GmbH & CO.KG, Tous droits réservés / Sous réserve d'erreurs et de modifications techniques / version: 2021-09<br />
Fabricant du produit <strong>ATH</strong>-<strong>Heinl</strong> GmbH & CO.KG<br />
- 39 -
6.3 Schéma hydraulique<br />
1 Filtre à l'huile 6 Moteur électrique<br />
2 Pompe à engrenages 7 Vanne de descente<br />
3 Pompe à main de secours - en option 8 Limiteur de débit<br />
4 clapet anti-retour 9 Vérin hydraulique<br />
5 Soupape de limitation de pression 10 Vanne de démarrage - pour<br />
entraînement 1PH<br />
® Droit d'auteur <strong>ATH</strong>-<strong>Heinl</strong> GmbH & CO.KG, Tous droits réservés / Sous réserve d'erreurs et de modifications techniques / version: 2021-09<br />
Fabricant du produit <strong>ATH</strong>-<strong>Heinl</strong> GmbH & CO.KG<br />
- 40 -
7.0 CARTE DE GARANTIE<br />
Adresse du revendeur :<br />
Société (numéro client le cas échéant) :<br />
Interlocuteur :<br />
Rue :<br />
CP et lieu :<br />
Tél. et Fax :<br />
E-mail :<br />
Adresse du client :<br />
Société (numéro client le cas échéant) :<br />
Interlocuteur :<br />
Rue :<br />
CP et lieu :<br />
Tél. et Fax :<br />
E-mail :<br />
Fabricant et modèle : Numéro de série : Année de construction : Numéro de référence :<br />
Description du message :<br />
Description des pièces de rechange nécessaires :<br />
Pièce de rechange : Numéro d'article : Quantité :<br />
REMARQUES IMPORTANTES :<br />
Les dommages qui résultent d'une utilisation incorrecte, d'un manque de maintenance ou de dommages<br />
mécaniques ne sont pas couverts par la garantie. Pour les installations qui n'ont pas été montées par un<br />
monteur agréé par <strong>ATH</strong>, la garantie se limite à la mise à disposition des pièces de rechange nécessaires.<br />
Dommages liés au transport :<br />
Défaut manifeste (dommages visibles liés au transport, mention sur le bon de livraison du<br />
transporteur, envoyer immédiatement une copie du bon de livraison et des photos à <strong>ATH</strong>-<strong>Heinl</strong>)<br />
Défaut caché (le dommage lié au transport n'est découvert que lors du déballage de la marchandise,<br />
envoyer une déclaration de dommage avec des photos dans un délai de 24 heures à <strong>ATH</strong>-<strong>Heinl</strong>)<br />
Lieu et date<br />
Signature et cachet<br />
® Droit d'auteur <strong>ATH</strong>-<strong>Heinl</strong> GmbH & CO.KG, Tous droits réservés / Sous réserve d'erreurs et de modifications techniques / version: 2021-09<br />
Fabricant du produit <strong>ATH</strong>-<strong>Heinl</strong> GmbH & CO.KG<br />
- 41 -
7.1 Étendue de la garantie produit<br />
• Cinq ans pour la structure de l'appareil<br />
• Le bloc d'alimentation, le cylindre hydraulique et les autres pièces d'usure comme les plateaux<br />
tournants, plaques de caoutchouc,<br />
câbles, chaînes, soupapes, interrupteurs, etc. sont couverts par la garantie pendant une année dans<br />
des conditions et une utilisation normales.<br />
La garantie ne couvre pas :<br />
• Les défauts causés par une usure normale, une mauvaise utilisation, les dommages liés au transport,<br />
une installation incorrecte, une tension incorrecte ou un manque de maintenance.<br />
• Les dommages résultant d'une négligence ou du non-respect des indications fournies dans ce manuel<br />
d'utilisation et/ou des autres instructions complémentaires.<br />
• L'usure normale sur les pièces de rechange qui nécessitent une maintenance pour assurer un<br />
fonctionnement sûr.<br />
• Tout composant endommagé lors du transport.<br />
• Les autres composants qui ne sont pas mentionnés expressément mais qui sont considérés comme<br />
pièces d'usure habituelles.<br />
• Dommages causés par la pluie, une humidité excessive, des environnements corrosifs ou autres<br />
impuretés.<br />
• Imperfections qui n'entravent pas le fonctionnement.<br />
LA GARANTIE NE S'APPLIQUE PAS<br />
LORSQUE LA CARTE DE GARANTIE N'A PAS ETE ENVOYÉE À <strong>ATH</strong>-HEINL.<br />
Veuillez noter que les dommages et dysfonctionnements liés au non-respect des travaux de maintenance et<br />
de réglage (conformément au manuel d'utilisation et/ou à l'initiation), à des raccordements électriques<br />
incorrects (champ tournant, tension nominale, protection par fusible) ou à une utilisation inappropriée<br />
(surcharge, mise en place à l'extérieur, modifications techniques) ne sont pas couverts par la garantie!<br />
® Droit d'auteur <strong>ATH</strong>-<strong>Heinl</strong> GmbH & CO.KG, Tous droits réservés / Sous réserve d'erreurs et de modifications techniques / version: 2021-09<br />
Fabricant du produit <strong>ATH</strong>-<strong>Heinl</strong> GmbH & CO.KG<br />
- 42 -
8.0 REGISTRE DE CONTRÔLE<br />
Ce registre de contrôle (procès-verbal compris) est un élément essentiel<br />
du manuel d'utilisation ou du produit.<br />
À CONSERVER PRÉCIEUSEMENT<br />
Contrôle<br />
Après le montage, la remise et l'initiation le cas échéant, le produit doit être contrôlé régulièrement<br />
conformément aux prescriptions et dispositions légales en vigueur dans le pays d'exploitation par une<br />
société ou un organisme qualifié(e) et agréé(e) à cet effet.<br />
En cas de modification ou d'extension du type de produit, un registre de contrôle supplémentaire doit être<br />
établi et réceptionné.<br />
Étendue du contrôle<br />
Outre le fonctionnement parfait, la propreté et les instructions de maintenance, il convient en particulier de<br />
contrôler les composants liés à la sécurité.<br />
Caractéristiques techniques<br />
- Veuillez les consulter dans le manuel d'utilisation ci-joint.<br />
Plaque signalétique<br />
- Notez toutes les données ci-dessous<br />
- Fabricant et type des matériaux de montage utilisés :<br />
® Droit d'auteur <strong>ATH</strong>-<strong>Heinl</strong> GmbH & CO.KG, Tous droits réservés / Sous réserve d'erreurs et de modifications techniques / version: 2021-09<br />
Fabricant du produit <strong>ATH</strong>-<strong>Heinl</strong> GmbH & CO.KG<br />
- 43 -
8.1 Procès-verbal d'installation et de remise<br />
Lieu d'installation : Appareil / Installation :<br />
Société : Fabricant :<br />
Rue : Type / modèle :<br />
Lieu : N° de série :<br />
Pays :<br />
Année de<br />
construction :<br />
Magasin compétent :<br />
Le produit mentionné ci-dessus a été monté, le fonctionnement et la sécurité ont été contrôlés, puis le produit a été<br />
mis en service. La mise en place a été effectuée par :<br />
l'exploitant<br />
un membre du personnel qualifié<br />
L'exploitant confirme avoir installé le produit de manière conforme, avoir lu, compris et respecté toutes les<br />
informations contenues dans ce manuel d'utilisation et dans le procès-verbal. Il confirme également avoir conservé<br />
ces documents de sorte qu'ils soient accessibles à tout moment par l'utilisateur formé.<br />
L'exploitant confirme qu'après le montage et la mise en service par une personne formée par le<br />
fabricant ou un revendeur agréé (personnel qualifié), une formation au fonctionnement, à l'utilisation, aux<br />
instructions de sécurité, maintenance et entretien de la machine a eu lieu ; il confirme avoir reçu les documents,<br />
informations et instructions concernant la machine et que le produit fonctionne parfaitement.<br />
REMARQUE IMPORTANTE :<br />
DANS LE CAS OÙ CES POINTS NE SONT PAS REMPLIS, AUCUNE RÉCLAMATION EN GARANTIE N'EST<br />
ACCEPTÉE :<br />
La garantie ne s'applique que lorsque le montage, la remise et éventuellement la formation à la machine ainsi que la<br />
maintenance annuelle par une personne qualifiée agréée par le fabricant ont été respectés et que la preuve en est<br />
apportée. L'intervalle entre 2 maintenances ne doit pas dépasser 12 mois. En cas d'utilisation hors standard ou par<br />
roulement d'équipes ou saisonnière, il convient de prévoir une vérification et une maintenance tous les six mois.<br />
Les réclamations en garantie ne sont acceptées que lorsque tous les points dans le procès-verbal et dans le manuel<br />
d'utilisation sont remplis et que la réclamation est faite immédiatement après la constatation et que ce procèsverbal<br />
en rapport avec le procès-verbal de maintenance et éventuellement avec le procès-verbal de<br />
service a été envoyé au fabricant.<br />
Les autres informations spécifiques relatives à la garantie, comme l'étendue, les exigences et prescriptions sont<br />
décrites dans le manuel d'utilisation et doivent être respectées.<br />
Les dommages et réclamations qui résultent d'une manipulation incorrecte, d'un défaut de maintenance et<br />
d'entretien, de l'utilisation de moyens de montage, d'exploitation, de maintenance et de nettoyage inappropriés ou<br />
non prescrits, de dommages mécaniques, d'une intervention dans l'appareil sans consultation préalable ou par du<br />
personnel qualifié non autorisé ne sont pas couverts par la garantie. Pour les installations qui ont été montées par un<br />
personnel qualifié autorisé, la garantie se limite après accord avec le fabricant à la mise à disposition des pièces de<br />
rechange nécessaires au maximum.<br />
Nom et cachet commercial du personnel qualifié<br />
éventuellement numéro et nom VKH<br />
Date et signature de la personne qualifiée<br />
Nom et cachet commercial de l'exploitant<br />
Date et signature de l'exploitant<br />
® Droit d'auteur <strong>ATH</strong>-<strong>Heinl</strong> GmbH & CO.KG, Tous droits réservés / Sous réserve d'erreurs et de modifications techniques / version: 2021-09<br />
Fabricant du produit <strong>ATH</strong>-<strong>Heinl</strong> GmbH & CO.KG<br />
- 44 -
8.2 Plan de contrôle<br />
Plaque signalétique<br />
Manuel d'utilisation abrégé<br />
Manuel d'utilisation<br />
Signalisation de sécurité<br />
Signalisation pour utilisation<br />
Autre signalisation<br />
Construction (déformation, fissures)<br />
Cheville de fixation et stabilité<br />
État du sol en béton (fissures)<br />
État / État général<br />
État / Propreté<br />
État / Entretien et scellement<br />
État / Fluides<br />
État / Lubrification<br />
État / Bloc<br />
État / Entraînement<br />
État / Moteur<br />
État / Transmission<br />
État / Cylindre<br />
État / Soupape<br />
État / Commande électrique<br />
État / Palpeurs électriques<br />
État / Interrupteur électrique<br />
État / Conduites électriques<br />
État / Conduites hydrauliques<br />
État / Raccord à vis hydraulique<br />
État / Conduites pneumatiques<br />
État / Raccord à vis pneumatique<br />
État / Étanchéité<br />
État / Boulons et paliers<br />
État / Pièces d'usure<br />
État / Recouvrements<br />
État / Fonctions sous charge<br />
État / Pièces de sécurité<br />
État / Dispositif de sécurité électrique<br />
État / Dispositif de sécurité hydraulique<br />
État / Dispositif de sécurité pneumatique<br />
État / Dispositif de sécurité mécanique<br />
État / Fonctions sous charge<br />
Plaquette de contrôle délivrée<br />
® Droit d'auteur <strong>ATH</strong>-<strong>Heinl</strong> GmbH & CO.KG, Tous droits réservés / Sous réserve d'erreurs et de modifications techniques / version: 2021-09<br />
Fabricant du produit <strong>ATH</strong>-<strong>Heinl</strong> GmbH & CO.KG<br />
- 45 -
8.3 Contrôle visuel (personne qualifiée autorisée)<br />
Résultat du contrôle<br />
d'un contrôle/contrôle ultérieur*) ordinaire / extraordinaire<br />
L'appareil a fait l'objet d'un contrôle du fonctionnement.<br />
Ce contrôle a permis de constater aucun défaut / les défauts suivants *) :<br />
_________________________________________________________________________________<br />
_________________________________________________________________________________<br />
_________________________________________________________________________________<br />
_________________________________________________________________________________<br />
_________________________________________________________________________________<br />
Étendue du contrôle : Contrôle du fonctionnement et visuel selon les prescriptions<br />
Contrôle partiel encore à réaliser :<br />
_________________________________________________________________________________<br />
_________________________________________________________________________________<br />
Il n'y a aucune objection pour une mise en service, aucun *) contrôle ultérieur n'est nécessaire.<br />
(Lieu, date)<br />
(Signature de la personne qualifiée)<br />
Confirmation de la réception :<br />
(Nom de la personne qualifiée)<br />
(Qualification professionnelle)<br />
(Adresse postale)<br />
(Employé(e) chez)<br />
Exploitant (cachet commercial, date, signature)<br />
Défauts pris en compte **)<br />
__________________________________________________________________<br />
Défauts corrigés **) ____________________________________________________________________<br />
*) Veuillez rayer les mentions inutiles<br />
**) Confirmation de l'exploitant ou de son représentant avec date et signature<br />
® Droit d'auteur <strong>ATH</strong>-<strong>Heinl</strong> GmbH & CO.KG, Tous droits réservés / Sous réserve d'erreurs et de modifications techniques / version: 2021-09<br />
Fabricant du produit <strong>ATH</strong>-<strong>Heinl</strong> GmbH & CO.KG<br />
- 46 -
Contrôle visuel (personne qualifiée autorisée)<br />
Résultat du contrôle<br />
d'un contrôle/contrôle ultérieur*) ordinaire / extraordinaire<br />
L'appareil a fait l'objet d'un contrôle du fonctionnement.<br />
Ce contrôle a permis de constater aucun défaut / les défauts suivants *) :<br />
_________________________________________________________________________________<br />
_________________________________________________________________________________<br />
_________________________________________________________________________________<br />
_________________________________________________________________________________<br />
_________________________________________________________________________________<br />
Étendue du contrôle : Contrôle du fonctionnement et visuel selon les prescriptions<br />
Contrôle partiel encore à réaliser :<br />
_________________________________________________________________________________<br />
_________________________________________________________________________________<br />
Il n'y a aucune objection pour une mise en service, aucun *) contrôle ultérieur n'est nécessaire.<br />
(Lieu, date)<br />
(Signature de la personne qualifiée)<br />
Confirmation de la réception :<br />
(Nom de la personne qualifiée)<br />
(Qualification professionnelle)<br />
(Adresse postale)<br />
(Employé(e) chez)<br />
Exploitant (cachet commercial, date, signature)<br />
Défauts pris en compte **)<br />
__________________________________________________________________<br />
Défauts corrigés **) ____________________________________________________________________<br />
*) Veuillez rayer les mentions inutiles<br />
**) Confirmation de l'exploitant ou de son représentant avec date et signature<br />
® Droit d'auteur <strong>ATH</strong>-<strong>Heinl</strong> GmbH & CO.KG, Tous droits réservés / Sous réserve d'erreurs et de modifications techniques / version: 2021-09<br />
Fabricant du produit <strong>ATH</strong>-<strong>Heinl</strong> GmbH & CO.KG<br />
- 47 -
Contrôle visuel (personne qualifiée autorisée)<br />
Résultat du contrôle<br />
d'un contrôle/contrôle ultérieur*) ordinaire / extraordinaire<br />
L'appareil a fait l'objet d'un contrôle du fonctionnement.<br />
Ce contrôle a permis de constater aucun défaut / les défauts suivants *) :<br />
_________________________________________________________________________________<br />
_________________________________________________________________________________<br />
_________________________________________________________________________________<br />
_________________________________________________________________________________<br />
_________________________________________________________________________________<br />
Étendue du contrôle : Contrôle du fonctionnement et visuel selon les prescriptions<br />
Contrôle partiel encore à réaliser :<br />
_________________________________________________________________________________<br />
_________________________________________________________________________________<br />
Il n'y a aucune objection pour une mise en service, aucun *) contrôle ultérieur n'est nécessaire.<br />
(Lieu, date)<br />
(Signature de la personne qualifiée)<br />
Confirmation de la réception :<br />
(Nom de la personne qualifiée)<br />
(Qualification professionnelle)<br />
(Adresse postale)<br />
(Employé(e) chez)<br />
Exploitant (cachet commercial, date, signature)<br />
Défauts pris en compte **)<br />
__________________________________________________________________<br />
Défauts corrigés **) ____________________________________________________________________<br />
*) Veuillez rayer les mentions inutiles<br />
**) Confirmation de l'exploitant ou de son représentant avec date et signature<br />
® Droit d'auteur <strong>ATH</strong>-<strong>Heinl</strong> GmbH & CO.KG, Tous droits réservés / Sous réserve d'erreurs et de modifications techniques / version: 2021-09<br />
Fabricant du produit <strong>ATH</strong>-<strong>Heinl</strong> GmbH & CO.KG<br />
- 48 -
Contrôle visuel (personne qualifiée autorisée)<br />
Résultat du contrôle<br />
d'un contrôle/contrôle ultérieur*) ordinaire / extraordinaire<br />
L'appareil a fait l'objet d'un contrôle du fonctionnement.<br />
Ce contrôle a permis de constater aucun défaut / les défauts suivants *) :<br />
_________________________________________________________________________________<br />
_________________________________________________________________________________<br />
_________________________________________________________________________________<br />
_________________________________________________________________________________<br />
_________________________________________________________________________________<br />
Étendue du contrôle : Contrôle du fonctionnement et visuel selon les prescriptions<br />
Contrôle partiel encore à réaliser :<br />
_________________________________________________________________________________<br />
_________________________________________________________________________________<br />
Il n'y a aucune objection pour une mise en service, aucun *) contrôle ultérieur n'est nécessaire.<br />
(Lieu, date)<br />
(Signature de la personne qualifiée)<br />
Confirmation de la réception :<br />
(Nom de la personne qualifiée)<br />
(Qualification professionnelle)<br />
(Adresse postale)<br />
(Employé(e) chez)<br />
Exploitant (cachet commercial, date, signature)<br />
Défauts pris en compte **)<br />
__________________________________________________________________<br />
Défauts corrigés **) ____________________________________________________________________<br />
*) Veuillez rayer les mentions inutiles<br />
**) Confirmation de l'exploitant ou de son représentant avec date et signature<br />
® Droit d'auteur <strong>ATH</strong>-<strong>Heinl</strong> GmbH & CO.KG, Tous droits réservés / Sous réserve d'erreurs et de modifications techniques / version: 2021-09<br />
Fabricant du produit <strong>ATH</strong>-<strong>Heinl</strong> GmbH & CO.KG<br />
- 49 -
9.0 NOTICES<br />
® Droit d'auteur <strong>ATH</strong>-<strong>Heinl</strong> GmbH & CO.KG, Tous droits réservés / Sous réserve d'erreurs et de modifications techniques / version: 2021-09<br />
Fabricant du produit <strong>ATH</strong>-<strong>Heinl</strong> GmbH & CO.KG<br />
- 50 -
® Droit d'auteur <strong>ATH</strong>-<strong>Heinl</strong> GmbH & CO.KG, Tous droits réservés / Sous réserve d'erreurs et de modifications techniques / version: 2021-09<br />
Fabricant du produit <strong>ATH</strong>-<strong>Heinl</strong> GmbH & CO.KG<br />
- 51 -
www.ath-heinl.de<br />
<strong>ATH</strong>-<strong>Heinl</strong> GmbH & Co. KG<br />
Gewerbepark 9<br />
D-92278 Illschwang<br />
Germany<br />
Tel.: +49 (0)9666 18801 00<br />
Fax: +49 (0)9666 18801 01<br />
info@ath-heinl.de<br />
www.ath-heinl.de<br />
DE<br />
ES<br />
EN<br />
NL<br />
FR<br />
PL<br />
CZ<br />
SK
Instrukcja Obsługi<br />
<strong>ATH</strong>-<strong>Single</strong> <strong>Lift</strong><br />
<strong>Single</strong> <strong>Lift</strong> <strong>25M</strong><br />
numer seryjny: C282140200089<br />
<strong>ATH</strong>-<strong>Heinl</strong> GmbH & Co. KG | Gewerbepark 9<br />
D-92278 Illschwang | Germany | www.ath-heinl.de<br />
Stand: September 2021. Fehler und Irrtümer vorbehalten. Verkauf nur über <strong>ATH</strong>-Vertriebspartner.
Spis treści<br />
1.0 WPROWADZENIE ..................................................................................................................- 3 -<br />
1.1 Informacje ogólne .............................................................................................................- 3 -<br />
1.2 Opis .................................................................................................................................- 4 -<br />
1.3 Obsługa ............................................................................................................................- 6 -<br />
1.4 Dane techniczne ................................................................................................................- 9 -<br />
1.5 Zwymiarowany rysunek ....................................................................................................- 11 -<br />
2.0 INSTALACJA .......................................................................................................................- 13 -<br />
2.1 Warunki transportu i składowanie .....................................................................................- 13 -<br />
2.2 Rozpakowanie maszyny ....................................................................................................- 13 -<br />
2.3 Zakres dostawy ...............................................................................................................- 14 -<br />
2.4 Lokalizacja ......................................................................................................................- 15 -<br />
2.5 Mocowanie ......................................................................................................................- 16 -<br />
2.6 Przyłącze elektryczne .......................................................................................................- 16 -<br />
2.7 Przyłącze pneumatyczne ..................................................................................................- 16 -<br />
2.8 Przyłącze hydrauliczne .....................................................................................................- 17 -<br />
2.9 Montaż ...........................................................................................................................- 18 -<br />
2.10 Prace końcowe ..................................................................................................................- 24 -<br />
3.0 PRACA ...............................................................................................................................- 28 -<br />
3.1 Instrukcja eksploatacji .....................................................................................................- 28 -<br />
3.2 Podstawowe informacje ...................................................................................................- 29 -<br />
4.0 KONSERWACJA ...................................................................................................................- 30 -<br />
4.1 Materiały eksploatacyjne do instalacji, konserwacji i pielęgnacji ...........................................- 30 -<br />
4.2 Przepisy bezpieczeństwa dotyczące oleju ...........................................................................- 31 -<br />
4.3 Wskazówki ......................................................................................................................- 32 -<br />
4.4 Harmonogram konserwacji ...............................................................................................- 32 -<br />
4.5 Fehlersuche / Fehleranzeige und Abhilfe ............................................................................- 33 -<br />
4.6 Instrukcje dotyczące konserwacji i serwisu ........................................................................- 35 -<br />
4.7 Utylizacja ........................................................................................................................- 36 -<br />
5.0 EG-/EU-KONFORMITÄTSERKLÄRUNG / EC-/EU-DECLARATION OF CONFORMITY...................... - 37 -<br />
6.0 ZAŁĄCZNIK ........................................................................................................................- 38 -<br />
6.1 Schemat obwodu pneumatycznego ...................................................................................- 38 -<br />
6.2 Schemat obwodu elektrycznego ........................................................................................- 39 -<br />
6.3 Schemat obwodu hydraulicznego ......................................................................................- 40 -<br />
7.0 KARTA GWARANCYJNA........................................................................................................ - 41 -<br />
7.1 Zakres gwarancji produktu ...............................................................................................- 42 -<br />
8.0 DZIENNIK BADAŃ ...............................................................................................................- 43 -<br />
8.1 Protokół ustawiania i przekazania ......................................................................................- 44 -<br />
8.2 Harmonogram kontroli .....................................................................................................- 45 -<br />
8.3 Kontrola wzrokowa (upoważniona osoba z odpowiednimi kompetencjami) ............................- 46 -<br />
9.0 NOTIZEN ...........................................................................................................................- 50 -<br />
® Prawa autorskie <strong>ATH</strong>-<strong>Heinl</strong> GmbH & Co. KG, Wszelkie prawa zastrzeżone / Błędy w druku i zmiany techniczne zastrzeżone /<br />
Stan: 2021-09<br />
Producent produktu <strong>ATH</strong>-<strong>Heinl</strong> GmbH & CO.KG<br />
- 2 -
1.0 WPROWADZENIE<br />
1.1 Informacje ogólne<br />
NINIEJSZA INSTRUKCJA JEST INTEGRALNĄ CZĘŚCIĄ MASZYNY.<br />
UŻYTKOWNIK MUSI JĄ PRZECZYTAĆ ZE ZROZUMIENIEM.<br />
PRODUCENT NIE PONOSI ŻADNEJ ODPOWIEDZIALNOŚCI ZA JAKIEKOLWIEK<br />
SZKODY SPOWODOWANE NIEPRZESTRZEGANIEM NINIEJSZEJ INSTRUKCJI<br />
ANI OBOWIĄZUJĄCYCH PRZEPISÓW BEZPIECZEŃSTWA.<br />
UWAGA: Należy postępować zgodnie z instrukcjami, aby zapobiec obrażeniom lub<br />
uszkodzeniom.<br />
WSKAZÓWKA: Dostarcza więcej informacji na temat sposobu działania i wskazówek<br />
dotyczących efektywnego korzystania z urządzenia.<br />
Podczas wszystkich prac związanych z opisanym urządzeniem należy nosić odpowiednią<br />
odzież ochronną.<br />
® Prawa autorskie <strong>ATH</strong>-<strong>Heinl</strong> GmbH & Co. KG, Wszelkie prawa zastrzeżone / Błędy w druku i zmiany techniczne zastrzeżone /<br />
Stan: 2021-09<br />
Producent produktu <strong>ATH</strong>-<strong>Heinl</strong> GmbH & CO.KG<br />
- 3 -
1.2 Opis<br />
Pokrywa na górze<br />
Aby zakryć kolumnę<br />
Kolumna podnosząca<br />
Wózek podnośnikowy jest prowadzony przez ślizgające się bloki, podczas gdy kolumna porusza<br />
się w górę iw dół. Siłownik hydrauliczny i łańcuch podnoszący znajdują się również na kolumnie<br />
podnoszącej.<br />
Wózek paletowy<br />
Wózek paletowy podtrzymuje ramię (osprzęt podporowy). Jest podnoszony i opuszczany przez<br />
siłownik hydrauliczny za pomocą łańcuchów; jest prowadzony na kolumnie podnoszącej za<br />
pomocą plastikowych klocków ślizgowych.<br />
Tylne ramiona podporowe<br />
Ramiona teleskopowe, których długość można regulować.<br />
Wspornik ramion „H”<br />
® Prawa autorskie <strong>ATH</strong>-<strong>Heinl</strong> GmbH & Co. KG, Wszelkie prawa zastrzeżone / Błędy w druku i zmiany techniczne zastrzeżone /<br />
Stan: 2021-09<br />
Producent produktu <strong>ATH</strong>-<strong>Heinl</strong> GmbH & CO.KG<br />
- 4 -
Przednie ramiona podporowe<br />
Ramiona teleskopowe, których długość można regulować.<br />
Rama podstawowa<br />
Służy do stabilizacji platformy podnoszącej i zawiera przednie rolki do przesuwania platformy.<br />
Zestaw napędowy<br />
Służy do prowadzenia i pozycjonowania podnośnika. Proces może być przeprowadzany tylko na<br />
pusto i bez obciążenia.<br />
Skrzynka kontrolna<br />
Mieści się tutaj kompletny elektryczny system sterowania. Wszystkie przyciski są chronione<br />
pierścieniem, aby zapobiec przypadkowym naciśnięciem. Ponadto wszystkie ruchy zatrzymają się<br />
natychmiast po zwolnieniu przycisków.<br />
Elektromagnes<br />
Elektromagnes do zwalniania blokady bezpieczeństwa podczas procesu opuszczania.<br />
Blokada bezpieczeństwa zapobiega nieautoryzowanemu opuszczeniu w przypadku awarii.<br />
Jednostka hydrauliczna<br />
Olej hydrauliczny pompowany jest ze zbiornika do siłownika podnoszącego za pomocą<br />
elektrycznej pompy zębatej. Zawór obniżający reguluje przepływ powrotny oleju do zbiornika.<br />
® Prawa autorskie <strong>ATH</strong>-<strong>Heinl</strong> GmbH & Co. KG, Wszelkie prawa zastrzeżone / Błędy w druku i zmiany techniczne zastrzeżone /<br />
Stan: 2021-09<br />
Producent produktu <strong>ATH</strong>-<strong>Heinl</strong> GmbH & CO.KG<br />
- 5 -
1.3 Obsługa<br />
Przycisk podnoszenia<br />
podnieść windę<br />
Dolny przycisk 1<br />
aby całkowicie opuścić podnośnik<br />
(Zawór wycięcia i opuszczania są otwarte)<br />
Gniazdo samochodowe 12V DC<br />
Wbudowane gniazdo 1 x 230V<br />
Przycisk parkowania (BLOKADA)<br />
opuścić windę do zapadki<br />
(otwarty jest tylko zawór opuszczania)<br />
Lampka operacyjna pokazuje, czy winda jest<br />
w trybie gotowości<br />
Zamykany wyłącznik główny z funkcją<br />
awaryjnego zatrzymania do włączania i<br />
wyłączania windy oraz do zabezpieczenia<br />
windy przed obsługą przez osoby<br />
niepowołane.<br />
® Prawa autorskie <strong>ATH</strong>-<strong>Heinl</strong> GmbH & Co. KG, Wszelkie prawa zastrzeżone / Błędy w druku i zmiany techniczne zastrzeżone /<br />
Stan: 2021-09<br />
Producent produktu <strong>ATH</strong>-<strong>Heinl</strong> GmbH & CO.KG<br />
- 6 -
PODNIEŚĆ<br />
• Upewnij się, że podnośnik jest całkowicie opuszczony.<br />
• Użyj wózka podnośnikowego, aby przesunąć platformę do pojazdu, który ma zostać podniesiony.<br />
Upewnij się, że kolumna podnosząca znajduje się w pozycji pionowej i nie uderza w pojazd.<br />
• Ustawić ramiona podporowe pod pojazdem.<br />
• Wyreguluj ramiona tak, aby gumowe podkładki dotykały punktów podnoszenia zalecanych przez<br />
producenta pojazdu.<br />
• Włącz przełącznik zasilania.<br />
• Podnieś platformę, naciskając przycisk podnoszenia, aż ramiona dotkną spodu pojazdu.<br />
• Upewnij się, że pojazd jest zabezpieczony.<br />
• Naciskaj przycisk podnoszenia, aż osiągniesz żądaną wysokość.<br />
PARK<br />
• Naciśnij przycisk bezpieczeństwa, aby aktywować mechaniczne środki bezpieczeństwa.<br />
• Zawsze upewnij się, że środki ostrożności są na miejscu przed rozpoczęciem pracy przy pojeździe<br />
lub w jego pobliżu.<br />
ZMNIEJSZYĆ<br />
• Opuść pojazd naciskając przycisk opuszczania: podnośnik potrzebuje kilku sekund na zwolnienie<br />
blokady zabezpieczającej, a następnie rozpoczyna proces opuszczania.<br />
• Opuść platformę, naciskając przycisk opuszczania na wysokość bezpieczną.<br />
• Upewnij się, że strefa bezpieczeństwa jest wolna od ludzi i przedmiotów.<br />
• Przytrzymaj dolny przycisk, aż podnośnik zostanie całkowicie opuszczony.<br />
• Zamknąć wyłącznik zasilania na kłódkę.<br />
• Wyprowadzić podnośnik z obszaru roboczego. Uważaj, aby nie uderzyć pojazdu.<br />
® Prawa autorskie <strong>ATH</strong>-<strong>Heinl</strong> GmbH & Co. KG, Wszelkie prawa zastrzeżone / Błędy w druku i zmiany techniczne zastrzeżone /<br />
Stan: 2021-09<br />
Producent produktu <strong>ATH</strong>-<strong>Heinl</strong> GmbH & CO.KG<br />
- 7 -
Instrukcje bezpieczeństwa<br />
1. Zwróć uwagę na prawidłowy<br />
rozkład masy pojazdu<br />
2. Jakiekolwiek zmiany w windzie są<br />
niedozwolone<br />
3. Opuść strefę zagrożenia podczas<br />
opuszczania podnośnika<br />
4. Strefa zagrożenia musi być wolna<br />
podczas podnoszenia i<br />
opuszczania<br />
5. Jeśli istnieje ryzyko upadku<br />
pojazdu, natychmiast opuść strefę<br />
zagrożenia<br />
6. Unikaj silnych ruchów obrotowych<br />
w pojeździe<br />
7. Podnośnik może być obsługiwany<br />
wyłącznie przez przeszkolony<br />
personel<br />
8. Użyj punktów odbioru określonych<br />
przez producenta pojazdu i<br />
zamknij wszystkie drzwi podczas<br />
podnoszenia pojazdu<br />
9. Tylko upoważnione osoby mogą<br />
wejść do strefy zagrożenia<br />
10. W razie potrzeby użyj<br />
odpowiednich adapterów<br />
11. Podczas montażu i demontażu<br />
ciężkich przedmiotów zawsze<br />
używaj urządzenia<br />
zabezpieczającego przed<br />
przewróceniem<br />
12. Adaptery zmniejszają określoną<br />
ładowność<br />
13. Właściwa konserwacja i przeglądy<br />
są niezbędne dla bezpiecznej<br />
pracy<br />
14. Przeczytaj i zrozum instrukcję<br />
obsługi przed uruchomieniem<br />
podnośnika<br />
15. Nie pracuj na uszkodzonych<br />
podnośnikach<br />
16. Żadne przedmioty ani ludzie nie<br />
mogą być przewożone na<br />
platformie podnoszącej,<br />
ramionach nośnych lub na<br />
podnoszonym pojeździe.<br />
17. Uważaj na przeszkody podczas<br />
opuszczania<br />
18. Podnośnika nie wolno czyścić pod<br />
bieżącą wodą.<br />
® Prawa autorskie <strong>ATH</strong>-<strong>Heinl</strong> GmbH & Co. KG, Wszelkie prawa zastrzeżone / Błędy w druku i zmiany techniczne zastrzeżone /<br />
Stan: 2021-09<br />
Producent produktu <strong>ATH</strong>-<strong>Heinl</strong> GmbH & CO.KG<br />
- 8 -
1.4 Dane techniczne<br />
Rodzaj<br />
Ładowność<br />
Czas na proces<br />
podnoszenia<br />
(2000 kg)<br />
Czas na proces obniżania<br />
(2000 kg)<br />
Układ elektryczny<br />
Wysokość podnoszenia<br />
Napięcie sterujące<br />
Moc silnika<br />
Bezpiecznik górny<br />
Kabel łączący<br />
<strong>ATH</strong>-<strong>Single</strong> <strong>Lift</strong> <strong>25M</strong><br />
2,500 kg<br />
60 s<br />
60 s<br />
3/400V/50 Hz<br />
115-1870 mm<br />
DC24V<br />
1.5 KW<br />
1 C 16 A / 3 C 16 A<br />
Min. 3 x 1.5 mm² lub 5 x 2.5 mm²<br />
Klasa ochrony IP 54<br />
Presja pracy ²<br />
Zalecany olej hydrauliczny<br />
Ilość oleju<br />
Poziom głośności<br />
waga<br />
Konkretne wymagania<br />
Około 180 bar<br />
lato : HVLP-D 46 (e.g.: ENI Precis HVLP-D 46)<br />
zima : HVLP-D 32<br />
Około 6 l<br />
≤ 76 dB<br />
900 kg<br />
Min. żelbet 250mm C25<br />
Nachylenie terenu Maks. 3°<br />
® Prawa autorskie <strong>ATH</strong>-<strong>Heinl</strong> GmbH & Co. KG, Wszelkie prawa zastrzeżone / Błędy w druku i zmiany techniczne zastrzeżone /<br />
Stan: 2021-09<br />
Producent produktu <strong>ATH</strong>-<strong>Heinl</strong> GmbH & CO.KG<br />
- 9 -
Rozkład obciążenia<br />
Q<br />
Całkowita waga pojazdu<br />
P1<br />
Maks. 2/5 x Q<br />
P2<br />
Maks. 3/5 x Q<br />
Podział<br />
obciążenia<br />
2/3<br />
A Min. 1,000 mm ²<br />
® Prawa autorskie <strong>ATH</strong>-<strong>Heinl</strong> GmbH & Co. KG, Wszelkie prawa zastrzeżone / Błędy w druku i zmiany techniczne zastrzeżone /<br />
Stan: 2021-09<br />
Producent produktu <strong>ATH</strong>-<strong>Heinl</strong> GmbH & CO.KG<br />
- 10 -
1.5 Zwymiarowany rysunek<br />
® Prawa autorskie <strong>ATH</strong>-<strong>Heinl</strong> GmbH & Co. KG, Wszelkie prawa zastrzeżone / Błędy w druku i zmiany techniczne zastrzeżone /<br />
Stan: 2021-09<br />
Producent produktu <strong>ATH</strong>-<strong>Heinl</strong> GmbH & CO.KG<br />
- 11 -
® Prawa autorskie <strong>ATH</strong>-<strong>Heinl</strong> GmbH & Co. KG, Wszelkie prawa zastrzeżone / Błędy w druku i zmiany techniczne zastrzeżone /<br />
Stan: 2021-09<br />
Producent produktu <strong>ATH</strong>-<strong>Heinl</strong> GmbH & CO.KG<br />
- 12 -
2.0 INSTALACJA<br />
Maszyna musi być zainstalowana przez upoważniony personel zgodnie z instrukcjami.<br />
Instrukcja obsługi (w tym protokół) jest ważną integralną częścią<br />
maszyny ew. produktu.<br />
!!!NALEŻY GO STARANNIE PRZECHOWYWAĆ!!!<br />
Po zakończeniu instalacji, przekazaniu, ew. instruktażu, a następnie w regularnych odstępach czasu należy<br />
zlecać kontrolę produktu odpowiedniej akredytowanej firmie lub instytucji zgodnie z obowiązującymi w<br />
kraju eksploatatora postanowieniami i przepisami prawnymi.<br />
2.1 Warunki transportu i składowanie<br />
Podczas transportu i ustawiania maszyny zawsze należy używać odpowiedniego sprzętu do podnoszenia,<br />
chwytania lub urządzeń do transportu poziomego i zwracać uwagę na środek ciężkości maszyny.<br />
Maszyna może być transportowana wyłącznie w oryginalnym opakowaniu.<br />
Dane: ----<br />
Szerokość ----<br />
Długość ----<br />
Wysokość ----<br />
Temperatura składowania -10 do +50 °C<br />
2.2 Rozpakowanie maszyny<br />
Zdjąć górną pokrywę opakowania i upewnić się, czy nie doszło do uszkodzenia podczas<br />
transportu.<br />
Usunąć sworzeń zabezpieczający, aby zdjąć maszynę z palety/stojaka.<br />
Aby opuścić maszynę z palety/stojaka, użyć odpowiedniego urządzenia podnoszącego<br />
(ew. z liną pomocniczą).<br />
Materiał opakowaniowy użyty dla maszyny należy starannie przechowywać.<br />
Materiał opakowaniowy przechowywać w miejscu niedostępnym dla dzieci, ponieważ<br />
może stanowić źródło niebezpieczeństwa.<br />
® Prawa autorskie <strong>ATH</strong>-<strong>Heinl</strong> GmbH & Co. KG, Wszelkie prawa zastrzeżone / Błędy w druku i zmiany techniczne zastrzeżone /<br />
Stan: 2021-09<br />
Producent produktu <strong>ATH</strong>-<strong>Heinl</strong> GmbH & CO.KG<br />
- 13 -
2.3 Zakres dostawy<br />
Skrzynia transportowa z:<br />
- Jednostka kolumnowa wraz z akcesoriami, ramionami podnoszącymi, elektryczną jednostką sterującą<br />
zapakowaną w stalową ramę<br />
- Wskazówki dotyczące transportu i przechowywania:<br />
- Podnieś ostrożnie. Podnoś tylko za pomocą odpowiedniego i dobrze utrzymanego sprzętu.<br />
- Unikaj nieoczekiwanych wzniesień i gwałtownych ruchów. Uważaj na uderzenia, złapanie itp.<br />
- Przechowuj usunięte opakowanie w punkcie zbiórki niedostępnym dla dzieci i zwierząt do czasu jego<br />
utylizacji.<br />
- Temperatura przechowywania: -25°C ~ + 55°C<br />
® Prawa autorskie <strong>ATH</strong>-<strong>Heinl</strong> GmbH & Co. KG, Wszelkie prawa zastrzeżone / Błędy w druku i zmiany techniczne zastrzeżone /<br />
Stan: 2021-09<br />
Producent produktu <strong>ATH</strong>-<strong>Heinl</strong> GmbH & CO.KG<br />
- 14 -
2.4 Lokalizacja<br />
Maszynę należy trzymać z dala od łatwopalnych i wybuchowych materiałów, a także chronić przed<br />
promieniami słońca i intensywnym światłem. Maszynę należy również umiejscowić w dobrze wentylowanym<br />
miejscu.<br />
Maszynę należy ustawić na wystarczająco twardym podłożu, a w razie konieczności zgodnie z minimalnymi<br />
wymogami wynikającymi z danych podanych na planie fundamentów.<br />
Oprócz warunków glebowych podczas wyboru miejsca instalacji należy przestrzegać wytycznych i<br />
wskazówek dotyczących przepisów BHP, a także rozporządzenia o miejscach pracy.<br />
Podczas montażu na płytach podłogowych należy sprawdzić ich wystarczającą nośność. W przypadku<br />
montażu na sufitach podłogowych zasadniczo zaleca się konsultacje z rzeczoznawcą budowlanym w celu<br />
wykonacie ekspertyzy.<br />
Maszynę należy instalować i używać tylko w zamkniętych pomieszczeniach. Maszyna nie wykazuje<br />
odpowiednich zabezpieczeń (np. ochrona IP, konstrukcja ocynkowana itp.).<br />
Temperatura 4-40 °C<br />
Poziom morza<br />
< 1500 m<br />
Wilgotność powietrza 50% przy 40°C – 90% przy 20 °C<br />
Rysunek<br />
® Prawa autorskie <strong>ATH</strong>-<strong>Heinl</strong> GmbH & Co. KG, Wszelkie prawa zastrzeżone / Błędy w druku i zmiany techniczne zastrzeżone /<br />
Stan: 2021-09<br />
Producent produktu <strong>ATH</strong>-<strong>Heinl</strong> GmbH & CO.KG<br />
- 15 -
2.5 Mocowanie<br />
W tym przypadku należy przestrzegać ogólnych i lokalnych przepisów. Dlatego kroki te<br />
powinny być wykonywane wyłącznie przez przeszkolonego specjalistę.<br />
Maszynę należy ustawić na wystarczająco twardym podłożu, a w razie konieczności ustawić i zamocować<br />
zgodnie z minimalnymi wymogami wynikającymi z danych podanych na planie fundamentów.<br />
Maszyna musi być zamocowana w przewidzianych do tego punktach za pomocą odpowiedniego ew.<br />
przewidzianego do tego materiału mocującego.<br />
Oprócz warunków glebowych podczas wyboru miejsca instalacji należy przestrzegać wytycznych i<br />
wskazówek dotyczących przepisów BHP, a także rozporządzenia o miejscach pracy.<br />
Podczas montażu na płytach podłogowych należy sprawdzić ich wystarczającą nośność. W przypadku<br />
montażu na sufitach podłogowych zasadniczo zaleca się konsultacje z rzeczoznawcą budowlanym w celu<br />
wykonacie ekspertyzy.<br />
2.6 Przyłącze elektryczne<br />
W tym przypadku należy przestrzegać ogólnych i lokalnych przepisów. Dlatego kroki te<br />
powinny być wykonywane wyłącznie przez przeszkolonego specjalistę.<br />
Zwróć uwagę na niezbędny przewód zasilający (patrz dane techniczne).<br />
Przyłącze należy wykonać za pomocą wtyczki Schuko 230V lub wtyczki 5-fazowej 16 A CEE (częściowo<br />
dostarczone).<br />
Odchylenia napięcia powinny być 0,9 - 1,1 razy większe od nominalnego zakresu napięcia, a odchylenie<br />
częstotliwości powinno być 0,99 – 1,01 razy większe od zakresu częstotliwości.<br />
Aby to zagwarantować, należy podjąć niezbędne środki ochronne.<br />
Po zakończeniu prac należy sprawdzić kierunek obrotów silnika.<br />
2.7 Przyłącze pneumatyczne<br />
W przypadku wszystkich instalacji pneumatycznych należy zainstalować jednostkę<br />
konserwacyjną sprężonego powietrza (częściowo w zakresie dostawy) między przewodem<br />
zasilającym a instalacją.<br />
Ciśnienie powietrza w przewodzie zasilającym musi odpowiadać przynajmniej danym technicznym.<br />
Należy sprawdzić prawidłowe ustawienie jednostki konserwacyjnej sprężonego powietrza.<br />
Jednostka konserwacyjna sprężonego powietrza musi być serwisowana w regularnych odstępach czasu.<br />
Maksymalne wzgl. minimalne ciśnienie zapewnia bezproblemowe działanie bez ewentualnych uszkodzeń.<br />
® Prawa autorskie <strong>ATH</strong>-<strong>Heinl</strong> GmbH & Co. KG, Wszelkie prawa zastrzeżone / Błędy w druku i zmiany techniczne zastrzeżone /<br />
Stan: 2021-09<br />
Producent produktu <strong>ATH</strong>-<strong>Heinl</strong> GmbH & CO.KG<br />
- 16 -
2.8 Przyłącze hydrauliczne<br />
Przed uruchomieniem urządzenia ew. przed pierwszym uruchomieniem systemu z olejem,<br />
należy przestrzegać następujących zasad dotyczących optymalnego, bezproblemowego i<br />
niemalże pozbawionego powietrza działania<br />
Wszystkie przewody hydrauliczne muszą być podłączone i dokręcone zgodnie z planem hydraulicznym, ew.<br />
zgodnie z oznaczeniem węża.<br />
Wszystkie przewody hydrauliczne i siłowniki muszą być odpowietrzane zgodnie z planem hydraulicznym,<br />
ew. zgodnie z oznaczeniem węża.<br />
Aby zapewnić nienaganną i bezpieczną pracę urządzenia i zastosowanych przewodów giętkich, należy<br />
koniecznie upewnić się, że zastosowane płyny hydrauliczne są zgodne z określonymi specyfikacjami i<br />
zaleceniami producenta.<br />
Zużyte media, które nie spełniają określonych wymogów lub mają niedozwolone zanieczyszczenie,<br />
uszkadzają cały układ hydrauliczny i skracają żywotność zastosowanych układów hydraulicznych. Uwaga:<br />
(Zanieczyszczenie instalacji możliwe jest również w wyniku napełniania nowym olejem)<br />
Należy sprawdzić ew. przywrócić minimalne wymaganie i minimalną ilość oleju.<br />
® Prawa autorskie <strong>ATH</strong>-<strong>Heinl</strong> GmbH & Co. KG, Wszelkie prawa zastrzeżone / Błędy w druku i zmiany techniczne zastrzeżone /<br />
Stan: 2021-09<br />
Producent produktu <strong>ATH</strong>-<strong>Heinl</strong> GmbH & CO.KG<br />
- 17 -
2.9 Montaż<br />
Niniejszej instrukcji nie należy traktować jako instrukcji montażu. Znajdują się tu jedynie<br />
wskazówki i pomoc dla wyspecjalizowanych monterów. Podczas kolejnych prac należy<br />
nosić odpowiednią odzież i ochronę osobistą.<br />
Nieprawidłowa instalacja i ustawienia prowadzą do wykluczenia odpowiedzialności i<br />
gwarancji.<br />
Przed uruchomieniem częściowo zmontowanych maszyn wymagane jest ich sprawdzenie i zatwierdzenie<br />
przez kompetentną osobę, a także przeprowadzenie instruktażu w zakresie obsługi.<br />
Montaż maszyn musi być przeprowadzony przez wykwalifikowaną i kompetentną osobę.<br />
Montaż kolumny na podstawie<br />
Śruba M20x60<br />
Śruba M8x20<br />
Podkładka D.20 Podkładka D.12<br />
Pierścień zabezpieczający D.20<br />
Śruba M12x40<br />
Pierścień Seegera D.16 Pierścień zabezpieczający D.12<br />
Kula stalowa D.20<br />
Nakrętka M12<br />
® Prawa autorskie <strong>ATH</strong>-<strong>Heinl</strong> GmbH & Co. KG, Wszelkie prawa zastrzeżone / Błędy w druku i zmiany techniczne zastrzeżone /<br />
Stan: 2021-09<br />
Producent produktu <strong>ATH</strong>-<strong>Heinl</strong> GmbH & CO.KG<br />
- 18 -
Montaż ramion podnośnika<br />
Zamontuj ramę ramienia do wózka za pomocą dostarczonych śrub i podkładek, jak pokazano na poniższym<br />
rysunku:<br />
Śruba M16x45 Pierścień zabezpieczający D.16<br />
Podkładka D.16<br />
Przymocuj ramiona teleskopowe do ramy ramienia, jak pokazano na poniższym rysunku:<br />
® Prawa autorskie <strong>ATH</strong>-<strong>Heinl</strong> GmbH & Co. KG, Wszelkie prawa zastrzeżone / Błędy w druku i zmiany techniczne zastrzeżone /<br />
Stan: 2021-09<br />
Producent produktu <strong>ATH</strong>-<strong>Heinl</strong> GmbH & CO.KG<br />
- 19 -
Instalacja zasilacza<br />
Umieść zasilacz ze śrubami i podkładkami na wsporniku z tyłu kolumny, jak pokazano na poniższym<br />
rysunku:<br />
Pierścień ustalający D.10<br />
Podkładka D.10<br />
Śruba M10x25<br />
• Cylinder znajduje się w środkowym otworze podstawy kolumny, jak pokazano na poniższym<br />
rysunku:<br />
Cylinder hydrauliczny<br />
® Prawa autorskie <strong>ATH</strong>-<strong>Heinl</strong> GmbH & Co. KG, Wszelkie prawa zastrzeżone / Błędy w druku i zmiany techniczne zastrzeżone /<br />
Stan: 2021-09<br />
Producent produktu <strong>ATH</strong>-<strong>Heinl</strong> GmbH & CO.KG<br />
- 20 -
Zamontuj osłonę łańcucha na kole pasowym<br />
Śruba M6x14 Pierścień zabezpieczający D.14<br />
Podkładka D.14<br />
Osłona łańcucha<br />
® Prawa autorskie <strong>ATH</strong>-<strong>Heinl</strong> GmbH & Co. KG, Wszelkie prawa zastrzeżone / Błędy w druku i zmiany techniczne zastrzeżone /<br />
Stan: 2021-09<br />
Producent produktu <strong>ATH</strong>-<strong>Heinl</strong> GmbH & CO.KG<br />
- 21 -
Podłączenie linii hydraulicznej<br />
Upewnij się, że węże i złącza są czyste i wolne od zanieczyszczeń. W razie potrzeby wyczyść części.<br />
Sprawdź wszystkie części pod kątem uszkodzeń i upewnij się, że wszystkie połączenia śrubowe i złącza są<br />
w dobrym stanie.<br />
Podłącz węże do jednostki hydraulicznej i cylindra zgodnie z poniższym rysunkiem. Dokręć wszystkie<br />
połączenia, aby zapobiec wyciekom oleju.<br />
Wąż plastikowy 10x6,5x1850<br />
przepustnica<br />
Wąż hydrauliczny ¼ L730<br />
® Prawa autorskie <strong>ATH</strong>-<strong>Heinl</strong> GmbH & Co. KG, Wszelkie prawa zastrzeżone / Błędy w druku i zmiany techniczne zastrzeżone /<br />
Stan: 2021-09<br />
Producent produktu <strong>ATH</strong>-<strong>Heinl</strong> GmbH & CO.KG<br />
- 22 -
Zainstaluj panel sterowania<br />
Zainstaluj panel sterowania na kolumnie, jak pokazano na poniższym rysunku:<br />
Śruba M6x16<br />
Zespół sterowania elektrycznego<br />
Przymocuj sterowanie elektryczne do kolumny za pomocą dostarczonych śrub, jak pokazano na<br />
sąsiednim rysunku.<br />
Sprawdź tabliczkę znamionową, aby upewnić się, że silnik jest odpowiedni dla napięcia dostępnego u<br />
klienta.<br />
Wykonaj połączenia elektryczne, jak pokazano na schemacie połączeń (rozdział 6.2). Użyj do tego<br />
dostarczonych kabli i przewodów.<br />
Prace należy wykonywać zgodnie z lokalnymi przepisami. Upewnij się, że fazy są prawidłowo<br />
podłączone (kierunek obrotu) i że winda jest prawidłowo uziemiona.<br />
® Prawa autorskie <strong>ATH</strong>-<strong>Heinl</strong> GmbH & Co. KG, Wszelkie prawa zastrzeżone / Błędy w druku i zmiany techniczne zastrzeżone /<br />
Stan: 2021-09<br />
Producent produktu <strong>ATH</strong>-<strong>Heinl</strong> GmbH & CO.KG<br />
- 23 -
2.10 Prace końcowe<br />
Przed uruchomieniem skontrolować wszystkie śruby mocujące, przewody elektryczne,<br />
pneumatyczne i hydrauliczne i w razie konieczności dokręcić je. Uwaga: Częściowo należy to<br />
sprawdzać w regularnych odstępach czasu i w razie konieczności dokręcić (patrz instrukcje).<br />
Ustawienie górnego wyłącznika krańcowego<br />
Wyłącznik krańcowy<br />
Podnieś stolik na wysokość 1870 mm, aby sprawdzić prawidłową pozycję.<br />
Jeśli przełącznik nie jest ustawiony prawidłowo, poluzuj dźwignię i ustaw ją w prawidłowej pozycji, aż<br />
podnośnik osiągnie żądaną wysokość.<br />
Po regulacji dokręć śrubę.<br />
Ustawianie limitu CE<br />
Ustaw podnośnik na wysokość 200 mm<br />
Przełącznik CE<br />
Członek poprzeczny<br />
Jeśli przełącznik nie jest ustawiony prawidłowo, poluzuj dźwignię i wyreguluj ją na odpowiednią wysokość<br />
(zaleca się, aby była o 1-3 mm niższa niż poprzecznica).<br />
Po regulacji dokręć śrubę.<br />
® Prawa autorskie <strong>ATH</strong>-<strong>Heinl</strong> GmbH & Co. KG, Wszelkie prawa zastrzeżone / Błędy w druku i zmiany techniczne zastrzeżone /<br />
Stan: 2021-09<br />
Producent produktu <strong>ATH</strong>-<strong>Heinl</strong> GmbH & CO.KG<br />
- 24 -
Wlej olej i odpowietrz<br />
Używaj wyłącznie oleju hydraulicznego określonego w instrukcji obsługi. Otwórz korek wlewu oleju i wlej<br />
ok. 6 litrów oleju hydraulicznego do zbiornika. Naciśnięcie przycisku podnoszenia przesuwa platformę w<br />
górę, aż do osiągnięcia maksymalnej wysokości. Zwolnij przycisk po osiągnięciu maksymalnej wysokości, w<br />
przeciwnym razie silnik elektryczny lub pompa zębata mogą ulec uszkodzeniu. Naciśnięcie dolnego<br />
przycisku przesuwa podnośnik całkowicie w dół. Przytrzymaj przycisk w dół przez około 3 sekundy po tym,<br />
jak scena osiągnie najniższy punkt, aby umożliwić ucieczkę uwięzionego powietrza. Powtórz ten proces<br />
podnoszenia i opuszczania trzy razy.<br />
Ostrzeżenie: Próba przeprowadzenia testu bez oleju lub jeśli silnik obraca się w złym kierunku może<br />
zniszczyć pompę hydrauliczną.<br />
Sprawdź przed uruchomieniem<br />
ogólna kontrola<br />
- Upewnij się, że wszystkie kołki i śruby są prawidłowo zainstalowane.<br />
- Upewnij się, że łańcuch jest prawidłowo zainstalowany.<br />
- Upewnij się, że napięcie zasilania odpowiada napięciu podanemu na tabliczce znamionowej silnika.<br />
Upewnij się, że instalacja elektryczna jest podłączona zgodnie ze schematem elektrycznym i że jest<br />
prawidłowo uziemiona.<br />
- Upewnij się, że winda jest uziemiona.<br />
- Należy również przeprowadzić następujące kontrole:<br />
Zabezpieczenia mechaniczne dla prawidłowej instalacji<br />
- Upewnij się, że zapadka bezpieczeństwa jest prawidłowo aktywowana po naciśnięciu przycisku<br />
„Zablokuj”. Można to zwolnić, naciskając przycisk „Opuść”.<br />
- Podczas podnoszenia upewnij się, że zaczepy zabezpieczające są zatrzaśnięte. Jeśli nie, sprawdź<br />
przyczynę.<br />
Sprawdź, czy układ hydrauliczny działa prawidłowo<br />
- Sprawdź poziom oleju iw razie potrzeby uzupełnij.<br />
- Podnieś ramiona podporowe do pełnej wysokości i pozwól silnikowi pracować przez 5 sekund.<br />
- Sprawdź wszystkie połączenia węży pod kątem wycieków. W razie potrzeby dokręcić połączenia lub<br />
uszczelnić nieszczelności.<br />
- Sprawdź podnośnik na maksymalnej wysokości.<br />
- W razie potrzeby powtórzyć odpowietrzanie butli.<br />
® Prawa autorskie <strong>ATH</strong>-<strong>Heinl</strong> GmbH & Co. KG, Wszelkie prawa zastrzeżone / Błędy w druku i zmiany techniczne zastrzeżone /<br />
Stan: 2021-09<br />
Producent produktu <strong>ATH</strong>-<strong>Heinl</strong> GmbH & CO.KG<br />
- 25 -
Sprawdź, czy wyłącznik krańcowy działa prawidłowo<br />
- Sprawdź, czy górny wyłącznik krańcowy działa prawidłowo. Upewnij się, że urządzenie nie działa,<br />
gdy ramiona podporowe osiągnęły maksymalną wysokość.<br />
- Sprawdź, czy wyłącznik krańcowy wysokości bezpieczeństwa działa prawidłowo. Upewnij się, że<br />
zasilanie nie działa, gdy ramiona podporowe osiągną wysokość ok. 200 mm.<br />
Zainstaluj przednią pokrywę<br />
Taśma maskująca<br />
Podkładka D.5<br />
Śruba M5x12<br />
Śruba M3x8<br />
Płytka mocująca taśmę<br />
Nakrętka M6 motyki<br />
Śruba M6x20<br />
® Prawa autorskie <strong>ATH</strong>-<strong>Heinl</strong> GmbH & Co. KG, Wszelkie prawa zastrzeżone / Błędy w druku i zmiany techniczne zastrzeżone /<br />
Stan: 2021-09<br />
Producent produktu <strong>ATH</strong>-<strong>Heinl</strong> GmbH & CO.KG<br />
- 26 -
OBNIŻANIE AWARYJNE<br />
• W sytuacji awaryjnej podniesiony pojazd można opuścić ręcznie bez prądu w następujący sposób:<br />
• Zamknąć wyłącznik zasilania na kłódkę.<br />
• Zdjąć osłony z tyłu kolumny, aby sprawdzić, czy zadziałały mechaniczne urządzenia<br />
zabezpieczające.<br />
• Po uruchomieniu urządzeń zabezpieczających należy uruchomić awaryjną pompę ręczną (jeśli<br />
została zamówiona z podnośnikiem), aby podnieść podnośnik nieco i zwolnić urządzenia<br />
zabezpieczające.<br />
• Po usunięciu urządzeń zabezpieczających, jak pokazano na poniższym rysunku, włóż odpowiednią<br />
śrubę pod każdy hak zabezpieczający, aby ominąć urządzenie zabezpieczające.<br />
• Poluzuj śrubę awaryjnego opuszczania, obracając ją w kierunku przeciwnym do ruchu wskazówek<br />
zegara, aż pojazd zostanie całkowicie opuszczony. Prędkość opuszczania można zmniejszyć lub<br />
zwiększyć, dokręcając lub odkręcając śrubę.<br />
• Dokręcić śrubę awaryjnego opuszczania, obracając ją zgodnie z ruchem wskazówek zegara.<br />
• Wykręcić śruby pod hakami zabezpieczającymi.<br />
• Załóż tylne osłony kolumny i dokręć śruby.<br />
śruba<br />
Zapadka zabezpieczająca<br />
Awaryjny zawór spustowy<br />
Awaryjna pompa ręczna (opcja)<br />
® Prawa autorskie <strong>ATH</strong>-<strong>Heinl</strong> GmbH & Co. KG, Wszelkie prawa zastrzeżone / Błędy w druku i zmiany techniczne zastrzeżone /<br />
Stan: 2021-09<br />
Producent produktu <strong>ATH</strong>-<strong>Heinl</strong> GmbH & CO.KG<br />
- 27 -
3.0 PRACA<br />
3.1 Instrukcja eksploatacji<br />
Firma:<br />
Stanowisko pracy:<br />
Czynność:<br />
Instrukcja eksploatacji<br />
dla<br />
Pomosty podnoszące<br />
Data:<br />
Podpis:<br />
Zagrożenia dla ludzi i środowiska<br />
• Upadek z wysokości albo spadanie ładunków lub części<br />
• Punkty zgniatające i tnące podczas przesuwania pomostu podnoszącego<br />
• Niebezpieczeństwo spowodowane częściami poruszającymi się w sposób<br />
niekontrolowany<br />
Środki ochronne i zasady postępowania<br />
Przed rozpoczęciem pracy:<br />
• Pomosty podnoszące mogą być używane wyłącznie przez poinstruowane osoby w wieku<br />
co najmniej 18 lat, posiadające pisemne zlecenie do wykonywania tego rodzaju prac.<br />
• W przypadku pracy większej liczby osób należy wyznaczyć osobę nadzorującą<br />
• Kontrola sprawności działania w dni robocze<br />
• Przestrzegać instrukcji obsługi producenta<br />
Podczas eksploatacji:<br />
• Zwracać uwagę na punkty zgniatające i tnące w otoczeniu<br />
• Nie przeciążać pomostu podnoszącego powyżej dopuszczalnego maksymalnego obciążenia<br />
• Nie podnosić osób<br />
• Nie wprowadzać pomostu w wibracje, unikać kołysania.<br />
• Podczas opuszczania nie przebywać w obszarze ruchu pomostu<br />
• Zlecać regularne kontrole pomostu<br />
Zachowanie w przypadku usterek i zagrożenia<br />
• W przypadku awarii natychmiast przerwać pracę pomostu<br />
• Zabezpieczyć przed dalszym użyciem<br />
• Zgłaszać wszelkie usterki instalatorowi lub producentowi<br />
Pierwsza pomoc<br />
• Poinformować ratownika przedmedycznego (patrz plan alarmowy ew. awaryjny)<br />
• Natychmiast opatrzyć obrażenia<br />
• Dokonać wpisu w książce pierwszej pomocy<br />
• W przypadku poważnych obrażeń połączyć się z numerem alarmowym<br />
Numer alarmowy:<br />
Transport chorych:<br />
_______________<br />
_______________<br />
Utrzymanie maszyn<br />
• Utrzymaniem maszyn zajmują się tylko wyznaczone i poinstruowane osoby<br />
• W przypadku zbrojenia i konserwacji odłączyć pomost podnoszący od sieci ew.<br />
zabezpieczyć go<br />
• Po zakończeniu pracy wyczyścić pomost i sprawdzić poziom płynu w układzie<br />
hydraulicznym<br />
• Coroczna kontrola pomostu podnoszącego przeprowadzana przez wyznaczoną i<br />
poinstruowaną osobę<br />
® Prawa autorskie <strong>ATH</strong>-<strong>Heinl</strong> GmbH & Co. KG, Wszelkie prawa zastrzeżone / Błędy w druku i zmiany techniczne zastrzeżone /<br />
Stan: 2021-09<br />
Producent produktu <strong>ATH</strong>-<strong>Heinl</strong> GmbH & CO.KG<br />
- 28 -
3.2 Podstawowe informacje<br />
Maszynę mogą samodzielnie obsługiwać wyłącznie osoby, które ukończyły 18 lat, zostały poinstruowane w<br />
zakresie obsługi maszyny i wykazały przed przedsiębiorcą, że potrafią to robić.<br />
Muszą one uzyskać od przedsiębiorcy wyraźne zlecenie obsługi maszyny. Zlecenie obsługi maszyny<br />
wymaga formy pisemnej.<br />
Maszyna może być używana tylko zgodnie z jej przeznaczeniem.<br />
Podczas instalacji i eksploatacji należy zawsze używać odpowiedniego materiału.<br />
Przed montażem lub demontażem należy sprawdzić wszystkie komponenty – nie mogą one wykazywać<br />
żadnych uszkodzeń.<br />
W razie konieczności należy przestrzegać specjalnych instrukcji producenta dotyczących montażu lub<br />
demontażu dla prac związanych z pojazdami.<br />
Ważną integralna częścią gwarancji / rękojmi jest realizacja harmonogramu konserwacji. W szczególności<br />
czystość, ochrona przeciwkorozyjna, kontrola, ew. natychmiastowa naprawa uszkodzeń.<br />
Podczas pracy należy zawsze zwracać uwagę na niebezpieczeństwa. Gdy tylko wystąpią zagrożenia,<br />
natychmiast wyłączyć maszynę, wyjąć wtyczkę sieciową i odciąć dopływ powietrza.<br />
Następnie należy skontaktować się ze sprzedawcą.<br />
Wszystkie tabliczki ostrzegawcze muszą być zawsze czytelne. W przypadku uszkodzenia należy je<br />
natychmiast wymienić.<br />
Zwrócić uwagę na możliwe punkty tnące maszyny.<br />
Podczas pracy poziom hałasu może osiągnąć 85 dB (A), dlatego operator powinien<br />
zastosować odpowiednie środki ochronne.<br />
Ruchome części maszyny mogą pochwycić luźne ubrania, długie włosy lub biżuterię.<br />
® Prawa autorskie <strong>ATH</strong>-<strong>Heinl</strong> GmbH & Co. KG, Wszelkie prawa zastrzeżone / Błędy w druku i zmiany techniczne zastrzeżone /<br />
Stan: 2021-09<br />
Producent produktu <strong>ATH</strong>-<strong>Heinl</strong> GmbH & CO.KG<br />
- 29 -
4.0 KONSERWACJA<br />
Aby zapewnić bezpieczną obsługę maszyny, użytkownik jest zobowiązany do regularnego przeprowadzania<br />
konserwacji maszyny.<br />
Naprawy mogą być wykonywane wyłącznie przez autoryzowanych partnerów serwisowych lub po<br />
konsultacji z producentem przez klienta.<br />
Przed przystąpieniem do prac konserwacyjnych i naprawczych należy:<br />
- Odłączyć maszynę od WSZYSTKICH sieci zasilających<br />
- Wyciągnąć wyłącznik główny z gniazda sieciowego, w razie potrzeby wypuść<br />
sprężone powietrze z układu<br />
Podjąć odpowiednie środki w celu zabezpieczenia maszyny przed ponownym<br />
uruchomieniem<br />
Prace w obrębie elementów elektrycznych lub przewodów zasilających mogą być<br />
wykonywane wyłącznie przez osoby o odpowiednich kompetencjach lub<br />
wyspecjalizowanych elektryków.<br />
4.1 Materiały eksploatacyjne do instalacji, konserwacji i pielęgnacji<br />
Olej hydrauliczny<br />
Minimalne wymaganie ogólnie:<br />
Eni PRECIS HVLP-D nr ART.00066018<br />
Lato (15° do 45°): HVLP-D 46 (np.: Eni PRECIS HVLP-D)<br />
Zima (poniżej 10°): HVLP-D 32 (np.: Eni PRECIS HVLP-D)<br />
Minimalne wymagania dotyczące w szczególności pomostów podnoszących 2-kolumnowych:<br />
Eni PRECIS HVLP-D nr ART.00067218<br />
Lato (15° do 45°): HVLP-D 32 (np.: Eni PRECIS HVLP-D)<br />
Zima (poniżej 10°): HVLP-D 22 (np.: Eni PRECIS HVLP-D)<br />
Środek konserwujący do lin, spoin, śrub, narożników, krawędzi i pustych przestrzeni.<br />
Minimalne wymagania:<br />
Petec Spray translucent - 500 ml nr art. 73550 / Petec Saugdose translucent - 1000ml nr art. 73510<br />
Petec pistolet do konserwacji UBS nr art. 98507<br />
Smar do prowadnic ślizgowych<br />
Minimalne wymagania:<br />
LAGERMEISTER WHS 2002 Biały wysokogatunkowy smar EP. Nr art. KPF1-2K-20<br />
Smar do tulei, łańcuchów, rolek i ruchomych części<br />
Minimalne wymagania:<br />
White Ultra Luber, spray 500 ml. Nr art. 34403 – WUL – White Ultra Lube<br />
Mocowanie w podłożu<br />
Minimalne wymaganie dotyczące pomostów podnoszących:<br />
Fischer FIS A M 16 x 250 galwanicznie ocynkowane w połączeniu z wkładem reakcyjnym Fischer<br />
Superbond<br />
Minimalne wymaganie dotyczące wyważarki do samochodów osobowych i ciężarówek:<br />
Kotwa wbijana M8 x 100<br />
® Prawa autorskie <strong>ATH</strong>-<strong>Heinl</strong> GmbH & Co. KG, Wszelkie prawa zastrzeżone / Błędy w druku i zmiany techniczne zastrzeżone /<br />
Stan: 2021-09<br />
Producent produktu <strong>ATH</strong>-<strong>Heinl</strong> GmbH & CO.KG<br />
- 30 -
Minimalne wymaganie dotyczące maszyny montażowej dla ciężarówki:<br />
Kotwa wbijana M12 x 100<br />
System sprężonego powietrza<br />
Minimalne wymagania:<br />
PROMAT chemicals Specjalistyczny olej do narzędzi pneumatycznych nr art: 4000355209<br />
Czyszczenie<br />
Minimalne wymagania:<br />
Caramba Intensiv Środek do czyszczenia hamulców nie zawiera acetonu<br />
Konserwacja i ochrona metali, powierzchni lakierowanych lub malowanych proszkowo<br />
Minimalne wymagania:<br />
Petec Spray translucent - 500 ml nr. art. 73550<br />
Petec Saugdose translucent - 1000ml nr art. 73510<br />
Petec pistolet do konserwacji UBS nr art. 98507<br />
Konserwacja i ochrona metali, powierzchni lakierowanych lub malowanych proszkowo w<br />
obszarze bieżnika i części z tworzywa sztucznego<br />
Minimalne wymagania:<br />
Valet Pro Classic Dressing do zabezpieczenia plastików 500ml<br />
4.2 Przepisy bezpieczeństwa dotyczące oleju<br />
Zawsze należy przestrzegać wymogów prawnych lub rozporządzeń dotyczących postępowania ze zużytym<br />
olejem.<br />
Zużyty olej utylizować zawsze za pośrednictwem certyfikowanej firmy.<br />
W przypadku nieszczelności należy natychmiast zebrać olej za pomocą lepiszcza lub tacek, aby nie<br />
przedostał się on do gleby.<br />
Unikać kontaktu skóry z olejem.<br />
Nie dopuścić do przedostania się oparów oleju do atmosfery.<br />
Olej jest łatwopalnym medium. Zwróć uwagę na możliwe źródła niebezpieczeństwa.<br />
Nosić odporne na olej ubrania ochronne, takie jak rękawiczki, okulary ochronne, odzież ochrona itp.<br />
® Prawa autorskie <strong>ATH</strong>-<strong>Heinl</strong> GmbH & Co. KG, Wszelkie prawa zastrzeżone / Błędy w druku i zmiany techniczne zastrzeżone /<br />
Stan: 2021-09<br />
Producent produktu <strong>ATH</strong>-<strong>Heinl</strong> GmbH & CO.KG<br />
- 31 -
4.3 Wskazówki<br />
Bez względu na zanieczyszczenie, maszyna musi być konserwowana, czyszczona<br />
i przeglądana w regularnych odstępach czasu.<br />
Maszynę należy następnie poddać działaniu środka pielęgnacyjnego (np. oleju lub wosku).<br />
Nie używać detergentów szkodliwych dla skóry.<br />
JEŚLI POWYŻSZE PUNKTY NIE SĄ SPEŁNIONE, ROSZCZENIE GWARANCJI WYGASA<br />
4.4 Harmonogram konserwacji<br />
Odstęp<br />
Natychmiast<br />
Co tydzień<br />
Co miesiąc<br />
Co kwartał<br />
Co pół roku<br />
Kontrola WSZYSTKICH istotnych dla bezpieczeństwa części<br />
Czyszczenie<br />
Sprawdzić ochronę powierzchni ew. zregenerować<br />
Sprawdzić szczelność układu hydraulicznego<br />
Sprawdzić ochronę powierzchni lub ochronę przeciwkorozyjną ew.<br />
zregenerować<br />
Sprawdzić uszkodzenia w obrębie powłoki lakierniczej i komponentów ew.<br />
zregenerować<br />
Sprawdzić pod kątem uszkodzeń spowodowanych rdzą ew. usunąć<br />
Sprawdzić wnęki i obszary nie pomalowane ew. powtórnie pomalować<br />
Sprawdzić szczelność układu pneumatycznego<br />
Kontrola wytrzymałości śrub<br />
Sprawdzić luz łożyska, nasmarować je i ustawić<br />
Sprawdzić części eksploatacyjne<br />
Sprawdzić płyny (poziom, zużycie, zanieczyszczenie, jakość)<br />
Sprawdzić i nasmarować powierzchnie ślizgowe<br />
Usunąć zabrudzenia wewnątrz<br />
Oczyścić i sprawdzić komponenty elektryczne<br />
Sprawdzić silnik i przekładnię pod kątem działania i zużycia<br />
Sprawdzić spoiny i konstrukcję<br />
Przeprowadzić kontrolę wzrokową (zgodnie z harmonogramem kontroli)<br />
X<br />
X<br />
X<br />
X<br />
X<br />
X<br />
X<br />
X<br />
X<br />
X<br />
X<br />
X<br />
X<br />
X<br />
X<br />
X<br />
X<br />
X<br />
X<br />
® Prawa autorskie <strong>ATH</strong>-<strong>Heinl</strong> GmbH & Co. KG, Wszelkie prawa zastrzeżone / Błędy w druku i zmiany techniczne zastrzeżone /<br />
Stan: 2021-09<br />
Producent produktu <strong>ATH</strong>-<strong>Heinl</strong> GmbH & CO.KG<br />
- 32 -
4.5 Fehlersuche / Fehleranzeige und Abhilfe<br />
Oznaki Przyczyna Rozwiązanie<br />
Problemy z podnoszeniem<br />
Podnośnik nie podnosi się po<br />
naciśnięciu przycisku (silnik nie<br />
pracuje)<br />
Podnośnik nie podnosi się po<br />
naciśnięciu przycisku (silnik<br />
pracuje)<br />
Podnieś szarpnięcia w górę<br />
Podnośnik kontynuuje podnoszenie<br />
po zwolnieniu przycisku<br />
Uszkodzenie silnika<br />
Przepalone bezpieczniki, np. z<br />
powodu wahań napięcia<br />
Wadliwy przycisk i/lub kontakt<br />
Wadliwy wyłącznik główny i/lub<br />
styk<br />
Wadliwa lub niewystarczająca<br />
linia zasilająca<br />
Wahające się lub nieprawidłowe<br />
napięcie wejściowe<br />
Uszkodzony stycznik silnika<br />
Zadziałał przekaźnik termiczny<br />
Uszkodzony lub zablokowany<br />
wyłącznik krańcowy<br />
Brak oleju hydraulicznego<br />
Zatkany filtr oleju<br />
Utrata oleju<br />
Otwarty zawór opuszczania<br />
Zły kierunek obrotów silnika<br />
Uszkodzona pompa zębata<br />
Przekroczono dopuszczalne<br />
obciążenie<br />
Zawór ograniczający ciśnienie<br />
ustawiony zbyt nisko<br />
zbyt mała przestrzeń między<br />
szynami ślizgowymi<br />
Powietrze w układzie<br />
hydraulicznym<br />
Zanieczyszczony olej hydrauliczny<br />
Prowadnice nie są smarowane<br />
Wadliwy przycisk<br />
Sprawdź silnik, w razie potrzeby<br />
wymień<br />
Usuń przyczyny i wymień<br />
bezpieczniki<br />
Wymień przycisk i/lub kontakt<br />
Wymień wyłącznik główny i/lub<br />
styk<br />
Wymień kabel<br />
Sprawdź napięcie<br />
Wymień stycznik silnika<br />
Sprawdź przekaźnik termiczny i<br />
silnik<br />
Sprawdź wyłącznik krańcowy, w<br />
razie potrzeby wymień<br />
uzupełnij olej<br />
Wyczyść filtr oleju<br />
Wymiana uszkodzonych elementów<br />
Sprawdź i w razie potrzeby wymień<br />
zawór opuszczania<br />
Zamień fazy<br />
Sprawdź pompę i wymień ją w razie<br />
potrzeby<br />
Pracuj w ramach określonej<br />
nośności<br />
Ustaw zawór bezpieczeństwa na<br />
maksymalne obciążenie<br />
Odległość między szynami<br />
ślizgowymi a prowadnicą musi<br />
wynosić 1,5 - 2,5 mm<br />
Odpowietrz układ hydrauliczny<br />
Wymień olej hydrauliczny<br />
Nasmaruj prowadnice<br />
Wymień uszkodzony przycisk<br />
® Prawa autorskie <strong>ATH</strong>-<strong>Heinl</strong> GmbH & Co. KG, Wszelkie prawa zastrzeżone / Błędy w druku i zmiany techniczne zastrzeżone /<br />
Stan: 2021-09<br />
Producent produktu <strong>ATH</strong>-<strong>Heinl</strong> GmbH & CO.KG<br />
- 33 -
Problemy z opuszczaniem<br />
Winda sama się obniża<br />
Nacięcia bezpieczeństwa nie<br />
reagują<br />
Sprawdź połączenie kablowe<br />
Sprawdź elektromagnes, w razie<br />
potrzeby wymień<br />
Uwolnij odpoczynek, podnosząc<br />
Sprawdź przekaźnik sterujący<br />
Usuń przeszkodę<br />
Podnieś na chwilę platformę i<br />
ponownie naciśnij „W DÓŁ”<br />
Wadliwy przekaźnik sterujący<br />
Przeszkoda pod sceną<br />
Zadziałała ochrona przed<br />
Winda nie obniża się<br />
pęknięciem węża<br />
Zawór opuszczania nie jest<br />
Sprawdź połączenie elektryczne<br />
włączony<br />
Elektromagnes zaworu<br />
Wymień elektrozawór<br />
opuszczania jest uszkodzony<br />
Uszkodzony zawór opuszczania Wymieniać się<br />
Nieprawidłowo ustawiony zawór<br />
Dostosować<br />
prędkości opuszczania<br />
Jeśli usterki nie można usunąć, opuść podnośnik za pomocą śruby awaryjnego opuszczania i<br />
skontaktuj się z naszym serwisem<br />
Brudny zawór opuszczania Wyczyść zawór opuszczania<br />
Scena obniża się zbyt wolno lub<br />
Nieprawidłowo ustawiony zawór<br />
gwałtownie<br />
Dostosować<br />
prędkości opuszczania<br />
Nieszczelne połączenia<br />
Dokręcić połączenia, w razie<br />
hydrauliczne<br />
potrzeby uszczelnić<br />
Nieszczelne przewody<br />
Wymień przewód hydrauliczny<br />
hydrauliczne<br />
Inne problemy<br />
Nieszczelne siłowniki hydrauliczne<br />
Zabrudzony lub uszkodzony zawór<br />
opuszczania<br />
Nieszczelny zawór zwrotny<br />
Wymień uszczelki i wyczyść układ<br />
hydrauliczny<br />
Wyczyść lub wymień zawór<br />
opuszczania<br />
Wyczyść lub wymień<br />
Powietrze w obwodzie<br />
Podnośnik nie podnosi się i nie hydraulicznym<br />
Odpowietrz obwód hydrauliczny<br />
opuszcza synchronicznie<br />
Niewystarczające napięcie w<br />
linach synchronizujących<br />
Ustawienie napięcia lub<br />
synchronizacji<br />
Uszkodzenie lub niewystarczająca<br />
Produkt wykazuje (poważne)<br />
Odrdzewiać, oczyścić i odnowić<br />
ochrona przed korozją, w razie<br />
uszkodzenia rdzy<br />
powierzchnię.<br />
potrzeby konserwacja<br />
Zanieczyszczony filtr oleju Wyczyść filtr oleju<br />
nietypowa objętość silnika<br />
Powietrze w obwodzie<br />
hydraulicznym<br />
Odpowietrz układ hydrauliczny<br />
Zanieczyszczony olej hydrauliczny Wymień olej hydrauliczny<br />
Sprawdź kontakt na styczniku Wymień stycznik<br />
Sprawdzenie mocy wyłączników Wymień bezpieczniki<br />
Zadziałał wyłącznik automatyczny<br />
Sprawdź, czy kabel nie jest<br />
Wymień kabel<br />
uszkodzony<br />
ZAWSZE UPEWNIJ SIĘ, ŻE UŻYWASZ ORYGINALNYCH CZĘŚCI I AKCESORIÓW.<br />
® Prawa autorskie <strong>ATH</strong>-<strong>Heinl</strong> GmbH & Co. KG, Wszelkie prawa zastrzeżone / Błędy w druku i zmiany techniczne zastrzeżone /<br />
Stan: 2021-09<br />
Producent produktu <strong>ATH</strong>-<strong>Heinl</strong> GmbH & CO.KG<br />
- 34 -
4.6 Instrukcje dotyczące konserwacji i serwisu<br />
Wszystkie czynności konserwacyjne i serwisowe powinny być wykonywane co najmniej<br />
zgodnie z harmonogramem konserwacji<br />
JEDNOSTKA KONSERWACYJNA SPRĘŻONEGO<br />
POWIETRZA<br />
(Częściowo stan może być niezbędny do działania)<br />
USTAWIANIE CIŚNIENIA ROBOCZEGO:<br />
• Sprawdzić ciśnienie robocze wyświetlane na<br />
manometrze (1). Musi ono odpowiadać danym<br />
technicznym.<br />
• Ciśnienie robocze można regulować za pomocą<br />
regulatora ciśnienia (A).<br />
• Pociągnąć regulator ciśnienia w górę, aby dokonać<br />
regulacji.<br />
• Aby zwiększyć ciśnienie w maszynie, należy<br />
przekręcić pokrętło zgodnie z kierunkiem ruchu<br />
wskazówek zegara; aby je zmniejszyć, obrócić je w<br />
kierunku przeciwnym do ruchu wskazówek zegara.<br />
OLEJARKA<br />
• Sprawdzić poziom oleju w zbiorniku oleju (3).<br />
• Wyjąć zbiornik oleju.<br />
• Napełnić teraz zbiornik olejem do układu<br />
pneumatycznego o lepkości SAE20.<br />
• Sprawdzić ilość wtrysku oleju przez wziernik (4).<br />
• Z reguły śrubę należy całkowicie zamknąć w<br />
kierunku zgodnym z ruchem wskazówek zegara,<br />
a następnie ponownie otworzyć o ¼ do ½<br />
obrotu, obracając ją w kierunku przeciwnym do<br />
ruchu wskazówek zegara.<br />
4<br />
3<br />
C<br />
A 1<br />
B<br />
2<br />
SEPARATOR WODY<br />
• Sprawdzić poziom wody w separatorze (2).<br />
• Przez otwarcie zaworu (B) woda zostaje<br />
opróżniona.<br />
® Prawa autorskie <strong>ATH</strong>-<strong>Heinl</strong> GmbH & Co. KG, Wszelkie prawa zastrzeżone / Błędy w druku i zmiany techniczne zastrzeżone /<br />
Stan: 2021-09<br />
Producent produktu <strong>ATH</strong>-<strong>Heinl</strong> GmbH & CO.KG<br />
- 35 -
4.7 Utylizacja<br />
• Odłączyć dopływ powietrza i prądu.<br />
• Usunąć wszystkie niemetaliczne substancje i przechowywać je zgodnie z lokalnymi przepisami.<br />
• Usunąć olej z maszyny i przechowywać go zgodnie z lokalnymi przepisami.<br />
• Zutylizować wszystkie substancje metaliczne.<br />
Maszyna zawiera niektóre substancje, które mogą zanieczyszczać środowisko i zaszkodzić<br />
ludzkiemu organizmowi, jeśli postępuje się z nimi niewłaściwie.<br />
® Prawa autorskie <strong>ATH</strong>-<strong>Heinl</strong> GmbH & Co. KG, Wszelkie prawa zastrzeżone / Błędy w druku i zmiany techniczne zastrzeżone /<br />
Stan: 2021-09<br />
Producent produktu <strong>ATH</strong>-<strong>Heinl</strong> GmbH & CO.KG<br />
- 36 -
5.0 EG-/EU-KONFORMITÄTSERKLÄRUNG / EC-/EU-DECLARATION OF CONFORMITY<br />
gemäß Maschinenrichtlinie 2006/42/EG, Anhang II 1A, EMV-Richtlinie 2014/30/EU, Anh. IV<br />
In accordance to Machine Directive 2006/42/EG, Appendix II 1A, EMC Directive 2014/30/EU, App. IV<br />
Seriennummer<br />
Serial number<br />
Firmenbezeichnung und vollständige Anschrift des Herstellers<br />
Business name and full address of the manufacturer<br />
Name und Anschrift des Dokumentations-Bevollmächtigten<br />
Name and address of the Technical Files authorized<br />
representative<br />
<strong>ATH</strong>-<strong>Heinl</strong> GmbH &Co. KG<br />
Gewerbepark 9<br />
DE – 92278 Illschwang<br />
<strong>ATH</strong>-<strong>Heinl</strong> GmbH &Co. KG<br />
Gewerbepark 9<br />
DE – 92278 Illschwang<br />
Hiermit erklären wir, dass die nachfolgend bezeichnete Maschine in der von uns in Verkehr gebrachten Ausführung den einschlägigen,<br />
grundlegenden Sicherheits- und Gesundheitsanforderungen der EG-Richtlinie 2006/42/EG sowie den unten aufgeführten<br />
Harmonisierungsrechtsvorschriften entspricht.<br />
We herewith declare that that the machine described below, as a result have been brought on to the general market comply with the relevant<br />
fundamental Safety and Health regulations of the of Directive 2000/60/EC and the harmonized standards listed below.<br />
Typbezeichnung<br />
Model name<br />
Beschreibung der Maschine<br />
Descriptions of the machine<br />
Hebebühne für Fahrzeuge<br />
Car lift<br />
<strong>ATH</strong>-<strong>Single</strong> <strong>Lift</strong> <strong>25M</strong><br />
Der oben beschriebene Gegenstand der Erklärung erfüllt die<br />
folgenden einschlägigen Harmonisierungs-Rechtsvorschriften der<br />
Union<br />
The object of the declaration described above meets the<br />
following applicable Community harmonisation legislation<br />
Folgende harmonisierten Normen und Vorschriften wurden<br />
eingehalten<br />
The following harmonized standards and regulations are applied<br />
Prüfinstitut<br />
Institute of Quality<br />
Referenznummer der technischen Daten<br />
Reference number for the technical data<br />
Nummer des Zertifikats<br />
Number of the certificate<br />
2006/42/EG (Machine-Directive)<br />
2006/95/EC (Low voltage directive)<br />
DIN EN 1493:2010 (Machine-Directive)<br />
DIN EN 60204-1: 2006+A1:2009 (Low voltage directive)<br />
EN ISO 121 :2010 (Risk assessment and risk reduction)<br />
CCQS UK Ltd.<br />
Level 7; Westgate House; Westgate Road<br />
London – W5 1YY<br />
UNITED KINGDOM<br />
TF-C-0722-16-143-02-5A<br />
CE-C-0722-16-143-02-5A<br />
<strong>ATH</strong>-<strong>Heinl</strong> GmbH &Co. KG<br />
Gewerbepark 9<br />
DE – 92278 Illschwang<br />
Datum<br />
Hans <strong>Heinl</strong><br />
(Geschäftsführer / General Manager)<br />
DURCH UMBAUTEN UND/ODER VERÄNDERUNGEN AN DER MASCHINE WIRD DIE CE-PRÜFUNG AUSSER KRAFT GESETZT UND<br />
EINE HAFTUNG AUSGESCHLOSSEN.<br />
BY MODIFICATION AND / OR CHANGES TO THE M ACHINE, THE CE EXAM INATION IS EXCLUDED W ITHOUT LIMITATION AND A<br />
LIABILITY SHALL BE EXCLUDED.<br />
® Prawa autorskie <strong>ATH</strong>-<strong>Heinl</strong> GmbH & Co. KG, Wszelkie prawa zastrzeżone / Błędy w druku i zmiany techniczne zastrzeżone /<br />
Stan: 2021-09<br />
Producent produktu <strong>ATH</strong>-<strong>Heinl</strong> GmbH & CO.KG<br />
- 37 -
6.0 ZAŁĄCZNIK<br />
6.1 Schemat obwodu pneumatycznego<br />
® Prawa autorskie <strong>ATH</strong>-<strong>Heinl</strong> GmbH & Co. KG, Wszelkie prawa zastrzeżone / Błędy w druku i zmiany techniczne zastrzeżone /<br />
Stan: 2021-09<br />
Producent produktu <strong>ATH</strong>-<strong>Heinl</strong> GmbH & CO.KG<br />
- 38 -
6.2 Schemat obwodu elektrycznego<br />
Q1 Wyłącznik główny JD Samolot bezzałogowy<br />
KM1/KM2 Stycznik silnika H1 Lampka operacyjna<br />
S1 Przycisk podnoszenia SV Zawór opuszczania<br />
S2 Dolny przycisk M Silnik 1,5 kW / 4P<br />
S3 Przycisk blokady MR1/MR2 Przełącznik CE<br />
® Prawa autorskie <strong>ATH</strong>-<strong>Heinl</strong> GmbH & Co. KG, Wszelkie prawa zastrzeżone / Błędy w druku i zmiany techniczne zastrzeżone /<br />
Stan: 2021-09<br />
Producent produktu <strong>ATH</strong>-<strong>Heinl</strong> GmbH & CO.KG<br />
- 39 -
6.3 Schemat obwodu hydraulicznego<br />
1 Filtr oleju 6 Silnik elektryczny<br />
2 Pompa zębata 7 Zawór opuszczania<br />
3 Awaryjna pompa ręczna - opcjonalnie 8 Ogranicznik przepływu<br />
4 zawór zwrotny 9 Cylinder hydrauliczny<br />
5 Zawór nadmiarowy ciśnienia 10 Zawór startowy - dla napędu 1PH<br />
® Prawa autorskie <strong>ATH</strong>-<strong>Heinl</strong> GmbH & Co. KG, Wszelkie prawa zastrzeżone / Błędy w druku i zmiany techniczne zastrzeżone /<br />
Stan: 2021-09<br />
Producent produktu <strong>ATH</strong>-<strong>Heinl</strong> GmbH & CO.KG<br />
- 40 -
7.0 KARTA GWARANCYJNA<br />
Adres dealera:<br />
Firma (ew. numer klienta):<br />
Osoba odpowiedzialna za kontakt:<br />
Ulica:<br />
Kod pocztowy i miejscowość:<br />
Tel. i faks:<br />
E-mail:<br />
Adres klienta:<br />
Firma (ew. numer klienta):<br />
Osoba odpowiedzialna za kontakt:<br />
Ulica:<br />
Kod pocztowy i miejscowość:<br />
Tel. i faks:<br />
E-mail:<br />
Producent i model: Numer serii: Rok produkcji: Numer referencyjny:<br />
Opis komunikatu:<br />
Opis wymaganych części zapasowych:<br />
Część zapasowa: Numer katalogowy: Ilość:<br />
WAŻNA INFORMACJA:<br />
Uszkodzenia wynikające z niewłaściwej obsługi, zaniechania czynności konserwacyjnych lub uszkodzeń<br />
mechanicznych nie są objęte gwarancją. W przypadku systemów, które nie zostały zamontowane przez<br />
autoryzowanego montera firmy <strong>ATH</strong>, gwarancja jest ograniczona do zapewnienia niezbędnych części<br />
zamiennych.<br />
Szkody transportowe:<br />
Widoczna wada (widoczne szkody transportowe, uwaga na dowodzie dostawy spedytora, kopię<br />
dowodu dostawy i zdjęcia należy natychmiast wysłać do <strong>ATH</strong>-<strong>Heinl</strong>)<br />
Ukryta wada (szkodę transportową wykrywa się dopiero podczas rozpakowywania towaru, zgłoszenie<br />
szkody wraz ze zdjęciami należy wysłać w ciągu 24 godzin do <strong>ATH</strong>-<strong>Heinl</strong>)<br />
Miejscowość i data<br />
Podpis i pieczęć<br />
® Prawa autorskie <strong>ATH</strong>-<strong>Heinl</strong> GmbH & Co. KG, Wszelkie prawa zastrzeżone / Błędy w druku i zmiany techniczne zastrzeżone /<br />
Stan: 2021-09<br />
Producent produktu <strong>ATH</strong>-<strong>Heinl</strong> GmbH & CO.KG<br />
- 41 -
7.1 Zakres gwarancji produktu<br />
• Pięć lat na konstrukcję urządzenia<br />
• Zasilacze, cylindry hydrauliczne i wszystkie inne elementy eksploatacyjne, takie jak obrotnice, płyty<br />
gumowe,<br />
liny, łańcuchy, zawory, przełączniki itp. są ograniczone do jednego roku gwarancji (w przypadku pracy<br />
w normalnych warunkach/użytkowania).<br />
Gwarancja nie obejmuje:<br />
• Wad spowodowanych normalnym zużyciem, niewłaściwym użytkowaniem, uszkodzeniem podczas<br />
transportu, nieprawidłową instalacją, napięciem lub brakiem wymaganej konserwacji.<br />
• Uszkodzeń spowodowanych zaniedbaniem lub nieprzestrzeganiem informacji podanych w niniejszej<br />
instrukcji i / lub w innych instrukcjach towarzyszących.<br />
• Normalnego zużycia części wymagających serwisowania w celu zapewnienia bezpieczeństwa<br />
eksploatacji produktu.<br />
• Każdego elementu, który został uszkodzony podczas transportu.<br />
• Innych komponentów, które nie zostały wyraźnie wymienione, ale stosuje się jako ogólne materiały<br />
eksploatacyjne.<br />
• Szkód spowodowanych przez wodę np. przez deszcz, nadmierną wilgotność, środowisko korozyjne lub<br />
inne zanieczyszczenia.<br />
• Drobnych wad, które nie mają wpływu na działanie.<br />
GWARANCJA NIE JEST WAŻNA,<br />
JEŚLI KARTY GWARANCYJNEJ NIE PRZESŁANODO <strong>ATH</strong>-HEINL.<br />
Należy zwrócić uwagę na to, że gwarancje wykluczają uszkodzenia i awarie spowodowane<br />
nieprzestrzeganiem prac konserwacyjnych i nastawczych (zgodnie z instrukcją obsługi i/lub instruktażem),<br />
wadliwymi połączeniami elektrycznymi (polem wirującym, napięciem znamionowym, ochroną) lub<br />
nieprawidłowym użytkowaniem (przeciążenie, instalacja na zewnątrz, zmiany techniczne)!<br />
® Prawa autorskie <strong>ATH</strong>-<strong>Heinl</strong> GmbH & Co. KG, Wszelkie prawa zastrzeżone / Błędy w druku i zmiany techniczne zastrzeżone /<br />
Stan: 2021-09<br />
Producent produktu <strong>ATH</strong>-<strong>Heinl</strong> GmbH & CO.KG<br />
- 42 -
8.0 DZIENNIK BADAŃ<br />
Niniejszy dziennik badań (w tym protokół) jest ważną integralną częścią<br />
instrukcji obsługi ew. produktu.<br />
!!!NALEŻY GO STARANNIE PRZECHOWYWAĆ!!!<br />
Kontrola<br />
Po zakończeniu instalacji, przekazaniu, ew. instruktażu, a następnie w regularnych odstępach czasu należy<br />
zlecać kontrolę produktu odpowiedniej akredytowanej firmie lub instytucji zgodnie z obowiązującymi w<br />
kraju eksploatatora postanowieniami i przepisami prawnymi.<br />
Zmiany i rozbudowa typu produktu wymagają prowadzenia i oddania dodatkowego dziennika badań.<br />
Zakres kontroli<br />
Oprócz bezproblemowego działania należy sprawdzić wymagania dotyczące czystości i konserwacji, w<br />
szczególności istotne dla bezpieczeństwa elementy całego systemu.<br />
Dane techniczne<br />
- znajdują się w załączonej instrukcji obsługi.<br />
Tabliczka znamionowa<br />
- Należy zanotować wszystkie poniższe dane<br />
- Producent i typ zastosowanych materiałów montażowych:<br />
® Prawa autorskie <strong>ATH</strong>-<strong>Heinl</strong> GmbH & Co. KG, Wszelkie prawa zastrzeżone / Błędy w druku i zmiany techniczne zastrzeżone /<br />
Stan: 2021-09<br />
Producent produktu <strong>ATH</strong>-<strong>Heinl</strong> GmbH & CO.KG<br />
- 43 -
8.1 Protokół ustawiania i przekazania<br />
Miejsce instalacji:<br />
Firma:<br />
Ulica:<br />
Miejsce:<br />
Kraj:<br />
Urządzenie / system:<br />
Producent:<br />
Typ / model:<br />
Nr serii:<br />
Rok produkcji:<br />
Odpowiedzialny dom sprzedaży:<br />
Powyższy produkt został zmontowany, sprawdzony pod kątem działania i bezpieczeństwa oraz uruchomiony.<br />
Instalacja została przeprowadzona przez:<br />
eksploatatora<br />
kompetentną osobę<br />
Eksploatator potwierdza prawidłowe ustawienie typu produktu<br />
oraz że przeczytał i zrozumiał wszystkie informacje zawarte w tej instrukcji obsługi i protokole, a także że będzie<br />
przechowywał niniejszą dokumentację w sposób zapewniający poinstruowanym operatorom stały dostęp do niej.<br />
Eksploatator potwierdza, że po zainstalowaniu i uruchomieniu przez przeszkoloną osobę ze strony producenta lub<br />
dealera (eksperta)<br />
przeprowadzono instruktaż w zakresie działania, obsługi, wytycznych istotnych dla bezpieczeństwa i konserwacji<br />
maszyny, otrzymano dokumenty, informacje i specyfikacje maszyny, a produkt działa prawidłowo.<br />
WAŻNA INFORMACJA:<br />
JEŚLI POWYŻSZE PUNKTY NIE SĄ SPEŁNIONE, ROSZCZENIE Z TYTUŁU GWARANCJI WYGASA:<br />
Gwarancja jest ważna tylko w przypadku przestrzegania i udokumentowania prawidłowego montażu, przekazania,<br />
ew. instruktażu w zakresie obsługi maszyny, a także corocznej konserwacji przeprowadzanej przez autoryzowanego<br />
eksperta wyznaczonego przez producenta. Przerwa między 2 konserwacjami nie może przekraczać 12 miesięcy. W<br />
przypadku użytkowania niestandardowego ew. wielozmianowego lub sezonowego należy przeprowadzać kontrolę i<br />
konserwację co pół roku.<br />
Roszczenia gwarancyjne uznaje się tylko wtedy, gdy wszystkie punkty w protokole i instrukcji obsługi zostały<br />
spełnione, roszczenie zostaje zgłaszane niezwłocznie po wykryciu, a protokół ten w kontekście protokołu<br />
konserwacyjnego ew. serwisowego jest wysyłany do producenta.<br />
Dalsze szczegółowe informacje na temat gwarancji, takie jak zakres, wymagania i wytyczne, opisano w instrukcji<br />
obsługi i należy ich przestrzegać.<br />
Uszkodzenia i reklamacje spowodowane niewłaściwą obsługą, zaniechaniem czynności związanych z konserwacją i<br />
utrzymaniem, stosowaniem niewłaściwych lub nieprzewidzianych środków montażowych, eksploatacyjnych,<br />
konserwacyjnych i pielęgnacyjnych, uszkodzeniami mechanicznymi, ingerencją w urządzenie bez konsultacji lub przez<br />
nieautoryzowanych ekspertów są wyłączone z gwarancji. W przypadku systemów, które nie zostały zamontowane<br />
przez autoryzowanego eksperta, gwarancja jest ograniczona po konsultacji z producentem maks. do zapewnienia<br />
niezbędnych części zamiennych.<br />
Nazwa i pieczęć firmowa rzeczoznawcy<br />
ew. numer i nazwa VKH<br />
Data i podpis rzeczoznawcy<br />
Nazwa i pieczęć firmowa eksploatatora<br />
Data i podpis eksploatatora<br />
® Prawa autorskie <strong>ATH</strong>-<strong>Heinl</strong> GmbH & Co. KG, Wszelkie prawa zastrzeżone / Błędy w druku i zmiany techniczne zastrzeżone /<br />
Stan: 2021-09<br />
Producent produktu <strong>ATH</strong>-<strong>Heinl</strong> GmbH & CO.KG<br />
- 44 -
8.2 Harmonogram kontroli<br />
Tabliczka znamionowa<br />
Skrócona instrukcja obsługi<br />
Instrukcja obsługi<br />
Znak bezpieczeństwa<br />
Oznakowanie dla obsługi<br />
Dalsze oznaczenie<br />
Konstrukcja (deformacja, pęknięcia)<br />
Kołki mocujące i stabilność<br />
Stan / Podłoga betonowa (pęknięcia)<br />
Stan / Stan ogólny<br />
Stan / Czystość<br />
Stan / Konserwacja i uszczelnianie<br />
Stan / Ciecze<br />
Stan / Smarowanie<br />
Stan / Agregat<br />
Stan / Napęd<br />
Stan / Silnik<br />
Stan / Przekładnie<br />
Stan / Siłownik<br />
Stan / Zawór<br />
Stan / Sterowanie elektryczne<br />
Stan / Przyciski elektryczne<br />
Stan / Przełączniki elektryczne<br />
Stan / Przewody elektryczne<br />
Stan / Przewody hydrauliczne<br />
Stan / Złącza śrubowe hydrauliczne<br />
Stan / Przewody pneumatyczne<br />
Stan / Złącza śrubowe pneumatyczne<br />
Stan / Szczelność<br />
Stan / Sworznie i łożyska<br />
Stan / Części eksploatacyjne<br />
Stan / Pokrywy<br />
Stan / Funkcje pod obciążeniem<br />
Stan / Elementy istotne dla bezpieczeństwa<br />
Stan / Elektryczne urządzenie zabezpieczające<br />
Stan / Hydrauliczne urządzenie zabezpieczające<br />
Stan / Pneumatyczne urządzenie zabezpieczające<br />
Stan / Mechaniczne urządzenie zabezpieczające<br />
Stan / Funkcje pod obciążeniem<br />
Przyznano plakietkę kontrolną<br />
® Prawa autorskie <strong>ATH</strong>-<strong>Heinl</strong> GmbH & Co. KG, Wszelkie prawa zastrzeżone / Błędy w druku i zmiany techniczne zastrzeżone /<br />
Stan: 2021-09<br />
Producent produktu <strong>ATH</strong>-<strong>Heinl</strong> GmbH & CO.KG<br />
- 45 -
8.3 Kontrola wzrokowa (upoważniona osoba z odpowiednimi kompetencjami)<br />
Wynik kontroli<br />
w oparciu o regularne / nadzwyczajne kontrole / weryfikację *)<br />
Urządzenie poddano kontroli gotowości.<br />
Nie stwierdzono przy tym wad / stwierdzono następujące wady *):<br />
_________________________________________________________________________________<br />
_________________________________________________________________________________<br />
_________________________________________________________________________________<br />
_________________________________________________________________________________<br />
_________________________________________________________________________________<br />
Zakres kontroli: Kontrola sprawności działania i wizualna zgodnie z wytycznymi<br />
Nie przeprowadzona jeszcze kontrola częściowa:<br />
_________________________________________________________________________________<br />
_________________________________________________________________________________<br />
Uruchomieniu nic nie stoi na przeszkodzie *), weryfikacja nie jest *) wymagana.<br />
(Miejsce, data)<br />
(Podpis rzeczoznawczy)<br />
Potwierdzenie odbioru:<br />
(Imię i nazwisko rzeczoznawcy)<br />
(Nazwa stanowiska)<br />
(Adres)<br />
(Zatrudniony(-a) w)<br />
Eksploatator (pieczęć firmowa, data, podpis)<br />
Przyjęte do wiadomości wady **) ________________________________________________________<br />
Usunięte wady **)<br />
____________________________________________________________________<br />
*) Niepotrzebne proszę skreślić<br />
**) Potwierdzenie eksploatatora lub przedstawiciela z datą i podpisem<br />
® Prawa autorskie <strong>ATH</strong>-<strong>Heinl</strong> GmbH & Co. KG, Wszelkie prawa zastrzeżone / Błędy w druku i zmiany techniczne zastrzeżone /<br />
Stan: 2021-09<br />
Producent produktu <strong>ATH</strong>-<strong>Heinl</strong> GmbH & CO.KG<br />
- 46 -
Kontrola wzrokowa (upoważniona osoba z odpowiednimi kompetencjami)<br />
Wynik kontroli<br />
w oparciu o regularne / nadzwyczajne kontrole / weryfikację *)<br />
Urządzenie poddano kontroli gotowości.<br />
Nie stwierdzono przy tym wad / stwierdzono następujące wady *):<br />
_________________________________________________________________________________<br />
_________________________________________________________________________________<br />
_________________________________________________________________________________<br />
_________________________________________________________________________________<br />
_________________________________________________________________________________<br />
Zakres kontroli: Kontrola sprawności działania i wizualna zgodnie z wytycznymi<br />
Nie przeprowadzona jeszcze kontrola częściowa:<br />
_________________________________________________________________________________<br />
_________________________________________________________________________________<br />
Uruchomieniu nic nie stoi na przeszkodzie *), weryfikacja nie jest *) wymagana.<br />
(Miejsce, data)<br />
(Podpis rzeczoznawczy)<br />
Potwierdzenie odbioru:<br />
(Imię i nazwisko rzeczoznawcy)<br />
(Nazwa stanowiska)<br />
(Adres)<br />
(Zatrudniony(-a) w)<br />
Eksploatator (pieczęć firmowa, data, podpis)<br />
Przyjęte do wiadomości wady **) ________________________________________________________<br />
Usunięte wady **)<br />
____________________________________________________________________<br />
*) Niepotrzebne proszę skreślić<br />
**) Potwierdzenie eksploatatora lub przedstawiciela z datą i podpisem<br />
® Prawa autorskie <strong>ATH</strong>-<strong>Heinl</strong> GmbH & Co. KG, Wszelkie prawa zastrzeżone / Błędy w druku i zmiany techniczne zastrzeżone /<br />
Stan: 2021-09<br />
Producent produktu <strong>ATH</strong>-<strong>Heinl</strong> GmbH & CO.KG<br />
- 47 -
Kontrola wzrokowa (upoważniona osoba z odpowiednimi kompetencjami)<br />
Wynik kontroli<br />
w oparciu o regularne / nadzwyczajne kontrole / weryfikację *)<br />
Urządzenie poddano kontroli gotowości.<br />
Nie stwierdzono przy tym wad / stwierdzono następujące wady *):<br />
_________________________________________________________________________________<br />
_________________________________________________________________________________<br />
_________________________________________________________________________________<br />
_________________________________________________________________________________<br />
_________________________________________________________________________________<br />
Zakres kontroli: Kontrola sprawności działania i wizualna zgodnie z wytycznymi<br />
Nie przeprowadzona jeszcze kontrola częściowa:<br />
_________________________________________________________________________________<br />
_________________________________________________________________________________<br />
Uruchomieniu nic nie stoi na przeszkodzie *), weryfikacja nie jest *) wymagana.<br />
(Miejsce, data)<br />
(Podpis rzeczoznawczy)<br />
Potwierdzenie odbioru:<br />
(Imię i nazwisko rzeczoznawcy)<br />
(Nazwa stanowiska)<br />
(Adres)<br />
(Zatrudniony(-a) w)<br />
Eksploatator (pieczęć firmowa, data, podpis)<br />
Przyjęte do wiadomości wady **) ________________________________________________________<br />
Usunięte wady **)<br />
____________________________________________________________________<br />
*) Niepotrzebne proszę skreślić<br />
**) Potwierdzenie eksploatatora lub przedstawiciela z datą i podpisem<br />
® Prawa autorskie <strong>ATH</strong>-<strong>Heinl</strong> GmbH & Co. KG, Wszelkie prawa zastrzeżone / Błędy w druku i zmiany techniczne zastrzeżone /<br />
Stan: 2021-09<br />
Producent produktu <strong>ATH</strong>-<strong>Heinl</strong> GmbH & CO.KG<br />
- 48 -
Kontrola wzrokowa (upoważniona osoba z odpowiednimi kompetencjami)<br />
Wynik kontroli<br />
w oparciu o regularne / nadzwyczajne kontrole / weryfikację *)<br />
Urządzenie poddano kontroli gotowości.<br />
Nie stwierdzono przy tym wad / stwierdzono następujące wady *):<br />
_________________________________________________________________________________<br />
_________________________________________________________________________________<br />
_________________________________________________________________________________<br />
_________________________________________________________________________________<br />
_________________________________________________________________________________<br />
Zakres kontroli: Kontrola sprawności działania i wizualna zgodnie z wytycznymi<br />
Nie przeprowadzona jeszcze kontrola częściowa:<br />
_________________________________________________________________________________<br />
_________________________________________________________________________________<br />
Uruchomieniu nic nie stoi na przeszkodzie *), weryfikacja nie jest *) wymagana.<br />
(Miejsce, data)<br />
(Podpis rzeczoznawczy)<br />
Potwierdzenie odbioru:<br />
(Imię i nazwisko rzeczoznawcy)<br />
(Nazwa stanowiska)<br />
(Adres)<br />
(Zatrudniony(-a) w)<br />
Eksploatator (pieczęć firmowa, data, podpis)<br />
Przyjęte do wiadomości wady **) ________________________________________________________<br />
Usunięte wady **)<br />
____________________________________________________________________<br />
*) Niepotrzebne proszę skreślić<br />
**) Potwierdzenie eksploatatora lub przedstawiciela z datą i podpisem<br />
® Prawa autorskie <strong>ATH</strong>-<strong>Heinl</strong> GmbH & Co. KG, Wszelkie prawa zastrzeżone / Błędy w druku i zmiany techniczne zastrzeżone /<br />
Stan: 2021-09<br />
Producent produktu <strong>ATH</strong>-<strong>Heinl</strong> GmbH & CO.KG<br />
- 49 -
9.0 NOTIZEN<br />
® Prawa autorskie <strong>ATH</strong>-<strong>Heinl</strong> GmbH & Co. KG, Wszelkie prawa zastrzeżone / Błędy w druku i zmiany techniczne zastrzeżone /<br />
Stan: 2021-09<br />
Producent produktu <strong>ATH</strong>-<strong>Heinl</strong> GmbH & CO.KG<br />
- 50 -
® Prawa autorskie <strong>ATH</strong>-<strong>Heinl</strong> GmbH & Co. KG, Wszelkie prawa zastrzeżone / Błędy w druku i zmiany techniczne zastrzeżone /<br />
Stan: 2021-09<br />
Producent produktu <strong>ATH</strong>-<strong>Heinl</strong> GmbH & CO.KG<br />
- 51 -
www.ath-heinl.de<br />
<strong>ATH</strong>-<strong>Heinl</strong> GmbH & Co. KG<br />
Gewerbepark 9<br />
D-92278 Illschwang<br />
Germany<br />
Tel.: +49 (0)9666 18801 00<br />
Fax: +49 (0)9666 18801 01<br />
info@ath-heinl.de<br />
www.ath-heinl.de<br />
DE<br />
ES<br />
EN<br />
NL<br />
FR<br />
PL<br />
CZ<br />
SK