Anterior Cruciate ligament reconstruction - Galway Clinic
Anterior Cruciate ligament reconstruction - Galway Clinic
Anterior Cruciate ligament reconstruction - Galway Clinic

Create successful ePaper yourself
Turn your PDF publications into a flip-book with our unique Google optimized e-Paper software.
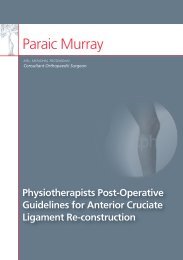
Paraic Murray<br />
MSc, MCh(Orth), FRCSEd(Orth)<br />
Consultant Orthopaedic Surgeon<br />
Patient Information<br />
Booklet Following<br />
A.C.L.<br />
<strong>Anterior</strong> <strong>Cruciate</strong><br />
<strong>ligament</strong> <strong>reconstruction</strong><br />
1
The practice Contents<br />
Consultant Orthopaedic Surgeon: Paraic Murray<br />
Secretary: Linda Moylan<br />
Physiotherapist / Research Assistant: Jane Campbell<br />
Typist: Fiona Walsh<br />
What is the ACL and what does it do? 4<br />
The Meniscus. What is it and what does it do? 5<br />
How an ACL Injury Occurs 5<br />
Diagnosing a torn ACL 6<br />
Pre-surgery preparation 6<br />
Prehabilitation exercise programme 7–10<br />
Surgery 11<br />
How do I prepare? 12<br />
What happens the day of surgery? 12<br />
After the procedure 12<br />
Physiotherapy and cryotherapy 13<br />
Wound Care 14<br />
When can I leave the hospital? 14<br />
What happens when I go home? 14<br />
When do I return to the <strong>Clinic</strong>? 14<br />
Physiotherapy/Rehabilitation 14–16<br />
Isokinetic Testing 16<br />
Notes 17<br />
References 18<br />
Useful Telephone Numbers 18
What is the <strong>Anterior</strong> <strong>Cruciate</strong> Ligament and what does it do?<br />
The knee contains four <strong>ligament</strong>s that connect the thighbone (femur) to the shinbone (tibia).<br />
These <strong>ligament</strong>s hold the knee in proper alignment and control its movement.<br />
There are two <strong>ligament</strong>s on either side of the knee the medial collateral <strong>ligament</strong> and the<br />
lateral collateral <strong>ligament</strong>. These two <strong>ligament</strong>s control side to side movement.<br />
The other two <strong>ligament</strong>s are on the inside of the knee and cross each other (hence the name<br />
cruciate) as they cross from the bottom of the thigh bone to the top of the shin.<br />
The posterior <strong>Cruciate</strong> Ligament (PCL) runs from the front of the thigh bone to the back of<br />
the shin and provides front to back stability. This <strong>ligament</strong> is rarely injured.<br />
The <strong>Anterior</strong> <strong>Cruciate</strong> Ligament (ACL) runs from the back of the thigh bone to near the<br />
front of the shin. It limits the side-to-side rotation of the lower leg and prevents the shin from<br />
moving too far forward in relation to the thighbone. It prevents the knee from buckling on<br />
twisting, sudden stopping, jumping and landing and in contact sports.<br />
Femur (thighbone)<br />
<strong>Anterior</strong> <strong>Cruciate</strong> Ligament<br />
Lateral Femoral Condyle<br />
Lateral meniscus<br />
Lateral Collateral<br />
Ligament<br />
Fibula<br />
Frontal View of Right Knee<br />
Patella (underside)<br />
Trochlea<br />
(patellofemoral groove)<br />
Posterior <strong>Cruciate</strong><br />
Ligament<br />
Medial Collateral<br />
Ligament<br />
Tibial Plateau<br />
Tibia (shinbone)<br />
Tibial Tuberosity<br />
Medial Meniscus<br />
The Meniscus. What is it and what does it do?<br />
The Meniscus or menisci (plural) is commonly referred to as cartilage. This is not to be<br />
confused with the cartilage which covers the joint surfaces called articular cartilage.<br />
There are two menisci in your knee each rest between the thigh bone and shin bone (see<br />
diagram). One meniscus is on the inside of your knee; this is the medial meniscus. The other<br />
meniscus rests on the outside of your knee, the lateral meniscus. They spread the weight of<br />
the body across the knee surface and reduce friction during movement.<br />
How an ACL Injury Occurs<br />
Typically ACL injuries occur during sports or fitness activities such as basketball, football, soccer<br />
or skiing. Most often they occur when you slow down or cut or pivot with your foot fixed on<br />
the ground. Landing awkwardly from a jump is also a common cause of ACL tears.<br />
It is not uncommon for the meniscus (cartilage) to tear along side with the ACL . If this injury<br />
includes the medial collateral <strong>ligament</strong> (MCL) it is known as the Ó Donoghues triad or ‘unhappy<br />
triad’. This is seen in sports such as football, when the player is hit on the outside of the knee.<br />
4 5
Diagnosing a torn ACL<br />
Firstly the surgeon will ask about how you injured the knee. How did it feel and did you hear or<br />
feel a ‘pop’? Did the knee swell immediately after? Were you unable to be physically active after?<br />
The surgeon will then examine your knee. The most commonly used exams are the Lachman’s<br />
test and the pivot shift test.<br />
If the movement in your knee is restricted by swelling or contraction of the muscles in the<br />
back of your upper thigh (hamstrings) the surgeon might not be able to detect an ACL tear<br />
with these tests. If this is the case a magnetic resonance image (MRI) may be requested.<br />
An MRI can also help identify if there is any damage to the cartilage (cushioning structures) or to the<br />
other <strong>ligament</strong>s. It must be noted that an MRI is not 100% accurate and is not always necessary.<br />
An arthroscopy may be necessary in some cases if there is a question about what is causing<br />
the knee problem (see also patient information booklet following knee arthroscopy)<br />
Pre-Surgery Preparation<br />
It is important prior to surgery to have reduced all swelling and have regained full range of<br />
motion. This is to decrease the likelihood of post-operative complications and the development<br />
of excess scar tissue. To this end Mr Murray will not operate until a minimum of six weeks<br />
after your injury.<br />
There are many different types of exercises which can be done prior to surgery with the aim of:<br />
• Restoring range of motion<br />
• Decreasing swelling<br />
• Decreasing pain<br />
• Increasing strength<br />
• Preparing you for your post-operative rehabilitation<br />
Using ice and elevating the leg will also help decrease the swelling. You may carry out your<br />
“pre-habilitation” even if you have torn your medial <strong>ligament</strong>.<br />
Avoid:<br />
• Jumping and landing<br />
• Sudden Stops<br />
• Twisting and turning<br />
• Contact sports<br />
Pre-habilitation Exercise Programme<br />
The following are some examples of exercises you may carry out prior to surgery. Your own<br />
Physiotherapist may suggest some additional exercises.<br />
Cycling<br />
Cycling is good for increasing range of motion and decreasing swelling.<br />
Swimming<br />
Avoid breaststroke leg kicks. A good non-weight bearing exercise.<br />
6 7
Assisted knee flexion/heel slides<br />
Lie/sit on the floor or bed. Put a sliding board or plastic bag under your heel to<br />
decrease friction. Hook a towel around your heel. Pull on the towel and slide your heel<br />
towards your buttocks. Pull it to the point of mild discomfort and tightness. Hold this<br />
point for a few seconds, then straighten your leg out. Repeat this 10 times<br />
Static Quadriceps<br />
With your leg straight out in front of you, push the back of your knee down<br />
onto the bed or floor . You will feel your quads (thigh muscles) tighten. Hold<br />
this for 10 seconds. Repeat 10-15 times<br />
Straight leg Raises<br />
Lie on the bed or floor. Bend the ‘good knee’ on the injured side tighten your quads<br />
as above. Now lift your leg 10cms off the floor. Hold 10 seconds. Do 10-15<br />
Hamstring stretches<br />
Sit with your leg elevated as shown. Keeping both your knee and your back<br />
straight. Lean forward from your hips until you feel a strong stretch. Hold 30<br />
seconds. Repeat 3 times<br />
8 9
Calf stretch<br />
Stand as shown with both feet and hips pointing forward. ‘Good leg’ to the front. Keeping<br />
your back knee straight lean forward taking your weight onto your font foot until you feel<br />
a stretch in the calf muscle on the back foot. Hold 30 seconds. Repeat 3 times.<br />
Surgery<br />
The aim of the ACL <strong>reconstruction</strong> is to give you the most stable knee possible so that you can<br />
resume your previous level of activity and minimise the risk of future knee damage.<br />
You may choose this option if:<br />
• Your knee gives way during typical daily activities<br />
• You are unable to participate in sporting activities which are important to you<br />
• In people with ACL tears whom we know will have instability<br />
The surgery is done with the aid of an arthroscope. Incision are required around the knee but<br />
the surgery doesnít require the surgeon to open the joint.<br />
10 11<br />
3<br />
2<br />
4<br />
1<br />
5 6 7<br />
1. Femur<br />
2. Patella<br />
3. Lateral meniscus<br />
8<br />
9<br />
4. <strong>Cruciate</strong> <strong>ligament</strong>s<br />
5. Fibula<br />
6. Medical meniscus<br />
In the majority of cases, the new ACL is made<br />
using a graft taken from the hamstrings tendons<br />
(the muscles which run down the back of the<br />
thigh). Their tendons cross the knee joint and<br />
attach to either side of the tibia (shin bone). The<br />
graft used in the ACL is usually taken from the<br />
semitendinousus and gracilis tendons which run<br />
along the inside part of the thigh and knee.<br />
In some cases or revision surgery (if you have had<br />
an ACL <strong>reconstruction</strong> before), the hamstring<br />
graft may be taken from the opposite knee.<br />
7. Tibia<br />
8. Collateral <strong>ligament</strong><br />
9. Irrigation cannula<br />
Hamstring Muscle Group<br />
Stab incisions are<br />
made into the knee<br />
through which<br />
a scope and an<br />
irrigation cannula<br />
will be inserted.<br />
The arthroscope<br />
allows the surgeon<br />
to view the joint in<br />
its entirety in order<br />
to make a diagnosis<br />
of its condition<br />
The other grafts which can be used for ACL<br />
<strong>reconstruction</strong> are the patella tendon or a donor<br />
tissue (allograft). Back view Side view
How do I prepare?<br />
If you are taking medication ask the surgeon if you need to stop taking it before or after<br />
surgery. Remove any nail polish and leave your valuables at home. It is important that you have<br />
an outpatient physiotherapy appointment organized for when you go home, usually about a<br />
week after the operation.<br />
You will be admitted into the hospital the night before the procedure. To avoid the risk of<br />
infection you will be asked to take 3 shower using a chlorohexidine scrub. This is a pink liquid<br />
like shower gel, which you wash thoroughly with, paying special attention to the foot and leg<br />
of the affected side. You will take two of these showers the night before your surgery. To avoid<br />
any damage to the skin do not shave your leg, this will be done in theatre. You must also be<br />
fasting from midnight the night before surgery.<br />
Certain circumstances can complicate the procedure.<br />
Before surgery, tell the surgeon if:<br />
• You are pregnant<br />
• You are allergic to any medication including anaesthetic<br />
• You have a skin infection or an infected wound near the affected joint<br />
• You or any family members have had an adverse reaction to anaesthesia in the past<br />
What happens the day of surgery?<br />
You will take the last of your 3 showers this morning. You will be taken to the operating<br />
theatre on your bed where you will meet Mr Murray. Various checks will take place including<br />
checking the correct side for operation. The anesthetist will then give you a general<br />
anesthetic which will put you asleep.<br />
After the procedure<br />
Once the surgery is complete the joint is washed out and injected with a local anaesthetic. The<br />
incisions are then closed with paper stitches, covered with white dressings and surrounded<br />
with a wool and crepe pressure bandage. A rolled up towel will be placed under your ankle to<br />
insure that you keep your knee<br />
straight while you are inactive<br />
and an x-ray will be taken. You<br />
will have an intervenous drip in<br />
your arm to give you any fluid or<br />
drugs you may require. Once you<br />
have woken from the general<br />
anaesthetic and are comfortable<br />
you will be taken back to the<br />
ward again in your bed.<br />
Physiotherapy<br />
You will be encouraged to lift your leg up straight as soon as possible after your surgery. This is<br />
to encourage the muscles at the front of your thigh to work (see diagram below).<br />
The physiotherapist may assist you to get up the evening of your operation or else the morning<br />
after. You will walk normally with the aid of elbow crutches. Please dress appropriately for<br />
Physiotherapy. Loose track suit<br />
bottoms or shorts and non-slip<br />
foot wear with heel support.<br />
The Physiotherapist will take you to<br />
the physiotherapy department where<br />
you will be instructed in exercises<br />
to carry out for the first couple of<br />
weeks after your operation.<br />
You will also be instructed how to<br />
use the stairs.<br />
Cryotherapy (ice-therapy)<br />
The Physiotherapist will put a cryocuff on your knee after your physiotherapy session. Ice is<br />
helpful to reduce pain and swelling in your knee which may slow your progress. You may use<br />
two bags of frozen peas on your knee, one on top and one underneath, when you return home.<br />
Leave the ice packs on for up to 20 minutes, three times a day for the first week and after<br />
exercises or when particularly swollen for the next few weeks thereafter.<br />
12 13
Wound Care<br />
The large wool and crepe bandage is taken off the morning after your operation. Underneath<br />
these, there are small square white dressings covering the little wounds, which are closed using<br />
a paper stitch.<br />
In order to let these wounds heal properly you will need to keep them clean<br />
and dry so you cannot soak in a bath but you may take a shower if you cut the<br />
end off a plastic bag, pull it over your knee and tape it above the knee to keep<br />
the wounds dry, acting like an umbrella over the wounds.<br />
After ten days you can let them come off in the shower or soak off, but you don’t have to<br />
remove them immediately.<br />
When can I leave the hospital?<br />
Once the Physiotherapist is satisfied that you can walk independently and safely on the elbow<br />
crutches, can climb the stairs and are able to do a straight leg raise, you will be able to go home.<br />
This is normally on the morning after the operation.<br />
What happens when I go home?<br />
You will be on the crutches for 7-10 days. You should wear your anti-DVT (deep vein thrombosis)<br />
stocking for 1-2 weeks while you are less active and on the crutches. You should attend a<br />
follow-up with your physiotherapist within the week of returning home. This may be either the<br />
physiotherapist who referred you, your local physiotherapist or the physiotherapy department in<br />
The <strong>Galway</strong> <strong>Clinic</strong>.<br />
When do I return to the clinic?<br />
Your first appointment is usually 6 weeks after surgery. This appointment is given to you either<br />
at your initial appointment or on discharge from the hospital.<br />
Physiotherapy/Rehabilitation<br />
It typically takes 6-9 months of Physiotherapy and strengthening exercises before you will be<br />
able to return to your previous level of activity. It will be a full 6 months before you may start<br />
jumping, landing or pivoting type sports (the same activities that tore the ACL initially)<br />
Your rehabilitation occurs in 5 phases. Progression from one phase to the next will depend on<br />
how well you master the goals within each stage.<br />
Phase 1<br />
The first phase of post-operative rehabilitation begins on the first day after surgery and<br />
continues until the 2nd post-operative week. It consists of controlling the pain and swelling,<br />
maintaining good quadriceps (front of thigh) control, maintaining full knee extension and<br />
normalising your walking pattern. The hamstring is quite fragile at this time so it is important<br />
that you do not carry out any hamstring/heel curls in this phase.<br />
Phase 2<br />
The second phase typically lasts from the 2nd to the 6th post-operative week. During this phase<br />
you focus on gaining full range of movement (ROM), decreasing swelling, improving your muscle<br />
strength and retraining your balance. Care needs to be taken with your hamstrings within the<br />
first 6 post-operative weeks to avoid straining them. Avoid doing leg straightening or bending<br />
exercises with a weight on the foot or ankle until you have passed the 12th post-operative week.<br />
This includes again hamstring/heel curls.<br />
Phase 3<br />
This phase lasts from approximately 7 to 12 weeks. The goals for this phase are to maintain full<br />
ROM, run in a straight line without pain or swelling, Hop without pain or swelling and increase<br />
the strength of the hamstring muscles.<br />
14 15
Phase 4<br />
The 4th phase goes from week 13 to week 16 post-op. At this point running drills may be<br />
introduced. By the end of this phase you should be able to carry out running drills at 70% speed<br />
without difficulty, jump without difficulty and hop 75% the distance of your ‘good’ knee.<br />
Phase 5<br />
The final phase of post-operative rehab lasts several months after surgery, and consists of a<br />
gradual return to full activity. You will continue with stability, balance and strength training as<br />
well as exercises specific to your sport or training. Your Physiotherapist will guide in these. You<br />
may also decide to have Isokinetic muscle strength testing.<br />
Isokinetic Testing<br />
Isokinetic testing is used for muscle strength testing.<br />
The machine measures the leg at three different<br />
resistance and speed levels, after measuring the<br />
range of motion in your knee.<br />
It compares the strength of the Quadriceps and<br />
Hamstrings on affected leg to the ‘good’ leg. It<br />
also compares the ratio of the Hamstrings to the<br />
Quadriceps on the same leg i.e. the hamstrings<br />
should be approximately 60% the strength of the<br />
Quadriceps on the same leg.<br />
It also looks at how quickly the muscles fatigue or tire depending on the speed and resistance<br />
they are working at. Isokinetic testing is available in the Physiotherapy Department of the <strong>Galway</strong><br />
<strong>Clinic</strong> or ask your Physiotherapist where the nearest isokinetic facility to you is.<br />
16 17<br />
Notes
18<br />
Useful Phone Numbers<br />
Admissions 091 785800 / 785801<br />
Freyer Unit (Orthopaedic ward) 091 785251 / 785252<br />
Hospital Switch 091 785000<br />
MRI 091 785554<br />
Physiotherapy Department 091 785450<br />
X-Ray 091 785600 / 785601<br />
References<br />
www.galwayclinic.com<br />
Multicenter Orthopaedics Outcomes Network (MOON) group<br />
www.mayoclinic.com<br />
www.eorthopod.com<br />
Authors:<br />
Jane Campbell – Chartered Physiotherapist<br />
Paraic Murray – Consultant Orthopaedic Surgeon
20<br />
Mr Murray’s suite is situated on the second floor of<br />
the <strong>Galway</strong> <strong>Clinic</strong>. On entering the main hospital<br />
entrance, the lifts to the suites are on your left.<br />
Once exiting the lifts on the second floor, suite 32<br />
is straight ahead and second suite on the right.<br />
GALWAY CLINIC<br />
<strong>Galway</strong><br />
Airport<br />
Western<br />
Motors<br />
<strong>Galway</strong><br />
<strong>Clinic</strong><br />
N6<br />
To <strong>Galway</strong> City<br />
Quality Inn<br />
Hotel<br />
N6<br />
Martin<br />
Roundabout<br />
To <strong>Galway</strong> City<br />
Coast Road<br />
To Claregalway<br />
(Sligo)<br />
N6<br />
To Oranmore<br />
To Dublin<br />
N18<br />
Suite 32 (Second Floor), Doughiska, <strong>Galway</strong><br />
Tel: (091) 720160 Fax: (091) 720161<br />
www.galwayclinic.com