ALLSPRAYPAINTED MAGAZINE #03
Latest edition of the ALLSPRAYPAINTED Magazine issue 03! As 2020 ended and 2021 rolls in, we need to remind ourselves that we have grown. Not only as individuals but as a global community. In the last 12 months, we have realized more than at any time in recent history, that we are all connected. And not just via the internet! We have overcome fear and we have conquered our biggest challenges even though the road ahead is still a hard one. And for those of us that managed to keep our chins up and our spirits high through all of it, we had time to rediscover the source of our own creativity! www.allspraypainted.com
Latest edition of the ALLSPRAYPAINTED Magazine issue 03! As 2020 ended and 2021 rolls in, we need to remind ourselves that we have grown. Not only as individuals but as a global community. In the last 12 months, we have realized more than at any time in recent history, that we are all connected. And not just via the internet! We have overcome fear and we have conquered our biggest challenges even though the road ahead is still a hard one. And for those of us that managed to keep our chins up and our spirits high through all of it, we had time to rediscover the source of our own creativity!
www.allspraypainted.com

You also want an ePaper? Increase the reach of your titles
YUMPU automatically turns print PDFs into web optimized ePapers that Google loves.
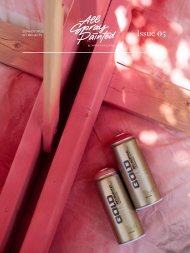
SOPHISTICATED<br />
DIY PROJECTS<br />
Issue 03<br />
by MONTANA-CANS
Magazine<br />
allspraypainted<br />
<strong>ALLSPRAYPAINTED</strong>.COM
Contents<br />
8 Editorial<br />
10<br />
Gradient<br />
Bar Stools<br />
Interior<br />
18 Marble Bathroom<br />
Embellishment<br />
Makeover<br />
26 allspraypainted<br />
meets Carolin Kaiser<br />
Interview<br />
34 Marble<br />
Entryway Bench<br />
Makeover<br />
42 Monochrome<br />
Easter Bowls<br />
Seasonal
allspraypainted Magazine<br />
50 Pink and Purple<br />
Trays<br />
Interior<br />
56<br />
10 Helpful hints to<br />
update your Workspace<br />
Workspace<br />
60 Bar Cart<br />
Makeover<br />
Upcycling<br />
66 Painted Wooden<br />
Animal Heads<br />
DIY<br />
72 Granit Bed Tray<br />
Makeover<br />
Interior<br />
78 Easy Pattern<br />
Planters<br />
Acrylic Marker
Contents<br />
84 Colorful Opaque<br />
Candle Holders<br />
Decor<br />
90<br />
Acetone<br />
Art Table Lamp<br />
Interior<br />
96 Wooden Box<br />
Sideboard<br />
104 Frosted White<br />
Christmas Decor<br />
110 Minimalist Granit<br />
Bookends<br />
116 Faded, Stone,<br />
and Sprayed<br />
Interior<br />
Seasonal<br />
DIY<br />
Interior
Find shops via<br />
montana.link/stores<br />
@allspraypainted
Editorial<br />
8<br />
Create your<br />
own world!<br />
As 2020 ended and 2021 rolls in, we need to remind ourselves that we have grown. Not only as individuals<br />
but as a global community. In the last 12 months, we have realized more than at any time in<br />
recent history, that we are all connected. And not just via the internet! We have overcome fear and<br />
we have conquered our biggest challenges even though the road ahead is still a hard one. And for<br />
those of us that managed to keep our chins up and our spirits high through all of it, we had time to<br />
rediscover the source of our own creativity!<br />
Allspraypainted is no exception to this growth. Our team, our collaborators, and our content all grew.<br />
We not only took on the coolest creative and DIY projects, as we do every year. We did it with more<br />
fun, more courage, and in our opinion, even more creativity. We worked our way through the various<br />
products in the Montana Cans aerosol range, and we created effects on artworks and objects that<br />
looked metallic, chrome, crackled, aged, and retro. We worked on glass, wood, ceramics, metals,<br />
plastics, paper, and canvas. We even made things look natural in marble and granit. All this we did<br />
together with our amazing team of creators who all deserve a big „Thank you“.<br />
In 2020, while the world was locked down, not knowing what will come, we took time and opened a<br />
treasure chest of inspiration in the form of „allspraypainted Meets“. With the realization that everyone<br />
can use a spray can, we decided it was time to take a deeper look at the movers and shakers using<br />
spray paint for their professions and their crafts. Who are the innovators, such as fine artists, visual<br />
artists, architects, interior designers, and creatives that are at the top of their game when it comes<br />
to using spray paint? How do they work, what inspires them, and what makes them tick? All fuel for<br />
the creative fire of every allspraypainted reader and supporter. In the „allspraypainted Meets“ series<br />
we will feature interviews, studio visits, films and articles that bring us closer to the creative minds<br />
that inspire us. Which in turn, brings us one step closer to our own creative spirit, while reiterating the<br />
„can-do“ attitude that lies within us all.<br />
Regardless of what is happening in the outside world, never forget as we like to put it, you can always<br />
„create your own world“. Allspraypainted will do all we can to keep bringing you projects, ideas, inspiration<br />
and support. And above all, bring color to your world. Until then, make yourself comfortable<br />
and be inspired by the pages you are about to read. The best is yet to come.
10<br />
Gradient Bar Stools<br />
TAKING A SEAT IN STYLE
Interior Gradient Bar Stools<br />
12<br />
“Here, take a seat”.. how often have you been invited to a party, gotten all dressed<br />
up, and then heard this sentence, only to think that the seats you’re being<br />
offered to sit on would make a cool DIY project? For us, this has happened often.<br />
That’s why we decided to take some action and freshen up our barstools to look<br />
like the sorts of seats you would be offered in a designer bar. Before you go fill<br />
up your cocktail glass or espresso cup, read on and learn how you too can make<br />
your own Gradient Bar Stools.
allspraypainted Magazine<br />
13<br />
BEFORE<br />
You may already have bar stools at home which means you are<br />
one step ahead. If not, that is your first goal. Source some stools<br />
that you like and that most of all suit your tastes. Giving a coat of<br />
paint to a design you don’t like to begin with will not change their<br />
designs, just make them a little less ugly. Yard sales, secondhand<br />
shops, homeware stores, and of course Ikea, have plenty<br />
of options for you to choose from so you can find what you like<br />
without needing a big budget.<br />
We had three different types of stools. We had two completely<br />
metal stools, and two different stools both with metal<br />
legs and wooden tops to sit on. We prepared them all by sanding<br />
down the wooden tops to remove the lacquer on the surface of<br />
the wood, and lightly sanding all the metal parts to create a surface<br />
ready to paint. Once the stools were all sanded and wiped<br />
free of dust, we were ready to start.<br />
For the stools with the wooden tops, we chose to mask off<br />
the wooden seats first so we could prime and paint the legs. The<br />
legs are a little trickier than the seats and this way we minimize<br />
the chance of spray dust landing on our seat tops. Using the<br />
Montana Metal PRIMER, we covered all the metal parts with a<br />
thin even coat. Not only does this give an optimal surface for<br />
our paint to stick to, but it also helps protect against the onset<br />
of rust. You can choose to apply a second coat of Metal PRIMER<br />
if you think you didn’t quite get into all the corners and angles.<br />
This process was the same for the metal stools as well,<br />
but in this case, you don’t have to mask anything off. Just apply<br />
the PRIMER evenly to coat each stool. Once dry, sand lightly again<br />
with fine sandpaper or even steel wool. Wipe down your stools<br />
with a damp cloth free of dust and you are ready to apply color.<br />
For the wooden top stools, we couldn’t go past Montana ME-<br />
TALLIC Effect Spray in the color Gold. We chose this as it had<br />
a timeless look, and the Montana METALLIC Effect Sprays are<br />
the most durable hard wearing metallic colors to use that don’t<br />
rub off. Oh, and did we mention they look awesome, too. Again,<br />
light even coat and apply again if you think the first coat didn’t<br />
get in all the corners. Leave these to dry while you’re painting<br />
the metal stools.<br />
For the metal stools, we chose Montana GOLD Line in variations<br />
of the colors Welsh, Malachite and Malachite light. But<br />
you can choose whichever colorway you desire. On one stool we<br />
applied Welsh on the upper part and Malachite Light on the legs,<br />
on the other we alternated it, fading the colors smoothly from<br />
one to the other. While these were drying, we went back to our<br />
wooden top stools and masked off our now dry legs. Using the<br />
Montana GOLD Malachite for one top and the Welsh for another,<br />
we then proceeded to paint the tops.
Interior<br />
Gradient Bar Stools<br />
14<br />
AFTER<br />
Well, it’s fair to say that our once bland bar stools are<br />
now eye-catching pieces of usable art. Or at the very<br />
least DIY designer furniture. The colors look great<br />
and using Malachite, Malachite Light and Welsh meant<br />
that we could tie in all the Gradient Bar Stools<br />
into the appearance of one collection as opposed to<br />
it looking like it was scratched together.<br />
The GOLD Line colors on the stools with metallic<br />
legs added a regal touch. The fact that we shook<br />
all the cans for 2-3 minutes before use meant that<br />
the brightness of the color and the finish of the application<br />
is beautiful. If you wanted to take this to the<br />
next level, you could also consider applying a coat of<br />
Montana VARNISH Spray once all the paint had dried<br />
overnight. This could enable you to tailor the finish to<br />
Gloss or Semi-Gloss if you wanted to. But if you are<br />
happy as they are, then you’re done.<br />
The Gradient Bar Stool project is not difficult<br />
but can vary in complications depending on<br />
the stools you choose. For the simplest route, find<br />
stools that are either all metal or all wood with simple<br />
designs. Wooden stools would not need metal priming<br />
and could be painted without needing to mask<br />
anything off. However, as you can see, the effort<br />
does pay off if you have a combination of wood and<br />
metal stools.<br />
Your working time will vary between 30 mins<br />
to an hour depending on the amount of sanding required<br />
and how intricate your spray work needs to<br />
be. Allow enough time to dry between each step so<br />
each coat of paint has a chance to settle. And don’t<br />
forget you can’t really do anything wrong. If you are<br />
not happy with your applied coats or colors, let them<br />
dry, give them a light sand and try another. You can<br />
do it! Have fun and Happy Crafting!
Allspraypainted Lookbook 15
Interior Gradient Bar Stools<br />
16
Allspraypainted Lookbook 17
18<br />
Marble Bathroom<br />
Embellishment<br />
KEEP IT SIMPLE, MAKE IT BEAUTIFUL
Makeover Marble Bathroom Embellishment<br />
20<br />
What is embellishing really? If we look at the<br />
dictionary, we will probably get an answer like;<br />
“Embellish: to beautify by or as if by ornamentation;<br />
ornament; adorn”. But when it comes<br />
to being creative and wanting to refresh your<br />
bathroom, how can you embellish it yourself?<br />
You have come to the right place as we have a<br />
few simple pointers of how you can do a little<br />
Marble Bathroom Embellishment, too!
allspraypainted Magazine<br />
KEEP IT SIMPLE<br />
The keywords as suggested above is to keep it simple. Before<br />
even tackling the idea of embellishing your bathroom or its contents,<br />
keep the items in it simple. Fewer colors and no excess of<br />
furniture is the way to go so that your creative little DIY accents<br />
can really shine. And of course, be noticed.<br />
COLORFUL ACCENTS<br />
In our bathroom, the basis of everything is black and white. It’s<br />
simple, timeless, and easy to maintain. Once you have managed<br />
to declutter the color and simplify the colors in our bathroom,<br />
then you only need to add, subtract, or change some color accents<br />
whenever you feel like a fresh look. For this project, we<br />
chose to work with two pink Montana GOLD tones and two green<br />
tones (Mortadella – Dusty Pink and Manila – Manila Dark). Picking<br />
everyday objects like soap dispensers, tissue box covers,<br />
or cups is an easy place to start. Ours were all black to start with<br />
so we decided not to completely cover the whole object with any<br />
one color. Instead, we wanted to add a touch of color to portions<br />
of the objects. Always leaving enough black to tie together<br />
all the objects with the base bathroom color. Should you have<br />
objects of all different colors that you want to simplify, choose<br />
black or another color as your base color and spray all your items<br />
one color first. Then only apply color to portions of the objects.<br />
ADDING SPECIAL EFFECTS<br />
Just like in the movies, adding a special effect can highlight<br />
a detail that otherwise could be overlooked. And besides, we<br />
trying to embellish, aren’t we? We chose the Montana MARBLE<br />
Spray to make it happen. Not just because we love it, but it actually<br />
enables you to add a special ‘something’, without covering<br />
all the color underneath it. And in our case, this helps tie all the<br />
black-based bathroom objects together. Again, masking off the<br />
areas you don’t want to be colored, apply the MARBLE Effect<br />
Spray at 20+ cm away from your objects so that the spray lands<br />
organically on it. We wanted to keep the black and white theme<br />
so it was obvious that we should use MARBLE in the color white<br />
all the way.<br />
MONOCHROME BASKETS AND OBJECTS<br />
The beauty of bathroom baskets and objects is that they are not<br />
expensive. And the less expensive they are, the more likely it is<br />
that they are made of natural material like jute, wood, or cane.<br />
Montana GOLD sprays perfectly onto natural materials so changing<br />
the colors of such items is easy. Not forgetting you don’t<br />
need to buy new baskets and objects each season rather just<br />
paint them a new color. We chose to go with the colors we already<br />
used previously to keep it monochrome and most importantly,<br />
keep the Marble Bathroom Embellishment simple.
Makeover<br />
Marble Bathroom Embellishment<br />
22<br />
MOTHER NATURE<br />
It doesn’t matter how modern or minimal your bathroom is, a little bit of<br />
mother nature in the form of plants or twigs is always a good thing. And if<br />
you choose your plants wisely, you can not only find colors that compliment<br />
your decor, but also have plants that benefit from the moisture conditions<br />
in a bathroom.<br />
Not to mention you will benefit in your daily space by having more<br />
clean oxygen and better energy. Plants and foliage can also be seasonal<br />
thus changing the ambiance of your bathroom and helping you get into the<br />
mood of whatever season you’re experiencing at the time.<br />
A couple of small tips to remember! If you are going to paint your objects<br />
one color before you start, use a Montana GOLD color as it is compatible<br />
with the following spray and make sure the objects you are painting are<br />
clean and dry. Allow your paint to dry 24+ hours before applying any further<br />
colors or Effect Sprays.<br />
Also, don’t forget masking tape can be your best friend. To protect<br />
the areas, you don’t want to spray on, apply it over those surfaces ensuring<br />
there is no leftover surface of your object exposed. Rather than just stick it<br />
on, try attaching it to your clothing once or twice (sweater or pants) to make<br />
it less sticky. This will ensure that it will remove easily when you want to take<br />
it off, without tearing any paint you applied under it.<br />
Whether you’re a DIY pro or a beginner, this project is possible for<br />
anyone. Start with what looks like the easy actions and build them up as<br />
you get more confident. Even just simplifying the paintable objects in your<br />
bathroom to one color could make a world of difference to the color chaos<br />
you may be used to now. But above all, have fun with it. Happy Crafting!
Allspraypainted Lookbook 23
Makeover<br />
Marble Bathroom Embellishment<br />
24
allspraypainted Magazine<br />
25
26<br />
allspraypainted<br />
meets Carolin Kaiser<br />
HANDS ON, OR PLUGGED IN
allspraypainted meets Carolin Kaiser<br />
28<br />
The world has reached a point where we could almost see ourselves as at the<br />
ceiling of technical development. Cars that drive themselves, machines that keep<br />
us alive, satellites helping us from space, and computers in our pockets that often<br />
get more attention than our friends and loved ones do. Our lust for progress<br />
and continual desire to out-do ourselves with technology has created such an<br />
immense speed at which society moves, that only a global virus could manage to<br />
slow us down.<br />
But, within the hectic and the turmoil, we are also given a chance to realize our<br />
true potential. And although a fast electronic society may seem scary to some, it<br />
is a sign that we may also be doing something right. After all, this would not be<br />
possible unless there were creative thinkers out there making things happen.<br />
At allspraypainted our „thing“ is connecting with creators. People who inspire us<br />
and make creative things happen that brighten our world. One of those people is<br />
no other than Carolin Kaiser from Mannheim - Germany. As you may have seen<br />
in a recent video we featured, Carolin is a unique artist, designer, and creator.<br />
Unique not only as she makes great art and design, but she is one of those lucky<br />
people who have managed to find a healthy balance between the digital world<br />
(and all its possibilities), and the manual world of creating with her own hands,<br />
which she feels most comfortable with. The whole scenario was so inspiring, we<br />
thought we would have a chat with her so you too, could learn how Caro, as we<br />
know her, has created a world that is uniquely hers. This is what she had to say:
allspraypainted Magazine<br />
29<br />
<strong>ALLSPRAYPAINTED</strong><br />
How do you see the connection between inspiration<br />
and the end product?<br />
CARO<br />
Since I use different sources of inspiration, the paths<br />
to the final product are also very different. When I<br />
let music drive me, it is more a feeling or a scene<br />
in my head that I want to transport into my artwork.<br />
If I get inspired by architecture, nature, or other artists<br />
and designers, it is often only single fragments<br />
or aspects of what I see that captivate me. I collect<br />
them all in my sketchbook so I can fall back on them if<br />
or when necessary, and then create my very own arrangements.<br />
Sometimes it is the first draft that is the<br />
winner. Sometimes I pick shapes that I play around<br />
with and mix them up repeatedly in my sketches until<br />
they find their place in the right composition.<br />
<strong>ALLSPRAYPAINTED</strong><br />
What does your working process look like?<br />
CARO<br />
Very intuitive. Thematic or preconceived concepts<br />
limit me. That‘s why I usually don‘t try to put a frame<br />
around my work, but let my ideas bubble up and then<br />
scribble everything on paper. Sometimes a rough<br />
theme emerges which I then develop further. After<br />
that, I work out the best ideas. Mostly I find the first<br />
drafts the best because they are clueless and spontaneous.<br />
<strong>ALLSPRAYPAINTED</strong><br />
What role does color play in your designs? What is<br />
your favorite color from the Montana palette?<br />
CARO<br />
Colors and their contrasts are very important to me.<br />
For me, this is what really brings shapes to life. Colors<br />
also help me to create certain positive moods.<br />
For example, if I use an untypical color for my motifs,<br />
I can lead the viewer into a different, or surreal<br />
world. My favorite color at the moment is definitely<br />
the Montana Black color Mescaline. A wonderfully<br />
rich and bright green. I am impressed by the calming,<br />
and at the same time bright, positive, and fresh mood<br />
it creates. It‘s like falling softly into a huge field of<br />
tall, lush green grass on a warm sunny day. You can<br />
literally feel every single blade of grass and the sun‘s<br />
rays.
allspraypainted meets<br />
Carolin Kaiser<br />
30<br />
Carolin in her studio
allspraypainted Magazine<br />
Some of the artworks Carolin exhibited<br />
at an Montana Cans event at the beginning<br />
of the year.<br />
<strong>ALLSPRAYPAINTED</strong><br />
How do you develop yourself and your style? Do you<br />
have rituals or routines that you follow?<br />
CARO<br />
I usually make myself comfortable in the evening,<br />
put on music, take my sketchbook, and just let my<br />
mind creatively drift. This routine helps me keep my<br />
focus. Of course, I don‘t come up with super-duper<br />
ideas every night, but I develop my own, constantly<br />
growing repertoire of motifs, forms, and ideas which<br />
I can then refer back to and develop further until it<br />
feels right and finished. Through this growing treasure<br />
of forms and ideas, my style also unfolds further<br />
and further. It is like a foreign language of forms<br />
and colors that you learn intuitively. In my opinion,<br />
this learning process is inexhaustible and grows and<br />
changes with every sketch.<br />
<strong>ALLSPRAYPAINTED</strong><br />
You work predominantly analog (hands-on) in the<br />
studio. What do you particularly like about working<br />
this way? How does the production of an artwork<br />
step by step, normally look like for you?<br />
CARO<br />
Firstly, I usually bring my analog sketches into digital<br />
form. It‘s a bit repetitive, but on the computer, you<br />
can work cleaner, and more accurately, and test various<br />
color combinations. I also need the shapes as<br />
vectors so that I can reproduce them, either by myself<br />
with a saw, a CNC cutter, or to print templates.<br />
Then I take it to the studio, where depending on the<br />
material, it first must be sanded and primed properly.<br />
A cleanly prepared surface is essential. And then the<br />
fun part begins, the spraying with paint. When everything<br />
is dry, the installing is done.<br />
<strong>ALLSPRAYPAINTED</strong><br />
How did you develop your style, and to working with<br />
the current tools that you work with? How long have<br />
you been working this way?<br />
CARO<br />
Actually, only since last year. Before that, I worked a<br />
lot with paper in the form of collage, or with Montana<br />
ACRYLIC‘s on paper in small formats. As my formats<br />
grew larger, I switched to wood as a base. Spray<br />
paints are perfect for painting them.
allspraypainted meets<br />
Carolin Kaiser<br />
34<br />
<strong>ALLSPRAYPAINTED</strong><br />
What would your next big project ideally look like? Do<br />
you already have any plans?<br />
CARO<br />
Yes, at the moment, I am working on a more extensive<br />
project. I‘m trying to extend my motifs from 2D and<br />
bring them more into the space of a room. To become<br />
more three-dimensional. Lately, I have been testing<br />
many different materials and expanding my „creative<br />
vocabulary“. In the current phase, I will evaluate<br />
these new findings and then decide which technique<br />
I want to explore deeper. However, the objects are<br />
hand-sized, and not so big. It would be tempting to<br />
design a large room and to dissolve the boundaries<br />
between my artwork and its confines.<br />
We look forward to seeing where<br />
Carolin's ideas develop. And learning<br />
a thing or two for ourselves along<br />
the way.<br />
Watch the video via<br />
montana.link/caro<br />
@allspraypainted
01<br />
Finished spray painted poster wall Carolin worked<br />
on when we came to visit her in the studio.
36<br />
Marble Entryway<br />
Bench<br />
WOOD AND COLOR COMPLEMENT EACH OTHER
Makeover<br />
Marble Entryway Bench 38<br />
A lot of homes have benches of some sort. Some classic sitting<br />
benches, kitchen benches, and entryway benches can often be<br />
the first thing that greets you. Benches and in this case entryway<br />
benches can become a focal point in any room they are in.<br />
Dressings are often not very helpful on an entryway bench.<br />
You would regularly slide off each time you want to sit on it, the<br />
cat would keep trying to pull it off, and what about those dirty<br />
footmarks that aren’t supposed to be there as well? We have just<br />
the solution for your wooden bench that just so happens to minimize<br />
the hassles while maximizing the coolness in your home.<br />
And best of all it gave us a chance to try out the new Montana<br />
MARBLE color, Pastel Green. Sound inviting? Then read on to get<br />
inspired for your very own Marble Entryway Bench.
allspraypainted Magazine
Interior Marble Entryway Bench<br />
40
allspraypainted Magazine<br />
41<br />
HOW IT WAS DONE<br />
The focus of this project was to give our somewhat tired wooden<br />
entryway bench, a new lease on life. Our bench happens to be a<br />
very simple, sleek, and timeless design. This made it easy for us<br />
to imagine the work that we were going to do on it. If you don’t<br />
already have an entryway bench or coffee table but want one<br />
for this project, remember to visit your local second-hand store,<br />
yard sale, or check out the next local hard rubbish day before<br />
you go out and buy a brand new one.<br />
As with every project, make sure your wooden surfaces<br />
are clean, dry, dust, and oil-free. The shape of our bench made it<br />
easy to decide that we were going to focus on its top and a small<br />
portion of the legs to highlight the beautiful wood in between.<br />
Your bench or coffee table may invite you to focus on other parts<br />
of it. As long as the surfaces you are painting, have been sanded<br />
and cleaned before adding color.<br />
The benchtop was the largest surface we were working<br />
on which is why we started there. By painting it first, we would<br />
easily be able to cover the legs with masking tape and spray<br />
unhindered. Starting with the Montana Universal PRIMER, we<br />
applied 2 even coats to the top which sealed and prepared it for<br />
the flawless application of the Montana GOLD color, Bone. The<br />
following day we applied the Bone in two even coats. The first<br />
appeared to have covered sufficiently already, but we figured a<br />
second coat can’t hurt. Again, the bench was left overnight to<br />
dry and completely cure. This brought us to the moment we had<br />
been waiting for, getting a chance to play with the new Montana<br />
MARBLE color, Pastel Green.<br />
We wanted an organic marble effect. So, we applied the<br />
paint slightly from above the top of the bench. The higher above<br />
the object you apply it, the more time the little strands of paint<br />
have to separate in the air and landing on the surface as if it was<br />
really marble. Apply as desired with as much or as little texture<br />
as you want. Again, we left the bench to dry overnight before we<br />
put on the final touch in the form of the Montana VARNISH in the<br />
Semi-Gloss finish.<br />
Apart from adding a little shine to the benches surface, if<br />
gave is some more protection against scratches and dents, as<br />
well as making the surface even more durable and easy to clean.<br />
And it looked good too. Having the Pastel Green MARBLE over<br />
the Montana GOLD color Bone was a great color combination.<br />
You may choose to do it differently remembering there are many<br />
colors to choose from in the Montana MARBLE and GOLD ranges.<br />
Just remember once your gloves and mask are on to shake<br />
each can very well for 2-3 minutes before use, and to remove the<br />
little black safety ring from under the nozzle.<br />
The final step was the bench‘s legs. Because the solid timber<br />
of our marble entryway bench was so nice, we wanted to<br />
highlight this against some color. And to tie in the use of the new<br />
MARBLE Pastel Green color, we chose to use the Montana GOLD<br />
color, Malachite Light which was slightly bolder than the Pastel<br />
Green. With most of the legs being completely masked with masking<br />
tape, we left equal distance below it on each leg to spray.<br />
First, we applied the Montana Universal PRIMER to the presanded<br />
legs, and then once dry we added two coats of Malachite<br />
Light. Ideally, overnight drying time is left between<br />
the application of each color. However, if you wanted to save<br />
time, you could work on painting the legs in between applying<br />
coats of color to the benchtop. You just need to make sure the<br />
parts of the bench you don’t want to paint are well covered, and<br />
that the coats you had applied previously are dry enough to that<br />
your covering material doesn’t stick to the paint while you are<br />
working on the other parts.<br />
This project is easy to medium level and can be done by<br />
anybody. The important point to remember is to prepare well<br />
and not to get impatient between coats. The longer everything<br />
has to dry or even cure, the better your result will be. And if you<br />
choose to go down the path of applying VARNISH on some or all<br />
of your table to finish it off, make sure you have left all coats of<br />
color to dry for 24 or more hours before applying it.<br />
Now you can sit back, feet up on your fabulous new-look<br />
marble entryway bench. Thinking that rewarding thought as you<br />
look at your bench and think, “I did that”. Good luck and Happy<br />
Crafting!<br />
MATERIALS USED<br />
• Montana MARBLE Effect Pastel Green<br />
• Montana Universal PRIMER<br />
• Montana GOLD Malachite Light<br />
• Montana GOLD Bone<br />
• Montana VARNISH Spray Semi-Gloss<br />
• Wooden Bench<br />
• Masking tape<br />
• Sanding paper<br />
• Covering material<br />
• Gloves<br />
• Mask<br />
• Drop Sheet
Makeover<br />
Marble Entryway Bench<br />
42
allspraypainted Magazine<br />
43
44<br />
Monochrome<br />
Easter Bowls<br />
ADDING PRECIOUS OPAQUE TO AN EASTER FAVORITE
Seasonal Monochrome Easter Bowls<br />
46<br />
It doesn’t get more Easter than some decorated colorful eggs. Or does it? This<br />
Easter we wanted to add another aspect to the mix. Not only did we want to<br />
use color, but we also wanted to play with light. The perfect excuse to use some<br />
of the awesome new Montana GLASS Paint and introduce some glass bowls<br />
into the classic Easter equation. Intrigued? Read on to learn more about our Monochrome<br />
Easter Bowls tutorial.
Seasonal<br />
Monochrome Easter Bowls<br />
48<br />
BEFORE<br />
We started by gathering all the necessities including the standard<br />
gloves, mask and drop sheet. Of course, for this project,<br />
we needed plastic eggs, wooden skewers to hold them while<br />
they got painted and some clear glass bowl-like containers that<br />
would function as our see-through baskets.<br />
The color aspect of this project consists of Montana GOLD<br />
cans in the colors of your choice. We used colors like Shrimp<br />
Dark and Shrimp Pastel, White Lilac and Light Lilac, Denim and<br />
Denim Stonewashed to name a few. Basically, solid colors with<br />
a pastel variation in tone as these just happened to complement<br />
the Montana GLASS Paint colors of which we used 5 colors.<br />
After following the familiar process of shaking cans really<br />
well, we were off and running. The skewers were easy to put<br />
into the plastic eggs. A ‘why didn’t I think of that’ moment as we<br />
sprayed around each egg with ease and then stuck the skewers<br />
in another piece of foam allowing them to dry all over. Alternating<br />
between colors we made our eggs in variations of 2 to 4 per<br />
color.<br />
With this step done, the final stage was coloring our glass.<br />
With clean and dry glass bowls at the ready, we lightly sprayed<br />
each bowl inside and out at a distance of 20-30 cm. The secret<br />
is to not apply too much paint so light can travel through. With<br />
one coat they were perfect.<br />
Subject to the glass you used, apply a second coat if you<br />
desire. Job done and what a stunning one at that! We let everything<br />
dry overnight before we handled it further.
allspraypainted Magazine<br />
49
Seasonal<br />
Monochrome Easter Bowls<br />
50<br />
AFTER<br />
WOW! The bowls dried to an amazing transparent matte finish.<br />
As we’d hoped, they let light through, and this meant our eggs<br />
looked stunning when they laid inside.<br />
The eggs removed easily from the skewers and it was just<br />
a matter of placing them in their designated bowls. Amongst all<br />
our other egg decorating variations from the past, this one was a<br />
welcomed change to mix things up and tie them all together. Or<br />
stand alone as a beautiful new Easter home decoration.<br />
We added a feather here and there to put a little icing on<br />
the cake so to say. Should you have any other little finishing<br />
touch, try them out and see if you can create your own personal<br />
aesthetic.<br />
The Monochrome Easter Bowls project was really easy to<br />
do for all abilities. The actual working time is about 15-30 minutes<br />
depending on the number of eggs and bowls you have. We<br />
left ours to dry overnight which ensured nothing stuck together<br />
even though we thought it was completely dry. Maybe not necessary<br />
if you’re in a warm or dry climate, but a good habit to get<br />
into anyway as often the curing process takes 24 hours regardless<br />
of the temperature. But that’s all just details. The important<br />
part is we did it and it was fun. Nice work and Happy Crafting!
52<br />
Pink and Purple Trays<br />
FOLD-UP TABLES TO EASILY PUT AWAY
Interior<br />
Pink and Purple Trays 54
allspraypainted Magazine<br />
55<br />
There is never a wrong time to have a tray. Why? Not only because you can put<br />
your laptop or magazines on them, but also because they double as cool side<br />
tables, bedside trays, or reading trays. As a bonus, you can put these small foldable<br />
tables away whenever they are not in use. This way, you could save a<br />
lot of space in your living room. Sound inspiring? Read on and see how you too<br />
can add this project to your next successful DIY adventure.<br />
HOW IT WAS DONE<br />
After struggling with a beautiful but small sofa table for quite a while, it dawned on us<br />
that maybe adding a fold-up tray was the solution. We found these cute fold-up tables<br />
that you could even put away when not in use. And being made of wood, Montana GOLD<br />
was the perfect tool for the job. If you don‘t have such a tray, you will be able to find<br />
them in furniture stores, Ikea, and some bigger hardware stores. And if you have time,<br />
look for an up-cycling possibility at your next yard sale outing.<br />
With some fine sandpaper, lightly sand back the surface of the wood so that it<br />
smooth and ready for painting. If your tray was covered in an oil-based lacquer, it is<br />
best if you can sand it down to the natural wood of the tray. Once this is done, clean<br />
your tray, freeing it of all dust, oils, or dirt. This is important as you now need to mask<br />
off the bases of the legs of the tray. If any dust is still left on the legs, the masking tape<br />
will not stick properly. Pick the height you think looks best on one leg, then apply the<br />
tape at the same level on all legs. Make sure no wood is exposed.<br />
With your painting space prepared and your mask and gloves on, it is now time<br />
to get to the fun part. Painting! Having shaken your Montana GOLD cans vigorously<br />
for 2-3 minutes, you will now hear the mixing ball moving freely, telling you it is time to<br />
remove the safety ring from under the nozzle and do a test spray away from your tray<br />
when applying it. Starting with your Montana Universal PRIMER, in soft, even, side to<br />
side strokes, spray your tray from a distance of about 15-20 cm. Allow to dry and give<br />
the tray another light sanding and clean in preparation for adding color. Then starting<br />
with the color of your choice, apply thin even coats in the same manner as before. You<br />
can apply further coats when dry apply as desired. We chose to stick to one color for<br />
the whole tray to keep things simple and to build on the feature of the natural wood on<br />
the tray‘s feet. Take a moment, step back, and admire your tray. It will already have a<br />
new lease on life. You can now remove the masking tape from the tray‘s legs before the<br />
paint is completely dried, peeling downward away from the color you have just applied.<br />
Once the tray has had the chance to dry overnight, you will know which Montana VAR-
Interior<br />
Pink and Purple Trays<br />
56<br />
NISH finish is right for you. We chose Gloss, not just as it looks classy, but it also made<br />
the tray more durable against things like stains from the bottoms of coffee cups. Applying<br />
VARNISH is done in the same technique as your color. Slow, sweeping strokes, from<br />
side to side, applying the paint evenly and thinly.<br />
The word that comes to mind is STUNNING! Simple, beautiful, and even more<br />
practical than before. Obviously, you may want to choose another color to match the<br />
decor in your home. Or if you‘re feeling adventurous, a gradient color fade with seasonal<br />
colors could be ideal for your home or living space.<br />
This project is for all skill levels. If you can trigger the nozzle of the can and move<br />
the sandpaper in the direction of the wood grain, then you‘re the right person for the<br />
job. Depending on the size of your table, we estimate 30-60 minutes of work time and<br />
recommend letting each coating dry overnight before applying the next product. Then<br />
it‘s time to place your coffee cup right back where it was before. How rewarding. Nice<br />
work and Happy Crafting!<br />
MATERIALS USED<br />
• Montana Universal PRIMER<br />
• Montana GOLD Lychee<br />
• Montana GOLD Light Lilac<br />
• Montana VARNISH Spray Gloss<br />
• Wooden fold-up tray<br />
• Sandpaper<br />
• Masking tape<br />
• Gloves<br />
• Mask<br />
• Drop Sheet
58<br />
10 Helpful hints<br />
to update your<br />
Workspace<br />
MAKE YOUR YEAR SUCCESSFUL FROM THE START
Workspace 10 Helpful hints to update your Workspace<br />
60<br />
These days we all spend so much time at our workspaces regardless of if they<br />
are at an office, working from home, at our desktops, or in the studio. To ensure<br />
that the output and quality of the work we create in these spaces stay good we<br />
must make sure those spaces stay positive, inspiring, and above all fun to be<br />
in. After all, for many of us, these places are like second homes. In order to make<br />
this possible and easy to do, we thought we’d help by making a simple list compiling<br />
our 10 helpful hints to update your workspace. It doesn’t matter if you do<br />
all, or just one. Even a small adjustment to your immediate environment can keep<br />
you and your workspace fresh and creative.<br />
1. EMBELLISH YOUR STATIONERY GADGETS<br />
You use them every day and they are supposed to help you keep<br />
things working and make things more creative. But are those<br />
very workspace stationary tools creative to look at too? Don’t let<br />
a boring desktop influence you into becoming boring. With some<br />
Montana Effect Sprays, you can turn your desktop gadgets into<br />
embellished pieces of art that inspire you to create while you are<br />
creating.<br />
2. ADD SOME COLOR TO YOUR SPACE<br />
You may find yourself looking over at your old clock early in<br />
the afternoon wishing it would go a little faster so you could go<br />
home. Why not make a change and add some gradient color to<br />
pep up your timekeeper? Using the Montana GOLD colors of<br />
your choice, a little masking tape, and some simple design work<br />
you can go from clock watching to clock admiring.<br />
3. GO TIMELESS, GO MINIMALIST<br />
Take some of the stress off your desktop by creating a little<br />
organization and decreasing the chaos. With our warm grey<br />
Montana GOLD colors, we introduce and spray some cardboard<br />
storage boxes that create a calming and natural effect. But it<br />
doesn’t have to stop at boxes in case you have other complementary<br />
items that can also be reinvented.<br />
4. GETTING STRUCTURED<br />
Even if you’re cluttered with post-it notes and to-do lists, there<br />
is a simple way to organize your time so you can see everything<br />
clearly at a glance. A pinboard is a cheap, easy, and fun way to<br />
monitor your appointments and it doesn’t need to be plugged<br />
in or charged. Create more order in your workspace with only a<br />
little bit of spray paint and some masking tape.
allspraypainted Magazine<br />
61<br />
5. DON’T FORGET YOUR WALLS!<br />
Think about the amount of time you look at your walls in your<br />
workspace and how walls you have around you. For some this<br />
could be a lot so, with some Montana Effect Sprays, some simple<br />
handmade images, and some simple but beautiful frames you<br />
can make your office look like a gallery. And the best part of<br />
all, with your art! Leave a good impression on your visitors and<br />
clients while having a bit of artistic fun as well.<br />
6. ALL PASTEL EVERYTHING<br />
Often a change of environment doesn’t actually need that much<br />
effort. If you have some ceramic items floating about, give them<br />
a lick of paint with Montana GOLD colors and warm your mood<br />
with all pastel everything! Easier than changing wall colors or<br />
covering large amounts of surface area, by simply spraying<br />
some of your quirky ceramic objects in cool new colors you can<br />
change the mood from boring to refreshing.<br />
7. DECLUTTER, DECLUTTER, DECLUTTER<br />
In case you didn’t “get it”, in this tip we want to remind you to declutter<br />
anything that has no productive purpose anymore. Bring<br />
some fresh air into your new year by filing, storing, shredding, or<br />
best yet removing any old documents, papers, or paper “things”<br />
you’ve collected that you don’t need anymore. Of course, pay attention<br />
not to dispose of anything that you legally need to archive,<br />
and remember to shred anything with sensitive information<br />
on it, but on a regular basis file away documents you’ll need in<br />
the future (away being the keyword) and dispose of, shred, or<br />
recycle anything you will not need again. Oh, and did we mention<br />
you should always remember to declutter?<br />
9. PUT ON A CANDLE<br />
Take a deep breath and ask yourself what your workspace<br />
smells like? Tea lights and candles generally can make a world of<br />
change whether it is the sweet scent of lavender that you enjoy<br />
(or any other scented candles), or the soothing ambiance they<br />
can create with their light. With simple materials like recycled<br />
jars and Montana GLASS Paint, you can make candles a safe,<br />
win/win addition to your office.<br />
10. MAKE YOUR SPACE HAPPY<br />
When the chips are down and you are swamped in deadlines and<br />
pressure, it is easy to forget that life is actually a lot of fun most<br />
of the time. Using the stenciling technique and a motif of your<br />
choice, with a can of Montana Effect Spray and an inexpensive<br />
small picture frame you can brighten even the smallest of desks<br />
or walls.<br />
Ten tips may be a lot! As we mentioned at the beginning, don’t<br />
get overwhelmed. Try as few or as many of the tips we suggested<br />
to update your workspace as you like. You don’t need to<br />
apply all tips to update your workspace to get some order in your<br />
natural habitat.<br />
8. GET ORGANIZED<br />
By now the decluttering message has come through loud and<br />
clear. Wooden boxes are a great way to store documents and<br />
stationery, so they don’t clutter your desk, or in the worst case<br />
your floor too. With some basic boxes and some Montana GOLD<br />
colors, you can add a soothing seaside touch to the environment<br />
without needing to get wet.<br />
Good luck and happy crafting<br />
with these 10 helpful hints to<br />
update your workspace!<br />
Visit the blog via<br />
montana.link/asp<br />
@allspraypainted
62<br />
Bar Cart Makeover<br />
BRINGING SOMETHING OLD AND RUSTY BACK TO LIFE
Upcycling Bar Cart Makeover<br />
64<br />
Some objects fall between the cracks of being too good to be rubbish, and too<br />
rubbish to be good. More often than not, the key to reviving such an object<br />
is motivation, elbow grease, and some good paint. Luckily for us, fate saved the<br />
day and this bar cart ended up in the studio with a new owner and a new look!<br />
The most important ingredients were some nice spray paint cans including<br />
Metal PRIMER and the dedication to give an old piece a new glow with a nice<br />
makeover! Here’s what we did to create our own Bar Cart Makeover.
HOW IT WAS DONE<br />
For us, fate would have it that we found a bar cart. However, you may find any other metal<br />
object that has heaps of potential and is cool looking in its basic form. If you can find<br />
a bar cart as well, then good on you. The following steps will be the same regardless of<br />
your object. Start by making sure all rust is removed. If you can take anything apart to<br />
clean the pieces individually, do it. This will take a little time in the beginning but actually<br />
save you time in the cleaning process and give you a better result. Any rust left on the<br />
metal will result in it returning at a later point, even if years later. Once you’ve cleaned<br />
with vinegar or metal cleaning polish, take your fine steel wool, and rub all metal parts<br />
down again. By now your cart probably looks a lot better. Ensure it is dry, free of dust<br />
and oils and you are ready to get creative.<br />
In your normal can preparation process, shake each can well for 2-3 minutes so<br />
that you can hear the mixing balls moving freely. With gloves and mask on, turn your<br />
cans upside down and take off the nozzle allowing the black safety ring to fall out before<br />
re-applying the nozzle. Give each can a quick test spray pointing away from anything.<br />
Your first can will be the Montana Metal PRIMER. Remove the wheels of your cart<br />
or cover them if you can’t remove them and don’t want them colored.<br />
Apply your primer 20-30 cm away from your cart and move in sweeping strokes<br />
from left to right as you spray. This will prevent too much paint applying and drips from<br />
forming. Once dry, take your Montana GOLD can (we used Yellow Cab), and repeat this<br />
process for 2 or more, thin, even coats. Allow drying thoroughly for 24 or more hours to<br />
cure. We chose to apply a Montana VARNISH to seal the surface and protect it further<br />
from scratching or marking. You can decide which finish to use (Gloss, Semi-Gloss or<br />
Matte), as long as the paint has dried before you applied it. Your basis is done and already<br />
your cart has a cool new look, you just got closer to finishing your Bar Cart Makeover.<br />
Unfortunately, our cart didn’t have any bottom trays. Most likely they used to be<br />
glass and had been broken. Our solution for this was acrylic (or plastic) circular pieces<br />
in the color of our choice (pink), that were cut to measure. Should this not be an option,<br />
you could either go to a glass cutter for glass trays or cut wooden trays to size. Wooden<br />
trays could be left raw or use the same process as for coloring your cart, except<br />
exchange the Metal PRIMER for a Montana Universal PRIMER. Sand your wood with fine<br />
sandpaper to prepare it. Ensure the circles are clean and free of dust before priming<br />
and spraying. You’re almost there.<br />
65
Upcycling<br />
Bar Cart Makeover<br />
66<br />
Your cart is spotless and colored. You’ve fixed the<br />
problem of missing bottom trays with acrylic, plastic,<br />
glass, or wood. And you have now decided to join us<br />
for the addition of a display tray to put the icing on<br />
the cake. We chose a wooden tray which was already<br />
smooth and clean. If yours isn’t, give it a light sand<br />
and a clean. Using our Montana Universal<br />
PRIMER, we then sprayed the tray completely to seal<br />
it. Once dry, we sprayed one side in one color and<br />
left this to dry. We then took our masking tape and<br />
stuck a piece of paper over the painted side, applying<br />
another color to the remaining exposed side. We<br />
removed the masking tape and paper about 2 minutes<br />
later. This was left overnight to dry and cure<br />
completely.<br />
Finally, we applied the Montana VARNISH coat<br />
to seal the surface in the finish we desired, and also<br />
protect it from liquids. After all, a bar cart is essentially<br />
a bar on wheels isn’t it. A few days later, you’re<br />
sitting in front of your new-look bar cart with gin and<br />
tonic in hand, thinking of how cool it now looks and<br />
how much fun it was to make!<br />
This project is a multi-leveled project. If you just<br />
need to paint the cart, then it’s an easy to medium level<br />
affair. The challenge is thorough preparation and<br />
cleaning. And possibly taking pieces off and putting<br />
them on again. If you need to create or source missing<br />
trays, it becomes harder, subject to your expectations.<br />
And if you’re adding a display tray as we did, it’s<br />
not any harder but requires more time. All in all, allow<br />
yourself at least 1-2 weeks to complete the project.<br />
We did it over the period of a month, which had the<br />
benefit of everything drying at least one night before<br />
the next product was applied. And we chose to scrub<br />
that metal THOROUGHLY to avoid rust returning. But<br />
have no fear, you can do it! Happy Crafting.<br />
MATERIALS USED<br />
• Montana Metal PRIMER<br />
• Montana GOLD Yellow Cab<br />
• Montana GOLD Light Blue<br />
• Montana VARNISH Spray Semi-Gloss<br />
• New or used cart<br />
• Steel wool<br />
• Metal cleaner and/or metal polish<br />
(vinegar is a possible cleaning agent)<br />
• Optional bottom trays if missing<br />
• Fine sandpaper for wooden parts<br />
• Masking tape<br />
• Covering paper<br />
• Gloves<br />
• Mask<br />
• Drop Sheet
Painted Wooden<br />
Animal Heads<br />
COOL MINIMALIST WALL DECOR
DIY Painted Wooden Animal Heads<br />
70<br />
If you’re not familiar with Cardboard Safari, you will be now. Famous for their cool<br />
cardboard, wooden, and acrylic DIY sculptures, you may have seen some of their<br />
animal heads hanging around somewhere? The pieces worked on were a very vibrant<br />
moose and one deer head. Or at least they became bright. Read on to find<br />
out what we did to create these Painted Wooden Animal Heads.<br />
HOW IT WAS DONE<br />
Due to the color variations used in these two animal heads, it<br />
was important to prepare the painting area thoroughly with a<br />
tarp, or some sort of drop sheet. To achieve the gradient ombre<br />
look, the pieces were laid out on the tarp (in number order) and<br />
put into three groups. Each group would be painted in one of the<br />
chosen colors. For an extra “pop” of color, you could choose a<br />
different color for the antlers.<br />
Having shaken our Montana GOLD colors vigorously for<br />
2-3 minutes so she could hear the mixing balls moving freely,<br />
she then turned each can upside down and removed the nozzle<br />
to allow the black safety ring to fall out from under it. After refitting<br />
the nozzle, a quick spray to the side away from anything<br />
important, and she was ready to spray.<br />
Lay your first group of pieces down and give a thin even<br />
coat and allow to dry. Once this has happened, flip them over<br />
and repeat on the other side. If you have space and you can protect<br />
each color, you can paint different colors directly one after<br />
the other. By the time you get to the last pieces, the first pieces<br />
are most likely dry.<br />
Once these are completely dry, you can spray thin, even<br />
coats, of pre-shaken Montana VARNISH, in the finish of your<br />
choice. This will not only add the aesthetic you want but also<br />
make the pieces more durable and easier to clean at a later point<br />
(if required). Then leave it all to dry overnight.<br />
The last step is easy. Make yourself comfortable and relaxed.<br />
Then when you are ready, fit the pieces together as per<br />
the instructions to form your new-look funky moose head hanging<br />
decor.<br />
If the pieces need a little effort for a smoother fit, take<br />
some fine sanding paper and run it carefully through the grooves<br />
for a snug fit. These sculptures will be the talk of the town once<br />
your visitors get a look at them. And the best part is no animals<br />
got hurt in the making of this project.<br />
The Painted Wooden Animal Heads are an easy project for<br />
anyone that can read instructions and trigger a spray can. Depending<br />
on the animal(s) you choose and the number of colors<br />
you want to paint them with, there are about 30-60 minutes of<br />
actual working time. So, don’t rush, and enjoy the steps on this<br />
project. Nice work and Happy Crafting!
allspraypainted Magazine<br />
71<br />
MATERIALS USED<br />
For moose:<br />
• Montana GOLD Malachite<br />
• Montana GOLD Malachite Light<br />
• Montana GOLD Malachite Dark<br />
• Montana GOLD Lychee for head<br />
• Montana VARNISH Spray<br />
in Semi-Gloss<br />
• Wooden animal heads, we<br />
got ours from Cardboard Safari<br />
• Sandpaper<br />
• Gloves<br />
• Mask<br />
• Drop Sheet<br />
For deer:<br />
• Montana GOLD Shock Yellow<br />
• Montana GOLD Golden Yellow<br />
• Montana GOLD Shock Orange<br />
• Montana GOLD Pool for head<br />
• Montana VARNISH Spray<br />
in Semi-Gloss
DIY<br />
Painted Wooden Animal Heads<br />
72
allspraypainted Magazine<br />
73
74<br />
Granit Bed Tray<br />
Makeover<br />
TURNING HARDWARE STORE MATERIALS INTO TREASURES
Interior<br />
Granit Bed Tray Makeover 76
allspraypainted Magazine<br />
77<br />
It’s Sunday morning, you’re under the warm covers of your bed and outside it is<br />
grey and raining. The perfect scenario for a cup of something hot and tasty,<br />
and a new read to turn the morning into the afternoon. In a moment like this, you<br />
might wish you had mobile bed tray to put everything on top. Doesn‘t that just<br />
scream DIY idea? Read on to create your very own GRANIT Bed Tray Makeover.<br />
BEFORE<br />
It’s now afternoon, the book you were reading is finished, as is<br />
your cup. The sun is now shining and that seed of creativity you<br />
had earlier can now be transformed into a project. In our case,<br />
the catalyst for the project is a bed tray. It is small, has few simple<br />
parts and with little effort, we will achieve a big result. However,<br />
should you want to extend this to other pieces of furniture in<br />
your home, we invite you to give it a go.<br />
We started by gathering the materials we previously<br />
bought at our local hardware store. Our wooden board was already<br />
clean and smooth. But should yours need a bit of TLC,<br />
simply sand it down so it is smooth and make sure it’s free of<br />
dust. Grab your can of Universal PRIMER and GRANIT Effect<br />
Spray and give them a good 2-3-minute shake. If you are upcycling<br />
a tray that has had oil-based products on it, be sure to<br />
sand off and remove this from the surface so that the Montana<br />
ACRYLIC based products can adhere to the wood.<br />
We chose to mask off an area of our tray top with masking<br />
tape so some raw wood would feature next to the GRANIT once<br />
the tape was removed. You could experiment with shapes and<br />
forms you mask off however a full GRANIT Spray job may be<br />
more to your liking. First, the Universal PRIMER was applied to<br />
the raw wood and let dry completely. This sealed the wood from<br />
seepage and created an optimum surface for our next coats.<br />
Then the GRANIT Effect Spray was applied. Thin, even<br />
coats from about 20-30 cm away from the wood. We were happy<br />
with one coat, but you could apply more as desired. It’s that easy<br />
and your more or less done!
Interior<br />
Granit Bed Tray Makeover<br />
78<br />
AFTER<br />
We left the tray top dry overnight. The GRANIT Effect Spray had<br />
ample time to cure and it felt sturdy. Should you want to, you<br />
could also apply some Montana VARNISH Spray in Gloss, Semi-<br />
Gloss or Matte to add even more durability to the tray’s surface.<br />
It could also allow you to give the tray top the finish you wanted<br />
if that was other than the natural GRANIT Effect straight from<br />
the can.<br />
If you are happy with the GRANIT Spray finish as it is, we<br />
recommend peeling the masking tape off about 5-10 minutes after<br />
your last coat. This will help keep the tight line clean between<br />
your raw wood and the GRANIT coats. If you apply a VARNISH,<br />
remove the tape 5-10 minutes after applying it. Same as above,<br />
it keeps the lines clean and your surfaces protected up until the<br />
last minute. Once everything is completely dry, attach the legs<br />
and admire what you have done.<br />
This is a great project for any skill level. Depending on the<br />
size of your tray and if the wood is ready or not, in total there is<br />
no more than 15-20 minutes of actual work. As suggested, don’t<br />
be afraid to expand your horizons and look at other pieces of<br />
furniture with the confidence and satisfaction you just earned<br />
from this project.<br />
And if you already know you can do it, maybe consider<br />
having a few items running at once so you can use the downtime<br />
while the PRIMER or GRANIT Spray is drying to prepare and<br />
coat your other chosen pieces of furniture. Good luck and Happy<br />
Crafting!
allspraypainted Magazine<br />
79
80<br />
Easy Pattern<br />
Planters<br />
EXCLUSIVE PLANTERS WITH ONLY TWO MARKERS
Acrylic Marker Easy Pattern Planters<br />
82<br />
Plants are an essential part of life, which is why it is no surprise that people with<br />
plants in their indoor spaces usually benefit greatly from them. If it’s not in the<br />
form of oxygen or good energy, then it’s the pure pleasure of how the plants look<br />
and watching them grow over time. But don’t forget to look down at the planters<br />
you have them in. They too can be a great form of pleasure and inspiration, and<br />
with the Easy Pattern Planters, we show you how.<br />
The planter can take many shapes and forms. Not to mention they can also be<br />
made of many varied materials. Whether ceramic, cement, or plastic. Often these<br />
shapes are smooth, simple, and timeless. But after a while, they can also become<br />
a little boring. You can take control of that with as little as only two Montana<br />
ACRYLIC Fine Markers. And if needed, one or two cans of Montana GOLD in the<br />
colors Shock Black and Shock White.
allspraypainted Magazine<br />
83<br />
BEFORE<br />
Our planters were just as mentioned previously.<br />
Simple, timeless, and plain. They were already black<br />
and white, however, if yours are natural or of another<br />
color, a simple coat of Montana GOLD Shock Black<br />
or Shock White can bring them to the base color you<br />
want.<br />
Just make sure they are clean and dry before<br />
you spray them. For some, this may be the first<br />
step. For others with black or white planters already,<br />
your project begins here. Go and grab your Montana<br />
ACRYLIC Fine Markers from your marker collection<br />
and give them a good shake.<br />
If these aren’t yet in your collection, a visit to<br />
your local Art & Craft store can fix that. Then, it’s as<br />
simple as drawing patterns on your plant pots.
Acrylic Marker<br />
Easy Pattern Planters<br />
84
allspraypainted Magazine<br />
85<br />
AFTER<br />
Your standard non-exceptional looking planters have now become incredible<br />
minimalist planters. And the best part is they are designed by that<br />
exclusive designer, you! As you can see in our pattern examples, there is no<br />
need to get too complicated or second guess your ideas. Keep it simple and<br />
just keep repeating it.<br />
The sum of all your lines and shapes will create the entire piece. Our<br />
patterns are just a suggestion. Inspiration for you to work from. You can<br />
choose to use them as they are or take bits and pieces from the ones you<br />
like and create your own. We chose black on white (and in reverse) as our<br />
colorway to keep it simple and timeless.<br />
Should you have another preference in the colorway, just use the colors<br />
in the combinations you want. But remember the key, keep it simple!<br />
The Easy Pattern Planter project is for everyone with any ability. You can<br />
create original designs resulting in beautiful planters or use the ones we<br />
suggested which will result in original designs anyway thanks to the wonder<br />
of everybody’s individual application technique. But most of all, have fun<br />
with it and Happy Crafting.
86<br />
Colorful Opaque<br />
Candle Holders<br />
MOOD LIGHTING MADE BY YOU
Decor Colorful Opaque Candle Holders<br />
88<br />
Although not as practical as flicking a switch, candles lit up our worlds with<br />
mood and ambiance while keeping us from living in the dark at night. And ironically,<br />
they still do. This got us thinking of a simple idea using Montana GLASS<br />
Paint and simple glass candle holders. A chance to play with two light sources<br />
at once. GLASS Paint Candle Holders were born. Read on to learn how we<br />
did the Colorful Opaque Candle Holders.
allspraypainted Magazine<br />
89<br />
HOW IT WAS DONE<br />
Depending on your time restrictions, you can either<br />
be efficient and drive to your local home decor, hardware,<br />
or craft store and be relatively sure you will<br />
find some sort of glass candle holder on offer. Or, if<br />
you have a little time up your sleeve and want to do it<br />
the low consumption way, visit your local yard sales,<br />
second-hand stores or peek through the boxes when<br />
it’s hard rubbish time. You may or may not have fast<br />
luck, but eventually, you’ll find what you want. Give<br />
your candle holders a good wash removing all oils<br />
and dust, and above all make sure they are completely<br />
dry. That’s the hard part!<br />
Placing the holders on your drop sheet, with<br />
gloves and mask on, shake your cans well for 2-3 minutes.<br />
If you can’t hear the mixing balls moving freely,<br />
then you still need to shake some more. At a distance<br />
of about 15-25 cm, spray your Montana GLASS<br />
Paint in a light even coat on the holder.<br />
Most likely one coat will be enough. If you want<br />
an opaquer finish, then you can opt for more coats<br />
once dry. Repeat this process to each holder. If you<br />
want to experiment, consider fading colors into each<br />
other, or masking areas off so you have a mix of clear<br />
glass and colored glass. We chose to stick to a single<br />
color, making the holders timeless and all-season.<br />
At this point, you may ask yourself, why a glass<br />
candleholder? Just as a candle is a source of light, so<br />
is the holder. By using Montana GLASS Paint, which<br />
is matte and transparent, we add another level to the<br />
possible ambiance that the candle can produce as<br />
light is also able to pass through the colorful opaque<br />
candle holder. And besides that, it looks cool.<br />
You are done and it was as easy as that! This is<br />
a project for absolutely any level and the most challenging<br />
part is locating the perfect shaped candle<br />
holders. So, start your search and make it happen.<br />
Happy Crafting!<br />
MATERIALS USED<br />
• Montana GLASS Paint Almond<br />
• Montana GLASS Paint Coral Red<br />
• Montana GLASS Paint Orchid<br />
• Montana GLASS Paint Bay Blue<br />
• Montana GLASS Paint Teal<br />
• Montana GLASS Paint Mint<br />
• Montana GLASS Paint Black<br />
• Candle holders<br />
• Candles<br />
• Gloves<br />
• Mask<br />
• Drop Sheet
Decor<br />
Colorful Opaque Candle Holders<br />
90
allspraypainted Magazine<br />
91
92<br />
Acetone Art<br />
Table Lamp<br />
CREATING A MOOD WITH FUNCTIONAL ART
Interior<br />
Acetone Art Table Lamp 94<br />
Light and lighting is an essential part of how we see the world and how it makes<br />
us feel. Just think of all those amazing summer sunsets at the beach. Or how<br />
good it feels when the first shimmers of light hit your skin after an extended<br />
period of grey skies and rain. For the Acetone Art Table Lamp project, we took<br />
a simple lamp with a card lampshade and turned it into an amazing designer art<br />
piece. That just happens to be functional as well. If you want to find the “designer”<br />
in you, read on.
allspraypainted Magazine<br />
95<br />
BEFORE<br />
You have been to those fancy lighting stores and have seen<br />
many beautiful lamps by a designer from Scandanavia you have<br />
never heard of. But you turned the tag around to see the price<br />
and moved on. Thanks to hardware stores, and yard sales, you<br />
managed to find a simple light, with a simple lampshade that is<br />
almost perfect. The final touch to make it perfect is the one that<br />
you will create yourself.<br />
Our lamp had a black wooden base and a paper/card white<br />
lampshade. A timeless combination. Once we prepared our<br />
workspace, removed the lampshade, and laid it flat, it was time<br />
to create a simple yet elegant touch. You can also work on paper<br />
and wrap it around the actual lampshade if taking it off is not<br />
possible. Using only Montana GOLD in the color Shock Black and<br />
a can of Montana ACETONE Spray, we have all we need. With<br />
your gloves and mask on and the cans are shaken well for 2-3<br />
minutes, apply a simple line (or lines) with the Shock Black as<br />
desired. The key here is “less is more”. You can always add more<br />
linework afterward if you want.<br />
While the lines are still wet, spray the Montana ACETONE<br />
Spray on them allowing the liquid to gather and pool. As these<br />
pools spread out, they will take the black pigment with them<br />
creating warm, natural-looking smokey pigment clouds. The<br />
more ACETONE you apply, the more the black will disperse. Apply<br />
a little at a time and observe what happens. Also, consider<br />
moving the lampshade material around to guide the directions<br />
the ACETONE takes the color. Then allow drying to occur before<br />
you re-apply the shade to the lamp base.
Interior<br />
Acetone Art Table Lamp<br />
96<br />
AFTER<br />
STUNNING! The lamp looks truly amazing almost as if you can’t believe you did it yourself.<br />
Those subtle little lines dispersed into shades of grey tones. The smokey effect<br />
fading into the white card looked not only timeless but as if you were in a studio in<br />
Stockholm when you did. Even if it was just your garden shed.<br />
We chose a black and white combination however you could choose to vary which<br />
Montana GOLD color you want with the Montana ACETONE Spray. The technique is the<br />
same regardless of the color combination.<br />
This project is absolutely for everyone. The main effort is in removing and re-applying<br />
the lampshade. You may need some sort of clear adhesive tape to re-apply it if<br />
there was a similar tape to apply it in the first place.<br />
Allow for about 10-20 minutes or prep time and 5 minutes of actual spraying time.<br />
Be warned, when your friends see your new Acetone Art Table Lamp you may be asked<br />
to make some more for them. Good luck and Happy Crafting.
allspraypainted Magazine<br />
97
98<br />
Wooden Box<br />
Sideboard<br />
PERSONAL FURNITURE THAT WORKS
Interior<br />
Wooden Box Sideboard<br />
100<br />
Finding the right balance between practical furniture and functional furniture is<br />
often harder than it sounds. Every home has those little spaces that are too small<br />
to store big furniture, and too big to not use for some sort of storage at all. So<br />
how do you find that balance? Simple, you create a sideboard from the materials<br />
you love. Big enough in a hallway or corridor to store some of those things you<br />
always reach for, like books and keys. Small enough to not invade your space<br />
and make your home feel crowded. Oh, and did we mention they look cool, too?<br />
Here is how we did the Wooden Box Sideboard.<br />
MATERIALS USED<br />
• Montana GOLD Shrimp<br />
• Montana GRANIT Grey<br />
• Montana Universal PRIMER<br />
• Montana VARNISH Semi-Gloss<br />
• Wooden plank (Your choice of size)<br />
• Wooden boxes (amount of your choice)<br />
• Steel pre-made table legs (or similar<br />
prefabricated legs<br />
• Sandpaper (optional)<br />
• Thin insolation material (optional)<br />
• Screwdriver or drill<br />
• Screws<br />
• Soft material of your choice (optional)<br />
• Covering material<br />
• Gloves<br />
• Mask<br />
• Drop Sheet
allspraypainted Magazine<br />
101<br />
HOW IT WAS DONE<br />
There are three main steps to this project. The tabletop, the main<br />
body (wooden boxes), and the legs. We undertook them all in<br />
that order but you could work whichever order suited you?<br />
Our tabletop was a pre-cut piece of pine wood. A standard at<br />
any big-box hardware store, or timber store. We knew the measurements<br />
of our wooden boxes (in the next step), so when we<br />
bought ours, we asked them to cut it to size to cover two boxes.<br />
Sand the top lightly, paying attention to the edges of the wood<br />
to remove potential splinters. Remove all dust and place in your<br />
covered spraying area.<br />
Remembering the magic steps, shake your cans for 2-3<br />
minutes vigorously, ensuring that you can hear the mixing balls<br />
moving freely. Where applicable, take the nozzle off and turn the<br />
can upside down letting the black safety ring drop out. Starting<br />
with your Montana Universal PRIMER, spray your top in two<br />
coats on both sides.<br />
Thinly and evenly, allowing 10+ minutes between coats.<br />
You might ask, why both sides? Spraying just the top may result<br />
in the wood warping. After it has dried, take your pre-shaken<br />
Montana GRANIT Spray can, and apply from approximately<br />
15-25 cm distance. Reapply if required and put aside to dry thoroughly.<br />
The second step is the body of the sideboard. The wooden<br />
boxes will form the body of your sideboard. You could source<br />
used boxes to up-cycle, but we chose new ones at the same<br />
place we bought our tabletop. Up-cycling may mean you need to<br />
lightly sand the boxes, but if you’re lucky, a quick clean may do<br />
the job.<br />
Depending on if you have a power drill or not, there are two<br />
options for you. The first is to pre-drill smaller holes (then the
Interior<br />
Wooden Box Sideboard<br />
102<br />
width of your screws) into the tops of your wooden boxes. This<br />
could prevent the wood from splitting. The second is just to drill<br />
through the wood with the screw on. Either way, you’ll need the<br />
correct screwdriver head for the screws you have. From inside<br />
the boxes, screw the lined-up tabletop to the boxes from underneath<br />
ensuring your screws are too short to come through the<br />
top.<br />
This may be enough and with 8 or more screws your sideboard<br />
will take shape. If you need to, you can also put a couple<br />
of screws joining the two boxes together for extra strength. If<br />
you don’t have a drill, although harder, this is also possible to<br />
do by hand with a screwdriver if your wood is soft. Should the<br />
boxes not be so square, you may choose to lay some sort of<br />
thin insolation type material between the top and the boxes to<br />
balance everything out. Make sure the insolation material is cut<br />
smaller than the top so you will not see it out the sides and that<br />
it is not too thick! Cut it off afterward if any sticks out from under<br />
the tabletop.<br />
The final step towards your Wooden Box Sideboard is coloring<br />
and applying the legs. If your table legs are not the color<br />
you want them to be, you can easily change that. After vigorous<br />
shaking, apply your Montana Universal PRIMER in 1-2 even, thin,<br />
coats, to the clean dry legs and allow the primer to dry. If you<br />
wanted to go to the next level, you could even use Montana Me-
allspraypainted Magazine<br />
103<br />
tal PRIMER which helps resist against rust. Using the Montana<br />
GOLD color of your choice, you can then apply 1-2 even coats<br />
as desired. We used a singular pastel color but may choose various<br />
colors of any orientation (bright, soft, pastel, monotone<br />
etc.) Once dry, with your sideboard body and top laid upside<br />
down, screw the legs in each corner ensuring you first calculated<br />
their equal positions. Flip the sideboard over carefully and<br />
then pat yourself on the back. You’re finished (possibly!). At this<br />
point, your funky new sideboard may be ready to place in its new<br />
home. We recommend giving one final coat of Montana VAR-<br />
NISH in the finish of your choice. This could add durability to<br />
the tabletop and legs as well or a different aesthetic to its finish.<br />
Alternatively, you could choose to varnish only the top, the<br />
body, or the legs, at the end of each of those stages in the construction<br />
of the sideboard. Either way, it will look GREAT! This is<br />
an intermediate project able to be completed by just about anyone.<br />
Of the 1-2 hours of actual working time, the hardest parts<br />
if you’re not familiar with it, are screwing the 3 parts (top/body/<br />
legs) together.<br />
Don’t be worried about this, take your time and screw in<br />
non-visible areas. All that is left now is to enjoy your new, DIY<br />
Wooden Box Sideboard. Well done and Happy Crafting!
105
106<br />
Frosted White<br />
Christmas Decor<br />
DREAMING OF A WHITE CHRISTMAS
Seasonal<br />
Frosted White Christmas Decor 108
allspraypainted Magazine<br />
109<br />
The house is clean, the gifts are ready, and the weather is cold outside. It‘s obvious<br />
to see that Christmas is coming. And along with the festive season comes<br />
the mad rush to decorate, put up the tree, and be ready. However, we also often<br />
fall into that trap of stressing out about what type of decorations to use each<br />
year. The stores all have the same things as last year, and the truth is, we all<br />
want something unique. We know just how you feel, which is why we put on our<br />
thinking caps for you and came up with some simple elements for your home<br />
that can be up-cycled or created without too much fuss. But of course, with a lot<br />
of fun. This year, we are going to help you have a Frosted White Christmas,<br />
whatever the weather outside.<br />
BEFORE<br />
Our White Frosted Christmas DIY is the ideal way to get you into<br />
the mood and fire up your Christmas spirit. Rather than go overboard<br />
with too much random color that will most likely date, we<br />
are going to stick with timeless, soul recharging, and light-filled<br />
white. Which in case you forget, is actually the most luminous<br />
color to reflect light in your home.<br />
The spring cleaning at the start of the year did two good<br />
things other than clean things up. It helped us find some cool<br />
vases and ornaments which we will now use, and it made us organize<br />
our Christmas decorations, so we actually know where<br />
they are now. It is amazing what finds its way to the back of your<br />
cupboards. But if you don‘t have the luck that we did, keep your<br />
eyes peeled when you are next at a second-hand shop, or visit<br />
your local craft store, or big box hardware store where you will<br />
find everything you need. What you are looking for is neutral<br />
colored glass containers, vases, or ornaments in the shapes of<br />
your desire. In the Christmas aisles, you‘re bound to find an array<br />
of baubles in the shapes and styles you want. Take all your goodies<br />
home to the workspace, and make sure they are all clean,<br />
dry, and free of dust and oils.<br />
For the spraying aspect of our White Frosted Christmas,<br />
we used Montana GLASS Paint white, Montana GOLD in the color<br />
Shock White, Montana Universal PRIMER (you guessed it, it‘s<br />
white), and Montana GLITTER. Or you can go for Montana HOLO-<br />
GRAM if you want more bling.
Seasonal<br />
Frosted White Christmas Decor<br />
110<br />
AFTER<br />
The beauty of making White Frosted Christmas decor is that it<br />
is easy, and the combinations of the products used are flexible.<br />
You have the choice to apply the Montana GLASS Paint white by<br />
itself, or over Montana GOLD Shock White. You can apply the<br />
Montana GOLD Shock White by itself, or coat it with Montana<br />
GLASS Paint, or Montana GLITTER Spray afterward. You can<br />
apply the Montana GLITTER Spray over Montana GOLD Shock<br />
White, or the Montana Universal PRIMER.<br />
After having put on our gloves and mask, prepared a drop<br />
sheet for our overspray, shaken our cans vigorously for 2-3 minutes,<br />
and removed the black safety ring from under the can‘s<br />
nozzle (where applicable), we simply turned all our vases and<br />
ornaments upside-down and placed them on our drop sheet.<br />
Depending on the product combination you decide to use first,<br />
we applied either Shock White, Universal PRIMER, or the GLASS<br />
Paint to the base of the object we were painting, and then faded<br />
away as we worked down the object. For the clear glass<br />
vases, the idea being that natural light could still pass through<br />
the top of them when turned the right way up. When dry, we then<br />
applied the GLASS Paint over the Shock White, and the GLIT-<br />
TER spray over the Shock White or Universal PRIMER. And in<br />
the case where we wanted to use glass paint alone, the first coat<br />
meant we were already done.<br />
Then we let it all dry overnight to ensure the paint could<br />
cure and be as durable as possible before we handled it. With<br />
very little effort, we had easily created some impressive decor.<br />
The shapes and forms made it easy for us to figure out what we<br />
wanted to put into each object. We stuck with fresh green foliage<br />
for our longer vases. A beautiful natural aspect, that brings<br />
a touch of life in your home at a time when it is often grey and<br />
dreary outside. For our flatter ornaments, our white baubles<br />
seemed to want to jump in there themselves. And if your upcycling<br />
baubles that are colored that you want to make white,<br />
have no fear. With your leftover Montana GOLD Shock White or<br />
Universal PRIMER, you can personalize them too using the skills<br />
you already have.<br />
You are done. At least for this part of your pre-Christmas<br />
preparations. It was easy, took less only 15-30 minutes, and<br />
looks stunning. Now to figure out what to fill the fridge with? Well<br />
done and Merry Christmas from all the team at allspraypainted.<br />
Happy Crafting!
allspraypainted Magazine<br />
111
112<br />
Minimalist Granit<br />
Bookends<br />
EMBELLISHING THE BOOKSHELF THE EASY WAY
DIY<br />
Minimalist Granit Bookends 114<br />
The bookshelf can be one of the most intimate spaces of your home. For some, it<br />
houses all those books that help heal their souls, for others, it could be the library<br />
of inspiration for their creativity, the place for secrets hidden deep within the<br />
pages of forgotten books. Or if you are lucky enough you have a place to sit and<br />
read quietly right at the source. But as with all parts of the house, the bookshelf<br />
is also not immune to change and reorganization. This week all the novels at the<br />
bottom, next week all the magazines. To keep up with this need for change and<br />
flexibility, we have just the right piece of practical decor, that happens to look<br />
stunning at the same time. Wooden Granit Bookends, every reader’s best friend.
allspraypainted Magazine<br />
115<br />
BEFORE<br />
There is a lot to consider when new books or magazines come into the collection.<br />
What gets which position? How often am I going to reach for this or<br />
that? And how do I keep them all from falling over? We can’t help you with<br />
the first two aspects, but the falling over issue, we can help with.<br />
All you need is two reasonably solid wooden blocks. The size can be<br />
subject to availability, the size of your books & magazines, as well as the size<br />
of your shelves. Often available from Hardware stores, Decor/Homewares<br />
shops and whereever wood is sold, make sure the wood is the size you want,<br />
sanded to the smoothness you desire, clean, dry and free of dust.<br />
Apply the Montana GRANIT Effect Spray in the color of your choice<br />
directly, pre-coat with Montana Universal PRIMER or Montana GOLD in the<br />
color Shock White. Remembering to shake well for 2-3 minutes prior to use<br />
and to remove the safety ring from under the nozzle before reapplying it<br />
to spray. A couple of thin even coats from a 20-30 cm distance and you’re<br />
done!
DIY<br />
Minimalist Granit Bookends<br />
116<br />
AFTER<br />
Your Wooden Granit Bookends are painted, and they look great. Your guests<br />
will ask themselves where you found such beautiful stones from? Such a<br />
simple project using easy going materials that can add even more character<br />
and warmth to your home than any bought item ever will.<br />
Not to mention the calming effect of symmetrical objects is always<br />
soothing. As your books and magazines change, so can your shelves. Just<br />
stack as you please and place the bookends wherever there is a risk of<br />
books falling.<br />
This project is for absolutely anyone and has no more than about 5<br />
minutes of work. Even less if you manage to find wooden blocks that are<br />
already sanded and clean. Have fun and Happy Crafting!
118<br />
Faded, Stone, and<br />
Sprayed<br />
LOOKING AT YOUR SURROUNDINGS FOR INSPIRATION AND IDEAS
Interior<br />
Faded, Stone, and Sprayed<br />
120<br />
Ideas are worth their weight in gold. To see something, and then turn it into something<br />
else, something better, more useful, or more engaging than it was, that<br />
is something special. Any DIY'er, designer, artist, craftsperson, or even just somebody<br />
trying to make their home a more comfortable, will agree. However, the<br />
spark that lights the fire of an idea doesn't have to be the completed idea itself.<br />
Sometimes it can be as simple as seeing color, a color combination, or a contrast<br />
between one surface and another. And nobody provides us with as many good<br />
ideas as our surroundings. Bringing beauty, inspiration, and function together is<br />
yet another strength of the natural world.
allspraypainted Magazine<br />
121<br />
FADED<br />
Look around when you're outside in the forest, in the park, or on<br />
the beach. Anywhere that is not enclosed by man-made walls.<br />
Notice how we are surrounded by gradient fades. See how one<br />
color, blends into another. Sometimes subtly and smooth, other<br />
times powerfully, shifting one contrasting color into another. All<br />
the while, conveying feelings of warmth, harmony, vibration, or<br />
calm. And everything in between. Pick the fades you like in the<br />
color combinations you prefer, and hold that thought.<br />
STONE<br />
Rock, earth, mountains, or whatever forms you see when thinking<br />
of stone, without this material, many of our structures,<br />
architecture, or landscapes (natural or man-made), would not<br />
exist. From the jutted peaks of an alpine mountain face, the minimalist<br />
cubic buildings of a contemporary major city, to the highly<br />
polished marble sculptures of those beautiful historic Italian Piazzas.<br />
Stone is everywhere and eventually; everything will turn<br />
into it. Which is why it is the perfect effect to give your home, or<br />
personal spaces, a little more grounding.<br />
SPRAYED<br />
You don't have to convince us; we know how versatile and fun it<br />
is to use spray paint. What the spray can – can do, and when it<br />
is at its best (like the Montana GOLD), you can bring any design<br />
idea to life, whether you are improving your home's interior or<br />
adapting a space to suit your needs. Spraying something can<br />
create a mood and improve your surroundings immensely, not to<br />
mention add function and durability.
Interior Faded, Stone, and Sprayed 122<br />
Spray paint FAQ via<br />
montana.link/help<br />
@allspraypainted
allspraypainted Magazine<br />
123<br />
With the humble stool as a basis, it became clear to us that these<br />
three elements could be the source of a great simple stool<br />
project. The stool, as one of the most used pieces of furniture in<br />
many homes, is the ideal starting point to explore fading, stone<br />
effects, and our favorite, spraying. With wood as the material of<br />
choice for our stools, we were flexible to explore each effect and<br />
have fun doing it. For all the stools, wherever it was required, the<br />
Montana Universal PRIMER was the ideal surface preparation for<br />
any coating. Not only does it seal the wood for longevity, it also<br />
gives a neutral white base to work on.<br />
For the first stool we brought two elements together. Stone,<br />
by way of the Montana GRANIT Effect Spray, and color, by<br />
way of the Montana GOLD color, Manila Green. It wasn't by accident<br />
that this color also represented the green of the natural<br />
world. After having coated the bases of the stool's feet with Manila<br />
Green, we then masked the color at equal heights before<br />
coating the rest of the stool with Montana GRANIT Effect Spray,<br />
in the color Light Grey. The result was stunning. Minimal, contemporary,<br />
and timeless.<br />
The second stool was to be given the sturdy optical effect<br />
of marble. With only variations of black and white, the stool's<br />
top was first primed in white. This could be the Montana GOLD<br />
Shock White or the Universal PRIMER. One half of the top was<br />
masked to protect the white color, while the rest of the stool<br />
was sprayed with Montana GOLD color, Shock Black. Once<br />
dry, it was time to add the ornate marble touch by spraying<br />
Montana MARBLE Effect Spray in the color Shock White, loosely<br />
over the whole stool. The remaining masking material on the<br />
white top was then removed, and the black areas safely masked<br />
and covered so a contrasting black MARBLE Effect could be cleanly<br />
applied to only the white portion of the top. AMAZING! A<br />
stunning 2 color contrast that was fast and simple. And with a<br />
coat of Montana VARNISH in Gloss, it may even look like a valuable<br />
marble ornament.<br />
The last stool was all about color. No fancy tricks, just a<br />
warm fade to create a positive mood to your indoor space. With<br />
the warmth of the summer sun, or faded leaves with the arrival of<br />
autumn, the stool was first completely coated with the Montana<br />
GOLD color, Shrimp Pastel. Once dry, the lower portion of the<br />
legs of the stool were sprayed with equal fading with the color<br />
Shrimp, to about halfway up. The final color Shrimp Dark was<br />
applied at the very base of the legs and only faded halfway up<br />
the previous color Shrimp. The effect, an eye-catching gradient<br />
that alludes to many moods, all of them good. The stool was<br />
improved further with a final coat of Montana VARNISH Gloss to<br />
add durability and flair.<br />
Faded, Stone, and Sprayed. All ideas from our very own<br />
surroundings, and all of them easy to create and maintain. Why<br />
don't you look around to see what inspires you or mix and match<br />
these ideas to create your unique look? Good luck and Happy<br />
Crafting!
Interior Faded, Stone, and Sprayed 124
Media Owner and Publisher:<br />
MONTANA-CANS /<br />
allspraypainted.com<br />
© 2021 allspraypainted.com<br />
All rights reserved.<br />
Reprinting, even in part,<br />
only with the approval of<br />
the publisher.<br />
MONTANA-CANS<br />
Häusserstraße 36<br />
69115 Heidelberg<br />
Deutschland<br />
Phone +49 (0) 6221 36 333 0<br />
info@montana-cans.com<br />
www.allspraypainted.com<br />
Creators:<br />
Vera from nicestthings.com<br />
Lisa from itsprettynice.com<br />
Rachel from thecraftedlife.com<br />
Carolin from carolinkaiser.de<br />
Danny and Martin from schreiberpoetter.de
<strong>ALLSPRAYPAINTED</strong>.COM<br />
FOLLOW US @<strong>ALLSPRAYPAINTED</strong><br />
505072