Roasting Survival Guide
Troubled by tenderloin? Stressed over seasoning? Stewing about roasting? Rest easy, roast master. We've got you.
Troubled by tenderloin? Stressed over seasoning? Stewing about roasting? Rest easy, roast master. We've got you.

Create successful ePaper yourself
Turn your PDF publications into a flip-book with our unique Google optimized e-Paper software.
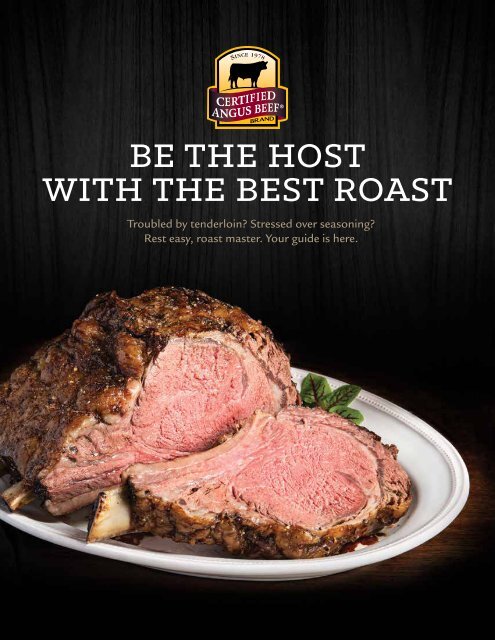
BE THE HOST<br />
WITH THE BEST ROAST<br />
Troubled by tenderloin? Stressed over seasoning?<br />
Rest easy, roast master. Your guide is here.
PICK THE PERFECT ROAST<br />
HOW BIG IS THE GROUP<br />
AT YOUR TABLE?<br />
Just a few.<br />
Like Goldilocks: just right!<br />
We have a big family.<br />
DO YOU WANT<br />
LEFTOVERS?<br />
Not too many.<br />
WHAT’S MORE<br />
IMPORTANT:<br />
FLAVOR OR<br />
TENDERNESS?<br />
Love me tender.<br />
Flavor is king.<br />
TENDERLOIN<br />
ROAST<br />
PRIME RIB<br />
As tender and elegant<br />
as it gets. Lean with<br />
mild flavor. Buy a<br />
whole tenderloin<br />
for a large group<br />
or ask your butcher<br />
for a center-cut<br />
chateaubriand if a<br />
small portion is in<br />
order.<br />
The king of beef<br />
roasts. Richly<br />
marbled, robustly<br />
flavored and naturally<br />
tender. Also known as<br />
a rib roast or ribeye<br />
roast, it’s available<br />
bone-in or boneless.<br />
Either way, it makes a<br />
grand impression.<br />
HOW MUCH<br />
SHOULD YOU BUY?<br />
As a general rule of thumb: 8 oz. per guest. Add a pound<br />
or two to the total if you want leftovers or have a bunch<br />
of big eaters at your table. Better yet, the Roast Perfect<br />
app has a calculator that will help you precisely choose<br />
the right size based on your preferred cut and number at<br />
your table.<br />
Duh. Yes.<br />
SPLURGING, OR<br />
LOOKING FOR<br />
SOMETHING<br />
COST-EFFECTIVE?<br />
We’re going all out.<br />
I’m all about value.<br />
DO YOU WANT<br />
TO KEEP IT<br />
SIMPLE OR<br />
DRESS IT UP?<br />
Spread the rub.<br />
Salt and pepper, please.<br />
TOP SIRLOIN<br />
ROAST<br />
STRIP ROAST<br />
Lean and juicy, this<br />
versatile roast is a<br />
great value and the<br />
perfect choice for<br />
a flavorful rub or<br />
glaze. If you want to<br />
get creative in the<br />
kitchen, give it a try.<br />
Start a new holiday<br />
tradition with this<br />
lean, flavorful and<br />
easy-to-carve roast.<br />
If you enjoy the<br />
beefiness of a strip<br />
steak, you’ll love this<br />
cut roasted, too. Have<br />
your butcher cut your<br />
roast small or large,<br />
depending on the size<br />
of your gathering.
BEAT THE HOLIDAY<br />
RUSH: BUY AHEAD &<br />
FREEZE YOUR ROAST<br />
FREEZING<br />
Your goal: create an airtight seal and keep as much air out<br />
as possible. Wrap beef tightly in foil or butcher paper, then<br />
seal in a plastic bag, squeezing out as much air as possible.<br />
Label all packages with the date and a description.<br />
Consider adding a weight, too.<br />
Roasts, like steaks, can be frozen up to 12 months.<br />
(But you’re not going to keep it on ice that long, are you?)<br />
PRO<br />
TIP<br />
Plan ahead! Depending on the weight and<br />
thickness of your roast, and the temperatures<br />
of your freezer and fridge, it can take two days<br />
or more to thaw your roast.<br />
EVERYTHING YOU NEED TO KNOW<br />
ABOUT THAWING<br />
Defrost beef in the fridge, never on the kitchen counter. Keep packages on a plate or a tray to<br />
catch any juices that might leak. (Also, it’s best to thaw beef on the lowest shelf in your fridge.)<br />
OOPS.<br />
YOUR ROAST IS STILL IN THE FREEZER.<br />
Don’t panic … you can still thaw your roast safely in cold water,<br />
using these tips from the USDA:<br />
1. Leave it in its packaging (it should be airtight, or put it in a leakproof<br />
bag).<br />
2. Submerge in cold water, changing the water every 30 minutes. A<br />
3- to 4-pound roast may take up to 3 hours to thaw this way.<br />
3. Cook immediately.<br />
Should you bring beef to room temperature before cooking it?<br />
No. Recent research shows that, contrary to popular belief, beef<br />
cooked at room temperature doesn’t cook significantly quicker or<br />
more evenly. To minimize any food safety concerns, take it directly<br />
from the fridge and cook it immediately.<br />
PRO<br />
TIP<br />
The FDA recommends setting<br />
your freezer at 0˚F or lower. The<br />
faster foods freeze, the smaller<br />
the ice crystals that will develop.<br />
That means a better texture after<br />
thawing.<br />
SEASONING<br />
Are you looking for classic flavors or something to spice up<br />
the table?<br />
Starting with the Certified Angus Beef ® brand means you<br />
don’t need to do a lot to make it taste good. A generous<br />
sprinkling of coarse kosher salt and freshly cracked pepper is<br />
the perfect way to enhance your roast’s natural flavors.<br />
Show off your culinary flair with a custom seasoning blend.<br />
Flavors that go well with most roasts include:<br />
• Aromatics: garlic, onion, shallot<br />
• Herbs: thyme, rosemary, parsley, sage, oregano<br />
• Sweet: brown sugar, granulated honey, maple syrup<br />
• Heat: pepper (black, white, pink, cayenne or crushed red),<br />
horseradish, ginger or mustard<br />
PRO<br />
TIP<br />
PRO<br />
TIP<br />
You can use fresh or dried herbs and seasonings.<br />
Just remember that you’ll need more fresh than<br />
dried to achieve the same flavor. Also, dried herbs<br />
lose their punch over time. If you don’t smell their<br />
aroma when you open them, it’s time to restock.<br />
The perfect ratio of salt to pepper is 2:1.<br />
INCREASE YOUR<br />
INSTAGRAM-ABILITY<br />
Scored: Before seasoning, use a<br />
sharp knife to make long diagonal<br />
cuts about 1/2 inch deep, and an<br />
inch apart, across the entire top<br />
surface of your roast. Turn your roast<br />
90 degrees and repeat, making a<br />
diamond cross-hatch pattern across<br />
its surface. Rub generously with<br />
your seasoning, making sure you<br />
get it into each of those cuts. As the<br />
roast cooks, it’ll develop a crunchy,<br />
flavorful scored exterior that doesn’t<br />
just look amazing, but tastes great,<br />
too!<br />
Studded: Use a paring knife to make<br />
small slits, about 1 inch wide and<br />
1 inch deep, across the top of your<br />
roast. Insert a small garlic clove and<br />
sprig of rosemary in each cut, then rub<br />
the entire roast with the seasoning of<br />
your choice. This technique ensures<br />
great flavor from the inside out.
READY TO ROAST?<br />
Follow these simple steps:<br />
1. Preheat oven to 450°F<br />
2. Season roast<br />
3. Place in a roasting pan fitted with a rack, fat side up<br />
4. Cook 15 minutes<br />
5. Reduce oven to 325°F and continue roasting (time will vary<br />
depending on cut, size and desired doneness)<br />
6. Remove from oven when 5-10° lower than target temperature<br />
7. Rest before serving<br />
Note: these instructions are tested and proven for a variety of roasts but<br />
are a general guide. If your recipe has specific instructions, follow them.<br />
ESSENTIAL TOOLS<br />
• <strong>Roasting</strong> pan with a rack<br />
• Salt and pepper mills<br />
• Instant-read thermometer<br />
• Chef’s knife<br />
• Cutting board<br />
• Roast Perfect app<br />
Looking for more guidance?<br />
The Roast Perfect app<br />
includes an interactive timer<br />
that you can customize for<br />
your specific roast cut, size<br />
and doneness to ensure<br />
perfect, no-stress results.<br />
REST, CARVE & SERVE<br />
Give your roast a rest. Letting it relax a few<br />
minutes before serving will allow all of the<br />
flavorful juices to redistribute throughout the<br />
roast. You can tent it loosely with foil if you like,<br />
but larger roasts will stay plenty warm while<br />
resting.<br />
• 10 minutes for roasts less than 4 lbs.<br />
• 15 minutes for 4-10 lb. roasts<br />
• 20 minutes for roasts larger than 10 lbs.<br />
Now, it’s time to carve. You’ll need a large cutting<br />
board and a long, sharp, non-serrated knife.<br />
1. If you tied your roast before cooking, snip away<br />
the butcher’s twine and carefully remove it.<br />
2. Identify which direction the grain is—the<br />
direction of the meat’s natural texture. In some<br />
cuts, this grain is very pronounced, and in<br />
others, it’s more subtle.<br />
3. Plan your cuts to go against the grain to<br />
maximize the tenderness in every bite.<br />
4. Using long, smooth strokes, slice the roast into<br />
thin or thick slices according to your preference.<br />
Avoid making short back-and-forth sawing<br />
motions.<br />
PRO<br />
TIP<br />
Ask your guests if they’d prefer thick or thin<br />
slices, and how much they’d like to be served.<br />
They’ll appreciate the personal touch.<br />
HOW DO YOU LIKE YOUR<br />
ROAST COOKED?<br />
Test for doneness using an instant-read thermometer. Insert<br />
it through the side of the cut, to the center, not touching any<br />
bone or fat. Remove from oven when thermometer registers<br />
5-10°F lower than your target temperature.<br />
1 Rare – Cool red center – 125°F<br />
2 Medium Rare – Warm red center – 135°F<br />
3 Medium – Warm pink center – 145°F<br />
4 Medium Well – Slightly pink center – 150°F<br />
5 Well – Little or no pink – 160°F<br />
CARVE A PRIME RIB<br />
Carving a bone-in roast, like a Prime Rib, doesn’t<br />
need to be intimidating.<br />
1. Start by holding the bones perpendicular to the<br />
cutting board.<br />
2. Hold your knife parallel to the bones, and carefully<br />
slice down to the board. When you’re done with<br />
this cut, you’ll have separated the bones from the<br />
main roast.<br />
3. Set the bone-in portion aside and carve the roast<br />
as described above. If your guests request it, you<br />
can slice in between the bones and distribute those<br />
at the table as well.<br />
1 2 3 4<br />
5<br />
PRO<br />
TIP<br />
Separate the bones from the Prime Rib before cooking. Make the same cut<br />
described above before you season the roast, then use butcher’s twine to tie the<br />
bones back in place before cooking. After the roast has rested, snip away the<br />
twines and the bones will fall away, allowing for easy carving tableside.
NEED AN EXTRA HAND?<br />
Scan here to get the Roast Perfect app<br />
Share your roasting success with the<br />
Certified Angus Beef ® Kitchen group on Facebook<br />
CertifiedAngusBeef.com.<br />
23441