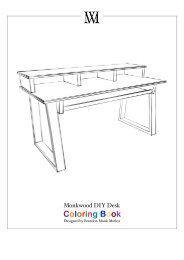
Monkwood DIY Desk Plans BETA version
Here's an 'as is' DIY desk with supplies and dimensions and some instructions. Fill in the blanks creatively and or consult a woodworker to create your own until full version is released. My client building schedule has been very intense and I have less help in the shop these days due to COVID. I aim to keep chipping away at these plans for release3 in the new year. For those who would like to get started I have made these BETA plans available. Thanks for your patience and interest in this project! Sincerely, Monk Please tag you pics with #monkwoodDIYdesk
Here's an 'as is' DIY desk with supplies and dimensions and some instructions. Fill in the blanks creatively and or consult a woodworker to create your own until full version is released.
My client building schedule has been very intense and I have less help in the shop these days due to COVID. I aim to keep chipping away at these plans for release3 in the new year.
For those who would like to get started I have made these BETA plans available.
Thanks for your patience and interest in this project!
Sincerely,
Monk
Please tag you pics with #monkwoodDIYdesk

Create successful ePaper yourself
Turn your PDF publications into a flip-book with our unique Google optimized e-Paper software.
10. cut 2 pieces of 2x6 @ 4.5” long for assembly<br />
supports for hidden shelf. (cut them off of a scrap<br />
piece no shorter than 14” for safety!)<br />
11. Lay 4.5” cut off on each side where the hidden<br />
shelf will be.<br />
12. Place hidden shelf on top of scrap supports<br />
and line up to markings.<br />
13. Screws into side frame using #8 x 2.5” wood<br />
screws. (3 screws pers side - 6 total). Use a clamp<br />
if needed to hold in place.<br />
14. Attach front and back 1x2 rails onto hidden<br />
shelf using nail gun or 1.5” brad finish nails.<br />
15. Take out shelf piece of drawer slide by pulling<br />
plastic tab. (see slides instructions for more details)<br />
16. Attach frame portion of slide to the left and<br />
right side frames.<br />
17. Place left and right side frames upside down<br />
on worktop with insides facing eachother.<br />
18. Attach 2x4 support beam angle using 2 - #8 x<br />
2.5” screws though pilot holes on each side.<br />
19. Drill 8 evenly spaced pilot holes to to trapezoid<br />
piece of the bases. Then Countersink.<br />
11. Sand and touch up finish on miter angles and<br />
ends