Monkwood DIY Desk Plans BETA version
Here's an 'as is' DIY desk with supplies and dimensions and some instructions. Fill in the blanks creatively and or consult a woodworker to create your own until full version is released. My client building schedule has been very intense and I have less help in the shop these days due to COVID. I aim to keep chipping away at these plans for release3 in the new year. For those who would like to get started I have made these BETA plans available. Thanks for your patience and interest in this project! Sincerely, Monk Please tag you pics with #monkwoodDIYdesk
Here's an 'as is' DIY desk with supplies and dimensions and some instructions. Fill in the blanks creatively and or consult a woodworker to create your own until full version is released.
My client building schedule has been very intense and I have less help in the shop these days due to COVID. I aim to keep chipping away at these plans for release3 in the new year.
For those who would like to get started I have made these BETA plans available.
Thanks for your patience and interest in this project!
Sincerely,
Monk
Please tag you pics with #monkwoodDIYdesk

Create successful ePaper yourself
Turn your PDF publications into a flip-book with our unique Google optimized e-Paper software.
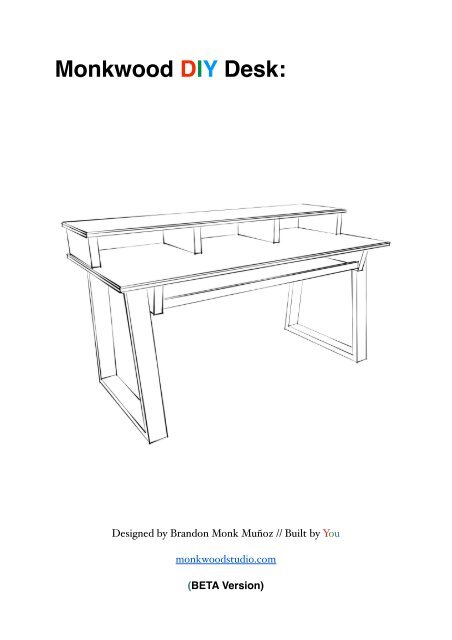
<strong>Monkwood</strong> <strong>DIY</strong> <strong>Desk</strong>:<br />
Designed by Brandon Monk Muñoz // Built by You<br />
monkwoodstudio.com<br />
(<strong>BETA</strong> Version)
Table of Contents<br />
3 Why Build a Studio <strong>Desk</strong>?<br />
4 Style & Method<br />
5 Notes on Safety<br />
6 Tools & Equipment<br />
10 Model A // 61 key - 3 rack bays<br />
11 - dimensions & diagrams<br />
11 - materials & supplies<br />
11 - cutting tops & shelving<br />
12 - cutting under frame parts<br />
13 - bases<br />
14 - finishing<br />
15 - assembly<br />
16 Model B // 88 key - 2 split rack bays<br />
11 - dimensions<br />
11 - materials & supplies<br />
11 - cutting tops & shelving<br />
12 - cutting under frame parts<br />
13 - bases<br />
14 - finishing<br />
15 - assembly<br />
22 Model Z (custom configuration)<br />
23 - notes on hardwood<br />
24 - notes on sit/stand bases<br />
25 - notes on future editions and upgrades<br />
25 Example Photos<br />
26 #<strong>Monkwood</strong><strong>DIY</strong>desk Community<br />
@ reddit.com/monkwooddiydesk
Why Build a Studio <strong>Desk</strong>?<br />
A desk can be much more than a wooden rectangle that holds up your stuff. A well built<br />
studio desk can organize your creative tools and help you focus your skills and ideas<br />
into a unified workflow that unlocks your potential to alter your current reality for the<br />
better. Or, it can simply be a very nice place to shoot some emails.<br />
However you decide to use your studio desk, you’ll soon experience the benefit of<br />
having a versatile space to work on what’s important to you. Now you won’t waste time<br />
setting up your gear whenever you get inspired or start feeling cable chaos fatigue when<br />
10 hours into an all night session. A designated space to create will allow you to pick up<br />
wherever you left off and begin to gain some real traction towards your goals and<br />
aspirations.<br />
I’m not suggesting a studio desk will magically make your life better. Yet, if built and<br />
used with sincere intent, it can definitely help open up many new possibilities for you.<br />
I’ve built over 250 desks for all sorts of creative professionals. Whether they were a full<br />
time composer/producer or a lawyer by day and synth lord by night - each of my clients<br />
has an innate desire to manifest their ideas into material form - no matter what.<br />
If that sounds anything like you, then I believe you have what it takes to make this<br />
<strong>DIY</strong> desk and then go on to do great things with it...<br />
You got this!<br />
Brandon Monk Muñoz
Style & Method<br />
These plans are intended for the first time woodworker with minimal tools, time,<br />
space and money to work with. If you can build a skate ramp, you can build this. The<br />
building style is inspired by the old school, use what you got in the garage method I<br />
watched my grandfather employ during my childhood. With only a few tools and<br />
some scrap wood he could build a doghouse that could survive the apocalypse.<br />
My aim is to help you create a beautiful and long lasting piece of furniture with<br />
common materials and very simple construction methods. In these plans I combine<br />
strength and accessibility of ‘skateramp joinery’ with the attention to detail I've<br />
learned over 20 years of furniture making.<br />
You are also welcome to seek assistance from an experienced craftsperson in your area<br />
if needed or preferred. Those with more experience and resources can enhance the<br />
design with alternate joinery and hardwood materials to make it even better.<br />
I see the #<strong>Monkwood</strong><strong>DIY</strong>desk as a long term and evolving project. I will add more<br />
details and options to the plans in the days to come. I look forward to seeing the<br />
many different <strong>version</strong>s that will come out of these plans.<br />
Treat it like a flexible recipe which can be adapted to fit your specific taste and needs.<br />
The desk can be made in a weekend, but if you have the time and space, I recommend<br />
giving it about a week so you can hone in and give each step of the process your full<br />
attention and focus. If you only have a small window to work with, just give it your all,<br />
don’t rush or get too mad at mistakes. They are a part of every learning process.
Notes on Safety<br />
(post in a visible area as you build)<br />
__________________________________________________________________________<br />
• Build Sober<br />
• Don’t Rush<br />
• Wear Eye Protection + Dust Mask<br />
• Measure Twice, Cut Once<br />
• Don’t Make Cuts in Awkward Positions<br />
• Let Blades Spin Fully Before Cutting<br />
• Don’t Video Yourself While Making Cuts<br />
• Organize Your Power Cables<br />
• Unplug Your Tools When Not in Use<br />
• Put Oily rags in Water Bucket After Use<br />
• Clean Work Area Frequently<br />
• Don’t Get Too Mad at Your Mistakes
Tools & Equipment:<br />
Use all tools with care and respect. If borrowing any from neighbors or friends please return<br />
them promptly, cleaned and in good condition. I also recommend requesting the help of those<br />
with building experience for any part of the process you may need assistance with.<br />
__________________________________________________________________________<br />
Essential//<br />
• miter saw or handsaw with miter box<br />
• #2 pencil / silver color pencil / sharpie<br />
• tape measure<br />
• combination square<br />
• hammer<br />
• power drill<br />
• stubby phillips screwdriver<br />
• #2 phillips / 1/8” pilot bit / counter sink bit<br />
• worktable on sawhorses or 4 x 8 - 3/4 ply or<br />
insulation foam on ground<br />
• extension chord<br />
• 3” paint brush<br />
• water bucket or large quart cup<br />
• cloth rags<br />
• first aid kit (place in plain sight to help stay alert)<br />
• sanding stick*<br />
Recommended//<br />
• circular saw ‘skil saw’ (if cutting<br />
your own ply)<br />
• orbital sander or regular square<br />
• 48” metal T-square or straight edge<br />
• router with 1/4” round over bit<br />
• small hand plane<br />
• nail gun with 2” and 2.5” nails**<br />
• Kreg pocket hole system**<br />
* Instructions how to make in finishing section<br />
** You can substitute wood screw and hammered finish<br />
nails with these tools
Model A // 61 key Studio <strong>Desk</strong>
Model A // Materials & Supplies:<br />
This shopping list is based on readily available and cost effective construction materials. You are<br />
welcome to substitute certain items for others, such as hardwood tops instead of ply. However,<br />
you will need to adapt the plans to suite your material preferences.<br />
This list also includes additional pieces of wood for a possible mistake cuts and scrap wood to<br />
use for assembly and finish purposes. If using Kreg Jig or nail gun you’ll need to get the<br />
equivalent screws/nails needed.<br />
__________________________________________________________________________<br />
Wood//<br />
1 4 x 8 ft sheet 3/4” (18mm) plywood (construction or furniture grade)<br />
1 4 x 8 ft sheet of 3/4” (18mm) ply or insulation foam (for cutting assembly work top)<br />
3 2 x 6 - 8ft (245cm)<br />
3 2 x 4 - 10ft (305cm) - or 4 @ 8ft long<br />
3 1 x 2 - 8ft (245cm) fir, pine or poplar<br />
Building Supplies//<br />
Choose the driest and straightest pieces you can find!<br />
2 14” (356mm) or 16” metal drawer slides<br />
(Accuride 3832 or equivalent - regular not soft close or push!)<br />
4 A35z Simpson Strong Tie mounting brackets<br />
(or large door hinges)<br />
25 box of #6 - 2” (50mm) coarse drywall or wood screws<br />
25 box of #8 - 2.5” (64mm) coarse drywall or wood<br />
screws<br />
50 box of #8 - 5/8” (16mm) pan head screws<br />
25 box of 2” (50mm) finish nails<br />
1 small bottle of wood glue (ex: Titebond 2)<br />
Finish Supplies//<br />
3 sheets each of 80/120/220 grit sandpaper<br />
5 80 grit paper for sander<br />
1 quart (946ml) clear top coat finish<br />
(water based recommended on ply)<br />
1 quart (946ml) wood stain or paint<br />
1 beeswax and or orange oil<br />
4 felt pads for bases<br />
1 small wood filler<br />
1 plastic or fabric drop cloth
Cutting Tops and Shelving:<br />
You can cut the main panels with a circular saw or even a handsaw if needed. You can also<br />
show this page to someone who can operate the sheet cutting panel saw which can be found at<br />
many large supply stores like Home Depot or B&Q. They can make the main cross cuts for<br />
you if you ask them nicely. Tips help too.<br />
__________________________________________________________________________<br />
Before cutting ply, look and see which side looks the<br />
best and use that for your desk top and top shelf<br />
1. Measure and mark ply from left edge at 66”<br />
2. Measure and mark ply from left edge at 81”<br />
3. Measure and mark ply from left edge at 91”<br />
4. Use T-square or straight edge to draw a line<br />
across the whole sheet with a sharpie<br />
5. Cut on the line at 91”<br />
6. Cut on the line at 81”<br />
7. Cut on the line at 66”<br />
8. Measure and mark a line at 33” lengthwise<br />
across the large 66” x 48 piece<br />
9. Cut across the line
Cutting Parts:<br />
Use the straightest and driest pieces of wood you can find for the under-frame and bases to<br />
avoid any assembly issues from warped wood. Cut rack shelf partitions from the same piece<br />
of wood to insure it is the same width as it can vary slightly from piece to piece.<br />
Always keep your holding hand AWAY from the cutting area.<br />
1. Cut 2 pieces of 2x6 at 31.5” (main side frame panels)<br />
2. Cut 10 degree angles on both ends of each. (make cure<br />
they face correctly like a v.<br />
3. Cut 4 pieces of 2x6 at 14” (rack shelf)<br />
4. Cut 1 piece of 2x4 at 48” (support beam)<br />
5. Cut 2 pieces of 1x2 at 48’ (hidden shelf rails)<br />
6. Cut 1 piece of 1x2 at 47 7/8” (sliding shelf front rail)<br />
7. Cut 1 piece of 1x2 at 47” (sliding shelf back rail)
Sanding and Finishing:<br />
I recommend pre-finishing the pieces before assembly as it it easier to work on in pieces +<br />
way less messy. It also allows for different tones for the parts and tops as shown in the<br />
example pieces. Always use adequate floor covering as to not anger your landlord. Things<br />
splatter no matter how careful you are.<br />
The Sanding Stick:<br />
A useful shaping and sanding tool for this project and beyond.<br />
I recommend making at least a couple.<br />
1. Cut 1x2 off cut at 11”<br />
2. Fold and cut 1 sheet of sandpaper in half lengthwise<br />
3. Apply spray adhesive or school glue to back of sandpaper<br />
4. Line up edge of paper with long edge of wood and wrap around<br />
5. Use hands to press on sandpaper until fully adhered<br />
Shaping and Sanding:<br />
Rough to smooth. Don’t rush or skip paper grits. It’ll all shows up in the end...<br />
1. Use router or sanding stick around to round the<br />
top edge of your desktop and top shelf piece.<br />
2. Use router or sanding stick to round the front and<br />
back edges of rack shelf partitions.<br />
3. Use router or sanding stick to round the front/<br />
back and bottom edge of the underframe side panels<br />
4. Use sanding stick to tame any remaining sharp -<br />
fresh cut edges and corners of the plywood shelving<br />
and underframe parts.<br />
5. Use sander or hand with 120/150 grit to smooth<br />
out the edges you just sanded with 80grit.<br />
6. Use sander or hand with 120/150 grit to smooth all<br />
flat surfaces of the panels and parts
Finishing:<br />
A million ways to chase a cat. Here’s just a few...<br />
Paint Sample Wood Stain:<br />
A cheap way to get wood to look any color you want.<br />
1. Mix one 8oz (237ml) sample per quart (1L) of water<br />
2. Stir well<br />
3. test on off cuts till you get the right ratio for you<br />
4. add more water if too dark/opaque<br />
Brushing on Finish:<br />
Use brush to apply water based paint or stain. Use rag or small bristle brush to apply oil<br />
stain. Always put oily rags in water bucker after use for fire safety.<br />
1. Paint or stain top panels desired color with brush<br />
2. Paint or stain underframe parts desired color<br />
3. Paint or stain 2x4’s for bases desired color (can<br />
do this before or after making cuts - see Base<br />
section for more info)<br />
4. Lightly sand with 220<br />
5. Apply clear water based finish<br />
6. Sand with used 220 and add another coat if<br />
desired. I recommend 2 or 3 coats of clear for the<br />
desktop.<br />
7. Add second coat on tops
Cutting Bases:<br />
2x4 material for bases can be pre finished before cutting or afterward. I pre-finished them<br />
in the example desks as its easier to brush upon the whole plank. Either way, I recommend<br />
cutting the 4 parts from a single 10ft - 2x4 for wood consistency. I cut pieces in order like I<br />
would a grain wrapped box. Make a smaller practice piece if you have extra wood.<br />
You can also make these a simpler rectangle if your miter saw or box doesn’t go past 45 deg.<br />
__________________________________________________________________________<br />
1. Set your miter saw to 0 deg and cut following<br />
pieces from long 8-10ft 2x4 starting from the right.<br />
2. Cut 1st piece at 29.5” then label 1a w/ pencil<br />
3. Cut 2nd piece at 30” then label 1b (bottom)<br />
4. Cut 3rd piece at 29.5” then label 1c (side)<br />
5. Cut 4th piece at 20.5” then label 1d (top)<br />
6. Repeat above cuts for for other base,<br />
labeling 2a - 2b - 2c - 2d in the same manner.<br />
7. Arrange Base 1 on your worktop next to you in<br />
the way with will be assembled (fig 3.)<br />
8. Draw a mark on each end indicating which<br />
direction the cut will be made. Then draw a 40 to the<br />
top cuts and a 50 to the bottom ones. This will help<br />
you keep track of each cut.<br />
On the following cuts I recommend making 2 cuts per<br />
miter. One to get close to the edge and the second to<br />
go right up to the the edge. If using a handsaw miter<br />
box just make one cut on the edge.<br />
9. Set miter saw to 40deg and make the 4 cuts on<br />
the top miters you labeled accordingly.<br />
10. Set miter saw to 50deg and make the 4 cuts on<br />
the top miters you labeled accordingly.<br />
11. Check cuts with measuring tape and dry<br />
assemble on worktop to see if they fit together well.<br />
12. Repeat the above steps with Base 2
Assembling Bases:<br />
Use the tape trick method for gluing up the base parts and reinforcing with screws after glue dries.<br />
_________________________________________________________________________<br />
1. Layout 4 pieces for left Base 1 on long work top<br />
or foam board. Place them in consecutive order from<br />
end to end with outside facing up.<br />
2. Use painters tape or duct tape to connect ends<br />
3. Flip over carefully<br />
4. Add glue to miters and spread evenly<br />
5. Gently lift up parts to meet together<br />
6. Attach tape to remaining end<br />
7. Wipe and let dry for 2-3hours<br />
8. Drill 2 pilot holes on each miter angle. entering<br />
from top and bottom of base. Use optional<br />
countersink after for cleaner screw entry.<br />
9. Use #8 x 2in screws in each pilot hole. 2 per<br />
angle - 8 per base.<br />
10. Drill 8 evenly spaced pilot holes to to trapezoid<br />
piece of the bases. Then Countersink.<br />
11. Sand and touch up finish on miter angles and<br />
ends<br />
12. Repeat the above steps with right Base 2
Assembling Underframe:<br />
We employ a simple skate ramp style method with screws or nail gun.<br />
You can adapt to dowels, pocket holes or dominoes if preferred.<br />
_________________________________________________________________________<br />
1. Designate which side frame pieces are left and<br />
right and mark them on the top side. L and R<br />
2. Lay side frames on worktop with inside facing up.<br />
3. Use measuring tape and combo square to mark<br />
layout points and pilot hole marking accorning to<br />
digram above. (Will include more specific instructions<br />
in <strong>version</strong> 1.0)<br />
4. Drill pilot holes for support beam and hidden shelf.<br />
add countersink on outside<br />
5. Set combo square to 7/8” (22ml) and mark a line<br />
on the bottom inside front of side piece for aligning<br />
the drawer slides. front of slide should be 2” from<br />
front and 29.5” from back for both left and right<br />
slides.<br />
6. Take out shelf piece of drawer slide by pulling<br />
plastic tab. (see slides instructions for more details)<br />
7. Attach frame portion of slide to the left and right<br />
side frames.<br />
8. Place left and right side frames upside down on<br />
worktop with insides facing eachother.<br />
9. Attach 2x4 support beam angle using 2 - #8 x<br />
2.5” screws though pilot holes on each side.
10. cut 2 pieces of 2x6 @ 4.5” long for assembly<br />
supports for hidden shelf. (cut them off of a scrap<br />
piece no shorter than 14” for safety!)<br />
11. Lay 4.5” cut off on each side where the hidden<br />
shelf will be.<br />
12. Place hidden shelf on top of scrap supports<br />
and line up to markings.<br />
13. Screws into side frame using #8 x 2.5” wood<br />
screws. (3 screws pers side - 6 total). Use a clamp<br />
if needed to hold in place.<br />
14. Attach front and back 1x2 rails onto hidden<br />
shelf using nail gun or 1.5” brad finish nails.<br />
15. Take out shelf piece of drawer slide by pulling<br />
plastic tab. (see slides instructions for more details)<br />
16. Attach frame portion of slide to the left and<br />
right side frames.<br />
17. Place left and right side frames upside down<br />
on worktop with insides facing eachother.<br />
18. Attach 2x4 support beam angle using 2 - #8 x<br />
2.5” screws though pilot holes on each side.<br />
19. Drill 8 evenly spaced pilot holes to to trapezoid<br />
piece of the bases. Then Countersink.<br />
11. Sand and touch up finish on miter angles and<br />
ends
Model B - 88key // Materials & Supplies:<br />
This shopping list is based on readily available and cost effective construction materials. You are<br />
welcome to substitute certain items for others, such as hardwood tops instead of ply. However,<br />
you will need to adapt the plans to suite your material preferences.<br />
This list also includes additional pieces of wood for a possible mistake cuts and scrap wood to<br />
use for assembly and finish purposes. If using Kreg Jig or nail gun you’ll need to get the<br />
equivalent screws/nails needed.<br />
__________________________________________________________________________<br />
Wood//<br />
1 4 x 8 ft sheet 3/4” (18mm) plywood (construction or furniture grade)<br />
1 4 x 8 ft sheet of 3/4” (18mm) ply or insulation foam (for cutting assembly work top)<br />
2 2 x 8 - 8ft (245cm)<br />
2 2 x 6 - 8ft (245cm)<br />
3 2 x 4 - 10ft (305cm) - or 4 @ 8ft long (245cm)<br />
3 1 x 2 - 8ft (245cm) fir, pine or poplar<br />
Building Supplies//<br />
Choose the driest and straightest pieces you can find!<br />
2 14” (356mm) or 16” metal drawer slides<br />
(Accuride 3832 or equivalent - regular not soft close or push!)<br />
4 A35z Simpson Strong Tie mounting brackets<br />
(or large 3” door hinges)<br />
25 box of #6 - 2” (50mm) coarse drywall or wood screws<br />
25 box of #8 - 2.5” (64mm) coarse drywall or wood<br />
screws<br />
50 box of #8 - 5/8” (16mm) pan head screws<br />
25 box of 2” (50mm) finish nails<br />
1 small bottle of wood glue (ex: Titebond 2)<br />
Finish Supplies//<br />
3 sheets each of 80/120/220 grit sandpaper<br />
5 80 grit paper for sander<br />
1 quart (946ml) clear top coat finish<br />
(water based recommended on ply)<br />
1 quart (946ml) wood stain or paint<br />
1 beeswax and or orange oil<br />
4 felt pads for bases<br />
1 small wood filler<br />
1 plastic or fabric drop cloth
Model B // 88 key Studio <strong>Desk</strong>