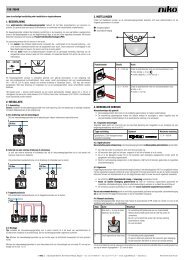
1. BESCHRIJVING 2. MONTAGE EN AANSLUITINGEN - Niko
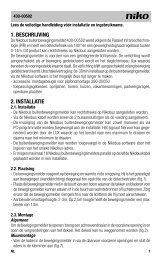
1. BESCHRIJVING 2. MONTAGE EN AANSLUITINGEN - Niko
1. BESCHRIJVING 2. MONTAGE EN AANSLUITINGEN - Niko

You also want an ePaper? Increase the reach of your titles
YUMPU automatically turns print PDFs into web optimized ePapers that Google loves.
420-00005 / 420-00006<br />
Specifications for the external RF transmitter<br />
The alarm can also be activated by another RF transmitter. To do this you need to press a button for which a 2-button mode can be used. The “on” button will<br />
activate the alarm, whereas the “off” button will disable the alarm again. If the alarm is activated by an external RF transmitter, you must take into account<br />
that only this switch is able to disable the alarm.<br />
3.1 Setting up a network of smoke detectors<br />
Option 1: only smoke detectors, no Easywave alarm button installed:<br />
<strong>1.</strong>All smoke detectors except one are put into programming mode<br />
<strong>2.</strong>The smoke detector, which is not in programming mode, is triggered to broadcast its code by pushing the test button for longer than 2 seconds. This address<br />
will become the master code.<br />
3.Other smoke detectors receive, verify, store and repeat this master code for other smoke detectors in the network.<br />
4.If a smoke detector received a valid master code, it automatically ends program mode and goes into stand-by mode after 1 minute (to prevent false alarms)<br />
you should therefore wait 1 minute before carrying out any test.<br />
Option 2: smoke detectors and an Easywave alarm button installed:<br />
<strong>1.</strong>All smoke detectors are put into programming mode<br />
<strong>2.</strong>The Easywave alarm button is pushed. This address will become the master code.<br />
Steps 3 and 4, see option <strong>1.</strong><br />
Note: if a smoke detector remains in programming mode, this means that it has not received the master code. Either the smoke detector is out of range of<br />
the network, or it is faulty.<br />
Note that not all the smoke detectors need to be programmed at once. If a group of detectors has the master code, another group (or single device) can be put<br />
into programming mode and programmed using a detector in the first group or the Easywave alarm button as reference for generating the master code.<br />
3.2 Adding an Easywave alarm button to a network<br />
In case an Easywave alarm button has to be programmed after the smoke detectors have been linked, follow the procedure from option 2 in 3.<strong>1.</strong> The master<br />
code of the alarm button will replace the original master code.<br />
3.3 Teaching the smoke detector alarm signal to a receiver<br />
You can teach the signal to another receiver from the Easywave RF range by <strong>Niko</strong>. To do this, put the RF receiver into programming mode and teach the smoke<br />
detector alarm signal in 2-button mode (on/off). The smoke detector broadcasts its code by pressing the test button for 2 seconds. For more information, see<br />
the RF receiver user manual.<br />
3.4 Resetting the smoke detector to factory settings — Removing a network<br />
Restore the factory settings of each smoke detector to remove the network.<br />
<strong>1.</strong>Press the program button for 2 sec => the LED flashes rapidly<br />
<strong>2.</strong>Press again for 2 sec => the LED goes out and is then illuminated for 2 sec to confirm that factory settings have been reloaded.<br />
4. CHECKING<br />
Test the operation of the smoke detector network each time a change has been made. To do this, wait for 1 minute after the last change and always test with<br />
the mounting cap mounted to the smoke detector.<br />
To test, you press the test button until the alarm is activated. The tested smoke detector emits a pulsating alarm tone for 3 seconds. The other smoke detectors<br />
in the system will generate a 30 second alarm within 30 seconds.<br />
<strong>EN</strong><br />
21