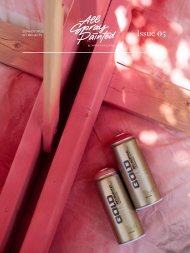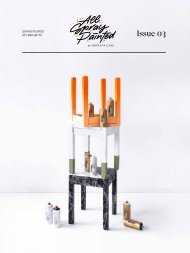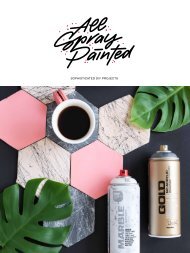
ALLSPRAYPAINTED Magazine 2020
sophisticated DIY Contents by MontanaCans - 2nd Issue! More Projects on https://allspraypainted.com/
sophisticated DIY Contents by MontanaCans - 2nd Issue!
More Projects on https://allspraypainted.com/

Create successful ePaper yourself
Turn your PDF publications into a flip-book with our unique Google optimized e-Paper software.
SOPHISTICATED DIY PROJECTS
MAGAZINE<br />
allspraypainted<br />
<strong>ALLSPRAYPAINTED</strong>.COM
Intro<br />
We have been quoted as saying, „Create Your Own World“.<br />
And when we first started this journey, we had no idea of<br />
how relevant this quote would be.<br />
For those of you who may not have seen the first issue of the<br />
allspraypainted <strong>Magazine</strong>, our team has been passionately<br />
helping people creatively personalize their surroundings,<br />
regardless of indoor or outdoor. Whether it be up-cycling furniture,<br />
re-vamping home decor or innovating DIY projects<br />
from scratch. Anything has been possible at allspraypainted.<br />
Create<br />
We are grateful for the help of our many international talented<br />
contributors. Not afraid to „give it a go“, they have added<br />
color and vibrance to our everyday lives. We also tip our<br />
hats off to our main supporter, MontanaCans. Not just a manufacturer<br />
of premium quality German made aerosol<br />
products, but also a source of inspiration and innovation.<br />
Although many ideas at allspraypainted have grown and flourished,<br />
it is not the ideas exclusively. So has our community.<br />
It‘s time to give a pat on the back to you, the reader. After all,<br />
you are the people that water the creative seeds we plant<br />
together. And hopefully enjoy the fruit those ideas bring.<br />
A year full of color has bound us all together. We have worked<br />
with old materials and new ones. We have gotten our hands<br />
dirty while working with wood, our gloves dirty while applying<br />
paint and turned rubbish into treasure. But above all had we<br />
had fun doing it.<br />
your<br />
own<br />
world!<br />
We have celebrated the seasons with their elements and the<br />
color changes they bring. We have re-invented some less<br />
than inspiring rituals into some exciting new projects. We have<br />
even turned nothing into something, while scratching our<br />
creative itch. The allspraypainted <strong>Magazine</strong> 02, is a celebration<br />
of what we have learnt and achieved. A reminder of what<br />
we did and a source of inspiration of what is still to come. So<br />
grab a seat and get inspired by the chapters in front of you.<br />
And never forget you can „create your own world!“
Content<br />
01<br />
02<br />
Metallic Effect Bowls 10<br />
Striped Gradient Clock 18<br />
03<br />
Granit Tray and Easter Eggs 24
04<br />
<strong>ALLSPRAYPAINTED</strong> MAGAZINE<br />
05<br />
Pink and Yellow Stools 28<br />
Glitter Homeware Objects 34<br />
06<br />
Glass Paint Tealights 42
Content<br />
07<br />
Aqua Colored Wooden Boxes 48<br />
Glass Paint Container 54<br />
08<br />
09<br />
Gradient Wooden Blocks 60
10<br />
Metallic Dipped Pumpkins 68<br />
11<br />
12<br />
Marble Effect Workspace and Wall Art 74<br />
Red Glitter Christmas 80
01<br />
Metallic Effect Bowls<br />
ADDING A SPLASH OF<br />
METALLIC COLOR TO NATURE
01<br />
<strong>ALLSPRAYPAINTED</strong> MAGAZINE<br />
13<br />
Make sure the bowls are clean and free of dusts<br />
and oils. Give them a light sanding with very<br />
fine sand paper. Take your masking tape and and<br />
apply it below the top of the bowls rim. You don’t<br />
want any paint near where there will be food or<br />
mouths. So only mask till about 2/3 of the way up.<br />
Apply the tape evenly and equally, pressing it<br />
down all the way around so no paint can sneak<br />
under the edges. Now it’s time to cover the rest of<br />
the bowl so no paint overspray lands anywhere<br />
you don’t want it to. Shake all your cans for 2-3<br />
minutes. Turn them upside down and remove the<br />
nozzles. Let the little black safety ring underneath<br />
them fall out. Re-apply the nozzles and give them<br />
a test spray, away from any surfaces.<br />
With gloves and mask on, start with the Montana<br />
Universal PRIMER and apply a light even coat to<br />
the outside of your bowls. Let them dry at least<br />
15 minutes or more, till they are touch dry. Give<br />
the painted surface an optional light sanding and<br />
then re-apply. Ideally you leave the bowls sit to<br />
dry over night so you are sure the primer is completely<br />
cured.<br />
The last step is applying the METALLIC Effect<br />
colors. Clean free of dust and make sure the<br />
bowls are dry. Shake the cans. The important<br />
part is to remember not to spray too close to your<br />
bowls with the METALLIC colors. Keep the can<br />
15-25 cm away from the bowls and apply in thin,<br />
even coats. Do multiple coats, allow them to<br />
touch dry and repeat the steps: sand – clean –<br />
shake – spray.
Metallic Effect Bowls<br />
MATERIALS USED<br />
• Montana METALLIC Effect EMC1010 Titanium<br />
• Montana METALLIC Effect EMC6040 Avocado Green<br />
• Montana METALLIC Effect EMC1030 Aztec Gold<br />
• Montana Universal PRIMER<br />
• Masking tape<br />
• Paper or material to cover the rest of the bowl<br />
• Fine sand paper<br />
• Gloves<br />
• Mask<br />
• Drop sheet<br />
14
01<br />
<strong>ALLSPRAYPAINTED</strong> MAGAZINE<br />
15
Warm Grey Stationary Update<br />
08
09<br />
0.12 Allspraypainted Lookbook
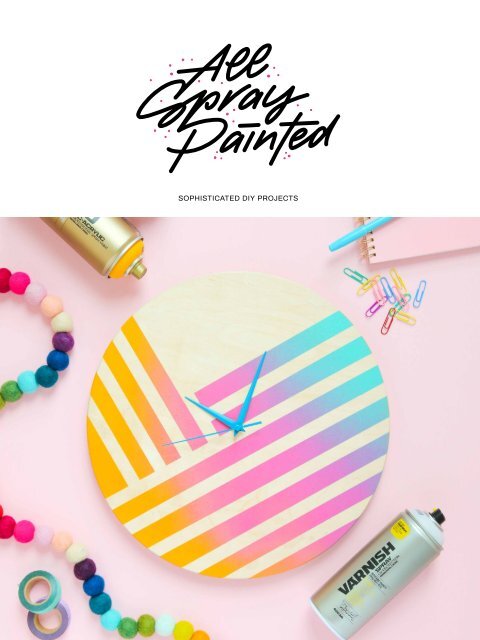
02<br />
Striped Gradient<br />
Clock<br />
“WHAT’S THE TIME” IN STYLE
Striped Gradient Clock<br />
Make sure the wood is clean and compatible to<br />
be sprayed. Shake all cans for 2–3 minutes. Take<br />
off the nozzles and turn the cans upside down,<br />
allowing the little black safety ring to fall out.<br />
Nozzle back on, now test spray away from any<br />
surfaces. Starting with the Montana GOLD color<br />
Yolk, spray an area from the left side leaving<br />
room for the next color Pink Pink. The final touch<br />
is a touch of Malachite. You are almost done!<br />
Remove the painters tape after about 3 to 5<br />
minutes and put on two coats of Montana Cans<br />
VARNISH Spray in Semi-Gloss to seal the paint<br />
and the wood. Let the clock base dry overnight.<br />
Put the clock kit together in the hole and<br />
you are ready to hang it.<br />
20
02<br />
<strong>ALLSPRAYPAINTED</strong> MAGAZINE<br />
21
Customized Striped Gradient Easter Clock Eggs<br />
MATERIALS USED<br />
• Montana GOLD G6130 Malachite<br />
• Montana GOLD G1230 Yolk<br />
• Montana GOLD G3130 Pink Pink<br />
• Montana Cans VARNISH Spray T1005 Semi-Gloss<br />
• Wooden circle as clock base<br />
• A clock kit<br />
• Painter’s tape<br />
• Gloves<br />
• Mask<br />
• Drop sheet<br />
22
23<br />
07 <strong>ALLSPRAYPAINTED</strong> LOOKBOOK
03<br />
Granit Tray and<br />
Easter Eggs<br />
ADDING A TOUCH OF STONE
Granit Tray and Easter Eggs<br />
On the tray, apply the Montana Universal PRIMER.<br />
Let dry and apply two coats of GRANIT Effect<br />
Spray. Seal with the Montana VARNISH. Let dry<br />
overnight. For the eggs, We didn’t need to prime<br />
them, as boiled eggs make for a great surface to<br />
paint. Depending on which type of egg you have<br />
chosen, you may want to prime it with the relevant<br />
Montana Plastic, Polystyrene or Universal<br />
PRIMER. Make sure the surfaces are clean, dust<br />
free and dry. Lightly coat them with the GRANIT<br />
Effect Spray at a distance of about 20–25cm in the<br />
color of your choice. Leave them to dry and then<br />
carefully roll them over to coat the other side.<br />
Disclaimer: Please note that sprayed Easter eggs<br />
can only be used for decorative purposes. 26
03<br />
<strong>ALLSPRAYPAINTED</strong> MAGAZINE<br />
27<br />
MATERIALS USED<br />
• Montana GRANIT Spray EG7000 Light Grey<br />
• Montana GRANIT Spray EG7050 Grey<br />
• Montana GRANIT Spray EG9000 Black<br />
• Montana PRIMER (depending on material of egg)<br />
• Tray<br />
• Eggs (natural, plastic, wood or polystyrene)<br />
• Gloves<br />
• Mask<br />
• Drop sheet
04<br />
Pink and<br />
Yellow Stools<br />
EYE CATCHING STOOLS FOR MORE<br />
THAN JUST SITTING ON
Pink and Yellow Stools<br />
Start by taping off the last 15cm–20cm of each<br />
stool’s feet. These areas you may want to stay<br />
clean and show natural wood when you remove<br />
the tape. If you are using existing stools you’ve<br />
found or recycled, give them a sanding to remove<br />
any existing paints or coatings. Ensure they are<br />
clean and dust free. We recommend using the<br />
Montana Universal PRIMER to pre-coat the wood.<br />
This will ensure the best color vibrancy for the<br />
later color application, but it also make sure the<br />
paint sticks optimally. Starting at the base of the<br />
legs, we first applied our darker colors, using<br />
broad sweeping strokes that were at least<br />
15cm –20cm away from the stools. Second coat<br />
the lighter shade and final color the lightest. Don’t<br />
forget to paint the insides and underneath of<br />
the stools as well! Once all the colors were applied,<br />
we removed the painters tape from the feet<br />
of the stools. Give them a coat of protection with<br />
Montana VARNISH Spray and let dry overnight.<br />
30
31<br />
04 <strong>ALLSPRAYPAINTED</strong> MAGAZINE
MATERIALS USED<br />
• Montana GOLD G3000 Lychee<br />
• Montana GOLD G3010 Bazooka Joe<br />
• Montana GOLD G3020 Strawberry<br />
• Montana GOLD G1010 Easter Yellow<br />
• Montana GOLD G1220 Yellow Cab<br />
• Montana GOLD G1240 Golden Yellow<br />
• Montana Universal PRIMER<br />
• Montana VARNISH T1005 Semi Gloss<br />
• Wooden stools<br />
• Sanding paper (if required)<br />
• Masking tape<br />
• Gloves<br />
• Mask<br />
• Drop sheet<br />
32
05<br />
Glitter Homeware<br />
Objects<br />
GIVING HOMEWARES SOME<br />
GLITTER ELEGANCE
Glitter Homeware Objects<br />
Remember the Montana GLITTER colors work<br />
best on black or dark surfaces. Count yourself<br />
lucky if any of your homewares are black to<br />
start with. If not, give them a coat of Montana<br />
GOLD Shock Black. Let dry. Attention:<br />
High quality metallic glitter pigments are heavy.<br />
As such, to ensure the best results, always<br />
re-shake your GLITTER Effect Colors to re-mix<br />
them again before use. Even after short pauses and<br />
regardless of if you shook well for 3 minutes to begin<br />
with. Leave your freshly painted objects 24 hours<br />
or more to completely dry. For the final touch, apply<br />
your Montana VARNISH Gloss.<br />
36
37<br />
05 <strong>ALLSPRAYPAINTED</strong> MAGAZINE
Glitter Homeware Objects<br />
MATERIALS USED<br />
• Montana GLITTER Paint Silver<br />
• Montana GLITTER Paint Dusty Gold<br />
• Montana GLITTER Paint Amethyst<br />
• Montana GLITTER Paint X-Mas Red<br />
• Montana GLITTER Paint Cosmos<br />
• Montana GOLD SHOCK 9000 Black<br />
• Montana VARNISH T1000 Gloss<br />
• Home wares including vase, urn, pots and a table<br />
• Gloves<br />
• Mask<br />
• Drop sheet<br />
38
39
06<br />
Glass Paint Tealights<br />
DIY FEELING FOR INDOOR OR OUT
Glass Paint Tealights<br />
Collect, empty the jars you think would be good<br />
vessels to hold candles. Make sure the jars are<br />
clean, free of dust and oils. Grab a tea towel and<br />
give them a wipe off before you start spraying.<br />
Then prepare your spraying area with a drop<br />
sheet, or piece of cardboard to spray on which<br />
will catch any overspray while spraying.<br />
Shake your cans vigorously for 2–3 minutes. Depending<br />
on how intense you want the color, you<br />
can apply one or more layers. Holding the can<br />
back about 15cm - 20cm from the jars, apply in<br />
thin light coats. The lighter you apply, the more<br />
light will stream through the glass. Add decorative<br />
thread if desired. 44
45<br />
06 <strong>ALLSPRAYPAINTED</strong> MAGAZINE
Glass Paint Tealights<br />
MATERIALS USED<br />
• Montana GLASS Paint GP6220 Mint<br />
• Montana GLASS Paint GP3010 Coral Red<br />
• Montana GLASS Paint GP1210 Almond<br />
• Colored thread to match chosen GLASS Paint colors<br />
• Empty glass jars<br />
• Scissors<br />
• Gloves<br />
• Mask<br />
• Drop sheet<br />
46
07<br />
Aqua Colored<br />
Wooden Boxes<br />
MORE THAN JUST WOODEN DECOR
Aqua Colored Wooden Boxes<br />
Make sure your boxes are smooth and free of<br />
possible splinters by sanding lightly with fine<br />
sanding paper. Brush them off and make sure<br />
they are clean and dry. Two light coats of<br />
Universal PRIMER, with a light sand in between<br />
coats are ideal. At a distance of about 15cm–<br />
20cm from each box, apply thin even coats of<br />
Montana GOLD color. One color per box.<br />
Let the boxes dry overnight and combine them<br />
as required.<br />
50
51<br />
07 <strong>ALLSPRAYPAINTED</strong> MAGAZINE
Aqua Colored Wooden Boxes<br />
MATERIALS USED<br />
• Montana Universal PRIMER<br />
• Montana GOLD G6000 Venom<br />
• Montana GOLD G6120 Malachite Light<br />
• Montana GOLD G6160 Pine<br />
• Montana GOLD G2610 Cool Candy<br />
• Montana GOLD G2660 Aqua<br />
• Montana GOLD G6200 Venice<br />
• Montana VARNISH T1005 Semi Gloss<br />
• Empty wooden boxes<br />
• Sand paper<br />
• Gloves<br />
• Mask<br />
• Drop sheet<br />
52
08<br />
Glass Paint<br />
Containers<br />
CREATING AMBIENCE<br />
WITH TRANSPARENT PAINT
Glass Paint Containers<br />
On some of the glass containers you can choose<br />
to mask off areas with painters tape. When you<br />
remove the tape after spraying, you are left with<br />
the original clean glass. At about 15cm from the<br />
glass, we sprayed sweeping passes of the GLASS<br />
PAINT. Consider that the more you put on, the<br />
more opaque they become. If you want a more<br />
transparent look, apply less coats. Leave the glass<br />
containers to dry overnight but remove the<br />
painters tape before the paint was completely dry.<br />
If desired, spray some leaves or twigs with colors<br />
from the Montana GOLD Line as an addition. 56
57<br />
08 <strong>ALLSPRAYPAINTED</strong> MAGAZINE
MATERIALS USED<br />
• Montana GLASS Paint GP1210 Almond<br />
• Montana GLASS Paint GP3010 Coral Red<br />
• Montana GLASS Paint GP3225 Rosé<br />
• Montana GLASS Paint GP4170 Orchid<br />
• Montana GLASS Paint GP5055 Bay Blue<br />
• Montana GLASS Paint GP6115 Teal<br />
• Montana GLASS Paint GP6220 Mint<br />
• Montana GLASS Paint GP9100 White<br />
• Montana GLASS Paint GP9000 Black<br />
• Montana GOLD G6120 Malachite Light<br />
• Montana GOLD G4000 Baby Skin<br />
• Montana VARNISH T1005 Semi Gloss<br />
• Glass containers or bottles<br />
• Plant matter/twigs/leaves of your choice<br />
• Masking tape<br />
• Gloves<br />
• Mask<br />
• Drop sheet<br />
58
09<br />
Gradient Wooden<br />
Blocks<br />
INVITE NATURE INTO YOUR HOME
Gradient Wooden Blocks<br />
Online, in a hardware store, recycle some wood<br />
or speak to a timber yard. Once you have your<br />
blocks, you need to assess if it is ready to paint<br />
or not? They must be clean, dust/oil free and<br />
smooth. If required, take some sand paper and<br />
rub your blocks down. Shake the Montana GOLD<br />
cans vigorously for 2-3 minutes. Take off the<br />
nozzles and turn them upside down, allowing the<br />
little black safety ring to fall out. Nozzle back on,<br />
a short test spray away from any surfaces to see<br />
if you are ready to go. Instead of the standard<br />
skinny beige dot nozzle that the can comes with,<br />
we chose a Flat Jet Cap Medium from our<br />
Montana DIY Capset. A must have for any DIY’er.<br />
This cap delivers paint evenly in vertical or<br />
horizontal output depending on how you turn<br />
the plastic insert. Which makes fading gradients<br />
easier as long as your spray stroke is in the<br />
direction you turned the insert. For this project,<br />
set horizontally to spray. 62
09<br />
<strong>ALLSPRAYPAINTED</strong> MAGAZINE<br />
HOW TO SPRAY<br />
A GRADIENT<br />
Now you don’t need a degree to figure out fading.<br />
You just need to make your spray strokes get<br />
further and further away from the surface your<br />
painting as you spray, in this case from the<br />
wooden blocks. If you do this, you will notice at<br />
each pass, the paint applies a little thinner and<br />
the color appears to become less opaque.<br />
When you have done majority of your fade, you<br />
can also spray from a little higher up the block<br />
so the spray mist falls thinner on the part you are<br />
fading. This may make the fade look smoother.<br />
If it looked fine as it was, you can leave it at that.<br />
63<br />
Grab an old piece of cardboard and practice on<br />
it as much as you need to until you are happy.<br />
Think about where you want the fade to stop also.<br />
Remember if you want the look of natural wood<br />
to stay on the lower parts, you need to consider<br />
that when you are spraying.
09<br />
<strong>ALLSPRAYPAINTED</strong> MAGAZINE<br />
67<br />
MATERIALS USED<br />
• Montana GOLD G8070 Salmon<br />
• Montana GOLD G3070 Purple Red<br />
• Montana GOLD G8170 Lip<br />
• Montana VARNISH T1005 Semi Gloss<br />
• Wooden Blocks<br />
• Sand paper (if required)<br />
• Gloves<br />
• Mask<br />
• Drop sheet
10<br />
Metallic Dipped<br />
Pumpkins<br />
MODERNIZING A HALLOWEEN CLASSIC
Metallic Dipped Pumpkins<br />
Clean the pumpkins with a damp cloth several<br />
times to take away any dust or dirt. Proceed to<br />
spray all the pumpkins completely in the color<br />
Lychee. Make sure you allow at least 15–20<br />
minutes before the next step. To create a dipped<br />
like effect, apply each pumpkin in one color<br />
from the top down to the middle. Literally making<br />
it look as if each pumpkin was dipped on its<br />
head in metallic color. Spray focusing on the<br />
stem of the pumpkin and lightly turn it.<br />
70
10<br />
<strong>ALLSPRAYPAINTED</strong> MAGAZINE<br />
71<br />
MATERIALS USED<br />
• Montana METALLIC EMC3020 Red<br />
• Montana METALLIC EMC1050 Gold<br />
• Montana METALLIC EMC6040 Avocado Green<br />
• Montana METALLIC EMC5030 Ice Blue<br />
• Montana METALLIC EMC6210 Tennessee<br />
• Montana METALLIC EMC4230 Plum<br />
• Montana METALLIC EMC7010 Silver<br />
• Montana GOLD G3000 Lychee<br />
• Pumpkins<br />
• Gloves<br />
• Mask<br />
• Drop sheet
Metallic Dipped Pumpkins<br />
72
73<br />
12 <strong>ALLSPRAYPAINTED</strong> LOOKBOOK
11<br />
Marble Effect<br />
Workspace and<br />
Wall Art<br />
CREATING MARBLED TREASURES
Marble Effect Workspace and Wall Art<br />
76
11 <strong>ALLSPRAYPAINTED</strong> MAGAZINE<br />
77<br />
MARBLE EFFECT WORKSPACE<br />
Cover all the areas of your work space objects<br />
that you don’t want paint on. Coat the rest of the<br />
area in Montana GOLD Line Shock White. Apply<br />
a nice even coat of Marble Gold. It is best to<br />
peel the tape off 5–15 minutes after your MARBLE<br />
coat has been applied to avoid the paint curing on<br />
the tape and tearing as you want to remove it<br />
cleanly. Pull way from the lines where you have<br />
your exposed surfaces. This will ensure your<br />
lines are crisp and tight. Then allow to dry overnight<br />
so the paint can cure.<br />
MARBLE EFFECT WALL ART<br />
The better the quality of your cardboard, the better<br />
it will hold paint without buckling. Measure and<br />
cut all the black card to fit the frame you want to<br />
use. Get creative with different styles and patterns.<br />
The tape should be removed about two<br />
minutes after the paint had been applied leaving<br />
the contrast of the black paper and the paint.<br />
A test spray proved good and with drop sheet<br />
laid, gloves on, mask on and windows open, we<br />
then applied the paint over our first piece. The<br />
closer and more direct you apply MARBLE 400ml<br />
paint, the closer the paint threads land on your<br />
substrate. This looks very spider web like. Let<br />
your artworks dry a few hours. Carefully mount<br />
them in your frames in preparation for the actual<br />
hard work of figuring out in which order to hang<br />
them?
Marble Effect Workspace and Wall Art<br />
MATERIALS USED<br />
• Montana MARBLE EMGOLD Gold<br />
• Montana GOLD Shock9100 White<br />
• Plain cover notebook<br />
• Masking tape<br />
• Gloves<br />
• Mask<br />
• Drop sheet<br />
78
11<br />
<strong>ALLSPRAYPAINTED</strong> MAGAZINE<br />
79<br />
MATERIALS USED<br />
• Montana MARBLE EMGOLD Gold<br />
• MARBLE EMSILVER Silver<br />
• Scissors or craft cutter<br />
• Pencil<br />
• Card or sturdy paper<br />
• Rule<br />
• Masking tape<br />
• Bowl to draw a circle<br />
• Hammer and nails<br />
• Frames<br />
• Gloves<br />
• Mask<br />
• Drop sheet
12<br />
Red Glitter<br />
Christmas<br />
PUTTING A NEW FACE ON<br />
THE FESTIVE SEASON
Red Glitter Christmas<br />
It‘s nearly the festive season again. Time to dust<br />
off the decor box and give your space some<br />
Christmas spirit. As with all your creative projects,<br />
make sure everything is clean, dust free<br />
and dry before you start. Once you‘ve done this,<br />
prepare your painting space with the drop sheet<br />
so that you don‘t get dust on your freshly painted<br />
ornaments. Start with any of the objects that<br />
have pre-coated surfaces that need covering or<br />
have no coat at all and you want to seal them.<br />
Grab your Montana Universal Primer can. Place<br />
the items on the drop sheet and apply evenly.<br />
The final aspect is adding color to your remaining<br />
objects. Remember we have Metallic colors and<br />
normal pigmented colors. Take some time to<br />
consider which items you want to give a Metallic<br />
look and which just need a new color to pep them<br />
up. Then shake, shake, shake and then choose<br />
the ornament you want start with. Have your<br />
objects 20-25cm away and apply thin even coats.<br />
After leaving these all to dry 24 hours or more,<br />
you are ready to put them into service.
MATERIALS USED<br />
• Montana GOLD G8175 Paris<br />
• Montana GOLD G4040 Powder Pink<br />
• Montana GOLD G8070 Salmon<br />
• Montana GOLD G8170 Lip<br />
• Montana GOLD G8190 Flesh<br />
• Montana GOLD SHOCK9000 Black<br />
• Montana Metallic EMC3110 Rose<br />
• Montana Metallic EMC1030 Aztec Gold<br />
• Montana Glitter X-Mas Red<br />
• Montana Glitter Dusty Gold<br />
• Montana Universal PRIMER<br />
• Christmas Decor of various types (we had baubles,<br />
cardboard trees & stars and wooden forms & letters)<br />
• Metallic display rack (optional)<br />
• Gloves<br />
• Mask<br />
• Drop sheet<br />
85
Red Glitter Christmas<br />
86
87<br />
12 <strong>ALLSPRAYPAINTED</strong> MAGAZINE
Imprint<br />
Media Owner and Publisher:<br />
MONTANA-CANS /<br />
allspraypainted.com<br />
© 2019 allspraypainted.com<br />
All rights reserved.<br />
Reprinting, even in part,<br />
only with the approval of<br />
the publisher.<br />
Photography by<br />
Lisa Reck<br />
Rachel Mae Smith<br />
Vera Wohlleben<br />
MONTANA-CANS<br />
Häusserstraße 36<br />
69115 Heidelberg<br />
Deutschland<br />
Phone +49 (0) 6221 36 333 0<br />
info@montana-cans.com<br />
www.allspraypainted.com
allspraypainted<br />
21.5k monthly viewers<br />
Heidelberg<br />
www.allspraypainted.com<br />
Join www.allspraypainted.com to explore sophisticated<br />
DIY projects and inspiring artworks that have been<br />
painted with MontanaCans products<br />
Save your favorite<br />
photos on Pinterest<br />
WWW.PINTEREST.COM/<strong>ALLSPRAYPAINTED</strong>
<strong>ALLSPRAYPAINTED</strong>.COM<br />
FOLLOW US @<strong>ALLSPRAYPAINTED</strong><br />
505072