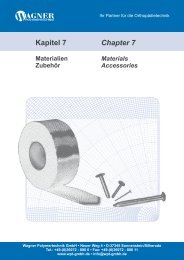
TI_3W010 Modular-Bremskniegelenke / Modular Safety Knee Joint

Create successful ePaper yourself
Turn your PDF publications into a flip-book with our unique Google optimized e-Paper software.
Ihr Partner für die<br />
Orthopädietechnik<br />
Technische Information<br />
Technical Information<br />
<strong>3W010</strong><br />
<strong>Modular</strong>-<strong>Bremskniegelenke</strong><br />
<strong>Modular</strong> <strong>Safety</strong> <strong>Knee</strong> <strong>Joint</strong><br />
D<br />
GB<br />
Printed in Germany • <strong>TI</strong> <strong>3W010</strong> • 042018
Ihr Partner für die<br />
Orthopädietechnik<br />
Schraube/Screw 15<br />
Schraube/Screw 14<br />
5 - 15mm<br />
±30mm<br />
Schraube/Screw 17
Ihr Partner für die<br />
Orthopädietechnik<br />
<strong>3W010</strong> <strong>Modular</strong>-Kniegelenk<br />
einachsig, mit Vorbringer<br />
1. Verwendungszweck<br />
Das <strong>3W010</strong> <strong>Modular</strong>-Kniegelenk ist ausschließlich für die prothetische Versorgung<br />
Oberschenkelamputierter des Mobilitätsgrades 1+2 geeignet. Der Einsatz ist auf<br />
100 kg begrenzt.<br />
Zusätzliche Traglasten sind bei der Gewichtsbestimmung mit zu berücksichtigen.<br />
1.2 Konstruktion und Funktion<br />
Das Gelenkmittelteil mit Schwingachse und belastungsabhängig wirkender<br />
Bremsbuchse verbindet Gelenkober- und -unterteil. In Kombination mit der<br />
Rückverlagerung sichert dieses die Standphase. Die Einstellung der Achsfriktion<br />
und der Vorbringerfederkraft reguliert die Schwungphase.<br />
2. Beschreibung<br />
Das Bremskniegelenk <strong>3W010</strong> ist geeignet für Patienten, die ein hohes Maß<br />
an Stabilität benötigen. Durch die eingebaute Flexionsbremse bremst das Gelenk<br />
bei Belastung in jeder Flexionsstellung. Das Kniegelenk hat proximal und distal<br />
einen Justierkern zur Verbindung mit einem Adapter mit Justierschrauben und<br />
einem Kugelabschnitt mit 50 mm (Standard).<br />
Achtung!<br />
Bitte vermeiden Sie es, Prothesenpassteile Umgebungen auszusetzen,<br />
die eine Korrosion an den Metallteilen begünstigen oder auslösen. Hierzu<br />
gehören u.a. Süßwasser, Salzwasser, Säuren und andere Flüssigkeiten.<br />
Der Einsatz des Medizinproduktes unter diesen Bedingungen läßt alle<br />
Ersatzansprüche gegenüber Wagner Polymertechnik erlöschen.<br />
Bitte informieren Sie Ihre Patienten/Kunden darüber..<br />
3. Technische Daten<br />
Art. Nr. Material Gewicht* Belastungsklasse<br />
<strong>3W010</strong>-1 Titan 368 g 100 kg<br />
<strong>3W010</strong>-2 Edelstahl 517 g 100 kg<br />
*Gewicht ohne Vorbringer 3W015<br />
max. Flexionswinkel: 150°, Bauhöhe: 40 mm (Achsmitte-Oberkante),<br />
Aktivitätsklasse: 1 – 2
Ihr Partner für die<br />
Orthopädietechnik<br />
Zulässige Umgebungsbedingungen<br />
• Einsatztemperaturbereich -20°C bis +65°C<br />
• Zulässige relative Luftfeuchtigkeit 0 % bis 90 %, nicht kondensierend.<br />
Unzulässige Umgebungsbedingungen<br />
• Mechanische Vibrationen oder Stöße<br />
• Schweiß, Urin, Süßwasser, Salzwasser, Säuren, Laugen<br />
• Staub, Sand, stark hygroskopische Partikel (z. B. Talkum)<br />
3.1 Nutzungsdauer<br />
Das Produkt ist nach ISO-Empfehlungen gemäß ISO 10328 geprüft.<br />
Grundsätzlich werden alle modularen Adapter vom Hersteller gemäß der<br />
Normvorgabe mit 3 Millionen Belastungszyklen geprüft. Dies entspricht, je nach<br />
Aktivitätsgrad des Patienten, einer Nutzungsdauer von 3 bis 5 Jahren.<br />
Achtung!<br />
3.2 Unzulässige Kombination von Prothesenkomponenten<br />
Verletzungsgefahr durch Bruch oder Verformung des Produkts<br />
• Kombinieren Sie das Produkt nur mit Prothesenkomponenten, die<br />
dafür zugelassen sind.<br />
• Prüfen Sie anhand der Gebrauchsanweisungen der<br />
Prothesenkomponenten, ob sie auch untereinander kombiniert<br />
werden dürfen.<br />
Achtung!<br />
3.3 Verwendung unter unzulässigen Umgebungsbedingungen<br />
Verletzungsgefahr durch Schäden am Produkt<br />
• Setzen Sie das Produkt keinen unzulässigen<br />
Umgebungsbedingungen aus.<br />
• Wenn das Produkt unzulässigen Umgebungsbedingungen<br />
ausgesetzt war, prüfen Sie es auf Schäden.<br />
• Verwenden Sie das Produkt bei offensichtlichen Schäden oder im<br />
Zweifelsfall nicht weiter.<br />
• Sorgen Sie im Bedarfsfall für geeignete Maßnahmen (z. B.<br />
Reinigung, Reparatur, Ersatz, Kontrolle durch den Hersteller oder<br />
eine Fachwerkstatt, etc.).<br />
4. Handhabung<br />
Nur bei einem korrekten Aufbau können die Vorteile des <strong>3W010</strong> optimal genutzt<br />
werden. Die Stellung des Stumpfes muß zur Positionierung des Schaftanschlußes<br />
berücksichtigt werden. Lotlinien in der Frontal- und Sagittalebene, die bei der<br />
Gipsabnahme und bei der Testschaft-Anprobe vom Hüftgelenk-Drehpunkt aus
Ihr Partner für die<br />
Orthopädietechnik<br />
angezeichnet werden, erleichtern das richtige Positionieren von Eingußanker bzw.<br />
Schaftadapter.<br />
4.1 Aufbauempfehlung<br />
Grundaufbau im Aufbaugerät<br />
1. Fußmitte ca. 30 mm in Bezug zur Aufbaulinie vorverlagern. Gilt für alle<br />
für das <strong>3W010</strong> empfohlenen Fußpaßteile unabhängig von den bisherigen<br />
Aufbauangaben in Fuß-Bedienungsanleitungen!<br />
2. Effektive Absatzhöhe plus 5 mm einstellen. Fußaußenstellung einstellen.<br />
3. Kniegelenk einspannen. Kniemitte 15 mm zur Aufbaulinie rückverlagern. Knie-<br />
Boden-Maß und Knie-Außenstellung (ca. 5°) berücksichtigen.<br />
4. Fuß mit dem Knie verbinden. Dazu entweder längenverstellbaren Rohradapter<br />
auf die benötigte Länge einstellen oder Überlänge des Rohradapters kürzen.<br />
5. Lateral die Mitte des Schaftes durch einen mittigen, proximalen und einen<br />
mittigen, distalen Punkt kennzeichnen. Beide Punkte zu einer Linie vom<br />
Schaftrand bis zum Schaftende verbinden.<br />
6. Schaft so positionieren, dass die Mitte im oberen Bereich mit der Aufbaulinie<br />
zusammenfällt. Die Schaftflexion beträgt normalerweise 3° – 5°, jedoch<br />
individuelle Situation beachten (z. B. Hüftgelenkskontrakturen).<br />
Dabei das Tuber-Boden-Maß beachten!<br />
7. Verbinden Sie das Kniegelenk und den Schaft mit den passenden Adaptern<br />
Achtung!<br />
Bei Nicht-Berücksichtigung der Stumpfflexion befindet sich das Gelenk<br />
zu weit anterior. Das führt zu Funktionsstörungen und frühzeitigem<br />
Verschleiß.<br />
4.2 Einstellung und Endmontage<br />
4.2.1 Einstellen des Pendelverhaltens durch Regulieren des Vorbringers<br />
Die Wirkung des mechanischen Vorbringers läßt sich über die Spannung des<br />
Federvorbringers stufenlos regulieren. Bei Bedarf muß die Federwirkung vom<br />
Lieferzustand aus erhöht werden.<br />
• Erhöhung der Federwirkung: Einstellschraube 17 nach rechts drehen<br />
• Verringerung der Federwirkung: Einstellschraube 17 nach links drehen<br />
4.2.2 Einstellen der Gelenkbeweglichkeit durch Justieren der Achsreibung<br />
Der Bewegungswiderstand zwischen Knieachse und Bremsbuchse lässt<br />
sich mit dem Gewindestift 15 verändern und muss feinfühlig vorgenommen<br />
werden. 3-mm-Sechskant-Stiftschlüssel verwenden.<br />
• Drehung nach rechts: Bewegung schwerer<br />
• Drehung nach links: Bewegung leichter
Ihr Partner für die<br />
Orthopädietechnik<br />
Bereits bei geringfügiger Drehung von 15–20° werden spürbare<br />
Veränderungen errreicht. Eine zu leichtgängige Einstellung kann zu<br />
Geräuschen und vorzeitigem Verschleiß führen. Bei zu fester Einstellung tritt<br />
die Bremswirkung auch ohne Belastung ein.<br />
4.2.3 Feinjustierung der lastabhängigen Bremswirkung<br />
Die Empfindlichkeit der Bremse ist werkseitig so eingestellt, daß im Regelfall<br />
keine Anpassung an den Patienten vorgenommen werden muß. Bei Bedarf<br />
kann jedoch die Empfindlichkeit der Bremse durch eine geringfügige Drehung<br />
der Einstellschraube 14 angepaßt werden. 6-mm-Sechskant-<br />
Stiftschlüssel verwenden.<br />
• Drehung nach rechts = Verringerung der Empfindlichkeit<br />
• Drehung nach links = Erhöhung der Empfindlichkeit<br />
Achtung!<br />
Die Empfindlichkeit der Bremse darf nur soweit reduziert werden, daß eine<br />
ausreichende Bremswirkung gewährleistet wird.<br />
4.3 Schaumkosmetik<br />
Für das Kniegelenk <strong>3W010</strong> empfehlen wir die Schaumkosmetik 3W313.<br />
Achtung!<br />
Verwenden Sie kein Talkum zur Beseitigung von Geräuschen in der<br />
Schaumkosmetik. Talkum entzieht den mechanischen Bauteilen das<br />
Fett. Dieses kann erhebliche Funktionsstörungen der Mechanik<br />
verursachen und kann zum Blockieren des Kniegelenkes und damit<br />
zum Sturz des Patienten führen. Bei Einsatz des Medizinproduktes<br />
unter Verwendung von Talkum erlöschen alle Ersatzansprüche.<br />
Hinweis:<br />
Zur Optimierung der Gleiteigenschaften und zur Beseitigung von<br />
Geräuschen bitte das Silikonspray 7W524 direkt auf die Reibflächen in<br />
der Schaumkosmetik sprühen.<br />
5. Wartungshinweise<br />
Wagner Polymertechnik GmbH empfiehlt, nach individueller Eingewöhnungszeit<br />
des Patienten an die Prothese, die Einstellungen des Kniegelenkes erneut an<br />
die Patientenanforderungen anzupassen.<br />
Bitte kontrollieren Sie das Kniegelenk mindestens einmal jährlich auf Verschleißzustand<br />
und Funktionalität und nehmen Sie gegebenenfalls Nachjustierungen
Ihr Partner für die<br />
Orthopädietechnik<br />
vor. Besonderes Augenmerk ist dabei auf den Bewegungswiderstand und auf<br />
ungewöhnliche Geräuschentwicklung zu legen. Die vollständige Beugung und<br />
Streckung muß gewährleistet sein.<br />
Achtung!<br />
Je nach Umgebungs- und Einsatzbedingungen kann die Funktion des<br />
Kniegelenkes beeinträchtigt werden. Um eine Gefährdung des Patienten<br />
zu vermeiden, darf das Kniegelenk nach spürbaren Funktionsveränderungen<br />
nicht weiter benutzt werden. Diese spürbaren Funktionsveränderungen<br />
können sich z.B. als Schwergängigkeit, unvollständige Streckung,<br />
nachlassende Schwungphasensteuerung bzw. Standphasensicherheit,<br />
Geräuschentwicklung, etc. bemerkbar machen.<br />
Maßnahme: Aufsuchen einer Fachwerkstatt zur Überprüfung der Prothese.<br />
6. Risiken<br />
Die Anwendung eines Prothesenknies birgt immer ein gewisses Maß an Risiko. Kein<br />
mechanisches Gelenk wird in jeder Situation 100%ige Sicherheit bieten können. Bei<br />
Beachtung der gegebenen Hinweise ist das Risiko bei der Benutzung relativ gering.<br />
Die Funktion des Kniegelenkes 3W530 ist in regelmäßigen Abständen, mindestens<br />
einmal pro Jahr, zu kontrollieren.<br />
7. Gewährleistung<br />
Eine Gewährleistung kann nur gegeben werden, wenn das Produkt unter den<br />
vorgegebenen Bedingungen und zu den vorgesehenen Zwecken eingesetzt<br />
wird. Eine Gewährleistung von einem (1) Jahr wird nur gegenüber Fachbetrieben<br />
übernommen. Die Gewährleistung bezieht sich auf Herstellungs- und Materialfehler.<br />
8. Konformitätserklärung<br />
Das Produkt erfüllt die Anforderungen der Richtlinie 93/42/EWG für<br />
Medizinprodukte.<br />
Aufgrund der Klassifizierungskriterien für Medizinprodukte nach Anhang IX der<br />
Richtlinie wurde das Produkt in die Klasse I eingestuft. Die Komformitätserklärung<br />
wurde deshalb von Wagner Polymertechnik GmbH in alleiniger Verantwortung,<br />
gemäß Anhang VII der Richtlinie, erstellt.
<strong>3W010</strong> <strong>Modular</strong> <strong>Safety</strong> <strong>Knee</strong> <strong>Joint</strong><br />
monocentric, with Extension Assist<br />
Ihr Partner für die<br />
Orthopädietechnik<br />
1. Intended Use<br />
The <strong>3W010</strong> <strong>Modular</strong> 4-Bar <strong>Knee</strong> <strong>Joint</strong> is intended exclusively for the prosthetic<br />
fitting of transfemoral amputees with mobility grade 1-2.<br />
The use is limited to 100 kg/220 lbs patient weight.<br />
Additional loads must also be considered for weight selection.<br />
1.2 Construction and function<br />
The upper and lower joint are connected by the center piece of the joint with swing<br />
axis and the load-dependent acting brake bushing. This, together with the posterior<br />
placement of the joint, secures the stance phase. The swing phase is controlled by<br />
an adjustment of the axis friction and the force of the extension assist spring.<br />
2. Description<br />
The <strong>3W010</strong> <strong>Safety</strong> <strong>Knee</strong> is designed for patients requiring a high degree of stability.<br />
By means of the installed flexion friction there is a brake activation at load in every<br />
flexion adjustment. The knee joint has a pyramid on its proximal and distal end for<br />
being connected to an adaptor with adjusting screws and a spherical segment of 50<br />
mm (standard).<br />
Attention!<br />
Please avoid exposing prosthetic components to surroundings that corrode<br />
metal parts, for example, freshwater, saltwater, acids and other liquids.<br />
Using this medical product in such environmental conditions will render all<br />
claims against Wagner Polymertechnik GmbH null and void.<br />
Please inform your patients/customers.<br />
3. Technical Data<br />
Art. No. Material weight* Load level<br />
<strong>3W010</strong>-1 Titan 368 g 100 kg<br />
<strong>3W010</strong>-2 Edelstahl 517 g 100 kg<br />
Maximum flexion angle: 150°, Structural height: 40 mm (knee center to upper end of<br />
pyramid), Activity class: 1 - 2
Allowable environmental conditions<br />
• Temperature range for use: -20°C to +65°C<br />
• Allowable relative humidity 0% to 90%, non-condensing<br />
Unallowable environmental conditions<br />
• Mechanical vibrations or impacts<br />
• Perspiration, urine, fresh water, salt water, acids, bases<br />
• Dust, sand, highly hygroscopic particles (e.g. talcum)<br />
Ihr Partner für die<br />
Orthopädietechnik<br />
3.1 Service life<br />
The product has been tested according to ISO 10328 recommendations. In<br />
general, all modular adapters are tested by the manufacturer according to the<br />
requirements of the ISO recommendations for 3 million load cycles. Depending on<br />
the patient‘s level of activity, this corresponds to a service life of 3 to 5 years.<br />
Attention!<br />
3.2 Unallowable combination of prosthetic components<br />
Risk of injury due to breakage or deformation of the product<br />
• Only combine the product with prosthetic components that are<br />
approved for that purpose.<br />
• Based on the instructions for use of the prosthetic components,<br />
verify that they may be combined with each other<br />
Attention!<br />
3.3 Use under unallowable environmental conditions<br />
Risk of injury due to damage to the product<br />
• Do not expose the product to unallowable environmental conditions.<br />
• If the product has been exposed to unallowable environmental<br />
conditions, check it for damage.<br />
• If damage is apparent or in case of doubt, do not continue using the<br />
product.<br />
• Take suitable measures if required (e.g. cleaning, repair,<br />
replacement, inspection by the manufacturer or a specialist<br />
workshop etc.).<br />
4. Handling<br />
Only with an appropriate alignment, the advantages of <strong>3W010</strong> can be used<br />
optimally. The position of the stump has to be considered for positioning the socket<br />
connection. The residual limb position must be considered when positioning the<br />
socket connector. Plumb lines in the frontal and sagittal planes (drawn from the
Ihr Partner für die<br />
Orthopädietechnik<br />
hip joint’s center of rotation and marked during plaster cast taking and trial fitting of<br />
the test socket) will facilitate correct positioning of the lamination anchor or socket<br />
adaptor.<br />
4.1 Alignment<br />
Base Alignment<br />
1. Position the middle of the foot 30 mm anterior to the alignment reference line.<br />
Applies regardless of the current construction details for all recommended for<br />
the <strong>3W010</strong> foot component in foot-manuals!<br />
2. Add 5 mm to the required heel height of the foot. Set correct outward rotation<br />
of the foot.<br />
3. For base alignment, the alignment reference line should run through the upper<br />
anterior axis (alignment reference point). At that point, the pyramid base<br />
should be horizontal. Pay attention to the knee ground distance and outward<br />
rotation of the knee. Recommended positioning of the alignment reference<br />
point: 20 mm above the medial tibial plateau.<br />
4. Connect the foot to the modular knee joint by using a tube adaptor<br />
5. Mark the center of the socket proximally and distally on the lateral side. Draw<br />
a line through both marks from socket brim to the distal end of the socket.<br />
6. Now position the socket such that the alignment reference line passes<br />
through the proximal center mark of the socket. Set the socket flexion to<br />
somewhere between 3° and 5°; however, the individual situation (e.g. hip<br />
joint contractures) must be taken into account and, if necessary, more flexion<br />
should be provided.<br />
Also pay attention to the ischial tuberosity to ground distance.<br />
7. Connect the socket and modular knee joint by using corresponding adaptors.<br />
Attention!<br />
Excluding the stump flection fi the joint friend too far anterior. This leads to<br />
dysfunction and premature wear.<br />
4.2 Adjustment of the pneumatic swing phase<br />
4.2.1 Adjusting swing phase with extension assist<br />
The effect of the mechanical advocate can be infinitely adjusted via the tension<br />
of the Mechanical Extension Assist. If necessary, the spring action must be<br />
increased from the delivery condition.<br />
• Increasing the spring action: Turn adjusting screw 17 to the right<br />
• Reduction of the spring action: Turn adjusting screw 17 to the left<br />
4.2.2 Setting swing phase speed with the friction adjustment<br />
Resistance to movement between the knee axis and the brake bushing may<br />
be adjusted with the Set Screw 15. Use a 3 mm hex head wrench.
Ihr Partner für die<br />
Orthopädietechnik<br />
• Clockwise rotation: movement slower<br />
• Counter-clockwise rotation: movement faster<br />
Adjustments of as little as 15 to 20° provide a perceptible change. Settings<br />
which are too loose may cause noise and lead to premature wear. Those<br />
which are too tight will cause the brake to be activated even when not under<br />
load.<br />
4.2.3 Adjustment of the load-dependent braking effect<br />
The sensitivity of the brake is factory set so that usually no adjustment to the<br />
patient must be made. If necessary, however, the sensitivity of the brake can<br />
be adjusted by a slight rotation of the adjusting screw 14.<br />
Use a 6 mm hexhead wrench.<br />
• Turn to the right = reduce the sensitivity<br />
• Turn to the left = increase the sensitivity<br />
Attention!<br />
The sensitivity of the brake may only be reduced to the extent that a sufficient<br />
braking effect is ensured.<br />
4.3 Foam cosmetics<br />
For the knee joint 3W011 the foam covers 3W313 is recommended.<br />
Attention!<br />
Do not use talcum powder to eliminate noises in the cosmetic foam cover!<br />
Talcum powder reduces the lubrication of the mechanical parts, which may<br />
lead to considerable malfunctions of the mechanism and a blocking of the<br />
knee joint and, thus, involves the risk that the patient falls down. Using this<br />
medical product after application of talcum powder will render all claims<br />
against Wagner Polymertechnik GmbH null and void.<br />
Note!<br />
To optimize sliding and for eliminating noises, please apply 7W524 Silicone<br />
Spray directly on the friction surfaces of the foam covers.<br />
5. Maintenance information<br />
Wagner Polymertechnik GmbH recommends the readjustment of the knee joint‘s<br />
settings after the patient has spent a period of time getting used to the prosthesis.<br />
This period of time varies depending on individual patient characteristics.<br />
Please check the wear and functionality of the knee joint at least once a year and<br />
make follow-up adjustments if necessary. Pay special attention to resistance to<br />
movement and the development of unusual sounds. Complete flexion and extension<br />
must be guaranteed.
Ihr Partner für die<br />
Orthopädietechnik<br />
Attention!<br />
Due to different environmental conditions and conditions of application, the<br />
function of the knee joint can be impaired. To avoid the risk of accident and<br />
possible injury to the patient, the knee joint must no longer be used after a<br />
noticeable loss of function has occurred. This noticeable loss of function can<br />
be for example stiffness, non-attainment of the extension stop, decreasing<br />
swing phase or stance phase stability, abnormal noises, etc.<br />
Measure: Have the knee joint examined by a specialist workshop where<br />
service parts or, if necessary, the entire knee joint will be exchanged.<br />
6. Risks<br />
The use of a prosthetic knee always includes a certain degree of risk. There<br />
is no mechanical joint which will give a 100% security in any situation. If<br />
the recommendations given have been observed, the risk to be expected is<br />
comparatively low when using the 3W530-... <strong>Knee</strong> <strong>Joint</strong>. The functioning of the knee<br />
joint is to be checked in regular intervals but at least once a year.<br />
7. Warranty<br />
Wagner Polymertechnik GmbH‘s warranty applies only if the product is used<br />
according to the specifi ed conditions and for the intended purposes, following<br />
all manufacturer‘s recommendations. A warranty of one (1) year is assumed<br />
for orthopaedic workshops only. This warranty applies to faults in material and<br />
workmanship.<br />
8. Declaration of Conformity<br />
The product meets the requirements of guideline 93/42/EEC for medical products.<br />
Based on the classifi cation criteria for medical products according to Appendix IX<br />
of the guideline, the product was classifi ed as Class I. Therefore, the conformity<br />
declaration was prepared - under the sole responsibility of<br />
Wagner Polymertechnik GmbH - according to Appendix VII of the guideline.<br />
Hergestellt durch/Manufactured by:<br />
Wagner Polymertechnik GmbH<br />
Neuer Weg 4 • D-37345 Silkerode/Sonnenstein<br />
Tel.: +49 (0) 36072/880 0 • Fax: +49 (0) 36072/880 11<br />
E-Mail: info@wpt-gmbh.de • www.wpt-gmbh.de<br />
Wagner Polymertechnik GmbH has been certified by the TÜV<br />
for the Certification of Quality Assurance Systems (DQS)<br />
in accordance with DIN EN ISO 9001:2008.<br />
<strong>TI</strong>_<strong>3W010</strong>_042018