2-way car alarm system with remote engine start - Net Trading
2-way car alarm system with remote engine start - Net Trading
2-way car alarm system with remote engine start - Net Trading

Create successful ePaper yourself
Turn your PDF publications into a flip-book with our unique Google optimized e-Paper software.
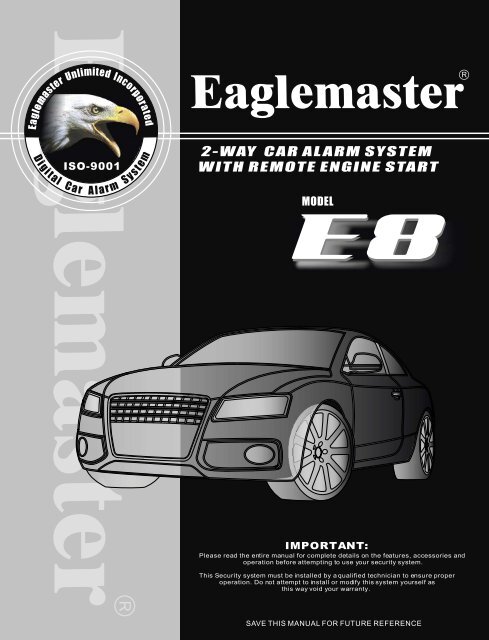
2-WAY CAR ALARM SYSTEM<br />
WITH REMOTE ENGINE START<br />
MODEL<br />
IMPORTANT:<br />
Please read the entire manual for complete details on the features, accessories and<br />
operation before attempting to use your security <strong>system</strong>.<br />
This Security <strong>system</strong> must be installed by a qualified technician to ensure proper<br />
operation. Do not attempt to install or modify this <strong>system</strong> yourself as<br />
this <strong>way</strong> void your warranty.
NOTE:<br />
About Your System<br />
Congratulations on your purchase of this state-of-the-art vehicle security <strong>system</strong>.<br />
With proper installation this <strong>system</strong> will provide superior protection and performance for<br />
many years to come.<br />
What is included:<br />
A control module<br />
Tranceiver module<br />
One 5-button 2-<strong>way</strong> LCD <strong>remote</strong> transmitter<br />
One 4-button random code <strong>remote</strong> transmitter<br />
Dual stage shock sensor<br />
High output 6-tone siren (optional)<br />
Full set wire harness<br />
Pin switches<br />
Options and Accessories:<br />
This <strong>system</strong> includes several optional inputs and outputs allowing the creation of a<br />
completely personalized security and convenience <strong>system</strong> by offering many optional<br />
features such as:<br />
2nd stage door unlock<br />
Channel programme time output<br />
2pulse signal door unlock<br />
Engine turbo time mode<br />
Check range notification<br />
Arm/disarm chirp on/off<br />
Window close control<br />
Anti <strong>car</strong>-jack by ignition turn<br />
Power trunk/hatch release<br />
Glass breakage sensor<br />
Micro-wave detector<br />
Back-up battery siren<br />
*Many require additional parts and/or labor, see store for details<br />
Some of the features described in this manual may required additional parts and/or<br />
labor, and may not be included as part of the standard installation of this unit.<br />
Additionally, many features of this security <strong>system</strong> have selectable options that must be<br />
activated or programmed during the <strong>system</strong>'s installation. These items will be identified<br />
in the following sections. Please discuss these features and any questions you may<br />
regarding the installation of this product <strong>with</strong> your authorized dealer.
Functions of <strong>remote</strong> transmitters<br />
The <strong>remote</strong> transmitters integrated <strong>with</strong> the security <strong>system</strong> use the most perfect and<br />
reliable radio frequency transfer as opposed to all <strong>car</strong> security <strong>system</strong>s being sold at the<br />
moment. Some of modern skilled <strong>car</strong> hijackers use the devices known as code grabbers<br />
allowing to accept and keep a signal transferred by the <strong>remote</strong> control of the <strong>car</strong> security<br />
<strong>system</strong>. As soon as the driver is out the code is used by the hijacker to disarm the <strong>system</strong>.<br />
Unlike the <strong>remote</strong> controls described above the <strong>remote</strong> transmitters integrated <strong>with</strong> your<br />
security <strong>system</strong> change the code of the transferred signal each time when the button is<br />
pressed, therefore, when a hijacker reproduces the signal grabbed from your <strong>remote</strong><br />
transmitter, the security <strong>system</strong> just will not react.<br />
2-<strong>way</strong> <strong>remote</strong> #TR-45 1-<strong>way</strong> <strong>remote</strong> #TX-4R<br />
Functions of <strong>remote</strong>transmitter buttons<br />
Button to arm the <strong>system</strong> (ARM)<br />
Button to disarm the <strong>system</strong> (DISARM)<br />
Button to control <strong>remote</strong> <strong>engine</strong> <strong>start</strong><br />
Button to control Trunk open / CH-1 active<br />
Button to check <strong>car</strong> status , to turn on LCD back light<br />
Fig.1
Standard LCD 2-<strong>way</strong> icon instructions<br />
Remote transmitting a signal.<br />
System Armed.<br />
Passive arming &<br />
Auto re-arming mode.<br />
Zone2<br />
1st-stage sensor bypass.<br />
Check-in range turn ON status.<br />
System Disarmed.<br />
Zone1<br />
1st-stage sensor bypass.<br />
Zone2<br />
2nd-stage sensor bypass.<br />
2<strong>way</strong> battery level indication.<br />
Silent Armed.<br />
Zone1<br />
2nd-stage sensor bypass.<br />
Panic mode.
Door open when armed. Trunk open when armed. Hood open when armed.<br />
Zone1<br />
1st stage sensor triggered.<br />
Zone1<br />
2nd stage sensor triggered.<br />
Zone2<br />
1st stage sensor triggered.<br />
Zone2<br />
1st stage sensor triggered. Door switch triggered. Trunk switch triggered.<br />
Hood switch triggered. Ignition switch triggered. Immobilizer mode.
Anti <strong>car</strong>-jacking mode.<br />
Valet mode.<br />
Safety mode/ Safe status<br />
Remote <strong>engine</strong> running mode. Clock time <strong>engine</strong> <strong>start</strong> mode. Fix time <strong>engine</strong> <strong>start</strong> mode.<br />
Temperature <strong>engine</strong> <strong>start</strong> mode.<br />
Turbo mode. Call / page mode.<br />
Battery conservemode. Remote button lock Vibrate mode.
Remote Function Table:<br />
Functions Step Condition<br />
Arm and door lock<br />
Arm <strong>with</strong>out siren chirp<br />
Zone1- 1st-stage bypass<br />
Zone1- 2nd-stage bypass<br />
Car search mode<br />
Standby Anti-Hi-Jack mode<br />
Disarm and door unlock<br />
Disarm <strong>with</strong>out siren chirp<br />
Arm <strong>with</strong> <strong>engine</strong> run mode<br />
Remote <strong>engine</strong> <strong>start</strong><br />
Remote <strong>engine</strong> stop<br />
Safety mode (manual-type <strong>car</strong>)<br />
Zone2- 1st-stage bypass<br />
Zone2- 2nd-stage bypass<br />
Press once<br />
Press over 2sec. until 1 beep given.<br />
Press once <strong>with</strong>in 5sec. of arming.<br />
Press twice <strong>with</strong>in 5sec. of arming.<br />
Press once after 5sec. of arming.<br />
Press over 2sec. Until 1 beep given.<br />
Press once<br />
Press over 2sec. until 1 beep given.<br />
Press over 2sec. Until 1 beep given.<br />
Press over 2sec. then press once. Armed <strong>with</strong> safe status<br />
Press over 2sec.<br />
Press over 2sec.<br />
Press once <strong>with</strong>in 5sec. of arming.<br />
Press twice <strong>with</strong>in 5sec. of arming<br />
Disarmed & ACC off<br />
Disarmed & ACC off<br />
Arming <strong>with</strong>in 5sec.<br />
Arming <strong>with</strong>in 5sec.<br />
Arming after 5sec.<br />
ACC ON<br />
Armed<br />
Armed<br />
Engine running<br />
Engine running mode<br />
Engine running<br />
Arming <strong>with</strong>in 5sec.<br />
Arming <strong>with</strong>in 5sec.
Remote Function Table:<br />
Functions Step Condition<br />
Trunk open / CH-1 active<br />
Prolong <strong>engine</strong> running time Press once, after LCD indicate 3min left.<br />
Enable check-in range<br />
Status check & Back light<br />
Indoor temperature check<br />
Silent armed<br />
Valet mode<br />
Panic mode<br />
Anti-Hi-Jack mode<br />
FIX time <strong>engine</strong> <strong>start</strong><br />
Temperature <strong>engine</strong> <strong>start</strong><br />
CH-2 active<br />
CH-3 active<br />
CH-4 active<br />
Press over 2sec. until 1 beep given<br />
Press once <strong>with</strong>in 5sec. of arming.<br />
Press once<br />
Press over 2sec. Until 1 beep given.<br />
Press over 2sec. Until 1 beep given.<br />
Press over 2sec. until 1 beep given.<br />
Press over 2sec. until 1 beep given.<br />
Press over 2sec. until 1 beep given.<br />
Press once<br />
Press over 2sec. until 1 beep given.<br />
Press over 2sec. until 1 beep given.<br />
Press over 2sec. until 1 beep given.<br />
Press over 2sec. until 1 beep given.<br />
Engine running mode<br />
Arming <strong>with</strong>in 5sec.<br />
ACC OFF<br />
ACC ON<br />
ACC OFF<br />
ACC ON<br />
Armed <strong>with</strong> safe status<br />
Armed <strong>with</strong> safe status
Functions Step Condition<br />
Remote button lock (on/off)<br />
Vibrate mode on/off<br />
Clock time adjust mode<br />
Clock time <strong>engine</strong> <strong>start</strong><br />
Battery conserve mode<br />
Press over 2sec. until 1 beep given.<br />
Press over 2sec. until 1 beep given.<br />
Press over 2sec. until 1 beep given.<br />
Press over 4sec. until 2 beep given.<br />
Press over 2sec. until 1 beep given.<br />
Remote battery discharge/replacement<br />
If the battery becomes exhausted, the <strong>remote</strong> will emit extra long beep, While press any<br />
button on the <strong>remote</strong>, few seconds later the indicator will flashing for identify.<br />
The battery discharge is displayed on the LCD screen as the icon <strong>with</strong> the status indicator .<br />
Also you can pay your attention that the effective distance for the transmitter is being<br />
reduced.<br />
To replace the batteries of 2-<strong>way</strong> <strong>remote</strong><br />
- Bend the top part of the cover a bit, move it up and remove,<br />
- Remove the discharged battery,<br />
- Place the new battery (AAA) observing polarity,<br />
- Carefully place the cover back.<br />
To replace the batteries of 1-<strong>way</strong> <strong>remote</strong><br />
- Loose the screws on the back side of the transmitter housing and separate two halves of<br />
the transmitter housing,<br />
- Remove the discharged battery,<br />
- Place the new battery 12V 23A observing polarity,<br />
- Carefully place the cover back (please do not damage the LED and switchers on the<br />
Circuit board);<br />
tighten the screws on the back side of the transmitter housing.
Programming of codes for new transmitters<br />
Important<br />
Please notice that during the programming of a new transmitter into the <strong>system</strong> memory all<br />
previous programmed codes of the transmitters will be erased so in case of programming<br />
for additional transmitters the available transmitters shall be programmed again.<br />
The <strong>system</strong> supports in memory up to four codes of <strong>remote</strong>s irrespective of the fact if the<br />
codes of four different <strong>remote</strong>s or the same code four times is recorded into the <strong>system</strong>.<br />
Programming of new transmitters.<br />
Important<br />
Please notice that each following operation shall be done <strong>with</strong>in 10 sec after the previous<br />
operation. If the 10 second period is over the <strong>system</strong> will automatically exit the<br />
programming mode and two long chirps will acknowledge the exit. If the ignition is turned off<br />
during programming the <strong>system</strong> will immediately exit the programming mode and two long<br />
chirps will acknowledge the exit.<br />
1. Disarm the <strong>system</strong> .<br />
2. Turn the ignition from on to off.<br />
3. Within 10 sec after switching off the ignition press and hold the Valet button over 3 sec ,<br />
the LED <strong>start</strong>s flashing , release the Valet button.<br />
4. Press and hold the Valet button, you will hear the siren <strong>start</strong> chirping (from 1~3 chirp),<br />
while give 2 chirp sound, immediately release the Valet button.<br />
5. The LED will <strong>start</strong> flashing to acknowledging that the <strong>system</strong> is ready for programming of<br />
new transmitters.<br />
6. Press any button of the first transmitter, you will hear 1-short chirp acknowledging that<br />
the first transmitter has been programmed<br />
Press any button of the second transmitter, you will hear 2-short chirp acknowledging<br />
that the second transmitter has been programmed.<br />
Repeat the operation 3 for other transmitters.<br />
7. To exit the transmitter programming mode, Turn on the ignition and you will hear two long<br />
siren chirps.
Programming 2-Way <strong>remote</strong><br />
Battery conserve mode<br />
The mode can be turned on/off 2-<strong>way</strong> receiving in the Disarmed mode if you simultaneously<br />
press down the buttons until the zzz icon turn on. Being in the Disarmed mode<br />
the <strong>remote</strong> pager turns off its receiver in 30sec.<br />
To exit the mode, simply press the buttons until zzzz icon turn off.<br />
2-<strong>way</strong> LCD display :<br />
2<strong>way</strong> <strong>remote</strong> button lock ON/OFF<br />
For safety purpose, this 2-<strong>way</strong> <strong>remote</strong> can be lockout the <strong>remote</strong> button in order not to<br />
mis-touched the buttons. Press button for over 2sec. until one beep is heard,<br />
<strong>remote</strong> button is now locked. To turn on <strong>remote</strong> button, press button for over<br />
2sec. until two beeps is heard, <strong>remote</strong> button is now unlocked.<br />
2-<strong>way</strong> LCD display :<br />
Vibrate mode on/off<br />
Press button for over 2sec. the 2-<strong>way</strong> <strong>remote</strong> will respond tone & vibrate feature,<br />
the button pressing 2sec. will change the feature, see under table:<br />
Beeps Vibrations 2-<strong>way</strong> <strong>remote</strong> feature<br />
1-beep 1-time Remote <strong>with</strong> tone and vibration<br />
1-beep<br />
1-time<br />
Remote <strong>with</strong> vibration only<br />
Remote <strong>with</strong> tone only
Check-in range notification (on/off )<br />
Arming the <strong>system</strong> <strong>with</strong>in 2 seconds, press button once on the 2<strong>way</strong> <strong>remote</strong> , the<br />
<strong>system</strong> will enable this Check- in range function.<br />
The 2<strong>way</strong> <strong>remote</strong><br />
will respond:<br />
This Icon will turn on and give 1 beep<br />
sound to indicate the function has been<br />
turned ON.<br />
- With in 5 minutes, the 2-<strong>way</strong> <strong>remote</strong> will than give 1 beep sound every one minute for 5<br />
cycles to remind the user <strong>with</strong>in range.<br />
- After 5 minutes, the 2-<strong>way</strong> <strong>remote</strong> will detect range every 10 minutes and <strong>with</strong>out any beep<br />
sound, the icon will constant on if the user <strong>with</strong>in range.<br />
For friendly usage, the 2-<strong>way</strong> <strong>remote</strong> will provide 2 beeps/ 3cycles and flashing icon<br />
if the user is out of the receiving rage. However, afterwards if the 2-<strong>way</strong> <strong>remote</strong> detect the<br />
signal again from the <strong>system</strong>, the icon will be ON to indicate the 2-<strong>way</strong> <strong>remote</strong> is <strong>with</strong>in<br />
range.<br />
Note: If under Check-in range mode, if <strong>alarm</strong> triggered, this function will automatically<br />
turn off (disable).<br />
Time adjust mode<br />
Besides operating for <strong>alarm</strong> functions, LCD <strong>remote</strong> control additionally provides 24-hour<br />
real time clock.<br />
Instructions:<br />
1. Press and hold Button for 2sec. to enter time-setup mode, 1 beep will be heard.<br />
2. Press button to select Hour & Min adjust setting. Icon flashing to indicate.<br />
24-hour display<br />
3. Press button to turn up the numbers. Press button to turn down the numbers.<br />
The button may be held down to scroll faster.<br />
4. Press button to exit the setting mode. 2 beep will be heard.<br />
Minutes display<br />
Note: The <strong>remote</strong> will revert to normal operation from the set mode when 10-seconds has<br />
elapsed <strong>with</strong>out a button entry.
Vehicle status checking<br />
The 2-Way <strong>remote</strong> offer the feature to check the current status of the <strong>car</strong>, simply press the<br />
button once <strong>with</strong>in proper operation range. The main unit will send the signals to the<br />
2-Way <strong>remote</strong> about the vehicle current status.<br />
Turn on LCD display back light<br />
Simply press button once, the back light of LCD display will turn on 5 seconds and<br />
also check the vehicle status.<br />
2-<strong>way</strong> signal paging features<br />
A page is the signal the control module sends to the <strong>remote</strong> controls confirmation of<br />
receipt of a command or <strong>alarm</strong> <strong>system</strong> status. When the <strong>remote</strong> control receives a page<br />
it will generate a page notification to the user (notifications are audible beeps) and the<br />
LCD Icons will display the current <strong>system</strong> status.<br />
Command Page<br />
When a command (arm/disarm, <strong>remote</strong> <strong>start</strong> , or auxiliary channel) from the <strong>remote</strong><br />
control is sent and received, the <strong>system</strong> will send a command page back to confirm receipt.<br />
Note: When the <strong>system</strong> is in Valet mode, the <strong>remote</strong> control will show the lock icon and<br />
unlock icon, but will not generate a command page.<br />
Page Recognition (Acknowledgement)<br />
To clear a page alert/notification, quickly press any button on the <strong>remote</strong> control. This<br />
can be performed at any time during or after the page notification has occurred.<br />
The <strong>remote</strong> control will not send a command to the <strong>system</strong> at this time; it will only clear<br />
future repeats of the page notification. The next time a button is pressed on the <strong>remote</strong><br />
control it will send a command to the <strong>system</strong>.<br />
Alarm Page<br />
If the <strong>alarm</strong> <strong>system</strong> is triggered while armed, an Alarm Page will be sent to the <strong>remote</strong><br />
control. When the <strong>remote</strong> receives an Alarm Page, the LCD icons will display the <strong>alarm</strong><br />
<strong>system</strong> status information and the <strong>remote</strong> control will generate beeps.
Alarm Page table<br />
Display Beeps Vibrations Trigger<br />
5 short<br />
Melody 1<br />
5 short<br />
Melody 1<br />
Melody 2<br />
Melody 3<br />
Melody 4<br />
Melody 5<br />
1 times<br />
1 times periodically<br />
1 times<br />
1 times periodically<br />
2 times periodically<br />
3 times periodically<br />
4 times periodically<br />
5 times periodically<br />
Zone 1<br />
1st stage-Sensor warning<br />
Zone 1<br />
2nd stage-Sensor triggering<br />
Zone2<br />
1st stage-Sensor warning<br />
Zone 2<br />
2nd stage-Sensor triggering<br />
Trunk switch triggering<br />
Door switch triggering<br />
Hood switch triggering<br />
Ignition triggering
Standard features<br />
- To ARM the <strong>system</strong>: Press the button once.<br />
To arm your <strong>system</strong> <strong>with</strong>in proper operation range, simply press button once (while<br />
<strong>system</strong> in disarmed or Acc off position) . The <strong>system</strong> will respond one siren chirp, one lights<br />
flash, doors lock, disable <strong>engine</strong> <strong>start</strong>er, the status LED will flash approximately once per<br />
second, indicating that the <strong>system</strong> is actively protecting your vehicle.<br />
2-<strong>way</strong> LCD display :<br />
- Arm <strong>with</strong>out siren chirp : Press the button over 2sec.<br />
You may temporarily to arm your <strong>system</strong> <strong>with</strong>out siren chirp , to operate it by simply press and hold<br />
the button for over 2sec. until the <strong>remote</strong> give 1 beep sound, then release the button .<br />
The <strong>system</strong> will armed and <strong>with</strong>out one siren chirp.<br />
Note: this features is only activated under the <strong>system</strong> is in disarmed and Acc off position,.<br />
- Defective Zone Bypass & Alert:<br />
If the security <strong>system</strong> is armed at the same time that an input is active (such as a door opening<br />
or hood / trunk opening ), you will hear one siren chirp to indicate arming and after 5 seconds<br />
a second siren chirp to indicate bypass Notification. A Bypass Notification chirp means that the<br />
security <strong>system</strong> ignores the input that was active when the <strong>system</strong> was armed, until that input<br />
ceases.<br />
Note: You may press 2-<strong>way</strong> <strong>remote</strong> button once to check again which zone is not closed.<br />
Defective zone Siren chirps 2-<strong>way</strong> beeps 2-<strong>way</strong> LCD indicator<br />
Door opened 4 chirps 1 long + 3 short<br />
Trunk opened 5 chirps 1 long + 4 short<br />
Hood opened 6 chirps 1 long + 5 short<br />
IMMO icon<br />
indicate that<br />
the <strong>engine</strong><br />
blocked
Passive arming: (Table-1 of No.2 ON status)<br />
If set programme mode to "ON", while turn Ignition OFF, then close the last door , the LED<br />
will <strong>start</strong>s flashing and Siren will give 2 chirps and Lights flash twice to<br />
indicated that the<br />
<strong>system</strong> is in passive arming mode. After 30sec. The <strong>system</strong> will arm by itself and LED<br />
flashing slowly to show the <strong>system</strong> is in arming mode. Main unit sends the signal to the 2-<br />
Way LCD <strong>remote</strong> and indicates ARM mode <strong>with</strong> one beep sound .<br />
2-<strong>way</strong> LCD display :<br />
Icon flashing<br />
indicator<br />
Two beep sound will provided to<br />
to indicate that the <strong>system</strong> is in<br />
Passive arm mode.<br />
Note: If during the operating of the passive arming timer if a door is being opened the<br />
Operating of the passive arming timer will be suspended. As soon as all doors, hood<br />
and trunk are closed the <strong>system</strong> will <strong>start</strong> the cycle of the passive arming again. As<br />
soon as 30 seconds are over the armed mode will be turned On.<br />
- Automatically rearming : (Table-1 of No.4 ON status)<br />
If the <strong>system</strong> is disarmed by <strong>remote</strong> and a door is not opened <strong>with</strong>in approximately 30 seconds the<br />
<strong>system</strong> will automatically rearm itself. This feature guards against disarming caused by accidental<br />
or unintended operation of the <strong>remote</strong> transmitter. Main unit will sends signal to the 2-Way LCD<br />
<strong>remote</strong> and indicates ARM mode <strong>with</strong> one beep sound.<br />
2-<strong>way</strong> LCD display :<br />
Icon flashing<br />
indicator<br />
- When armed your vehicle is protected as follows:<br />
Light impacts trigger the sensor. When triggered, the siren will give 3 chirps.<br />
Heavy impacts trigger the sensor. The sequence consists of the siren sounding<br />
continuously and the parking lights flashing for 20 seconds.<br />
If a door is opened, the <strong>system</strong> will immediately <strong>start</strong> chirping the siren and flashing the<br />
parking lights for 30seconds.<br />
Turning on the ignition key will trip the same progressive response as opening a door.<br />
Turning on the trunk or hood will trip the same progressive response as opening a door.<br />
The optional <strong>start</strong>er kill prevents the vehicle's <strong>start</strong>er from Cranking.<br />
Flashing icon to indicate<br />
that the <strong>system</strong> is in Auto<br />
re-arming mode.
- Alarm cycle :<br />
If a violation occurs the <strong>system</strong> will respond by sounding the siren and flashing the lights for<br />
approximately 30sec. before the <strong>system</strong> resets itself and continues to protect your <strong>car</strong>. If<br />
violation still occurs the <strong>system</strong>, siren and lights will working for 4 or 5 cycles then the<br />
<strong>system</strong> reset itself and continues to protect other zones.<br />
- Zone-1 / Zone-2 : 2nd stage sensor triggering limited for 4 cycles<br />
- Door / Hood / Trunk zone triggering limited for 5 cycles<br />
- To DISARM the <strong>system</strong> : Press the button once.<br />
To disarm your <strong>system</strong> <strong>with</strong>in proper operating range, simply press button once (while<br />
<strong>system</strong> in arm position). The <strong>system</strong> will respond two siren chirp, two light flash, doors<br />
unlock, Enable your <strong>engine</strong> <strong>start</strong>er, LED off.<br />
2-<strong>way</strong> LCD display :<br />
+ Two beep sound<br />
- Disarm <strong>with</strong>out siren chirp :Press the button over 2sec.<br />
To disarm your <strong>system</strong> <strong>with</strong>out siren chirp , simply press and hold the button for over<br />
2sec. until the <strong>remote</strong> give 1 beep sound, then release the button . The <strong>system</strong> will<br />
disarmed and <strong>with</strong>out one siren chirp.<br />
Note: this features is only activated under the <strong>system</strong> is in armed position.<br />
- 2 step disarm:<br />
This <strong>system</strong> offers 2 step disarm. It's a feature that make it possible to silence and reset<br />
the <strong>system</strong> while it is triggering, <strong>with</strong>out disarming the <strong>system</strong>. If the <strong>system</strong> is triggered<br />
and the siren has been sounding, pressing any button once on the <strong>remote</strong> transmitter will<br />
stop the trigger and return the unit to the armed state.<br />
Note: Under <strong>system</strong> triggering, if press any button of 2-<strong>way</strong> <strong>remote</strong> once , the <strong>remote</strong> will<br />
stop the beep sound and LCD display will indicate the intrusion icon for 2sec.<br />
Press any button again to stop <strong>alarm</strong> triggering.<br />
- 2nd step release <strong>start</strong> killer (Table-1 of NO.7 ON status):<br />
If programmed <strong>with</strong> this feature, when disarming the <strong>system</strong> by the <strong>remote</strong>, however the<br />
<strong>engine</strong> will still blocked, the status LED will fast flashing 4 times after a pulse and the 2<strong>way</strong><br />
LCD will turn on the icon for indication.<br />
To exit : Turn ignition ON then (1) press Valet (over-ride) switch once . (2) or press <strong>remote</strong><br />
button once to release the <strong>start</strong> killer . The status LED will off to indicate the <strong>engine</strong><br />
released .
- Disarming <strong>with</strong>out a transmitter :(table-1 of No.6 Valet sw status)<br />
The security <strong>system</strong> can be disarmed <strong>with</strong>out the <strong>remote</strong> transmitter. The function<br />
is provided for the case when you need to disarm the <strong>system</strong> and drive the <strong>car</strong> but the<br />
Remote transmitter is faulty or lost. If while the programming of the <strong>system</strong> for the manual<br />
disarming the Valet (table-1 of No.6) was selected act as follows to disarm the <strong>system</strong>:<br />
open the <strong>car</strong> door - the security <strong>system</strong> will be triggered and the siren will be turned on; turn<br />
on the ignition, press the Valet switch once to disarm the <strong>system</strong>.<br />
- Disarming by using the PIN code :(table-1 of no.6 PIN code status)<br />
To select the PIN coded disarming mode. Please contact your installation technician or see<br />
Functions to be programmed section and the Installation manual. If the coded disarming<br />
mode is on you can use the manufacturer code (25) or to provide the maximum arming of<br />
your <strong>car</strong> you can program your own PIN code for disarming at any time. The code comprises<br />
two digit; each digit can vary from 1 to 9.<br />
To disarm the <strong>system</strong> using the PIN code<br />
1. Open the door <strong>with</strong> the key (the <strong>system</strong> will be triggered and the parking lights will go on<br />
and so on).<br />
2. Turn ON the ignition .<br />
3. Press the Valet button 2 times , the number of times which is in accordance <strong>with</strong> the first<br />
digit of your PIN code (the manufacturer setting is 2 time).<br />
4. Turn OFF the ignition then turn ON again.<br />
5. Press the Valet button 5 times, the number of times which is in accordance <strong>with</strong> the<br />
second digit of your PIN code (the manufacturer setting is 5 time).<br />
6. System will automatically disarmed if insert the correct PIN code.<br />
Note:<br />
If you enter the wrong code , you must wait next cycle triggering and turn off the ignition<br />
then <strong>start</strong> from step #2.<br />
- Silent arming mode : Press the button over 2sec.<br />
To temporarily turn off the arm or disarm chirps, use Silent mode. Simply press the button<br />
1+2 over 2sec.. The <strong>system</strong> will armed <strong>with</strong>out siren chirp. Disarm the <strong>system</strong> the siren will<br />
be automatically returned into the normal mode.<br />
2-<strong>way</strong> LCD display : + One beep sound<br />
Note: The Zone1 and Zone 2 sensors are bypassed if the <strong>system</strong> is armed using Silent<br />
Mode. This ensures that no chirps will be emitted by the siren in an area you want chirp-free.<br />
The <strong>system</strong> is still fully capableof triggering. Only the sensor is bypassed.
- Panic (turning on/off) : Press the button over 2sec.<br />
The <strong>system</strong> will be immediately armed , and siren turned on and the parking lights will <strong>start</strong><br />
flashing for 30 seconds.<br />
To turn off the panic mode, press any button once of the <strong>remote</strong> . If you do not turn off the<br />
panic mode the <strong>system</strong> will be automatically turned off in 30sec. and in armed .<br />
2-<strong>way</strong> LCD display :<br />
Icon flashing<br />
indicator<br />
Under Panic mode, the<br />
2-<strong>way</strong> <strong>remote</strong> will respond<br />
melody sound and flashing<br />
icons .<br />
- Car search mode:<br />
The <strong>system</strong> provide a feature to easy find your <strong>car</strong> position, simply press button once<br />
when in armed after 5sec. The <strong>system</strong> will respond by 1-long chirp <strong>with</strong> 10sec. for the<br />
parking lights flashing.<br />
- Passive immobilizer: (Table-1 of NO.3 ON status)<br />
To turn on the function of passive locking of the <strong>engine</strong> contact an installation technician or<br />
see the section Programmed functions (Table-1 of NO.3 ).<br />
If programmed <strong>with</strong> this function, when turn off ignition switch for 30 seconds or you open<br />
and close the door, it will disable the <strong>engine</strong> <strong>start</strong>er right <strong>way</strong> . The<br />
status LED will fast<br />
flashing 4 times after a pulse and the 2<strong>way</strong> LCD will turn on the IMMO icon.<br />
2-<strong>way</strong> LCD display :<br />
Turning off of the passive locking of the <strong>engine</strong><br />
- If the ignition is turned on press the disarming button 2 for a short time to cancel the<br />
function of the passive immobilizer<br />
- If the transmitter is faulty or lost turn off the <strong>system</strong> <strong>with</strong> the Valet switch .<br />
- In door temperature check :Press the button over 2sec.<br />
This feature provide temperature check inside the vehicle , simply press the button for<br />
over 2sec. the 2<strong>way</strong> LCD will indicate icon to show the current temperature .<br />
2-<strong>way</strong> LCD display :<br />
+ Two beep sound<br />
Icon turn on for<br />
current temperature<br />
inside the <strong>car</strong>
- Intrusion Alert by status LED :<br />
Upon disarming the <strong>system</strong>, if the vehicle is attempted or intruded, siren and lights will<br />
Indicates 5 chirps and 5 flashes to identify which zone was triggered. LED mode indicates<br />
the following different triggering.<br />
- 2-<strong>way</strong> LCD Intrusion Alert:<br />
Upon disarming the <strong>system</strong>, if the vehicle is attempted or intruded, the 2-<strong>way</strong> <strong>remote</strong> will<br />
respond 2 short beep follow <strong>with</strong> melody sound, and LCD display will indicates different<br />
icons as under:<br />
Zone1: 1st-stage<br />
sensor triggered<br />
Zone2: 2nd-stage<br />
sensor triggered<br />
flash 2 times after a pause Sensor 1st-stage triggered<br />
flash 3 times after a pause Sensor 2nd-stage triggered<br />
flash 4 times after a pause Door switch triggered<br />
flash 5 times after a pause Hood switch triggered<br />
flash 6 times after a pause Trunk switch triggered<br />
Flash 7times after a pause Ignition switch triggered<br />
Zone1: 2nd-stage<br />
sensor triggered<br />
Door switch triggered<br />
Hood switch triggered Ignition switch triggered<br />
Zone2: 1st-stage<br />
sensor triggered<br />
Trunk switch triggered<br />
Note: Before the ignition turn on, you may realized again which zone been triggered by<br />
Press button (status check) once, the LCD will display triggered zone again.
- Dual stage shock sensor:<br />
This device only activates after 5 seconds of arming state; this is preventing from the<br />
weak impact caused by the driver while leaving the <strong>car</strong>.<br />
-Light impact will activate the 1st stage sensor by giving 3 short warning chirps. 2-<strong>way</strong><br />
<strong>remote</strong> will respond 5 beeps and flashing icon as under.<br />
2-<strong>way</strong> LCD display :<br />
-Heavy impact will activate the 2nd stage sensor and trigger the <strong>alarm</strong> for 20sec. 2-<strong>way</strong><br />
<strong>remote</strong> will respond melody and flashing icon as under.<br />
2-<strong>way</strong> LCD display :<br />
NOTE: Adjustments are made via the rotary control above the shock sensor.<br />
- Remote Zone1 sensor bypass: Press the button <strong>with</strong>in 5sec. of amring.<br />
This <strong>system</strong> offer 2 stage sensors bypass feature . Within 5sec. after set arming, to press<br />
button once , the <strong>system</strong> will give 2 short chirps , the 1st stage bypassed. Press button<br />
Once again, <strong>with</strong>in 5sec. the <strong>system</strong> will give 3 short chirps, the 2nd stage bypassed.<br />
2-<strong>way</strong> LCD display :<br />
Zone 1 - 1st stage<br />
sensor trigger<br />
With 5 beeps sound With 5 beeps sound<br />
Zone 1 -2nd<br />
stage<br />
e sensor trigger<br />
With Melody sound<br />
Zone1- 1st stage<br />
sensor bypass.<br />
Zone 2 -1st stage<br />
sensor trigger<br />
Zone 2 -2nd stage<br />
sensor trigger<br />
With Melody sound<br />
Zone1- 2nd stage<br />
sensor bypass.<br />
With 2 beeps sound With 3 beeps sound<br />
Note: - if <strong>remote</strong> sensor bypassed, it will be detected again by next arming.<br />
- if armed <strong>with</strong> silent mode, to operate sensor bypass will only indicate by lights flash.
- Remote Zone2 sensor bypass: Press the button <strong>with</strong>in 5sec. of amring.<br />
This <strong>system</strong> offer 2 stage sensors bypass feature . Within 5sec. after set arming, to press<br />
button once , the <strong>system</strong> will give 2 short chirps , the 1st stage bypassed. Press button<br />
Once again, <strong>with</strong>in 5sec. the <strong>system</strong> will give 3 short chirps, the 2nd stage bypassed.<br />
2-<strong>way</strong> LCD display :<br />
Zone2- 1st stage<br />
sensor bypass.<br />
Zone2- 2nd stage<br />
sensor bypass.<br />
With 2 beeps sound With 3 beeps sound<br />
Note: - if <strong>remote</strong> sensor bypassed, it will be detected again by next arming.<br />
- if armed <strong>with</strong> silent mode, to operate sensor bypass will only indicate by lights flash.<br />
Valet mode<br />
If you are going to have your vehicle serviced, parked by a valet or washed you will want to<br />
put your security <strong>system</strong> Into valet mode. To enter valet mode as follows:<br />
With Valet button:<br />
1. Disarm the <strong>system</strong> .<br />
2. Turn the ignition from on to off.<br />
3. Within 10 sec after switching off the ignition press and hold the Valet button over 3 sec ,<br />
the LED <strong>start</strong>s flashing , release the Valet button.<br />
4. Press and hold the Valet button, you will hear siren chirp (from 1 to 3 chirp sound), while<br />
give 1 chirp sound, immediately release the Valet button. You will automatically at Valet<br />
mode, the LED steady ON .<br />
With <strong>remote</strong>:<br />
1. Turn the ignition to ON status.<br />
2. Press the button for over 2sec. until the status LED steady ON.<br />
2-<strong>way</strong> LCD display:<br />
Note:<br />
Under Valet mode, each time<br />
turn Acc off , the siren will give<br />
2 chirps for notification.<br />
When the <strong>system</strong> is in the valet mode it can not be armed. The door lock and unlock will<br />
function as keyless entry <strong>system</strong>.<br />
To exit valet mode:<br />
Turn Ignition switch to ON position , then press button for over 2seconds. You<br />
will hear siren provide 2 long and LED light OFF to confirm exit this mode and in <strong>alarm</strong> mode.<br />
The 2-Way <strong>remote</strong> will respond 1 long and 2 short beeps.
Manage Engine <strong>start</strong> /running features<br />
- Safe status :<br />
This <strong>system</strong> has several important safety input to ensure proper operation of the motor and<br />
prevent accidental damage to the <strong>engine</strong> or its components.<br />
If one of the under list input is defective , the <strong>engine</strong> will not allow to <strong>start</strong>.<br />
- The hood switch is opened.<br />
- The Hand brake switch off<br />
- Not in Park switch gear position.<br />
- Safety mode :<br />
Arming the <strong>system</strong> the 2<strong>way</strong> <strong>remote</strong> will turn on the safety mode icon , it will allow to<br />
<strong>engine</strong> <strong>start</strong> if the icon is turn on. If one of the zone's been triggered, the icon will turn off<br />
and <strong>engine</strong> <strong>start</strong> is not available . It will able to <strong>engine</strong> <strong>start</strong> by next arming again.<br />
Note: this Safety mode will turn OFF if door switch opened when arming.<br />
- Safety mode for manual-type <strong>car</strong>: Press the button over 2sec.<br />
This safety feature for the <strong>car</strong> <strong>with</strong> manual-gear type (Table-3 of NO 4), before set the<br />
<strong>engine</strong> <strong>start</strong> mode, you have to set the <strong>system</strong> in Safety mode.<br />
To set safety mode:<br />
1. In safe status, Engine running , press the button for over 2sec.<br />
2. The parking lights will active to indicate in safety mode.<br />
3. Remove the ignition key, and leave the <strong>car</strong> , however the <strong>engine</strong> still running.<br />
4. Arm the <strong>system</strong>, and the 2-<strong>way</strong> LCD will indicate Safety icon as under:<br />
Note: this Safety mode will turn OFF if door switch opened when arming.<br />
2-<strong>way</strong> LCD display :<br />
Icon on if the<br />
safety mode active.<br />
- Remote <strong>start</strong> : Press the button over 2sec. then press once.<br />
This feature allows you to <strong>remote</strong>ly <strong>start</strong> and run your vehicle for a programmable period of<br />
time. This makes it possible to warm up the <strong>engine</strong>, as well as the <strong>system</strong> is in Safe status.<br />
Important!<br />
(1) Never <strong>remote</strong> <strong>start</strong> your vehicle when the keys are in the ignition, except when<br />
performing "Arm <strong>with</strong> <strong>engine</strong> run mode", and (2) Never <strong>start</strong> the vehicle if it is not in Park<br />
switch gear position and not Hand brake on .
To <strong>remote</strong> <strong>start</strong> the vehicle:<br />
1. Armed position, press the button for over 2sec. Then <strong>with</strong>in 2sec. Press the button<br />
Once.<br />
2. The parking lights will flash 3 times to confirm that the vehicle will attempt to <strong>start</strong>.<br />
3. Once the vehicle has <strong>start</strong>ed, it will run for the pre-programmed period of time<br />
(either 10, 20,30 minutes or unlimited - see Table-3 of NO.1 section ) or until a shutdown<br />
input is triggered.<br />
4. The 2-<strong>way</strong> LCD will indicate <strong>engine</strong> run icon and <strong>engine</strong> run time icon as under:<br />
2-<strong>way</strong> LCD display<br />
if <strong>engine</strong> <strong>start</strong>ed :<br />
Run time icon will turn on 2sec. for programmed time of ( ,<br />
, , ). and then it will display every 2sec. of<br />
alternate run-time and current-time.<br />
Note: if programmed <strong>with</strong> unlimited , it will display only for<br />
current-time <strong>with</strong>out run-time.<br />
Flash icon if<br />
<strong>engine</strong> <strong>start</strong>ed.<br />
Extension <strong>engine</strong> running time 10 minutes:<br />
To prolong the <strong>engine</strong> running time again by press the button once, the <strong>engine</strong> running<br />
time will <strong>start</strong> from 10 minutes, except set in unlimited time.<br />
When you are ready to drive the vehicle:<br />
1. Disarm the <strong>system</strong>, if programmed <strong>with</strong> delay time (Table-3 of NO.12)<br />
2. Insert the ignition key and turn it to the ON (not the START) position.<br />
3. Press the brake pedal.<br />
Note: If the brake pedal is pressed before the key is in the ON position, the <strong>engine</strong> will shut<br />
down.<br />
Shutdown input :<br />
While the vehicle is running during <strong>remote</strong> <strong>start</strong> operation, the <strong>system</strong> will monitor the<br />
vehicle and will automatically shut down the <strong>engine</strong> if the <strong>system</strong> receives any of the<br />
following shutdown inputs:<br />
- The brake pedal is pressed.<br />
- The hood is opened.<br />
- The hand brake switch off / Park switch gear off position.<br />
- The pre-programmed run time (10, 20, or 30 minutes) has elapsed.<br />
- Press the button over 2sec.
- Fix time <strong>engine</strong> <strong>start</strong> : Press the button once.<br />
This feature will automatically <strong>engine</strong> <strong>start</strong> for every (2/3/4/24 hour) check programme<br />
Table-3 of NO.2. This makes it possible to warm up the <strong>engine</strong> (Table-3 of NO.1 ), as well<br />
as the <strong>system</strong> is in Safe status.<br />
To active Fix time <strong>engine</strong> <strong>start</strong> the vehicle:<br />
1. Armed position, press the button once.<br />
2. The 2-<strong>way</strong> LCD will indicate fix time icon and hour icon as under:<br />
2-<strong>way</strong> LCD display :<br />
Exit the FIX time <strong>engine</strong> <strong>start</strong> mode:<br />
1. Under the mode, press the button once again.<br />
2. The 2-<strong>way</strong> LCD will turn off fix time icon and give 2 beep sound.<br />
- Temperature <strong>engine</strong> <strong>start</strong> : Press the button for over 2sec.<br />
This feature will automatically <strong>engine</strong> <strong>start</strong> when the programme temperature detect ( -5C,<br />
-10C,-20C,-25C) check programme Table-3 of NO.3. This makes it possible to warm up the<br />
<strong>engine</strong> (Table-3 of NO.1 ), as well as the <strong>system</strong> is in Safe status.<br />
To active Fix time <strong>engine</strong> <strong>start</strong> the vehicle:<br />
1. Armed position, press the button for over 2sec.<br />
2. The 2-<strong>way</strong> LCD will indicate ( ) icon and temperature icon as under:<br />
3. The main unit will detect the vehicle temperature after 10sec.<br />
2-<strong>way</strong> LCD display :<br />
Run time icon will on for 2sec.<br />
To indicate fix time every ( , , , ) hour.<br />
Turn on to indicate<br />
temp.<strong>start</strong> enable<br />
Programme temp. icon will on for 2sec. to indicate<br />
detect temp. As:<br />
( , , , )<br />
Exit the FIX time <strong>engine</strong> <strong>start</strong> mode:<br />
1. Under the mode, press the button for over 2sec. again.<br />
2. The 2-<strong>way</strong> LCD will turn off temp. icon and give 2 beep sound.<br />
Turn on to indicate<br />
Fix time <strong>start</strong> enable
- Clock time <strong>engine</strong> <strong>start</strong>: Press the button over 2sec. for twice time.<br />
This feature will <strong>engine</strong> <strong>start</strong> by pre-setting clock time. This makes it possible to warm up<br />
the <strong>engine</strong> (Table-3 of NO.1 ), as well as the <strong>system</strong> is in Safe status.<br />
To set clock time <strong>engine</strong> <strong>start</strong> the vehicle:<br />
1. press the button over 2sec. then press again the button over 2sec.<br />
2 beep sound will be heard and clock icon flashing :<br />
2. Press button to select Hour & Min adjust setting. Icon flashing to indicate.<br />
3. Press button to turn up the numbers. Press button to turn down the numbers.<br />
The button may be held down to scroll faster.<br />
4. Press button to enable clock time. 1 beep will be heard and exit the mode.<br />
Press button to disable clock time. 2 beep will be heard and exit the mode.<br />
Note: The <strong>remote</strong> will revert to normal operation from the set mode when 10-seconds has<br />
elapsed <strong>with</strong>out a button entry.<br />
Exit the Clock time <strong>engine</strong> <strong>start</strong> mode:<br />
1. press the button over 2sec. then press again the button over 2sec.<br />
2 beep sound will be heard and clock icon flashing.<br />
2. Press button to disable clock time. 2 beep will be heard and exit the mode.<br />
-Arm <strong>with</strong> <strong>engine</strong> run mode: (Table-1 of No.8 ON status)<br />
This feature allows the vehicle to remain running after the key has been removed from the<br />
ignition. This feature is useful for occasions when you wish to exit and lock the vehicle for<br />
short periods of time, but would like to leave the motor running and the climate controls on.<br />
The <strong>engine</strong> running time can be programmed (2/5/10/untimited time (Table-1 No.9).<br />
To perform Arm <strong>with</strong> <strong>engine</strong> run mode:<br />
1. Before turning off the <strong>engine</strong>, make sure the <strong>system</strong> is in Safe status as: ( Hood switch<br />
closed, Hand brake on, Park switch gear on.)<br />
2. Press the button over 2sec. The status LED will <strong>start</strong> flashing twice per second and<br />
the parking light will active as programme (Table-3 of NO.5)<br />
3. Turn the ignition key to the OFF position. (The <strong>engine</strong> will stay running.)<br />
4. Press the button , to arm the <strong>system</strong> , however<br />
the <strong>engine</strong> will keep running.<br />
The <strong>engine</strong> will run until the pre-programmed time elapses or a shut-down input is<br />
received. (See the Remote Start section for a complete list of shut-down inputs.)<br />
Note: This feature will not work if the brake pedal is being pressed.<br />
2-<strong>way</strong> LCD display :<br />
Icon flashing<br />
indicator
Anti-Hi-Jack mode<br />
This feature will protect your vehicle in the event that there is an attempt to Hi-jack the<br />
vehicle. The <strong>system</strong> allows using three independent or simultaneous options to turn on the<br />
function Anti-Hi-Jack.<br />
If the <strong>system</strong> turned on Anti-hI-Jack mode, the parking lights will flash 1 time and the LED<br />
will <strong>start</strong> flashing fast indicate that the mode is turned on.<br />
- Standby door switch activates:<br />
To operate it when driving the <strong>car</strong>, press button for over 2seconds, siren will give<br />
one chirp and LED <strong>start</strong> flashing twice per second, <strong>system</strong> now is in standby Anti <strong>car</strong>jacking<br />
mode. Under this standby mode, if a door is forced been open and close, the <strong>system</strong><br />
will activate Anti-HI- jack mode immediately. The parking lights will flash once and the LED<br />
will fast flash to show the <strong>system</strong> is enter anti <strong>car</strong>-jack mode.<br />
EXIT: Under standby mode, you may exit this mode, if it is not activate the door, press<br />
button for over 2 seconds, siren will give two chirps and LED off.<br />
- Remote Anti-Hi-Jack: (Table-1 of NO.5 <strong>remote</strong> status).<br />
1. Turn on the ignition or <strong>start</strong> the <strong>engine</strong>.<br />
2. Simultaneously press the buttons 1+3 until the acknowledgement signal<br />
,1 flash of parking lights and the status LED <strong>start</strong> flashing.<br />
- Ignition turn Anti-Hi-Jack: (Table-1 of NO.5 ignition status).<br />
If programmed <strong>with</strong> the feature, each time ignition switch has been turn ON , the <strong>system</strong> will<br />
auto enter anti-hi-jack mode. The parking lights will flash once and the status LED will <strong>start</strong><br />
flashing to show the <strong>system</strong> is enter anti <strong>car</strong>-jack mode.<br />
- Door switch Anti-Hi-Jack: (Table-1 of NO.5 Door switch status).<br />
If programmed, to operate it when driving the <strong>car</strong>, if a door is forced been open and close,<br />
the <strong>system</strong> will activate Anti-<strong>car</strong> jack immediately. The parking lights will flash once and the<br />
LED will fast flash to show the <strong>system</strong> is enter anti <strong>car</strong>-jack mode.<br />
2-<strong>way</strong> LCD display : The AHJ icon will turn on<br />
after 60sec. of active the<br />
mode.
- Anti <strong>car</strong>-jack mode table:<br />
If enter anti <strong>car</strong>-jack mode, the Parking lights will flashing once and the LED will fast<br />
flashing to show the <strong>system</strong> is enter anti <strong>car</strong>-jack mode.<br />
While proceed at 60sec. main unit sends signal to the 2-Way <strong>remote</strong> a<br />
2-<strong>way</strong> LCD display : The AHJ icon will turn on<br />
after 60sec. of active the<br />
mode.<br />
Anti-Hi-Jack mode table<br />
LED flash<br />
Lights flash<br />
Siren<br />
Engine circuit<br />
Timer<br />
LED flashing fast<br />
Flashing normally<br />
1 flash Flashing<br />
Warning chirp Siren turn on<br />
Locking the <strong>engine</strong> circuits<br />
0sec. 50sec. 60sec. 90sec.<br />
Turning off of the Anti-Hi-Jack mode<br />
Exit <strong>with</strong>in 60sec. : Turn ignition off then on . press button for 2sec. or press valet<br />
switch once ,siren will give two chirps and LED off.<br />
Exit after 60sec. :<br />
1- Within Disarm switch (Table-1 of NO.6 Valet sw status) :<br />
After entering this mode, simply press the Disarm switch once .<br />
2- With PIN code (Table-1 of NO.6 PIN code status) :<br />
To exit this mode <strong>with</strong> the PIN code , Turn off then on the ignition , press the Valet button to<br />
insert the pin code , please check the function " Using the PIN code ".
Additional service functions to control the <strong>system</strong><br />
- Remote controlled additional channel (CH-1)<br />
The <strong>system</strong> has the channel CH-1 to control various additional devices connected to the<br />
<strong>system</strong>. This channel "Gray wire" is a negative pulsed output. The channel can be used<br />
for : (Table-2 of NO.5)<br />
- Remote trunk open .<br />
- Remote Latched.<br />
- Remote control of <strong>with</strong> the programme timer (1~120sec.) and sensor zones off.<br />
- Remote control of <strong>with</strong> the programme timer (1~120sec.) and sensor zones on.<br />
. Control of the CH-1 (Trunk open) - Press the button over 2sec.<br />
Simply press and hold button 4 over 2 seconds, the channel will output for 1 second pulse ,<br />
to open the trunk. When armed if <strong>remote</strong> trunk open or close, the 2-<strong>way</strong> <strong>remote</strong> will give one<br />
beep sound and display icon as under:<br />
2-<strong>way</strong> LCD display :<br />
Note. If the CH1 channel output is enable when the <strong>system</strong> was in the armed mode the<br />
<strong>system</strong> will simultaneously turn off the shock sensor and the trunk trigger. As soon as the<br />
trunk is closed the <strong>system</strong> will automatically re-arm the circuit and turn the shock sensor on.<br />
Note: (1) Ignition ON does not allow to <strong>remote</strong> trunk open.<br />
(2) Armed, if trunk keep opened over 1 minutes, the 2-<strong>way</strong> <strong>remote</strong> will give pre-warn<br />
beep sound.<br />
. Control of the CH-1 (Remote latched) - Press the button over 2sec.<br />
Simply press and hold button 4 over 2 seconds, the channel will constant output .<br />
To exit by press and hold button 4 over 2 seconds, the channel will deactivated.<br />
. Control of the CH-1 (programming time output <strong>with</strong> sensor off /on) -<br />
Press the button over 2sec.<br />
Simply press and hold button 4 over 2 seconds, the channel will constant output for the pre-<br />
programmed period of time or until press the button 4 over 2 seconds.<br />
The sensor zones can be turn off or on status , during the channel activated, check Table-2<br />
of NO.5.<br />
- Program controlled additional channel (CH-2)<br />
The <strong>system</strong> has the channel CH-2 to control various additional devices connected to the<br />
<strong>system</strong>. This channel "White/black wire" is a negative pulsed output. The channel can<br />
be used for : (Table-2 of NO.6)<br />
- Disarming pulsed output for 30 seconds .<br />
- Remote Latched.<br />
- Remote control of <strong>with</strong> the programme timer (1~120sec.) and sensor zones off.<br />
- Remote control of <strong>with</strong> the programme timer (1~120sec.) and sensor zones on.
. Control of the CH-2 (Disarming output for 30sec.)<br />
If programmed , the channel will constant output 30sec. when disarming. This feature<br />
for the <strong>car</strong> <strong>with</strong> dome-light supervision.<br />
. Control of the CH-2 (Remote latched) - Press the button over 2sec.<br />
Simply press and hold button 1+4 over 2 seconds, the channel will constant output .<br />
To exit by press and hold button 1+4 over 2 seconds, the channel will deactivated.<br />
. Control of the CH-2 (programming time output <strong>with</strong> sensor off /on) -<br />
Press the button over 2sec.<br />
Simply press and hold button 1+4 over 2 seconds, the channel will constant output for the<br />
pre-programmed period of time or until press the button 1+4 over 2 seconds.<br />
The sensor zones can be turn off or on status , during the channel activated, check Table-2<br />
of NO.6.<br />
- Program controlled additional channel (CH-3)<br />
The <strong>system</strong> has the channel CH-3 to control various additional devices connected to the<br />
<strong>system</strong>. This channel "Gray/black wire" is a negative pulsed output. The channel can be<br />
used for : (Table-2 of NO.7)<br />
- Arming pulsed output for 30 seconds .<br />
- Remote Latched.<br />
- Remote control of <strong>with</strong> the programme timer (1~120sec.) and sensor zones off.<br />
- Remote control of <strong>with</strong> the programme timer (1~120sec.) and sensor zones on.<br />
. Control of the CH-3 (Arming output for 30sec.)<br />
If programmed , the channel will constant output 30sec. when arming. This feature for<br />
the <strong>car</strong> <strong>with</strong> window closing after arming.<br />
. Control of the CH-3 (Remote latched) - Press the button over 2sec.<br />
Simply press and hold button 2+4 over 2 seconds, the channel will constant output .<br />
To exit by press and hold button 2+4 over 2 seconds, the channel will deactivated.<br />
. Control of the CH-2 (programming time output <strong>with</strong> sensor off /on) -<br />
Press the button over 2sec.<br />
Simply press and hold button 2+4 over 2 seconds, the channel will constant output for the<br />
pre-programmed period of time or until press the button 2+4 over 2 seconds.<br />
The sensor zones can be turn off or on status , during the channel activated, check Table-2<br />
of NO.7.<br />
- Remotecontrolled additional channel (CH-4)<br />
The <strong>system</strong> has the channel CH-4 to control various additional devices connected to the<br />
<strong>system</strong>. This channel "Orang/black wire" is a negative pulsed output.<br />
The channel can<br />
be used for : (Table-2 of NO.8)<br />
- 2nd stage door unlock .<br />
- Remote Latched.<br />
- Remote control of <strong>with</strong> the programme timer (1~120sec.) and sensor zones off.<br />
- Remote control of <strong>with</strong> the programme timer (1~120sec.) and sensor zones on.
. Control of the CH-4 (2nd stage door unlock)<br />
If you select this function the stage-by-stage unlocking of driver's then passengers' doors<br />
one after another is automatically <strong>car</strong>ried out <strong>with</strong> the <strong>remote</strong> transmitter if you sequentially<br />
press the disarming button. Control of unlocking of the passengers doors by the signal of<br />
one of additional channels (CH4 ) to be programmed respectively.<br />
When you first time press the disarming button 2 the <strong>system</strong> will enable driver's door<br />
unlocking and when you press the button once again the CH4 will be enabled for<br />
Passengers' doors unlocking.<br />
. Control of the CH-4 (Remote latched) - Press the button over 2sec.<br />
Simply press and hold button 3+4 over 2 seconds, the channel will constant output .<br />
To exit by press and hold button 3+4 over 2 seconds, the channel will deactivated.<br />
. Control of the CH-4 (programming time output <strong>with</strong> sensor off /on) -<br />
Press the button over 2sec.<br />
Simply press and hold button 3+4 over 2 seconds, the channel will constant output for the<br />
pre-programmed period of time or until press the button 3+4 over 2 seconds.<br />
The sensor zones can be turn off or on status , during the channel activated, check Table-2<br />
of NO.8.<br />
- Program controlled additional channel (CH-5)<br />
This channel "Orange wire" is a negative pulsed output. The channel can be used for:<br />
(Table-2 of NO.3)<br />
- Armed output (for interlock N/C type)<br />
- Disarmed output (for interlock N/O type)<br />
This CH-5 output for the <strong>car</strong> <strong>with</strong> <strong>engine</strong> <strong>start</strong> killer feature while active the <strong>system</strong>.<br />
Armed or disarmed output can be programme by Table-2 of NO.3 . This wire may be wired<br />
to an optional <strong>start</strong>er kill relay .<br />
- Additional channel (CH-6)<br />
This channel "Yellow wire" is a negative pulsed output. This CH-6 output for the <strong>car</strong> <strong>with</strong><br />
<strong>engine</strong> <strong>start</strong> killer feature as soon as <strong>system</strong> disarmed. This wire may be wired to an<br />
optional <strong>start</strong>er kill relay .<br />
2-<strong>way</strong> LCD display :<br />
To indicate that the<br />
<strong>engine</strong> blocked.<br />
CH-5/CH-6 activated.
- Additional (<strong>alarm</strong>) call if <strong>alarm</strong> call button located on the antenna<br />
module of the transceiver is pressed<br />
- The <strong>system</strong> has an additional channel to transfer the signal to call for/notify the owner of<br />
the two-<strong>way</strong> communication <strong>remote</strong>. The call can be made by the second person being in<br />
the <strong>car</strong> and enabling the call button on the module of the antenna pager. The call is<br />
formed by pressing the call button .<br />
- The two-<strong>way</strong> communication <strong>remote</strong> will <strong>start</strong> issuing frequent beeps few seconds.<br />
Transceiver<br />
Receivertransmitter<br />
unit<br />
# BASE-2<br />
2-<strong>way</strong> LCD display :<br />
LED<br />
indicator<br />
Call button<br />
LED<br />
indicator<br />
To indicate that the call<br />
button activated.<br />
Changing of the PIN code to turn off the <strong>system</strong><br />
This <strong>system</strong> provide 2 digit PIN code, each digit code can be programme from 1 to 9 , and<br />
manufacturer code is ( 2.5).<br />
To program your new PIN code as follows:<br />
1. Disarm the <strong>system</strong> .<br />
2. Turn the ignition from on to off.<br />
3. Within 10 sec after switching off the ignition press and hold the Valet button over 3 sec ,<br />
the LED <strong>start</strong>s flashing , release the Valet button.<br />
4. Press and hold the Valet button, you will hear siren chirp (from 1 to 3 chirp sound),<br />
while give 3 chirp sound, immediately release the Valet button.<br />
You will automatically at the PIN code setting mode. Siren will give 1 long chirp sound.<br />
5. Enter the first digit of the code <strong>with</strong> the Valet button (the number of pressing the Valet<br />
button corresponds to one digit of the code);<br />
Press <strong>remote</strong> button 1 once to confirm the first code, by given 1 chirp sound.<br />
6. Enter the second digit of the code <strong>with</strong> the Valet button (the number of pressing the<br />
Valet button corresponds to the second digit of the code);<br />
Press <strong>remote</strong> button 1 once to confirm the second code, by given 2 chirp sound.
7. If PIN code correct insert , the siren will give 1 long chirp to acknowledging that the<br />
<strong>system</strong> is ready for programming of new PIN code, see next step #9.<br />
If PIN code incorrect insert, the <strong>system</strong> will exit the mode by given 2-long chirp.<br />
><br />
8. To programme the 1st PIN code by press the Valet button the number of times<br />
corresponding to the 1st digit of your PIN code. Press 3 times of the Valet button,<br />
(each time the Valet button is pressing, the status LED will activated) .<br />
9. Press the <strong>remote</strong> button 1 once, siren will give 1 chirp to confirm the 1st digit code .<br />
10. To programme the 2nd PIN code by press the Valet button the number of times<br />
corresponding to the 2nd digit of your PIN code. Press 8 times of the Valet button,<br />
(each time the Valet button is pressing, the status LED will activated) .<br />
11. Press the <strong>remote</strong> button 1 once, siren will give 2 chirp to confirm the 2nd digit code .<br />
12. Wait a second, the status LED will notify the 2 digit PIN code, by 3 flashes - pause - 8<br />
flashes.<br />
13. If you wish to change the new PIN code again, press and hols the Valet button until<br />
transceiver give 1 long beep, to indicate that you can programme again from above<br />
step 9 .<br />
14. To Exit the mode, turn ignition to ON , and you will hear two long siren chirps.<br />
You must write down or remember your PIN code.<br />
Note:<br />
Please notice that the time between your actions shall be less than 20 sec; otherwise the<br />
<strong>system</strong> will automatically exit the programming mode and you will hear two long siren chirps.<br />
Entering the programming mode<br />
1. Disarm the <strong>system</strong> .<br />
2. Turn the ignition from on to off.<br />
3. Within 10 sec after switching off the ignition press and hold the Valet button over 3 sec ,<br />
the LED <strong>start</strong>s flashing , release the Valet button.<br />
4. Press and hold the Valet button, you will hear siren chirp<br />
(from 1-short 2-short 3-short 1-long 1-long+1-short 1-long+2shot ),<br />
5. While give 1-long chirp , release the Valet button to programme Table-1.<br />
While give 1-long+1short chirp , release the Valet button to programme Table-2.<br />
While give 1-long +2short chirp , release the Valet button to programme Table-3.<br />
6. After release the Valet button, you will automatically at the programming mode for the<br />
No.1 function. The LED <strong>start</strong>s flashing as separate flashes and the lights will turn ON.<br />
The number of the LED flashes in the programming mode for a certain function<br />
Corresponds to the programmed function number;<br />
7. - Change the status of the function by press the button 1.2. 3.4 of the transmitter. You will<br />
hear 1, 2, 3,4 siren chirps depending on the new status of the function,<br />
- Switch into the next function by press the Valet button one time.<br />
- Exit the programming mode (e.g. turn on the ignition).<br />
Note<br />
Please notice that the time between your actions shall be less than 20 sec; otherwise the<br />
<strong>system</strong> will automatically exit the programming mode and you will hear two long siren chirps.
Press the<br />
Valet SW<br />
to next item<br />
Item NO. by<br />
LED flash<br />
No.1<br />
No.2<br />
No.3<br />
No.4<br />
No.5<br />
No.6<br />
No.7<br />
No.8<br />
No.9<br />
PROGRAMME<br />
FEATURES<br />
Foot brake & Ignition control<br />
door lock / Ignition off unlock<br />
Passive arming<br />
Passive immobilizer<br />
Automatically Rearming<br />
Anti-Hi-Jack mode<br />
Emergency disarm by :<br />
Valet Switch / Pin code<br />
2nd step release <strong>start</strong> killer<br />
Arm <strong>with</strong> <strong>engine</strong> run mode<br />
Arm <strong>with</strong> <strong>engine</strong> run time<br />
Factory settings<br />
PROGRAMME TABLE-1<br />
Press button Press button Press button Press button<br />
1-chirp 2-chirp 3-chirp 4-chirp<br />
Foot brake<br />
Lock /<br />
IGN off<br />
Unlock<br />
OFF<br />
OFF<br />
OFF<br />
OFF<br />
OFF<br />
ON<br />
2minutes<br />
IGN on10sec<br />
Lock/<br />
IGN off<br />
Unlock<br />
OFF<br />
OFF<br />
OFF<br />
ON<br />
By Door SW<br />
Activate<br />
ON<br />
5 minutes<br />
IGN on10sec<br />
Lock/<br />
W/o<br />
Unlock<br />
ON<br />
ON<br />
ON<br />
ON<br />
OFF<br />
10 minutes<br />
OFF<br />
ON<br />
With door<br />
locking<br />
ON<br />
ON<br />
With door<br />
locking<br />
Valet SW Valet SW Pin code Pin code<br />
OFF<br />
ON<br />
By ignition<br />
turn on<br />
ON<br />
By <strong>remote</strong><br />
activate<br />
ON<br />
OFF<br />
Unlimited
Press the<br />
Valet SW<br />
to next item<br />
Item NO. by<br />
LED flash<br />
No.1<br />
No.2<br />
No.3<br />
No.4<br />
No.5<br />
No.6<br />
No.7<br />
No.8<br />
PROGRAMME<br />
FEATURES<br />
Manage door lock/unlock<br />
Door switch delay while<br />
arming<br />
Controlled channel (-) CH-5<br />
output<br />
Exchange CH-1/CH-2 &<br />
Lock / Unlock channel .<br />
Lock output = gray wire (-)<br />
Unlock output = white/black wire (-)<br />
CH-1 output = internal lock relay<br />
CH-2 output = inter unlock relay<br />
Controlled channel (-) CH-1<br />
output<br />
Controlled channel (-) CH-2<br />
output<br />
Controlled channel (-) CH-3<br />
output<br />
Controlled channel (-) CH-4<br />
output<br />
PROGRAMME TABLE-2<br />
Press button Press button Press button Press button<br />
1-chirp 2-chirp 3-chirp 4-chirp<br />
0.8sec. 3.5sec.<br />
5sec.<br />
Interlock<br />
N/C Type<br />
Armed output<br />
15sec.<br />
Interlock<br />
N/C Type<br />
Armed output<br />
OFF OFF<br />
Trunk open<br />
Pulse output<br />
1sec<br />
Disarming<br />
Pulse<br />
output<br />
30sec<br />
Arming<br />
Pulse output<br />
30sec<br />
2nd stage<br />
unlock<br />
Remote<br />
latched<br />
by key-1<br />
Remote<br />
latched<br />
by key-1+4<br />
Remote<br />
latched<br />
by key-2+4<br />
Remote<br />
latched<br />
by key-3+4<br />
Lock-<br />
0.8sec.<br />
Unlock-<br />
2pulse<br />
45sec.<br />
Interlock<br />
N/O Type<br />
Disarmed<br />
output<br />
Lock-<br />
30sec.<br />
Unlock-<br />
0.8sec.<br />
60sec.<br />
Interlock<br />
N/O Type<br />
Disarmed<br />
output<br />
ON ON<br />
Programme<br />
time output<br />
1~120sec.<br />
sensor off<br />
Programme<br />
time output<br />
1~120sec.<br />
sensor off<br />
Programme<br />
time output<br />
1~120sec.<br />
sensor off<br />
Programme<br />
time output<br />
1~120sec.<br />
sensor off<br />
Programme<br />
time output<br />
1~120sec.<br />
sensor on<br />
Programme<br />
time output<br />
1~120sec.<br />
sensor on<br />
Programme<br />
time output<br />
1~120sec.<br />
sensor on<br />
Programme<br />
time output<br />
1~120sec.<br />
sensor on<br />
Note: How to programme No.5~No.8 timer output<br />
While in programme item No.5~No.8 ,to programme the channel timer output by pressing<br />
the button or , at the time the siren will give chirps and the LED will steady ON ,<br />
the programmer now is in counting time (from 1~120sec.) , after your desire time, pressing<br />
the button or again, thus the channel has been programmed the time output.
Press the<br />
Valet SW<br />
to next item<br />
Item NO. by<br />
LED flash<br />
No.1<br />
No.2<br />
No.3<br />
No.4<br />
No.5<br />
No.6<br />
No.7<br />
No.8<br />
No.9<br />
No.10<br />
No.11<br />
No.12<br />
PROGRAMME<br />
FEATURES<br />
Engine run time after <strong>start</strong><br />
Time <strong>start</strong> <strong>engine</strong> by each<br />
2 / 3 / 4 / 24 hours<br />
Auto <strong>start</strong> <strong>engine</strong> by<br />
temperature detect<br />
Auto-type /Manual-type <strong>car</strong><br />
safety switch -/+ signal detect<br />
Parking lights activate when<br />
<strong>remote</strong> <strong>engine</strong> running<br />
Blue wire (CON1)<br />
ACC(+) output<br />
Start <strong>engine</strong> crank time<br />
Engine type (<strong>start</strong> delay)<br />
Engine control detect<br />
Turo off Safety mode if<br />
Zone1&Zone2 triggered<br />
Bypass Zone-1& Zone-2<br />
when Engine <strong>start</strong> running<br />
Shut down <strong>engine</strong> run when<br />
press button to disarm<br />
Factory settings<br />
PROGRAMME TABLE-3<br />
Press button Press button Press button Press button<br />
1-chirp 2-chirp 3-chirp 4-chirp<br />
10 minutes<br />
2 hour<br />
- 5 C - 10 C - 15 C - 25 C<br />
Auto-type Auto-type Manual-type Manual-type<br />
(-) safety sw (+) safety sw (-) safety sw (+) safety sw<br />
Flashing<br />
Active when<br />
ACC is on<br />
(Green wire)<br />
Petrol<br />
(Delay-<br />
2sec.)<br />
Generator<br />
(+)<br />
OFF<br />
OFF<br />
OFF<br />
20 minutes 30 minutes<br />
3 hour 4 hour 24 hour<br />
Active when<br />
IGN1 is on<br />
(Yellow wire)<br />
0.8 sec. 1.4 sec. 2 sec. 3.6 sec.<br />
Diesel<br />
(Delay-<br />
4sec.)<br />
Generator<br />
(-)<br />
Zone1<br />
2nd stage<br />
Triggered<br />
Zone1<br />
Bypass<br />
Delay<br />
10sec.<br />
Active when<br />
Engine is<br />
running<br />
Diesel<br />
(Delay-<br />
6sec.)<br />
Voltage<br />
"noise"<br />
Zone2<br />
2nd stage<br />
triggered<br />
Zone2<br />
Bypass<br />
ON<br />
Unlimited<br />
Flashing Constant OFF<br />
Active when<br />
Engine is<br />
running<br />
Diesel<br />
(Delay-<br />
10sec.)<br />
Tacho<br />
sensor<br />
Zone1+2<br />
2nd stage<br />
triggered<br />
Zone1+2<br />
Bypass<br />
ON
System Installation:<br />
1. Thoroughly read and become familiar <strong>with</strong> the installation instructions before<br />
beginning the installation.<br />
2. Review <strong>system</strong> contents: (1). A control module. (2).2-<strong>way</strong> pager transceiver antenna<br />
(3). One 5-button 2-<strong>way</strong> LCD <strong>remote</strong> transmitter.<br />
(4).One 3-button random code <strong>remote</strong> transmitter<br />
(5).Dual stage shock sensor (6).High output 6-tone siren (optional)<br />
(7).Harness:<br />
. 24-Pin main harness . 4-pin x2 shock sensor harness.<br />
. 7-pin transceiver harness . 3-Pin (40a) block relay harness<br />
3. Verify <strong>with</strong> the owner, the mounting location for all visible components, including the<br />
LED and Valet/over-ride switch.<br />
4. Verify <strong>with</strong> the owner, the optional programme features.<br />
5. Inspect and perform a function test for all vehicle <strong>system</strong>s before and after the<br />
installation.<br />
6. Al<strong>way</strong>s use a Volt / Ohm meter for testing vehicle circuits. Never use a test light.<br />
7. Al<strong>way</strong>s look before drilling any holes or mounting self-tapping screws. Be sure fuel<br />
lines and exterior wiring looms are clear as they often close to the chassis and difficult<br />
to see.<br />
8. Protect all wires running from the <strong>engine</strong> compartment to the interior of the vehicle by<br />
covering <strong>with</strong> electrical tape and split loom tubing. Be sure to use a grommet when<br />
routing wires through the firewall.<br />
9. Properly fuse any additional accessories such as window module, trunk opener, etc.,<br />
making sure to power them separate from the <strong>alarm</strong> module. This will ensure the<br />
functionality <strong>system</strong> in the event of an accessory failure.<br />
Mounting the Control Unit<br />
The control unit only be mounted in the inter of the vehicle. Do not mount the main unit in<br />
the <strong>engine</strong> compartment. Choose a mounting location that will not be easily accessible<br />
to a thief, and will not interfere <strong>with</strong> the operation of any vehicle components, such as<br />
foot pedal, steering column, air vents, seat rails, etc.<br />
Do not mounting the control unit until after setting the internal jumpers and performing<br />
a complete operation check of the <strong>system</strong>. After installation is complete and<br />
performance verified, the control unit can be easily mounted using wire ties through the<br />
mounting tabs on the button of the unit.<br />
Mounting the Shock Sensor<br />
Choose a suitable interior mounting locating for the shock sensor that provides ample<br />
coverage of the vehicle. Keep the sensor a<strong>way</strong> from the vehicle's ECM or other sources<br />
of the electrical interference. Suggested mounting locations include air conditioning<br />
ducts, dashboard braces, or center console supports.<br />
During proper operation, the shock sensor will detect impacts to the vehicle only and<br />
will not usually br triggered by slow rocking movements of the vehicle like those caused<br />
by wind.
ZONE1<br />
Plug-in dual stage<br />
shock sensor<br />
1 2<br />
Dual-stage/zone<br />
Shock Sensor<br />
External<br />
Temperature<br />
Sensor<br />
Use external temperature<br />
sensor for measurement of<br />
<strong>engine</strong> temperature or<br />
temperature in the given<br />
point of <strong>car</strong> compartment.<br />
Install the sensor in nearby<br />
<strong>engine</strong> .<br />
Plug-in Valet/ over-ride switch<br />
WIRING DIAGRAM :<br />
2nd stage (-) trigger<br />
1st stage(-) trigger<br />
- Ground<br />
+12V DC output<br />
Green<br />
Blue<br />
Black<br />
Red<br />
ZONE2<br />
External<br />
Ultra sonic &<br />
micro-wave<br />
sensor port<br />
20-PIN CON2<br />
Main connector<br />
wiring<br />
Antenna<br />
Extend the whole wire, align it <strong>with</strong> the intersection<br />
of dashboard and the front window glass.<br />
Keep it a<strong>way</strong> from the metal at least 5 cm to have<br />
the best receiving condition.<br />
LED<br />
indicator<br />
Push button<br />
Call switch<br />
E8<br />
Main control unit<br />
6-PIN CON3<br />
Connector<br />
for door lock<br />
wiring<br />
6-PIN CON1<br />
Connector<br />
for Engine <strong>start</strong><br />
wiring<br />
LED<br />
indicator
Connect to Chassis<br />
Ground (-)<br />
Connect to (-)<br />
negative Hood<br />
pin switch<br />
Foot brake (+)<br />
input<br />
Hand brake (-)<br />
input<br />
Connect to (-)<br />
negative Trunk<br />
pin switch<br />
Connect to<br />
Existing (+)<br />
Positive<br />
Door Switch<br />
Connect to<br />
Existing (-)<br />
Negative<br />
Door Switch<br />
(+) Siren output<br />
20-PIN CON2 main connector wiring<br />
Black<br />
11<br />
Green/white<br />
Engine control input (prog.)<br />
By tachometer or generator<br />
(-) CH-5 (prog.)<br />
(-) 500mA negative pulsed<br />
when armed output (Killer1)<br />
Pink<br />
1 2 3 4 5 6 7 8 9 10<br />
Blue/white<br />
Blue<br />
Purple<br />
Green<br />
Brown<br />
White/red<br />
Orange<br />
20<br />
Gray<br />
Yellow<br />
White/black<br />
White<br />
Gray/black<br />
White<br />
Orange/black<br />
Yellow/black<br />
Black/white<br />
Red/black<br />
(-) CH-6<br />
(-) 300mA negative<br />
pulsed when<br />
disarmed output<br />
(killer2)<br />
(-) Safety switch<br />
(-) negative input<br />
Connect to the<br />
Park switch gear in<br />
the vehicle.<br />
(-) CH-1 (prog.)<br />
(-) 500mA negative pulsed<br />
output for Trunk open<br />
(-) CH-2 (prog.)<br />
(-) 500mA negative<br />
output 30sec. when<br />
disarming.<br />
Right side parking<br />
light output<br />
(-) CH-3 (prog.)<br />
(-) 500mA negative<br />
pulsed output 30sec.<br />
when arming.<br />
Left side parking<br />
light output<br />
(-) CH-4 (prog.)<br />
(-) 500mA negative<br />
pulsed output for 2nd<br />
stage door unlock<br />
(-) Factory disarm output<br />
(-) 500mA negative output<br />
to disarm factory antitheft<br />
device<br />
(-) Original bypass output<br />
(-) 500mA negative output when<br />
active <strong>engine</strong> run and <strong>start</strong> on .
6-PIN CON1 Connector for Engine <strong>start</strong> wiring<br />
IGN1 output(+)<br />
the wire will active<br />
when <strong>remote</strong> <strong>start</strong><br />
and <strong>engine</strong> running<br />
Starter input (+)<br />
Positive power<br />
(+) 12VDC input<br />
Door Lock N/O<br />
Door Unlock N/O<br />
30A<br />
Yellow<br />
Yellow/black<br />
red<br />
3<br />
6<br />
5<br />
2<br />
Black/yellow<br />
blue<br />
Green<br />
6-PIN CON3 Connector for Door Lock wiring<br />
Door Unlock COM<br />
(+)12V DC<br />
(-) When Armed<br />
Green/red<br />
Blue/red<br />
Blue<br />
4-PIN Connector for sensors<br />
Red<br />
4<br />
1<br />
Green<br />
Green/black<br />
Blue/black<br />
Green<br />
Black Blue<br />
Starter ON output (+)<br />
ACC (+) output (prog.)<br />
(acc circuit , air-con &<br />
heater..)<br />
check Table-3 of No.6<br />
ACC ON output (+)<br />
Door Lock COM<br />
Door Lock N/C<br />
Door Unlock N/C<br />
1st stage (-) input<br />
2nd stage (-) input
CON1 <strong>engine</strong> <strong>start</strong> wire connection guide:<br />
The six heavy gauge wires coming from the large connector are used to energize high<br />
current circuits in the vehicle. It is crucial that these connections are well-made and<br />
capable of handling the current demands.<br />
Black/yellow (+) <strong>start</strong>er output<br />
Connect this wire to the <strong>start</strong>er wire in the vehicle.<br />
Yellow/black <strong>start</strong>er input<br />
For anti group or <strong>start</strong>er kill attach this wire to the key side of the <strong>start</strong>er wire for anti grind<br />
and for the <strong>start</strong>er kill to be active.<br />
RED (+)12V input for high current outputs<br />
Remove the 30-amp fuses prior to connecting these wires and do not replace them until the<br />
satellite has been plugged into the control module. These wires are the source of current for<br />
all the circuits the relay satellite will energize. They must be connected to a high current<br />
source. Since the factory supplies (+)12V to the key switch that is used to operate the motor,<br />
it is recommended that these wires be connected there.<br />
Yellow(+) Ignition #1 ON output<br />
Connect this wire to the ignition #1 wire in the vehicle. This wire will immediate active when<br />
<strong>remote</strong> <strong>start</strong> and <strong>engine</strong> running .<br />
Green(+) ACC ON output<br />
Connect this wire to the ACC ON wire in the vehicle. This wire will activate when <strong>remote</strong><br />
<strong>engine</strong> running.<br />
Blue (+) ACC(+) output (prog.)<br />
This wire will activate for programme (Table-3 of No.6)<br />
CON2 wire connection guide:<br />
Black/white (-) original bypass output<br />
This wire supplies a 500mA output as soon as the module <strong>with</strong> <strong>remote</strong> <strong>start</strong> process. It can<br />
be used <strong>with</strong> a relay to disconnect a sensor from the <strong>system</strong> as shown below.<br />
This wire can also be used to rearm a factory anti-theft <strong>system</strong> when the <strong>remote</strong> <strong>start</strong> shuts<br />
down.<br />
To bypass an optional sensor:<br />
Black/white<br />
original bypass<br />
output<br />
(+) 12V FUSED<br />
SENSOR TRIGGER<br />
OUTPUT<br />
CUT<br />
SENSOR INPUT<br />
OF SYSTEM
Yellow/black (-) factory disarm output<br />
This wire sends a negative pulse every time the <strong>remote</strong> <strong>start</strong> is activated. This can be used<br />
to pulse the disarm wire of the vehicle's factory anti-theft device. Use a relay to send a (-) or<br />
(+) pulse to the disarm wire as shown in the diagrams below.<br />
Relay for Negative (-) Disarm Wire Relay for Positive (+) Disarm Wire<br />
(+)12V<br />
Yellow/black (-)<br />
factory disarm output<br />
White/red Engine control input ( tachometer or generator input)<br />
This input can be programmed three <strong>way</strong>s to detect <strong>engine</strong> status - run or not .<br />
( Tachometer RPMs & Generator (+) /(-) & Voltage "noise" ) .<br />
by programmable (Table-3 of No. 9)<br />
- Control by tacho sensor:<br />
This input provides the module <strong>with</strong> information about the <strong>engine</strong>'s revolutions per minute<br />
(RPMs). connection to such circuit is ensure right <strong>start</strong>er disconnection. There are some<br />
<strong>car</strong>s where tacho signal amplitude is lower than 4V. Therefore you need to use additional<br />
Capacitor .<br />
11<br />
To disarm (-)<br />
wire<br />
1 2 3 4 5 6 7 8 9 10<br />
20<br />
White/red wire<br />
(+)12V<br />
1.0 uf/250V<br />
Yellow/black (-)<br />
factory disarm output<br />
(+)12V<br />
To disarm (+)<br />
wire<br />
To Tachometer sensor<br />
- Control by generator (+) or (-):<br />
connect the wire to "generator charge lamp" on dashboard. This wire circuit must<br />
changed from 0V(<strong>engine</strong> stop) to 9-12V (<strong>engine</strong> running) or from +12V to 0V (Table-3 of<br />
No. 9) there are some <strong>car</strong> models where +12V is appear when <strong>start</strong>er is running.<br />
- Control by Voltage "noise" :<br />
When you can't use <strong>engine</strong> control by tacho and by generator. Starter disconnection<br />
according to the Table-3 of No.9 , white/red wire do not used.
Green/White (+) Foot brake input<br />
This wire MUST be connected to the vehicle's brake light wire. This is the wire that shows (+)<br />
12V when the brake pedal is depressed. The <strong>remote</strong> <strong>start</strong> or turbo mode will be disabled or<br />
shut down any time the brake pedal is depressed.<br />
Foot brake<br />
Blue/White (-) Hand brake input<br />
This wire MUST be connected to the vehicle's brake light wire. This is the wire that shows<br />
(-) when the hand brake is ON. The <strong>remote</strong> <strong>start</strong> or turbo mode will be activate if the brake<br />
Is ON position.<br />
Green/white<br />
Hand brake lamp<br />
on dashboard<br />
Hand brake<br />
Red/black (-) Safety switch input (prog.)<br />
Connect the wire to the PARK gear (-)switch in the vehicle. This wire will test <strong>with</strong> ground<br />
<strong>with</strong> the gear selector in PARK position. This will prevent the vehicle from accidentally being<br />
<strong>start</strong>ed while in a drive gear. This input must rest at ground in order for the <strong>remote</strong> <strong>start</strong><br />
<strong>system</strong> to operate. Connected properly the vehicle will only <strong>start</strong> while in PARK gear<br />
position. This wire can be programmed (-) / (+) signal detect by table-3 of No.4.<br />
(+) signal Safety sw<br />
Red/black<br />
Green/white<br />
Park gear<br />
Park gear lamp<br />
+ 12V<br />
STOP lamps<br />
Black (-) chassis ground connection<br />
Remove any paint and connect this wire to bare metal, preferably <strong>with</strong> a factory bolt rather<br />
than your own screw. (Screws tend to either strip or loosen <strong>with</strong> time.) We recommend<br />
grounding all your components, including the siren, to the same point in the vehicle.<br />
ORANGE (-) CH-5 ground-when-armed output (prog.)<br />
This wire supplies a (-)500 mA ground as long as the <strong>system</strong> is armed (if programmed<br />
armed output by (Table-2 of No.3). This output ceases as soon as the <strong>system</strong> is disarmed.<br />
The orange wire may be wired to an optional <strong>start</strong>er kill relay.<br />
+12V<br />
(-) signal Safety sw<br />
Red/black<br />
+ 12V<br />
Park gear lamp<br />
+12V<br />
Park gear
6-PIN Connector for Central Door Locking Wiring<br />
1.) For Factory installed central door lock <strong>system</strong><br />
ORIGINAL<br />
BUILT-IN<br />
CONTROLLER<br />
Central door lock wiring<br />
Green/black<br />
Green<br />
Green/red<br />
Blue/black<br />
Blue<br />
Blue/red<br />
Green/black<br />
Green<br />
Green/red<br />
Blue/black<br />
Blue<br />
Blue/red<br />
Green/black<br />
Green<br />
Green/red<br />
Blue/black<br />
Blue<br />
Blue/red<br />
MOTOR CONTROL<br />
MOTOR CONTROL<br />
DOWN<br />
MAIN LINE<br />
2.) Directly connect to 2 wire Actuator<br />
Central door lock wiring<br />
+ 12V<br />
UP<br />
(-)GND<br />
DOOR MOTOR LOCK<br />
(Inside of the front door)<br />
2 WIRE ACTUATOR<br />
3.) A built-in Central door lock <strong>with</strong> electric lock switch(like: CHRYSLER..)<br />
Central door lock wiring<br />
Green/black<br />
Green<br />
Green/red<br />
Blue/black<br />
Blue<br />
Blue/red<br />
ELECTRIC<br />
MOTOR<br />
+ 12V<br />
LOCK MOTOR<br />
UNLOCK MOTOR<br />
DOWN<br />
UP<br />
MOTOR LOCK<br />
INSIDE THE<br />
FRONT DOOR<br />
4.) For vacuum type central door lock <strong>system</strong> (like : Mercedes Benz , AUDI..)<br />
Central door lock wiring<br />
ELECTRIC<br />
MOTOR<br />
+ 12V<br />
DOWN<br />
UP<br />
Note: Door lock active time for 4 secs.<br />
AIR COMPRESSOR
Made in Taiwan