

Gourmia GAF570 Air Fryer -
Gourmia GAF570 Air Fryer -
Gourmia GAF570 Air Fryer -

You also want an ePaper? Increase the reach of your titles
YUMPU automatically turns print PDFs into web optimized ePapers that Google loves.
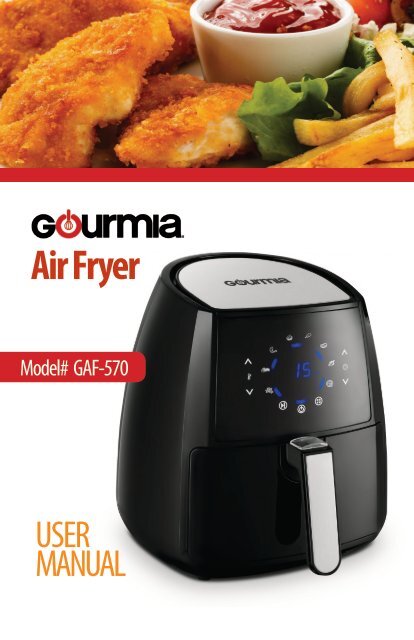
<strong>Air</strong> <strong>Fryer</strong><br />
Model# GAF-570<br />
USER<br />
MANUAL
Read this manual thoroughly<br />
before using and save it for<br />
future reference<br />
Welcome to the Exciting World of<br />
<strong>Air</strong> Frying from <strong>Gourmia</strong><br />
Model: GAF-570<br />
© 2017 <strong>Gourmia</strong><br />
www.gourmia.com<br />
The Steelstone Group<br />
Brooklyn, NY<br />
All rights reserved. No portion of this manual may be reproduced by any means<br />
whatsoever without written permission from The Steelstone Group, except for the<br />
inclusion of quotations in a media review.<br />
Although every precaution has been taken in the preparation of this manual, The<br />
Steelstone Group assumes no responsibility for errors or omissions. Nor is any<br />
liability assumed for damages resulting from the use of the information contained<br />
herein. Although every effort has been made to ensure that the information<br />
contained in this manual is complete and accurate, The Steelstone Group is not<br />
engaged in rendering professional advice or services to the individual consumer;<br />
further, The Steelstone Group shall not be held responsible for any loss or damage<br />
allegedly arising from any information or suggestion in this manual.<br />
Congratulations on your purchase of the <strong>Air</strong> <strong>Fryer</strong> from <strong>Gourmia</strong>, exclusively<br />
designed for healthier cooking!<br />
If you are one the those people who enjoy the great crisp of fried food, – that<br />
“crunchy” goodness when you bite into fried chicken, french fries, or crispy hot<br />
wings. Yet you stay away from those foods - you’ve made the right choice.<br />
With your new <strong>Gourmia</strong> <strong>Air</strong> <strong>Fryer</strong> preparing fresh and healthy fried foods, is only<br />
moments away. We’re confident that you’ll find your new compact <strong>Air</strong> <strong>Fryer</strong> from<br />
<strong>Gourmia</strong> easy and fun to use, with the end results being a fresh air fried, great<br />
tasting food and snack. With the <strong>Gourmia</strong> <strong>Air</strong> <strong>Fryer</strong> you and your whole family<br />
are sure to enjoy over and over again!<br />
The pages of this manual offer full and comprehensive instructions to guide you<br />
through the functions and features of the <strong>Gourmia</strong> <strong>Air</strong> <strong>Fryer</strong>. Inside this guide<br />
you will also find information on its modes of operation, complete step-by-step<br />
instructions for the operation, assembly, cleaning, and maintenance of your<br />
appliance.<br />
Please read all safety instructions thoroughly to ensure safe usage at all times.<br />
Thank you for your purchase! We sincerely hope you will enjoy this as well as all<br />
the many innovative products brought to you by our family at <strong>Gourmia</strong>.<br />
2 3
IMPORTANT SAFEGUARDS<br />
IMPORTANT SAFEGUARDS<br />
Before using the electrical appliance, the following basic precautions should always be followed<br />
including the following:<br />
1. This appliance is not intended for use by persons (including children younger 8) with reduced<br />
physical, sensory or mental capabilities, or lack of experience and knowledge, unless they have<br />
supervision.<br />
2. Check if the voltage indicated on the appliance corresponds to the local main voltage before you<br />
connect the appliance.<br />
3. Do not use the appliance if the plug, the main cord or the appliance itself is damaged. Always<br />
make sure that the plug is inserted properly into a wall outlet.<br />
4. If the main cord is damaged, you must have it replaced by the manufacturer, its service agent or<br />
similarly qualified persons in order to avoid a hazard.<br />
TABLE OF CONTENTS<br />
Know Your <strong>Air</strong> <strong>Fryer</strong>.........................6<br />
Before Using The <strong>Air</strong> <strong>Fryer</strong>...............7<br />
Using Your <strong>Air</strong> <strong>Fryer</strong>.........................8<br />
Troubleshooting...........................10<br />
TABLE OF CONTENTS<br />
5. Children should be supervised to ensure that they do not play with the appliance. Cleaning<br />
and user maintenance shall not be made by children unless they are older than 8 and supervised.<br />
6. Keep the main cord away from hot surfaces.<br />
7. Do not plug in the appliance or operate the control panel with wet hands.<br />
8. Never connect this appliance to an external timer switch or separate remote-control system in<br />
order to avoid a hazardous situation.<br />
Frying Tips.................................... 11<br />
Settings Chart.............................. 12<br />
Cleaning & Maintenance...............14<br />
9. Do not place the appliance on or near combustible materials such as a tablecloth or curtain.The<br />
accessible surfaces may become hot during use.<br />
10. Do not place the appliance against a wall or against other appliances. Leave at least 10cm free<br />
space on the back and sides and 10cm free space above the appliance. Do not place anything on<br />
top of the appliance.<br />
11. Do not use the appliance for any other purpose than described in this manual.<br />
12. Do not let the appliance operate unattended.<br />
13. During hot air frying, hot steam is released through the air outlet openings. Keep your hands<br />
and face at a safe distance from the steam and from the air outlet openings. Also be careful of hot<br />
steam and air when you remove the pan from the appliance.<br />
14. After using the appliance, the metal cover inside is very hot, avoid to contact the hot metal inside<br />
after cooking.<br />
15. Immediately unplug the appliance if you see dark smoke coming out of the appliance. Wait for<br />
the smoke emission to stop before you remove the pan from the appliance.<br />
FOR HOUSEHOLD USE ONLY<br />
4 5
KNOW YOUR AIR FRYER<br />
Temperature<br />
Control Panel<br />
Power<br />
Icon<br />
Pause<br />
Icon<br />
KNOW YOUR AIR FRYER<br />
Food<br />
Option<br />
Icons<br />
Timer<br />
Control<br />
Panel<br />
Pre-Heat<br />
Icon<br />
Before Using The <strong>Air</strong> <strong>Fryer</strong> For The First Time<br />
1. Remove all packaging material.<br />
Remove any stickers or labels from the appliance.<br />
2. Thoroughly clean the basket and pan with hot water,<br />
some dishwashing liquid and a non-abrasive sponge.<br />
3. Wipe the inside and outside of the appliance with a moist cloth.<br />
Using Your <strong>Air</strong> <strong>Fryer</strong><br />
This is an air fryer that works on hot air.<br />
• Do not fill the pan with oil or frying fat.<br />
• Do not fill the pan with oil or any other liquid.<br />
• Do not put anything on top of the appliance.<br />
• Do not put anything on the air vents on the two sides of the appliance.<br />
USING YOUR AIR FRYER<br />
Basket<br />
Release<br />
Button<br />
Basket<br />
Pan<br />
Handle<br />
1. Place the appliance on a stable,<br />
horizontal and heat-resistant,<br />
level surface.<br />
2. Place the basket in the pan.<br />
Put the ingredients in the<br />
basket. (Do not overload)<br />
Slide the pan into the air fryer,<br />
Note: Never use the pan without<br />
the basket.<br />
3. Plug in the machine into an<br />
electrical wall outlet. To Turn<br />
on the appliance press the<br />
power icon. Blue ring of lights<br />
will appear with temperature<br />
and time flashing.<br />
4. Tap the desired food option<br />
icon. To adjust the preset<br />
settings tap the temperature<br />
or timer arrows.<br />
5. To start the <strong>Air</strong> Frying process<br />
tap power icon again.<br />
6. To pause the <strong>Air</strong> <strong>Fryer</strong> press the<br />
Pause Icon.<br />
7. To turn off the <strong>Air</strong> <strong>Fryer</strong> manually-<br />
pull out the basket. Slide<br />
the basket back in to resume<br />
air frying.<br />
6 7
USING YOUR AIR FRYER<br />
º F<br />
º F<br />
MIN<br />
MIN<br />
8. Check if the ingredients are ready.<br />
If the ingredients are not ready yet,<br />
simply slide the pan back into the<br />
appliance and set the timer to a few<br />
extra minutes.<br />
9. Some ingredients require shaking<br />
halfway through the preparation time<br />
(see ‘Settings Chart’ on page 12). To<br />
shake the ingredients, pull the pan<br />
out of the appliance by the handle<br />
and shake it. Then slide the pan back<br />
into the air fryer and continue to<br />
cook.<br />
11. To remove small ingredients<br />
(e.g. fries), put the pan on a flat<br />
heat resistant surface, and press the<br />
basket release button and lift the<br />
basket out of the pan.<br />
12. Empty the basket into a bowl<br />
or onto a plate. To remove large or<br />
fragile ingredients, use a pair of tongs!<br />
13. When a batch of ingredients is<br />
ready, the air fryer is instantly ready<br />
for preparing another batch. No<br />
preheat is neccesary.<br />
USING YOUR AIR FRYER<br />
5. To Turn on the appliance<br />
press the power icon. Blue<br />
ring of lights will appear<br />
with temperature and time<br />
flashing.<br />
6. Tap the desired food option<br />
icon. To adjust the preset<br />
settings tap the temperature<br />
or timer arrows.<br />
10. When you hear the timer<br />
bell ring five times, the set<br />
preparation time has elapsed.<br />
Pull the pan out of the appliance<br />
and place it on a<br />
heat-resistant surface.<br />
Temperature<br />
Control<br />
Power<br />
Icon<br />
Note: Preheat Icon has three presets 180ºF/ 280ºF / 380ºF which will<br />
preheat within 5 minutes.<br />
Note: after the timer rings five times<br />
the air blower will stop after twenty<br />
seconds.<br />
Timer<br />
Control<br />
CAUTION:<br />
Do not press the<br />
button of the handle<br />
during shaking.<br />
This will release the<br />
handle!<br />
Tip: Do not turn the basket upside down with the pan still attached<br />
to it, as any excess oil that has collected on the bottom of the pan will<br />
leak onto the ingredients.<br />
Tip: After hot air frying, the pan and the ingredients are hot - avoid<br />
touching. Depending on the type of the ingredients in the air fryer,<br />
steam may escape from the pan.<br />
Tip: Empty the basket into a bowl or onto a plate.<br />
8 9
TROUBLESHOOTING<br />
PROBLEM POSSIBLE CAUSE SOLUTION<br />
The air fryer does not work.<br />
The ingredients fried in<br />
the air fryer are not done.<br />
The ingredients are fried<br />
unevenly in the air fryer.<br />
The appliance is not plugged in.<br />
You have not set the timer.<br />
The pan is not put into the appliance<br />
properly.<br />
The amount of ingredients in the<br />
basket are too much.<br />
The set temperature is too low.<br />
The preparation time is too short.<br />
Certain types of ingredients need<br />
to be shaken halfway through the<br />
preparation time.<br />
Put the main plug in an earthed wall socket.<br />
Tap the timer control icon to the required preparation<br />
time to turn on the appliance.<br />
Slide the pan into the appliance properly.<br />
Put smaller batches of ingredients in the basket.<br />
Smaller batches are fried more evenly.<br />
Tap the temperature control icon to the required<br />
temperature setting.<br />
(see ‘Settings Chart’ on page 12).<br />
Tap the timer control icon to the required<br />
preparation time.<br />
(see ‘Settings Chart’ on page 12).<br />
Ingredients that lie on top of or across each other<br />
(e.g.fries) need to be shaken halfway through the<br />
preparation time.<br />
(see ‘Settings Chart’ on page 12).<br />
AIR FRYING TIPS<br />
• Smaller ingredients usually require a slightly shorter preparation time<br />
than larger ingredients.<br />
• Shaking smaller ingredients halfway through the preparation time<br />
optimizes the end result and can help prevent unevenly fried ingredients.<br />
• Add some oil to fresh potatoes for a crispy result. Fry your ingredients in<br />
the air fryer within a few minutes after you add the oil.<br />
• Do not prepare extremely greasy ingredients such as sausages in the air<br />
fryer.<br />
• Snacks that can be prepared in a oven can also be prepared in the air fryer.<br />
• The optimal amount for preparing crispy fries is 500 grams.<br />
• Use pre-made dough to prepare filled snacks quickly and easily. Pre-made<br />
dough also requires a shorter preparation time than home-made dough.<br />
• Place a baking tin or oven dish in the air fryer basket if you want to bake a<br />
cake or quiche or if you want to fry fragile ingredients or filled ingredients.<br />
FRYING TIPS<br />
Fried snacks are not crispy<br />
when they come out of the<br />
air fryer.<br />
You used a type of snack meant to be<br />
prepared in a traditional deep fryer.<br />
Use oven snacks or lightly brush some oil onto the<br />
snacks for a crispier result.<br />
• You can also use the air fryer to reheat ingredients. To reheat ingredients,<br />
set the temperature to 300ºF up to 10 minutes.<br />
I cannot slide the pan into<br />
the appliance properly.<br />
There are too much ingredients in the<br />
basket.<br />
The basket is not placed in the pan<br />
correctly.<br />
Do not fill the basket beyond max line<br />
(see ‘Settings Chart’ on page 12).<br />
Push the basket down into the pan until you hear<br />
a click.<br />
Note: Because the rapid hot air technology instantly reheats the air inside the<br />
appliance, pulling the pan out of the appliance during use, for a short amount<br />
of time, will not effect the process.<br />
White smoke comes out<br />
of the appliance.<br />
You are preparing greasy ingredients.<br />
When you fry greasy ingredients in the air fryer, a<br />
large amount of oil will leak into the pan. The oil<br />
produces white smoke and the pan may heat up<br />
more than usual. This does not affect the appliance<br />
or the end result.<br />
Tip: To reduce the weight, you can remove the basket from the pan and<br />
shake the basket only. To do so, pull the pan out of the appliance, place it on<br />
a heat-resistant surface and press the button of the handle.<br />
Fresh fries are fried unevenly<br />
in the air fryer.<br />
Fresh fries are not crispy when<br />
they come out of the air fryer.<br />
The pan still contains grease residues<br />
from previous use.<br />
You did not use the right potato type.<br />
You did not rinse the potato sticks<br />
properly before you fried them.<br />
The crispiness of the fries depends on<br />
the amount of oil and water in the<br />
fries.<br />
White smoke is caused by grease heating up in the<br />
pan- make sure you clean the pan properly after<br />
each use.<br />
Use fresh potatoes and make sure they stay firm<br />
during frying.<br />
Rinse the potato sticks properly to remove starch<br />
from the outside of the sticks.<br />
Make sure you dry the potato sticks properly<br />
before you add the oil.<br />
Cut the potato sticks smaller for a crispier result.<br />
Tip: If you set the timer to half the preparation time, your timer will ring<br />
when you have to shake the ingredients. However, this means that you have<br />
to set the timer again to the remaining preparation time after shaking.<br />
(see ‘Settings Chart’ on page 12).<br />
Tip: If you set the timer to full preparation time, there is no timer bell during<br />
cooking. Before finishing, you can pull out the pan at any time to check the<br />
ingredients cooking condition. The power will shut down automatically<br />
and, will only resume after you slide the pan back into the appliance (timer<br />
always counts down in this situation).<br />
Add slightly more oil for a crispier result.<br />
10 11
SETTINGS CHART<br />
SETTINGS CHART<br />
(The chart below are the basic settings for preparing your food.)<br />
The settings below are only indications-as ingredients differ in origin, size, shape as well as brand,<br />
we cannot guarantee the best setting for your ingredients.<br />
Min-max Time Temperature Shake Extra information<br />
_________________________________________________________________<br />
(ounces) (min.)<br />
_________________________________________________________________<br />
POTATOES & VEGETABLES<br />
_________________________________________________________________<br />
Thin frozen fries 7 oz. 8-12 400 shake every 5 min.<br />
_________________________________________________________________<br />
Thick frozen fries 7 oz. 8-15 400 shake every 5 min.<br />
_________________________________________________________________<br />
Frozen onion rings 10 oz. 8-14 400<br />
_________________________________________________________________<br />
Roasted zucchini 2 oz or 6 slices 16-10 400 flip halfway spray with oil<br />
_________________________________________________________________<br />
Roasted broccoli and peppers 4 oz 5-10 400 shake spray with oil<br />
_________________________________________________________________<br />
Fresh thin fries 5 oz 8-12 400 shake every 5 min. spray with oil<br />
_________________________________________________________________<br />
Fresh thick fries 5 oz. 10-20 400 shake every 5 min. spray with oil<br />
_________________________________________________________________<br />
Fresh hash browns 2 oz. 20-25 350<br />
_________________________________________________________________<br />
MEAT & FISH<br />
_________________________________________________________________<br />
Frozen chicken fingers 11 oz. 10-20 400 toss halfway<br />
_________________________________________________________________<br />
Frozen fishsticks 10.5 oz. 10-20 400 toss halfway<br />
_________________________________________________________________<br />
Fresh fish fillet 2-4 oz. 10-15 350 flip halfway<br />
_________________________________________________________________<br />
Steaks (medium) 3.2 oz. 10-15 320 flip halfway<br />
_________________________________________________________________<br />
Chicken breasts 1 Breast 20-25 350 flip halfway<br />
_________________________________________________________________<br />
Chicken wings 3-7 Wings 20-30 350 flip halfway<br />
_________________________________________________________________<br />
Chicken legs 1 Leg 20-25 350 flip halfway<br />
_________________________________________________________________<br />
Chicken thigh 1 Thigh 20-25 350 flip halfway<br />
_________________________________________________________________<br />
Hamburger 2 Burgers 10-20 350 flip halfway<br />
_________________________________________________________________<br />
BAKING<br />
_________________________________________________________________<br />
Cake 10 oz. 20-25 350<br />
_________________________________________________________________<br />
Muffins 2 0z. 10-20 350 pour batter into paper muffin cups<br />
• Do not turn the basket upside down with the pan still attached to it, as<br />
any excess oil that has collected on the bottom of the pan will leak onto<br />
the ingredients.<br />
<strong>Air</strong> fryers perform similar to ovens- if your dish is not on the list, please refer<br />
to oven instructions on item packaging or recipe.<br />
• Do not touch the pan or basket after use. Depending on the type of the<br />
ingredients in the air fryer, steam may escape from the pan.<br />
Note: Add 3 minutes to the preparation time when you start frying while the air fryer is still cold.<br />
12 13
CLEANING AND MAINTENANCE<br />
CLEANING AND MAINTENANCE<br />
• Clean the appliance after every use.<br />
• Make sure the appliance is<br />
completely cooled off before cleaning.<br />
• Do not use metal kitchen utensils<br />
or abrasive cleaning material, to clean<br />
the pan and the basket, as this may<br />
damage the non-stick coating.<br />
1. Remove the main plug from the wall<br />
outlet and let the appliance cool down.<br />
Note: Remove the pan to let the air<br />
fryer cool down, quicker.<br />
2. Wipe the outside of the appliance<br />
with a moist cloth.<br />
3. Clean the pan and the basket with<br />
hot water, some dishwashing liquid<br />
and a non-abrasive sponge.<br />
Tip: If dirt is stuck to the basket or the<br />
bottom of the pan, fill the pan with hot<br />
water and some dishwashing soap. Put<br />
the basket in the pan and let the pan<br />
and the basket soak for approximately<br />
10 minutes.<br />
4. Clean the inside of the air fryer with<br />
hot water and a cleaning brush to<br />
remove any food residues.<br />
STORAGE<br />
• Unplug the appliance<br />
and let it cool down.<br />
• Make sure all parts are<br />
clean and dry.<br />
• Put the air fryer on a<br />
clean and dry place.<br />
WARRANTY & SERVICE<br />
This Limited Warranty is for one full year from the date<br />
of purchase. It is applicable to the original purchaser<br />
only and is not transferable to a third party user. Repair<br />
or replacement of defective parts is solely at the seller’s<br />
discretion. In the event that repair isn’t possible, the<br />
seller will replace the product/part. If product repair/<br />
replacement won’t suffice, the seller has the option of<br />
refunding the cash value of the product or component<br />
returned.<br />
Product defects not covered under the Warranty<br />
provisions include normal wear and damage incurred<br />
from use or accidental negligence, misuse of instruction<br />
specifications or repair by unauthorized parties.<br />
The manufacturing company is not liable for any<br />
incidental or consequential damages incurred by such<br />
circumstances.<br />
WARRANTY AND SERVICES<br />
Environment<br />
Do not throw away the appliance with the normal household waste<br />
at the end of its life, but hand it in at an official collection point for<br />
recycling. By doing this, you help to preserve the environment.<br />
Guarantee and service<br />
If you need service or information or if you have a problem, please visit<br />
our website or contact your distributor.<br />
14 15
FOR CUSTOMER SERVICE<br />
QUESTIONS OR COMMENTS<br />
VISIT US @ GOURMIA.COM<br />
INFO@GOURMIA.COM<br />
OR CALL 888.552.0033


