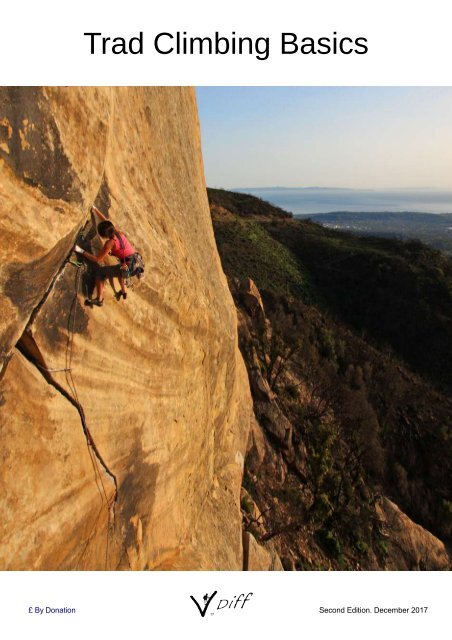
Trad Climbing Basics - VDiff Climbing
This e-book will teach you how to:
- Place cams, nuts and other trad climbing gear
- Build trad anchors
- Use different belay methods (including guide mode)
- Equalize and extend gear effectively
- Understand forces on climbing gear
- Abseil safely (including using a prusik knot)
- Climb with half ropes
- Test rock quality
- Prepare for your first trad lead
Plus much more.
Further information:
* Perfect for those who want to start trad climbing.
* 200+ accurately drawn, full-colour illustrations.
* Step-by-step climbing techniques explained in a beginner friendly way.
* Updated December 2017
Trad Climbing Basics £ By Donation Second Edition. December 2017
- Page 2 and 3: Contents Introduction 5 Trad Gear 1
- Page 4 and 5: Trad Climbing Basics Using Trad Gea
- Page 6 and 7: Cams Part 1: The Placement Step 1 P
- Page 8 and 9: Cams Part 2: Size Correct Size This
- Page 10 and 11: You can reduce the chance of this b
- Page 12 and 13: Cams Part 6: Removal To remove a ca
- Page 14 and 15: How to Attach a Prusik to the Rope
- Page 16: Get the Full Version The full versi
<strong>Trad</strong> <strong>Climbing</strong> <strong>Basics</strong><br />
£ By Donation<br />
Second Edition. December 2017
Contents<br />
Introduction 5<br />
<strong>Trad</strong> Gear 16<br />
<strong>Trad</strong> Anchors 57<br />
Ropework 85<br />
Next Steps 110<br />
<strong>VDiff</strong> – <strong>Trad</strong> <strong>Climbing</strong> <strong>Basics</strong><br />
4
Can I <strong>Trad</strong> Climb?<br />
Yes!<br />
Learning to trad climb is similar to learning<br />
to drive a car. It takes time, effort and<br />
commitment. It can be dangerous if you<br />
don't know what you're doing, or very safe<br />
once you become competent.<br />
This guide focuses on the physics behind<br />
trad gear and the reasons for using<br />
………..<br />
different rope techniques. This is so you<br />
understand why each technique is used,<br />
and therefore you'll be able to adapt them<br />
for any situation.<br />
So, learn the skills and practise them<br />
safely. Start with small adventures to build<br />
up your problem solving ability before you<br />
move on to anything bigger. And remember<br />
to have fun!<br />
Peak District, England. Climber: Lucy Creamer. Photo: Jamie Moss (see more here).
<strong>Trad</strong> <strong>Climbing</strong> <strong>Basics</strong><br />
Using <strong>Trad</strong> Gear<br />
Assasin, Gogarth, Wales. Climber: Lee Roberts. Photo: Jethro Kiernan.
<strong>Trad</strong> Gear: Cams<br />
Cams are reliable and versatile pieces of<br />
trad protection that are designed to be<br />
placed in parallel sided cracks, where nuts<br />
won't work.<br />
A cam has three or four lobes mounted on<br />
an axle. Each lobe is shaped according to<br />
a mathematical logarithmic spiral, so the<br />
angle between the lobes and the rock is<br />
always the same, no matter how retracted<br />
the cam lobes are. This means that the<br />
cam will work at any point of it's size range<br />
(more on this later).<br />
When a cam is weighted, the lobes are<br />
forced apart, converting the downwards<br />
force into a huge amount of outwards<br />
pressure on the sides of the crack. It is this<br />
outwards pressure which holds the cam in<br />
place.<br />
When you place a cam, its springs keep<br />
the lobes pressing out on the sides of the<br />
crack, creating just enough friction to keep<br />
it in place. Because cams rely on this<br />
friction to stay in position, make sure to<br />
only place them in clean, dry cracks. Mud,<br />
water or ice reduces the friction and can<br />
cause the cam to slide out during a fall.<br />
Learn more: www.vdiffclimbing.com<br />
17
Cams Part 1: The Placement<br />
Step 1<br />
Pull the trigger to retract the cam lobes and<br />
slot it into the crack.<br />
Step 2<br />
Release the trigger to allow the lobes to<br />
open up and make contact with the sides<br />
of the crack.<br />
If the lobes open up all the way, try a<br />
bigger size.<br />
<strong>VDiff</strong> – <strong>Trad</strong> <strong>Climbing</strong> <strong>Basics</strong> > Using <strong>Trad</strong> Gear<br />
18
A Good Cam Placement<br />
All lobes retracted evenly<br />
Cam is in the middle section<br />
of its range of movement<br />
Fits completely inside the<br />
crack without being too far<br />
back<br />
Each lobe makes contact<br />
with a smooth, straight-sided<br />
part of the crack<br />
Stem points in the direction of<br />
loading, usually down and<br />
slightly out from the rock<br />
Rock is clean, dry and solid<br />
Learn more: www.vdiffclimbing.com<br />
19
Cams Part 2: Size<br />
Correct Size<br />
This is the ideal cam size for the crack it is<br />
in.<br />
The strongest and optimal placement is<br />
within the middle section of the cam’s<br />
range of movement. You should aim to<br />
place every cam like this.<br />
Too Big<br />
This is 'over-cammed' and will be very<br />
difficult to remove. Use a smaller cam if<br />
possible.<br />
Too Small<br />
This is 'tipped out' and will be very unlikely<br />
to hold a fall. During a fall, cam lobes often<br />
slip down the crack very slightly before<br />
being pressed outwards.<br />
In this case, at least one of the lobes is<br />
likely to open completely to it's maximum<br />
range, causing the cam to slip out of the<br />
crack. Use a bigger cam.<br />
<strong>VDiff</strong> – <strong>Trad</strong> <strong>Climbing</strong> <strong>Basics</strong> > Using <strong>Trad</strong> Gear<br />
20
Cams Part 3: Flared Cracks<br />
A flared crack is one which becomes<br />
narrower or wider at one side. Cracks can<br />
be flared in any direction.<br />
Upward Flares<br />
The placement in this slightly upwardflared<br />
crack is very good. If the cam slips<br />
down slightly during a fall, it will remain<br />
securely in the crack.<br />
Warning<br />
When a cam is placed in an extremely<br />
upward-flaring crack, as shown below, it<br />
could easily 'walk' upwards.<br />
This means that it will either wiggle out of<br />
position or be impossible to retrieve. This<br />
is caused by movements in the rope as<br />
you climb above.<br />
Learn more: www.vdiffclimbing.com<br />
21
You can reduce the<br />
chance of this by<br />
extending the cam with a<br />
sling or quickdraw.<br />
An alternative would be to<br />
use a nut or a hex instead.<br />
Downward Flares<br />
The downwards flare of this crack is too<br />
great for the cam to hold. In the event of a<br />
fall, the lobes will continue opening until<br />
they reach their maximum, at which point<br />
the cam will fall out of the crack.<br />
Cams can hold in very slightly downwardflared<br />
cracks, but it is best to look for<br />
parallel-sided or slightly upward-flared<br />
cracks.<br />
<strong>VDiff</strong> – <strong>Trad</strong> <strong>Climbing</strong> <strong>Basics</strong> > Using <strong>Trad</strong> Gear<br />
22
Cams Part 4: Horizontal Cracks<br />
Cams can be placed in<br />
horizontal or diagonal<br />
cracks.<br />
In these types of cracks,<br />
placing your cam with the<br />
outer lobes on the bottom<br />
makes the placement<br />
more stable.<br />
Flexible stemmed cams<br />
will bend around the edge<br />
of the rock and maintain<br />
their strength.<br />
Rigid stemmed cams will<br />
lever over the edge,<br />
causing damage to the<br />
stem.<br />
Cams Part 5: Passive Protection<br />
Certain types of cams can<br />
be used passively (like a<br />
nut). However, in this<br />
situation nuts wedge into<br />
place better.<br />
So unless you've just<br />
dropped them all, you'll<br />
probably be better placing<br />
a nut instead.<br />
Learn more: www.vdiffclimbing.com<br />
23
Cams Part 6: Removal<br />
To remove a cam, simply pull the trigger<br />
and slide it out. Sometimes you may need<br />
to wiggle it around constrictions in the rock.<br />
If your cam trigger is unreachable, use the<br />
hook on the end of your nut tool to pull it.<br />
Cams Part 7: Racking<br />
An efficient way of racking cams is to put<br />
them in size order on your harness with<br />
their own separate colour-coded<br />
carabiners.<br />
If you have small cams on a front gear loop<br />
and bigger cams further back, they'll be<br />
less annoying as you climb.<br />
<strong>VDiff</strong> – <strong>Trad</strong> <strong>Climbing</strong> <strong>Basics</strong> > Using <strong>Trad</strong> Gear<br />
24
Method 5 – Attaching to Two or More Points<br />
Step 1<br />
Clip the rope through the furthest away<br />
point, then walk to your belay position.<br />
Step 2<br />
Attach a screwgate to your rope loop and<br />
then clovehitch the rope to it, just the same<br />
as method 3.<br />
Step 3<br />
Repeat steps 1 and 2 with the second<br />
point.<br />
Step 4<br />
Tie your rope to the third point using a<br />
clovehitch, as described in method 2. You<br />
can fine-tune the clovehitches to equalize<br />
the three points.<br />
Advantages<br />
- You can use this method to equalize as<br />
many points as you need. Just keep<br />
repeating steps 1 and 2 until you've<br />
equalized all your pieces.<br />
Best Situation to Use This Method<br />
If you arrive at a belay with no slings or<br />
cordelette.<br />
Disadvantages<br />
- Uses up a lot of rope.<br />
- You must belay directly from your<br />
harness.<br />
<strong>VDiff</strong> – <strong>Trad</strong> <strong>Climbing</strong> <strong>Basics</strong> > <strong>Trad</strong> Anchors<br />
74
How to Attach a Prusik to the Rope<br />
Step 1<br />
Wrap the prusik around both ropes a few<br />
times and then clip the ends together with<br />
a screwgate carabiner. More wraps will<br />
create more friction around the ropes,<br />
……..<br />
though four wraps are generally enough.<br />
Pull the knot tight, make sure it is neat and<br />
the double fisherman's knot is away from<br />
the ropes.<br />
Step 2<br />
Clip the prusik to your leg loop. The prusik<br />
will slide down the ropes if you hold it close<br />
to your leg loop and lock around the ropes<br />
if you let go. Test this before you abseil.<br />
If it doesn't lock, take it off and re-tie it with<br />
an extra wrap around the ropes.<br />
Harness<br />
Leg Loop<br />
If your prusik loop is too long, it's possible<br />
that it could jam into your belay device<br />
during the abseil. If this happens, it can be<br />
difficult to control your descent. To avoid<br />
this, you can extend your belay device with<br />
a sling (see page 105).<br />
<strong>VDiff</strong> – <strong>Trad</strong> <strong>Climbing</strong> <strong>Basics</strong> > Ropework<br />
100
Abseiling Part 6: Check the System<br />
Before you unclip your attachment point<br />
from the anchor, check:<br />
Solid<br />
anchor<br />
Rope threaded through<br />
main point of anchor<br />
Correctly tied<br />
abseil knot<br />
30<br />
cm<br />
Prusik knot<br />
Both ropes through<br />
belay device<br />
Knots added<br />
to rope ends<br />
Holding<br />
both ropes<br />
beneath<br />
belay device<br />
Learn more: www.vdiffclimbing.com<br />
101
Get the Full Version<br />
The full version of this e-book is available<br />
on a pay-what-you-want pricing system,<br />
starting at £0.<br />
You can download it for free, or show your<br />
support with a small donation.<br />
Get your copy here:<br />
https://gumroad.com/l/<strong>VDiff</strong>-<strong>Trad</strong><br />
Learn How To:<br />
- Place cams, nuts and other trad gear<br />
- Build trad anchors<br />
- Use different belay methods (including<br />
guide mode)<br />
- Equalize and extend gear effectively<br />
- Understand forces on climbing gear<br />
- Abseil safely (including using a prusik)<br />
- Climb with half ropes<br />
- Test rock quality<br />
- Prepare for your first trad lead<br />
Plus much more.<br />
Further Information:<br />
* Perfect for those who want to start trad<br />
climbing.<br />
* 200+ accurately drawn, full-colour<br />
illustrations.<br />
* Step-by-step climbing techniques<br />
explained in a beginner friendly way.<br />
* Updated December 2017


