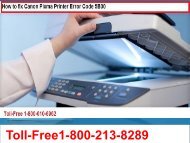
Call 18002138289 Fix Error Code 0001000c On Epson 7600 Printer

Create successful ePaper yourself
Turn your PDF publications into a flip-book with our unique Google optimized e-Paper software.
<strong>Fix</strong> <strong>Error</strong> <strong>Code</strong> <strong>0001000c</strong> <strong>On</strong> <strong>Epson</strong> <strong>7600</strong> <strong>Printer</strong><br />
Toll-Free 1-800-213-8289
Solutions to troubleshoot <strong>0001000c</strong> on <strong>Epson</strong> <strong>7600</strong> <strong>Printer</strong><br />
<strong>Epson</strong> printer are well known printing devices<br />
preferred by infinite number of users across<br />
the world but sometimes, you can come<br />
across critical error codes such as <strong>0001000c</strong><br />
which is usually visible in <strong>Epson</strong> printers. This<br />
error code happens to exists even if users are<br />
turning off the device and switching it on. It<br />
will start printing accurately for<br />
approximately 10 documents but again the<br />
issue will start arising. Now, have us discuss<br />
top solutions to B error code <strong>0001000c</strong> on<br />
<strong>Epson</strong> <strong>7600</strong> <strong>Printer</strong>.<br />
Toll-Free 1-800-213-8289
Solution 1: Clear off the counters completely. To do this, perform<br />
below steps carefully<br />
• Turn off the printer first and hold down the<br />
“Paper Source, Paper Feed, Select Feed as well<br />
as Cut/Eject” buttons at the same time while<br />
you are turn the printer on again.<br />
• Users are needed to navigate through all menus<br />
to completely clear off the counter
Solution 2: If the above solution did not work out then, try this one<br />
1. This solution asks users to perform a<br />
routine maintenance while keeping ink<br />
tanks full.<br />
2. Clean out all the print head with the help of<br />
denatured alcohol solvent<br />
3. Now, put up two layers of paper towels in<br />
the extreme bottom of a dish to completely<br />
protect sensitive sprayer heads.<br />
Put enough of solvent in the dish to cover<br />
the screen completely which<br />
the cartridges will stay while in use.<br />
Take two small screws which will be used to<br />
hold white ceramic piece properly<br />
Toll-Free 1-800-213-8289
Solution 2: If the above solution did not work out then, try this one<br />
4. Make use of the ceramic piece to<br />
completely reveal the underside<br />
5. Now, gently move the head up and down to<br />
slosh solvent around it<br />
6. Work with the canned air with a plastic<br />
straw to easily blow up through all orifices<br />
7. Now, completely empty your dirty solvent<br />
from bowl to replace with paper towels and<br />
clean all of the solvent. Soak it for at-least<br />
10 minutes and rinse it again with a clean<br />
solvent poured directly on all of the parts.<br />
Toll-Free 1-800-213-8289
Solution 2: If the above solution did not work out then, try this one<br />
8. Gently shake the solvent off the head and<br />
then, take it outside to spray properly with<br />
compressed air into all orifices. This should<br />
be done to completely clear out and help<br />
evaporate your remaining solvent. Apply a<br />
clean paper towel for 20 minutes and then,<br />
re-install the head as well as cartridges to<br />
print it like a new printer.<br />
Toll-Free 1-800-213-8289
• We are available at <strong>Epson</strong> Support<br />
Number to connect to us immediately and<br />
get solutions by our technicians for <strong>Epson</strong><br />
printer issues. Solutions are brought worldclass<br />
and are matched according to the latest<br />
market standards. So, for any such query, do<br />
call us and get the problem solved.
<strong>Call</strong> 1-800-213-8289<br />
• Wait for at-least 5 minutes, plug-in and then, wait for a while to<br />
see what kind of error message occurs.<br />
At last, reinsert the cartridges.<br />
• If still both the above methods do not solve then, proceed to<br />
below solution<br />
• Solution 3: This calls for a hard reset procedure<br />
• The very first step is to turn off the printer from the mains wall<br />
socket areas and then, unplug it from the user’s computer.<br />
• You are now requested to restart the computer<br />
make sure that you have taken out the paper and put it back in by<br />
checking it from all the corner.<br />
• Now plug the device back into its original socket and switch on.<br />
Allow it to warm up and try to perform the printing process again.
GET IN TOUCH WITH US<br />
<strong>Call</strong> Now1-800-213-8289<br />
<strong>Epson</strong> <strong>Printer</strong> Support Number<br />
https://www.facebook.com/<strong>Epson</strong><strong>Printer</strong>TechnicalSupportNu<br />
mberfor<strong>Printer</strong>Repair<br />
https://plus.google.com/101938860674288193774<br />
https://twitter.com/<strong>Epson</strong>printerhel<br />
https://www.linkedin.com/in/epson-printer-support-number
Thank<br />
You!