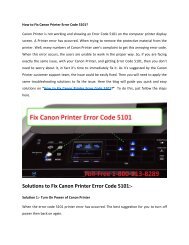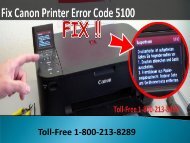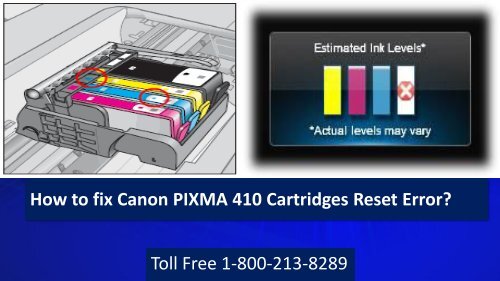
How to fix Canon PIXMA 410 Cartridges Reset Error

Create successful ePaper yourself
Turn your PDF publications into a flip-book with our unique Google optimized e-Paper software.
<strong>How</strong> <strong>to</strong> <strong>fix</strong> <strong>Canon</strong> <strong>PIXMA</strong> <strong>410</strong> <strong>Cartridges</strong> <strong>Reset</strong> <strong>Error</strong>?<br />
Toll Free 1-800-213-8289
Fix <strong>Canon</strong> <strong>PIXMA</strong> <strong>410</strong> <strong>Cartridges</strong> <strong>Reset</strong> <strong>Error</strong><br />
In case the cartridges do not have<br />
continuous ink flow from the system<br />
which user come across when a<br />
message appear saying cartridges are<br />
empty which prevents printing. To <strong>fix</strong><br />
<strong>Canon</strong> <strong>PIXMA</strong> <strong>410</strong> <strong>Cartridges</strong> <strong>Reset</strong><br />
<strong>Error</strong> follow the blog for resetting the<br />
ink for better quality printer. For getting<br />
the best printing quality it is must <strong>to</strong><br />
reset the ink cartridge and <strong>to</strong> continue<br />
printing with refilled unit. To get the<br />
excellent print number of pages for the<br />
cartridges are refilled fully which gives<br />
user 200 pages the error has <strong>to</strong> appear<br />
the message user get that ink levels are<br />
low <strong>to</strong> solve follow the blog steps.<br />
Toll Free 1-800-213-8289
Steps <strong>to</strong> troubleshoot <strong>Canon</strong> <strong>PIXMA</strong> <strong>410</strong><br />
<strong>Cartridges</strong> <strong>Reset</strong> <strong>Error</strong><br />
• Step 1: Refill the cartridge and install back <strong>to</strong> printer<br />
• Step 2: Open the device and printer from start menu<br />
• Step 3: Double click on <strong>Canon</strong> MX<strong>410</strong> series printer<br />
• Step 4: Under the Printer or fax management click on display printer or fax<br />
management<br />
• Step 5:<br />
• If all of the options are grayed out, you need <strong>to</strong> enable them first – select the<br />
“General” tab.<br />
• On the “General” tab, click on the “Change Properties” but<strong>to</strong>n.<br />
• Go back <strong>to</strong> the “Advanced tab, the options should now be enabled.<br />
• Step 6. Uncheck “Enable advanced printing features.”<br />
• Step 7. User is now required <strong>to</strong> click on apply but<strong>to</strong>n and then ok <strong>to</strong> close the<br />
but<strong>to</strong>n.<br />
• Step 8. Hold the red “S<strong>to</strong>p” but<strong>to</strong>n on MX<strong>410</strong> printer for 5-20 seconds. The<br />
“out of ink” message will disappear.<br />
• Step 9. Repeat steps 4 and 5 <strong>to</strong> open the properties window again.<br />
Toll Free 1-800-213-8289
• Step 10. Check “Enable advanced printing features” <strong>to</strong> return the setting <strong>to</strong> what it was before.<br />
• Step 11. User now need <strong>to</strong> press the click on Apply icon at the bot<strong>to</strong>m and then OK but<strong>to</strong>n <strong>to</strong><br />
close the window.<br />
• Step 12. Now Printer must work again with the newly refilled ink cartridge.<br />
• Step 1: Refill the cartridge and install back <strong>to</strong> printer<br />
• Step 2: Open the device and printer from start menu<br />
• Step 3: Double click on <strong>Canon</strong> MX<strong>410</strong> series printer<br />
• Step 4: Under the Printer or fax management click on display printer or fax management<br />
• Step 5:<br />
• If all of the options are grayed out, you need <strong>to</strong> enable them first – select the “General” tab.<br />
• On the “General” tab, click on the “Change Properties” but<strong>to</strong>n.<br />
• Go back <strong>to</strong> the “Advanced tab, the options should now be enabled.<br />
• Step 6. Uncheck “Enable advanced printing features.”<br />
• Step 7. User is now required <strong>to</strong> click on apply but<strong>to</strong>n and then ok <strong>to</strong> close the but<strong>to</strong>n.<br />
• Step 8. Hold the red “S<strong>to</strong>p” but<strong>to</strong>n on MX<strong>410</strong> printer for 5-20 seconds. The “out of ink” message<br />
will disappear.<br />
• Step 9. Repeat steps 4 and 5 <strong>to</strong> open the properties window again.<br />
• Step 10. Check “Enable advanced printing features” <strong>to</strong> return the setting <strong>to</strong> what it was before.<br />
• Step 11. User now need <strong>to</strong> press the click on Apply icon at the bot<strong>to</strong>m and then OK but<strong>to</strong>n <strong>to</strong><br />
close the window.<br />
• Step 12. Now Printer must work again with the newly refilled ink cartridge.<br />
Toll Free 1-800-213-8289
Dial at <strong>Canon</strong> Printer Support Number for resolving<br />
issues of <strong>Canon</strong> printer faster
GET IN TOUCH WITH US<br />
<strong>Canon</strong> Printer Support Number<br />
https://www.facebook.com/canonprintertechnicalsupportphonenumbe<br />
r/<br />
https://plus.google.com/u/0/b/116030026982756504246/116<br />
030026982756504246/posts<br />
https://twitter.com/For<strong>Canon</strong>printer<br />
Toll Free 1-800-213-8289