What are Hair Extensions?
Types of Hair Extensions: Nail Hair is made of real hair and is available in several qualities and lengths making it easy to match your own hair quality and get the most natural result possible. The huge array of colours on offer means that you will have no problem nding a colour that suits your own. The strands are pre-bonded with wax at the top end. In order to attach the extensions you melt the wax with a fusion connector, roll the attachments between your nger and thumb around a small amount of hair close to the roots. Real hair can be cut, straightened, curled and styled to create the hairstyle you desire. The attachments are easily taken out by using remover and a special tong.
Types of Hair Extensions:
Nail Hair is made of real hair and is available in several qualities and lengths making it easy to match your own hair quality and get the most natural result possible. The huge array of colours on offer means that you will have no problem nding a colour that suits your own. The strands are pre-bonded with wax at the top end. In order to attach the extensions you melt the wax with a fusion connector, roll the attachments between your nger and thumb around a small amount of hair close to the roots. Real hair can be cut, straightened, curled and styled to create the hairstyle you desire. The attachments are easily taken out by using remover and a special tong.

Create successful ePaper yourself
Turn your PDF publications into a flip-book with our unique Google optimized e-Paper software.
H A I R & S K I N A E S T H E T I C C L I N I C<br />
www.looksforever.com<br />
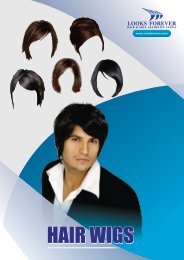
HAIR<br />
EXTENSIONS
NAIL<br />
HAIR EXTENSION<br />
Nail <strong>Hair</strong> Extension<br />
Nail <strong>Hair</strong> is made of real hair and is available in several qualities and lengths making it<br />
easy to match your own hair quality and get the most natural result possible. The<br />
huge array of colours on offer means that you will have no problem nding a colour<br />
that suits your own. The strands <strong>are</strong> pre-bonded with wax at the top end. In order to<br />
attach the extensions you melt the wax with a fusion connector, roll the attachments<br />
between your nger and thumb around a small amount of hair close to the roots. Real<br />
hair can be cut, straightened, curled and styled to create the hairstyle you desire. The<br />
attachments <strong>are</strong> easily taken out by using remover and a special tong.<br />
Clip-In <strong>Extensions</strong><br />
The more modern and less damaging alternative to bonding, clip-ins <strong>are</strong> wefts of<br />
different lengths that have wig clips attached which can be clipped into the hair. The<br />
clips <strong>are</strong> removed easily and great for special occasions.<br />
How to use Clip-on <strong>Extensions</strong><br />
STEP - 1<br />
Your extensions must match not only the color but also the<br />
texture of your hair. While blow-drying, Alyssa used a large<br />
round brush to give her real hair the same loose waves as<br />
the hairpiece she chose.<br />
STEP - 2<br />
Separate your hair into upper and lower sections. Start<br />
parting it at your left temple and move across the back of<br />
your head in a straight line to the right temple. Use a clip to<br />
secure the upper section of hair on top of your head.
NAIL<br />
HAIR EXTENSION<br />
STEP - 3<br />
If your hair is ne or very straight, tease it along the bottom<br />
of the part line with a ne-toothed comb. This will help keep<br />
the clips secure. First, tease a one-inch section of hair in the<br />
middle of the part, then one-inch sections on both sides,<br />
just above your ears.<br />
STEP - 5<br />
STEP - 4<br />
Each set of extensions is attached to a semicircular net with<br />
three clips across the top and four around the bottom.<br />
Make sure that all seven clips <strong>are</strong> in the open position, then<br />
line up the top seam of the netting with your part and<br />
attach the top middle clip rst. Push it down into the teased<br />
hair, then press it at against your scalp (you'll hear, and<br />
feel, a little snap when it's secure).<br />
Line up the piece along the part on both sides of your head,<br />
pulling it taut against your scalp, and attach the two side<br />
clips, one above each ear.<br />
STEP - 6<br />
Attach the four lower clips along the lower half of your<br />
hairline, around the nape of your neck. Let down the top<br />
section of hair and use your ngers to blend it with the<br />
extensions.
TAPE EXTENSIONS<br />
Tape in extensions <strong>are</strong>, truly thin and undetectable! They <strong>are</strong> so adaptable in your<br />
hair as well - you cannot feel them when you brush over them or wash them. The<br />
best thing about tape in hair extensions contrasted with individual hair extensions is<br />
that when you wash and blow-dry your hair they <strong>are</strong> MUCH more adaptable and less<br />
demanding to dry and deal with. The individual extensions <strong>are</strong> stringy, tend to<br />
tangle, and the real bonds <strong>are</strong> not as adaptable and delicate as tape extensions<br />
about washing and blow-drying. In the event that you need really undetectable and<br />
adaptable extensions, tape in hair extensions <strong>are</strong> the best.<br />
SETTING UP METHOD<br />
Essentially, three or four inch hair extension track and append an extraordinary sort<br />
of two-fold sided tape to them. They will then sandwich 10-15 singular hairs<br />
between the two extension tracks, followed together with the two-fold sided tape.<br />
Since the extension is really stuck to another extension, it permits this kind of hair<br />
establishment last a whole lot longer than when extensions <strong>are</strong> recently stuck to<br />
your scalp with that tar-like weft paste you may have seen before at the<br />
magnicence supply stores. Normal weft stick typically just keeps going 2-3 weeks,<br />
yet the tape-in technique endures around 2 months.