


Create successful ePaper yourself
Turn your PDF publications into a flip-book with our unique Google optimized e-Paper software.
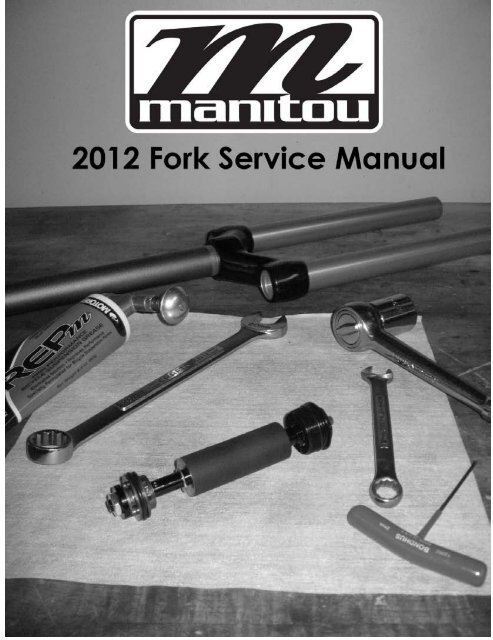
INTRODUCTION<br />
This manual is intended to guide the user through basic service of <strong>Manitou</strong> front forks. <strong>Service</strong> is<br />
supported by the identification of common parts and assemblies that have been assembled into<br />
<strong>Service</strong> Kits. The purpose of this manual will be to describe conditions that may drive the need<br />
for service and to provide installation instructions for the kits.<br />
Due to the time-consuming nature of suspension fork service, at this time our primary focus is to<br />
offer service kits that minimize the amount of downtime and labor involved.<br />
Important information is highlighted in this manual by the following notations:<br />
WARNING<br />
Failure to follow WARNING instructions could result in severe injury or death to the<br />
person inspecting or repairing the suspension fork or the user.<br />
CAUTION<br />
A CAUTION a caution indicates special precautions that must be taken to avoid damage to<br />
the product.<br />
NOTE<br />
A NOTE provides key information to make procedures easier or clearer<br />
GENERAL WARNING: Suspension forks by design can contain preloaded springs, gases<br />
and fluids under extreme pressure and warnings contained in this manual must be<br />
observed to reduce the possibility of injury or possible death. Following these<br />
instructions can help you reduce the risk of being injured. Any questions in regards to the<br />
information in this manual should be directed to <strong>Manitou</strong> Customer <strong>Service</strong> at (888) 686-<br />
3472.<br />
WARNING: Suspension forks uses preloaded spring(s) to provide compression spring<br />
resistance. This system must be relieved of preload prior to servicing. Failure to relieve<br />
air pressure could result in injury or possible death.<br />
CAUTION: Suspension forks use precision machined aluminum and other soft alloy components.<br />
Using correct tools for assembly is essential to prevent damage.<br />
2012 SERVICE MANUAL
This manual is divided up into different sections, each one pertaining to a different part of the<br />
servicing of your fork. Below is a list of our fork models and which sections you will use to service<br />
your particular fork.<br />
Circus Comp/Match/Tower Comp Forks<br />
1. Section 1 – Casting Removal<br />
2. Section 3 – Dust Seal Replacement<br />
3. Section 4 – Coil Spring <strong>Service</strong><br />
4. Section 8 – Absolute+ <strong>Service</strong><br />
5. Section 10 – Casting Installation<br />
Circus Expert/Minute Expert/Tower Expert<br />
Forks<br />
1. Section 1 – Casting Removal<br />
2. Section 3 – Dust Seal Replacement<br />
3. Section 7 – ACT Air <strong>Service</strong><br />
4. Section 8 – Absolute+ <strong>Service</strong><br />
5. Section 10 – Casting Installation<br />
R7 MRD Forks<br />
1. Section 2 – MRD Casting Removal<br />
2. Section 3 – Dust Seal Replacement<br />
3. Section 6 – TS Air <strong>Service</strong><br />
4. Section 9 – Absolute+ MRD <strong>Service</strong><br />
5. Section 11 – MRD Casting Installation<br />
Minute Pro/Tower Pro Forks<br />
1. Section 1 – Casting Removal<br />
2. Section 3 – Dust Seal Replacement<br />
3. Section 5 – MARS Air Spring <strong>Service</strong><br />
4. Section 8 - Absolute+ <strong>Service</strong><br />
5. Section 10 – Casting Installation<br />
R7 Forks<br />
1. Section 1 – Casting Removal<br />
2. Section 3 – Dust Seal Replacement<br />
3. Section 6 – TS Air <strong>Service</strong><br />
4. Section 8 – Absolute+ <strong>Service</strong><br />
5. Section 10 - Casting Installation<br />
Marvel Expert Forks<br />
1. Section 1 – Casting Removal<br />
2. Section 3 – Dust Seal Replacement<br />
3. Section 8 – ISO Air <strong>Service</strong><br />
4. Section 8 – Absolute+ <strong>Service</strong><br />
5. Section 10 – Casting Installation<br />
Marvel Pro Forks<br />
1. Section 2 – MRD Casting Removal<br />
2. Section 3 – Dust Seal Replacement<br />
3. Section 8 – ISO Air <strong>Service</strong><br />
4. Section 9 – Absolute+ MRD <strong>Service</strong><br />
5. Section 11 – MRD Casting Installation<br />
<br />
2012 SERVICE MANUAL
Table of Contents<br />
Section<br />
Page Number<br />
Section 1 - Casting Removal 4<br />
Section 2 - MRD Casting Removal 5<br />
Section 3 - Dust Seal Replacement 6<br />
Section 4 - Coil Spring <strong>Service</strong> 7 - 8<br />
Section 5 - MARS Air Spring <strong>Service</strong> 9 - 10<br />
Section 6 - TS Air Spring <strong>Service</strong> 11 - 12<br />
Section 7 - ACT Air Spring <strong>Service</strong> 13 - 14<br />
Section 8 - ISO Air Spring <strong>Service</strong> 15 - 16<br />
Section 9 - Absolute+ <strong>Service</strong> 17 - 18<br />
Section 10 - Absolute+ MRD <strong>Service</strong> 19 - 20<br />
Section 11 - Casting Installation 21<br />
Section 12 - MRD Casting Installation 22<br />
Oil Height Chart 23<br />
Fork Exploded Diagrams 24 - 34<br />
Contact Information<br />
Hayes Bicycle Group<br />
6750 W Florist Ave<br />
Milwaukee, WI 53218<br />
Toll Free: (888) 686-3472<br />
Direct: (262) 242-4300<br />
FAX: (414) 462-0214<br />
E-mail: manitoutech@hayesbicycle.com<br />
Web site: www.manitoumtb.com<br />
2012 SERVICE MANUAL
Casting Removal<br />
1. From the left leg dropout (Left when sitting on the bike), use<br />
a 10 or 11mm wrench to remove the compression rod screw.<br />
(Fig. 1)<br />
2. From the right leg dropout, if the fork has adjustable rebound,<br />
the knob will need to be removed. Screw the rebound<br />
all the way in (clockwise) remove the 2mm hex screw inside<br />
the knob by turning it counter clockwise. Remove the knob by<br />
pulling gently away from the fork. (Fig. 2)<br />
FIG. 1<br />
3. Use an 8mm hex wrench to turn the damper clockwise until<br />
it can be pushed into the casting. (Fig. 3)<br />
4. Remove crown/steer/inner leg assembly from the outer leg<br />
casting by pulling firmly on the casting. If the fork uses the<br />
Semi bath Lubrication system, use caution as the oil that is in<br />
the casting will be released when the casting is removed, it is<br />
best to do this over some type of catch pan.<br />
FIG. 2<br />
FIG. 3<br />
<br />
2012 SERVICE MANUAL
MRD Casting Removal<br />
1. From the left leg dropout (Left when sitting on the bike),<br />
use a 10 or 11mm wrench to remove the compression rod<br />
screw. (Fig. 1)<br />
2. Remove the blue rebound knob on the bottom of the<br />
right leg with a 1.5mm Allen wrench. Be cautious of the<br />
detent balls and springs under the knob as they are very<br />
small and easily lost. (Fig. 2)<br />
3. Remove the detent balls and springs from the Detent<br />
Housing. (Fig. 3)<br />
FIG. 1<br />
4. Remove the Detent housing by unscrewing it counterclockwise<br />
using a green Park Tool pin spanner (or similar<br />
tool) inserted into the holes that the springs and detent<br />
balls sit in. (Fig. 4)<br />
5. Using a 7mm or 8mm Allen wrench, turn the rebound<br />
assembly clockwise until it can be pushed into the casting.<br />
(Fig. 5)<br />
FIG. 2<br />
6. Remove crown/steer/inner leg assembly from the outer<br />
leg casting by pulling firmly on the casting. The fork uses<br />
the Semi bath Lubrication system, use caution as the oil<br />
that is in the casting will be released when the casting is<br />
removed, it is best to do this over some type of catch pan.<br />
FIG. 3<br />
FIG. 5<br />
FIG. 4<br />
2012 SERVICE MANUAL
Dust Seal Replacement<br />
1. Before replacing the dust seals you will need to remove<br />
the lower casting. Refer to the Casting Removal or MRD<br />
Casting Removal instructions depending on which model<br />
fork you have.<br />
FIG. 1<br />
2. To remove the dust seals, first remove the seal tension<br />
springs (otherwise they will get damaged), then take a<br />
large flat-bladed screwdriver and insert the tip between the<br />
bottom of the seal and the top of the foam wiper. (Fig. 1)<br />
3. Push down on the screwdriver. This will pop the seal out<br />
of the casting. Next remove the foam oil ring. (Fig. 2)<br />
4. Oil the foam rings (new or after cleaning the old rings)<br />
with a small amount of semi-bath oil and place them in the<br />
top of the casting above the Upper Bushings. (Fig. 3)<br />
FIG. 2<br />
5. Install the dust seal into the leg, use a large socket or<br />
piece of round tubing that is large enough in diameter to<br />
press on the outside shoulder of the seal rather than putting<br />
pressure on the sealing lip and spring so that they are<br />
not damaged. (Fig. 4) Repeat steps 1-4 for the opposite<br />
casting leg.<br />
FIG. 3<br />
<br />
2012 SERVICE MANUAL<br />
FIG. 4
Coil Spring <strong>Service</strong><br />
1. Using a 2mm Allen wrench, remove the knob<br />
from the preload adjuster. (Fig. 1)<br />
2. Remove the preload adjuster from the fork using<br />
a 20mm socket. (Fig. 2)<br />
FIG 1<br />
3. Pull the coil spring out of the stanchion leg.<br />
4. Remove travel spacer and bottom out bumper<br />
from the end of the compression rod assembly.<br />
(Fig. 3)<br />
5. Remove the compression rod assembly from<br />
the stanchion leg. The compression rod comes<br />
out from the top of the stanchion leg. Turn the fork<br />
sideways or upside down to get the compression<br />
rod out of the leg. (Fig. 4)<br />
FIG 2<br />
6. Inspect compression rod and top-out bumper. If<br />
damaged replace.<br />
7. Install compression rod assembly into the stanchion<br />
leg. Insert through the top of the stanchion<br />
leg and maneuver the rod until it drops through the<br />
hole at the bottom of the stanchion leg.<br />
8. Lightly grease the spring and install into stanchion<br />
leg.<br />
FIG 3<br />
9. Install the preload adjuster into the fork leg.<br />
Tighten down using a 20mm socket to 5,1- 6,2 Nm<br />
(45-55 in. lbs).<br />
10. Using a 2mm Allen wrench, install the preload<br />
knob onto the adjuster. Tighten knob down to 0,5-<br />
0,7 Nm (4-6 in. lbs).<br />
11. Install bottom-out bumper and travel spacer<br />
onto the end of the compression rod.<br />
FIG 4<br />
2012 SERVICE MANUAL
12. The casting needs to be removed prior to servicing<br />
the coil spring. Refer to the Casting Removal<br />
Instructions first.<br />
13. Turn the preload knob counter-clockwise until it<br />
stops to relieve the preload on the spring.<br />
TRAVEL CONVERSION ON MATCH<br />
AND CIRCUS COMP 80/100MM FORKS<br />
1. The Match/Circus Comp 80 and 100mm forks<br />
can be converted to either travel by moving a<br />
spacer on the compression rod. Follow steps 1-7 to<br />
remove the compression rod form the fork.<br />
2. The travel of the fork is determined by a plastic<br />
spacer. The spacer being on top of the flange on<br />
the compression rod will cause the fork to have<br />
100mm of travel. (Fig. 5). The spacer being on the<br />
bottom on the flange will cause the fork to have<br />
80mm of travel. (Fig. 6)<br />
100mm<br />
80mm<br />
FIG. 5 FIG. 6<br />
<br />
2012 SERVICE MANUAL
MARS Air Spring <strong>Service</strong><br />
WARNING This fork uses compressed air to provide spring resistance and<br />
must be relieved of pressure prior to servicing. Failure to relieve air pressure<br />
could result in injury or possible death.<br />
FIG. 1<br />
1. Before servicing the Mars Air System you will need to<br />
remove the lower casting. Refer to the Casting Removal or<br />
MRD Casting removal instructions depending on which fork<br />
model you have.<br />
2. Release the air from the fork by depressing the valve<br />
core on the Schrader valve.<br />
3. Remove the air cap from the fork using a 20mm socket.<br />
(Fig. 1)<br />
4. Unthread the compression rod assembly from the bottom<br />
of the stanchion using a 22mm wrench and remove from<br />
fork. (Fig. 2)<br />
FIG. 2<br />
5. Remove the spring from the stanchion. (Fig. 3)<br />
6. Remove the air pushrod from the stanchion by pulling<br />
it out with needle nose pliers or by turning the fork upside<br />
down and letting it fall out. (Fig. 4)<br />
7. The next step is to remove the air piston. First look up<br />
into the stanchion leg from the bottom. You will see an air<br />
shelf in the fork with a hole in the center of it. You will want<br />
to push the air piston out the top of the stanchion leg with<br />
a long Allen wrench or similar tool. When inserting the tool<br />
into the stanchion leg you must be sure it goes through<br />
the center hole of the air shelf to push the piston out. The<br />
air shelf should never be removed from the fork. Doing<br />
so would damage the fork and require you to replace the<br />
crown/steer assembly of the fork.<br />
FIG. 3<br />
FIG. 4<br />
2012 SERVICE MANUAL
8. Apply grease around the side of the new air piston.<br />
We suggest using <strong>Manitou</strong> Prep M grease. (Fig. 5)<br />
9. Install air piston into the top of the stanchion leg and<br />
push it past the threads. (Fig. 6)<br />
10. Pour in 5cc’s of semi-bath oil on top of the air piston.<br />
(Fig. 7)<br />
11. Install air cap onto the stanchion leg using a 20mm<br />
socket and tighten to 6,8-8,0 Nm [60-80 lbf*in]<br />
FIG. 5<br />
12. Turn the fork upside down and insert the air pushrod<br />
into the bottom of the stanchion. The long end of<br />
the pushrod goes towards the top of the fork and must<br />
drop through the center hole of the air shelf discussed<br />
in Step 7. Drop the pushrod into the stanchion leg and<br />
maneuver it until you feel it drop through the center<br />
hole.<br />
13. Lightly grease the spring and insert into the stanchion<br />
leg.<br />
FIG. 6<br />
14. Install compression rod assembly into the stanchion<br />
leg using a 22mm wrench and tighten down to 6,8-8,0<br />
Nm [60-80 lbf*in]<br />
FIG. 7<br />
10 2012 SERVICE MANUAL
TS AIR SERVICE<br />
WARNING This fork uses compressed air to provide spring resistance and<br />
must be relieved of pressure prior to servicing. Failure to relieve air pressure<br />
could result in injury or possible death.<br />
1. Before servicing the TS Air system you will need to<br />
remove the lower casting. Refer to the Casting Removal<br />
or MRD Casting removal instructions depending on which<br />
fork model you have.<br />
FIG. 1<br />
2. Release all air from the system by depressing the valve<br />
core on the Schrader valve.<br />
3. Using a 20mm socket, remove the air cap from the fork.<br />
(Fig. 1)<br />
4. Remove compression rod assembly from the bottom of<br />
the stanchion using a 22mm wrench. (Fig. 2 & 3)<br />
5. Using a long Allen wrench or similar tool, push the air<br />
piston down and out the bottom of the stanchion leg. (Fig.<br />
4)<br />
FIG. 2<br />
6. Apply grease around the side of the new air piston. We<br />
suggest using the <strong>Manitou</strong> Prep M grease. (Fig. 5)<br />
7. Install air piston into the fork stanchion. Install by pushing<br />
the piston in through the top of the stanchion and push<br />
it past the threads. (Fig. 6)<br />
8. Install compression rod assembly into the bottom of the<br />
stanchion and tighten down the end cap using a 22mm<br />
wrench. Tighten to 9,0–11,3 Nm [80-100 lbf*in]<br />
FIG. 3<br />
9. Pour in 5cc’s of semi-bath oil on top of the air piston.<br />
FIG. 4<br />
2012 SERVICE MANUAL<br />
11
FIG. 5 FIG. 6<br />
12 2012 SERVICE MANUAL
ACT Air <strong>Service</strong><br />
WARNING This fork uses compressed air to provide spring resistance and<br />
must be relieved of pressure prior to servicing. Failure to relieve air pressure<br />
could result in injury or possible death.<br />
1. The casting needs to be removed prior to servicing<br />
the ACT Air system. Refer to the Casting Removal<br />
section for instructions on how to do this.<br />
FIG. 1<br />
2. Release all air from the system by depressing the<br />
valve core on the Schrader valve.<br />
3. Using a 20mm socket or wrench remove the top air<br />
cap assembly from the fork. (Fig. 1)<br />
4. Remove the spring from the fork. (Fig. 2)<br />
5. Using a 22mm wrench unthread the compression<br />
rod assembly end cap and remove the assembly from<br />
the fork uppers. (Fig. 3)<br />
FIG. 2<br />
6. Replace the air piston o-ring on the compression<br />
rod assembly. (Fig. 4)<br />
7. Apply a small amount of grease to the o-ring and<br />
insert compression rod assembly back into the fork<br />
uppers. Tighten the end cap down to 9.0-11.3 Nm<br />
(80-100 in. lbs)<br />
FIG. 3<br />
8. Grease the spring and place it into the fork uppers<br />
from the top.<br />
9. Install air cap. Tighten down to 6.8-9.0 Nm (60-80<br />
in. lbs)<br />
10. Using a shock pump, fill fork to desired air pressure.<br />
FIG. 4<br />
2012 SERVICE MANUAL<br />
13
TRAVEL CONVERSION ON DRAKE/CIRCUS<br />
EXPERT/MINUTE EXPERT 80 and 100mm<br />
FORKS<br />
1. The Drake 80 and 100mm forks can be converted to<br />
either travel by moving a spacer on the compression rod<br />
assembly. Follow Steps 1-5 above to remove the compression<br />
rod assembly.<br />
2. The travel of the fork is determined by a plastic spacer.<br />
The spacer being on the bottom of the air piston will cause<br />
the fork to have 80mm of travel. The spacer being on top<br />
of the piston will cause the fork to have 100mm of travel.<br />
Fig. 5 on this page shows the placement of the spacer for<br />
80mm of travel. Fig. 6 on this page shows the placement of<br />
the spacer for 100mm of travel.<br />
80mm<br />
100mm<br />
FIG. 5<br />
FIG. 6<br />
14 2012 SERVICE MANUAL
ISO Air Spring <strong>Service</strong><br />
WARNING This fork uses compressed air to provide spring resistance and<br />
must be relieved of pressure prior to servicing. Failure to relieve air pressure<br />
could result in injury or possible death.<br />
FIG. 1<br />
1.Before servicing the Mars Air System you will need to<br />
remove the lower casting. Refer to the Casting Removal or<br />
MRD Casting removal instructions depending on which fork<br />
model you have.<br />
2. Release the air from the fork by depressing the valve<br />
core on the Schrader valve.<br />
3. Remove the air cap from the fork using a 20mm socket.<br />
(Fig. 1)<br />
4. Unthread the compression rod assembly from the bottom<br />
of the stanchion using a 22mm wrench and remove from<br />
fork. (Fig. 2 &3)<br />
5. Remove the air piston from the stanchion leg. There are<br />
two ways to do this. You can use a long Allen wrench or<br />
dowel rod to push the air piston through and out the bottom<br />
of the stanchion leg. (Fig. 4) You can alternatively use a<br />
6mm bolt and thread it into the center of the piston and pull<br />
it out the top of the fork leg. (Fig. 5) The second method is<br />
convenient when you are just servicing the air piston and<br />
do not want to disassemble the fork.<br />
FIG. 2<br />
FIG. 3<br />
6. Apply grease around the side of the new air piston. We<br />
suggest using <strong>Manitou</strong> Prep M grease. (Fig. 6)<br />
7. Install air piston into the top of the stanchion leg and<br />
push it past the threads.<br />
8. Pour in 5cc’s of semi-bath oil on top of the air piston.<br />
(Fig. 7)<br />
9. Install air cap onto the stanchion leg using a 20mm<br />
socket and tighten to 6,8-8,0 Nm [60-80 lbf*in]<br />
2012 SERVICE MANUAL<br />
FIG. 4<br />
15
FIG. 5 FIG. 6<br />
FIG. 7<br />
16 2012 SERVICE MANUAL
Absolute+ <strong>Service</strong><br />
Disassembly<br />
1. The casting needs to be removed prior to servicing<br />
the damping side of the fork. Refer to the Casting<br />
Removal instructions.<br />
2. Using a 2mm Allen wrench, remove the adjuster<br />
knob from the top of the fork. (Fig. 1) Be careful<br />
when removing the knob as there are two detent ball<br />
bearings under it. Remove the detent ball bearings<br />
and springs.<br />
FIG. 1<br />
3. Using a 24mm socket remove the Absolute+<br />
damper from the stanchion leg. (Fig. 2)<br />
4. Pour the damping oil out of the stanchion leg.<br />
5. Turn the fork upside down and using a 22mm box<br />
end wrench, remove the rebound damper assembly<br />
from the stanchion. (Fig. 3)<br />
6. Check o-rings on rebound and compression assemblies<br />
and replace any that are worn or damaged.<br />
FIG. 2<br />
Assembly<br />
1. Install the rebound damper assembly into the<br />
bottom of the stanchion leg. Using a 22mm box end<br />
wrench tighten down to 9,0-11,3 Nm [80-100 lbf*in].<br />
2. The next step is to fill the fork with oil and install<br />
the compression damper. To ensure proper oil height<br />
the casting must be installed prior to filling. If you<br />
have other service to perform on the fork continue<br />
onto the appropriate section and finish that first. If<br />
not refer to the Casting Installation instructions to<br />
install the casting back onto the fork.<br />
FIG. 3<br />
2012 SERVICE MANUAL<br />
17
3. Once the casting is installed you are ready to<br />
fill the fork with oil. Pour oil into the stanchion leg<br />
until it is about a quarter of the way up. (Fig. 4)<br />
Cover the hole in the stanchion with a rag and<br />
cycle the fork 7-10 times. Failure to do this will<br />
cause an incorrect oil height. After cycling the fork,<br />
continue filling the stanchion leg with oil to the oil<br />
height specified on the Oil Height Chart found in<br />
this manual for your fork model.<br />
4. Install the Absolute+ damper into the stanchion<br />
and tighten down using a 24mm socket to 6,8-9,0<br />
Nm [60-80 lbf*in].<br />
FIG. 4<br />
5. Install detent springs and ball bearings into the<br />
holes on the top cap. You want them placed in<br />
holes opposite of each other. (Fig. 5)<br />
6. Install adjuster knob and using a 2mm Allen<br />
wrench tighten down to 0,5-0,7 Nm [4-6 lbf*in].<br />
FIG. 5<br />
18 2012 SERVICE MANUAL
Absolute+ MRD <strong>Service</strong><br />
Disassembly<br />
1. The casting will need to be removed prior to servicing<br />
the damping side of the fork. Refer to the MRD Casting<br />
Removal Instructions.<br />
FIG. 1<br />
2. Using a 2mm Allen wrench, remove the adjuster knob<br />
from the top of the fork leg. (Fig. 1) Be careful when<br />
removing the knob as there are two detent ball bearings<br />
below the knob. Remove the detent springs from the top<br />
cap.<br />
3.Remove the Absolute+ damper from the stanchion leg<br />
using a 24mm socket. (Fig. 2)<br />
4. Pour the damping oil out of the fork leg.<br />
5. Turn the fork upside down and using a 15mm open<br />
end wrench, unthread the rebound damping assembly<br />
from the bottom of the stanchion. (Fig. 3) The rebound<br />
assembly will come out of the fork leg with the cartridge<br />
tube attached to it. (Fig. 4) If you are replacing the tube<br />
or the damper, pull the cartridge tube off the damper end<br />
cap. The tube is tightly fit into the damper cap so it can<br />
be difficult to get off.<br />
6. Check o-rings on rebound damper end cap and ABS+<br />
compression damper top cap and replace if damaged or<br />
worn.<br />
FIG. 2<br />
FIG. 3<br />
FIG. 4<br />
2012 SERVICE MANUAL<br />
19
Assembly<br />
1. If you replaced the rebound damper cartridge or<br />
cartridge tube you will need to press the tube back onto<br />
the damper assembly end cap. First slide the damper<br />
end cap all the way to the top of the assembly (top is<br />
towards the piston head). Next slide the tube over the<br />
piston head and press it into the end cap.<br />
2. Install the rebound damper/cartridge tube assembly<br />
into the bottom of the stanchion leg. Using a 15mm<br />
open end wrench tighten the end cap down to 9,0-11,3<br />
Nm [80-100 lbf*in].<br />
3. The next step is to fill the fork with oil and install<br />
the compression damper. To ensure proper oil height the<br />
casting must be installed prior to filling. If you have other<br />
service to perform on the fork continue onto the appropriate<br />
section and finish that first. If not refer to the MRD<br />
Casting Installation Instructions to install the casting<br />
back onto the fork.<br />
4. Once the casting is installed you are ready to fill<br />
the fork with oil. Insert a small funnel or similar device<br />
into the top of the cartridge tube. (Fig. 5) Pour a small<br />
amount of oil (10cc’s) into the cartridge tube. Remove<br />
the funnel and cover the top of the tube with a rag. Cycle<br />
the fork 7-10 times. This is to ensure the oil gets under<br />
the rebound piston. Failure to do this will cause your oil<br />
level to drop below the proper level. After cycling the fork<br />
insert the funnel back into the cartridge tube and fill the<br />
fork to the specified oil height found on the Oil Height<br />
Chart in this manual.<br />
5. Install the Absolute+ damper into the cartridge tube<br />
and using a 24mm socket tighten down to 6,8-9,0 Nm<br />
[60-80 lbf*in]. (Fig. 6)<br />
FIG. 5<br />
FIG. 6<br />
FIG. 7<br />
6. Install detent springs and ball bearings into the holes<br />
on the top cap. You want to place them in holes opposite<br />
of each other. (Fig. 7)<br />
7. Install adjuster knob onto the hex and using a 2mm<br />
Allen wrench tighten down to 0,5-0,7 Nm [4-6 lbf*in].<br />
20 2012 SERVICE MANUAL
Casting Installation<br />
1. Slide the lower casting onto the upper stanchions.<br />
You want to slide them on only about halfway at this<br />
point.<br />
2. Inject 16cc’s of semi-bath oil into the lower legs<br />
using a syringe or similar tool. (Fig. 1)<br />
FIG. 1<br />
3. Slide the casting all the way onto the upper stanchions.<br />
4. Insert the compression rod bolt into the compression<br />
rod and tighten down using either a 10 or 11mm<br />
wrench depending on fork model. Tighten 5,1-6,2<br />
Nm [45-55 lbf*in]. (Fig. 2)<br />
5. Using an 8mm Allen wrench, thread the rebound<br />
damper assembly into the casting by turning it counter-clockwise.<br />
Tighten to 3,4-4,5 Nm [30-40 lbf*in].<br />
(Fig. 3)<br />
FIG. 2<br />
6. Install rebound knob onto the rebound shaft using<br />
a 2mm Allen wrench. (Fig. 4)<br />
FIG. 3<br />
2012 SERVICE MANUAL<br />
FIG. 4<br />
21
MRD Casting Installation<br />
1. Slide the lower casting onto the upper stanchions.<br />
You want to slide them on only about halfway at this<br />
point.<br />
2. Inject 16cc’s of semi-bath oil into the lower legs<br />
using a syringe or similar tool. (Fig. 1)<br />
FIG. 1<br />
3. Slide the casting all the way onto the upper stanchions.<br />
4. Insert the compression rod bolt into the compression<br />
rod and tighten down using either a 10 or 11mm<br />
wrench depending on fork model. Tighten to the<br />
torque specified in the back of the manual. (Fig. 2)<br />
5. Using an 8mm Allen wrench, thread the rebound<br />
damper assembly into the casting by turning it counter-clockwise.<br />
Tighten to 3,4-4,5 Nm [30-40 lbf*in].<br />
(Fig. 3)<br />
FIG. 2<br />
6. Thread the detent housing on the rebound damper<br />
assembly threads using a green Park Tool pin<br />
spanner or similar tool. (Fig. 4)<br />
7. Place springs and detent ball bearings into the<br />
detent housing. (Fig. 5)<br />
8. Install rebound knob onto the rebound shaft using<br />
a 1.5mm Allen wrench. (Fig. 6)<br />
FIG. 3<br />
FIG. 6<br />
FIG. 5<br />
FIG. 4<br />
22 2012 SERVICE MANUAL
OIL HEIGHT CHART<br />
FORK TRAVEL OIL HEIGHT (mm)<br />
Nominal<br />
Range<br />
Circus Comp/Match 80/100mm 83 80-85<br />
Match 130mm 83 80-85<br />
Circus Expert/Minute 80/100mm 87 85-90<br />
Expert<br />
Circus Expert/ Minute 130mm 87 85-90<br />
Expert<br />
R7 80mm 83 80-85<br />
R7 100mm 83 80-85<br />
Minute Pro 100mm 87 85-90<br />
Minute Pro 120mm 87 85-90<br />
Minute Pro 140mm 87 85-90<br />
Tower Expert 80mm 87 85-90<br />
Tower Expert 100mm 87 85-90<br />
Tower Expert 120mm 87 85-90<br />
Tower Pro 80mm 87 85-90<br />
Tower Pro 100mm 87 85-90<br />
Tower Pro 120mm 87 85-90<br />
R7 MRD 80mm 103 100 -105<br />
R7 MRD 100mm 108 105 -110<br />
Marvel Expert 80/100mm 87 85-90<br />
Marvel Pro 100mm 108 105 -110<br />
Marvel Pro 120mm 113 110 -115<br />
2012 SERVICE MANUAL<br />
23
Circus Comp Exploded View<br />
Part Description Part Number Kit Group<br />
1. Outer Casting QR NB - Black 141-23994-K015 E<br />
1. Outer Casting QR NB - White 141-23994-K016 E<br />
1. Outer Casting TA NB - Black 141-23994-K025 E<br />
1. Outer Casting TA NB - White 141-23994-K026 E<br />
2. Bushing Kit 141-27181-K007 E<br />
3. Seal Kit 85-5293 K<br />
4. Rebound Damper Assembly 141-27220-K001 B<br />
5. Absolute+ Damper 141-26532-K006 A<br />
6. Crown/Steer/Leg 80/100 Steel 141-27181-K005 D<br />
6. Crown/Steer/Leg 80/100 Blk 141-27220-K004<br />
Crwn<br />
D<br />
6. Crown/Steer/Leg 80/100 Wht 141-27220-K005 D<br />
Crwn<br />
7. Preload Adjuster 141-27181-K002 C<br />
8. Ride Kit – Soft – 80/100 141-26686-K001 G<br />
8. Ride Kit – Medium – 80/100 141-26686-K002 G<br />
8. Ride Kit – Firm – 80/100 141-26686-K003 G<br />
9. Compression Rod 141-27181-K003 H<br />
24 2012 SERVICE MANUAL
Circus Expert Fork Schematic<br />
Part Description Part Number Kit Group<br />
1. Compression Rod 80/100 141-23999-K003 H<br />
1. Compression Rod 130 141-23999-K003 H<br />
2. Ride Kit – Soft – 80/100 141-23998-K001 G<br />
2. Ride Kit – Medium – 80/100 141-23998-K004 G<br />
2. Ride Kit – Firm – 80/100 141-23998-K007 G<br />
2. Ride Kit – Soft - 130 141-23998-K003 G<br />
2. Ride Kit – Medium - 130 141-23998-K006 G<br />
2. Ride Kit – Firm - 130 141-23998-K009 G<br />
3. Air Preload Cap 141-23992-K002 C<br />
4. Crown/Steer/Leg 80/100 Blk<br />
Crwn 141-27220-K006 D<br />
4. Crown/Steer/Leg 80/100<br />
Wht Crwn 141-27220-K007 D<br />
4. Crown/Steer/Leg 130 Blk<br />
Crwn 141-27220-K008 D<br />
4. Crown/Steer/Leg 130 Wht<br />
Crwn 141-27220-K009 D<br />
5. Absolute+ Damper 141-26532-K007 A<br />
6. Rebound Damper 80/100 141-27220-K002 B<br />
6. Rebound Damper 130 141-27220-K003 B<br />
7. Seal Kit 85-5293 K<br />
8. Bushing Kit 141-27181-K007 E<br />
9. Outer Casting QR NB Black 141-23994-K015 E<br />
9. Outer Casting QR NB White 141-23994-K016 E<br />
9. Outer Casting TA NB Black 141-23994-K025 E<br />
9. Outer Casting TA NB White 141-23994-K026 E<br />
10. Knob Kit 141-27177-K001 I<br />
2012 SERVICE MANUAL<br />
25
12<br />
11<br />
10<br />
1<br />
9<br />
2<br />
8<br />
3<br />
Marvel Expert Fork Schematic<br />
P a rt D e sc rip tio n P a rt N u m b e r K it G ro u p<br />
1 . C ro w n /S te e r/A ssem b ly , 1 1 /8 S tee r, 10 0m m , B lk C rw n 1 4 1 -2 8 1 3 1 -K 0 07 D<br />
1 . C ro w n /S te e r/A ssem b ly, 1 1 /8 S tee r, 10 0m m , W ht C rw n 1 4 1 -2 8 1 3 1 -K 0 05 D<br />
1 . C ro w n /S te e r/A ssem b ly, 1 1 /8 S tee r, 120m m , B lk C rw n 1 4 1 -2 8 1 3 1 -K 0 08 D<br />
1 . C ro w n /S te e r/A ssem b ly, 1 1 /8 S tee r, 120m m , W ht C rw n 1 4 1 -2 8 1 3 1 -K 0 06 D<br />
1 . C ro w n /S te e r/A ssem b ly, T a pe r S tee r, 10 0m m , B lk C rw n 1 4 1 -2 8 1 3 1 -K 0 11 D<br />
1 . C ro w n /S te e r/A ssem b ly, T a pe r S tee r, 10 0m m , W ht C rw n 1 4 1 -2 8 1 3 1 -K 0 09 D<br />
1 . C ro w n /S te e r/A ssem b ly, T a pe r S tee r, 120m m , B lk C rw n 1 4 1 -2 8 1 3 1 -K 0 12 D<br />
1 . C ro w n /S te e r/A ssem b ly, T a pe r S tee r, 120m m , W ht C rw n 1 4 1 -2 8 1 3 1 -K 0 10 D<br />
2 . K no b K it 1 4 1 -2 8 1 3 1 -K 0 17 I<br />
3 . A b so lu te + D a m p e r A sse m b ly 1 4 1 -26532 -K 0 10 A<br />
4 . R e b o u n d D am pe r A sse m b ly 1 4 1 -2 8 1 3 1 -K 0 18 B<br />
5 . O ute r C a stin g, Q R N B , B la ck 1 4 1 -2 7 9 8 8 -K 0 18 E<br />
5 . O ute r C a stin g, Q R N B , W hite 1 4 1 -2 7 9 8 8 -K 0 17 E<br />
5 . O ute r C a stin g, Q R 15 N B , B la ck (Q R 1 5 a xle in clu d e d) 1 4 1 -2 7 9 8 8 -K 0 20 E<br />
5 . O ute r C a stin g, Q R 15 N B , W hite (Q R 1 5 a xle in clu d e d) 1 4 1 -2 7 9 8 8 -K 0 19 E<br />
6 . Q R 15 A xle 1 4 1 -2 8 1 3 1 -K 0 16 E<br />
7 . Q R 15 A xle H a rd w a re (in se rt & e n d ca p ) 1 4 1 -2 8 1 3 1 -K 0 24 E<br />
8 . B u sh in g K it 8 5 -596 4 E<br />
9 . S ea l K it 8 5 -529 3 K<br />
1 0 . C om p re ssio n R od A sse m b ly , 1 0 0 m m 1 4 1 -2 8 1 3 1 -K 0 13 H<br />
1 0 . C om p re ssio n R od A sse m b ly , 1 2 0 m m 1 4 1 -2 8 1 3 1 -K 0 14 H<br />
1 1 . A ir P isto n 1 4 1 -2 8 1 3 1 -K 0 15 G<br />
1 2 . A ir C ap 1 4 1 -2 7 9 8 8 -K 0 13 C<br />
4<br />
5<br />
6<br />
2<br />
7<br />
26 2012 SERVICE MANUAL
Marvel Pro Fork Schematic<br />
Part D escription Part N um ber K it G roup<br />
1. C rown/Steer/Assem bly, 1 1/8 Steer, 100m m , Blk C rwn 141-28131-K007 D<br />
1. C rown/Steer/Assem bly, 1 1/8 Steer, 100m m , W ht C rwn 141-28131-K005 D<br />
1. C rown/Steer/Assem bly, 1 1/8 Steer, 120m m , Blk C rwn 141-28131-K008 D<br />
1. C rown/Steer/Assem bly, 1 1/8 Steer, 120m m , W ht C rwn 141-28131-K006 D<br />
1. C rown/Steer/Assem bly, Taper Steer, 100m m , Blk C rwn 141-28131-K011 D<br />
1. C rown/Steer/Assem bly, Taper Steer, 100m m , W ht C rwn 141-28131-K009 D<br />
1. C rown/Steer/Assem bly, Taper Steer, 120m m , Blk C rwn 141-28131-K012 D<br />
1. C rown/Steer/Assem bly, Taper Steer, 120m m , W ht C rwn 141-28131-K010 D<br />
2. Knob Kit 141-28131-K017 I<br />
3. C artridge Absolute + D am per Assem bly 141-26532-K009 A<br />
4. C artridge Tube, 1 1/8 Steer, 100m m 141-28131-K003 A<br />
4. C artridge Tube, 1 1/8 Steer, 120m m 141-28131-K004 A<br />
4. C artridge Tube, Taper Steer, 100m m 141-28131-K001 A<br />
4. C artridge Tube, Taper Steer, 120m m 141-28131-K002 A<br />
5. C artridge R ebound D am per Assem bly 83-3283 B<br />
6. Q R 15 Axle 141-28131-K016 E<br />
7. Q R 15 Axle H ardware (insert & endcap) 141-28131-K024 E<br />
8. O uter C asting, Q R N B, Black 141-27988-K018 E<br />
8. O uter C asting, Q R N B, W hite 141-27988-K017 E<br />
8. O uter C asting, Q R15 N B, Black (Q R 15 axle included) 141-27988-K020 E<br />
8. O uter C asting, Q R15 N B, W hite (Q R 15 axle included) 141-27988-K019 E<br />
9. Bushing Kit 85-5964 E<br />
10. Seal Kit 85-5293 K<br />
11. C om pression R od Assem bly, 100m m 141-28131-K013 H<br />
11. C om pression R od Assem bly, 120m m 141-28131-K014 H<br />
12. Air Piston 141-28131-K015 G<br />
13. Air C ap 141-27988-K013 C<br />
5<br />
6<br />
2<br />
7<br />
4<br />
8<br />
3<br />
9<br />
2<br />
10<br />
1<br />
13<br />
12<br />
11<br />
2012 SERVICE MANUAL<br />
27
Match Exploded View<br />
Part Description Part Number Kit Group<br />
1. Outer Casting QR STD Black 141-23994-K005 E<br />
1. Outer Casting QR STD White 141-23994-K006 E<br />
1. Outer Casting QR NB Black 141-23994-K015 E<br />
1. Outer Casting QR NB White 141-23994-K016 E<br />
2. Bushing Kit 141-27181-K007 E<br />
3. Seal Kit 141-27177-K001 K<br />
4. Rebound Damper Assembly 141-27181-K001 B<br />
5. Absolute+ Damper 141-25404-K003 A<br />
6. Crown/Steer/Leg 80/100 141-27181-K005 D<br />
6. Crown/Steer/Leg 130 141-27181-K006 D<br />
7. Preload Adjuster 141-27181-K002 C<br />
8. Ride Kit – Soft – 80/100 141-26686-K001 G<br />
8. Ride Kit – Medium – 80/100 141-26686-K002 G<br />
8. Ride Kit – Firm – 80/100 141-26686-K003 G<br />
8. Ride kit – Soft - 130 141-26686-K004 G<br />
8. Ride Kit – Medium - 130 141-26686-K005 G<br />
8. Ride Kit – Firm – 130 141-26686-K006 G<br />
9. Compression Rod 80/100 141-27181-K003 H<br />
9. Compression Rod 130 141-27181-K004 H<br />
28 2012 SERVICE MANUAL
Minute Expert Fork Schematic<br />
Part Description Part Number Kit Group<br />
1. Compression Rod Assembly 141-23999-K003 H<br />
2. Ride Kit – Soft 80/ 100 141-23998-K001 G<br />
2. Ride Kit – Medium 80/100 141-23998-K004 G<br />
2. Ride Kit – Firm 80/100 141-23998-K007 G<br />
2. Ride Kit – Soft 130 141-23998-K003 G<br />
2. Ride Kit – Medium 130 141-23998-K006 G<br />
2. Ride Kit - Firm 130 141-23998-K009 G<br />
3. Air Preload Cap 141-23992-K002 C<br />
4. Crown/Steer/Leg 80/100 141-23993-K001 D<br />
4. Crown/Steer/Leg 130 141-23993-K002 D<br />
5. Absolute+ Damper 141-26532-K002 A<br />
6. Rebound Damper 141-23991-K003 B<br />
7. Seal & Wiper Kit 32mm 85-5293 K<br />
8. Bushing Kit 85-5964 E<br />
9. Outer Casting QR STD Black 141-23994-K005 E<br />
9. Outer Casting QR STD White 141-23994-K006 E<br />
9. Outer Casting QR NB Black 141-23994-K015 E<br />
9. Outer Casting QR NB White 141-23994-K016 E<br />
9. Outer Casting TA Black 141-23994-K025 E<br />
9. Outer Casting TA White 141-23994-K026 E<br />
10. Knob Kit 141-27177-K001 I<br />
2012 SERVICE MANUAL<br />
29
Minute Pro Fork Schematic<br />
Part Description Part Number Kit Group<br />
1. Compression Rod 83-3183 H<br />
2. Ride Kit – Soft 100 83-3170 G<br />
2. Ride Kit – Medium 100 83-3171 G<br />
2. Ride Kit – Firm 100 83-3172 G<br />
2. Ride Kit – X Firm 100 83-3173 G<br />
2. Ride Kit – Soft 120 83-3175 G<br />
2. Ride Kit – Medium 120 83-3176 G<br />
2. Ride Kit – Firm 120 83-3177 G<br />
2. Ride Kit – X Firm 120 141-26745 G<br />
2. Ride Kit – Soft 140 141-25683-K001 G<br />
2. Ride Kit – Medium 140 141-25683-K002 G<br />
2. Ride Kit – Firm 140 141-25683-K003 G<br />
2. Ride Kit – X Firm 140 141-25683-K004 G<br />
3. Air Piston 83-3188 G<br />
4. Air Cap 83-3150 C<br />
5. Crown/Steer/Leg -100 83-3155 D<br />
5. Crown/Steer/Leg -120 83-3156 D<br />
5. Crown/Steer/Leg -140 83-3157 D<br />
6. Absolute+ Damper 141-26532-K008 A<br />
7. Rebound Damper 83-3341 B<br />
8. Seal/Wiper Kit 32mm 85-5293 K<br />
9. Bushing Kit 85-5964 E<br />
10. Outer Casting QR – Black 141-23994-K015 E<br />
10. Outer Casting QR – White 141-23994-K016 E<br />
10. Outer Casting TA – Black 141-23994-K025 E<br />
10. Outer Casting TA – White 141-23994-K026 E<br />
11. Knob Kit 141-27177-K001 E<br />
30 2012 SERVICE MANUAL
R7 MRD Schematic<br />
Part Description Part Number Kit Group<br />
1. Compression Rod Assembly – 80mm 83-3262 H<br />
1. Compression Rod Assembly – 100mm 83-3263 H<br />
2. Air Piston 83-2669 G<br />
3. Air Cap 83-2654 C<br />
4. Crown/Steer/Leg – 80mm 141-25389-K001 D<br />
4. Crown/Steer/Leg – 100mm 141-25389-K002 D<br />
5. Absolute+ Cartridge Damper 141-26532-K004 A<br />
6. Cartridge Tube – 80mm 83-3270 A<br />
6. Cartridge Tube – 100mm 83-3271 A<br />
7. Cartridge Rebound Damper 83-3267 A<br />
8. Bushing Kit 85-5321 E<br />
9. Seal Kit 85-5281 K<br />
10. Outer casting QR STD - Black 98-23561 E<br />
10. Outer Casting QR STD White 98-23562 E<br />
10. Outer Casting QR NB - Black 141-27200-K001 E<br />
10. Outer Casting QR NB - White 141-27200-K002 E<br />
11. Knob Kit 141-27177-K002 I<br />
2012 SERVICE MANUAL<br />
31
Part Description Part Number Kit Group<br />
1. Compression Rod Assembly – 80mm 83-3262 H<br />
1. Compression Rod Assembly – 100mm 83-3263 H<br />
2. Air Piston 83-2669 G<br />
3. Air Cap 83-2654 C<br />
4. Crown/Steer/Leg – 80mm 83-2656 D<br />
4. Crown/Steer/Leg – 100mm 83-2659 D<br />
5. Absolute+ Damper 141-26532-K001 A<br />
6. Rebound Damper Assembly 83-3254 B<br />
7. Seal Kit 85-5281 K<br />
8. Bushing Kit 85-5321 E<br />
9. Outer casting QR STD - Black 98-23561 E<br />
9. Outer Casting QR STD White 98-23562 E<br />
9. Outer Casting QR NB - Black 141-27200-K001 E<br />
9. Outer Casting QR NB - White 141-27200-K002 E<br />
10. Knob Kit 141-27177-K003 I<br />
R7 Pro Fork Schematic<br />
32 2012 SERVICE MANUAL
Part Description Part Number Kit Group<br />
1. Compression Rod - Air 141-23999-K004 H<br />
2. Ride Kit – Soft 80/ 100 141-23998-K001 G<br />
2. Ride Kit – Medium 80/100 141-23998-K004 G<br />
2. Ride Kit – Firm 80/100 141-23998-K007 G<br />
2. Ride Kit – Soft 120 141-23998-K002 G<br />
2. Ride Kit – Medium 120 141-23998-K006 G<br />
2. Ride Kit - Firm 120 141-23998-K008 G<br />
3. Air Preload Cap 141-23992-K002 C<br />
4. Crown/Steer/Leg 80/100 141-23993-K004 D<br />
4. Crown/Steer/Leg 120 141-23993-K005 D<br />
5. Absolute+ Damper 141-26532-K002 A<br />
6. Rebound Damper 141-23991-K004 B<br />
7. Seal & Wiper Kit 32mm 85-5293 K<br />
8. Bushing Kit 85-5964 E<br />
9. Outer Casting QR NB Black 83-3302 E<br />
9. Outer Casting QR NB White 141-23994-K031 E<br />
9. Outer Casting TA Black 83-3303 E<br />
9. Outer Casting TA – White 141-23994-K036 E<br />
10. Knob Kit 141-27177-K001 I<br />
Tower Expert Fork Schematic<br />
2012 SERVICE MANUAL<br />
33
Tower Pro Fork Schematic<br />
Part Description Part Number Kit Group<br />
1. Compression Rod 83-3312 H<br />
2. Ride Kit – Soft - 80 141-25690-K002 G<br />
2. Ride Kit – Medium - 80 141-25690-K003<br />
G<br />
2. Ride Kit – Firm - 80 141-25690-K004<br />
G<br />
2. Ride Kit – X Firm 80 141-25690-K005<br />
G<br />
2. Ride Kit – Medium – 100 141-26743-K001<br />
G<br />
2. Ride Kit – Firm – 100 141-26743-K002<br />
G<br />
2. Ride Kit – X Firm – 100 141-26743-K003<br />
G<br />
2. Ride Kit – Medium – 120 141-26744-K001<br />
G<br />
2. Ride Kit – Firm – 120 141-26744-K002<br />
G<br />
2. Ride Kit – X Firm - 120 141-26744-K003<br />
G<br />
3. Air Piston 141-25698 G<br />
4. Air Cap 83-3150 C<br />
5. Crown/Steer/Leg - 80 83-3299 D<br />
5. Crown/Steer/Leg - 100 83-3330 D<br />
5. Crown/Steer/Leg - 120 83-3331 D<br />
6. Absolute+ Damper 141-26532-K008 A<br />
7. Rebound Damper Assembly 83-3295 B<br />
8. Seal/Wiper Kit 32mm 85-5293 K<br />
9. Bushing Kit 85-5964 E<br />
10. Outer Casting QR – Black 83-3302 E<br />
10. Outer Casting QR – White 141-23994-K031 E<br />
10. Outer Casting TA – Black 83-3303 E<br />
10. Outer Casting TA – White 141-23994-K036 E<br />
11. Knob Kit 141-27177-K001 E<br />
34 2012 SERVICE MANUAL