DVA - VPAD Version 5 - Installation Instructions Upgrade Install
DVA - VPAD Version 5 - Installation Instructions Upgrade Install
DVA - VPAD Version 5 - Installation Instructions Upgrade Install
Create successful ePaper yourself
Turn your PDF publications into a flip-book with our unique Google optimized e-Paper software.
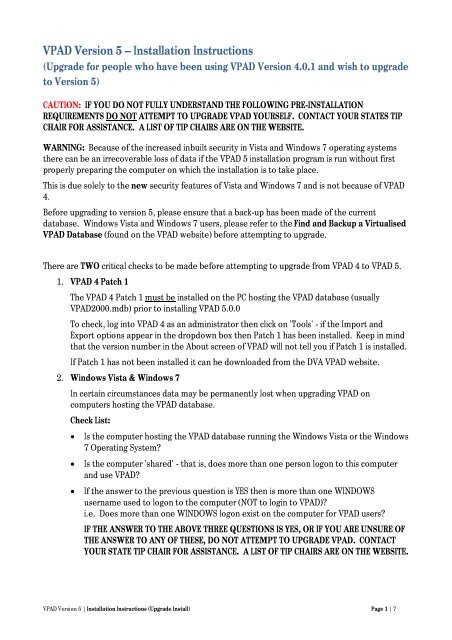
<strong>VPAD</strong> <strong>Version</strong> 5 – <strong><strong>Install</strong>ation</strong> <strong>Instructions</strong><br />
(<strong>Upgrade</strong> for people who have been using <strong>VPAD</strong> <strong>Version</strong> 4.0.1 and wish to upgrade<br />
to <strong>Version</strong> 5)<br />
CAUTION: IF YOU DO NOT FULLY UNDERSTAND THE FOLLOWING PRE-INSTALLATION<br />
REQUIREMENTS DO NOT ATTEMPT TO UPGRADE <strong>VPAD</strong> YOURSELF. CONTACT YOUR STATES TIP<br />
CHAIR FOR ASSISTANCE. A LIST OF TIP CHAIRS ARE ON THE WEBSITE.<br />
WARNING: Because of the increased inbuilt security in Vista and Windows 7 operating systems<br />
there can be an irrecoverable loss of data if the <strong>VPAD</strong> 5 installation program is run without first<br />
properly preparing the computer on which the installation is to take place.<br />
This is due solely to the new security features of Vista and Windows 7 and is not because of <strong>VPAD</strong><br />
4.<br />
Before upgrading to version 5, please ensure that a back-up has been made of the current<br />
database. Windows Vista and Windows 7 users, please refer to the Find and Backup a Virtualised<br />
<strong>VPAD</strong> Database (found on the <strong>VPAD</strong> website) before attempting to upgrade.<br />
There are TWO critical checks to be made before attempting to upgrade from <strong>VPAD</strong> 4 to <strong>VPAD</strong> 5.<br />
1. <strong>VPAD</strong> 4 Patch 1<br />
The <strong>VPAD</strong> 4 Patch 1 must be installed on the PC hosting the <strong>VPAD</strong> database (usually<br />
<strong>VPAD</strong>2000.mdb) prior to installing <strong>VPAD</strong> 5.0.0<br />
To check, log into <strong>VPAD</strong> 4 as an administrator then click on 'Tools' - if the Import and<br />
Export options appear in the dropdown box then Patch 1 has been installed. Keep in mind<br />
that the version number in the About screen of <strong>VPAD</strong> will not tell you if Patch 1 is installed.<br />
If Patch 1 has not been installed it can be downloaded from the <strong>DVA</strong> <strong>VPAD</strong> website.<br />
2. Windows Vista & Windows 7<br />
In certain circumstances data may be permanently lost when upgrading <strong>VPAD</strong> on<br />
computers hosting the <strong>VPAD</strong> database.<br />
Check List:<br />
� Is the computer hosting the <strong>VPAD</strong> database running the Windows Vista or the Windows<br />
7 Operating System?<br />
� Is the computer 'shared' - that is, does more than one person logon to this computer<br />
and use <strong>VPAD</strong>?<br />
� If the answer to the previous question is YES then is more than one WINDOWS<br />
username used to logon to the computer (NOT to login to <strong>VPAD</strong>)?<br />
i.e. Does more than one WINDOWS logon exist on the computer for <strong>VPAD</strong> users?<br />
IF THE ANSWER TO THE ABOVE THREE QUESTIONS IS YES, OR IF YOU ARE UNSURE OF<br />
THE ANSWER TO ANY OF THESE, DO NOT ATTEMPT TO UPGRADE <strong>VPAD</strong>. CONTACT<br />
YOUR STATE TIP CHAIR FOR ASSISTANCE. A LIST OF TIP CHAIRS ARE ON THE WEBSITE.<br />
<strong>VPAD</strong> <strong>Version</strong> 5 | <strong><strong>Install</strong>ation</strong> <strong>Instructions</strong> (<strong>Upgrade</strong> <strong>Install</strong>) Page 1 | 7
Step 1 - Navigate to <strong>VPAD</strong><br />
Website<br />
http://www.dva.gov.au/exservice_organisations/tip/Pages/<br />
<strong>VPAD</strong>.aspx<br />
Step 2 - Locate <strong>Install</strong> Link<br />
Under the Section ‘Downloading<br />
<strong>VPAD</strong> <strong>Version</strong> 5’ will be a link<br />
called ‘<strong>Install</strong> <strong>Version</strong> 5 Online’.<br />
Click the link<br />
Step 3 - Start Download/<strong>Install</strong><br />
Process<br />
You will see the following screen.<br />
Click the <strong>Install</strong> button to start<br />
the installation process.<br />
Step 2 - Start Backing Up Your<br />
<strong>VPAD</strong> <strong>Version</strong> 4 Database<br />
First you will need to identify the<br />
location of the <strong>VPAD</strong> <strong>Version</strong> 4<br />
database.<br />
Open <strong>VPAD</strong> <strong>Version</strong> 4.<br />
Click View, then Options.<br />
<strong>VPAD</strong> <strong>Version</strong> 5 | <strong><strong>Install</strong>ation</strong> <strong>Instructions</strong> (<strong>Upgrade</strong> <strong>Install</strong>) Page 2 | 7
Step 3 - Find Your <strong>VPAD</strong> <strong>Version</strong><br />
4 Database<br />
Click the Database tab.<br />
Right click the Database Location<br />
text box and click Select All.<br />
Then press Ctrl + C to copy the<br />
database location.<br />
Close <strong>VPAD</strong> version 4.<br />
Step 4 - <strong>Install</strong> <strong>VPAD</strong> <strong>Version</strong> 5<br />
Locate the version 5 icon on the<br />
desktop.<br />
Double click it.<br />
Step 3 - Allow <strong>Install</strong>er to Run on<br />
your Computer<br />
After double clicking the <strong>VPAD</strong><br />
icon for the first time, the <strong>VPAD</strong><br />
application will be fully<br />
downloaded and installed.<br />
Windows states that an<br />
unidentified program wants<br />
access to your computer.<br />
Windows Vista<br />
To give permission for <strong>VPAD</strong> to<br />
run on Windows Vista, click<br />
Allow.<br />
<strong>VPAD</strong> <strong>Version</strong> 5 | <strong><strong>Install</strong>ation</strong> <strong>Instructions</strong> (<strong>Upgrade</strong> <strong>Install</strong>) Page 3 | 7
Windows 7<br />
To give permission for <strong>VPAD</strong> to<br />
run on Windows 7, click Yes.<br />
Step 4 - Run <strong>VPAD</strong> <strong>Install</strong>er<br />
The installation welcome screen<br />
will then appear.<br />
Click Next.<br />
Step 5 - Accept <strong>VPAD</strong> Licence<br />
You need to agree to the license<br />
agreement to continue. If you<br />
accept the agreement, select the<br />
‘I accept the terms in the license<br />
agreement’ option.<br />
Then click Next.<br />
<strong>VPAD</strong> <strong>Version</strong> 5 | <strong><strong>Install</strong>ation</strong> <strong>Instructions</strong> (<strong>Upgrade</strong> <strong>Install</strong>) Page 4 | 7
Step 5<br />
The installer detects that <strong>Version</strong><br />
4 of <strong>VPAD</strong> is installed and a<br />
prompt appears.<br />
Select the location of the<br />
database by clicking the Select<br />
button.<br />
Step 6<br />
Click inside the File name box<br />
press Ctrl + V to paste the<br />
database location and file name.<br />
Then click Open.<br />
Step 6<br />
The database file name should<br />
appear (similar to when it was<br />
copied in <strong>VPAD</strong> 4) in the text box.<br />
REMINDER: Ensure that a backup<br />
of this database has been made,<br />
perhaps by placing a copy of it on<br />
the Desktop.<br />
Click the checkbox to indicate<br />
that a backup has been made<br />
Click Next.<br />
<strong>VPAD</strong> <strong>Version</strong> 5 | <strong><strong>Install</strong>ation</strong> <strong>Instructions</strong> (<strong>Upgrade</strong> <strong>Install</strong>) Page 5 | 7
Step 7<br />
The following message will only<br />
appear if the <strong>Version</strong> 4 database<br />
resides in the Program<br />
Files\<strong>VPAD</strong>\Database folder.<br />
If it appears, click OK.<br />
The installation then proceeds as<br />
normal and will uninstall the<br />
previous version of <strong>VPAD</strong>.<br />
Step 8<br />
<strong>Version</strong> 5 is now ready to install.<br />
Click <strong>Install</strong> to commence<br />
installation.<br />
Step 9<br />
<strong><strong>Install</strong>ation</strong> progress screen<br />
appears.<br />
No action is required.<br />
<strong>VPAD</strong> <strong>Version</strong> 5 | <strong><strong>Install</strong>ation</strong> <strong>Instructions</strong> (<strong>Upgrade</strong> <strong>Install</strong>) Page 6 | 7
Step 10<br />
The upgrade is complete!<br />
<strong>VPAD</strong> will automatically start<br />
when Finish is clicked.<br />
NOTE: In the event that a<br />
database installed on an office<br />
network has been upgraded, all<br />
computers using that database<br />
will need to be upgraded to<br />
<strong>Version</strong>.<br />
This also applies to single<br />
computers with multiple<br />
Windows logins.<br />
<strong>VPAD</strong> <strong>Version</strong> 5 | <strong><strong>Install</strong>ation</strong> <strong>Instructions</strong> (<strong>Upgrade</strong> <strong>Install</strong>) Page 7 | 7


