Tools\PCAN-Router Pro\Documentation\Tutorial ... - PEAK-System
Tools\PCAN-Router Pro\Documentation\Tutorial ... - PEAK-System
Tools\PCAN-Router Pro\Documentation\Tutorial ... - PEAK-System

Create successful ePaper yourself
Turn your PDF publications into a flip-book with our unique Google optimized e-Paper software.
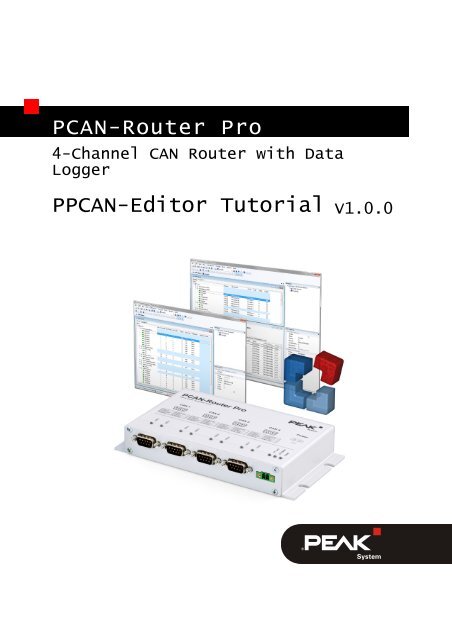
PCAN-<strong>Router</strong> Pro<br />
4-Channel CAN <strong>Router</strong> with Data<br />
Logger<br />
PPCAN-Editor Tutorial V1.0.0
PCAN-<strong>Router</strong> Pro – PPCAN-Editor Tutorial<br />
Products taken into account<br />
Product name Model Part No.<br />
PCAN-<strong>Router</strong> Pro 4 High-speed-CAN channels,<br />
Wake-Up-capability, other CANtransceiver<br />
modules on request<br />
IPEH-002212<br />
PCAN-Explorer 5<br />
PPCAN-Editor 2, PCAN-View,<br />
<strong>PEAK</strong>-Converter<br />
IPES-005028<br />
Products names mentioned in this document may bet the trademarks or registered<br />
trademarks of their respective companies. They are not explicitly marked by ““ and<br />
“®“.<br />
© 2011 <strong>PEAK</strong>-<strong>System</strong> Technik GmbH<br />
<strong>PEAK</strong>-<strong>System</strong> Technik GmbH<br />
Otto-Roehm-Straße 69<br />
64293 Darmstadt<br />
Germany<br />
Phone: +49 (0)6151 8173-20<br />
Fax: +49 (0)6151 8173-29<br />
www.peak-system.com<br />
info@peak-system.com<br />
Document version 1.0.0 (2011-05-30)<br />
2
PCAN-<strong>Router</strong> Pro – PPCAN-Editor Tutorial<br />
Contents<br />
1 Introduction 5<br />
1.1 Prerequisites for Operation 5<br />
2 The Configuration concept 7<br />
2.1 Possibilities of configuration 7<br />
2.2 Scaling 8<br />
2.3 CAN Gateway Services 8<br />
2.4 Default Values 9<br />
2.5 Function Blocks 9<br />
2.6 Event-triggered Transmission of CAN Messages 9<br />
2.7 Characteristics Curves 9<br />
3 List of Exercises 11<br />
4 Solutions and Explanations 13<br />
4.1 Exercise 1a: Forwarding of all messages from<br />
CAN-1 to CAN-4 13<br />
4.2 Exercises 1b: Forwarding of defined messages<br />
from CAN-1 to CAN-4 19<br />
4.3 Exercise 1c: Forwarding of all messages from<br />
CAN-1 to CAN-4 with exceptions 20<br />
4.4 Exercise 2a: Recording of all received<br />
messages to a binary Trace file on the CF<br />
card 21<br />
4.5 Exercise 2b: Conversion of the binary Trace<br />
file from the CF card to the PC 23<br />
4.6 Exercise 3a: Definition of CAN messages, e.g.<br />
reading a system variable 24<br />
4.7 Exercise 3b: Translating a CAN ID 32<br />
4.8 Exercise 3c: (Variation 3b) Transmission only<br />
if source message was received 36<br />
3
PCAN-<strong>Router</strong> Pro – PPCAN-Editor Tutorial<br />
4.9 Exercise 3d: (Variation 3a) Transmission only<br />
on Remote Request 39<br />
4.10 Exercise 4a: Manipulating CAN signals using<br />
SCALE and OFFSET 41<br />
4.11 Exercise 4b: Manipulating CAN signals using<br />
Function block Characteristic curve 44<br />
4.12 Exercise 5a: LED activity on CAN reception<br />
and transmission 50<br />
4.13 Exercise 5b: Controlling LED manually or<br />
conditionally 53<br />
4.14 Exercise 5c: Controlling LED externally 58<br />
4.15 Exercise 5d: Controlling Beeper (continuous<br />
tone) 60<br />
4.16 Exercise 5e: Controlling the Beeper (tone<br />
sequence) 62<br />
4.17 Exercise 6a: Reading date and time (Hardware<br />
Diagnostics) 64<br />
4.18 Exercise 6b: Setting date and time (Hardware<br />
Diagnostics) 66<br />
4.19 Exercise 6c: Reading the module ID (Hardware<br />
Diagnostics) 67<br />
4.20 Exercise 6d: Reading firmware version and<br />
configuration version (Hardware Diagnostics) 70<br />
4.21 Exercise 7a: Sleep and WakeUp via CAN 71<br />
4.22 Exercise 7b: Sleep and WakeUp via external<br />
pin 72<br />
4.23 Exercise 7c: Sleep and WakeUp via timed alarm 73<br />
4.24 Exercise 8a: Changing the bit rate 74<br />
Appendix A Literature and References 76<br />
4
PCAN-<strong>Router</strong> Pro – PPCAN-Editor Tutorial<br />
1 Introduction<br />
Working successfully with the PPCAN-Editor requires at least some<br />
basic understanding of the user regarding hardware knowledge and<br />
programming experience.<br />
This tutorial therefore addresses owners of a PCAN-<strong>Router</strong> Pro, who<br />
are trying to do some more complex configurations of the device,<br />
using their skills from Electronics and Informatics education.<br />
At first, you should try to get familiar with the free PPCAN-Editor<br />
following the steps of this tutorial. When experiencing more and<br />
more difficulties with understanding the matter and proceedings,<br />
this may at least serve as an indication for the future use of the<br />
PPCAN-Editor: when deciding against the effort, <strong>PEAK</strong> <strong>System</strong><br />
Technik GmbH offers to their customers a configuration service<br />
subject to detailed specifications.<br />
1.1 Prerequisites for Operation<br />
For reasonably processing this tutorial respectively for solving the<br />
exercises, a PCAN-<strong>Router</strong> Pro (with sufficient power source) should<br />
be at hand. Its CAN busses should be connected to a computer via<br />
<strong>PEAK</strong> interfaces and also should be properly terminated e.g. by<br />
means of the internal DIP switches.<br />
At least two CAN busses (e.g. 1 and 4) are connected to the PC<br />
via <strong>PEAK</strong> interfaces, with 500 kbit/s each<br />
A specially prepared CF card (e.g. 1 GByte, included in<br />
shipment) is inserted<br />
The PPCAN-Editor 2 software is installed<br />
5
PCAN-<strong>Router</strong> Pro – PPCAN-Editor Tutorial<br />
As a partner CAN participant, e.g. a PCAN-View (or even better:<br />
a PCAN-Explorer part no. IPES-005028) is installed on the PC<br />
Also the included <strong>PEAK</strong>-Converter software plus a commercial<br />
CF card reader (not included) are installed on the PC<br />
The device PCAN-<strong>Router</strong> Pro offers the following resources for<br />
configurations<br />
Device ID (4 bit, 0..15 dec) may be adjusted within the device<br />
using a rotary switch (see user manual PCAN-<strong>Router</strong> Pro)<br />
4 CAN busses (#1 .. #4), with WakeUp feature<br />
Different CAN bus transveiver (HS, HS-OPTO 1 , LS-DW, LS-SW)<br />
CAN bus bit rate 2 (10k; 20k; 33.3k; 47.6k; 50k; 83.3k; 95.2k; 100k;<br />
125k; 250k; 500k; 1M)<br />
CAN messages (11 bit or 29 bit IDs)<br />
1 CompactFlash card (serving as virtual CAN bus #5), recording<br />
modes configurable<br />
2 LEDs per CAN bus (for a total of 8, status can be written or<br />
read)<br />
Time of Day (RTC)<br />
Beeper<br />
Software switch for Sleep mode<br />
1 Please query for availability<br />
2 Bit rates may be adjusted freely, but actual function is depending on equipped<br />
transceiver types<br />
6
PCAN-<strong>Router</strong> Pro – PPCAN-Editor Tutorial<br />
2 The Configuration concept<br />
Most of the microcontroller-equipped devices of <strong>PEAK</strong>-<strong>System</strong><br />
Technik GmbH offer possibilities to link any of their internally<br />
accessible resources with each other. For this, the firmware allows<br />
virtual wiring of the hardware resources by several means, e.g. so<br />
called Function Blocks, among others. Accordingly, a module<br />
without configuration just represents a collection of loose ends and<br />
is therefore inoperational.<br />
For creating, editing, and managing configurations, <strong>PEAK</strong>-<strong>System</strong><br />
Technik GmbH offers the PPCAN-Editor 2 for free download from<br />
their website. Files created this way along with the enclosed<br />
configuration are stored to the PC at first, then transferred via CAN<br />
to the PCAN device (upload) and stored there non-volatile. Some<br />
devices can hold several configurations: the valid one is then<br />
determined by means of a selector switch.<br />
Project files created with the PPCAN-Editor 2 may contain several<br />
configurations. The device ID selects the one to be executed when<br />
the device starts (e.g. after being powered). The selector switch<br />
simultaneously determines the device ID and the memory slot<br />
within the device's non-volatile memory, where the chosen<br />
configuration is loaded from. This offers the possibility to wire<br />
several devices with different IDs to the same CAN bus and to<br />
upload the same multi-configuration file to them all. The unique ID<br />
of each device will let them load their individual configuration from<br />
the appropriate memory slot and subsequentially execute a<br />
different task each.<br />
2.1 Possibilities of configuration<br />
Linking of internal resources can be done using straight<br />
assignment, the simple scaling of values, as well as applying<br />
7
PCAN-<strong>Router</strong> Pro – PPCAN-Editor Tutorial<br />
methods "CAN gateway services", "Default values", "Function<br />
blocks", "Event based messaging", "Time events", and<br />
"Characteristic curves". Devices with only one CAN bus do not<br />
support the "Gateway services", and "Time events" may also be<br />
missing on some of the smaller platforms. All available resources of<br />
a device are advised to the PPCAN-Editor by applying a special file<br />
related to that hardware. This so-called "hardware profile" lets the<br />
PPCAN-Editor allow or restrict configuration possibilities<br />
correspondingly. The user instead may refer to the hardware<br />
manual of a specific device (see our website www.peak-system.com<br />
for free manual download).<br />
2.2 Scaling<br />
The most elementary means of manipulating values is using the<br />
four basic arithmetics. They are controlled with parameters SCALE<br />
and OFFSET, taken from mathematics well known linear equation.<br />
Here, the parameter SCALE decides on multiplication (if > 1)<br />
respectively division (if 0, positive) respectively subtraction (if<br />
< 0, negative). As a neutral setting, SCALE=1 and OFFSET= 0 are<br />
preset by default.<br />
2.3 CAN Gateway Services<br />
Incoming messages on one CAN bus may be (selectively) forwarded<br />
to a different CAN bus. Or they may be transmitted on the same<br />
CAN bus but with a different ID (e.g. conversion 11 bit 29 bit). Or<br />
an incoming message may be used to trigger transmission of a<br />
completely different message.<br />
8
PCAN-<strong>Router</strong> Pro – PPCAN-Editor Tutorial<br />
2.4 Default Values<br />
When defining parameter values here, the module's resources may<br />
be preset from the start. For example, a non-default bit rate of a<br />
CAN bus may be set here, permanent message routings or logging<br />
modes may be activated, LEDs and wires may be switched logically,<br />
etc.<br />
2.5 Function Blocks<br />
In the case that simple manipulation of values using SCALE and<br />
OFFSET turned out to be insufficient, the firmware offers so called<br />
function blocks with even more complex capabilities. Such<br />
functions are e.g. value mapping with X/Y tables or matrices,<br />
hysteresis functions, delays, counters, timers, low pass filters, a vast<br />
collection of mathematical and logical functions up to a complex<br />
PIDT1 closed-loop control. Function blocks may be processed<br />
sequentially or conditionally.<br />
2.6 Event-triggered Transmission of CAN<br />
Messages<br />
For CAN messages to be transmitted conditionally, a pool of trigger<br />
conditions is available. Also CAN messages can be requested from<br />
distant nodes (RTR mechanism supported).<br />
2.7 Characteristics Curves<br />
Here, 2 to 31 X/Y translation pairs may be defined. An incoming X<br />
value results in the output of the assigned Y value. X values in<br />
between two X/Y pairs will return an Y value linear interpolated<br />
9
PCAN-<strong>Router</strong> Pro – PPCAN-Editor Tutorial<br />
from the available Y points. In other words: characteristic curves<br />
allow value manipulation in a way like up to 31 different SCALE and<br />
OFFSET values would do. Using this, segments of the curve may be<br />
influenced in their gradient to define plateaus or non-continuous<br />
functions.<br />
10
PCAN-<strong>Router</strong> Pro – PPCAN-Editor Tutorial<br />
3 List of Exercises<br />
An overview on the vast capabilities of the PCAN hardware (like the<br />
PCAN-<strong>Router</strong> Pro) may be given when solving the following<br />
exercises.<br />
1a) Forwarding of all messages from CAN-1 to CAN-4<br />
1b) Forwarding of defined messages from CAN-1 to CAN-4<br />
1c) Forwarding of all messages from CAN-1 to CAN-4 with<br />
exceptions<br />
2a) Recording of all received messages to a binary Trace file on<br />
the CF card<br />
2b) Conversion of the binary Trace file from the CF card to a PC<br />
3a) Definition of CAN messages (e.g. reading a system variable)<br />
3b) Translating CAN ID<br />
3c) (Variation 3b) Transmission only if source message was<br />
received<br />
3d) (Variation 3a) Transmission only on Remote Request<br />
4a) Manipulating CAN signals using SCALE and OFFSET<br />
4b) Manipulating CAN signals using Function block<br />
Characteristic curve<br />
5a) LED activity on CAN reception and transmission<br />
5b) Controlling LED manually or conditionally<br />
5c) Controlling LED externally<br />
5d) Controlling the Beeper (continuous tone)<br />
5e) Controlling the Beeper (tone sequence)<br />
6a) Reading date and time (Hardware Diagnostics)<br />
11
PCAN-<strong>Router</strong> Pro – PPCAN-Editor Tutorial<br />
6b) Setting date and time (Hardware Diagnostics)<br />
6c) Reading the module ID (Hardware Diagnostics)<br />
6d) Reading firmware version and configuration version<br />
(Hardware Diagnostics)<br />
7a) Sleep and WakeUp via CAN<br />
7b) Sleep and WakeUp via external pin<br />
7c) Sleep and WakeUp via timed alarm<br />
8a) Changing the bit rate<br />
12
PCAN-<strong>Router</strong> Pro – PPCAN-Editor Tutorial<br />
4 Solutions and Explanations<br />
You can find further information about the use of PPCAN-Editor 2 in<br />
the help which you can invoke in the program via the menu Help or<br />
the F1 key.<br />
4.1 Exercise 1a: Forwarding of all<br />
messages from CAN-1 to CAN-4<br />
Activity: Start the PPCAN-Editor with a double click on the icon, or<br />
by selecting the PPCAN-Editor from the list of installed programs.<br />
Activity: Connecting the PPCAN-Editor with a <strong>PEAK</strong>-Interface e. g.<br />
PCAN-USB. Select menu item CAN -> Connect and choose then the<br />
appropriate hardware.<br />
Reaction: The selected connection is displayed in the status bar of<br />
the PPCAN-Editor (bottom left corner).<br />
Activity: Check whether the PCAN-<strong>Router</strong> Pro can be found on the<br />
CAN network by selecting menu item Transmit -> Detect Modules.<br />
Reaction: The Active Modules window lists the available devices<br />
(here: PCAN-<strong>Router</strong> Pro) along with some status information.<br />
13
PCAN-<strong>Router</strong> Pro – PPCAN-Editor Tutorial<br />
E. g. column Module No holds the currently adjusted device ID, 0 in<br />
this case. The field Version holds the firmware revision.<br />
Activity: Create a new empty configuration file using menu item<br />
File -> New.<br />
Reaction: A yet empty window appears where global CAN objects<br />
can be defined. Instructions on using that window (and editing its<br />
content) are given in exercise 3a.<br />
Activity: For creating a new configuration within the configuration<br />
file choose menu item Edit -> New Configuration:<br />
Reaction: PPCAN-Editor asks for the hardware to be configured.<br />
Information: PPCAN-Editor can configure several different PCAN<br />
devices, equipped with individual resources each. Therefore with<br />
each type of hardware a list of available resources is supplied by the<br />
manufacturer for each type of hardware: the so called hardware<br />
profile file (*.ppprf).<br />
14
PCAN-<strong>Router</strong> Pro – PPCAN-Editor Tutorial<br />
Activity: Choose the profile for the PCAN-<strong>Router</strong> Pro.<br />
Reaction: Besides the General tab a new tab has been created<br />
entitled with the configuration's name: Config0 I/O by default. Also<br />
the navigator (at the left window edge) now contains an additional<br />
icon named Config0.<br />
Activity: A double-click on this icon will open the configuration<br />
window. Here, e.g. default values for data objects can be set, like<br />
routing instructions etc. Change to Default values for data objects<br />
by selecting that tab. Then a new record must be added here by<br />
either selecting menu entry Edit -> Add record or selecting<br />
Add record from the context menu:<br />
15
PCAN-<strong>Router</strong> Pro – PPCAN-Editor Tutorial<br />
Activity: Cell content can be edited by either pressing F2, or by a<br />
slow double click, or by simply typing the new value. The entries<br />
should be set as follows:<br />
1. I/O-Function: SpecialOut (one group of resources).<br />
2. I/O-No: Routing 1 to 4 All.<br />
3. Default value: 3 = Sum of 1 (route 11 bit IDs only) and 2<br />
(route 29 bit IDs only).<br />
4. Information: Description of what this line does (helpful in<br />
later sessions).<br />
In this example, routing of messages from CAN-1 (source) to CAN-4<br />
(destination) is activated. A value of 3 means, that both the 11 bit<br />
IDs (1) as well as the 29 bit IDs (2) are forwarded (parameter values<br />
can be combined by addition). The I/O function for routing is located<br />
16
PCAN-<strong>Router</strong> Pro – PPCAN-Editor Tutorial<br />
in resource group 0x70 SpecialOut, which (among others) offers the<br />
following routing possibilities for CAN messages:<br />
Source is CAN 1 Source is CAN 2 Source is CAN 3 Source is CAN 4<br />
Routing 1 to 2 All Routing 2 to 1 All Routing 3 to 1 All Routing 4 to 1 All<br />
Routing 1 to 3 All Routing 2 to 3 All Routing 3 to 2 All Routing 4 to 2 All<br />
Routing 1 to 4 All Routing 2 to 4 All Routing 3 to 4 All Routing 4 to 3 All<br />
Routing 1 to CF All Routing 2 to CF All Routing 3 to CF All Routing 4 to CF All<br />
Routing 1 to 2 Routing 2 to 1 Routing 3 to 1 Routing 4 to 1<br />
explicit<br />
explicit<br />
explicit<br />
explicit<br />
Routing 1 to 3 Routing 2 to 3 Routing 3 to 2 Routing 4 to 2<br />
explicit<br />
explicit<br />
explicit<br />
explicit<br />
Routing 1 to 4 Routing 2 to 4 Routing 3 to 4 Routing 4 to 3<br />
explicit<br />
explicit<br />
explicit<br />
explicit<br />
Routing 1 to CF Routing 2 to CF Routing 3 to CF Routing 4 to CF<br />
explicit<br />
explicit<br />
explicit<br />
explicit<br />
Routing 1 to 2 Routing 2 to 1 Routing 3 to 1 Routing 4 to 1<br />
excluding<br />
excluding<br />
excluding<br />
excluding<br />
Routing 1 to 3 Routing 2 to 3 Routing 3 to 2 Routing 4 to 2<br />
excluding<br />
excluding<br />
excluding<br />
excluding<br />
Routing 1 to 4 Routing 2 to 4 Routing 3 to 4 Routing 4 to 3<br />
excluding<br />
excluding<br />
excluding<br />
excluding<br />
Routing 1 to CF Routing 2 to CF Routing 3 to CF Routing 4 to CF<br />
excluding<br />
excluding<br />
excluding<br />
excluding<br />
In this context, explicit means routing of the specified ID only and<br />
excluding means routing of everything except that ID. The use of<br />
these functions is demonstrated in the following exercises (1b and<br />
1c).<br />
Remark 1: Routing functions explicit und excluding only support 11<br />
bit IDs.<br />
Remark 2: CF card cannot be used as a data source (e.g. for<br />
Playbacks).<br />
Information: At this point, all the configuration work for solving the<br />
exercise is done.<br />
17
PCAN-<strong>Router</strong> Pro – PPCAN-Editor Tutorial<br />
Activity: Enter a title for this configuration in the field Remark. The<br />
configuration project file (*.ppproj) should be saved as Exercise 1a<br />
to your PC. To do so, please select the menu item File -> Save As.<br />
Activity: The configuration must be transmitted to the PCAN-<strong>Router</strong><br />
Pro via CAN bus (Upload). For this, select menu item<br />
Transmit -> Send Configuration or click the corresponding icon<br />
from the toolbar:<br />
Important Note: Ensure that the list box in the toolbar (upper<br />
window edge) shows the name of your configuration Config0.<br />
Reaction: While uploading, the "Output" window of the PPCAN-<br />
Editor shows lots of progress messages regarding the transmission<br />
protocol. Their meaning is explained in other documents.<br />
Reaction: The status LED of the PCAN-<strong>Router</strong> Pro flashes during the<br />
transmission and processing of the configuration file randomly.<br />
Thereafter, the status LED flashes green at 1 Hz and the PCAN-<br />
<strong>Router</strong> Pro is ready with its new configuration.<br />
Result: The PCAN-<strong>Router</strong> Pro will now transfer all incoming<br />
messages from CAN-1 unmodified to the CAN-4 (but not in the<br />
reverse direction, this must be specified in an additional record<br />
line).<br />
18
PCAN-<strong>Router</strong> Pro – PPCAN-Editor Tutorial<br />
4.2 Exercises 1b: Forwarding of defined<br />
messages from CAN-1 to CAN-4<br />
Information: Only ID 0x100 shall be routed from CAN-1 to CAN-4.<br />
Activity: Open the configuration created in exercise 1a and save as<br />
exercise 1b. In the navigator (left edge of the main window), doubleclick<br />
Config0. The dialog box configuration is shown, change to the<br />
tab Default values for data objects.<br />
Activity: Modify the existing entry from exercise 1a as shown:<br />
1. I/O-Function: SpecialOut (remains unchanged).<br />
2. I/O-No: Routing 1 to 4 explicit.<br />
3. Default Value: enter here the 11 bit ID to be routed<br />
(0..2047dez).<br />
4. Information: Description of what this line does (helpful in<br />
later sessions).<br />
Remark: Routing function explicit only support 11 bit IDs!<br />
Information: At this point, all the configuration work for solving the<br />
exercise is done.<br />
Activity: Save the configuration file as project exercise 1b to your<br />
PC.<br />
19
PCAN-<strong>Router</strong> Pro – PPCAN-Editor Tutorial<br />
Activity: Transmit (upload) the configuration to the PCAN-<strong>Router</strong><br />
Pro via CAN bus. As explained in the first exercise, see previous<br />
page for instruction.<br />
Result: All incoming messages at CAN-1 are ignored, only ID 0x100<br />
is routed to CAN-4.<br />
4.3 Exercise 1c: Forwarding of all<br />
messages from CAN-1 to CAN-4 with<br />
exceptions<br />
Information: Anything except ID 0x700 shall be forwarded from<br />
CAN-1 to CAN-4.<br />
Activity: Open configuration from exercise 1a and save as exercise<br />
1c. In the navigator (left edge of the main window), double-click<br />
Config0. The dialog box configuration is shown, change to the tab<br />
Default values for data objects.<br />
Activity: Modify the existing entry from exercise 1a as shown:<br />
1. I/O-Function: SpecialOut (remains unchanged).<br />
2. I/O-No: Routing 1 to 4 excluding.<br />
3. Default Value: enter here the 11 bit ID to be omitted<br />
(0..2047dec).<br />
20
PCAN-<strong>Router</strong> Pro – PPCAN-Editor Tutorial<br />
4. Information: Description of what this line does (helpful in<br />
later sessions).<br />
Remark: Routing function excluding only supports 11 bit IDs!<br />
Information: At this point, all the configuration work for solving the<br />
exercise is done.<br />
Activity: Save the configuration file as project exercise 1c to your<br />
PC.<br />
Activity: Transmit (upload) the configuration to the PCAN-<strong>Router</strong><br />
Pro via CAN bus.<br />
Result: PCAN-<strong>Router</strong> Pro forwards all 11 bit IDs coming in at CAN-1<br />
to CAN-4 except for ID 0x700, which is discarded (which also applies<br />
to all 29 bit IDs).<br />
4.4 Exercise 2a: Recording of all received<br />
messages to a binary Trace file on the<br />
CF card<br />
Activity: Open configuration from exercise 1a and save as exercise<br />
2a. In the navigator (left edge of the main window), double-click<br />
Config0. The dialog box configuration is shown, change to the tab<br />
Default values for data objects.<br />
Activity: Modify the existing entry from exercise 1a and create 4<br />
additional lines as shown:<br />
21
PCAN-<strong>Router</strong> Pro – PPCAN-Editor Tutorial<br />
1. I/O-Function: SpecialOut.<br />
2. Rows 1..4, I/O-No: Routing 1/2/3/4 to CF all.<br />
3. Default Value: 3 = Sum of 1 (route 11 bit IDs only) and 2<br />
(route 29 bit IDs only).<br />
4. Row 5, I/O-No: Trace enable (1 bit for each CAN channel).<br />
5. Default Value: 15 = Sum of 1 (CAN-1), 2 (CAN-2), 4 (CAN-3),<br />
and 8 (CAN-4).<br />
6. Information: Description of what this line does (helpful in<br />
later sessions).<br />
Information: At this point, all the configuration work for solving the<br />
exercise is done.<br />
Activity: Save the configuration file as project exercise 2a to your<br />
PC.<br />
Activity: Transmit (upload) the configuration to the PCAN-<strong>Router</strong><br />
Pro via CAN bus).<br />
Result: All messages coming in at the four CAN ports are forwarded<br />
to the CF card (logging function). Post processing is done later after<br />
transferring the log file to your PC (see exercise 2b).<br />
22
PCAN-<strong>Router</strong> Pro – PPCAN-Editor Tutorial<br />
Remark 1: Also the known routing functions explicit and excluding<br />
may be used (only support 11 bit IDs).<br />
Remark 2: The CF card is also accessible as CAN-5 (virtual CAN<br />
channel).<br />
Remark 3: The reverse direction (routing from CF card to the CAN<br />
ports, playback) is -not- possible.<br />
4.5 Exercise 2b: Conversion of the binary<br />
Trace file from the CF card to the PC<br />
Information: Using the CF management tool "<strong>PEAK</strong>-Converter"<br />
(comes along with the PCAN-<strong>Router</strong> Pro, or to be found on our<br />
website or the <strong>PEAK</strong> product CD), traces can be extracted from the<br />
CF card and converted to plain text (*.trc). This format is used by all<br />
<strong>PEAK</strong>-Applications (PCAN-Explorer, PCAN-Trace, etc.) for post<br />
processing.<br />
Activity: For data extraction, the CF card must be removed from the<br />
PCAN-<strong>Router</strong> Pro (only to be done when the device is plugged off or<br />
in sleep mode). The card is then inserted into your PC's card reader,<br />
and the contained binary file TRACE.BTR should be copied to your<br />
PC's local hard disk.<br />
23
PCAN-<strong>Router</strong> Pro – PPCAN-Editor Tutorial<br />
Activity: Now the binary Trace file (respectively the recorded traces)<br />
is processed with the CF management tool <strong>PEAK</strong>-Converter.<br />
Activity: Before re-inserting the CF card into the PCAN-<strong>Router</strong> Pro<br />
any content should be removed in order to have the full capacity<br />
available: Simply do a format with Windows Explorer and<br />
afterwards copy an empty TRACE.BTR file to the card. Such file is<br />
available in different sizes from the PCAN-<strong>Router</strong> Pro’s product CD.<br />
4.6 Exercise 3a: Definition of CAN<br />
messages, e.g. reading a system<br />
variable<br />
Activity: Create a new empty configuration file using menu item<br />
File -> New.<br />
Reaction: This will open an (yet empty) window for all the global<br />
CAN objects used later within the different configurations. If a file<br />
contains multiple configurations with different CAN objects, they all<br />
must be defined here. Later, they are imported selectively into the<br />
different configurations.<br />
24
PCAN-<strong>Router</strong> Pro – PPCAN-Editor Tutorial<br />
Reaction: In that window, one CAN bus is already defined: Bus_0,<br />
below which global CAN objects can be created hierarchically.<br />
Remember: This is just an example for a possible configuration.<br />
Definition: Bus 0 will be named <strong>Router</strong>_CAN-1, the field Bitrate is<br />
just for informational purposes. The CAN transceiver TJA1041<br />
(standard model) will work at 500 kbit/s by default.<br />
Activity: Double-click the name Bus_0 and enter a new name for it.<br />
Choose the default bit rate 500 kbit/s from the dropdown list (only<br />
as an information).<br />
1. Bus name: <strong>Router</strong>_CAN-1.<br />
2. Bit rate: 500 kbit/s (only as an information).<br />
3. Information: Description of what this line does (helpful in<br />
later sessions).<br />
Definition: On this bus, a CAN message mCfInfo shall be<br />
transmitted: 8 bytes length, CAN-ID = 0x205.<br />
Activity: Select entry Add a new Symbol from the context menu (by<br />
right-clicking <strong>Router</strong>_CAN-1). This defines a new message on the<br />
CAN bus <strong>Router</strong>_CAN-1, parameters of the message must be set as<br />
follows:<br />
25
PCAN-<strong>Router</strong> Pro – PPCAN-Editor Tutorial<br />
1. Symbol name: mCfInfo.<br />
2. ID: 0x205.<br />
3. DLC: 8 (message has 8 data bytes).<br />
4. Extended: No, 11 bit IDs are sufficent.<br />
5. Enabled: Yes.<br />
6. RTR: No, message shall be sent always (-not- only on<br />
request).<br />
7. Information: Description of what this line does.<br />
Definition: This message shall contain a 32 bit signal<br />
FreeTraceMemory (in the data bytes 5...8), that displays the<br />
available number of CAN messages to be stored on the CF card.<br />
Activity: Within the CAN message, a 32 bit wide data object must be<br />
created (= CAN signal), that holds the number of free places. From<br />
the context menu (right click on CAN message) select<br />
Add a new Variable and then supply the parameters of the signal:<br />
1. Variable name: FreeTraceMemory.<br />
2. Unit: no physical unit (only as an information).<br />
26
PCAN-<strong>Router</strong> Pro – PPCAN-Editor Tutorial<br />
3. Bit length: 32.<br />
4. Start Byte: 4 (by this, the signal is located in data bytes 5..8).<br />
5. Start Bit: 0.<br />
6. Signed: no, can’t be negative.<br />
7. Byte Order: Intel format (LSB in byte 0 bit 0, MSB in byte 3<br />
bit 7).<br />
8. Information: Description of what this line does.<br />
Information: The empty layout of the CAN message is hereby<br />
defined, but not yet assigned to a physical data source. Therefore a<br />
configuration must be created.<br />
Activity: Create an empty configuration within this file: select the<br />
menu item Edit -> New Configuration.<br />
Reaction: You’re asked for the hardware to be configured.<br />
Activity: Select the profile for a PCAN-<strong>Router</strong> Pro.<br />
Reaction: Besides the General tab, a new tab has been created<br />
entitled with the configuration's name: Config0 I/O by default. Also<br />
27
PCAN-<strong>Router</strong> Pro – PPCAN-Editor Tutorial<br />
the navigator (at the left window edge) now contains an additional<br />
icon named Config0.<br />
Activity: The globally defined CAN message shall be used in this<br />
configuration here. Therefore it must be imported. Click on the new<br />
tab Config0 I/O (for bringing it into the foreground) and select from<br />
the context menu (right click) Add defined Bus:<br />
28
PCAN-<strong>Router</strong> Pro – PPCAN-Editor Tutorial<br />
Reaction: The previously defined global CAN bus <strong>Router</strong>_CAN-1<br />
(along with his contained message mCfInfo and 32 bit variable<br />
FreeTraceMemory) will be imported into the configuration Config0.<br />
Activity: The defined bus <strong>Router</strong>_CAN-1 must get a CAN channel of<br />
the hardware (here: CAN channel #0):<br />
1. Channel-Number: 0 (the hardware CAN channels are<br />
numbered 0-3 internally).<br />
29
PCAN-<strong>Router</strong> Pro – PPCAN-Editor Tutorial<br />
Activity: Now the message must be supplied with physical<br />
parameters:<br />
1. Direction: Transmit (the PCAN-<strong>Router</strong> Pro shall be<br />
transmitter).<br />
2. Enable: Yes, this is the message to be transmitted.<br />
3. Period: 500 (the transmission cycle time in ms).<br />
Activity: The contained CAN signal must get a data source:<br />
1. I/O-Function: F0-Special In (this is the source: an internal<br />
firmware variable).<br />
2. I/O-Number: Trace File Msg Free (which is the name of the<br />
variable).<br />
3. Scale: 1 (no scaling at all, like multiplying with 1).<br />
4. Offset: 0 (no shifting at all, like addition of 0).<br />
5. Enable: Yes, this is the signal (within the message) to be<br />
used.<br />
30
PCAN-<strong>Router</strong> Pro – PPCAN-Editor Tutorial<br />
Information: At this point, all the configuration work for solving the<br />
exercise is done.<br />
Activity: Save the configuration file as project exercise 3a to your<br />
PC.<br />
Activity: Transmit (upload) the configuration to the PCAN-<strong>Router</strong><br />
Pro via CAN bus as shown in exercise 1a.<br />
Reaction: While uploading, the "Output" window of the PPCAN-<br />
Editor shows lots of progress messages regarding the transmission<br />
protocol. Their meaning is explained in other documents.<br />
Reaction: While transmitting and processing of the configuration,<br />
the status LED of the PCAN-<strong>Router</strong> Pro is blinking randomly. After<br />
automatic restart, the status LED blinks with 1 Hz and the PCAN-<br />
<strong>Router</strong> Pro has successfully started with your new configuration.<br />
Result: PCAN-<strong>Router</strong> Pro now transmits via CAN-1 a message with<br />
ID0x205, length 8 carrying the 32 bit value TraceFileMsgFree (which<br />
is an internal variable of the PCAN-<strong>Router</strong> Pro).<br />
With a PCAN-View connected to the same CAN network this<br />
message can be watched.<br />
The shown message shown here contains information that the trace<br />
memory of the CompactFlash card has still room for 390600 CAN<br />
message (= 0x0005F5C8).<br />
31
PCAN-<strong>Router</strong> Pro – PPCAN-Editor Tutorial<br />
4.7 Exercise 3b: Translating a CAN ID<br />
Information: For the conversion of a CAN message to a different ID<br />
first two messages must be globally defined and imported into a<br />
new configuration. The buttons, menus, and clicks for doing this are<br />
already known from the previous exercises.<br />
Definition: The contents of the incoming message 0x321 shall be<br />
transferred unchanged to the outgoing message 0x12345678. This<br />
transmit message will additionally be sent with ID 0x5FF on CAN-4.<br />
Activity: Global definition of two CAN busses <strong>Router</strong>_CAN-1 and<br />
<strong>Router</strong>_CAN-4, as well as 3 messages (Add a new Symbol):<br />
Activity: Global definition of a 32 bit signal (Add a new Variable)<br />
within each of the 3 messages:<br />
32
PCAN-<strong>Router</strong> Pro – PPCAN-Editor Tutorial<br />
Activity: Creating a new configuration with Edit -> New<br />
Configuration (incl. selecting the hardware profile PCAN-<strong>Router</strong><br />
Pro).<br />
Activity: Import of the globally defined CAN objects into the tab<br />
Config0 I/O. To do so, open (right click) the context menu and select<br />
Add defined Bus. In the selection window choose the busses<br />
<strong>Router</strong>_CAN-1 and <strong>Router</strong>_CAN-4 one by one.<br />
Activity: Assigning hardware channels to the busses:<br />
1. Channel-Number: 0 (for <strong>Router</strong>_CAN-1) and 3 (for<br />
<strong>Router</strong>_CAN-4).<br />
Activity: Enter the parameters for the 3 messages:<br />
33
PCAN-<strong>Router</strong> Pro – PPCAN-Editor Tutorial<br />
1. Direction: one incoming message 0x321 (Receive), two<br />
outgoing messages 0x12345678 und 0x5FF (Transmit).<br />
2. Enable: Yes, all these messages shall be used.<br />
3. Period: 50 (transmission cycle time in ms).<br />
Activity: Enter the parameters for the 3 signals:<br />
1. I/O-Function: FFh 32 bit variable (used for temporary storage<br />
of the content).<br />
2. I/O-Number: 0 (256 of these RAM variables are available).<br />
3. Scale: 1 (no scaling at all, like multiplying with 1).<br />
4. Offset: 0 (no shifting at all, like addition of 0).<br />
5. Enable: Yes, all these signals (within the messages) shall be<br />
used.<br />
34
PCAN-<strong>Router</strong> Pro – PPCAN-Editor Tutorial<br />
Information: At this point, all the configuration work for solving the<br />
exercise is done.<br />
Activity: Save the configuration file as project exercise 3b to your<br />
PC.<br />
Activity: Transmit (upload) the configuration to the PCAN-<strong>Router</strong><br />
Pro via CAN bus.<br />
Activity: From PCAN-View or PCAN-Explorer, a 4 byte CAN message<br />
with ID 0x321 is sent into PCAN-<strong>Router</strong> Pro’s CAN-1 with data bytes<br />
containing an eye-catching pattern.<br />
Result: CAN-1 and CAN-4 will transmit messages 0x12345678 and<br />
0x5FF cyclically with the same data pattern.<br />
Information: Receive message 0x321 included a 32 bit value<br />
(0x0555A5F5) which is assigned to RAM variable # 0 within the<br />
PCAN-<strong>Router</strong> Pro. When transmitting message 0x12345678 and<br />
35
PCAN-<strong>Router</strong> Pro – PPCAN-Editor Tutorial<br />
0x5FF, the content of this variable # 0 is read back and stored into<br />
the transmit message. It may be stored on any position within the<br />
messages and may previously be scaled or modified by<br />
mathematical means.<br />
4.8 Exercise 3c: (Variation 3b)<br />
Transmission only if source message<br />
was received<br />
Information: Another feature is sending CAN messages, e. g. only if<br />
message 0x321 was really received, or its content has changed. As a<br />
variation of the previous exercise, the messages 0x5FF and<br />
0x12345678 are transmitted only if a source message 0x321 was<br />
received.<br />
Activity: First, in the window CAN Objects, tab Config0 I/O set<br />
period values to 0, thus switching off cyclic transmission:<br />
1. Period: 0 (no cyclic transmission).<br />
Activity: Instead, create two new entries in window Config0, tab<br />
Message Gateway: To do so, open the context menu (right click)<br />
and select Add Record. Enter the parameters of the ID 0x12345678<br />
as follows:<br />
36
PCAN-<strong>Router</strong> Pro – PPCAN-Editor Tutorial<br />
1. Source-Bus: Bus#0 (= <strong>Router</strong>_CAN-1).<br />
2. Source-Message-ID: ID 0x321 (in 11 bit format).<br />
3. Destination-Bus: Bus#0 (= <strong>Router</strong>_CAN-1).<br />
4. Destination-Message-ID: ID 0x12345678 (in 29 bit format).<br />
5. Enable I/O-Function: this routing shall -always- be active, so<br />
set it constantly.<br />
6. Enable I/O-Number: set to value 1.<br />
7. Mode: Direct copy (whenever something is received).<br />
8. Mode I/O Function: not implemented yet, do not change.<br />
9. Mode I/O Number: not implemented yet, do not change.<br />
10. Mode Params: not implemented yet, do not change.<br />
11. Information: Description of what this line does.<br />
37
PCAN-<strong>Router</strong> Pro – PPCAN-Editor Tutorial<br />
Activity: Then enter the parameters for the ID 0x5FF (on the 4 th bus)<br />
as follows:<br />
1. Source-Bus: Bus#0 (= <strong>Router</strong>_CAN-1).<br />
2. Source-Message-ID: ID 0x321 (in 11 bit format).<br />
3. Destination-Bus: Bus#3 (= <strong>Router</strong>_CAN-2).<br />
4. Destination-Message-ID: ID 0x5FF (in 11 bit format).<br />
Information: At this point, all the configuration work for solving the<br />
exercise is done.<br />
Activity: Save the configuration file as project exercise 3c to your<br />
PC.<br />
Activity: Transmit (upload) the configuration to the PCAN-<strong>Router</strong><br />
Pro via CAN bus.<br />
Result: When sending a message with ID 0x321 to the PCAN-<strong>Router</strong><br />
Pro, the contained data is forwarded in message ID 0x12345678 on<br />
CAN-1 and also in message ID 0x5FF on CAN-4:<br />
38
PCAN-<strong>Router</strong> Pro – PPCAN-Editor Tutorial<br />
4.9 Exercise 3d: (Variation 3a)<br />
Transmission only on Remote Request<br />
Information: Based on exercise 3a the internal variable<br />
FreeTraceMemory shall be transmitted on external request (RTR =<br />
Remote Transmission Request).<br />
Activity: Open the configuration from exercise 3a and save it as<br />
exercise 3d. In tab General modify the CAN message to<br />
Transmission Request by setting the RTR check for that symbol:<br />
39
PCAN-<strong>Router</strong> Pro – PPCAN-Editor Tutorial<br />
1. RTR: activate Remote Transmission Request.<br />
Activity: In tab Config0 I/O set period value 0, thus switching off<br />
cyclic transmission:<br />
1. Period: 0 (no more cyclic transmission).<br />
Information: At this point, all the configuration work for solving the<br />
exercise is done.<br />
Activity: Save the configuration file as project exercise 3d to your<br />
PC.<br />
Activity: Transmit (upload) the configuration to the PCAN-<strong>Router</strong><br />
Pro via CAN bus.<br />
Result: CAN message mCfInfo with ID 0x205 is transmitted only, if<br />
previously a request with ID 0x205 and length = 0 was received.<br />
40
PCAN-<strong>Router</strong> Pro – PPCAN-Editor Tutorial<br />
4.10 Exercise 4a: Manipulating CAN signals<br />
using SCALE and OFFSET<br />
Information: With the parameters Scale and Offset values from a<br />
CAN bus can be manipulated like using the four basic arithmetics,<br />
all without a definition of a function block. For example, an<br />
increasing 8 bit value (rising ramp) can be inverted (falling ramp):<br />
0x00..0xFF > 0xFF..0x00. To do so, the original value from the<br />
incoming message is written into a 32 bit variable (there is not a<br />
smaller type), and when writing to the output message, this value is<br />
processed with Scale = -1 and Offset = 255. As an alternative, the<br />
incoming value can be processed immediately (before writing it to<br />
the 32 bit variable), and is then passed on to the CAN message<br />
directly. Important: You have to take care, that the manipulated<br />
result value – under all conditions - fits into the 32 bit size.<br />
Activity: Create an empty configuration file using menu item<br />
File -> New. In the General tab add two symbols (CAN messages) to<br />
the already existing bus 0:<br />
41
PCAN-<strong>Router</strong> Pro – PPCAN-Editor Tutorial<br />
Then, each message will get a 8 bit variable (= CAN signal) using<br />
the context menu:<br />
Activity: Create a new configuration within the file (HW profile:<br />
PCAN-<strong>Router</strong> Pro) and import all CAN objects from the General tab,<br />
e.g. by dragging a complete bus with all underlying objects from<br />
the General tab and drop it onto the configuration tab's name<br />
"Config I/O". The parameters then should be entered to meet this<br />
scenario: A message 0x100 is received, the contained signal is<br />
written into a 32 bit variable #0. A message 0x200 is transmitted<br />
cyclically (100 msec), the contained signal is taken from the 32 bit<br />
variable #0, inverted (Scale = -1) and lifted (Offset=255):<br />
42
PCAN-<strong>Router</strong> Pro – PPCAN-Editor Tutorial<br />
1. Direction: 0x100 is received, 0x200 is transmitted by the<br />
PCAN-<strong>Router</strong> Pro.<br />
2. Enable: Yes.<br />
3. Period: 100 (transmission cycle time in ms).<br />
Information: At this point, all the configuration work for solving the<br />
exercise is done.<br />
Activity: Save the configuration file as project exercise 4a to your<br />
PC.<br />
Activity: Transmit (upload) the configuration to the PCAN-<strong>Router</strong><br />
Pro via CAN bus.<br />
Result: The values contained in the receive message 0x100 (data<br />
byte 0) are transmitted as y=(-1)*x+255 resp. y=255-x in message<br />
0x200. A rising ramp (increasing x values) is converted into a falling<br />
ramp (decreasing y values).<br />
43
PCAN-<strong>Router</strong> Pro – PPCAN-Editor Tutorial<br />
4.11 Exercise 4b: Manipulating CAN signals<br />
using Function block Characteristic<br />
curve<br />
Definition: The temperature of a motor’s cooling fluid shall be<br />
represented as constantly 90 °C, even if the real coolant<br />
temperature varies between 80 °C and 105 °C. Such plateau is often<br />
implemented for smoothing of analog meters. In case the real<br />
temperature leaves the specified range (e.g. motor defect), it shall<br />
be displayed directly.<br />
Information: For implementing such a behavior, the function block<br />
"characteristic curve" is suitable. It recalculates any incoming value<br />
by means of a X->Y list (thus creating that plateau).<br />
In the following example, 32 bit variable #0 holds the raw input<br />
value, which is given to the characteristic curve as input, whereas<br />
32 bit value #1 gets the result of the conversion. That smoothed<br />
value is then transmitted in a separate CAN message.<br />
Activity: As with the previous example, create an empty<br />
configuration file using menu item File -> New, then add two<br />
symbols (= CAN messages) with an 8 bit variable (= CAN signal)<br />
each:<br />
44
PCAN-<strong>Router</strong> Pro – PPCAN-Editor Tutorial<br />
1. CAN-ID: 0x100 for the incoming raw value, 0x200 for the<br />
outgoing display value (with plateau).<br />
2. DLC: Both CAN messages are 1 byte of lenght.<br />
3. Enable: Yes.<br />
1. Bit Length: 8 (value range 256 sufficient).<br />
2. Signed: no, always positive.<br />
Activity: As in the previous example, please create a new<br />
configuration within the file (HW profile: PCAN-<strong>Router</strong> Pro) and<br />
import all CAN objects from the General tab:<br />
45
PCAN-<strong>Router</strong> Pro – PPCAN-Editor Tutorial<br />
1. Direction: 0x100 is received, 0x200 is transmitted.<br />
2. Enable: Yes.<br />
3. Period: 500 ms (= cycle time for the transmit message<br />
carrying the converted coolant temperature signal).<br />
I/O-Function, I/O-Number: The signal RealTemperature from<br />
message 0x100 is transferred into variable #0, the modified result<br />
WithPlateau is transferred with message 0x200.<br />
Information: The assignment of the raw value (variable # 0 to the<br />
smoothed result variable #1) is defined in a characteristic curve (a<br />
list of X/Y pairs). A function block characteristic curve is needed to<br />
manage the conversion using this list. The following table defines<br />
all points needed to create the mentioned plateau (X values other<br />
than the listed ones are linearly interpolated):<br />
46
PCAN-<strong>Router</strong> Pro – PPCAN-Editor Tutorial<br />
X Y<br />
Curve point 0 X=0 Y=0<br />
Curve point 1 X=75 Y=75<br />
Curve point 2 X=85 Y=90<br />
Curve point 3 X=105 Y=90<br />
Curve point 4 X=110 Y=110<br />
Curve point 5 X=255 Y=255<br />
Activity: These values are now entered as a characteristic curve. To<br />
do so, open the configuration window in the navigator (left edge of<br />
the main window), double-click Config0, then change to tab<br />
Characteristic curve, open the context menu there (right click) and<br />
choose menu item Add Record.<br />
Reaction: A new table row appears, representing a characteristic<br />
curve. This curve must be filled with the mentioned values:<br />
1. Curve-ID: 13 (a number chosen at random).<br />
2. Point Count: 6 (number of X/Y points on the curve).<br />
3. Pairs of values 0..5: The Characteristic curve (values taken<br />
from the table above). Further entries are not used and<br />
contain 0 / 0.<br />
Important Note: X value must be entered in strictly ascending<br />
order!<br />
47
PCAN-<strong>Router</strong> Pro – PPCAN-Editor Tutorial<br />
Information: Finally, you must manage the assignment of the<br />
incoming raw value to the characteristic curve’s X axis and also of<br />
the resulting Y value (= result) to variable #1, which is<br />
subsequentially transmitted onto CAN. For this, a special function<br />
block Characteristic curve is needed, which handles that conversion.<br />
Activity: For creating a new function block, focus on tab Function<br />
blocks, open context menu (right click), and choose menu item<br />
Add Record.<br />
Reaction: A new line appears, representing a function block. This<br />
line must be supplied with values.<br />
Information: Basically, each function block has two inputs<br />
(operands) and one output (result), each of the three consisting of<br />
an I/O type and a I/O number. Additional there is a main switch<br />
(enable) and a cycle time (With what frequency is this block recalculated,<br />
in ms).<br />
Remark: In the function block Characteristic Curve the second input<br />
is always unused.<br />
Activity: The function block is supplied as follows:<br />
1. Function Code: Characteristic curve (a special function block<br />
for this purpose).<br />
2. Enable: Yes, this function block shall be active.<br />
48
PCAN-<strong>Router</strong> Pro – PPCAN-Editor Tutorial<br />
3. Input1: FF-32 bit variable, 0 (X value comes from 32 bit<br />
variable #0).<br />
4. Input2: F0-Special In, none (= unused).<br />
5. Output: FF-32 bit variable, 1 (Y result is written to 32 bit<br />
variable #1).<br />
6. Parameter: 13 (number of the already defined characteristic<br />
curve). When clicking the field, the following dialog window<br />
appears.<br />
7. Enter the number of the already defined characteristic curve<br />
in column Value. Confirm with Close.<br />
8. Cycle time: 100 (conversion of the raw value takes place<br />
every 100 ms).<br />
Information: At this point, all the configuration work for solving the<br />
exercise is done.<br />
Activity: Save the configuration file as project exercise 4b to your<br />
PC.<br />
Activity: Transmit (upload) the configuration to the PCAN-<strong>Router</strong><br />
Pro via CAN bus.<br />
Result: A continuously rising input value (from message 0x100) is<br />
superimposed with a plateau and then forwarded (to message<br />
0x200).<br />
49
PCAN-<strong>Router</strong> Pro – PPCAN-Editor Tutorial<br />
Information: With the help of a PCAN-Explorer (Part No. IPES-<br />
005028) with an Instrument Panel Add-in (Part No. IPES-005028), the<br />
values can be represented graphically.<br />
4.12 Exercise 5a: LED activity on CAN<br />
reception and transmission<br />
Information: Reception and transmission of CAN messages can be<br />
visualized. For this, the PCAN-<strong>Router</strong> Pro is equipped with two LEDs<br />
per channel. In this exercise, the LEDs shall indicate CAN activity,<br />
separated by direction Rx and Tx.<br />
Activity: Create an empty configuration project file by using menu<br />
item File -> New.<br />
Activity: Create a new configuration within the configuration project<br />
file using menu item Edit -> New Configuration.<br />
50
PCAN-<strong>Router</strong> Pro – PPCAN-Editor Tutorial<br />
Activity: Activate the configuration window (by clicking the icon<br />
Config0 at the left window edge). Select the tab Function Blocks and<br />
create a new entry for each LED. To do so, use menu item Add<br />
Record from the context menu:<br />
1. Function Code: Identity (a variable’s content is copied into<br />
another).<br />
2. Enable: Yes, this function block shall be active.<br />
3. Input 1: <strong>System</strong> variable Special In, TrafficIndicator (active<br />
for 100 ms).<br />
4. Input 2: F0-Special In and none (= unused).<br />
5. Output: Dout-Level and the appropriate LED number.<br />
6. Parameter: not necessary.<br />
7. Cycle time: 100 (refresh of LED status every 100 ms, it is not<br />
the lucent period).<br />
Remark: The LEDs lucent period of 100 ms is hardcoded witin the<br />
firmware and can’t be changed. The identity Function blocks cycle<br />
time therefore cannot be used to affect the LED behavior.<br />
Activity: Last thing to do is the declaration of routing all the<br />
messages incoming at CAN-1 to CAN-4 and vice versa. The<br />
appropriate settings are done in tab Default values for data objects:<br />
51
PCAN-<strong>Router</strong> Pro – PPCAN-Editor Tutorial<br />
1. I/O-Function: SpecialOut (one group of device functions).<br />
2. I/O-No: Routing 1 to 4 All and Routing 4 to 1 All.<br />
3. Default value: 3 = Sum of 1 (only routes 11 bit IDs)<br />
and 2 (only routes 29 bit IDs).<br />
4. Information: Description of what this line does.<br />
Information: At this point, all the configuration work for solving the<br />
exercise is done.<br />
Activity: Save the configuration file as project exercise 5a to your<br />
PC.<br />
Activity: Transmit (upload) the configuration to the PCAN-<strong>Router</strong><br />
Pro via CAN bus.<br />
Result: At reception or transmission of a CAN message the assigned<br />
LED will be lit for 100 ms.<br />
52
PCAN-<strong>Router</strong> Pro – PPCAN-Editor Tutorial<br />
4.13 Exercise 5b: Controlling LED manually<br />
or conditionally<br />
Information: From bus <strong>Router</strong>_CAN-1 a 1-byte message mLED shall<br />
be received, containing an analog value LedByte (0..255). If this<br />
value exceeds 127, the LED shall be lit, dark otherwise.<br />
Activity: Create an empty configuration project file by using menu<br />
item File -> New. Globally define a receive message mLED (0x333)<br />
containing an 8 bit CAN signal LedByte:<br />
1. CAN-ID: 0x333.<br />
2. DLC: 1 (the CAN messages has a length of 1 byte).<br />
3. Enable: Yes.<br />
1. Bit Length: 8 (256 values sufficient).<br />
2. Signed: no, never negative.<br />
53
PCAN-<strong>Router</strong> Pro – PPCAN-Editor Tutorial<br />
Activity: Create a new configuration within the project file: for this,<br />
use menu item Edit -> New Configuration. Then import the receive<br />
message into the new configuration and finally enter the<br />
parameters:<br />
1. Direction: 0x333 will come in (Receive).<br />
2. Enable: Yes.<br />
I/O-Function, I/O-Number: The signal LedByte from the message<br />
0x333 is transferred into the variable #0.<br />
Activity: Open the configuration window (by clicking icon Config0 at<br />
the left window edge) and select tab Function blocks. From the<br />
context menu, use Add Record to create 4 new Function blocks:<br />
54
PCAN-<strong>Router</strong> Pro – PPCAN-Editor Tutorial<br />
Line 1:<br />
1. Function block: Math Function (IF).<br />
2. Enable: Yes.<br />
3. Input#1 I/O-Function: 32 bit variable.<br />
4. Input#1 I/O-Number: 0.<br />
5. Input#2 I/O-Function: constant.<br />
6. Input#2 I/O-Number: value is 127.<br />
7. Output I/O-Function: unused (do not change).<br />
8. Output I/O-Number: unused (do not change).<br />
9. Parameter: Compare, whether In1 is greater equal 127: If<br />
YES, then execute next line (switch on LED). If NO, then skip<br />
1 line. Following dialog window appears:<br />
The type of Math function block may chosen from a list:<br />
click – slowly - the Value field twice for opening the list.<br />
55
PCAN-<strong>Router</strong> Pro – PPCAN-Editor Tutorial<br />
Line 2:<br />
Line 3:<br />
Parameters below must be entered directly. Confirm with<br />
Close.<br />
10. Cycle: This Function block is processed every 25 ms.<br />
1. Function block: Identity (copy 1:1).<br />
2. Enable: Yes.<br />
3. Input#1 I/O-Function: constant.<br />
4. Input#1 I/O-Number: value is 1.<br />
5. Input#2 I/O-Function: unused (do not change).<br />
6. Input#2 I/O-Number: unused (do not change).<br />
7. Output I/O-Function: is written to the following hardware<br />
resource.<br />
8. Output I/O-Number: LED CAN-1a.<br />
9. Parameter: none.<br />
10. Cycle: this Function block is processed every 25 ms.<br />
1. Function block: Math Function (ELSE respectively an IF with<br />
reversed condition).<br />
2. Enable: Yes.<br />
3. Input#1 I/O-Function: 32 bit variable.<br />
4. Input#1 I/O-Number: #0.<br />
5. Input#2 I/O-Function: constant.<br />
6. Input#2 I/O-Number: value is 127.<br />
7. Output I/O-Function: unused (do not change).<br />
8. Output I/O-Number: unused (do not change).<br />
56
PCAN-<strong>Router</strong> Pro – PPCAN-Editor Tutorial<br />
Line 4:<br />
9. Parameter: Compare, whether In1 is less than 127: If YES,<br />
then execute the next line (switch off LED). If NOT, then skip<br />
1 line.<br />
10. Cycle: this Function block is processed every 25 ms.<br />
1. Function block: Identity (copy 1:1).<br />
2. Enable: Yes.<br />
3. Input#1 I/O-Function: constant.<br />
4. Input#1 I/O-Number: value is 0.<br />
5. Input#2 I/O-Function: unused (do not change).<br />
6. Input#2 I/O-Number: unused (do not change).<br />
7. Output I/O-Function: is written to the following hardware<br />
resource.<br />
8. Output I/O-Number: LED CAN-1a.<br />
9. Parameter: none.<br />
10. Cycle: this Function block is processed every 25 ms.<br />
Information: At this point, all the configuration work for solving the<br />
exercise is done.<br />
Activity: Save the configuration file as project exercise 5b to your<br />
PC.<br />
Activity: Transmit (upload) the configuration to the PCAN-<strong>Router</strong><br />
Pro via CAN bus.<br />
Result: Receiving values up to 0x7F will switch off the LED-1a,<br />
values of 0x80 and beyond will switch it on.<br />
57
PCAN-<strong>Router</strong> Pro – PPCAN-Editor Tutorial<br />
4.14 Exercise 5c: Controlling LED<br />
externally<br />
Information: For remote switching of a LED it is sufficient to receive<br />
a 1 bit signal from CAN. This signal is then assigned to the internal<br />
resource Dout-Level -> LED CAN-1a.<br />
Activity: Create an empty configuration file using menu item<br />
File -> New. Define a reception message mSwitch (0x111) carrying a<br />
1 bit CAN signal:<br />
Activity: Create a new configuration within the file, import the<br />
globally defined CAN message and enter the parameters:<br />
1. Direction: Receive (since switch value comes in from CAN).<br />
2. I/O-Function: DOut-Level (internal hardware resource).<br />
3. I/O-Number: LED CAN-1a.<br />
Information: At this point, all the configuration work for solving the<br />
exercise is done.<br />
Activity: Save the configuration file as project exercise 5c to your<br />
PC.<br />
58
PCAN-<strong>Router</strong> Pro – PPCAN-Editor Tutorial<br />
Activity: Transmit (upload) the configuration to the PCAN-<strong>Router</strong><br />
Pro via CAN bus.<br />
Result: Via transmitting the corresponding bit the LED can be<br />
switched on or off.<br />
Tip: When expanding the example to 8 LEDs and you own a<br />
PCAN-Explorer (Part No. IPES-005028), a symbol file can be<br />
created (see the appropriate manual) containing each switch<br />
value in symbolic form.<br />
{SEND}<br />
[mSwitch]<br />
ID=111h<br />
Picture=---b---a ---d---c ---f---e ---h---g<br />
a=TxLedCan1 bit<br />
b=RxLedCan1 bit<br />
c=TxLedCan2 bit<br />
d=RxLedCan2 bit<br />
e=TxLedCan3 bit<br />
f=RxLedCan3 bit<br />
g=TxLedCan4 bit<br />
h=RxLedCan4 bit<br />
Remark: With the help of a PCAN-Explorer (Part No. IPES-005028)<br />
and the Instruments Panel Add-in (Part No. IPES-005028), a<br />
graphical interface for the visualization of the switch can easily be<br />
created.<br />
59
PCAN-<strong>Router</strong> Pro – PPCAN-Editor Tutorial<br />
4.15 Exercise 5d: Controlling Beeper<br />
(continuous tone)<br />
Information: Similar to the activation of a LED, a continuous tone (or<br />
a short pattern) from the internal beeper can be also be controlled<br />
externally.<br />
Activity: Configuring of the PCAN-<strong>Router</strong> Pro in a way that the 32 bit<br />
receive signal (from CAN) is written directly to firmware resource<br />
BeeperPattern:<br />
1. I/O Function: Special Out.<br />
2. I/O Number: Beeper Pattern.<br />
60
PCAN-<strong>Router</strong> Pro – PPCAN-Editor Tutorial<br />
3. Enable: Yes.<br />
Information: At this point, all the configuration work for solving the<br />
exercise is done.<br />
Activity: Save the configuration file as project exercise 5d to your<br />
PC.<br />
Activity: Transmit (upload) the configuration to the PCAN-<strong>Router</strong><br />
Pro via CAN bus.<br />
Information: When creating a tone pattern, user must calculate a<br />
32 bit value first.<br />
Structure of this value is as follows:<br />
The upper 24 bit will define the tone pattern.<br />
The lower 5 bit will declare, how many of these bits are already played.<br />
In between there are 2 bits unused and 1 bit decides whether the pattern is<br />
played endlessly (1=continuous) or only once (0=one-shot).<br />
Playback speed is 100 ms per bit.<br />
Example: Programming of a continuous tone:<br />
10000000.00000000.00000000.00100001<br />
mmmmmmmm.mmmmmmmm.mmmmmmmm = 1* 100ms tone<br />
.uu = unused<br />
W = 0=OneShot; 1=endless repeat<br />
lllll = Pattern length: 1 bit<br />
Duration: 24 *100 ms = 2,4 s<br />
Pattern: 0x80. 0x00. 0x00. 0x21<br />
Activity: Send this pattern to the PCAN-<strong>Router</strong> Pro using a PCAN-<br />
View or PCAN-Explorer:<br />
0x100-8-"21 00 00 80 00 00 00 00", 0<br />
For switching it off, send a pattern with all bits set to 0:<br />
0x100-8-"00 00 00 00 00 00 00 00", 0<br />
61
PCAN-<strong>Router</strong> Pro – PPCAN-Editor Tutorial<br />
4.16 Exercise 5e: Controlling the Beeper<br />
(tone sequence)<br />
Information: Based on the configuration from exercise 5d, different<br />
tone pattern may be generated.<br />
Example: Programming the SMS Morse code:<br />
10000000.00000000.00000000.00100001<br />
mmmmmm = S (6 bit used)<br />
mm.mmmmmm = M (8 bit used)<br />
mm.mmmm = S (6 bit used)<br />
mmmm. = Pause=4*100 ms (4 bit used)<br />
uu = unused<br />
w = 0=OneShot, 1=endless repeat<br />
lllll = Pattern length: 24 bit<br />
Duration: 24 *100 ms = 2,4 s<br />
Pattern: 0xAB. 0x32. 0xA0. 0x1F<br />
Activity: Send this pattern to the PCAN-<strong>Router</strong> Pro using a PCAN-<br />
View or PCAN-Explorer:<br />
0x100-8-"1F A0 32 AB 00 00 00 00", 0<br />
For switching it off, send a pattern with all bits set to 0:<br />
0x100-8-"00 00 00 00 00 00 00 00", 0<br />
62
PCAN-<strong>Router</strong> Pro – PPCAN-Editor Tutorial<br />
Tip: The 32 bit value for a beep pattern (like the one from<br />
exercise 5e) can be stored as a constant value in tab Default<br />
values for data objects. To do so, a 32 bit variable is supplied<br />
with the calculated bit pattern and remains unchanged further<br />
on. When defining several different patterns here, then<br />
incoming CAN selector or a calculation result can decide which<br />
pattern to be played.<br />
Remark 1: As the current pattern is bigger than 31 bit, the<br />
assignment to a variable must be done in 2’s complement (since the<br />
PPCAN-Editor only accepts SIGNED variables in tab Default values<br />
for data object).<br />
Open Windows accessory Calculator:<br />
Switch display mode to HEX<br />
Adjust width to Dword (=32 Bit)<br />
Enter the number: AB32A01F<br />
Change the sign: +/-<br />
Switch display mode to DEZ<br />
Again, change the sign: +/-<br />
Result = -1422745569 (Enter this value into the PPCAN-Editor)<br />
Open the configuration window in the navigator (left edge of the<br />
main window) by double-clicking Config0. Change to the tab Default<br />
values for data objects:<br />
63
PCAN-<strong>Router</strong> Pro – PPCAN-Editor Tutorial<br />
1. I/O-Function: Special Out.<br />
2. I/O-Number: Beeper Pattern.<br />
3. Default Value: -1422745569.<br />
Remark 2: The continuous tone as explained in exercise 5d must be<br />
entered as value -2147483615 in the PPCAN-Editor’s default values.<br />
4.17 Exercise 6a: Reading date and time<br />
(Hardware Diagnostics)<br />
Information: Date and time in the PCAN-<strong>Router</strong> Pro are supplied by<br />
a hardware RealTimeClock. The values can be read from the internal<br />
variables and subsequently be transmitted via CAN, e.g. for display<br />
purpose.<br />
Activity: Definition of two transmit messages (length = 4 each),<br />
which are cyclically filled by the PCAN-<strong>Router</strong> Pro with date and<br />
time values and transmitted on CAN bus <strong>Router</strong>_CAN-1.<br />
64
PCAN-<strong>Router</strong> Pro – PPCAN-Editor Tutorial<br />
Information: At this point, all the configuration work for solving the<br />
exercise is done.<br />
Activity: Save the configuration file as project exercise 6a to your<br />
PC.<br />
Activity: Transmit (upload) the configuration to the PCAN-<strong>Router</strong><br />
Pro via CAN bus.<br />
Information: With the help of a PCAN-Explorer (Part No. IPES-<br />
005028), the packed structures of the RTC can be displayed in plain<br />
text, when decoded by means of a symbol file.<br />
{SEND}<br />
[mDate]<br />
ID=101h<br />
// Byte 0 Byte 1 Byte 2 Byte 3 Byte 4 Byte 5 Byte 6 Byte 7<br />
// 76543210 76543210 76543210 76543210 76543210 76543210 76543210 76543210<br />
Picture=yyyyyyyy mmmmmmmm dddddddd nnnn----<br />
y=year unsigned<br />
m=month unsigned<br />
d=dayofmonth unsigned<br />
n=dayofweek unsigned<br />
[mTime]<br />
ID=102h<br />
// Byte 0 Byte 1 Byte 2 Byte 3 Byte 4 Byte 5 Byte 6 Byte 7<br />
// 76543210 76543210 76543210 76543210 76543210 76543210 76543210 76543210<br />
Picture=ffffffff ssssssss mmmmmmmm hhhhhhhh<br />
f=fractseconds unsigned<br />
s=seconds unsigned<br />
m=minutes unsigned<br />
h=hours unsigned<br />
By applying this symbol file, messages transmitted from the<br />
PCAN-<strong>Router</strong> Pro are decoded as follows:<br />
65
PCAN-<strong>Router</strong> Pro – PPCAN-Editor Tutorial<br />
4.18 Exercise 6b: Setting date and time<br />
(Hardware Diagnostics)<br />
Information: For adjusting the RealTimeClock, all elements for date<br />
and time are supplied in separate values, there is no packed<br />
structure like when reading time and date (see exercise 6a).<br />
Definition: 3 separate messages are to be implemented for date,<br />
time, and the activation command. Each firmware variables therein<br />
is 8 bit wide:<br />
Information: At this point, all the configuration work for solving the<br />
exercise is done.<br />
Activity: Save the configuration file as project exercise 6b to your<br />
PC.<br />
66
PCAN-<strong>Router</strong> Pro – PPCAN-Editor Tutorial<br />
Activity: Transmit (upload) the configuration to the PCAN-<strong>Router</strong><br />
Pro via CAN bus.<br />
Result: If these (properly supplied) CAN messages are now sent to<br />
PCAN-<strong>Router</strong> Pro, the internal RealTimeClock may be adjusted to an<br />
actual value:<br />
Remark: The shown message will set the RTC to<br />
Thursday, 18. February 2010, 12:29:30.<br />
4.19 Exercise 6c: Reading the module ID<br />
(Hardware Diagnostics)<br />
Information: The module ID is a 4 bit value, which is set to 0 by<br />
default, but can be changed inside of the PCAN-<strong>Router</strong> Pro by<br />
means of a rotary switch. The ID has several functions. For example,<br />
it selects one from several configurations contained in a PPCAN<br />
project file according to the switch position.<br />
When experiencing unexpected behavior of your freshly edited<br />
configuration, one of the first steps in trouble-shooting is<br />
determination of the module ID. It sometimes happens that a<br />
configuration is edited again and again without success, since each<br />
time a different one is executed by the PCAN-<strong>Router</strong> Pro.<br />
Definition: Transmitting a CAN message mDiag with ID 0x500,<br />
length 8 bytes on the bus <strong>Router</strong>_CAN-1. This message contains the<br />
67
PCAN-<strong>Router</strong> Pro – PPCAN-Editor Tutorial<br />
4 bit signal ModuleID, which displays the current position of the<br />
module ID rotary switch.<br />
Activity: Create a new CAN message mDiag at the General tab<br />
(length = 8 bytes):<br />
Creating the new CAN signal ModuleID (4 Bit, unsigned) at the<br />
General tab:<br />
Importing of the message and signal into the configuration<br />
(cycle time 500 ms):<br />
68
PCAN-<strong>Router</strong> Pro – PPCAN-Editor Tutorial<br />
Supplying the signal with internal variable ModuleID of the PCAN-<br />
<strong>Router</strong> Pro:<br />
1. I/O-Function: F0-Special In.<br />
2. I/O-Number: ModuleID.<br />
3. Enable: Yes.<br />
Information: At this point, all the configuration work for solving the<br />
exercise is done.<br />
Activity: Save the configuration file as project exercise 6c to your<br />
PC.<br />
Activity: Transmit (upload) the configuration to the PCAN-<strong>Router</strong><br />
Pro via CAN bus.<br />
Reaction: The CAN message mDiag (with ID 0x500) carrying the<br />
module ID is transmitted.<br />
Information: Changes of the module ID (e.g. by turning the rotary<br />
switch) is shown immediately, but it becomes effective only after a<br />
restart of the module (e.g. Power Off/On).<br />
69
PCAN-<strong>Router</strong> Pro – PPCAN-Editor Tutorial<br />
4.20 Exercise 6d: Reading firmware version<br />
and configuration version (Hardware<br />
Diagnostics)<br />
Activity: The mDiag message will get 5 additional 8 bit variables:<br />
Firmware version (3 numbers) and configuration version<br />
(2 numbers):<br />
Assignment of data sources:<br />
Information: At this point, all the configuration work for solving the<br />
exercise is done.<br />
Activity: Save the configuration file as project exercise 6d to your<br />
PC.<br />
Activity: Transmit (upload) the configuration to the PCAN-<strong>Router</strong><br />
Pro via CAN bus.<br />
70
PCAN-<strong>Router</strong> Pro – PPCAN-Editor Tutorial<br />
Remark: Using a PCAN-Explorer (Part No. IPES-005028) with the<br />
Instruments Panel Add-in (Part No. IPES-005028) installed, you can<br />
visualize all signals received from the PCAN-<strong>Router</strong> Pro by means of<br />
a symbol file:<br />
4.21 Exercise 7a: Sleep and WakeUp via CAN<br />
Information: PCAN-<strong>Router</strong> Pro is usually equipped with 4<br />
transceivers capable of waking the device. If the device is in sleep<br />
mode, any incoming CAN message will wake the device and set it to<br />
the normal operation mode.<br />
Activity: Definition of a receive message, which sets the internal<br />
variable SELFHOLD to 0. When receiving this message, the PCAN-<br />
<strong>Router</strong> Pro enters the so called Sleep Mode (e.g. useful for saving<br />
vehicle’s battery capacity):<br />
Information: At this point, all the configuration work for solving the<br />
exercise is done.<br />
71
PCAN-<strong>Router</strong> Pro – PPCAN-Editor Tutorial<br />
Activity: Save the configuration file as project exercise 7a to your<br />
PC.<br />
Activity: Transmit (upload) the configuration to the PCAN-<strong>Router</strong><br />
Pro via CAN bus.<br />
Result: If a message ID 0x100 carrying the signal Selfhold = 0 is<br />
received, then the PCAN-<strong>Router</strong> Pro enters Sleep Mode<br />
immediately. Any subsequent message will cause wake up of the<br />
device (Status LED is blinking).<br />
Information: After waking up, the internal variable SELFHOLD is<br />
initialized to "1". Therefore the PCAN-<strong>Router</strong> Pro stays awake all the<br />
time (until configured otherwise).<br />
4.22 Exercise 7b: Sleep and WakeUp via<br />
external pin<br />
Information: A second method for waking up the PCAN-<strong>Router</strong> Pro<br />
is connecting pin 4 of the D-Sub sockets 3 or 4 with Vbat (8..26 V).<br />
The vehicle's wire ignition (carrying that voltage when driver's key<br />
is present and turned) is suitable for this purpose.<br />
72
PCAN-<strong>Router</strong> Pro – PPCAN-Editor Tutorial<br />
4.23 Exercise 7c: Sleep and WakeUp via<br />
timed alarm<br />
Information: A third method for waking up the PCAN-<strong>Router</strong> Pro is<br />
setting the alarm clock (feature of the internal real time clock RTC).<br />
Remark: Setting the current time of the real time clock RTC was<br />
explained in exercise 6b. Assuming the current time to be Thursday,<br />
18. February 2010, 12:29:30 o’clock, then a suitable alarm time could<br />
be Thursday, 18. February 2010, 12:30:00 o’clock for example.<br />
Activity: Open the configuration created in exercise 6b and save as<br />
exercise 7c. Add another receive message (ID = 0x150) for setting<br />
the alarm time (length = 4 Bytes). Add another receive message (ID<br />
= 0x100) for bringing the PCAN-<strong>Router</strong> Pro into sleep mode (see<br />
exercise 7a):<br />
Information: At this point, all the configuration work for solving the<br />
exercise is done.<br />
Activity: Save the configuration file as project exercise 7c to your<br />
PC.<br />
Activity: Transmit (upload) the configuration to the PCAN-<strong>Router</strong><br />
Pro via CAN.<br />
73
PCAN-<strong>Router</strong> Pro – PPCAN-Editor Tutorial<br />
Information: After setting the alarm time 12:30:00 o’clock PCAN-<br />
<strong>Router</strong> Pro must be set to Sleep Mode first by setting Selfhold = 0<br />
(send message 0x100 for this).<br />
Result: As soon as the message ID 0x100 with signal Selfhold = 0 is<br />
received, the PCAN-<strong>Router</strong> Pro enters Sleep Mode immediately.<br />
When reaching the programmed alarm time, the device wakes up.<br />
4.24 Exercise 8a: Changing the bit rate<br />
Information: Depending on the installed CAN transceivers, PCAN-<br />
<strong>Router</strong> Pro sets the following bit rates by default:<br />
Interface-Type CAN-Transceiver Default bit rate WakeUp-capability<br />
HS TJA-1041 (default) 500 kbit/s yes<br />
HS opto3 TJA-1040 500 kbit/s no<br />
HS TJA-1040 500 kbit/s no<br />
HS 82C251 500 kbit/s no<br />
LS-DW TJA-1054 125 kbit/s yes<br />
LS-SW TH-8056 33,3 kbit/s yes<br />
These default bit rates may be changed by adding appropriate<br />
entries in the configuration. In the tab Default values for data<br />
objects add one record per channel to be modified and fill in the<br />
desired transmission speeds:<br />
3 Query for availability<br />
74
PCAN-<strong>Router</strong> Pro – PPCAN-Editor Tutorial<br />
1. I/O-Number: enter the desired bit rate here.<br />
2. Default-Value: CAN channel number (0..3).<br />
Remark: As PPCAN-Editor (running on your PC) doesn't know about<br />
the transceiver types installed in your PCAN-module, it will offer all<br />
usual bit rates. Please take care that the equipped transceivers<br />
support the settings. E.g. TH-8056 does not support bit rates beyond<br />
83,3 kbit/s, whereas TJA-1040 does not support bit rates below 40<br />
kbit/s<br />
75
PCAN-<strong>Router</strong> Pro – PPCAN-Editor Tutorial<br />
Appendix A Literature and<br />
References<br />
PCAN-<strong>Router</strong> Pro hardware manual<br />
PPCAN-Editor integrated help system<br />
Reference of Function blocks<br />
PCAN-View integrated help system<br />
PCAN-Explorer integrated help system<br />
PPCAN protocol reference<br />
76
![English - Low Quality [7.2 MB] - PEAK-System](https://img.yumpu.com/5931738/1/184x260/english-low-quality-72-mb-peak-system.jpg?quality=85)