


Create successful ePaper yourself
Turn your PDF publications into a flip-book with our unique Google optimized e-Paper software.
•1<br />
i<br />
Sewing on Zipper 36<br />
Attachment Foot 32<br />
Cording & Zipper Foot 36<br />
Binder 33<br />
Darning Spring 34<br />
Hemmers 34<br />
Ruffler 35<br />
Edgestitcher 32<br />
Attachments 31-32-33-34-35-36<br />
27-28-29<br />
Threading Bobbin Case 7<br />
Upper Threading 9<br />
Straight Stitching 10<br />
Setting the Stitch Length 11<br />
Adjusting Pressure and Feed 12<br />
Creative Embroidery 14<br />
Embroidery Patterns 15<br />
Embroidery With a Hoop 18<br />
Blind Hems 17<br />
Darning and Monogramming 13<br />
Samples of Embroidery 15<br />
I<br />
Adjusting the Tensions 11<br />
i Sewing in Reverse 11<br />
I Changing Foot and Plate 10<br />
Placing Bobbin Case in Shuttle 8<br />
Adjusting Stitch Width 15<br />
Removing the Work 14<br />
Satin Stitch 14<br />
Light Weight Fabrics 13<br />
: Winding the Bobbin 6<br />
f<br />
Setting the Needle 6<br />
Needle and Thread Chart 5<br />
Preparing to Sew 13<br />
Features and Parts 2—3—4<br />
Stitch Length Chart 11<br />
General Sewing 12<br />
Automatic Embroidery 16<br />
French Seam<br />
Accessories<br />
Trouble Charts<br />
Quilting Guide<br />
Cleaning and Oiling Shuttle<br />
Oiling<br />
Flat Felled Seam<br />
Lace Edge<br />
Narrow Hemmer<br />
Lace Trimmed Hem<br />
How to Use Accessories<br />
Sewing on Buttons<br />
Making Buttonholes<br />
Care and Maintenance<br />
Seam Gauge<br />
Darning<br />
Hand Rolled Effect<br />
22<br />
23<br />
25<br />
26<br />
19<br />
22<br />
22<br />
22<br />
22<br />
24<br />
21<br />
21-22-23<br />
20<br />
23<br />
18<br />
21<br />
I<br />
Page<br />
Page<br />
INDEX
2<br />
Fig. 1<br />
18j<br />
2O<br />
// A<br />
22 23 24 25 4<br />
I<br />
Lf.<br />
—,<br />
st*owIen<br />
/<br />
/<br />
/6<br />
—w
Drop Feed Knob 9o c 7<br />
Push Button Reverse<br />
Bobbin Winder<br />
Bobbin Winding Tension<br />
Control Lever<br />
11.<br />
12.<br />
Wheel Clutch<br />
Hand Wheel<br />
Cover Plate<br />
Cam Cover Chamber<br />
Arm Thread Guide<br />
10.<br />
Stitch Width Window<br />
Stitch Width Lever<br />
Stitch Length Dial ,‘v-’fr 2D C<br />
Light Switch<br />
Tension Regulator<br />
Take-up Lever<br />
Thread Guides<br />
Pressure Release -<br />
Darner<br />
3.<br />
4.<br />
5.<br />
6.<br />
8.<br />
9.<br />
Needle Bar Thread Guide<br />
Spool Pins<br />
Zigzag Stop Knobs<br />
Attachment and Foot Thumb Screw<br />
Presser Foot<br />
Needle Plate -<br />
Needle Clamp and Screw<br />
2.<br />
Seam<br />
Guide<br />
1.<br />
7.<br />
14.<br />
18.<br />
19.<br />
13.<br />
15.<br />
16.<br />
17.<br />
20.<br />
21.<br />
22.<br />
24.<br />
25.<br />
23.<br />
da u<br />
, CL7<br />
(Front View)<br />
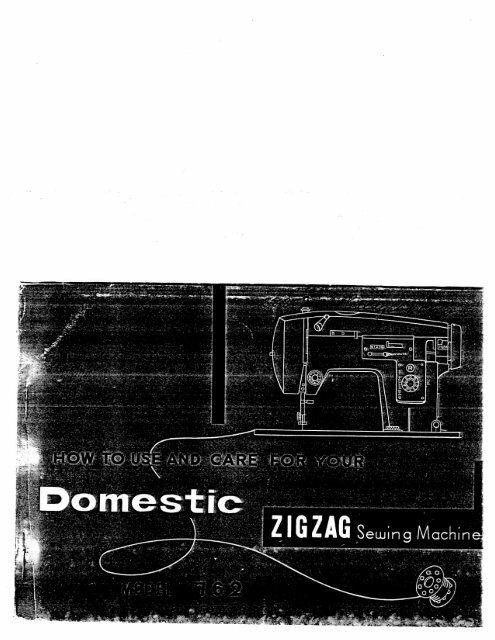
FEATURES AND PARTS<br />
3<br />
•1
4<br />
I<br />
FEATURES AND PARTS<br />
1Back View)<br />
LJ<br />
0<br />
27<br />
24. Thread Cutter<br />
25. Presser Bar Lifter<br />
26. Feed<br />
27. Motor<br />
Fig. 2<br />
28. Belt
canvas, duck, etc. 8 30<br />
Medium heavy drapery 10 40<br />
fabric, velveteen, 2 to to Heavy Duty<br />
Medium broadcloth, 12 60<br />
chintz, taffeta, sheer<br />
Very sheer chiffon, 16 100<br />
ninon, net, marquisette, etc. 20 150<br />
No. Per Inch<br />
Machine<br />
Needle Stitches<br />
Extremely heavy 6 24<br />
Heavy upholstery 8 30<br />
batiste, lace, organdy, 00 to to 50 A<br />
8 to 10<br />
handkerchief linen, 16 100<br />
plastic film, etc. (Plastic film)<br />
denim, leatherette 10 40<br />
suiting, felt, terry, etc. 12 60<br />
dimity, crepe, 0 to to 50 A<br />
fabric, ticking, 3 to to Heavy Duty<br />
tarpaulin, sacking, 4 to to Heavy Duty<br />
Sheer voile, lawn, 14 80<br />
wool, shantung, etc. 14 80<br />
1 to to<br />
A<br />
percale gingham, linen,<br />
Thread Thread<br />
Cotton Mercerized<br />
or<br />
Silk<br />
Nylon<br />
Fabric<br />
NEEDLE -<br />
THREAD<br />
- FABRIC -<br />
STITCHING<br />
GUIDE<br />
5
-<br />
B<br />
----<br />
Fig. 3<br />
SETTING THE NEEDLE<br />
See Fig. 3. Raise the needle bar A to its I<br />
I<br />
highest point, turning wheel toward you by hand.<br />
Then loosen the needle clamp screw B and<br />
the needle can be inserted into clamp C. Place<br />
needle (flat side to right) in the needle clamp GRO\ED<br />
and push it upward as far as jt will go into the<br />
C needle clamp hole, tightening the needle clamp —j<br />
screw securely with a screw driver.<br />
I After changing needle make one complete revolution<br />
of balance wheel by hand to be sure the needle is in the<br />
I<br />
correct position.<br />
HOW TO WIND THE BOBBIN<br />
Turn the clutch in the center of the hand wheel (Fig. 4) toward<br />
you to disengage the sewing mechanism. Place a spool of thread<br />
on the spool pin on the bed of the machine (Fig. 5). Pass thread<br />
through tension disc A. Insert thread<br />
I through a hole on edge of bobbin and<br />
place bobbin on spindle (B) of winder.<br />
Be sure that the notch in the bobbin<br />
fits over the small pin on the spindle.<br />
Place pulley (C) against hand wheel<br />
by pressing lever (D) and set machine<br />
in motion. When the bobbin is fully<br />
wound, the action of the winder stops<br />
automatically. Remove from spindle<br />
and cut off loose thread end used to<br />
start winding. Before starting to sew<br />
Fig. 5<br />
again, tighten clutch by turning it away from you,<br />
If the bobbin winds unevenly, adjust the bobbin winding<br />
Fig. 4 tension disc (A) to the right or left by loosening the screwS<br />
When the disc is in the proper position, tighten screw.<br />
E
of the spring as shown in Fig. 8<br />
right hand so that the thread on<br />
pull the thread into the slot of the<br />
and into the fork-shaped opening<br />
top leads from left to right. Step<br />
draw it under the tension spring<br />
bobbin case as shown in Fig.7, and<br />
2. Insert bobbin into bobbin case,<br />
between thumb and forefinger of<br />
case is on top. Take the bobbin<br />
and forefinger of left hand, so that<br />
the slot in the edge of the bobbin<br />
Hold bobbin case between thumb<br />
Step 1 (illustrated in Fig. 6).<br />
BOBBIN CASE<br />
THREADING THE<br />
Fig. 8<br />
Fig. 7<br />
Fig. 6<br />
4 ..,<br />
—<br />
I<br />
I<br />
7
ace notch, (A).<br />
sible until latch<br />
securely in place. Close the cover plate.<br />
leased to make sure the bobbin case is locked<br />
hand, with at least three inches of thread running<br />
case (B) into the<br />
Press bobbin case again after latch has been re<br />
and center the bobbin case on the stud of the shuttle<br />
THEN release the bobbin case latch, (D).<br />
body, (C). Be sure<br />
Press the bobbin<br />
enter the shuttle<br />
finger, (E), is will<br />
Fig. 9, between the thumb and forefinger of the left<br />
from the top of the bobbin case to the right. Insert<br />
Fig. 9 shuttle.<br />
center post of the<br />
(See 12, Fig. 1) Hold the bobbin case latch, (D),<br />
Open hinged cover plate left of the needle.<br />
the bobbin case<br />
shuttle as far as pos<br />
catches on the<br />
PLACING BOBBIN CASE IN SHUTTLE<br />
8<br />
‘LI<br />
Fig. 10
4) into the check spring C over threaded discs<br />
9) and into needle from left to right. Pull three or four inches of thread through needle<br />
;hes long.<br />
sser foot and draw toward the back of the machine, leaving both threads three or four<br />
read which then can be pulled out straight. Place both thread ends under the slot of the<br />
5. then pull thread under bar D See insert, Fig.<br />
es all the way down and comes back up. A loop (Fig. 11) will be formed over the lower<br />
Hold the end of upper thread loosely and turn hand wheel toward you until the needle<br />
8, through the needle bar thread guide G<br />
7, down into thread guide F on face plate<br />
10)<br />
3) down and around tension discs B from right to<br />
2) lead thread through arm thread guide A<br />
6) up into take-up lever E from right to left Fig. 11<br />
1, Place spool of thread on upper spool pin,<br />
left<br />
Fig. 10)<br />
UPPER THREADING<br />
I<br />
9<br />
J
1<br />
Fig. 12-A<br />
slots.<br />
10<br />
_<br />
will break in striking the loot or plate. Adjust stops E<br />
hold assembly wrong side up. Holding cover plate in<br />
as the tongue on cover plate slips out of the spring<br />
foot and the straight stitch needle plate which are in<br />
to groove, then. li± cover plate to insert tongue into<br />
needle plate, and pull upper portion of cover plate<br />
remove zigzag foot. Replace with hinged narrow foot<br />
foot (14, Fig. 1) loosen thumb screw (16, Fig. 1) and<br />
away. Then lower pin can be separated from groove<br />
right. (Fig. 12-A<br />
up. Hold needle plate in left hand and cover plate in<br />
and tighten screw securely.<br />
ial, you may want to use the straight stitch presser<br />
to hold zigzag lever D in 0 position.<br />
right hand at a slight upward angle, slide lower pin in<br />
cover plate from machine. Turn assembly wrong side<br />
cluded in your accessory box. Both have narrow needle<br />
needle plate screws.<br />
opening of spring latch. Upper pin will then slide<br />
easily into groove.<br />
latch on needle plate.<br />
To change needle plate 13, Fig. 1 remove it with<br />
To attach cover plate to straight stitch plate, again<br />
Changing the Foot and Plate. To change presser<br />
Put plates on machine and fasten securely with<br />
Slip upper pin on. cover plate out of groove on<br />
For straight sewing on fine fabric or very soft mater<br />
Be sure to set the stitch width at 0 or the needle<br />
STRAIGHT STITCHING<br />
Fig. 12-B
counterclockwise to loosen. 1g.<br />
F 13<br />
screw Fig. 14) on side of the bobbin case clockwise to tighten,<br />
Always adjust the upper tension with the presser loot down,<br />
the right, or clockwise. To decrease, turn to the left. The higher<br />
the number on the dial the tighter the tension. Before adjusting<br />
When necessary to change the bobbin tension, turn small<br />
U1<br />
wer tension be sure that the machine is threaded properly.<br />
increase the tension on the upper thread, turn dial (Fig. 13) to<br />
as the tension is automatically released when it is raised. To [/f4f<br />
ADJUSTING THE TENSIONS<br />
button is held in. Only about 4 or 5 stitches are needed to tie a seam.<br />
in the button G, Fig. 12-B, as far as it will go. The machine will sew backward as long as the<br />
SEWING IN REVERSE<br />
When you wish to sew in reverse to tie the threads at the beginning or end of a seam, press<br />
Figures on indicator 0 1 2 3 4 5 6 7 8 9<br />
Number of stitches per inch No Feeding 60 40 20 16 12 10 8 7 6<br />
STITCH LENGTH CHART ‘Approximate;<br />
of the stitch length you choose should appear below the dot on the control plate.<br />
lengths. Turn the dial to the right to lengthen and to the left to shorten the stitch. The number<br />
stitch and 9 is the longest, but the dial may be set at any spot between markings for variety of<br />
The length of the stitch is regulated by the dial, F, shown in Fig. 12-B. Near 0 is the shortest<br />
SETTING THE STITCH LENGTH<br />
11
__ ___ ___<br />
_<br />
12<br />
*, ‘, ,-,<br />
Fig. 18 Fig. 19<br />
Fig. 17________<br />
Fig. 16<br />
or darner release, 22, Fig. 18, is at its lowest position and the drop feed knob is turned t<br />
Fig. 15<br />
F<br />
REG. position, Fig. 19.<br />
GENERAL SEWING. Usually for straight sewing and zigzag stitching, the pressure bar ca<br />
AND FEEDING OF FABRIC<br />
ADJUSTING PRESSURE<br />
Fig. 14<br />
the fabric (Fig. 17,.<br />
balanced, a perfect stitch will be formed with both<br />
lying flat on. the fabric ‘Fig. 16’).<br />
threads interlocking in fabric Fig. 15,).<br />
thread is pulled up over the upper thread which is<br />
thread forms loops over the lower thread lying flat on<br />
When the upper and under tensions are properly<br />
When the upper tension is too tight, the lower<br />
When the upper tension is too loose the upper
y increasing or decreasing the amount of pressure exerted on the control.<br />
NEVER run machine without material under presser foot.<br />
to start the machine. You merely press the control. The speed of the machine is regulated<br />
sewing. By having the needle at its highest point, it is not necessary to touch the hand wheel<br />
the hand wheel toward you until the needle is at its highest point. You are now ready to begin<br />
Place material and threads in position under the presser foot and lower the presser foot. Turn<br />
by pulling the material as this may deflect the needle and cause it to break.<br />
Have take-up lever at highest point before starting to sew. Do not try to help the feeding<br />
PREPARING TO SEW<br />
needle plate. To return feed to normal, return knob to “BEG”.<br />
pletely by pressing down on the snap lock, A, Fig. 20. Turn the<br />
fabric freely in any direction for darning, mending and certain<br />
knob to ADARN position, which drops the feed well below the<br />
DARNING AND MONOGRAMMING. In order to move the<br />
and then press cap B down again to halfway spot. Lower the feed<br />
slightly by turning the red arrow on the knob to ‘SILK” position,<br />
kinds of free-hand embroidery, release the pressure cap B com<br />
down. Release all the way by pressing the snap lock, A, Fig. 20,<br />
silk or filmy material, the pressure cap should be about halfway<br />
When lighter pressure is required to sew satisfactorily on thin<br />
I<br />
SEWING THIN OR LIGHT WEIGHT FABRICS.<br />
Fig. 20<br />
13
zigzag stitch, and the basis for Fig. 22<br />
widest, 4.<br />
The satin stitch, Fig. 22,<br />
most embroidery, is obtained by setting the stitch length as<br />
The width may be set anywhere from just past 0 to the<br />
which is really just a very short<br />
near 0 as possible without stopping the feeding action.<br />
in place and control lever ‘25” ‘Fig. 1’ is in the M position.<br />
Be sure zigzag presser foot and zigzag needle plate are<br />
CREATIVE EMBROIDERY<br />
Pull down slightly, holding thread in both hands, so as<br />
Leave the ends of thread under the presser foot.<br />
not to bend the needle.<br />
o the left, Fig. 21-A and B, and pass the threads over the<br />
Now raise the presser foot and draw the fabric back and<br />
lever and needle bar are located at the highest position.<br />
thread cutter.<br />
Be sure to stop the machine when the thread take-up<br />
REMOVING THE WORK<br />
14<br />
Fig. 21-B
widths. Try setting the locks at 1 and 4, 2 and 3, etc. Set a rhythm for yourself and then<br />
raise it again. By operating the feed knob rhyth- Fig. 23<br />
mically it is not necessary to count stitches.<br />
SAMPLES OF CREATIVE EMBROIDERY<br />
zigzag stitches, drop feed for 3 or 4 stitches, then E<br />
D. Set both stops at 4, stitch length at 4. Do a few<br />
to 4, then snap it back quickly to 1. D<br />
C. Set stops at 1 and 4. Gradually move lever from 1<br />
the stitch width or zigzag lever back and forth between 0 and 4 or any other combinaticn of<br />
With the machine set for a short stitch length, different designs can be made by swinging<br />
Embroidery Patterns<br />
tween settings, operating machine rather fast. c<br />
lever back to 0 for a short period. Count, if neces-<br />
B. Set stops at 2 and 4, then move lever slowly be<br />
B<br />
sary, to establish a rhythm.<br />
A<br />
A. Sew a few stitches at 4 width, then quickly move<br />
the machine, stitch length and width and the manipulation of the lever.<br />
zigzag width lever to the right. Set left stop at desired width. Then move lever to the left and<br />
such as 2 and 4, in doing free hand embroidery or buttonholes, slide stops to 0 and 4, then move<br />
proceed. After a while you will become guite skillful, varying your designs by the speed of<br />
To stitch continuously at one width of zigzag stitching lock stops E (Fig. 12B) so that red<br />
Adjusting the Stitch width<br />
pointers meet on width chosen. Should you wish to move freely between any two widths,<br />
set the right stop at width desired. To move stops, turn knob to left to loosen and to right to<br />
tighten.<br />
15
7<br />
‘.5<br />
3<br />
16<br />
E. Drop feed, lock stitch width at 4, take 3 or 4 stitches, leave needle in fabric left of stitches.<br />
on spindle, apply slight pressure while turning cam until it slips down into place.<br />
cams (Fig. 24, in the chamber on top of the machine.<br />
‘Fig. 25 is in the “D” position and the zigzag stitch width stops “6” are in the off positions.<br />
Lock threads by setting stitch width at 0 and taking 3 or 4 stitches in center of design.<br />
Pivot fabric on needle to make next daisy petal. Continue until flower design is complete.<br />
Your machine will produce embroidery patterns automatically by inserting anyone of its<br />
With zigzag stitch width lever “7” ‘Fig. 25, in its extreme right hand position, place cam<br />
Be sure the zigzag needle plate and zigzag presser foot are on. the machine, control lever 5”<br />
9<br />
Fig. 24<br />
AUTOMATIC EMBROIDERY<br />
Fig. 25
N,<br />
Blind hem completed.<br />
Place control lever 5 (Fig. 25, in the B position, the zigzag lever to the extreme left and<br />
Step 3. Fold hem back toward right side of garment leaving 1. 4” extended.<br />
Step 4. Place material under presser foot and sew blind hem automatically.<br />
Step 1. çFig. 26) If hem with folded edge is used make first fold 3/8” deep.<br />
Step 2. Turn hem the depth desired and baste 1 4” from upper edge. Press into place.<br />
Prepare the garment in the same manner as for hand hemming.<br />
set stitch length at approximately number 5.<br />
dresses, skirts, mens trousers, drapes and any other item when an inconspicuous hem is required.<br />
Blind hems are one of the most helpful things your machine will make, they are used on<br />
Fig. 26<br />
BLIND HEMS<br />
it will go and lift cam off the spindle.<br />
To remove cam, open door covering cam chamber, move lever “7” to the right as far as<br />
length where you prefer it, but remember that most embroidery designs require a stitch length<br />
of 1 or less for best appearance.<br />
Move zigzag stitch width lever “7” to its extreme left hand position and set the stitch<br />
17
L<br />
tion.<br />
18<br />
_<br />
free hand when embroidering or monogramming.<br />
stitching in fabric.<br />
darner. Turn the drop feed knob to ‘DARN” posi<br />
by pressing down the snap lock on the automatic<br />
ower the presser bar lifter. Then operate the machine at a rather high speed while moving<br />
foot. Set the stitch width at the size you prefer and<br />
place under the needle after removing the presser<br />
of the needle.<br />
(See Fig. 27). Release the pressure from the foot<br />
he hoop slowly with both hands. Work carefully and be sure to keep fingers out of the path<br />
and slowly in any direction. To fill in the hole, stitch from center outward, completing and<br />
It is easy to follow a stamped design or to work<br />
Stretch the fabric in an embroidery hoop, and<br />
Release pressure from foot and drop feed as directed above.<br />
Place fabric to be mended under foot, and stitch around hole, moving the fabric firmly<br />
EMBROIDERING WITH A HOOP<br />
DARNING<br />
Fig. 27
19<br />
MAKING BUTTONHOLES<br />
First, mark the beginning and end of the buttonhole on fabric<br />
with a basting line or tailor’s chalk. Make one on scrap fabric<br />
(following directions below) to be sure machine adjustments are<br />
correct.<br />
1. Replace presser foot with buttonhole foot which is grooved<br />
underneath to prevent piling up of thread. (See Fig.<br />
2. Lock the stitch width at 2 and set the stitch length near 0.<br />
3. Lower carefully into the mark on fabric indicating the<br />
beginning of buttonhole. Stitch to the mark for the end of the<br />
buttonhole, step 1, Fig. 29, stopping machine with needle in<br />
fabric at right side of stitching.<br />
4. Lift the presser foot and using the as a<br />
pivot, turn the fabric end for end..<br />
5. Lower presser foot and turn hand wheel just enough<br />
to raise out of fabric.<br />
deeply<br />
needle<br />
needle<br />
needle<br />
6. Drop feed all the way down and move zigzag lever<br />
to 4. While holding the lever at 4 width, take five<br />
or six stitches to form bar tack, step 2, Fig. 29.<br />
7. Raise needle out of fabric and return feed to “REG”<br />
position and return stitch width lever to 2.<br />
8. Stitch second side of buttonhole, step 3.<br />
Fig. 29<br />
9. Make bar tack by<br />
5 and 6 above4step 4).<br />
10. Return stitch width to 0 and take two or three stitches to fasten bar threads and prevent<br />
ravelling. Cut the buttonhole opening with a seam ripper, being careful not to cut the<br />
stitching.<br />
repeating<br />
28,.<br />
Fig. 28<br />
S S S S<br />
4’<br />
1I ii U
20<br />
If you plan to make buttonholes on sheer or soft material, place<br />
tarlatan or paper, which can be torn away after stitching, under the<br />
fabric. And it is always wise to make several buttonholes on scraps<br />
of fabric before working on the garment.<br />
For narrower buttonholes, set the stitch width at 1½ and move<br />
stitch width lever to 3 for bar tack.<br />
SEWING ON BUTTONS<br />
1. Remove hinged presser foot and attach button sewing foot. (See<br />
Fig. 30-A, B and C).<br />
2. Turn drop feed knob to “DARN”.<br />
3. Move zigzag width lever to “0” position or to the extreme left.<br />
Place the button so that its left hole comes directly under the<br />
needle, then gently lower the presser foot. Move the zigzag<br />
width lever to the right until the needle comes exactly over the<br />
right hole of the button. Turn the balance wheel slowly by hand<br />
to be sure the needle clears both holes of the button. Correct<br />
width if necessary.<br />
4. When needle goes into the center of each hole, run the machine<br />
at medium speed, making five or six stitches, stopping with the<br />
needle in the left hole.<br />
5. To lock the zigzag stitch and prevent ravelling,<br />
set the stitch width at 0, and take a few stitches ()<br />
in the same hole. If you wish you may place<br />
a rounded toothpick over the button, between ‘<br />
the two holes, and sew button to fabric in<br />
regular way. Fig. 30-C<br />
;<br />
Fig. 30-A<br />
Fig. 30-B
‘qf<br />
Fig. 32<br />
1<br />
p<br />
r<br />
four holes, hoDks, and snaps, etc.<br />
button, forming a shank. Fasten.<br />
procedure as for sewing two hole buttons.<br />
same procedure above for the two hole button.<br />
permit stitching the remaining two holes. Hooks,<br />
snaps, etc., are sewn to the fabric with the same<br />
highest position, replace regular presser foot with<br />
narrow hemmer “Fig. 31’. For a plain narrow hem,<br />
along edge of fabric. Hold each end of the two inch<br />
make a 1/8 inch double fold for about two inches<br />
the scroll of hemmer, draw forward to end and fas<br />
fold, slip underneat.’i. hemmer. Bring fold up into<br />
ten with point of needle. Lower presser bar lifter.<br />
and attach lace in one stitching, insert lace in the<br />
matically take a double turn through scroll.<br />
Gently pull ends of thread as you start stitching.<br />
guiding lace under needle and hem into scroll.<br />
slot next to needle ‘Fig. 32). Sew hem as above<br />
Remove the toothpick and wind thread under<br />
Apply the above method to sew on buttons with<br />
If a four hole button is to be sewn, follow the<br />
Now lift presser foot slightly and move fabric to<br />
NARROW HEMMER. With the needle at its<br />
LACE TRIMMED HEM. To sew a narrow hem<br />
Guide material slightly to right, and it will auto<br />
HOW TO USE ACCESSORIES<br />
Fig. 31<br />
21<br />
H
Let<br />
-. 1<br />
-.<br />
22<br />
the pronged holder between the presser foot and the presser foot thumb screw (Fig. 34).<br />
edges of the narrow, rolled hem.<br />
Edgestitch to lay seam flat.<br />
making French seam.<br />
edge of lower piece. Insert in hemmer scroll, allowing hem to roll over and sew in top fabricr<br />
little fullness in lace by feeding it freely under scroll.<br />
side of fabric. Insert both in scroll as for plain narrow hem Fig. 33 .<br />
sew in lace. Press lace out flat along edge with hem turned up. It is possible to have a<br />
HAND ROLLED EFFECT. Use a narrow zigzag stitch, just wide enough to catch both<br />
FRENCH SEAM. With right sides together, place top piece of material 1 8 inch inside<br />
QUILTING GUIDE. This guide for making parallel rows of stitching is attached by placing<br />
FLAT FELLED SEAM. Open out French seam and insert rolled edge in scroll of hemmer.<br />
LACE EDGE WITH INVISIBLE STITCHING. Hold lace 1 8 inch from raw edge on right<br />
Fig. 33 Fig. 34<br />
Lr 7’<br />
7 7’<br />
hem roll over and
__<br />
at points indicated by arrows in Fig. 36, turn hand<br />
lowest point. Remove top cover by loosening two<br />
screws on cover.<br />
wheel toward you until the take-up lever is at its<br />
Your machine should be oiled occasionally to<br />
Before oiling the upper part of the sewing unit<br />
the amount of sewing you do.<br />
keep it operating smoothly how often depends on<br />
HOW TO OIL YOUR MACHINE<br />
YOUR MACHINE<br />
CARE AND MAINTENANCE OF<br />
bed of machine 1Fig. 35). Adjust to seam width<br />
gauge with accompanying screw in threaded hole in<br />
desired.<br />
is to the right of the needle, it may also serve as a<br />
When the bar is attached so that the curved part<br />
rows of top stitching along edges of fabric. Fasten<br />
By letting the guide ride on the first stitching<br />
SEAM GAUGE OR CLOTH GUIDE. Use the<br />
fabric.<br />
Adjust the curved bar to press lightly on the<br />
line, successive rows will be an equal distance apart.<br />
seam width guide.<br />
seam gauge as a guide for straight seams and even<br />
44<br />
Fig. 36<br />
Fig. 35<br />
14<br />
23
24<br />
Fig. 37<br />
Fig. 38<br />
Avoid over-oiling only a drop is needed at each point.<br />
To oil parts under the bed of the machine, tip the unit back on its hinges and apply a<br />
drop of oil at each point indicated in Fig. 37.<br />
To oil moving parts inside the face plate, which only rarely require oiling, open plate.<br />
at spots indicated in Fig. 38.<br />
Oil
25<br />
r<br />
CLEANING AND OILING THE SHUTTLE<br />
(See Figs. 39 and 40,<br />
The stitch forming mechanism occasionally becomes clogged with loose threads and lint.<br />
This will interfere with the efficient operation of the machine. Cleaning and removal of<br />
the lint will safeguard the performance. To remove the shuttle assembly, proceed as follows.<br />
1. Turn the balance wheel until the needle reaches its highest position. Tilt head back<br />
on its hinges.<br />
2, Remove bobbin case (A), Fig. 40.<br />
3. Turn the two shuttle race cover clamps (B) outward and remove the shuttle race cover<br />
(C) and shuttle body (D).<br />
[<br />
U<br />
Fig.39<br />
Fig.40
12<br />
11<br />
10<br />
26<br />
Is<br />
9 Thumb Screw<br />
8 Quilter Guide 14 Button Sewing Foot<br />
7 Small Hemmer Foot Straight Sewing<br />
3 Small Screw Driver (for spool pins<br />
6 Buttonhole Foot 13 Needle Plate for<br />
S Cloth Guide Straight Sewing<br />
1<br />
J 4 Package of Needles 12 Presser Foot for<br />
1 2 3 2 Large Screw Driver 11 Felt Washers<br />
1<br />
1 Plastic Oiler 10 Bobbins 3)<br />
ACCESSORIES<br />
4. Put bobbin into bobbin case.<br />
5. Put the bobbin case into the shuttle race, fitting tongue into notch E of race cover.<br />
snapped securely into position.<br />
position with shuttle race cover clamps, B , making certain the clamps have been<br />
2. Place shuttle body, (D), against shuttle driver and adjust into position.<br />
1. Turn the balance wheel until the needle reaches its highest position.<br />
When the cleaning has been completed, proceed as follows to replace the shuttle assembly:<br />
S. Apply a drop of oil with finger tip to outer edge of shuttle.<br />
4. Clean the shuttle race, the shuttle, and shuttle race cover by removing all threads, lint, etc.<br />
3. Replace shuttle race cover, C), fitting pin at lower edge into notch, and lock into
27<br />
TROUBLE CHART<br />
Trouble Probable Cause Correction<br />
If machines Thread or lint in race way 1. With take-up lever in highest position,<br />
bind<br />
tilt head back on hinges and remove<br />
bobbin case.<br />
BOBBIN BOBBIN NOPCH RACE<br />
CASE<br />
LATCH RACE COVER HOOK CLAMPS<br />
2. Turn clamps downward and remove race<br />
cover.<br />
3.— Remove hook.<br />
4.- Clean thread and lint from all parts, in<br />
cluding race.<br />
5.- Run a drop of oil alcng rim of hook.<br />
6.— Replace hooky then race cover. Snap<br />
clamps into place.<br />
7.- Grasp threaded bobbin case by latch<br />
and replace, fitting tongue into notch of<br />
race cover.<br />
I
_______<br />
28<br />
Trouble Probable Cause Correction<br />
Bent needle<br />
Discard and replace.<br />
Skipping<br />
stitches<br />
Needle placed incorrectly<br />
in clamp<br />
See instruction page No. 6.<br />
Too fine a needle for thread See needle and thread chart, page No. 5.<br />
being used.<br />
Upper thread tension too<br />
loose<br />
Tighten upper tension.<br />
Irregular<br />
stitches Improper threading See threading instruction, page No. 9.<br />
Bobbin not wound even<br />
Rewind bobbin.<br />
Uneven<br />
stitches<br />
Pulling or holding material<br />
Not enough tension on<br />
upper thread<br />
Poor quality thread<br />
Needle too fine for thread<br />
being used<br />
Avoid pulling or holding material, just guide it.<br />
Increase tension.<br />
Try different thread.<br />
See needle and thread chart, page No. 5.
Material -<br />
Stitch length too long Reduce stitch length.<br />
puckering<br />
Dull needle Change needle.<br />
—<br />
Tensions too tight See tensions adjustment page No. 11 and 12.<br />
Bent or blunt needle<br />
Discard all blunt or bent needles and re<br />
place with new.<br />
Eye of needle too sharp Try a new needle.<br />
Refer to needle setting instructions see<br />
breaking<br />
Upper thread<br />
incorrect position highest position.<br />
Imprcper setting of needle<br />
Starting with take up in Always start sewing with take up lever in<br />
page No. 6.<br />
thread tension knob to lower number.<br />
Too much tension<br />
Loosen tension on upper thread by turning<br />
Improperly threaded<br />
9 and rethread machine.<br />
Refer to threading instructions see page No.<br />
Trouble Probable Cause Correction<br />
29
3D<br />
Your sewing machine comes equipped with the basic set of acces<br />
sories described earlier in this book.<br />
The following pages illustrate additional time saving attachments<br />
that have been designed specifically for your machine. They are<br />
available at modest cost from your dealer. If your dealer cannot<br />
supply you with these items, ask him to order them for you by<br />
part number. Then you will be assured of receiving the genuine<br />
part designed for best performance with your machine.<br />
If a sewing machine dealer is not available mail your inquiry<br />
directly to:<br />
DOMESTIC SEWING MACHINE CO., INC.<br />
SERVICE DIVISION<br />
ELM AND WASHINGTON STREETS<br />
CLEVELAND 13, OHIO<br />
In Canada<br />
DOMESTIC SEWING MACHINES<br />
111 BERMONDSEY ROAD<br />
TORONTO 16, ONTARIO, CANADA
PART :76553 PART 76552 PART :76551 PART :76550<br />
14<br />
Hemmers<br />
Attachment Foot Binder Edgestitcher<br />
PART :82528 PART :74159 PART :76554<br />
Ruffler Darning Spring Cording & Zipper Foot<br />
PART :1403 PART :4990 PART :1873<br />
SOME OF THE ATTACHMENTS AVAILABLE FOR YOUR MACHINE<br />
31
piece in slot 4.<br />
\<br />
Fig. 41<br />
screw.<br />
32<br />
the fabric in slot 4, and the fold of the piping, to the left in slot 3. For a narrow piping, place<br />
the fabric in slot 2 and the folded edge of the piping to the right in slot 3.<br />
The slots serve as guides. To sew lace<br />
want on top in slot, Fig, 42, and other<br />
edging to fabric, place the material you<br />
lace insertions, edgings and pipings.<br />
Slot S may be used as a guide in stitching a french seam.<br />
The edgestitcher is used in making<br />
To trim with a wide piping, place Fig. 42 Fig. 43<br />
THE EDGESTITCHER<br />
mounting screw.<br />
The mounting slot enables you to sew as close to or<br />
attachment to the left as far as possible and tighten<br />
Mount binder, edgestitcher or hemmers sliding the<br />
replace it with the attachment foot, Fig. 41.<br />
hemmers, it is necessary to remove the presser foot and<br />
I<br />
In order to attach the binder, edgestitcher and the<br />
ATTACHMENT FOOT<br />
as far away from the edge as desired. lust move the<br />
attachment to the correct position before tightening the
33<br />
are for corresponding widths of commercial folded bias<br />
of material in one operation. Slots on scroll of the binder<br />
binding.<br />
bias strips cut 15 16 inch wide.<br />
Draw through slot and under binder with strong pin. Slid<br />
ing binder slot to right or left.<br />
opens and binding encircles open end of scroll. Test stitch<br />
ing to be sure it is on the edge adjust if necessary.<br />
tween widths, inserting each in correct size slot.<br />
operation. When two are used, always skip one size be<br />
fold. Slip fold into center of binder. Draw back until cut<br />
of inches. Cut Binding diagonally toward end, almost to<br />
This attachment folds bias binding, applies it to the edge<br />
The open mouth of binder scroll is used for unfolded<br />
Cut a point of folded binding, insert in appropriate slot.<br />
Two bindings can be sewn on fabric edge also in one<br />
Cut 15, 16 inch bias binding fold in half for a couple<br />
HAND-CUT BIAS BINDING (Fig. 45,<br />
TWO-TONE BINDING (Fig. 44)<br />
FOLDED BINDING (Fig. 44)<br />
BINDER<br />
Fig. 44<br />
Fig. 45<br />
I!’ IL
Fig. 47<br />
Fig. 46<br />
34<br />
both hands and slip horizontally under henmer toward back.<br />
See page. No. 23 Fig. 47.<br />
PATCHING AND MONOGRAMING<br />
spring, on needle and slip hook up over hub on needle clamp.<br />
Remove presser foot, unthread needle, place darner<br />
HOW TO ATTACH<br />
DARNING SPRING<br />
back of hemmer.<br />
Bobbin thread will catch loop and carry upper thread to<br />
thread loosely and turn handwheel one full turn toward you,<br />
making a loop under hemmer. Grasp bobbin thread with<br />
IL<br />
Fold material in 1, 8 inch for two inches along edge,<br />
thread is pulled up. Then, with hemmer in place, hold top<br />
Before attaching any of the hemmers, be sure bobbin<br />
THE SET OF HEMMERS<br />
Pull on threads gently as you start stitching.<br />
Draw forward to end of hem and fasten with point of needle.<br />
spoon. (Fig. 46). Fold hem in material back of hemmer.<br />
hold at each end of fold. Slip fold into guide and up over
35<br />
The ruffler will produce yards of delicate ruffling or precision pleating.<br />
Ruffling can also be done and sewn to another piece of fabric at the same time.<br />
This highly versatile attachment despite its wide range of use, is simple to use.<br />
Use the ruffler for making aprons, curtains, pleating a skirt, adding fullness to the bodice of a<br />
dress and etc.<br />
Fig. 48 Fig. 49 Fig. 50<br />
Fig. 48A Fig. 49A Fig. 50A<br />
RUFFLER<br />
r (
/<br />
“I<br />
36<br />
ew<br />
insert covered cording, and to sew in<br />
zippers. Loosen thumb screw to slide<br />
foot to either right or left of needle.<br />
foot so needle is centered in needle<br />
over cord. Loosen thumb screw and set<br />
hole. Machine baste cord in place<br />
reset adjustable foot so needle stitches<br />
fabric.<br />
closer to cord, and on edge of base<br />
Fig. 52..<br />
THE ADJUSTABLE CORDING<br />
This attachment is used. to make and<br />
CORDING. Fold bias strip of fabric<br />
To sew covered cord to material,<br />
S -<br />
AND ZIPPER FOOT<br />
Fig. 51<br />
i2r1I<br />
along edge of foot (Fig. 51. Stitching should be<br />
close to zipper to allow easy opening and closing.<br />
enters center of needle hole. Guide metal of zipper<br />
Adjust to sew from either right or left side, wbicb<br />
ever is more convenient.<br />
Loosen thumb screw and slide foot so needle<br />
SEWING IN A ZIPPER<br />
Fig. 52


