

Samsung YP-K3JQR - YP-K3JQR/XAA - User Manual (ENGLISH)
Samsung YP-K3JQR - YP-K3JQR/XAA - User Manual (ENGLISH)
Samsung YP-K3JQR - YP-K3JQR/XAA - User Manual (ENGLISH)

You also want an ePaper? Increase the reach of your titles
YUMPU automatically turns print PDFs into web optimized ePapers that Google loves.
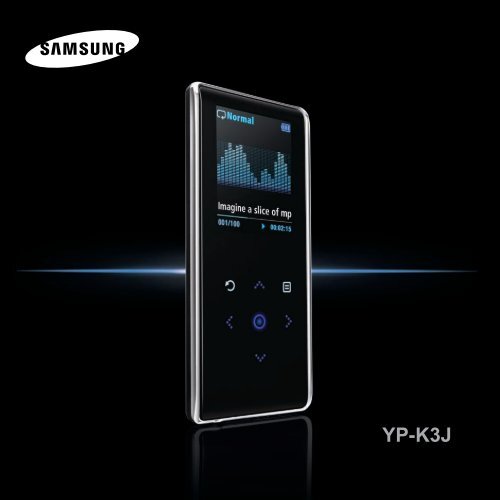
<strong>YP</strong>-K3J
Read this manual carefully to ensure proper use of the player and<br />
For Your Safety to avoid any danger or physical damage.<br />
WARNING<br />
Failing to heed the player instructions may cause serious injury.<br />
Product Use<br />
Improper use can result in explosion,<br />
fire or electric shock.<br />
To avoid your hearing damage<br />
Do not disassemble, repair<br />
or modify this player on<br />
your own.<br />
Do not get the player wet<br />
or drop it in water.<br />
If the player gets wet, do not<br />
switch it on. Contact a Service<br />
Center.<br />
Do not place the player in<br />
damp, dusty or sooty<br />
areas, as it could result in<br />
fire or electric shock.<br />
Do not leave the player in<br />
areas above 35°C(95°F)<br />
(such as a sauna or inside<br />
a parked car).<br />
During hot weather, the<br />
temperature inside a car may<br />
rise up to 80°C(176°F).<br />
Avoid using your player at<br />
high volume levels, as it may<br />
result in permanent hearing<br />
damage. If you experience<br />
ringing in your ears while<br />
using the earphone, remove<br />
the earphone immediately<br />
and lower the volume.<br />
To avoid a risk of traffic accident<br />
Do not use the earphones while you are<br />
driving a bicycle, automobile or motorcycle.<br />
It can cause a serious accident and furthermore,<br />
is prohibited by law in some areas.<br />
Using the earphones while walking, in particular,<br />
on a crosswalk, can lead to a serious accident.<br />
Take care not to tangle the earphone cable<br />
around your arms or neighboring objects<br />
while driving, working out or walking, as it<br />
could result in a car accident or other<br />
injuries.<br />
2
CAUTION<br />
Failure to follow all instructions lead to physical injuries or damage to the player.<br />
ENG<br />
Product Use<br />
Management of Important Data<br />
Avoid malfunction<br />
Avoid malfunction<br />
Be sure to back up<br />
important data.<br />
Please be aware that we<br />
claim no responsibility for<br />
damage from data loss due<br />
to breakdown, repair or other<br />
causes.<br />
Do not cause excessive<br />
impact on the player by<br />
dropping it. Do not place<br />
heavy objects on top of the<br />
player.<br />
Prevent any foreign<br />
particles or dust from<br />
entering into the player.<br />
Always use the accessories<br />
provided by or approved by<br />
<strong>Samsung</strong>.<br />
Do not spray water on the<br />
player. Never clean the<br />
player with chemical<br />
substances such as<br />
benzene or thinner, as it<br />
may cause fire, electric<br />
shock or deteriorate the<br />
surface.<br />
Do not place the player<br />
near magnetic objects, as it<br />
may cause a malfunction.<br />
3
Contents<br />
For Your Safety ..........................................2<br />
Contents .......................................................4<br />
Chapter 1. Preparation<br />
Basic Information .......................................6<br />
Components...............................................6<br />
Screen Display Information........................9<br />
Button Functions ......................................10<br />
Charging the battery ................................12<br />
Basic Use.................................................13<br />
Chapter 2. Loading Your Desired File<br />
Loading Your Desired File ......................16<br />
Installing <strong>Samsung</strong> Media Studio ............16<br />
Connecting to your PC.............................17<br />
Adding Files/Folders in<br />
<strong>Samsung</strong> Media Studio............................18<br />
Transferring Files to the Player with<br />
<strong>Samsung</strong> Media Studio............................20<br />
Chapter 3. Multimedia function<br />
Listening to Music....................................22<br />
Listening to Music ....................................22<br />
Creating a Playlist Using<br />
<strong>Samsung</strong> Media Studio............................26<br />
To Play a Playlist......................................28<br />
Using the Music Option Menu..................29<br />
Photo Viewing ...........................................31<br />
Photo Viewing ..........................................31<br />
Using the Photo Option Menu..................32<br />
Listening to FM Radio .............................33<br />
Listening to FM Radio..............................33<br />
Setting FM Presets ..................................36<br />
To Delete Presets.....................................38<br />
Setting FM Radio .....................................39<br />
4
Chapter 4. Setting<br />
Settings.......................................................40<br />
Setting Display .........................................40<br />
Setting Time ............................................42<br />
Setting Language.....................................44<br />
Setting the System ..................................45<br />
Chapter 6. Appendix<br />
Menu Tree...................................................51<br />
Product Specifications ............................53<br />
ENG<br />
Chapter 5. Troubleshooting<br />
To Upgrade Firmware ..............................47<br />
Troubleshooting........................................49<br />
5
Basic Information<br />
Components<br />
Checking the Accessories<br />
Player Earphones USB Cable Installation CD<br />
■<br />
Design of accessories is subject to change for the purpose of improvement, without notice.<br />
6
Front, Right Side<br />
All buttons are 'Light-touch' buttons.<br />
ENG<br />
Screen Display<br />
Menu Button<br />
Back Button<br />
Button<br />
Play/Pause &<br />
Select Button<br />
Power &<br />
Hold Switch<br />
7
Basic Information<br />
Components (Continued)<br />
Bottom/Rear<br />
USB<br />
Connection<br />
Port<br />
[Bottom]<br />
Earphone<br />
Jack<br />
[Rear]<br />
Reset Hole<br />
Earphone Connection<br />
√ Bottom<br />
Earphones<br />
8
Basic Information<br />
Screen Display Information<br />
Music<br />
ENG<br />
1<br />
Normal<br />
6<br />
7<br />
2<br />
3<br />
4<br />
5<br />
1.Life is cool<br />
002/020 √ 00:02:20<br />
8<br />
9<br />
1 Play Mode Display<br />
2 Graphic Equalizer<br />
3 Music Information<br />
4 Play Status Bar<br />
5 Current Music Number/<br />
Total Number Display<br />
6 Sound Effect Display<br />
7 Battery Status Display<br />
8 Play Time Display<br />
9 Play/Pause Display<br />
NOTE<br />
■<br />
The screen pictures are for illustration purposes only. The actual screen may differ.<br />
9
Basic Information<br />
Button Functions<br />
Buttons<br />
Functions and Use<br />
■ Slide and hold in the opposite direction of the arrow to turn the power on/off.<br />
■ Slide in the arrow direction to lock the buttons.<br />
■ Long tap to move to the main menu.<br />
■ Short tap to move to the previous screen.<br />
■ Moving up, down, left and right and Function Selection.<br />
Tap to move up or down by one selection.<br />
Tap to move left or right by one selection.<br />
Press and hold to move up or down continuously.<br />
Short tap to select the play/pause and function, move to the<br />
next screen.<br />
■ Search for a track and control volume while listening to music.<br />
Press and hold to scan to a point on the current track.<br />
Tap to move to the previous track or to play the current track<br />
from the start.<br />
Press and hold to scan to a point on the current track.<br />
Tap to move to the next track.<br />
Tap to reduce/increase the volume.<br />
■ Tap to display the option menu.<br />
10
✽ Tap on touch screen with your<br />
fingertip.<br />
ENG<br />
CAUTION<br />
■ Do not use any sharp object other than your fingers to operate the touch screen.<br />
Otherwise, touch screen may be damaged.<br />
■ Do not tap on the touch screen if your fingers are not clean.<br />
■ Do not tap on the touch screen with your gloves on. Otherwise, the button does not operate in any way.<br />
11
Basic Information<br />
Charging the battery<br />
Fully charge the rechargeable battery before using the<br />
player for the first time or when it has not been used for a while.<br />
1<br />
2<br />
Connect the USB cable to the USB port<br />
( ) on your PC.<br />
Connect the other end of the USB<br />
cable to the USB Connection Port on<br />
the bottom of the player.<br />
■ When connected with the USB cable, it takes<br />
about 4 hours for the player to fully charge<br />
although this may vary depending on your PC<br />
environment.<br />
Battery Use<br />
■ Recharge and store within the temperature range<br />
of 5°C~35°C(40°F~95°F).<br />
■ Do not overcharge (longer than 12 hours).<br />
Excessive charging or discharging may shorten<br />
the battery’s life.<br />
■ Battery life naturally shortens slowly over time.<br />
NOTE<br />
■ If you are charging the player while it is connected to your Notebook, make sure the Notebook's<br />
battery is also fully charged.<br />
12
Basic Information<br />
Basic Use<br />
Turning the Power On & Off<br />
Normal<br />
Turning the Power On<br />
Slide and hold the [ HOLD √] switch in the opposite direction<br />
of the arrow.<br />
■ Power is turned on.<br />
ENG<br />
1.Life is cool<br />
002/020 √ 00:02:20<br />
Turning the Power Off<br />
Slide and hold the [ HOLD √] switch in the opposite direction<br />
of the arrow again.<br />
■ Power is turned off.<br />
NOTE<br />
■ Power is automatically turned off when none of the buttons have been tapped for a preset<br />
period of time (Default: 1 minute) in the pause mode. √ Page 42<br />
Playing Music<br />
Normal<br />
1 Press and hold [ ] to move to the main menu.<br />
2 Tap [ ] to select and then tap [ ].<br />
■ The Music Menu will appear.<br />
1.Life is cool<br />
002/020 √ 00:02:20<br />
3 Use [ ] and [ ] to select a music file of your choice.<br />
4 Tap [ ].<br />
■ The music file will begin playing.<br />
NOTE<br />
■ Tap [ ] to move to the previous screen.<br />
■ Press and hold [ ]to move to the main menu screen.<br />
13
Basic Information<br />
Basic Use (Continued)<br />
Volume Control<br />
Normal<br />
Tap [ ].<br />
■ You will see a volume control icon.<br />
■ Tap [ ] to increase the volume or [ ] to decrease it.<br />
1.Life is cool<br />
002/020 √ 00:02:20<br />
Lock Function<br />
Normal<br />
1.Life is cool<br />
002/020 √ 00:02:20<br />
In Hold mode, all buttons are disabled. This function is useful<br />
when you are walking or jogging.<br />
1<br />
2<br />
Slide the [ HOLD √] switch in the direction of the arrow.<br />
Slide the [ HOLD √] switch in the opposite direction of the<br />
arrow to release the Lock function.<br />
14
Reset Function<br />
ENG<br />
If a player malfunction occurs, you can<br />
re-initialize the system by pressing the<br />
Reset hole.<br />
Reset hole<br />
Press the Reset hole at the rear of the<br />
player with a pointed object such as a<br />
safety clip.<br />
■ The system will be initialized.<br />
■ Your settings and files will not be affected.<br />
15
Loading Your Desired File<br />
Installing <strong>Samsung</strong> Media Studio<br />
Use Media Studio to transfer music<br />
files from your PC to the player.<br />
If Media Studio is not installed automatically<br />
CAUTION ■ Install the program on PCs running Windows XP after logging on with the Administrator account.<br />
Please refer to the PC user manual on how to log on with the Administrator account.<br />
Before you start!<br />
Insert the installation CD provided with the player into the CD-ROM drive.<br />
1<br />
Click .<br />
2<br />
Click .<br />
■ Media Studio installation starts.<br />
■ An icon is created on the desktop<br />
after installation is complete and Media<br />
Studio starts.<br />
16
Loading Your Desired File<br />
Connecting to your PC<br />
Before you start!<br />
Use the USB Cable provided when connecting the player to your PC.<br />
ENG<br />
2<br />
1<br />
1<br />
2<br />
Connect the USB cable to the USB port (<br />
) on your PC.<br />
Connect the other end of the USB cable to the USB Connection Port on the<br />
bottom of the player.<br />
PC Requirements<br />
The PC system must meet the following minimum specifications:<br />
■ Pentium 300MHz or higher<br />
■ Windows XP Service Pack 2 or higher<br />
■ DirectX 9.0 or higher ■ USB Port 2.0<br />
■ 100MB of free hard disc space<br />
■ CD Rom Drive (2X or higher)<br />
■ Windows Media Player 10.0 or higher ■ Resolution 1024 X 768 or higher<br />
CAUTION<br />
■ If you connect the player through a USB hub, the connection may be unstable. Please connect the<br />
player to your PC directly.<br />
■ If you connect the player to your PC in the low battery condition, the player automatically checks<br />
the battery status and charges itself for several minutes before connecting to your PC.<br />
17
Loading Your Desired File<br />
Adding Files/Folders in <strong>Samsung</strong> Media Studio<br />
Media Studio enables you to select and organize files and folders in preparation<br />
for transfer to your player.<br />
2<br />
3<br />
3<br />
Please refer to Help for more information on how to use Media Studio.<br />
■<br />
Click ➝ ➝ from the menu at the top of the Media Studio program.<br />
18
■<br />
Before you start! Connect the player to your PC.<br />
■ Media Studio must be installed on your PC.<br />
1<br />
2<br />
3<br />
4<br />
3<br />
4<br />
Media Studio will automatically start when the player is connected to your PC.<br />
■ If the program does not start automatically, double-click the Media Studio icon on the desktop.<br />
Click the desired file icon on the left side.<br />
■ Choose the file type you want to transfer by clicking on one of these icons.<br />
represents a music file and represents a photo.<br />
■ Click icon to display etc list. The ETC list includes file types (ex: TXT, XOV, etc) other than<br />
music and photo files.<br />
To add folders<br />
Click on the bottom of Media Studio.<br />
■<br />
The Open Folder window will appear.<br />
Select the folder to add and click .<br />
■ The files of the selected folder are added to the list on the left<br />
side the Media Studio Screen.<br />
To add files<br />
Click on the bottom of Media Studio.<br />
■<br />
The Open window will appear.<br />
Select the files to add and click .<br />
■<br />
The selected files are added to the list on the left side the<br />
Media Studio Screen.<br />
4<br />
4<br />
ENG<br />
19
Loading Your Desired File<br />
Transferring Files to the Player with <strong>Samsung</strong> Media Studio<br />
Perform the following steps to transfer files from your PC to the player.<br />
2<br />
3<br />
4<br />
Portable<br />
window<br />
20<br />
NOTE<br />
■ Music recognition technology and related data are provided by Gracenote and<br />
Gracenote CDDB ® Music Recognition Service SM .<br />
■ CDDB is a registered trademark of Gracenote. The Gracenote logo and logotype, the Gracenote<br />
CDDB logo and logotype, and the "Powered by Gracenote CDDB" logo are<br />
trademarks of Gracenote. Music Recognition Service and MRS are service marks of Gracenote.
■<br />
Before you start! Connect the player to your PC.<br />
■ Media Studio must be installed on your PC.<br />
ENG<br />
1<br />
2<br />
3<br />
Media Studio will automatically start when the player is connected to your PC.<br />
■ If the program does not start automatically, double-click the Media Studio icon on the desktop.<br />
Click the desired file icon on the left side.<br />
■ Choose the file type you want to transfer by clicking on one of these icons.<br />
represents a music file and represents a photo.<br />
■ Click icon to display etc list. The ETC list includes file types (ex: TXT, XOV, etc) other than<br />
music and photo files.<br />
Select the file to transfer in the left file list.<br />
4 Click icon.<br />
■ The Selected file is transferred to the player.<br />
■ Do not disconnect the USB cable during file transfer. This may cause damage to the player or your PC.<br />
CAUTION<br />
NOTE<br />
■ When transferring a photo file to the player using , it is automatically converted into<br />
JPG format before transfer. The file size is automatically adjusted, too.<br />
■ A photo file that is transferred to the player without using can look different from<br />
the source on the screen of the player.<br />
21
Listening to Music<br />
Listening to Music<br />
Before you start!<br />
Connect the earphones, then turn on the player, and check the battery.<br />
E.g. Playing by Artist<br />
1<br />
Press and hold [ ] to move to the main menu.<br />
Music<br />
1<br />
2,3<br />
2 Tap [ ] to select and then tap [ ].<br />
■ The Music Menu will appear.<br />
Music Menu<br />
■ : You can see the current song.<br />
■ : To play by artist<br />
■ : To play by album<br />
■ : To play in numeric or alphabetical order<br />
■ : To play by genre<br />
■ : To play by Playlist<br />
3 Tap [ ] to select and then tap [ ].<br />
22<br />
NOTE<br />
■ The music files compatible with the player are MP3, and WMA .<br />
■ MP1 or MP2 files which only have a changed extension to MP3 may not play on the player.<br />
■ A file without an ID3 Tag is displayed as [Unknown].<br />
■ Files with an ID3 tag will automatically be organized on the player by Artists, Albums etc.<br />
An ID3 tag is a hidden part of each music file and is used to categorize.
ENG<br />
Music<br />
Now Playing<br />
Artists<br />
Albums<br />
Tracks<br />
Genres<br />
Playlists<br />
4<br />
Tap [ ] to select an artist, then tap [ ].<br />
■ The albums for the artist will appear.<br />
5 Tap [ ] to select an album, then tap [ ].<br />
■ The music files for the selected album will appear.<br />
6 Tap [ ] to select a music file to play, then<br />
tap [ ].<br />
■ The music will start playing.<br />
4,5,6<br />
23
Listening to Music<br />
Listening to Music (Continued)<br />
To Pause<br />
1 Tap [ ] while the music is playing.<br />
■ The music playback will be paused.<br />
2 Tap [ ] again.<br />
■ The music will play from the point where it stopped.<br />
NOTE<br />
■ Power is automatically turned off when none of the buttons have been tapped for a preset period of<br />
time (Default: 1 minute) in the pause mode. √ Page 42<br />
To search within a track<br />
1<br />
2<br />
Press and hold [ ] while the selected track is playing.<br />
■ It searches to the beginning or the end of the track.<br />
Release the button at the point you want to start.<br />
■ It starts playing from the point you release the button.<br />
24
To Play from the beginning of the current track<br />
ENG<br />
Tap [<br />
] after 3 seconds of play.<br />
■ The current track starts playing from the beginning.<br />
To play the previous/next track<br />
Tap [ ] within 3 seconds of play.<br />
■ The previous track will start playing.<br />
Tap [ ].<br />
■ The next track will start playing.<br />
CAUTION<br />
■ When playing VBR files, the previous track may not play even if you tap [<br />
3 seconds of play.<br />
] within<br />
25
Listening to Music<br />
Creating a Playlist Using <strong>Samsung</strong> Media Studio<br />
A playlist is a list of your favorite songs.<br />
1<br />
3<br />
3<br />
2<br />
26<br />
1<br />
2<br />
3<br />
Click on the top of Media Studio.<br />
■ The window appears.<br />
Click on the bottom.<br />
■ The Creation window appears.<br />
Type in the album title and click .<br />
■ A new album (playlist) will be created and stored in the My Album section of Media Studio.
4<br />
Adding Music files to a Playlist<br />
1<br />
2<br />
5<br />
1<br />
2<br />
3<br />
4<br />
5<br />
Click on the top of Media Studio.<br />
■ The window appears.<br />
Click in the right corner of the<br />
window.<br />
■ The Album window appears.<br />
Double-click on a desired album in the right<br />
window.<br />
Select files that you want to transfer in the<br />
window.<br />
Click icon.<br />
■ The selected files will be added to the album (playlist).<br />
ENG<br />
3<br />
Exporting a Playlist to your Player Using Media Studio<br />
1<br />
2<br />
4<br />
1<br />
2<br />
3<br />
4<br />
Click on the top of Media Studio.<br />
■ The window appears.<br />
Click in the right corner of the<br />
window.<br />
■ The window appears.<br />
Select a desired album in the list.<br />
Click icon.<br />
■ The selected album will be transferred to the player<br />
and stored in ➝ .<br />
27
Listening to Music<br />
To Play a Playlist<br />
Before you start!<br />
For more information, see pages 26~27 to see how to create and transfer playlists<br />
to your player.<br />
Music<br />
Now Playing<br />
Artists<br />
Albums<br />
Tracks<br />
Genres<br />
Playlists<br />
1<br />
2<br />
3<br />
4<br />
5<br />
Press and hold [ ] to move to the main menu.<br />
Tap [ ] to select and then tap [ ].<br />
■<br />
The Music Menu will appear.<br />
Tap [ ] to select and then tap [ ].<br />
■ The Playlist(s) will appear.<br />
■ If there is no playlist found, you will see a message of on the<br />
screen.<br />
Tap [ ] to select the playlist of your choice, then tap [ ].<br />
■ The music files saved in the selected playlist will appear.<br />
Tap [ ] to select a music file to play, then tap [ ].<br />
■ The music file will start playing.<br />
28
Listening to Music<br />
Using the Music Option Menu<br />
To select the sound effect<br />
Different sound effects can be selected that enable you to enhance the music you<br />
are listening to.<br />
Normal<br />
1<br />
Tap [ ] while listening to music.<br />
■<br />
The music option menu appears.<br />
ENG<br />
Sound Effect<br />
Graphic EQ<br />
Play Mode<br />
2 Tap [ ] to select and then tap [ ].<br />
■ The sound effect menu appears.<br />
3 Tap [ ] to select the desired sound effect and then tap [ ].<br />
■ You can select either <br />
or .<br />
To select the graphic EQ display<br />
Normal<br />
1<br />
Tap [ ] while listening to music.<br />
■<br />
The music option menu appears.<br />
Sound Effect<br />
Graphic EQ<br />
Play Mode<br />
2 Tap [ ] to select and then tap [ ].<br />
■ The graphic equalizer menu appears.<br />
3 Tap [ ] to select or and then tap [ ].<br />
■ : The graphic equalizer will be displayed on the screen.<br />
■ : The graphic equalizer will not be displayed on the screen.<br />
29
Listening to Music<br />
Using the Music Option Menu (Continued)<br />
To select the play mode<br />
Normal<br />
1<br />
Tap [ ] while listening to music.<br />
■<br />
The music option menu appears.<br />
Sound Effect<br />
Graphic EQ<br />
Play Mode<br />
2 Tap [ ] to select and then tap [ ].<br />
■ The play mode menu appears.<br />
3 Tap [ ] to select the desired mode and then tap [ ].<br />
■ You can select either or .<br />
■ : To play all the tracks in order one time.<br />
■ : To repeat one file.<br />
■ : To repeat all files.<br />
■ : To play files at random.<br />
30
Photo Viewing<br />
Photo Viewing<br />
Before you start!<br />
See pages 20-21 to transfer Photo files to your player.<br />
1<br />
Press and hold [ ] to move to the main<br />
menu.<br />
ENG<br />
2 Tap [ ] to select and then tap<br />
[ ].<br />
■ The Photo list will appear.<br />
Photo<br />
1<br />
1,2<br />
2,3<br />
3 Tap [ ] to select the photo file of<br />
your choice, then tap [ ].<br />
■ The selected file will appear.<br />
■ Large photos may take longer to display.<br />
Slideshow Viewing<br />
You can view your picture files in order as a<br />
Slideshow.<br />
1 Tap [ ] in Photo Viewing mode.<br />
■ The slideshow will start.<br />
NOTE<br />
■ You will see thumbnail<br />
photos if the appropriate<br />
information is included in<br />
the file.<br />
For a file with no<br />
information, you will<br />
see instead.<br />
2 Tap [ ] to stop the slideshow.<br />
To view the previous / next photo<br />
Tap [ ].<br />
■ You can see the previous or next photo on the display.<br />
31
Photo Viewing<br />
Using the Photo Option Menu<br />
To listen to music while viewing your photo<br />
You can listen to the song that you last played while viewing your photo.<br />
1 Tap [ ] while viewing a photo.<br />
Background Mu..<br />
Add to Screen S..<br />
■<br />
2 Tap [ ] to select or .<br />
■<br />
■<br />
: You can listen to the song that you last<br />
played while viewing your photo.<br />
: No background music is played while<br />
viewing a photo.<br />
The photo option menu appears.<br />
Background Mu..<br />
Add to Screen S..<br />
3 Tap [ ] to select and then tap<br />
[ ].<br />
■ The selected photo file is added to the screen saver list.<br />
32<br />
NOTE<br />
■ Select from → → and the selected photo is<br />
displayed on the screen as a screen saver. √ page 41<br />
■ If you set , the screen saver will be initialized to .
Listening to FM Radio<br />
Listening to FM Radio<br />
Before you start!<br />
Connect the earphones, then turn on the player, and check the battery.<br />
ENG<br />
1<br />
Press and hold [ ] to move to the main<br />
menu.<br />
FM Radio<br />
2 Tap [ ] to select and then<br />
tap [ ].<br />
■ FM radio reception will start.<br />
1<br />
2<br />
To use Mute function<br />
Tap [ ] while listening to the FM radio.<br />
■ Sound is muted.<br />
■ Tap [ ] once again to hear sound.<br />
CAUTION<br />
■ Always connect your earphones to the player when searching or setting frequencies. The earphones are<br />
used as antennas to receive FM radio reception.<br />
33
Listening to FM Radio<br />
Listening to FM Radio (Continued)<br />
To switch to <strong>Manual</strong> mode<br />
Select this mode if you want to manually search through the FM band one frequency<br />
at a time.<br />
Preset Mode<br />
1<br />
Tap [ ] in .<br />
Go to <strong>Manual</strong> ..<br />
Delete Preset<br />
Auto Preset<br />
Preset List<br />
FM Sensitivity<br />
2 Tap [ ] to select and then tap<br />
[ ].<br />
■ You will see on the screen.<br />
To switch to Preset Mode<br />
Select this mode if you want to search through your saved FM presets one preset at a time.<br />
<strong>Manual</strong> Mode<br />
Go to Preset ..<br />
Add Preset<br />
Auto Preset<br />
FM Sensitivity<br />
1 Tap [ ] in .<br />
2<br />
Tap [ ] to select and then tap [ ].<br />
■ You will see on the screen.<br />
3 Tap [ ] to select the preset frequency.<br />
■ Once appears on the screen, you can select a radio<br />
frequency and listen to it.<br />
34<br />
NOTE<br />
■ If no preset frequencies are set, you will see and the player will not<br />
switch to .<br />
■ If you set , the saved preset lists are deleted.<br />
■ If you select on the FM option menu, you will see the preset frequencies.<br />
■ For more information on the preset setup, see pages 36~37.
To automatically search for frequencies<br />
ENG<br />
<strong>Manual</strong> Mode<br />
Press and hold [<br />
] in .<br />
■ The broadcast station frequency nearest from the point the button is<br />
released will be searched.<br />
To manually search for frequencies<br />
<strong>Manual</strong> Mode<br />
Tap [<br />
] in .<br />
■ Moves to next frequency whenever the button is tapped.<br />
35
Listening to FM Radio<br />
Setting FM Presets<br />
You can set up to 30 presets in FM Radio mode.<br />
To automatically set Presets<br />
<strong>Manual</strong> Mode<br />
1 Tap [ ] in FM Radio mode.<br />
Go to Preset ..<br />
Add Preset<br />
Auto Preset<br />
FM Sensitivity<br />
2 Tap [ ] to select and then tap [ ].<br />
■ You will see the Auto Preset window on the screen.<br />
3 Tap [ ] to select and then tap [ ].<br />
■ Up to 30 presets are automatically saved.<br />
NOTE<br />
■ Using deletes all previous presets.<br />
To cancel during setting<br />
Tap [ ] to cancel during auto scanning.<br />
■ The auto preset setting is canceled and frequencies set up to then are stored.<br />
36
To manually set Presets<br />
<strong>Manual</strong> Mode<br />
Go to Preset ..<br />
Add Preset<br />
Auto Preset<br />
FM Sensitivity<br />
1<br />
2 Tap [ ].<br />
3 Tap [ ] to select and then tap [ ].<br />
4<br />
Tap [ ] to select the desired frequency in .<br />
■ The selected frequency will be added to the preset list. A maximum of<br />
30 preset numbers are added to the list in sequential order.<br />
To set a preset for other frequencies, follow 1-3 steps above.<br />
ENG<br />
NOTE<br />
■ If a frequency that you try to add already exists in the list, you will see and<br />
the selected frequency is not added to the preset list.<br />
To search for presets in Preset mode<br />
Preset Mode<br />
Tap [<br />
■<br />
] in .<br />
The preset number is selected and you can listen to the stored radio<br />
frequency.<br />
NOTE<br />
■ If you want to check the preset list in , tap [ ] to select and Tap [ ].<br />
37
Listening to FM Radio<br />
To Delete Presets<br />
Delete Preset<br />
89.1MHz<br />
89.2MHz<br />
89.3MHz<br />
89.4MHz<br />
1 Tap [ ] in .<br />
2 Tap [ ] to select and then tap [ ].<br />
■ The preset frequencies will appear.<br />
3 Tap [ ] to select the preset frequency you want to delete<br />
and then tap [ ].<br />
■ The confirmation window will appear.<br />
4 Tap [ ] to select and then tap [ ].<br />
■ The selected preset will be deleted.<br />
5<br />
To select and delete other preset numbers, follow 1-4 steps<br />
above.<br />
38
Listening to FM Radio<br />
Setting FM Radio<br />
To set FM Sensitivity<br />
<strong>Manual</strong> Mode<br />
1 Tap [ ] in FM Radio mode.<br />
ENG<br />
Go to Preset ..<br />
Add Preset<br />
Auto Preset<br />
FM Sensitivity<br />
2 Tap [ ] to select and then tap [ ].<br />
■ The FM Sensitivity menu appears.<br />
3 Tap [ ] to select the sensitivity and then tap [ ].<br />
■ You can select from , and .<br />
■<br />
The higher FM sensitivity is, the more frequencies that can be received.<br />
39
Settings<br />
Setting Display<br />
You can adjust the screen saver and the turn-off time for the screen display.<br />
1 Press and hold [ ] to move to the main menu.<br />
Settings<br />
2 Tap [ ] to select and then tap [ ].<br />
■ The Settings menu appears.<br />
Settings<br />
Display<br />
Time<br />
Language<br />
System<br />
3 Tap [ ] to select and then tap [ ].<br />
■ The Display menu appears.<br />
4 Use the [ ] and [ ] to set the desired functions.<br />
NOTE<br />
Button Operation<br />
■ Tap [ ] to move up or down in the list.<br />
■ Tap [ ] to select and confirm your settings.<br />
■ Tap [ ] to return to the previous screen.<br />
40
■ : You can set an image to use as a screen saver.<br />
Select either , , , and and set<br />
the wait time. is a photo you designated as a screen saver in .<br />
√ page 32<br />
You can select from , , , , , and . If no button is<br />
tapped within the time set shown above, the player will display the screen saver image.<br />
■ : If no button is tapped within the time set shown below, the screen display will<br />
automatically turn off. Select either , , , , , and . With the display turned off, tap any button to turn back on the screen display.<br />
ENG<br />
Screen Saver Setting<br />
Screen Saver<br />
Photo<br />
15 sec<br />
1 Tap [ ] to select and then tap [ ].<br />
■ The screen saver menu appears.<br />
2 Tap [ ] to select the desired screen saver image and<br />
then tap [ ].<br />
3 Tap [ ] to select a wait time and then tap [ ].<br />
■ The Confirmation window will appear.<br />
4 Tap [ ] to select and then tap [ ].<br />
■ The screen saver setting is complete.<br />
41
Settings<br />
Setting Time<br />
You can not only set the current Time set but also Sleep Timer and Auto<br />
Power Off.<br />
Settings<br />
Display<br />
Time<br />
Language<br />
System<br />
1 Press and hold [ ] to move to the main menu.<br />
2 Tap [ ] to select and then tap [ ].<br />
■ The Settings menu appears.<br />
3 Tap [ ] to select and then tap [ ].<br />
■ The Time menu appears.<br />
4 Use the [ ] and [ ] to set the desired functions.<br />
■ : Turns off power automatically after the preset time.<br />
Select either , , , , , or .<br />
■ : Automatically turns power off when there is no<br />
button operation after the preset time in the pause mode.<br />
Select either , , , , or .<br />
■ : You can set the current time. √ Page 43<br />
42
Time Set<br />
ENG<br />
Time Set<br />
1 Tap [ ] to select and then tap [ ].<br />
Hour<br />
Min<br />
PM 06 35<br />
2 Tap [ ] to move to and use the [ ]<br />
to set the time.<br />
3 Tap [ ].<br />
■<br />
The confirmation window will appear.<br />
4 Tap [ ] to select and then tap [ ].<br />
■ The time setting will be saved.<br />
43
Settings<br />
Setting Language<br />
You can set the language for the menu.<br />
Settings<br />
Display<br />
Time<br />
Language<br />
System<br />
1 Press and hold [ ] to move to the main menu.<br />
2 Tap [ ] to select and then tap [ ].<br />
■ The Settings menu appears.<br />
3 Tap [ ] to select and then tap [ ].<br />
4 Use the [ ] and [ ] to select the language for the menu.<br />
■ Select from , < >, , , ,<br />
< >, < >, < >, , < >, ,<br />
, , , and .<br />
NOTE<br />
■ The supported languages can be changed or added.<br />
44
Settings<br />
Setting the System<br />
You can set various functions of the player.<br />
Settings<br />
Display<br />
Time<br />
Language<br />
System<br />
1 Press and hold [ ] to move to the main menu.<br />
2 Tap [ ] to select and then tap [ ].<br />
■ The Settings menu appears.<br />
ENG<br />
3 Tap [ ] to select and then tap [ ].<br />
■ The System menu appears.<br />
4 Use the [ ] and [ ] to set the desired functions<br />
■ : You can set the start point where the player resumes playback after you stop<br />
playing the music. Selecting will resume playback from the last stopped point while <br />
will resume playback from the beginning of the last played file.<br />
■ : Enables button sounds. Select either or .<br />
■<br />
■<br />
: You can avoid hearing damage by setting the limit of the volume when using<br />
the earphone. will limit the maximum volume level up to 20. The maximum volume level<br />
when Volume Limit is set to is 30.<br />
: You can select your regional area for FM radio. Select from ,<br />
and .<br />
NOTE<br />
■ Frequency range by region<br />
- Korea/USA: Search for FM frequencies in 100 kHz increments between 87.5 MHz~108.0 MHz.<br />
- Japan: Search for FM frequencies in 100 kHz increments between 76.0 MHz~108.0 MHz.<br />
- Other Countries: Search for FM frequencies in 50 kHz increments between 87.50 MHz~108.00 MHz.<br />
■ FM region can be deleted or changed according to the target region of the player.<br />
■ If you change the FM region, the previously stored radio frequencies are deleted.<br />
.<br />
45
Settings<br />
Setting the System (Continued)<br />
■<br />
■<br />
: Returns all settings to the default value.<br />
: You can check the firmware version, memory capacity and file number.<br />
■ Firmware Version : Displays the current firmware version.<br />
■ Memory : Indicates the remaining memory capacity. indicates the usage, indicates the<br />
remaining capacity and indicates the total memory capacity.<br />
■ Files : indicates the number of music files, for the number of photos, and for the<br />
number of entire files.<br />
Default Set<br />
Settings<br />
Resume<br />
Beep<br />
Volume Limit<br />
FM Region<br />
Default Set<br />
About<br />
1 Tap [ ] to select and then tap [ ].<br />
■ The Confirmation window will appear.<br />
2 Tap [ ] to select and then tap [ ].<br />
■ : Initializes all settings to default.<br />
■<br />
: Cancels default settings.<br />
NOTE<br />
■ If you set , all functions you set are initialized to the default settings.<br />
■ Regarding the Built-In Memory<br />
The actual built-in memory available is slightly less than indicated as the internal firmware uses a<br />
portion of the memory.<br />
46
To Upgrade Firmware<br />
Future upgrades may be available for this player to enhance performance and<br />
compatibility.<br />
ENG<br />
1 Connect to http://www.samsung.com, select [SUPPORT] → [DOWNLOAD CENTER]<br />
and then select your player.<br />
2<br />
3<br />
4<br />
5<br />
When the player page appears, select [Firmware] below the model name to<br />
download the latest firmware.<br />
Uncompress the downloaded file onto your Desktop.<br />
■ The uncompressed files will be displayed.<br />
Connect the player to your PC with the USB cable.<br />
Right click on the Start button on the<br />
bottom left of your PC's screen,<br />
then choose Explore to Open<br />
Windows Explorer on your PC.<br />
■ [<strong>Samsung</strong> <strong>YP</strong>-K3] is displayed in Windows<br />
Explorer.<br />
47
To Upgrade Firmware (Continued)<br />
6 Locate and click on the Desktop icon in<br />
Windows Explorer (left column).<br />
The contents of the Desktop will appear in<br />
the right column.<br />
7 Locate and select the Firmware update files<br />
(right column) and drag-and-drop it into the<br />
[<strong>Samsung</strong> <strong>YP</strong>-K3] → [Data] folder.<br />
8<br />
9<br />
After disconnecting USB Cable, the player will be turned off automatically.<br />
Slide and hold the [ HOLD √] switch in the opposite direction of the arrow.<br />
■ The firmware will be upgraded.<br />
■ When upgrading is complete, the player will be turned off automatically.<br />
48<br />
NOTE<br />
■ Check the battery charge status of the player. If the battery is not sufficiently charged, the firmware<br />
will not be upgraded.<br />
■ You need to have at least 20 MB of free space on the player for the upgrade.
Troubleshooting<br />
If a malfunction is experienced, check thefollowing.<br />
If the problem persists, contact a <strong>Samsung</strong> Service Center near you.<br />
Problem<br />
Power will not turn on.<br />
Check points & Troubleshooting<br />
■ Power will not turn on if the battery is fully discharged.<br />
Recharge the battery and turn on the player again.<br />
■ Press the Reset hole.<br />
ENG<br />
Buttons do not work.<br />
The screen will not turn on.<br />
Power is turning off.<br />
Battery life differs from<br />
the <strong>Manual</strong>.<br />
Program Malfunction<br />
Connection to your PC<br />
is disabled.<br />
■ Check if the [HOLD √] switch is in the direction of the arrow position.<br />
■ Check if you tapped the right button, then tap again. √ Page 11<br />
■ Press the Reset hole.<br />
■ If is selected from → , the<br />
screen display will be turned off. Tap any button to turn on the<br />
screen display or check the Display settings. √ Page 41<br />
■ The screen may not be visible under direct sunlight.<br />
■ Check the battery status.<br />
■ The power is automatically turned off when the battery is fully<br />
discharged. Recharge the battery.<br />
■ If is selected from → , the<br />
Power in the pause mode will be turned off. Turn on the Player.<br />
■ The battery time can vary, depending on the sound mode and<br />
display setting.<br />
■ The battery life may be shortened when left for extended periods<br />
in low or high temperatures.<br />
Please check if your PC requirements are met.<br />
Press on the toolbar of your PC to run Windows Update.<br />
Select Key Updates and Service Packs, then update all.<br />
Reboot your PC and reconnect.<br />
49
Troubleshooting (Continued)<br />
Problem<br />
Check points & Troubleshooting<br />
Playing is disabled.<br />
■ Check if the available file has been saved in the player.<br />
■ Check if the music file is damaged.<br />
■ Check if there is enough battery power.<br />
File upload is disabled.<br />
■ Check if the USB cable is securely connected.<br />
Reconnect if necessary.<br />
■ Check if the memory is full.<br />
■ Press the Reset hole.<br />
Files or data are missing.<br />
Check if the USB cable has been disconnected during file or data<br />
transmission. If this is the case, it may cause serious damage not<br />
only to files/data but also to the player. You have to be extra<br />
cautious as <strong>Samsung</strong> cannot be not held responsible for data loss.<br />
Abnormal Play Time<br />
Display during Play<br />
Check if the file is in VBR (Variable Bit Rate) format.<br />
The player is hot.<br />
Heat may be generated during recharging. This has no effect on<br />
the player life or functions.<br />
50
Menu Tree<br />
You can quickly view the menu structure.<br />
Menu Select Screen<br />
ENG<br />
Music FM Radio Photo Settings<br />
»≠∏È º≥¡§ Display<br />
Time<br />
Language<br />
System<br />
Screen Saver<br />
Sleep Timer<br />
Resume<br />
Display Off<br />
Auto Power Off<br />
Beep<br />
Time Set<br />
Volume Limit<br />
FM Region<br />
Default Set<br />
About<br />
51
Product Specifications<br />
Model Name<br />
Power<br />
Built-in Battery Power<br />
File Compatibility<br />
Earphone Output<br />
Output Frequency Range<br />
Noise Ratio<br />
Play Time<br />
Temperature Range for Operation<br />
Case<br />
Weight<br />
Dimension (WxHxD)<br />
FM Frequency<br />
FM Signal to Noise Ratio<br />
FM T.H.D<br />
FM Useable Sensitiivity<br />
<strong>YP</strong>-K3<br />
3.7V (Li-Polymer Rechargeable)<br />
500mAh<br />
Music : MPEG1/2/2.5 Layer3(8kbps~320kbps, 22kHz~48kHz)<br />
WMA(48kbps~192kbps, 22kHz~48kHz)<br />
Image : JPEG(ISO/IEC 10918-1/Annex F-Sequential DCT-based mode<br />
of operation)<br />
20mW(16 Ω)<br />
20Hz~20KHz<br />
88 dB (based on 1KHz 0 dB)<br />
Music 25 hrs (based on MP3 128kbps, volume level 15 and normal mode)<br />
-5~35 °C (23~95°F)<br />
Stainless, Plastic<br />
1.76 oz (50g)<br />
1.73 X 3.78 X 0.27 inches (44 X 96 X 6.95 mm)<br />
87.5~108.0MHz<br />
50dB<br />
1%<br />
38dBµ<br />
● The contents of this <strong>Manual</strong> are subject to change without prior notice for further<br />
improvement.<br />
52
License<br />
The product unit accompanying this user manual is licensed under certain intellectual<br />
property rights of certain third parties. This license is limited to private non-commercial<br />
use by end-user consumers for licensed contents.<br />
No rights are granted for commercial use. The license does not cover any product unit<br />
other than this product unit and the license does not extend to any unlicensed product<br />
unit or process conforming to ISO/IEC 11172-3 or ISO/IEC 13818-3 used or sold in<br />
combination with this product unit. The license only covers the use of this product unit<br />
to encode and/or decode audio files conforming to the ISO/IEC 11172-3 or ISO/IEC<br />
13818-3. No rights are granted under this license for product features or functions that<br />
do not conform to the ISO/IEC 11172-3 or ISO/IEC 13818-3.<br />
53
<strong>Samsung</strong> Limited Warranty<br />
<strong>Samsung</strong> Electronics Canada Inc. (SECA),<br />
warrants that this product is free from defective material and workmanship.<br />
SECA further warrants that if this product fails to operate properly within the specified<br />
warranty period and the failure is due to improper workmanship or defective material<br />
SECA will repair or replace the product at its option.<br />
All warranty repairs must be performed by a SECA authorized service centre.<br />
(The name and address of the location nearest you can be obtained by calling toll free<br />
1-800-726-7864 or visiting our web site at www.samsung.ca)<br />
Labour<br />
one (1) year (carry-in)<br />
Parts<br />
one (1) year<br />
On carry-in models, transportation to and from the service centre is the customer’s<br />
responsibility.<br />
The original dated sales receipt must be retained by the customer and is the only<br />
acceptable proof of purchase. It must be presented to the authorized service centre<br />
at the time service is requested.<br />
Exclusions<br />
This warranty does not cover damage due to accident, fire flood and/or<br />
other acts of God; misuse, incorrect line voltage, improper installation,<br />
improper or unauthorized repairs, commercial use, or damage that occurs in shipping.<br />
Exterior and interior finish, lamps and glass are not covered under this warranty.<br />
Customer adjustments which are explained in the instruction manual are not covered<br />
under the terms of this warranty. This warranty will automatically be voided for any<br />
unit found with a missing or altered serial number. This warranty is valid only on<br />
products purchased and used in Canada.<br />
54
If you have any questions or comments relating to <strong>Samsung</strong> products,<br />
please contact the SAMSUNG customer care centre.<br />
<strong>Samsung</strong> Electronics Canada Inc., Customer Service<br />
1-800-SAMSUNG (7267864)<br />
www.samsung.com/ca<br />
REV 0.0


