

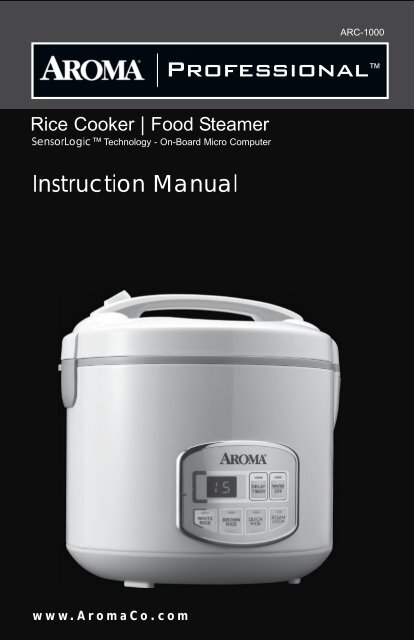
Aroma Professional Series 10-Cup Sensor Logic™ Rice CookerARC-1000 (ARC-1000) - ARC-1000 Instruction Manual - Professional Series 10-Cup Sensor Logic™ Rice Cooker
Aroma Professional Series 10-Cup Sensor Logic™ Rice CookerARC-1000 (ARC-1000) - ARC-1000 Instruction Manual - Professional Series 10-Cup Sensor Logic™ Rice Cooker
Aroma Professional Series 10-Cup Sensor Logic™ Rice CookerARC-1000 (ARC-1000) - ARC-1000 Instruction Manual - Professional Series 10-Cup Sensor Logic™ Rice Cooker

You also want an ePaper? Increase the reach of your titles
YUMPU automatically turns print PDFs into web optimized ePapers that Google loves.
<strong>ARC</strong>-<strong>10</strong>00<br />
<strong>Rice</strong> <strong>Cooker</strong> | Food Steamer<br />
<strong>Sensor</strong>Logic Technology - On-Board Micro Computer<br />
<strong>Instruction</strong> <strong>Manual</strong><br />
<strong>Professional</strong> <br />
w w w . A r o m a C o . c o m
With the <strong>Aroma</strong> ® <strong>Sensor</strong> Logic <strong>10</strong>-<strong>Cup</strong> Digital <strong>Rice</strong> <strong>Cooker</strong> you’ll be making<br />
fantastic, restaurant-quality rice at the touch of a button! This machine is<br />
specially calibrated to cook all varieties of rice, including tough-to-cook brown<br />
rice, to fluffy perfection.<br />
In addition to rice, your new <strong>Aroma</strong> ® rice cooker is ideal for healthy one-pot<br />
meals for the whole family. The convenient steam tray inserts directly over the<br />
rice, allowing you to cook meats and vegetables at the same time, in the<br />
same pot. Steaming food locks in natural flavors and nutrients that are often<br />
lost with other methods of cooking. And with the Smart Steam feature,<br />
steaming favorite meats and vegetables has never been easier. Program the<br />
number of minutes needed to steam and the Smart Steam feature does the<br />
rest.<br />
Your new rice cooker is also great for soups, stews, stocks, oatmeal, gumbos,<br />
jambalaya, breakfast frittatas, dips and even desserts! See the included recipe<br />
booklet for great meal ideas.<br />
This manual contains helpful measurement charts for cooking rice and<br />
steaming. For more information on your <strong>Sensor</strong> Logic rice cooker, or for<br />
product service, recipes and other home appliance solutions, please visit us<br />
online at www.<strong>Aroma</strong>Co.com.<br />
Published By:<br />
1<br />
<strong>Aroma</strong> Housewares Co.<br />
6469 Flanders Drive<br />
San Diego, CA 92121<br />
U.S.A.<br />
1-800-276-6286<br />
www.<strong>Aroma</strong>Co.com<br />
©2008 <strong>Aroma</strong> Housewares Company All rights reserved.
IMPORTANT SAFEGUARDS<br />
Basic safety precautions should always be followed when using electrical<br />
appliances,including the following:<br />
1. Important: Read all instructions<br />
carefully before first use.<br />
2. Make sure the appliance is “OFF”<br />
when not in use, before putting on or<br />
taking off parts and before cleaning.<br />
3. To protect against electrical shock, do<br />
not immerse cord, plug or the<br />
appliance itself in water or any other<br />
liquid.<br />
4. Keep the appliance away from<br />
children to avoid accidents.<br />
5. Unplug from outlet when not in use<br />
and before cleaning. Allow unit to<br />
cool before putting on or taking off<br />
parts, and before cleaning the<br />
appliance.<br />
6. Do not operate any appliance with a<br />
damaged cord or plug or after the<br />
appliance malfunctions or has been<br />
damaged in any manner. Contact<br />
<strong>Aroma</strong> ® customer service for<br />
examination, repair or adjustment.<br />
7. Do not use attachments or accessories<br />
other than those supplied or<br />
recommended by the manufacturer.<br />
Incompatible parts create a hazard.<br />
8. Do not use outdoors.<br />
9. Do not let cord hang over the edge of<br />
the table or counter, or touch hot<br />
surfaces.<br />
<strong>10</strong>. Do not place on or near a hot gas or<br />
electric burner or in a heated oven.<br />
11. Do not use the appliance for other<br />
than intended use.<br />
12. Extreme caution must be used when<br />
moving the appliance while it contains<br />
hot water or other hot liquids.<br />
13. Always unplug from the base of the wall<br />
outlet. Never pull on the cord.<br />
14. The rice cooker should be operated on<br />
a separate electrical circuit from other<br />
operating appliances. If the electric<br />
circuit is overloaded with other<br />
appliances, this appliance may not<br />
operate properly.<br />
15. Maximum uncooked rice capacity is 1.8<br />
liters (total capacity is 4.0 Liters) or <strong>10</strong><br />
cups of the provided measuring cup.<br />
16. Avoid sudden temperature changes<br />
when using the rice cooker.<br />
17. Use only with 120V AC power outlet.<br />
18. Always make sure the outside of the<br />
inner cooking pot is dry prior to use. If<br />
cooking pot is returned to cooker when<br />
wet, it may damage the product,<br />
causing it to malfunction.<br />
19. Use extreme caution when opening the<br />
lid during or after cooking. Hot steam<br />
will escape and may cause scalding.<br />
20. During the cooking and steaming stage,<br />
you may see steam coming from the<br />
vent on the lid. This is normal. Do not<br />
cover, touch or obstruct the steam vent.<br />
21. Do not touch hot surfaces. Use handles<br />
or knobs.<br />
22. Store rice cooker in a cool, dry place.<br />
23. Use the appliance on a level, dry and<br />
heat-resistant surface.<br />
24. To reduce the risk of electric shock,<br />
cook only in the provided inner pot.<br />
25. To disconnect, press the "OFF" button,<br />
then remove plug from the wall outlet.<br />
SAVE THESE INSTRUCTIONS<br />
2
SHORT CORD INSTRUCTIONS<br />
1. A short power-supply cord is provided to reduce the risks resulting<br />
from becoming entangled in or tripping over a longer cord.<br />
2. Longer extension cords are available and may be used if care is<br />
exercised in their use.<br />
3. If a longer extension cord is used:<br />
a. The marked electrical rating of the extension cord should be<br />
at least as great as the electrical rating of the appliance.<br />
b. The longer cord should be arranged so that it will not drape<br />
over the countertop or tabletop where it can be pulled by<br />
children or tripped over unintentionally.<br />
POLARIZED PLUG<br />
This appliance has a polarized plug (one blade is wider than the<br />
other); follow the instructions below:<br />
To reduce the risk of electric shock, this plug is intended to fit into a<br />
polarized outlet only one way. If the plug does not fit fully into the<br />
outlet, reverse the plug. If it still does not fit, contact a qualified<br />
electrician. Do not attempt to modify the plug in any way.<br />
This appliance is for household use only.<br />
3
PARTS IDENTIFICATION<br />
Lid Release Button<br />
Steam Vent<br />
Handle<br />
Lid<br />
Condensation<br />
Collector<br />
Digital Display<br />
Delay Timer<br />
Keep Warm/Off<br />
White <strong>Rice</strong> Button<br />
Brown <strong>Rice</strong> Button<br />
Steam/Cook Button<br />
Quick <strong>Rice</strong> Button<br />
ACCESSORIES<br />
Measuring <strong>Cup</strong><br />
Soup Ladle<br />
Steam Tray<br />
Serving Spatula<br />
4
BEFORE FIRST USE<br />
1. Read all instructions and important safeguards.<br />
2. Remove all packaging materials and make sure items are received<br />
in good condition.<br />
3. Tear up all plastic bags, as they can pose a risk to children.<br />
4. Wash accessories in warm, soapy water. Rinse and dry thoroughly.<br />
5. Remove inner pot from rice cooker and clean with warm,<br />
soapy water. Rinse and dry thoroughly before returning to cooker.<br />
6. Wipe body clean with a damp cloth.<br />
• Do not use abrasive cleaners or scouring pads.<br />
• Do not immerse the rice cooker base, cord or plug in water<br />
at any time.<br />
COOKING RICE<br />
SHORT ON TIME?<br />
Use the “Quick <strong>Rice</strong>” function. See more details on this time-saving<br />
feature on page 8.<br />
1. Using the measuring cup provided, measure out the desired amount of<br />
rice. One cup refers to one full, level cup. The measuring cup provided<br />
adheres to rice industry standards (180mL or ¾ of a standard U.S. cup) and<br />
is not equal to one U.S. cup (240mL).<br />
2. Rinse rice in a mesh strainer or other separate container (do not rinse rice<br />
in the inner pot) until the water becomes relatively clear. Place rinsed<br />
rice into the inner pot.<br />
3. Using the measuring cup provided or the measurement lines inside the<br />
inner pot, add the appropriate amount of water to the inner pot. A<br />
helpful “<strong>Rice</strong>/Water Measurement Chart” is on the next page (page 6)<br />
for reference. Smooth over the top of the rice with the rice paddle so<br />
that rice surface is level to ensure even cooking.<br />
TIP:<br />
To add an extra dimension of flavor to rice, try substituting a favorite<br />
variety of meat or vegetable broth or stock. The ratio of broth/stock<br />
to rice will be the same as water to rice.<br />
CONTINUED ON NEXT PAGE<br />
5
COOKING RICE (CONT.)<br />
<strong>Rice</strong>/Water Measurement Chart<br />
UNCOOKED<br />
RICE<br />
WATER<br />
RICE<br />
WATERLINE<br />
INSIDE POT<br />
APPROX.<br />
COOKED<br />
RICE YIELD<br />
COOKING TIMES<br />
2 <strong>Cup</strong>s 2-1/2 <strong>Cup</strong>s Line 2 4 <strong>Cup</strong>s<br />
3 <strong>Cup</strong>s 3-1/2 <strong>Cup</strong>s Line 3 6 <strong>Cup</strong>s<br />
4 <strong>Cup</strong>s 4-1/2 <strong>Cup</strong>s Line 4 8 <strong>Cup</strong>s<br />
5 <strong>Cup</strong>s 5-1/2 <strong>Cup</strong>s Line 5 <strong>10</strong> <strong>Cup</strong>s<br />
6 <strong>Cup</strong>s 6-1/2 <strong>Cup</strong>s Line 6 12 <strong>Cup</strong>s<br />
7 <strong>Cup</strong>s 7-1/2 <strong>Cup</strong>s Line 7 14 <strong>Cup</strong>s<br />
8 <strong>Cup</strong>s 8-1/2 <strong>Cup</strong>s Line 8<br />
9 <strong>Cup</strong>s 9-1/2 <strong>Cup</strong>s LIne 9 18 <strong>Cup</strong>s<br />
<strong>10</strong> <strong>Cup</strong>s <strong>10</strong>-1/2 <strong>Cup</strong>s Line <strong>10</strong> 20 <strong>Cup</strong>s<br />
Helpful Hints:<br />
1. Rinse rice to remove excess bran<br />
and starch. This will help reduce<br />
browning and sticking to the bottom<br />
of the pot.<br />
2. Certain varieties of rice are stickier<br />
than others. If you have experienced<br />
any sticking to the inner pot, try adding<br />
a light coating of vegetable oil or<br />
nonstick cooking spray to the bottom<br />
of the inner pot before adding rice.<br />
3. The chart above is only a general<br />
measuring guide. As there are many<br />
different kinds of rice available (see<br />
“About <strong>Rice</strong>” on page 15), rice/water<br />
measurement may vary slightly.<br />
WHITE RICE: 30-35 Min.<br />
BROWN RICE: <strong>10</strong>0-<strong>10</strong>5 Min.<br />
WHITE RICE: 32-37 Min.<br />
BROWN RICE: <strong>10</strong>2-<strong>10</strong>7 Min.<br />
WHITE RICE: 34-39 Min.<br />
BROWN RICE: 1<strong>10</strong>-115 Min.<br />
WHITE RICE: 38-43 Min.<br />
BROWN RICE: 114-119 Min.<br />
WHITE RICE: 40-45 Min.<br />
BROWN RICE: 116-121 Min.<br />
WHITE RICE: 41-46 Min.<br />
BROWN RICE: 118-123 Min.<br />
16 <strong>Cup</strong>s<br />
WHITE RICE: 43-48 Min.<br />
BROWN RICE: 120-125 Min.<br />
WHITE RICE: 44-49 Min.<br />
BROWN RICE: 123-128 Min.<br />
WHITE RICE: 46-51 Min.<br />
BROWN RICE: 125-130 Min.<br />
NOTE:<br />
• Chart refers to cups of rice and water<br />
based on the measuring cup provided.<br />
Only use the measuring cup provided with<br />
this rice cooker as it is not a standard cup<br />
size.<br />
• Cooking times are approximate. This table is<br />
for reference only.<br />
• Brown rice will naturally take longer to cook<br />
than white rice due to the extra bran layers<br />
around the grains. This appliance is<br />
equipped with a “Brown <strong>Rice</strong>” function that<br />
will automatically adjust temperature and<br />
time settings for best absorption of water for<br />
perfect brown rice.<br />
• Wild rice & other rice medleys will take<br />
longer to cook and may require more<br />
water. Please follow package instructions.<br />
CONTINUED ON NEXT PAGE 6
COOKING RICE (CONT.)<br />
INNER POT WATER LINES<br />
The water lines in the inner pot may be used to measure the correct amount<br />
of water for rice (see illustration below). Be sure to add the desired amount of<br />
rice first. Then fill the inner pot with water to the corresponding line in the<br />
inner pot (i.e. 6 cups of uncooked rice would be filled to line 6 in the inner<br />
pot). This is a quick and easy method to achieve perfect rice results.<br />
NOTE: If using the “Quick <strong>Rice</strong>” function with brown rice, it is recommended<br />
an additional cup of water, using the included measuring cup, is<br />
added.<br />
4. Place the inner pot into the rice cooker. Close the lid, making sure that it<br />
locks into place, and plug the power cord into a wall outlet. The<br />
“Warm/Off” light will flash and two dashes will appear on the LED<br />
screen (see illustration below). The dashes will remain on the screen<br />
unless the “Delay Timer” or “Smart WATER Steam” functions are used.<br />
Water Line<br />
<strong>Rice</strong><br />
CUP<br />
<strong>10</strong><br />
8<br />
6<br />
4<br />
2<br />
L<br />
1.8<br />
1.4<br />
1.0<br />
0.6<br />
7<br />
5. To begin cooking, press the "White <strong>Rice</strong>" or "Brown <strong>Rice</strong>" button,<br />
depending upon the type of rice to be cooked. The cooking mode<br />
indicator light will illuminate.<br />
6. Once cooking is complete, the rice cooker will automatically switch to<br />
“Keep-Warm” mode. The digital display will show a countdown 12 minutes<br />
for white rice and 25 minutes for brown rice prior to the completion of the<br />
cooking cycle.<br />
TIP:If you wish to cancel your selection at any time, press the “Warm/Off”<br />
button and reset by pressing the appropriate cooking button.<br />
NOTE: Brown rice requires a much longer cooking cycle than other rice<br />
varieties due to the extra bran layers on the grains. The “Brown <strong>Rice</strong>”<br />
function on this rice cooker allows extra time and adjusted heat<br />
setings in order to cook the rice properly.
USING THE QUICK RICE FUNCTION<br />
The “Quick <strong>Rice</strong>” function will save time by foregoing the soaking cycle. However, we<br />
only recommend using this function if time is of the essence. The rice produced by the<br />
“Quick <strong>Rice</strong>” function will not be of the same quality as if the “White <strong>Rice</strong>” or “Brown<br />
<strong>Rice</strong>” functions were used.<br />
To use the “Quick <strong>Rice</strong>” function, follow the steps for “Cooking <strong>Rice</strong>” beginning on<br />
page 5. Rather than pressing one of the rice function buttons, press the “Quick <strong>Rice</strong>”<br />
button to utilize this feature. The digital display will show a countdown 3 minutes before<br />
the rice is finished.<br />
NOTE:<br />
For best results with brown rice when using the “Quick <strong>Rice</strong>” function, add an<br />
additional 1½ cups of water, using the provided measuring cup. The<br />
additional water helps to compensate for the lack of soaking time.<br />
QUICK RICE TIME GUIDE<br />
White <strong>Rice</strong><br />
Uncooked <strong>Cup</strong>s<br />
Cooking Time with<br />
“Quick <strong>Rice</strong>” Function<br />
Approx. Time Savings<br />
Compared to<br />
“White <strong>Rice</strong>” Function<br />
2 <strong>Cup</strong>s 17-22 Min. 15 Min.<br />
4 <strong>Cup</strong>s 22-27 Min. 15 Min.<br />
6 <strong>Cup</strong>s 27-32 Min. 15 Min.<br />
8 <strong>Cup</strong>s 30-35 Min. <strong>10</strong> Min.<br />
<strong>10</strong> <strong>Cup</strong>s 38-43 Min. <strong>10</strong> Min.<br />
Brown <strong>Rice</strong><br />
Uncooked <strong>Cup</strong>s<br />
Cooking Time with<br />
“Quick <strong>Rice</strong>” Function<br />
Approx. Time Savings<br />
Compared to<br />
“Brown <strong>Rice</strong>” Function<br />
2 <strong>Cup</strong>s 38-43 Min 60 Min.<br />
4 <strong>Cup</strong>s 44-49 Min 70 Min.<br />
6 <strong>Cup</strong>s 46-51 Min. 70 Min.<br />
8 <strong>Cup</strong>s 52-57 Min. 70 Min.<br />
<strong>10</strong> <strong>Cup</strong>s 57-62 Min. 70 Min.<br />
Cooking times are approximate. This table is for reference only. Possible variations in<br />
cooking times may be caused by one or more of the following factors:<br />
• Variations in the type of rice being cooked.<br />
• Variations in the amount of rice and/or water in the inner pot.<br />
• If you are making a second batch of rice shortly after the first batch, cooking times<br />
may be reduced because the heating element will already be warm.<br />
• Opening the lid during the cycle causes a loss of heat and steam. Cooking time<br />
may be prolonged if the lid is opened before the rice is finished.<br />
8
USING THE DELAY TIMER<br />
The “Delay Timer” function will have rice ready for mealtime up to 15 hours in<br />
advance. When setting the timer, it is important to remember that rice will be<br />
finished cooking once the amount of time set has elapsed. At that point the<br />
rice cooker will automatically switch to “Keep-Warm” to ensure rice is at its<br />
freshest for serving.<br />
NOTE:<br />
To ensure safe food handling, the “Delay Timer” will not work in<br />
tandem with the “Smart Steam” function. The “Delay Timer” is<br />
meant to be used only with the “White <strong>Rice</strong>” and “Brown <strong>Rice</strong>”<br />
cooking functions.<br />
To use the “Delay Timer”:<br />
1. Repeatedly press the “Delay Timer” button to select the number of hours<br />
by which you would like to delay cooking. The timer increases in 1-hour<br />
increments, as indicated on the LED screen.<br />
2. Press the “White <strong>Rice</strong>” or “Brown <strong>Rice</strong>” button to begin countdown. The<br />
cooking cycle will begin automatically according to the timer.<br />
NOTE:<br />
The digital display on this unit is for the “Delay Timer” and “Smart<br />
Steam” functions only. When they are not in use, the display will show<br />
two red lines (see illustration below).<br />
9
USING THE SMART STEAM FUNCTION<br />
1. Add the desired amount of water to the inner pot. The inner pot includes<br />
steam lines for approximate steam times (<strong>10</strong>, 20 and 30 minutes). Fill the<br />
inner pot to the line of the desired steam time. Refer to the steaming guide<br />
for approximate times for vegetables on page 12 and meat on page 13.<br />
2. Place the steam tray inside the rice cooker.<br />
3. Place food in the steam tray and shut the lid, ensuring it locks securely<br />
closed.<br />
4. Press the “Steam/Cook” button. The new “Smart Steam” function will<br />
automatically set the time to <strong>10</strong> minutes. To modify the timer, press the<br />
“Steam/Cook” button repeatedly to adjust the time in one minute<br />
increments between 5 and 30 minutes. The time displayed will be the<br />
steaming time once the water has come to a boil.<br />
NOTE: To cancel the “Smart Steam” function, press the “Warm/Off” button at<br />
any time.<br />
5. Once the steaming time has elapsed, the rice cooker will automatically<br />
switch to “Keep-Warm” mode.<br />
6. Using caution, as steam escaping will be extremely hot, check food for<br />
doneness. If food is not quite finished, add more water, if needed, and<br />
repeat the steaming process for a few more minutes until the desired level<br />
of doneness is reached.<br />
7. Remove cooked food immediately, using an oven mitt or tongs, as food will<br />
be extremely hot after the cooking process has completed. Leaving it in<br />
the rice cooker may cause food to over cook.<br />
8. The rice cooker will remain in “Keep-Warm” mode until it is unplugged. Be<br />
sure to unplug the cord from the wall outlet when not in use.<br />
SEE PAGE 11 FOR INSTRUCTIONS ON COOKING RICE<br />
AND STEAMING SIMULTANEOUSLY.<br />
<strong>10</strong>
TO STEAM AND COOK RICE SIMULTANEOUSLY<br />
One of the most convenient features of this rice cooker is the ability to both<br />
cook rice and steam food simultaneously, ideal for creating delicious all-inone<br />
meals.<br />
1. Place the desired amount of rice and appropriate amount of water into<br />
the inner pot. See “Cooking <strong>Rice</strong>” beginning on page 5 for details. Do not<br />
attempt to cook more than 8 cups (uncooked) white or brown rice if<br />
simultaneously using the steam tray or the steam tray will not fit once the<br />
rice cooks.<br />
2. Place the inner pot into the unit and begin to cook the rice.<br />
3. Refer to the steaming guides for vegetables (page 12) or meat (page 13)<br />
for hints and approximate steaming times. It is best to insert the food to be<br />
steamed toward the end of the rice cooking cycle so that your meal is<br />
fresh and warm all at once. See the Cooking Times column of the<br />
“<strong>Rice</strong>/Water Measurement Chart” included on Page 6 or if using “Quick<br />
Cook” the “Quick <strong>Rice</strong> Time Guide” on page 8 for approximate rice<br />
cooking times.<br />
4. Place your choice of vegetables or meat into the steam tray. Open the<br />
lid, using caution as steam escaping will be extremely hot, and place the<br />
steam tray into the rice cooker.<br />
5. Close the lid and allow the cooker to resume cooking.<br />
6. Once food has steamed for the appropriate time open the lid. Use<br />
caution when opening the lid as steam escaping will be extremely hot.<br />
Remove the steam tray and check food to be sure it has been thoroughly<br />
cooked. Exercise caution when removing the steam tray as well, as it will<br />
be hot.<br />
7. If the rice has not finished cooking, close the lid and allow rice to continue<br />
to cook until done. Once the rice is finished, the rice cooker will<br />
automatically switch to “Keep-Warm” mode.<br />
8. The rice cooker will remain on “Keep-Warm” mode until it is unplugged. Be<br />
sure to unplug the cord from the wall outlet when not in use.<br />
NOTE<br />
It is possible to steam at any point during the rice cooking cycle.<br />
However, it is recommended that you steam during the end of the<br />
cycle so that steamed food does not grow cold or become soggy<br />
before the rice is ready.<br />
11
VEGETABLE STEAMING GUIDE<br />
VEGETABLE AMOUNT OF WATER STEAMING TIME<br />
Asparagus 1/2 <strong>Cup</strong> 7 Minutes<br />
Broccoli 1/4 <strong>Cup</strong> 5 Minutes<br />
Cabbage 1 <strong>Cup</strong> 15 Minutes<br />
Carrots 1 <strong>Cup</strong> 15 Minutes<br />
Cauliflower 1 <strong>Cup</strong> 15 Minutes<br />
Corn 1 <strong>Cup</strong> 15 Minutes<br />
Eggplant 1-1/4 <strong>Cup</strong> 15 Minutes<br />
Green Beans 1 <strong>Cup</strong> 15 Minutes<br />
Peas 1/2 <strong>Cup</strong> 7 Minutes<br />
Spinach 1/2 <strong>Cup</strong> 7 Minutes<br />
Squash 1/2 <strong>Cup</strong> 7 Minutes<br />
Zucchini 1/2 <strong>Cup</strong> 7 Minutes<br />
Helpful Hints:<br />
1. Since most vegetables only<br />
absorb a small amount of<br />
water, there is no need to<br />
increase the amount of<br />
water for larger servings.<br />
2. Always keep the lid closed<br />
during the entire steaming<br />
process. Opening the lid<br />
causes a loss of heat and<br />
steam, resulting in a slower<br />
cooking time. If you find it<br />
necessary to open the lid,<br />
you may want to add a<br />
small amount of water to<br />
help restore the cooking time.<br />
3. Frozen vegetables will take<br />
a longer time to cook.<br />
4. When using the steam tray,<br />
the maximum amount of<br />
rice that can be cooked<br />
simultaneously is 8 cups<br />
(uncooked). This ensures<br />
that both the cooked rice<br />
and the steam tray will fit<br />
properly into the inner pot.<br />
5. Altitude, humidity and<br />
outside temperature will<br />
affect cooking times.<br />
6. This steaming chart is for<br />
reference only. Actual<br />
cooking times may vary.<br />
12
MEAT STEAMING CHART<br />
Meat<br />
Amount of<br />
Water<br />
Steaming Time<br />
Safe<br />
Temperature<br />
Fish 2 <strong>Cup</strong>s 15 Min. 140º<br />
Chicken 2-1/2 <strong>Cup</strong>s 20 Min. 165º<br />
Pork 2-1/2 <strong>Cup</strong>s 20 Min. 160º<br />
Beef<br />
2-1/2 <strong>Cup</strong>s<br />
Medium = 15 Min.<br />
Medium-Well =20 Min.<br />
Well = 23 Min.<br />
160º<br />
NOTE<br />
1. Steaming times may vary depending on the cut of meat being used.<br />
2. To ensure meat tastes its best, and to prevent possible illness, check that<br />
meat is completely cooked prior to serving. If it is not, simply place more<br />
water in the inner pot and repeat the cooking process until meat is<br />
adequately cooked.<br />
13
HOW TO CLEAN<br />
Always unplug unit and allow to cool completely before cleaning.<br />
To Clean Inner Pot and Accessories<br />
1. Remove the inner cooking pot. Wash it in warm, soapy water using a<br />
nylon sponge or dishcloth. Do not use abrasive cleaners or scouring<br />
pads, as they may damage the finish or create a risk of electric shock.<br />
2. If rice is stuck to the bottom of the inner pot, soak in warm, soapy water<br />
before scrubbing to avoid damage to the nonstick coating.<br />
3. Rinse and dry thoroughly.<br />
4. Repeat process with steam tray and other provided accessories.<br />
To Clean <strong>Rice</strong> <strong>Cooker</strong> Exterior<br />
1. Wipe the body of the rice cooker clean with a warm, damp cloth.<br />
2. Dry with a soft cloth.<br />
To Clean the Underside of the Lid<br />
The underside of the lid should be cleaned after every use.<br />
1. Wipe the underside of the lid with a warm, damp cloth.<br />
2. Dry with a soft cloth.<br />
To Clean the Condensation Collector<br />
The condensation collector collects excess moisture from the lid to prevent it<br />
from dripping into the rice or spilling. The condensation collector should be<br />
cleaned after every use.<br />
1. Remove the condensation collector by pushing in the space indicated<br />
by the “Push” arrow.<br />
2. Empty and wash in warm, soapy water. Dry with a a soft cloth.<br />
3. Reattach the condensation collector to the rice cooker by snapping it<br />
back into place.<br />
To Clean Steam Vent<br />
The steam vent should be cleaned after every use.<br />
1. Pull out the steam vent as shown in<br />
Diagram 1 (to the right).<br />
2. Empty and wash the steam vent in warm,<br />
soapy water. Rinse thoroughly.<br />
3. Dry the steam vent with a soft cloth.<br />
4. Reinsert the steam vent for next use.<br />
IMPORTANT<br />
• Do not use harsh or abrasive cleaners.<br />
• This appliance and the inner pot are NOT dishwasher safe.<br />
Diagram 1<br />
14
ABOUT RICE<br />
COURTESY OF THE USA RICE FEDERATION<br />
For recipes and rice information visit the USA <strong>Rice</strong> Federation online at<br />
www.usarice.com/consumer.<br />
<strong>Rice</strong> is the perfect foundation for today’s healthier eating. It is a nutrient-dense<br />
complex carbohydrate that supplies energy, fiber, essential vitamins and<br />
minerals and beneficial antioxidants. <strong>Rice</strong> combines well with other healthy<br />
foods such as vegetables, fruits, meat, seafood, poultry, beans and soy foods.<br />
Nearly 88% of rice consumed in the U.S. is grown in the U.S. Arkansas, California,<br />
Louisiana, Texas, Mississippi and Missouri produce high-quality varieties of short,<br />
medium and long grain rice as well as specialty rices including jasmine, basmati,<br />
arborio, red aromatic and black japonica, among others.<br />
There are many different varieties of rice available in the market. Your <strong>Aroma</strong> ®<br />
<strong>Rice</strong> <strong>Cooker</strong> can cook any type perfectly every time. The following are the<br />
commonly available varieties of rice and their characteristics:<br />
Long Grain <strong>Rice</strong><br />
This rice has a long, slender kernel<br />
three to four times longer than its<br />
width. Due to its starch composition,<br />
cooked grains are more separate, light<br />
and fluffy compared to medium or<br />
short grain rice. The majority of white<br />
rice is enriched to restore nutrients lost<br />
during processing. Great for entrees<br />
and side dishes – rice bowls, stir-fries,<br />
salads and pilafs.<br />
Medium Grain <strong>Rice</strong><br />
When compared to long grain rice,<br />
medium grain rice has a shorter, wider<br />
kernel that is two to three times longer<br />
than its width. Cooked grains are<br />
more moist and tender than long<br />
grain, and have a greater tendency to<br />
cling together. Great for entrees,<br />
sushi, risotto and rice puddings.<br />
Short Grain <strong>Rice</strong><br />
Short grain rice has a short, plump,<br />
almost round kernel. Cooked grains<br />
are soft and cling together, yet remain<br />
separate and are somewhat chewy,<br />
with a slight springiness to the bite.<br />
Great for sushi, Asian dishes and<br />
desserts.<br />
15<br />
Brown <strong>Rice</strong><br />
Brown rice is a <strong>10</strong>0% whole grain food<br />
that fits the U.S. Dietary Guidelines for<br />
Americans recommendation to<br />
increase daily intake of whole grains.<br />
Brown rice contains the nutrient-dense<br />
bran and inner germ layer where<br />
many beneficial compounds are<br />
found. Brown rice is available in short,<br />
medium and long grain varieties and<br />
can be used interchangeably with<br />
enriched white rice.<br />
Wild <strong>Rice</strong><br />
Wild rice is an aquatic grass grown in<br />
Minnesota and California and is a<br />
frequent addition to long grain rice<br />
pilafs and rice mixes. Its unique flavor,<br />
texture and rich dark color provide a<br />
delicious accent to rice dishes. Wild<br />
rice also makes a wonderful stuffing for<br />
poultry when cooked with broth and<br />
mixed with your favorite dried fruits.
ABOUT RICE<br />
COURTESY OF THE USA RICE FEDERATION<br />
For recipes and rice information visit the USA <strong>Rice</strong> Federation online at<br />
www.usarice.com/consumer.<br />
DID YOU KNOW?<br />
• <strong>Rice</strong> is the primary dietary staple for more than half of the world’s<br />
population.<br />
• U.S. grown rice is the standard for excellence and accounts for nearly 88%<br />
of the rice consumed in America. It is grown and harvested by local<br />
farmers in five south-central states and California.<br />
• <strong>Rice</strong> contains no sodium, cholesterol, trans fats or gluten, and has only a<br />
trace of fat. One half-cup of rice contains about <strong>10</strong>0 calories.<br />
• Research shows that people who eat rice have healthier diets than nonrice<br />
eaters and eat more like the U.S. Dietary Guidelines for Americans<br />
recommendations.<br />
• Whole grains like brown rice help reduce the risk of chronic diseases such<br />
as heart disease, diabetes and certain cancers, and aid in weight<br />
management.<br />
• Brown rice is a <strong>10</strong>0% whole grain. One cup of whole grain brown rice<br />
provides two of the three recommended daily servings of whole grains.<br />
• Eating rice triggers the production of serotonin in the brain, a chemical<br />
that helps regulate and improve mood.<br />
• September is National <strong>Rice</strong> Month- promoting awareness of the versatility<br />
and the value of U.S. grown rice.<br />
ABOUT SENSOR LOGIC <br />
Traditional electric rice cookers heat only at one set temperature, then turn<br />
off once all the water has been absorbed. <strong>Sensor</strong> Logic rice cookers are<br />
for true rice enthusiasts. This rice cooker uses an on-board fuzzy<br />
micro-computer to ‘think’ for itself. By simply pressing the corresponding<br />
function button, <strong>Sensor</strong> Logic will optimize the cooking temperature of the<br />
rice to enhance flavor and texture. The sensor monitors the boiling rate of the<br />
water in the pot and controls temperature accordingly to provide the perfect<br />
pot of rice, every time.<br />
16
TROUBLESHOOTING<br />
PROBLEM<br />
<strong>Rice</strong> is too dry/hard<br />
after cooking.<br />
SOLUTION<br />
If your rice is dry or hard/chewy when the<br />
rice cooker switches to WARM mode,<br />
additional water and cooking time will soften<br />
the rice. Depending on how dry your rice is,<br />
add ½ to 1 cup of water and stir through.<br />
Close the lid and press the “COOK” button.<br />
When rice cooker switches to warm mode,<br />
open the lid and stir the rice to check the<br />
consistency. Repeat as necessary until rice is<br />
soft and moist.<br />
<strong>Rice</strong> is too moist/soggy<br />
after cooking.<br />
If your rice is still too wet or soggy when the<br />
rice cooker switches to warm mode, use the<br />
rice paddle to stir the rice. This will<br />
redistribute the bottom (moistest) part of the<br />
rice as well as release excess moisture. Close<br />
the lid and allow to remain on warm mode for<br />
<strong>10</strong>-30 minutes as needed, opening the lid and<br />
stirring periodically to release excess<br />
moisture.<br />
17
LIMITED WARRANTY<br />
<strong>Aroma</strong> Housewares Company warrants this product free from defects<br />
in material and workmanship for two years from provable date of<br />
purchase in the continental United States.<br />
Within this warranty period, <strong>Aroma</strong> Housewares Company will repair<br />
or replace, at its option, defective parts at no charge, provided the<br />
product is returned, freight prepaid with proof of purchase and U.S.<br />
$14.00 for shipping and handling charges payable to <strong>Aroma</strong><br />
Housewares Company. Before returning an item, please call the toll<br />
free number below for a return authorization number. Allow 2-4<br />
weeks for return shipping.<br />
This warranty does not cover improper installation, misuse, abuse or<br />
neglect on the part of the owner. Warranty is also invalid in any case<br />
that the product is taken apart or serviced by an unauthorized<br />
service station.<br />
This warranty gives you specific legal rights, which may vary from<br />
state to state, and does not cover areas outside the United States.<br />
HOUSEWARES COMPANY<br />
6469 Flanders Drive<br />
San Diego, California 92121<br />
1-800-276-6286<br />
M-F, 8:30 AM - 5:00 PM,<br />
Pacific Time<br />
www.<strong>Aroma</strong>Co.com<br />
18
w w w . A r o m a C o . c o m


