

Aroma Professional 1.7 Liter (7 Cup) Digital Electric Water KettleAWK-165DI (AWK-165DI) - AWK-165DI Instruction Manual - Professional 1.7 Liter (7 Cup) Digital Electric Water Kettle
Aroma Professional 1.7 Liter (7 Cup) Digital Electric Water KettleAWK-165DI (AWK-165DI) - AWK-165DI Instruction Manual - Professional 1.7 Liter (7 Cup) Digital Electric Water Kettle
Aroma Professional 1.7 Liter (7 Cup) Digital Electric Water KettleAWK-165DI (AWK-165DI) - AWK-165DI Instruction Manual - Professional 1.7 Liter (7 Cup) Digital Electric Water Kettle

Create successful ePaper yourself
Turn your PDF publications into a flip-book with our unique Google optimized e-Paper software.
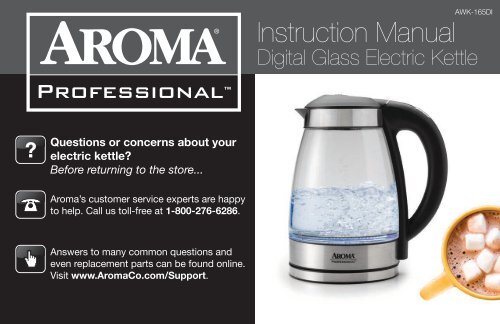
<strong>AWK</strong>-<strong>165DI</strong><br />
<strong>Instruction</strong> <strong>Manual</strong><br />
<strong>Digital</strong> Glass <strong>Electric</strong> <strong>Kettle</strong><br />
<strong>Professional</strong> <br />
Questions or concerns about your<br />
electric kettle?<br />
Before returning to the store...<br />
<strong>Aroma</strong>’s customer service experts are happy<br />
to help. Call us toll-free at 1-800-276-6286.<br />
Answers to many common questions and<br />
even replacement parts can be found online.<br />
Visit www.<strong>Aroma</strong>Co.com/Support.
Congratulations on your purchase of the <strong>Aroma</strong> ® <strong>Professional</strong> <strong>Digital</strong> <strong>Electric</strong> <strong>Kettle</strong>– the best way to boil! This digital electric kettle is the ideal solution for any need in<br />
the kitchen that calls for boiling water in a hurry. It’s perfect for soothing tea, an easy bowl of noodles, an invigorating cup of instant coffee, a hearty helping of oatmeal,<br />
delicious hot chocolate and the list goes on and on.<br />
Faster than the stovetop, your new kettle will boil water at a blazing cup-a-minute speed. And there’s no need to worry about a forgotten kettle, as the digital electric kettle<br />
shuts off automatically once water has boiled.<br />
The German SCHOTT glass is perfect for boiling water for your favorite hot drinks and meals. And serving hot beverages to friends and family has never been easier as the<br />
electric kettle lifts off the power base for cordless pouring.<br />
For more information on your <strong>Aroma</strong> ® <strong>Professional</strong> <strong>Digital</strong> <strong>Electric</strong> <strong>Kettle</strong>, or for product service, replacement parts and other home appliance solutions, please visit us<br />
online at www.<strong>Aroma</strong>Co.com.<br />
www.<strong>Aroma</strong>TestKitchen.com <strong>Aroma</strong>Housewares <strong>Aroma</strong>Housewares <strong>Aroma</strong>Housewares <strong>Aroma</strong>Housewares<br />
Published By:<br />
<strong>Aroma</strong> Housewares Co.<br />
6469 Flanders Drive<br />
San Diego, CA 92121<br />
U.S.A.<br />
1-800-276-6286<br />
www.<strong>Aroma</strong>Co.com<br />
©2015 <strong>Aroma</strong> Housewares Company<br />
All rights reserved.
IMPORTANT SAFEGUARDS<br />
When using electrical appliances basic safety precautions should always be followed, including the following:<br />
1. Read all instructions carefully before using the appliance.<br />
2. Do not touch hot surfaces. Use handles or knobs. Glass surfaces<br />
become extremely hot.<br />
3. To protect against fire, electric shock and injury to persons, do<br />
not immerse cord, plug or kettle in water or any other liquid. See<br />
instructions for cleaning.<br />
4. Close supervision is necessary when the appliance is used by or near<br />
children.<br />
5. Always unplug the appliance from the outlet when not in use and<br />
before cleaning. Allow the kettle to cool completely before putting on or<br />
taking off parts, and before cleaning the appliance.<br />
6. Do not operate appliance with a damaged cord or plug, or after<br />
appliance malfunctions or has been damaged in any manner. Contact<br />
<strong>Aroma</strong> ® customer service for examination, repair or electrical/<br />
mechanical adjustment.<br />
7. The use of accessory attachments not recommended by <strong>Aroma</strong> ®<br />
Housewares may result in fire, electrical shock or injury.<br />
8. Do not use outdoors.<br />
11. To disconnect, turn any control to the “OFF” position, then remove the plug from the<br />
wall outlet.<br />
12. Always unplug from the base of the wall outlet. Never pull on the cord.<br />
13. Only use the kettle to heat water. No other liquids should be placed inside the kettle.<br />
14. Do not use kettle for other than its intended use.<br />
15. The power base must only be used with the provided kettle.<br />
16. Do not unscrew any screws on the kettle or power base or attempt to<br />
disassemble them in any way.<br />
17. Do not move kettle during the heating process.<br />
18. This appliance is for household use only.<br />
19. Do not immerse this appliance or any of its parts in water.<br />
20. Scalding may occur if the lid is removed during the boiling cycle.<br />
21. Caution: If water exceeds the “MAX” line, the boiled water may spill out.<br />
22. Use only on a level, dry and heat-resistant surface.<br />
9. Do not let cord hang over the edge of a table or counter or to touch hot<br />
surfaces.<br />
10. Do not place kettle on or near a hot gas or electric burner or in a<br />
heated oven.<br />
23. The electric kettle should be operated on a separate electrical circuit from other<br />
operating appliances. If the electrical circuit is overloaded with other appliances the<br />
electric kettle may not operate properly.<br />
24. Do not open the kettle lid when in operation.<br />
SAVE THESE INSTRUCTIONS<br />
1
IMPORTANT SAFEGUARDS<br />
Short Cord<br />
<strong>Instruction</strong>s<br />
1. A short power-supply cord is<br />
provided to reduce the risks<br />
resulting from becoming<br />
entangled in or tripping over<br />
a longer cord.<br />
2. Longer extension cords are<br />
available and may be used if<br />
care is exercised in their use.<br />
DO NOT DRAPE CORD!<br />
Grounding <strong>Instruction</strong>s<br />
3. If a longer extension cord is<br />
used:<br />
a. The marked electrical<br />
rating of the extension<br />
KEEP AWAY<br />
FROM CHILDREN!<br />
cord should be at least as great as the electrical rating of the<br />
appliance.<br />
b. The longer cord should be arranged so that it will not drape over the<br />
countertop or tabletop where it can be pulled by children or tripped<br />
over unintentionally.<br />
c. The extension cord should be a grounding-type 3-wire cord.<br />
This appliance must be grounded while in use to protect the operator from<br />
electrical shock. The appliance is equipped with a 3-conductor cord and a<br />
3-prong grounding-type plug to fit the proper grounding-type receptacle. The<br />
appliance has a plug that looks like sketch A. An adapter, sketch B, should be<br />
used for connecting sketch-A plugs to two-prong receptacles. The grounding<br />
tab, which extends from the adapter, must be connected to a permanent<br />
ground such as a properly grounded outlet box as shown in sketch C using a<br />
metal screw.<br />
2<br />
THIS APPLIANCE IS FOR HOUSEHOLD USE ONLY.
PARTS IDENTIFICATION<br />
Lid Button<br />
Lid<br />
LED Display<br />
Removable Filter<br />
Drip-Free Spout<br />
LED Display<br />
Control Panel<br />
Easy-Grip Handle<br />
Stainless Steel<br />
Tea Infuser<br />
LED Display<br />
Decrease<br />
Temperature<br />
Blue Illumination<br />
Light<br />
<strong>Kettle</strong> Body<br />
Power Button<br />
Increase<br />
Temperature<br />
Keep Warm<br />
Power Base<br />
Power Cord<br />
3
BEFORE FIRST USE<br />
Before using for the first time, it is recommended to clean the interior of the kettle thoroughly. Please follow the procedures below<br />
before using the kettle:<br />
1. Remove all packing materials and make sure that the product has been received in good condition.<br />
2. Taking care to keep the electrical components on the exterior of the kettle dry, wipe the interior of the kettle with a damp cloth. If your hand will not fit<br />
inside the kettle, swish warm, soapy water around in the interior of the kettle with the lid closed.<br />
3. Rinse out the inside of the kettle thoroughly with water.<br />
4. With a damp cloth, gently wipe off the exterior of the kettle. Do not wipe electrical components as this may cause damage to the unit.<br />
5. Dry all parts completely.<br />
6. It is recommended to run your kettle through one boiling cycle before using it to consume beverages. Following the instructions in “To Boil<br />
<strong>Water</strong>” on page 5, boil a full kettle of water. When water has boiled, pour it out and rinse the inside of the kettle once more. The kettle is now ready<br />
for use.<br />
NOTE<br />
• Do not use abrasive cleaners or scouring pads.<br />
• Do not immerse the kettle body or power base in water at any time.<br />
4
TO BOIL WATER<br />
1<br />
2<br />
3<br />
4<br />
Place the Power Base on a sturdy,<br />
level and dry surface.<br />
Make sure that the Removable Filter<br />
is properly inserted. See “Removing<br />
and Inserting the Filter” on page 12<br />
for instructions on inserting the filter.<br />
Open the lid and fill with water<br />
through the lid opening. <strong>Water</strong> must<br />
be filled between the “Min” and<br />
“Max” levels inside the kettle.<br />
Close the lid, ensuring it locks into<br />
place.<br />
• Never fill the kettle with any liquids other than water.<br />
• Use distilled water when possible for best taste and to minimize mineral build-up in the kettle.<br />
CAUTION<br />
5
TO BOIL WATER (CONT.)<br />
5<br />
6<br />
080<br />
7 8<br />
Plug the Power Cord into a wall<br />
outlet and place the kettle onto the<br />
Power Base. The kettle will “beep”<br />
once to indicate it is on.<br />
9<br />
Press the POWER ( ) button<br />
to turn the kettle on. The Blue<br />
Illumination Light will illuminate<br />
and the kettle will begin heating<br />
the water. As the water begins to<br />
heat, the LED Display will show the<br />
temperature in real time.<br />
Once the water reaches a boil, the<br />
kettle will “beep” three times and<br />
automatically stop heating.<br />
Using the Easy-Grip Handle, lift the<br />
kettle off the Power Base to serve.<br />
Do not touch the glass body, as it<br />
will be hot.<br />
When finished serving, pour out<br />
any remaining water and unplug the<br />
Power Cord.<br />
6<br />
NOTE<br />
• Never open the lid while water is boiling.<br />
• If the kettle is heated with no water, the internal safety mechanism will automatically turn the kettle off.<br />
• If the lid is not completely closed or if the filter isn’t inserted correctly the kettle will not automatically turn off.
USING THE KEEP WARM TEMPERATURES<br />
1<br />
2<br />
3<br />
4<br />
Place the Power Base on a sturdy,<br />
level and dry surface.<br />
Make sure that the Removable Filter<br />
is properly inserted. See “Removing<br />
and Inserting the Filter” on page 12<br />
for instructions on inserting the filter.<br />
Open the lid and fill with water<br />
through the lid opening. <strong>Water</strong> must<br />
be filled between the “Min” and<br />
“Max” levels inside the kettle.<br />
Close the lid, ensuring it locks into<br />
place.<br />
• Never fill the kettle with any liquids other than water.<br />
• Use distilled water when possible for best taste and to minimize mineral build-up in the kettle.<br />
CAUTION<br />
7
USING THE KEEP WARM TEMPERATURES (CONT.)<br />
5<br />
6<br />
160<br />
7 8<br />
140<br />
Plug the Power Cord into a wall<br />
outlet and place the kettle onto the<br />
Power Base. The kettle will “beep”<br />
once to indicate it is on.<br />
Press the POWER ( ) button to<br />
turn the kettle on and then press<br />
the Keep Warm button. The Blue<br />
Illumination Light will illuminate<br />
and the kettle will begin heating<br />
the water. As the water begins to<br />
heat, the LED Display will show the<br />
temperature in real time.<br />
Pressing the + or – buttons<br />
will increase or decrease the<br />
temperature in 10 degree intervals<br />
between 105 and 195 degrees.<br />
Once the desired temperature<br />
setting is reached, the Blue<br />
Illumination Light will turn off and<br />
stop heating. The kettle will heat<br />
occasionally in order to maintain the<br />
selected temperature.<br />
• Do not use abrasive cleaners or scouring pads.<br />
• Do not immerse the kettle body or power base in water at any time.<br />
NOTE<br />
8
USING THE KEEP WARM TEMPERATURES (CONT.)<br />
9<br />
10<br />
11 12<br />
080<br />
Using the easy-grip handle, lift the<br />
kettle off the Power Base to serve.<br />
Do not touch the glass body, as it<br />
will be hot. Lifting the kettle off the<br />
Power Base will turn it off.<br />
After pouring, make sure the bottom<br />
of the kettle and the Power Base are<br />
dry before placing kettle back on the<br />
Power Base.<br />
To continue using the Keep warm<br />
setting, press the POWER ( )<br />
button to turn the kettle on. Press<br />
the Keep Warm button and select<br />
the desired temperature by pressing<br />
the + or – buttons.<br />
When finished serving, pour out<br />
any remaining water and unplug the<br />
power cord.<br />
• Never fill the kettle with any liquids other than water.<br />
• Use distilled water when possible for best taste and to minimize mineral build-up in the kettle.<br />
CAUTION<br />
9
USING THE KEEP WARM TEMPERATURES (CONT.)<br />
SUGGESTED TEMPERATURE USES<br />
SUGGESTED USE<br />
TEMPERATURE<br />
French Press Coffee 195°F<br />
Oolong Tea 185°F<br />
Green Tea 160°F<br />
Black Tea 212°F<br />
White Tea 175°F<br />
Herbal Tea 212°F<br />
Noodles 212°F<br />
Oatmeal 212°F<br />
Hot Chocolate 212°F<br />
• Never fill the kettle with any liquids other than water.<br />
10<br />
NOTE
USING THE STAINLESS STEEL TEA INFUSER<br />
1<br />
2<br />
3 4<br />
Boil water to desired temperature.<br />
See “To Boil <strong>Water</strong>” on page<br />
5 and “Using The Keep Warm<br />
Temperatures” on page 7.<br />
5<br />
Press the Lid Button and allow<br />
steam to disperse from the kettle.<br />
6<br />
Place tea to be brewed into the<br />
infuser.<br />
Carefully insert the infuser into the<br />
kettle by holding the infuser handle,<br />
making sure the flat side of the<br />
infuser lays parallel to the removable<br />
filter.<br />
• Loose tea or tea bags can be used in the infuser.<br />
Close the lid and steep tea for<br />
desired length of time.<br />
Once finished, remove the infuser<br />
from the kettle, close the lid and<br />
serve.<br />
HELPFUL<br />
HINT<br />
11
1<br />
REMOVING AND INSERTING THE FILTER<br />
To remove the filter:<br />
2<br />
3<br />
Do not attempt to remove filter until<br />
the unit has cooled completely. Open<br />
the lid.<br />
To insert the filter:<br />
Grasp the tab on the filter and pull<br />
upward. The filter should slide out<br />
easily.<br />
Wash and rinse the filter, then<br />
replace.<br />
1 2<br />
3<br />
• It is necessary for the<br />
filter to be properly in<br />
place for the kettle to<br />
NOTE<br />
shut off automatically.<br />
Open the lid.<br />
12<br />
Grasping the filter at the tab, slide<br />
the filter into the slots on the inside<br />
of the spout until the filter sits<br />
securely into place.<br />
Once the filter is securely in place,<br />
the kettle will be ready for use.<br />
HELPFUL<br />
HINT<br />
• Misplace your filter?<br />
Replacement parts<br />
are available online at<br />
www.<strong>Aroma</strong>Co.com<br />
or contact <strong>Aroma</strong>®<br />
Customer Service tollfree<br />
at 1-800-276-6286.
TO CLEAN<br />
Always unplug the kettle and allow it to cool completely before cleaning.<br />
1<br />
2<br />
3<br />
Wipe the exterior of the kettle with a<br />
damp cloth, taking care to avoid the<br />
electrical components.<br />
Clean the interior of the kettle with<br />
a soft sponge and warm, soapy<br />
water. If your hand does not fit in<br />
the lid opening, swish warm, soapy<br />
water around inside the kettle with<br />
the lid closed.<br />
Rinse any remaining soapy water<br />
from the kettle. Drain.<br />
NOTE<br />
• Never attempt to disassemble the kettle or the power base.<br />
• Never immerse the kettle, power cord, plug or power base in water.<br />
• Always take care not to allow electrical components to come into contact with water.<br />
• Do not use abrasive cleaners or scouring pads of any kind on the kettle or power base. This will cause damage to the finish and may<br />
create a risk of electrical shock.<br />
• Any other servicing should be performed by <strong>Aroma</strong> ® Housewares.<br />
13
1<br />
REMOVING MINERAL DEPOSITS<br />
Hard water can leave mineral deposits that create scale build-up on the interior of the kettle. If mineral deposits occur, follow<br />
these steps:<br />
2<br />
3<br />
4<br />
Fill the kettle half full with water.<br />
Following the instructions in “To Boil<br />
<strong>Water</strong>” on page 5, bring the water to<br />
a boil.<br />
Add one cup of white vinegar to the<br />
water in the kettle.<br />
Allow the mixture to soak overnight.<br />
5<br />
6<br />
HELPFUL<br />
HINT<br />
• Using distilled water will help to prevent the buildup of<br />
mineral deposits.<br />
Empty the mixture and rinse out the<br />
kettle.<br />
14<br />
Refill the kettle with water only.<br />
Bring it to a boil and empty again.<br />
Repeat as needed.
LIMITED WARRANTY<br />
LIMITED WARRANTY<br />
<strong>Aroma</strong> Housewares Company warrants its products against defects in<br />
material and workmanship for five years from provable date of purchase in<br />
the United States.<br />
Within this warranty period, <strong>Aroma</strong> Housewares Company will repair or<br />
replace, at its discretion, defective parts at no charge, provided the product<br />
is returned, freight prepaid with proof of purchase and U.S. $15.00 for<br />
shipping and handling charges payable to <strong>Aroma</strong> Housewares Company.<br />
Before returning an item, please call the toll free number below for a return<br />
authorization number. Allow 2-4 weeks for return shipping.<br />
This warranty does not apply if the warranty period expired; the products<br />
has been modified by any unauthorized service center or personnel; the<br />
defect was subject to abuse, improper use not conforming to product<br />
manual instructions, or environment conditions more severe than those<br />
specified in the manual and specification, neglect of the owner or improper<br />
installation; the defect was subject to Force Majeure such as flood,<br />
lightning, earthquake, other natural calamities, war, vandalism, theft,<br />
brownouts or sags (damage due to low voltage disturbances).<br />
SERVICE & SUPPORT<br />
In the event of a warranty claim, or if service is required for this product, please<br />
contact <strong>Aroma</strong> ® customer service toll-free at:<br />
1-800-276-6286<br />
M-F, 8:30AM-4:30PM, Pacific Time<br />
Or we can be reached online at CustomerService@<strong>Aroma</strong>Co.com.<br />
For your records, we recommend stapling your sales receipt to this page along with<br />
a written record of the following:<br />
Date of Purchase:<br />
Place of Purchase:<br />
This warranty gives you specific legal rights, which may vary from state to<br />
state, and does not cover areas outside the United States.<br />
AROMA HOUSEWARES COMPANY<br />
6469 Flanders Drive<br />
San Diego, California 92121<br />
1-800-276-6286<br />
M-F, 8:30 AM - 4:30 PM, Pacific Time<br />
Website: www.<strong>Aroma</strong>Co.com<br />
NOTE<br />
• Proof of purchase is required for all warranty claims.<br />
15


