SAS Marketing Automation 5.1 Unix Install Instructions for Hot Fix ...
SAS Marketing Automation 5.1 Unix Install Instructions for Hot Fix ...
SAS Marketing Automation 5.1 Unix Install Instructions for Hot Fix ...

You also want an ePaper? Increase the reach of your titles
YUMPU automatically turns print PDFs into web optimized ePapers that Google loves.
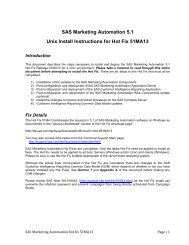
Introduction<br />
<strong>SAS</strong> <strong>Marketing</strong> <strong>Automation</strong> <strong>5.1</strong><br />
<strong>Unix</strong> <strong>Install</strong> <strong>Instructions</strong> <strong>for</strong> <strong>Hot</strong> <strong>Fix</strong> 51ma12<br />
This document describes the steps necessary to install and deploy the <strong>SAS</strong> <strong>Marketing</strong> <strong>Automation</strong> <strong>5.1</strong><br />
<strong>Hot</strong> fix Release 51ma12 <strong>for</strong> a <strong>Unix</strong> environment. Please take a moment to read through this entire<br />
document be<strong>for</strong>e attempting to install the hot fix. There are six steps to this hot-fix that must all be<br />
completed:<br />
1) <strong>Install</strong>ation of the updates to the <strong>SAS</strong> <strong>Marketing</strong> <strong>Automation</strong> Components<br />
2) Post-configuration and deployment of the <strong>SAS</strong> <strong>Marketing</strong> <strong>Automation</strong> Application Server<br />
3) Post-configuration and deployment of the <strong>SAS</strong> Customer Intelligence Reporting Application<br />
4) Post-configuration and deployment of the <strong>SAS</strong> <strong>Marketing</strong> <strong>Automation</strong> Web Components update<br />
(optional)<br />
5) <strong>Install</strong> the changes to macros and stored processes on the <strong>SAS</strong> Compute Server<br />
6) Customer Intelligence Reporting Common Data Model updates<br />
<strong>Fix</strong> Details<br />
The hot fix 51ma12 addresses the issue(s) in <strong>5.1</strong> of <strong>SAS</strong> <strong>Marketing</strong> <strong>Automation</strong> software on Windows as<br />
documented in the "Issue(s) Addressed" section of the hot fix download page:<br />
http://ftp.sas.com/techsup/download/hotfix/ma51.html #51ma12<br />
You may also access <strong>SAS</strong> Notes from the Technical Support Main page:<br />
http://support.sas.com/techsup/search/sasnotes.html<br />
<strong>SAS</strong> <strong>Marketing</strong> <strong>Automation</strong> hot fixes are cumulative. Only the latest hot fix need be applied to install all<br />
fixes. The hot-fix needs to be applied to all tiers. Servers (Windows and/or <strong>Unix</strong>) and clients (Windows).<br />
Please be sure to use the hot fix installer appropriate to the server/client operating system.<br />
Although the actual fixes incorporated in the hot fix are cumulative there are changes to the <strong>SAS</strong><br />
Customer Intelligence Reporting Common Data Model (CDM) which depend on whether or not you have<br />
already installed any hot fixes. See Section 7 and Appendix A of this document be<strong>for</strong>e making any CDM<br />
changes.<br />
Please review <strong>SAS</strong> Note SN-018542, (http://support.sas.com/kb/18/542.html) as the hot-fix install can<br />
overwrite the lsfadmin password and prevent campaigns from being directly scheduled from Campaign<br />
Studio.<br />
<strong>SAS</strong> <strong>Marketing</strong> <strong>Automation</strong> hot fix 51ma12 Page | 1
1. Obtaining the <strong>Hot</strong> <strong>Fix</strong> Bundle<br />
Save the hot fix bundle (archive file) from the <strong>SAS</strong> Technical Support <strong>Hot</strong> <strong>Fix</strong> web site<br />
(http://ftp.sas.com/techsup/download/hotfix/ma51.html ) to a work directory on the server using the <strong>SAS</strong><br />
user account that originally installed <strong>SAS</strong> <strong>Marketing</strong> <strong>Automation</strong>. This is typically the ‘sas’ account. The<br />
name of the downloaded archive file will vary depending on the <strong>Unix</strong> plat<strong>for</strong>m. The downloaded file will<br />
be one of the following:<br />
• 51ma12r6.tar <strong>for</strong> AIX<br />
• 51ma12s6.tar <strong>for</strong> Solaris<br />
• 51ma12hx.tar <strong>for</strong> HP Itanium<br />
There are check boxes included at each step to assist you with verification of the completion of each step<br />
as you work through these instructions.<br />
1.1 <strong>Install</strong>ation<br />
You should per<strong>for</strong>m these installation steps <strong>for</strong> each machine where the following <strong>Marketing</strong> <strong>Automation</strong><br />
components have been installed.<br />
• <strong>SAS</strong> Customer Intelligence Core Mid-Tier<br />
• <strong>SAS</strong> Customer Intelligence Web Components<br />
• <strong>SAS</strong> Customer Intelligence Studio<br />
• <strong>SAS</strong> Customer Intelligence Plug Ins <strong>for</strong> <strong>SAS</strong> Management Console<br />
• <strong>SAS</strong> <strong>Marketing</strong> <strong>Automation</strong> Launcher<br />
• <strong>SAS</strong> <strong>Marketing</strong> <strong>Automation</strong> Integration Utilities<br />
• <strong>SAS</strong> Customer Intelligence Reporting Mid-Tier<br />
• <strong>SAS</strong> <strong>Marketing</strong> <strong>Automation</strong> Server Processes (macros and stored processes)<br />
Once the hot fix has been installed on your <strong>Unix</strong> servers you will need to download and install the<br />
Windows 51ma12 hot fix onto all of your client PCs<br />
1.2 Unarchive the downloaded tar file<br />
Unarchive the 51ma12xxx tar file using the following command:<br />
tar -xvf 51ma12xxx.tar<br />
where xxx is the appropriate suffix <strong>for</strong> your unix plat<strong>for</strong>m.<br />
This will extract the following files into a new 51ma12_xxx directory. For example, the AIX tar file<br />
51ma12r6.tar will extract into 51ma12_r64. Sample output from the above tar command is shown below.<br />
The sizes of the files will vary based on the <strong>Unix</strong> plat<strong>for</strong>m. The sample below shows messages from an<br />
AIX tar file extract.<br />
x 51ma12_r64/emaauxdataio_r64.tar, 34672640 bytes<br />
x 51ma12_r64/emacore_r64.tar, 42054960 bytes<br />
x 51ma12_r64/emalauncher_r64.tar, 31641600 bytes<br />
x 51ma12_r64/emasmc_r64.tar, 34713600 bytes<br />
x 51ma12_r64/emawebnport_r64.tar, 34826240 bytes<br />
x 51ma12_r64/custintelmid_r64.tar, 34672640 bytes<br />
x 51ma12_r64/mktautor6.tar, 441344 bytes<br />
<strong>SAS</strong> <strong>Marketing</strong> <strong>Automation</strong> hot fix 51ma12 Page | 2
You can see from the tar files the following <strong>Marketing</strong> <strong>Automation</strong> Components will be updated by this hot<br />
fix:<br />
• <strong>Marketing</strong> <strong>Automation</strong> Integration Utilities (eamauxdataio)<br />
• Customer Intelligence Core Mid-Tier (emacore)<br />
• <strong>Marketing</strong> <strong>Automation</strong> Launcher (emalauncher)<br />
• Customer Intelligence Plugins to <strong>SAS</strong> Management Console (emasmc)<br />
• Custom,er Intelligence Web Application (emawebnport)<br />
• Customer Intelligence Reporting (custintelmid)<br />
• <strong>Marketing</strong> <strong>Automation</strong> Server Processes (mktauto)<br />
For each component on installed on your server, you’ll need to unarchive the tar file and run the setup<br />
script. The files within the component archives are named similarly, so you will need to unarchive and<br />
execute the setup scripts one by one.<br />
Sample AIX process shown below:<br />
Step 1: Unarchive the component tar file<br />
tar -xvf emaauxdataio_r64.tar<br />
This creates 3 new files in r64 subdirectory:<br />
-rwxr-xr-x 1 sas staff 27812035 Oct 31 10:01 Setup_AIX_Power<br />
-rw-r--r-- 1 sas staff 13 Oct 31 10:01 media.inf<br />
-rw-r--r-- 1 sas staff 7603287 Oct 31 10:01 setup.jar<br />
Step 2: Run Setup script to lay down component files.<br />
cd r64<br />
chmod +x Setup*<br />
Setup_AIX_Power<br />
Note that you must turn on the execute bit <strong>for</strong> the setup script the first time you per<strong>for</strong>m the unarchive.<br />
This setup command runs an <strong>Install</strong>Shield wizard to lay down the <strong>SAS</strong> components. A series of three<br />
screens will appear by the <strong>Install</strong>er that you must click through.<br />
Step 3: Repeat steps 1 and 2 (above) <strong>for</strong> each component except the <strong>Marketing</strong> <strong>Automation</strong> Server<br />
Processes (mktauto – Section 6 discusses applying the <strong>SAS</strong> Compute Server changes) until the setup<br />
scripts matching the components installed on your server have been run.<br />
Step 4: Once <strong>Install</strong>Shield Components have been run, you can verify the updated files as follows:<br />
Mid-Tier<br />
<strong>SAS</strong><strong>Marketing</strong><strong>Automation</strong>Core/4.1/Config/emacore_hf.xml (01/29/08)<br />
<strong>SAS</strong><strong>Marketing</strong><strong>Automation</strong>Core/4.1/ear/sas.iquery.metadata.jar (06/04/09)<br />
<strong>SAS</strong><strong>Marketing</strong><strong>Automation</strong>Core/4.1/ear/sas.iquery.dataservices.jar (06/04/09)<br />
___ <strong>Install</strong>ation Ran Successfully<br />
<strong>SAS</strong> <strong>Marketing</strong> <strong>Automation</strong> hot fix 51ma12 Page | 3
2. Post-configuration and Deployment of the <strong>SAS</strong> <strong>Marketing</strong> <strong>Automation</strong><br />
Application Server<br />
2.1 Download Ant to Run the Post Configuration Script<br />
Apache Ant is needed to run the post-configuration script <strong>for</strong> the <strong>SAS</strong> <strong>Marketing</strong> <strong>Automation</strong> Application<br />
Server that is included in this hot fix. Download and install Ant 1.7 from http://ant.apache.org/. See the<br />
Apache Ant Documentation <strong>for</strong> any install details.<br />
Run ant -version from your command prompt and verify that you are accessing ant 1.7<br />
Be sure JAVA_HOME is set correctly with the location of your java installation. Failure to do so will result<br />
in errors when running the ant command.<br />
___ Downloaded ANT and verified the version<br />
2.2: Run the Post-configuration Ant script<br />
The 51ma12 hot fix has installed a post-configuration script, emacore_hf.xml, that will repackage<br />
sas.analytics.crm.ma.core.ear with the updated code and the deployment descriptor (ejb-jar.xml) that has<br />
already been configured <strong>for</strong> your environment. You will find emacore_hf.xml in the sas installation<br />
directory: <strong>SAS</strong><strong>Marketing</strong><strong>Automation</strong>Core/4.1/Config/emacore_hf.xml.<br />
Navigate to the bin subdirectory where ant is installed:<br />
Example: cd /usr/local/ant/apache-ant-1.7.0/bin<br />
Set JAVA_HOME <strong>for</strong> session if needed <strong>for</strong> you specific installation:<br />
Example: export JAVA_HOME=/usr/java14<br />
Stop the <strong>SAS</strong> Remote Services server be<strong>for</strong>e running the ant script.<br />
Run this command to execute the emacore_hf.xml script (all on one line)<br />
ant -f emacore_hf.xml<br />
-Dconfig.dir=<br />
-Dtemp.dir=<br />
-Dinstall.loc=<br />
where<br />
is the path to the Configuration Directory (eg. /saswork/MAplan) where the new<br />
sas.analytics.crm.ma.core.ear files are copied when the hot fix is applied by executing the ant scripts.<br />
is a path to an empty temporary directory <strong>for</strong> temp files. Make sure this location is empty so<br />
that the script can execute without errors when it per<strong>for</strong>ms the clean up.<br />
is the location of the product install (eg.<br />
/saswork/<strong>SAS</strong>/<strong>SAS</strong><strong>Marketing</strong><strong>Automation</strong>Core/4.1)<br />
Helpful hint: create a .sh file with the command above in case you need to make corrections.<br />
Example:<br />
ant -f "/saswork/<strong>SAS</strong>/<strong>SAS</strong><strong>Marketing</strong><strong>Automation</strong>Core/4.1/Config/emacore_hf.xml"<br />
-Dconfig.dir="/saswork/MAplan" -Dtemp.dir="/saswork/hotfix_tmp"<br />
-Dinstall.loc="/saswork/<strong>SAS</strong>/<strong>SAS</strong><strong>Marketing</strong><strong>Automation</strong>Core/4.1"<br />
<strong>SAS</strong> <strong>Marketing</strong> <strong>Automation</strong> hot fix 51ma12 Page | 4
Final messages from the execution of the script should be similar to:<br />
BUILD SUCCESSFUL<br />
Total time: 11 seconds<br />
Note: A complete log from the ant script can be found in the <strong>SAS</strong> installation directory<br />
<strong>SAS</strong><strong>Marketing</strong><strong>Automation</strong>Core/4.1/emacore_hf.log.<br />
___ Successfully executed emacore_hf.xml script<br />
Verify core-remote jar and restart RemoteServices<br />
The ant script will copy an updated sas.analytics.crm.ma.core-remote.jar into the configuration directory<br />
at Lev1/web/Deployments/RemoteServices/WEB-INF\lib. The new file will have a size of 713575 kb.<br />
Once you verify the jar has been updated, restart your StartRemoteServices.bat script to restart the <strong>SAS</strong><br />
Application Services.<br />
___ Restart Remote Services<br />
2.3: Run the Post-configuration Ant script <strong>for</strong> Customer Intelligence<br />
Reporting<br />
The 51ma12 hot fix has installed a post-configuration script, custintelmid_hf.xml, that will repackage<br />
sas.analytics.crm.ma.ccsservice.war with updated code. You will find custintelmid_hf.xml in the <strong>SAS</strong><br />
installation directory: /saswork/<strong>SAS</strong>/<strong>SAS</strong>CustomerIntelligenceReporting/<strong>5.1</strong>/Config. Note this directory<br />
will contain a log called custintelmid_hf.log after the execution of this script. As with the previous step,<br />
execute the custintelmid_hf.xml script by using Apache Ant.<br />
Open a command window and navigate to the bin subdirectory where ant is installed:<br />
cd c:\apache-ant-1.7.0\bin<br />
Run this command to execute the custintelmid_hf.xml script (all on one line)<br />
ant -f custintelmid_hf.xml<br />
-Dconfig.dir=<br />
-Dtemp.dir=<br />
-Dinstall.loc=<br />
Helpful hint: create a .bat file with the command above in case you need to make corrections.<br />
Example:<br />
ant -f<br />
"/saswork/<strong>SAS</strong>/<strong>SAS</strong>CustomerIntelligenceReporting/<strong>5.1</strong>/Config/custintelmid_hf.xml<br />
"<br />
-Dconfig.dir="/saswork/<strong>SAS</strong>/MA51Plan" -Dtemp.dir="c:/temphf"<br />
-Dinstall.loc="/saswork/<strong>SAS</strong>/<strong>SAS</strong>CustomerIntelligenceReporting/<strong>5.1</strong>"<br />
Verify sas.analytics.crm.ma.ccsservice.war<br />
The ant script will copy an updated sas.analytics.crm.ma.ccservice.war into the configuration directory at<br />
Lev1/web/webapps. The script will have created a copy of the original war file suffixed with today’s date.<br />
<strong>SAS</strong> <strong>Marketing</strong> <strong>Automation</strong> hot fix 51ma12 Page | 5
The Customer Intelligence Reporting war module needs to be redeployed in its respective application<br />
server (Weblogic or Websphere) <strong>for</strong> the changes to take effect.<br />
___ Successfully executed custintelmid_hf.xml script<br />
2.4: Deployment of the MA core Jar file<br />
If you are deploying to BEA WebLogic, please now follow the instructions under section 2.4.1:<br />
Deployment <strong>Instructions</strong> <strong>for</strong> BEA WebLogic.<br />
If you are deploying to IBM WebSphere, please now follow the instructions under section 2.4.2:<br />
Deployment <strong>Instructions</strong> <strong>for</strong> IBM WebSphere.<br />
2.4.1: Deployment <strong>Instructions</strong> <strong>for</strong> BEA WebLogic.<br />
After logging into the Weblogic console, Navigate to Deployments==> Applications==> MAAppServer ==><br />
sas.analytics.crm.ma.core.jar in the left panel. (Note that your application name may vary. The example<br />
below used the name MACore.) Click the Configuration tab to verify your deployment path is the<br />
Lev1/web/webapps/exploded directory where the updated jar now resides. (If you used some other path,<br />
you’ll need to extract and copy the updated jar.)<br />
Click the 'Deploy' tab at the top of the right window.<br />
Click the 'ReDeploy' button under the Actions column.<br />
<strong>SAS</strong> <strong>Marketing</strong> <strong>Automation</strong> hot fix 51ma12 Page | 6
This will cause the jar file to be redeployed within the Weblogic server.<br />
Notes:<br />
It is the JAR file that is being deployed not the EAR file. Once you run the hotfix setup program<br />
and extract the jar file, you're done with the ear.<br />
To verify the path to the deployed jar file, click on the Configuration tab.<br />
___ Weblogic Application Server Deployed<br />
This completes the application server deployment of the hot fix to Weblogic. Please now skip to section 3:<br />
Deployment Customer Intelligence Reporting War file.<br />
2.4.2: Deployment <strong>Instructions</strong> <strong>for</strong> IBM WebSphere.<br />
Deploying the <strong>Marketing</strong> <strong>Automation</strong> Application Server will involve uninstalling the current <strong>Marketing</strong><br />
<strong>Automation</strong> Application, and reinstalling the ear file.<br />
Be<strong>for</strong>e uninstalling the current <strong>Marketing</strong> <strong>Automation</strong> Application, make a back up copy of the current<br />
WAS.policy file. You can find the file in this directory.<br />
/profiles/AppSrv01/config/cells//applications/<strong>Marketing</strong> <strong>Automation</strong> <strong>5.1</strong>.ear/deployments/<strong>Marketing</strong><br />
<strong>Automation</strong> <strong>5.1</strong>/META-INF<br />
Where is the ‘home’ directory location <strong>for</strong> WebSphere:<br />
For example: /saswork/IBM/WebSphere/AppServer<br />
Stop the <strong>Marketing</strong> <strong>Automation</strong> <strong>5.1</strong> application from your Websphere console:<br />
• Uninstall the <strong>Marketing</strong> <strong>Automation</strong> <strong>5.1</strong> application from your Websphere console<br />
• Save the configuration<br />
• Next, the newly configured <strong>Marketing</strong> <strong>Automation</strong> <strong>5.1</strong> application needs to be reinstalled.<br />
• The deployed location of the configured ear file is typically on the mid-tier machine that hosts the<br />
<strong>SAS</strong> <strong>Marketing</strong> <strong>Automation</strong> hot fix 51ma12 Page | 7
<strong>Marketing</strong> <strong>Automation</strong> Software. This machine should contain a directory or path named:<br />
/Lev1/web/webapps<br />
Where is a directory name that represents the configuration directory used to<br />
originally configure the mid-tier environment through the <strong>SAS</strong> Software Navigator.<br />
Deploy Application to Web Server<br />
Deploy <strong>SAS</strong> <strong>Marketing</strong> <strong>Automation</strong> Application Server using the Websphere admin console<br />
a) Applications-><strong>Install</strong> New Application<br />
• Select “Local path” radio button<br />
• Select Browse button and navigate to the MA ear file (/Lev1/<br />
web/webapps/sas.analytics.crm.ma.core.ear)<br />
• Choose Next<br />
• Choose Next<br />
• Choose Continue on the Application Security Warnings panel<br />
• Step 1: Choose Next<br />
• Step 2: Choose Next<br />
• Step 3: Choose Next<br />
• Step 4: Choose Next<br />
• Step 5: Choose Next<br />
• Step 6: Check the “Select” box <strong>for</strong> Web Module “<strong>SAS</strong> Customer Intelligence Servlets”<br />
then Choose Next<br />
• Step 7: Choose Next<br />
• Step 8: Choose Finish<br />
• Save<br />
b) Applications->Enterprise Applications<br />
• Select <strong>Marketing</strong> <strong>Automation</strong> <strong>5.1</strong> link<br />
• Classloader Mode: PARENT_LAST<br />
• Apply/Save<br />
c) Locate your saved copy of the WAS.policy file, and copy it back to its original location at<br />
/config/cells//applications/<strong>Marketing</strong><br />
<strong>Automation</strong> 4.4.ear/deployments/<strong>Marketing</strong> <strong>Automation</strong> 4.4/META-INF.<br />
d) Applications->Enterprise Applications<br />
• Select <strong>Marketing</strong> <strong>Automation</strong> <strong>5.1</strong> check box<br />
• Select Start button<br />
___ Websphere Application Server Deployed<br />
<strong>SAS</strong> <strong>Marketing</strong> <strong>Automation</strong> hot fix 51ma12 Page | 8
3. Deployment of the Customer Intelligence Reporting War file<br />
If you are deploying to BEA WebLogic, please now follow the instructions under section 3.1.1<br />
Deployment <strong>Instructions</strong> <strong>for</strong> BEA WebLogic.<br />
If you are deploying to IBM WebSphere, please now follow the instructions under section 3.1.2:<br />
Deployment <strong>Instructions</strong> <strong>for</strong> IBM WebSphere.<br />
3.1.1: Deployment <strong>Instructions</strong> <strong>for</strong> BEA WebLogic.<br />
• After logging into the Weblogic console, Navigate to Deployments==> Web Application Modules<br />
==> sas.analytics.crm.ma.ccsservice in the left panel. (Note that your Target name may vary. The<br />
example below used the name <strong>SAS</strong>ManagedServer.)<br />
• Click the Configuration tab to verify your deployment path is the Lev1/web/webapps/directory<br />
where the updated war file now resides.<br />
• Click the Deploy tab in order to redeploy the war file.<br />
• Click the 'ReDeploy' button under the Actions column.<br />
___ Weblogic Customer Intelligence Reporting war Deployed<br />
This completes the Customer Intelligence reporting war file deployment to Weblogic. Please now skip to<br />
Section 4.<br />
3.1.2: Deployment <strong>Instructions</strong> <strong>for</strong> IBM WebSphere.<br />
Re-deploy <strong>SAS</strong> Customer Intelligence Reporting war components using the Websphere Admin console.<br />
• Navigate to Applications->Enterprise Applications<br />
• Select the Stop button to stop CICommonServices<br />
<strong>SAS</strong> <strong>Marketing</strong> <strong>Automation</strong> hot fix 51ma12 Page | 9
• Select the update button to update CICommonServices<br />
• On the next screen, fill in the path to the sas_analytics_crm_ma_ccsservice_war file<br />
(Lev1/web/webapps)<br />
• Type /ccs as the Context Root<br />
• Choose Next<br />
• Choose Next<br />
• Choose Continue on the Application Security Warnings panel<br />
• Select Step 4 Summary<br />
• Finish<br />
• Save<br />
• Navigate to Applications->Enterprise Applications<br />
• Select CICommonServices link<br />
• Change the Classloader Mode to Parent_Last<br />
• Under the startup options section, enter 10 <strong>for</strong> the starting weight field.<br />
<strong>SAS</strong> <strong>Marketing</strong> <strong>Automation</strong> hot fix 51ma12 Page | 10
• Apply and Save<br />
• Navigate to Applications->Enterprise Applications<br />
• Select CICommonServices check box<br />
• Select Start button<br />
___ Websphere Customer Intelligence Reporting war Deployed<br />
<strong>SAS</strong> <strong>Marketing</strong> <strong>Automation</strong> hot fix 51ma12 Page | 11
4. Changes required to the Customer Intelligence Reporting deployment<br />
If you have already installed the 51MA05 hot fix you should have already reconfigured the JMS<br />
messaging. If so skip this section and continue to section 5.<br />
JMS messages enqueued on the CICommonCHTricklingInsertQueue or the<br />
CICommonRHTricklingInsertQueue have reliable persistence. Changes were made as part of the<br />
MA5105 hotfix to make these transient. The deployment of the CI JMS messages needs to change due<br />
to this change in persistence.<br />
If deployed to BEA WebLogic, please now follow the instructions under section 4.1.1 Changes <strong>for</strong> BEA<br />
WebLogic.<br />
If deployed to IBM WebSphere, please now follow the instructions under section 4.1.2: Changes <strong>for</strong> IBM<br />
WebSphere.<br />
4.1.1: Changes <strong>for</strong> BEA Weblogic<br />
After logging into the Weblogic console, Navigate to Services==> JMS==> Servers ==><br />
CICommonJMSServer in the left panel. (Note that your CICommonJMSServer name may vary. The<br />
example below uses the name CICommonJMSServer.)<br />
Double click on CICommonJMSServer and change<br />
Persistent Store: to None<br />
Then Navigate to Services==> JMS==> Stores ==> CICommonFileStore and right click and delete the<br />
<strong>SAS</strong> <strong>Marketing</strong> <strong>Automation</strong> hot fix 51ma12 Page | 12
CICommonFileStore<br />
Then Navigate to Services==> JMS==> ConnectionFactories ==> CICommonQueueConnectionFactory<br />
and double click and Change Default Delivery Mode to NON-Persistent<br />
Then Navigate to Services==> JMS==> ConnectionFactories ==> CICommonTopicConnectionFactory<br />
and double click and Change Default Delivery Mode to NON-Persistent<br />
<strong>SAS</strong> <strong>Marketing</strong> <strong>Automation</strong> hot fix 51ma12 Page | 13
Then Navigate to Services==> JMS==> Servers ==> CICommonJMS==>Destinations ==> All<br />
Destinations shown e.g. CICommonCHTricklingInsertQueue<br />
Leave the Enable Store setting to default (which means it will use the JMS servers Store settings)<br />
You have now completed all changes needed <strong>for</strong> CICommon on Weblogic<br />
___ Weblogic jms changes completed<br />
Please now skip to Section 5.<br />
4.1.2: Changes <strong>for</strong> IBM WebSphere<br />
After logging into the WebShere console, Navigate to Service Integration==> Buses==> CICOMMONBUS<br />
==> Destinations on right of the screen. (Note that your bus name may vary. The example below uses the<br />
name CICOMMONBUS.) You will see a list of CICommon Queue’s and Topic’s of which the<br />
CICommonCHTricklingInsertQueue<br />
CICommonRHTricklingInsertQueue<br />
Need to be edited<br />
<strong>SAS</strong> <strong>Marketing</strong> <strong>Automation</strong> hot fix 51ma12 Page | 14
Double click on CICommonCHTrickingInsertQueue and<br />
Under Quality of service section ensure<br />
a. Enable Producers to over-ride default reliability - Should be checked<br />
b. Default Reliability - Reliable Non Persistent<br />
c. Maximum Reliability - Reliable Non Persistent<br />
See example below:<br />
<strong>SAS</strong> <strong>Marketing</strong> <strong>Automation</strong> hot fix 51ma12 Page | 15
Click on Apply and then Save<br />
Double click on CICommonRHTrickingInsertQueue and<br />
Under Quality of service section ensure<br />
a. Enable Producers to over-ride default reliability - Should be checked<br />
b. Default Reliability - Reliable Non Persistent<br />
c. Maximum Reliability - Reliable Non Persistent<br />
See example below:<br />
<strong>SAS</strong> <strong>Marketing</strong> <strong>Automation</strong> hot fix 51ma12 Page | 16
Click on Apply and then Save<br />
You have now completed all changes needed <strong>for</strong> CICommon on websphere<br />
___ Websphere jms changes completed<br />
<strong>SAS</strong> <strong>Marketing</strong> <strong>Automation</strong> hot fix 51ma12 Page | 17
5. Deployment of the <strong>SAS</strong> <strong>Marketing</strong> <strong>Automation</strong> Web Components Update<br />
This section is optional <strong>for</strong> <strong>Marketing</strong> <strong>Automation</strong> customers. If Campaign Web Studio is not installed,<br />
you can skip to section 6. Campaign Management customers (which are not <strong>Marketing</strong> <strong>Automation</strong><br />
packages) do not have this component and there<strong>for</strong>e, must skip this step.<br />
<strong>5.1</strong>: Run the Post-configuration Ant script<br />
The 51ma12 hot fix has installed a post-configuration script, emawebnport_hf.xml that will repackage<br />
sas.analytics.ma.webapp.war with the updated code. You will find emawebnport_hf.xml in the sas<br />
installation directory: /<strong>SAS</strong>/<strong>SAS</strong><strong>Marketing</strong><strong>Automation</strong>Web/4.1/Config Note this directory will contain a log<br />
called emawebnport_hf.log after the execution of this script.<br />
Use a similar ant script and methodology discussed in section 2.2 above to deploy the changes:<br />
Example:<br />
ant -f "/<strong>SAS</strong>/<strong>SAS</strong><strong>Marketing</strong><strong>Automation</strong>Web/4.1/Config/emawebnport_hf.xml"<br />
-Dconfig.dir="/<strong>SAS</strong>/MAPlan" -Dtemp.dir="/<strong>SAS</strong>/temphf"<br />
-Dinstall.loc="/<strong>SAS</strong>/<strong>SAS</strong><strong>Marketing</strong><strong>Automation</strong>Web/4.1"<br />
5.2 Verify sas.analytics.crm.ma.webapp.war<br />
The ant script will copy an updated sas.analytics.crm.ma.webapp.war into the configuration directory at<br />
Lev1/web/webapps. The script will have created a copy of the original war file suffixed with today’s date.<br />
The <strong>Marketing</strong> <strong>Automation</strong> Web Components web module needs to be redeployed in its respective<br />
application server (Weblogic or Websphere) <strong>for</strong> the changes to take effect.<br />
5.3: Deployment of the <strong>SAS</strong> Campaign Web Studio war<br />
If you are deploying to BEA WebLogic, please now follow the instructions under section 5.3.1:<br />
Deployment <strong>Instructions</strong> <strong>for</strong> BEA WebLogic.<br />
If you are deploying to IBM WebSphere, please now follow the instructions under section 5.3.2:<br />
Deployment <strong>Instructions</strong> <strong>for</strong> IBM WebSphere.<br />
5.3.1: Deployment <strong>Instructions</strong> <strong>for</strong> BEA WebLogic.<br />
After logging into the Weblogic console, Navigate to Deployments==> Web Application Modules ==><br />
sas.analytics.crm.ma.webapp in the left panel. (Note that your Target name may vary. The example<br />
below used the name <strong>SAS</strong>ManagedServer.) Click the Configuration tab to verify your deployment path is<br />
the Lev1/web/webapps/directory where the updated war file now resides.<br />
Click the 'ReDeploy' button under the Actions column.<br />
<strong>SAS</strong> <strong>Marketing</strong> <strong>Automation</strong> hot fix 51ma12 Page | 18
___ Weblogic Campaign Web Studio Deployed<br />
This completes the application server deployment of the hot fix to Weblogic. Please now skip to section 6.<br />
5.3.2: Deployment <strong>Instructions</strong> <strong>for</strong> IBM WebSphere.<br />
Re-deploy <strong>SAS</strong> <strong>Marketing</strong> <strong>Automation</strong> Web components using the Websphere Admin console.<br />
• Navigate to Applications->Enterprise Applications<br />
• Select the Stop button to stop sas_analytics_crm_ma_webapp<br />
• Select the update button to update sas_analytics_crm_ma_webapp<br />
• On the next screen, fill in the path to the sas_analytics_crm_ma_webapp_war file<br />
(Lev1/web/webapps)<br />
• Type ma as the Context Root<br />
<strong>SAS</strong> <strong>Marketing</strong> <strong>Automation</strong> hot fix 51ma12 Page | 19
• Choose Next<br />
• Choose Next<br />
• Choose Continue on the Application Security Warnings panel<br />
• Step 1 Select Next<br />
• Step 2 Select Next<br />
• Step 3 Check the box <strong>for</strong> Web Module “sas.analytics.crm.ma.webapp.war” then Select Next<br />
• Step 4 Summary, Select Finish<br />
• Save<br />
___ Websphere Campaign Web Studio Deployed<br />
<strong>SAS</strong> <strong>Marketing</strong> <strong>Automation</strong> hot fix 51ma12 Page | 20
6. <strong>Install</strong>ing 51ma12 hotfix on the Server Tier<br />
The 51ma12 hotfix contains files <strong>for</strong> the <strong>Marketing</strong> <strong>Automation</strong> Server Tier.<br />
The 51ma12_xxx directory under the directory containing the hot-fix tar file will contain a file:<br />
mktautox6.tar (where x is the appropriate suffix <strong>for</strong> the <strong>Unix</strong> plat<strong>for</strong>m. A <strong>for</strong> AIX etc.)<br />
With the exception of HP Itanium, where the suffix will be ‘hx’, example below:<br />
Ex: mktautohx.tar<br />
Copy this file to the /<strong>SAS</strong>_9.1 then cd to that directory<br />
Unarchive the file using tar –xvf mktautox6.tar. This will replace the necessary stored process and <strong>SAS</strong><br />
macros with the hot fix versions<br />
You can verify the updated files as follows<br />
/<strong>SAS</strong>_9.1/cmacros/ma/sasmacr.sas7bcat new date of Sep xx 2009<br />
/<strong>SAS</strong>_9.1/sasstp/ma/ma_cdi_update_ch.sas new date of Sep xx 2009<br />
/<strong>SAS</strong>_9.1/sasstp/ma/ma_cdi_update_rh.sas new date of Sep xx 2009<br />
/<strong>SAS</strong>_9.1/misc/ma/mapublish.map new date of Sep xx 2009<br />
/<strong>SAS</strong>_9.1/misc/ma/mapublish.map needs to be copied to the MAMisc folder. To know<br />
the location of this folder open the file /Lev1/<strong>SAS</strong>Main/appserver_autoexec.sas. Copy the<br />
mapublish.map to the path specified in the line : "libname MAMisc '..\MAMisc';" (default location: /Lev1/<strong>SAS</strong>Main/Data/MAMisc).<br />
___ <strong>SAS</strong> Compute Server updated<br />
<strong>SAS</strong> <strong>Marketing</strong> <strong>Automation</strong> hot fix 51ma12 Page | 21
7. Common Data Model DDL and Alter Scripts<br />
Released Version DDL and Alter Scripts<br />
<strong>SAS</strong> Customer Intelligence is delivered with Data Description Language (DDL) scripts to be used at<br />
installation time to create the <strong>SAS</strong> Customer Intelligence reporting Common Data Model on the<br />
underlying database. (/<strong>SAS</strong>_9.1/misc/ma/ciddlxxx.sas)<br />
The scripts that accompany the <strong>5.1</strong> release of Customer Intelligence do not include any changes<br />
introduced by subsequent hot-fixes. These updates have been provided through ‘alter’ DDL scripts that<br />
accompany the hot-fixes.<br />
New customer sites that have not configured the Common Data Model should refer to the product<br />
documentation on how to configure the common data model <strong>for</strong> the first time. Then create it be<strong>for</strong>e<br />
running any of the alter DDL scripts. The alter scripts must then be applied in sequence following<br />
successful creation and configuration of the Common Data Model tables.<br />
If you already have hot fixes applied then please skip to the hot fix after the latest you have installed.<br />
All DDL scripts are installed to /<strong>SAS</strong>_9.1/misc/ma<br />
51MA01 <strong>Hot</strong> <strong>Fix</strong><br />
The Customer Intelligence hot-fix (51MA01) introduced alter scripts to modify the key of the<br />
CI_RESPONSE_HISTORY table and to add a new column to the CI_CAMPAIGN table:<br />
CAMPAIGN_FOLDER_TXT. These scripts are designed to alter a Customer Intelligence <strong>5.1</strong> Common<br />
Data Model that has already been installed using the DDL that was shipped with the Customer<br />
Intelligence <strong>5.1</strong> release. The following files are provided by the service-pack in the /<strong>SAS</strong>_9.1/misc/ma location<br />
File Supported DB<br />
1 cia01ora.sas Oracle<br />
2 cia01db2.sas DB2<br />
3 cia01trd.sas Teradata<br />
4 cia01sqs.sas SQL Server<br />
5 cia01spd.sas SPDS<br />
Appendix A: of this document provides specific guidance on how to apply the 51MA01 alter scripts.<br />
51MA02 <strong>Hot</strong> <strong>Fix</strong><br />
The Customer Intelligence hot-fix (51MA02) introduced a new DDL script <strong>for</strong> support of the Netezza<br />
database plat<strong>for</strong>m. The script comprised a full DDL that can be used to create the physical data<br />
structures <strong>for</strong> the Common Data Model tables on Netezza. The script included changes and updates that<br />
were introduced in 51MA01 so no additional alter script is required <strong>for</strong> Netezza. The file is named as<br />
follows:<br />
File Supported DB<br />
6 ciddlntz.sas Netezza<br />
If you have already installed the 51ma01 hot fix and are not using Netezza as your database then this<br />
<strong>SAS</strong> <strong>Marketing</strong> <strong>Automation</strong> hot fix 51ma12 Page | 22
script need not be run<br />
51ma12 <strong>Hot</strong> <strong>Fix</strong><br />
The 51ma12 hot fix contains a second set of alter scripts one <strong>for</strong> each supported plat<strong>for</strong>m as well as<br />
introducing a new DDL script <strong>for</strong> support of the Neoview database plat<strong>for</strong>m and an update to the Netezza<br />
DDL.<br />
The alter scripts provide updates to add five new budget columns to the CI_COMMUNICATION table.<br />
Again, these scripts are designed to alter a Customer Intelligence <strong>5.1</strong> Common Data Model that has<br />
already been installed using the DDL that was shipped with the Customer Intelligence <strong>5.1</strong>. These scripts<br />
should only be applied after the scripts from 51MA01 have been applied. The second set of alter script<br />
files are named as follows:<br />
File Supported DB<br />
1 cia02ora.sas Oracle<br />
2 cia02db2.sas DB2<br />
3 cia02trd.sas Teradata<br />
4 cia02sqs.sas SQL Server<br />
5 cia02spd.sas SPDS<br />
The full Netezza DDL discussed under the 51MA02 hot fix has been superseded the new versions<br />
incorporates changes needed in 51ma12<br />
A new DDL was added to support Neoview.<br />
Customers who wish to use the Common Data Model with either Netezza or Neoview should refer to the<br />
product documentation on how to configure the common data model <strong>for</strong> the first time and apply these<br />
scripts accordingly. No alter scripts are provided <strong>for</strong> these two database plat<strong>for</strong>ms.<br />
The Netezza and Neoview DDL scripts are named as follows:<br />
File Supported DB<br />
6 ciddlntz.sas Netezza<br />
7 ciddlneo.sas Neoview<br />
<strong>SAS</strong> <strong>Marketing</strong> <strong>Automation</strong> hot fix 51ma12 Page | 23
Appendix A: <strong>Instructions</strong> <strong>for</strong> applying changes to the Common Data Model<br />
The 51ma12 hotfix has supplied Alter DDL scripts <strong>for</strong> the Customer Intelligence <strong>5.1</strong> Common Data Model.<br />
New customer sites that have not configured the Common Data Model should refer to the product<br />
documentation on how to configure the common data model <strong>for</strong> the first time be<strong>for</strong>e running the Alter DDL<br />
scripts.<br />
The hot fix delivers Alter table DDL to modify the key of the CI_RESPONSE_HISTORY table and to add a<br />
new column to the CI_CAMPAIGN table: CAMPAIGN_FOLDER_TXT. These Alter Table DDLs will alter a<br />
Customer Intelligence <strong>5.1</strong> Common Data Model that has already been installed using the DDL that was<br />
shipped with the Customer Intelligence <strong>5.1</strong> product. The following files are downloaded with the hotfix.<br />
Oracle DDL: cia01ora<br />
DB2 DDL: cia01db2<br />
SQL Server DDL: cia01sqs<br />
SPD Server DDL: cia01spd<br />
Teradata DDL: cia01trd<br />
PLEASE NOTE: Prior to running any Alter table DDL, you must apply an update to the data in your<br />
CI_RESPONSE_HISTORY table(s). The primary key is being changed to add two columns:<br />
TREATMENT_SK and CELL_PACKAGE_SK. TREATMENT_SK was delivered in the original DDL script<br />
with a setting of “NULL”. TREATMENT_SK will now be set to “NOT NULL” to comply with the<br />
requirements of being a member of the primary key. All rows of data that contain a null value in the<br />
TREATMENT_SK column must be updated to a ‘NOT NULL” value (-1).<br />
Sample code to update TREATMENT_SK in the CI_RESPONSE_HISTORY table:<br />
PROC SQL;<br />
UPDATE <br />
SET TREATMENT_SK = -1<br />
WHERE TREATMENT_SK IS NULL;<br />
QUIT;<br />
Overall code changes required be<strong>for</strong>e executing the DDL scripts:<br />
1. If the CI_RESPONSE_HISTORY table was renamed when initially created, to allow <strong>for</strong> multiple<br />
subjects or business contexts, rename the table specified in the alter table statements to match<br />
the table created by your install.<br />
2. If the CONSTRAINT names were renamed when initially created to allow <strong>for</strong> multiple subjects or<br />
business contexts, rename the constraint names in the alter table statements to match the<br />
constraints created by your install.<br />
3. Modify the SUBJECT_ID column in the list of primary key columns in the execute statement, to<br />
match the modifications that were made when the table was initially created. The SUBJECT_ID<br />
column was a placeholder column name in the original CI <strong>5.1</strong> CI_RESPONSE_HISTORY DDL<br />
and should have been modified with key columns to a customer specific subject.<br />
4. If multiple CI_RESPONSE_HISTORY tables were created to accommodate multiple subjects and<br />
business contexts, copy and repeat all EXECUTE statements that contain the alter table code.<br />
Make the changes listed in 1, 2 and 3 above to each set of alter table code <strong>for</strong> each Response<br />
History table that you have uniquely created in your schema.<br />
*** This completes the changes to CI_RESPONSE_HISTORY ***<br />
<strong>SAS</strong> <strong>Marketing</strong> <strong>Automation</strong> hot fix 51ma12 Page | 24
<strong>Install</strong> specifics <strong>for</strong> Teradata customers:<br />
Since the change to the CI_RESPONSE_HISTORY table requires a change to the primary key of the<br />
table, the above alter table instructions do not apply to Teradata. Teradata will not allow a primary key to<br />
be dropped and dropping the key is necessary to accomplish this modification to the table.<br />
Prior to running the supplied Teradata code, per<strong>for</strong>m the following tasks:<br />
• If data exists in your CI_RESPONSE_HISTORY table, save the data to another table. This hot<br />
fix requires deletion of the CI_RESPONSE_HISTORY table, so saving the data is essential.<br />
• Drop the existing CI_RESPONSE_HISTORY table.<br />
Make the following changes to the supplied code <strong>for</strong> the CI_RESPONSE_HISTORY table:<br />
1. If the CI_RESPONSE_HISTORY table was renamed when initially created to allow <strong>for</strong> multiple<br />
subjects or business contexts, rename the table specified in the create table statements to match<br />
the table created by your install.<br />
2. If the primary key constraint name was renamed when initially created to allow <strong>for</strong> multiple<br />
subjects or business contexts, rename the constraint name in the create table code statements to<br />
match the constraints created by your install.<br />
3. Modify the SUBJECT_ID column in the list of primary key columns in the execute statement, to<br />
match the modifications that were made when the table was initially created. The SUBJECT_ID<br />
column was a placeholder column name in the original CI <strong>5.1</strong> CI_RESPONSE_HISTORY DDL<br />
and should have been modified with key columns to a customer specific subject.<br />
4. If multiple CI_RESPONSE_HISTORY tables were created to accommodate multiple subjects and<br />
business contexts, copy and repeat all EXECUTE statements that contain the create table code.<br />
Make the changes listed in 1, 2 and 3 above to each set of create table code <strong>for</strong> each Response<br />
History table that you have uniquely created in your schema.<br />
5. Reload the saved data from your existing CI_RESPONSE_HISTORY table to the newly created<br />
CI_RESPONSE_HISTORY table.<br />
*** This completes the changes to the CI_RESPONSE_HISTORY table. ***<br />
<strong>Install</strong> specifics <strong>for</strong> DB2 customers:<br />
The DB2 Alter table code has to be run in two passes. First make the changes listed above in the section<br />
titled: Overall code changes required be<strong>for</strong>e executing the DDL scripts. Next, after the primary key is<br />
dropped and the TREATMENT_SK column in the CI_RESPONSE_HISTORY table has been set to NULL<br />
in the first section of SQL code, you must have your DBA REORG the CI_RESPONSE_HISTORY table.<br />
This is a DB2 requirement and you cannot continue until this is done!<br />
After your DBA has run the REORG on the CI_RESPONSE_HISTORY table, you must un-comment<br />
the final set of Proc SQL code statements provided in the last section of the DDL script and run only<br />
this SQL code to create the new primary key on the CI_RESPONSE_HISTORY table. This<br />
completes the changes to your DB2 CI_RESPONSE_HISTORY table.<br />
<strong>SAS</strong> <strong>Marketing</strong> <strong>Automation</strong> hot fix 51ma12 Page | 25