
You also want an ePaper? Increase the reach of your titles
YUMPU automatically turns print PDFs into web optimized ePapers that Google loves.
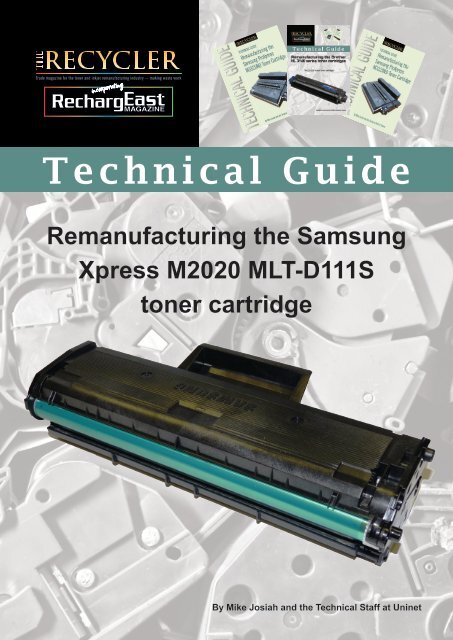
Technical Guide<br />
Remanufacturing the <strong>Samsung</strong><br />
<strong>Xpress</strong> <strong>M2020</strong> <strong>MLT</strong>-<strong>D111S</strong><br />
toner cartridge<br />
By Mike Josiah and the Technical Staff at Uninet
Remanufacturing the <strong>Samsung</strong> <strong>Xpress</strong><br />
<strong>M2020</strong> <strong>MLT</strong>-<strong>D111S</strong> toner cartridge<br />
By Mike Josiah and the Technical Staff at Uninet<br />
First released in May 2014, the <strong>Samsung</strong> <strong>Xpress</strong> <strong>M2020</strong> series of printers are based on a 21ppm, 1,200dpi engine. The first<br />
page out is stated to be under 8.5 seconds, and all “W” models so far come with Wi-Fi, <strong>Samsung</strong> Mobile Print, Google Cloud Print,<br />
AirPrint and NFC (near-field communication) features built in.<br />
The <strong>M2020</strong> comes with 64MB memory, and the M2070 comes with 128MB memory installed (fixed amounts). Both have a duty<br />
cycle of 10,000 pages per month.<br />
These cartridges do not have a built-in drum cover, but do come new with an orange plastic cover (see Figure 1). The replacement<br />
cartridge itself is rated for 1,000 pages at five percent coverage (ISO 19752). The starter cartridge is rated for 500 pages.<br />
Figure 1<br />
Printers based on this engine:*<br />
<strong>Samsung</strong> <strong>Xpress</strong> <strong>M2020</strong>W<br />
<strong>Samsung</strong> <strong>Xpress</strong> M2021W<br />
<strong>Samsung</strong> <strong>Xpress</strong> M2022<br />
<strong>Samsung</strong> <strong>Xpress</strong> M2022W<br />
<strong>Samsung</strong> <strong>Xpress</strong> M2070F<br />
<strong>Samsung</strong> <strong>Xpress</strong> M2070FW<br />
<strong>Samsung</strong> <strong>Xpress</strong> M2070W<br />
<strong>Samsung</strong> <strong>Xpress</strong> M2071FH<br />
<strong>Samsung</strong> <strong>Xpress</strong> M2071W<br />
<strong>Samsung</strong> <strong>Xpress</strong> M2070FW<br />
*as of 4/1/15<br />
REQUIRED TOOLS<br />
• Toner-approved vacuum<br />
• A small common screw driver<br />
• A Phillips head screwdriver<br />
• Needle nose pliers<br />
• Chisel blade knife<br />
• Electric drill<br />
• #29 drill bit (see supplies needed right)<br />
REQUIRED SUPPLIES<br />
• Replacement toner for use in the <strong>Samsung</strong> <strong>M2020</strong><br />
• Dedicated wiper blade<br />
• Replacement chip<br />
• Conductive grease<br />
• Drum lubricating powder<br />
• If using the #29 drill bit, we recommend #8 x ¼”<br />
self-tapping screws. If not, make sure you match the<br />
drill size to your screws, and the screws cannot be<br />
longer than ¼” (6.35mm)<br />
THE RECYCLER - TECHNICAL GUIDE PAGE 2
TECHNICAL GUIDE<br />
By Mike Josiah and the Technical Staff at Uninet<br />
STEP ONE<br />
Place the cartridge with the handle facing away from you.<br />
Slice off the three plastic rivets with a square Xacto-type<br />
blade on the contact (chip side) end cap.<br />
STEP TWO<br />
Gently pry off the end cap. The end cap looks like<br />
it’s in two pieces but it’s not. Be careful not to break it<br />
when removing.<br />
STEP THREE<br />
On the opposite side of the cartridge, slice off the four<br />
plastic rivets with a square Xacto-type blade.<br />
STEP FOUR<br />
Gently pry off the end cap. This one is actually in<br />
two pieces.<br />
THE RECYCLER - TECHNICAL GUIDE PAGE 3
TECHNICAL GUIDE<br />
By Mike Josiah and the Technical Staff at Uninet<br />
STEP FIVE<br />
Lift off the waste chamber.<br />
STEP SIX<br />
Slide the drum axle out from the hub side and remove the<br />
drum.<br />
STEP SEVEN<br />
Remove the PCR. Make sure the holders stay in place.<br />
STEP EIGHT<br />
Remove the two screws and wiper blade from the waste<br />
chamber.<br />
THE RECYCLER - TECHNICAL GUIDE PAGE 4
TECHNICAL GUIDE<br />
By Mike Josiah and the Technical Staff at Uninet<br />
STEP NINE<br />
Remove the large drive gear.<br />
STEP TEN<br />
Clean out any remaining toner from the waste chamber. Be<br />
careful to keep the wiper blade seal clean.<br />
STEP ELEVEN<br />
Re-install the wiper blade and two screws.<br />
STEP TWELVE<br />
Clean the PCR with your normal PCR cleaner and install<br />
in the cartridge. Make sure the guides fit in place and the<br />
rollers fit into the holders properly.<br />
WARNING: Do not clean the OEM PCR with alcohol,<br />
as this will remove the conductive coating from<br />
the roller. If the PCR is an aftermarket, follow the<br />
cleaning methods recommended by the manufacturer.<br />
If the PCR is an OEM, we recommend it be cleaned with<br />
your standard PCR cleaner.<br />
THE RECYCLER - TECHNICAL GUIDE PAGE 5
TECHNICAL GUIDE<br />
By Mike Josiah and the Technical Staff at Uninet<br />
STEP THIRTEEN<br />
Install the hub gear side first, then slide the axle<br />
through the gear and cartridge wall.<br />
STEP FOURTEEN<br />
Install the large drive gear.<br />
STEP FIFTEEN<br />
Remove the three gears as shown and place<br />
aside. Remove the developer roller gear by<br />
squeezing the tab on the shaft.<br />
STEP SIXTEEN<br />
Remove the developer roller inner plate and<br />
screw on the gear side of the cartridge. Remove<br />
the developer roller sleeve (see Figures A, B and<br />
C).<br />
A<br />
C<br />
B<br />
THE RECYCLER - TECHNICAL GUIDE PAGE 6
TECHNICAL GUIDE<br />
By Mike Josiah and the Technical Staff at Uninet<br />
STEP SEVENTEEN<br />
Until new replacement fill plugs are available, leave the<br />
plug in place. The OEM plugs are very brittle and break<br />
easily.<br />
STEP EIGHTEEN<br />
Remove the two screws on the doctor blade and blade.<br />
STEP NINETEEN<br />
Clean out any remaining toner from the hopper through the<br />
developer roller/doctor blade hole.<br />
STEP TWENTY<br />
Clean the feed roller and any remaining toner from the<br />
hopper seals.<br />
STEP TWENTY-ONE<br />
Fill the hopper with toner for use in the <strong>M2020</strong> cartridge.<br />
THE RECYCLER - TECHNICAL GUIDE PAGE 7
TECHNICAL GUIDE<br />
By Mike Josiah and the Technical Staff at Uninet<br />
STEP TWENTY-TWO<br />
Clean and re-install the doctor blade and two screws.<br />
It is highly recommended that the doctor blade be cleaned.<br />
Failure to do so will cause streaking. Dampen a cotton swab<br />
with alcohol, and clean the blade. Be careful not to press too<br />
hard and damage the blade. If the blade has a heavy build-up of toner<br />
on it, clean it with acetone, and then alcohol.<br />
STEP TWENTY-THREE<br />
Install the developer roller.<br />
STEP TWENTY-FOUR<br />
Install the inner plate and screw.<br />
STEP TWENTY-FIVE<br />
Install the four gears as shown in the order indicated. You<br />
may need to press on the auger gear to seat gear # 4<br />
properly.<br />
STEP TWENTY-SIX<br />
Place the two halves together. Make sure the two<br />
springs fit in their respective points.<br />
THE RECYCLER - TECHNICAL GUIDE PAGE 8
TECHNICAL GUIDE<br />
By Mike Josiah and the Technical Staff at Uninet<br />
STEP TWENTY-SEVEN<br />
Install the gear-side end caps (two pieces). Install<br />
the top piece first.<br />
STEP TWENTY-EIGHT<br />
Drill a hole where the four rivets were and install<br />
the screws.<br />
STEP TWENTY-NINE<br />
Install the replacement chip on the contact end<br />
cap by sliding it out from the inside of the end cap.<br />
Replace the chip, making sure it’s seated properly.<br />
STEP THIRTY<br />
Install the end cap, drill the three holes and install<br />
the screws.<br />
THE RECYCLER - TECHNICAL GUIDE PAGE 9
TECHNICAL GUIDE<br />
By Mike Josiah and the Technical Staff at Uninet<br />
STEP THIRTY-ONE<br />
Install the drum cover on the cartridge.<br />
NOTES<br />
THE RECYCLER - ISSN 2045-2047 (Print)<br />
THE RECYCLER TEAM<br />
Editor & Publisher<br />
David Connett - publisher@therecycler.com<br />
Deputy Publisher<br />
Stefanie Unland – s.unland@therecycler.com<br />
Deputy Editor<br />
William Roszczyk – w.roszczyk@therecycler.com<br />
Journalist<br />
Nicholas Dawson – n.dawson@therecycler.com<br />
Designer<br />
Ian Winter - production@therecycler.com<br />
Publishing Consultant<br />
Anthony Critchley – a.critchley@therecycler.com<br />
THE SMALL PRINT<br />
Articles may be photocopied for the private use of paid subscribers only. For other<br />
copying or republication please contact The Recycler. The Recycler (ISSN 2045-<br />
2047 (Print)) is published 12 times per year (every four weeks) by David Connett.<br />
Copyright 1997 – 2014 by David Connett. The editorial content does not reflect the<br />
opinions of the publisher or editorial team. The Recycler is printed in the United<br />
Kingdom by Buxton Press Limited. The regular retail price of The Recycler is £120<br />
for 12 months (12 issues) worldwide, and is delivered free to your home or<br />
office worldwide.<br />
THE RECYCLER<br />
Wittas House, Two Rivers,<br />
Station Lane, Witney,<br />
United Kingdom OX28 4BH<br />
Phone: +44 (0) 1993 899 800<br />
Fax: +44 (0) 1993 226 899<br />
Email: info@therecycler.com<br />
Website: www.therecycler.com<br />
Bureau Office – Australia<br />
Graham McCusker<br />
Phone: +61 (0) 416 813 700<br />
Email: g.mccusker@therecycler.com<br />
Bureau Office – Germany<br />
Stefanie Unland<br />
Phone: +49 (0) 2582 9910 701<br />
Email: info@therecycler.com<br />
Bureau Office – United States<br />
Olivia Stephens<br />
Phone: +1 702 497 4756<br />
Email: usa@therecycler.com<br />
www.therecycler.com/contactus<br />
THE RECYCLER - TECHNICAL GUIDE PAGE 10
eader offer<br />
AF20 Toner filling machine<br />
Small-sized toner filling machine<br />
A compact toner filling machine that requires minimal<br />
installation and operation space, and allows you to fill toner<br />
cartridges as part of your production process.<br />
For low-volume, prototype usage, use one machine.<br />
Use one machine and four hoppers (one per colour)<br />
for niche product remanufacturing, or four machines<br />
for high-density working.<br />
The AF20 is manufactured in the EU, comes with a<br />
12-month guarantee and utilises a 100/240Vac to<br />
12Vdc power adapter for use in most countries.<br />
Stable, accurate and reliable.<br />
Offer 1<br />
• 1 x AF20 base unit<br />
• 1 x patent-pending filling funnel<br />
• 1 x 10Kg capacity stainless steel hopper<br />
Offer price €2,995 + VAT<br />
Offer 2<br />
• 4 x AF20 base unit<br />
• 4 x patent-pending filling funnel<br />
• 4 x 10Kg capacity stainless steel hopper<br />
Offer price €9,995 + VAT<br />
Offer 3<br />
• 1 x AF20 base unit<br />
• 4 x patent-pending filling funnel<br />
• 4 x 10Kg capacity stainless steel hopper<br />
Offer price €4,495 + VAT<br />
To order your AF20 filling machine, or to find out more,<br />
visit www.therecycler.com/readeroffer